AN fittings, known for their durability and precision, are commonly used in various applications such as automotive, aerospace, and industrial machinery. These fittings ensure secure, leak-free connections that are essential for system efficiency and safety. However, improper installation can lead to misalignment, leaks, and system failures. Troubleshooting and resolving common issues promptly can prevent costly downtime and potential hazards. This post aims to provide readers with valuable insights and practical solutions for addressing common installation problems, ultimately enhancing the reliability and longevity of their hydraulic systems.
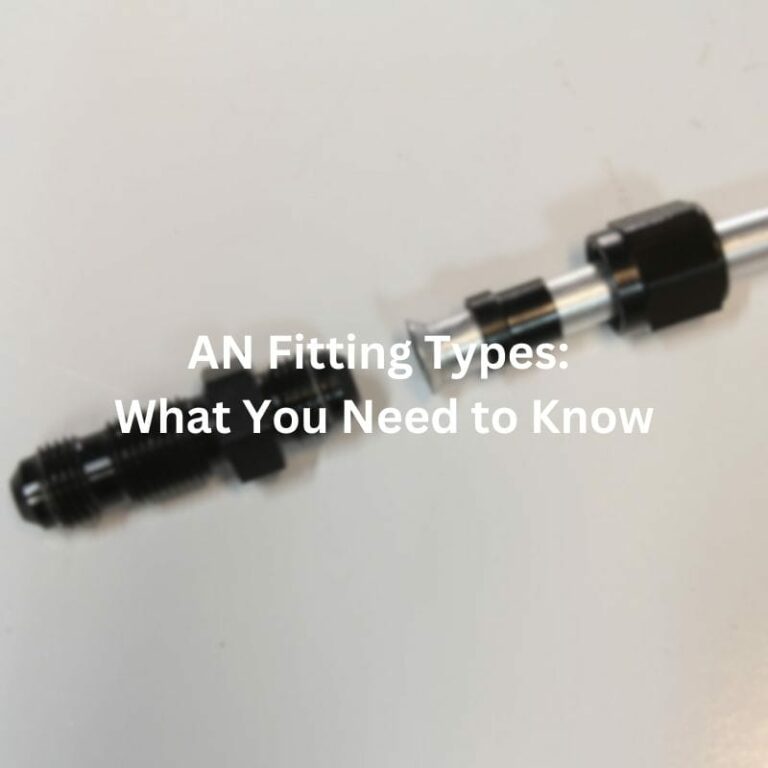
AN (Army-Navy) fittings are standardized connectors used primarily in fluid transfer systems. They feature a 37-degree flare fitting, designed to provide a secure and reliable connection. AN fittings come in various sizes, typically designated by a dash number indicating the size in 1/16-inch increments (e.g., -4, -6, -8). Common types of AN fittings include straight, elbow, tee, and bulkhead fittings, each designed for specific routing and connection needs.
AN fittings are commonly made from high-quality materials such as aluminum, stainless steel, and brass. Aluminum fittings are lightweight and corrosion-resistant, making them ideal for automotive and aerospace applications. Stainless steel fittings offer superior strength and durability, suitable for high-pressure and high-temperature environments. Brass fittings provide good corrosion resistance and are often used in plumbing and general industrial applications. Specifications for AN fittings include precise thread dimensions, material grades, and pressure ratings, ensuring they meet the rigorous demands of various systems.
AN fittings are widely used in industries where the reliable fluid transfer is critical. In the automotive industry, they are used for fuel, brake, and oil lines due to their high-performance capabilities and ease of installation. In aerospace, AN fittings are essential for hydraulic and fuel systems, ensuring safe and efficient aircraft operation. Industrial machinery and equipment also rely on AN fittings for hydraulic and pneumatic systems, benefiting from their durability and leak-proof connections. The key benefits of AN fittings include their high pressure and temperature tolerance, ease of assembly and disassembly, and the ability to create custom configurations for specific applications.
Measure the Required Length
Begin by accurately measuring the required length of the hose or tube. Use a tape measure or ruler to ensure precision. Mark the hose with a marker or tape to indicate where the cut will be made.
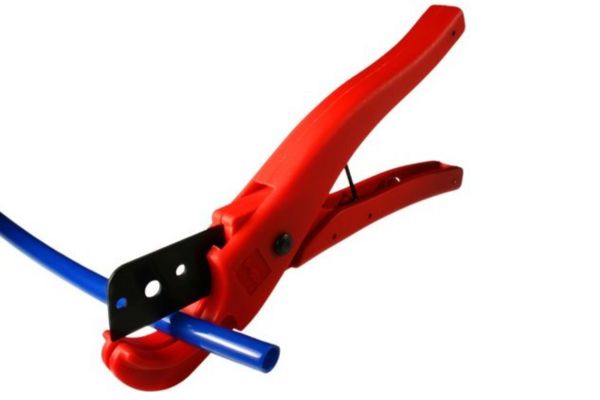
Cut the Hose
Use a high-quality tube cutter or hacksaw to cut the hose at the marked location. Ensure the cut is clean and straight to avoid any sealing issues later. A straight cut ensures a uniform contact surface for the fitting.
For best results, use a tube cutter designed for the specific type of hose material (e.g., rubber, PTFE, or stainless steel braided). This helps maintain the integrity of the hose and ensures a clean cut.
Remove Sharp Edges
After cutting the hose, use a deburring tool to remove any sharp edges or burrs from the cut end. Burrs can interfere with the fitting assembly and may cause leaks or damage to the fitting.
Carefully run the deburring tool around the inside and outside edges of the hose to create a smooth, clean surface. This step is crucial for ensuring a secure fit with the AN fitting.
Inspect the Hose
After deburring, visually inspect the hose end to ensure all burrs and sharp edges have been removed. The hose end should be smooth and even and ready for fitting installation.
Slide the Fitting Nut and Sleeve
Slide the AN fitting nut onto the hose, followed by the sleeve (or ferrule). Ensure the sleeve is oriented correctly according to the fitting type. The sleeve is designed to create a tight seal when the fitting is assembled.
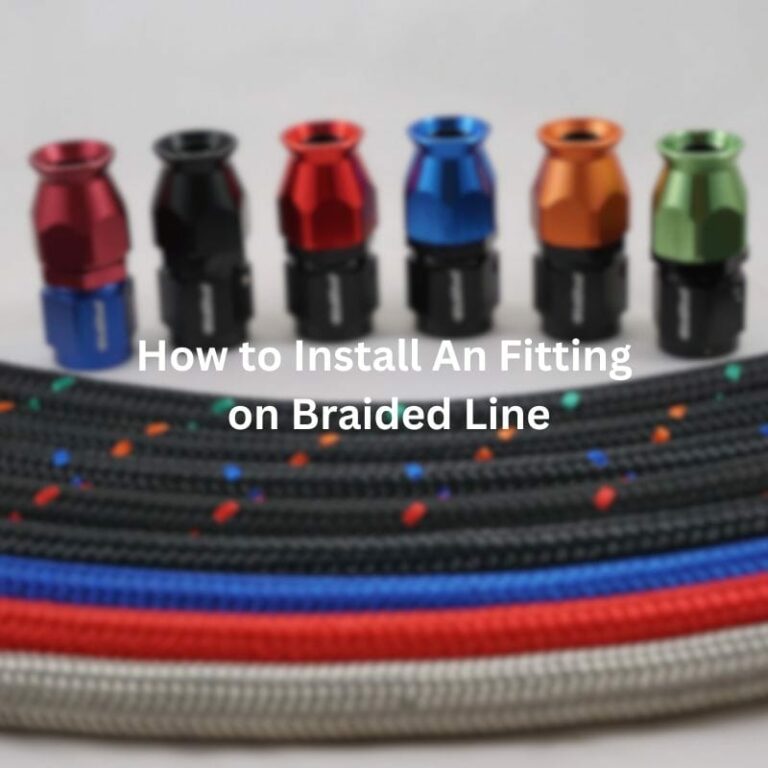
For braided hoses, take extra care to ensure the braid is evenly distributed around the fitting body. This helps achieve a secure and uniform seal.
Insert the Hose into the Fitting Body
Insert the hose into the fitting body until it bottoms out. Ensure the hose is fully seated within the fitting body to create a proper seal.
For hoses with a braided cover, ensure the braid is not obstructing the fitting body and is properly aligned.
Lubricate the Threads
Lubricate the threads of the fitting and nut with a compatible lubricant. This reduces friction during assembly and helps prevent galling or thread damage.
Use a lubricant that is compatible with the hose and fitting materials as well as the fluid type used in the system.
Hand-Tighten the Nut
Hand-tighten the nut onto the fitting body. This initial tightening helps ensure the fitting components are properly aligned before using a wrench.
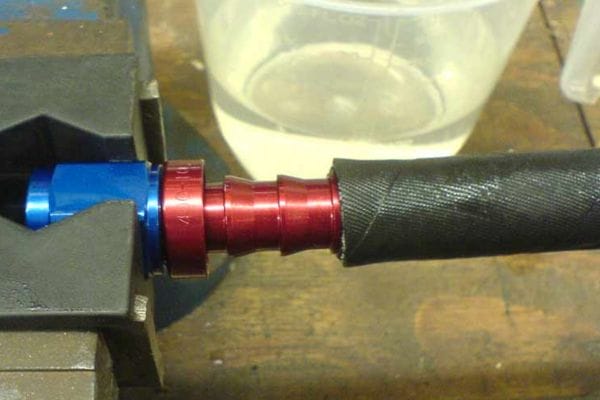
Secure the Fitting in a Vice
Place the fitting into a vice with soft jaws to avoid damaging the fitting surface. Soft jaws provide a secure grip without marring the fitting.
Tighten the Nut with a Wrench
Use a wrench to tighten the nut onto the fitting body. Follow the manufacturer’s recommended torque specifications to avoid over-tightening, which can cause damage or deformation to the fitting.
Tighten the nut until you feel a slight resistance, then give it an additional turn to ensure a secure fit. Do not over-tighten, as this can lead to issues such as stripped threads or crushed fittings.
When installing AN fittings, various issues can arise that compromise the integrity and performance of the connections. Being aware of these common problems and understanding how to address them is crucial for ensuring a successful and leak-free installation. Below are some of the most frequent issues encountered during AN fitting installation:
Symptoms
Visible gaps between fitting components.
Uneven contact surfaces.
Difficulty in threading the nut onto the fitting body.
Causes
Incorrect hose cutting or deburring.
Improper insertion of the hose into the fitting body.
Misalignment of the fitting components before tightening.
Solutions
Ensure the hose is cut straight and deburred properly.
Carefully insert the hose into the fitting body until it bottoms out.
Align the fitting components correctly before tightening the nut.
Use a vice with soft jaws to hold the fitting securely while ensuring proper alignment.
Symptoms
Over-tightening: Stripped threads, crushed fitting components, or difficulty in disassembling the fitting.
Under-tightening: Loose connections, leaks, or components that can be moved by hand.
Causes
Not following the manufacturer’s torque specifications.
Using excessive force when tightening the nut.
Insufficient tightening, leads to a weak seal.
Solutions
Always use a torque wrench to achieve the recommended torque specifications.
Avoid using excessive force when tightening the fitting.
Double-check the tightness of the fitting to ensure it is secure but not over-tightened.
Symptoms
Difficulty in threading the nut onto the fitting body.
Visible damage to the threads.
Misalignment between the nut and fitting body.
Causes
Misalignment of the fitting components before threading.
Forcing the nut onto the fitting body at an incorrect angle.
Damaged or contaminated threads.
Solutions
Inspect the threads for damage or contamination before assembly.
Ensure proper alignment of the fitting components before threading.
Thread the nut onto the fitting body by hand initially to avoid cross-threading.
If cross-threading occurs, disassemble the fitting and inspect the threads. Repair or replace damaged threads as needed.
Symptoms
Increased friction during assembly.
Difficulty in tightening the nut onto the fitting body.
Potential damage to the threads or fitting components.
Causes
Not using lubricant during assembly.
Using an incompatible lubricant.
Insufficient application of lubricant.
Solutions
Apply a compatible lubricant to the threads of the fitting and nut before assembly.
Ensure even distribution of the lubricant to reduce friction.
Reapply lubricant as needed during assembly to maintain smooth threading.
Symptoms
Leaks or poor sealing performance.
Damage to the fitting components during assembly.
Blockages or obstructions in the fluid flow.
Causes
Contaminants or debris in the hose, fittings, or assembly area.
Inadequate cleaning of components before installation.
Failure to protect open ends of hoses or fittings during storage.
Solutions
Clean all components thoroughly before assembly to remove any contaminants or debris.
Use protective covers or caps to keep hoses and fittings clean during storage and handling.
Inspect the assembly area for cleanliness and ensure it is free from debris.
Visible Gaps: There are noticeable gaps between the fitting components.
Uneven Contact Surfaces: The surfaces of the fitting do not sit flush against each other.
Threading Difficulty: Difficulty in threading the nut onto the fitting body, indicating components are not aligned correctly.
Leaks: Presence of leaks at the connection point due to improper sealing.
Causes of Misalignment and How to Prevent It
Incorrect Hose Cutting: An uneven or angled cut can cause the hose to sit improperly in the fitting.
Prevention: Use a tube cutter or saw to make a clean, straight cut. Always deburr the cut ends.
Improper Insertion: The hose is not fully inserted into the fitting body.
Prevention: Ensure the hose is pushed fully into the fitting body until it bottoms out.
Component Misalignment: Fitting components are not aligned correctly before tightening.
Prevention: Align all components properly before threading the nut. Use visual and tactile checks to confirm alignment.
Visual Inspection:
Check the fitting for any visible gaps between components.
Ensure that all surfaces are flush and even.
Threading Test:
Try threading the nut onto the fitting body by hand. If it doesn’t thread smoothly, misalignment is likely.
Leak Check:
Pressurize the system and check for leaks around the fitting. Leaks often indicate misalignment.

Disassemble the Fitting:
Carefully disassemble the fitting by unscrewing the nut and separating the components.
Inspect Components:
Inspect the fitting components for any signs of damage or debris. Clean all parts thoroughly.
Align the Hose:
Reinsert the hose into the fitting body, ensuring it is fully seated and aligned correctly. For braided hoses, make sure the braid is evenly distributed.
Align the Components:
Place the fitting components together, ensuring they are aligned properly. The nut should easily engage the threads of the fitting body without force.
Lubricate the Threads:
Apply a compatible lubricant to the threads of the fitting and the nut to facilitate smooth assembly.
Hand-Tighten the Nut:
Begin threading the nut onto the fitting body by hand. Ensure it threads smoothly without resistance, indicating proper alignment.
Secure the Fitting:
Place the fitting in a vice with soft jaws to prevent damage. Use a wrench to tighten the nut to the manufacturer’s specified torque.
Final Inspection:
Perform a final visual inspection to confirm there are no gaps and all components are flush.
Pressure Test:
Pressurize the system and check for leaks to ensure the fitting is properly aligned and secured
Symptoms:
Difficulty in threading the nut onto the fitting body.
Visible damage or deformation of the threads.
Misalignment between the nut and fitting body.
Resistance or binding when tightening the nut.
Causes of Cross-Threading During Installation
Misalignment: The fitting components are not properly aligned before threading.
Forcing the Nut: Applying excessive force to thread the nut onto the fitting body at an incorrect angle.
Damaged Threads: Pre-existing damage or debris on the threads.
Best Practices to Prevent Cross-Threading
Proper Alignment: Ensure all components are aligned correctly before threading.
Hand-Threading First: Always start threading the nut by hand to avoid applying excessive force.
Thread Inspection: Inspect threads for damage or debris before installation.
Role of Lubrication in AN Fitting Installation
Reducing Friction: Lubrication reduces friction between threads, making assembly easier and preventing thread damage.
Ensuring Proper Torque: Helps achieve the correct torque without over-tightening.
Preventing Galling: Protects threads from galling, which can cause permanent damage.
Types of Lubricants Suitable for AN Fittings
Anti-Seize Compounds: Suitable for preventing galling in metal-to-metal contact.
Hydraulic Oil: Compatible with the system’s fluid and materials.
Silicone-Based Lubricants: Offer good protection and compatibility with various materials.
Signs of Inadequate Lubrication
Increased Friction: Difficulty in tightening the nut onto the fitting body.
Thread Damage: Visible damage or galling on the threads.
Poor Sealing: Leaks due to improper torque application.
Common Sources of Contamination and Debris
Environmental Factors: Dust, dirt, and debris from the installation environment.
Handling: Contamination is introduced during handling and assembly.
Residual Manufacturing Debris: Particles left from the manufacturing process.
Impact of Contaminants on Fitting Performance
Leaks: Contaminants can prevent proper sealing, leading to leaks.
Damage: Debris can cause wear and damage to fitting components.
Flow Obstruction: Contaminants can block or restrict fluid flow, reducing system efficiency.
Preventive Measures to Keep Fittings Clean
Clean Work Area: Maintain a clean and organized work environment.
Protective Covers: Use caps or plugs to protect fitting ends during storage and handling.
Regular Cleaning: Clean fittings and tools regularly to prevent contamination.
In this post, we’ve covered the essential steps and best practices for installing AN fittings, including identifying and troubleshooting common issues such as misalignment, cross-threading, inadequate lubrication, and contamination. Proper installation and meticulous attention to these details are crucial to ensuring the reliability and performance of your hydraulic systems. By following the outlined procedures and preventive measures, you can achieve leak-free and durable connections. If you encounter any challenges or need further assistance, don’t hesitate to seek professional advice to ensure the optimal functioning of your system.
AN fittings are primarily used in hydraulic systems for creating secure, leak-free connections. They are commonly found in automotive, aerospace, and industrial applications.
To prevent cross-threading, always start threading the nut onto the fitting body by hand, ensuring proper alignment. Avoid using excessive force and inspect the threads for damage or debris before installation.
Use a compatible lubricant such as anti-seize compounds, hydraulic oil, or silicone-based lubricants. Ensure the lubricant is suitable for the materials and fluid type used in your system.
Signs of misalignment include visible gaps between fitting components, uneven contact surfaces, and difficulty in threading the nut onto the fitting body. Misalignment can also lead to leaks.
Clean AN fittings with a clean, lint-free cloth to remove surface dirt. For stubborn contaminants, use a suitable solvent or cleaning solution, rinse thoroughly, and allow the fittings to dry completely before installation.
Proper torque ensures that the fitting is securely tightened without over-tightening, which can cause damage or deformation. Using a torque wrench to achieve the manufacturer’s recommended torque specifications helps maintain the integrity and performance of the connection.
