
One-piece hydraulic hose fittings can simplify replacement assembly work when the fitting series, hose, connection, and crimp specification are verified together. Their preassembled construction reduces one separate component-selection step, but it does not resolve seized threads, repair damaged ports, or make similar-looking hose ends interchangeable. On older equipment, the immediate challenge is often identifying what failed before ordering what appears to be the same part.
What One-Piece Construction Changes
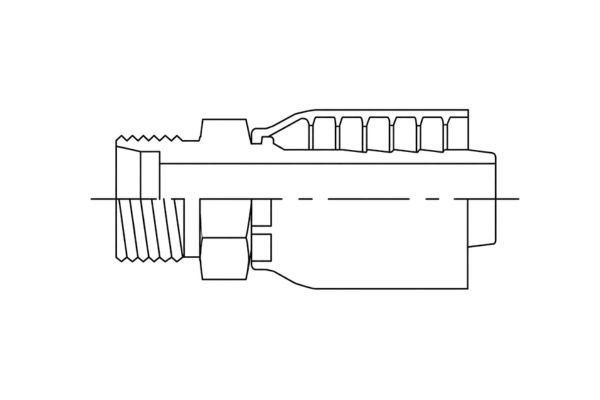
A one-piece fitting combines the stem or body and ferrule into a preassembled or retained unit. It describes the hose attachment construction, rather than a universal thread type or pressure class.
Separate the Ferrule Arrangement From the End Connection
The stem enters the hose, while the ferrule surrounds the prepared hose end and is compressed during the specified crimping process. How the ferrule is retained and how the stem engages the hose depend on the fitting series, so the term “one-piece” should always be followed by a product identification.
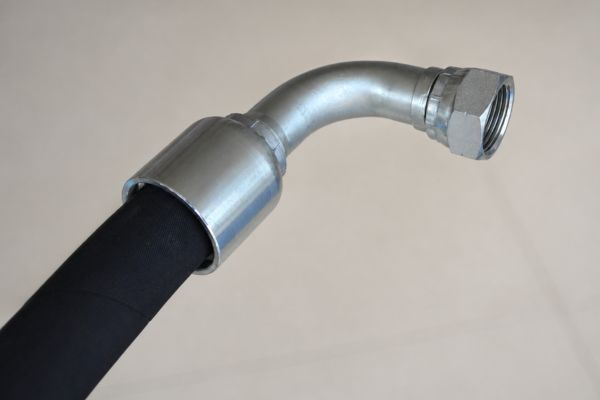
Having the ferrule supplied with the stem can reduce the need to pick a separate ferrule, which is useful when preparing repeat assemblies from approved parts. However, you must still select the correct fitting family, hose size, and connection configuration. A female swivel, rigid male end, straight fitting, and elbow can all require different identification checks even when their hose attachment construction is described the same way.
Diagnose the Old Connection Before Choosing a Replacement
A stuck fitting, a broken fitting, and a connection that turns without tightening are different symptoms. None identifies the cause or establishes whether a new hose end alone will complete the repair.
Use the Symptom to Define the Inspection
First establish the safe maintenance condition: stop and isolate the equipment, control supported loads, and release hydraulic pressure and stored energy according to the equipment manufacturer’s procedures. A stopped pump or one gauge reading cannot replace the required verification process, and loosening a fitting is not an improvised depressurization method.
Trace the assembly from the hose fitting through any adapter to the equipment port, then identify the joint that is supposed to separate. Corrosion outside the joint does not establish the condition of the engaged threads, while rounded wrench flats can prevent removal without proving that the threads have seized. Likewise, a broken part requires assessment of the remaining piece and surrounding body, rather than an immediate assumption of fatigue or a promise that an extractor will remove it without damage.
| Symptom | Inspection priority | Replacement consequence |
| Swivel nut will not turn | Intended separation point, tool engagement, and backup support | The hose end and mating adapter may need separate assessment |
| Adapter remains stuck in a port | Port type, surrounding body, and approved removal procedure | Protecting the equipment body may determine the repair route |
| Fitting breaks during removal | Remaining geometry and condition of the port | A new hose assembly does not address retained material or port damage |
| Connection turns but will not tighten | Which component turns and where engagement has failed | Inspect both mating parts before selecting a replacement |
| Joint leaks after previous replacement | Thread, seal, installation, and application information | Repeating the same part selection may repeat the problem |
Identify the Thread and the Actual Seal
The equipment end must match the complete connection design. Thread engagement alone cannot confirm that the sealing surfaces are compatible or that the fitting is suitable for the application.
Measure Before Assigning a Connection Standard
Record male or female configuration, straight or tapered thread, measured diameter, and pitch or threads per inch before comparing the fitting with a reliable identification reference. Then confirm the connection standard, seat angle, sealing face, and any O-ring or washer arrangement; measuring an internal thread requires the appropriate reference method, rather than treating its opening diameter as a nominal size. JIC, SAE 45-degree flare, NPT/NPTF, BSPP/BSPT, ORFS, ORB, metric, DIN, and JIS descriptions must lead to a specific verified connection.
Threads can provide retention while a separate face, cone, or elastomeric element provides the seal, depending on the connection design. Parker’s technical training resources treat O-ring face seal, flare, flareless, and parallel-thread port connections as distinct assembly subjects, reinforcing the need to identify more than diameter and pitch. Do not use thread tape or additional tightening to compensate for an unidentified sealing interface; follow the instructions for the confirmed connection.
Photographs help narrow the possibilities, especially when markings are incomplete, but they do not replace dimensional and sealing checks. Capture the entire fitting, the thread, and the sealing face before cleaning or handling obscures useful evidence, and record the original part number where available. If damage prevents a reliable measurement, use the mating-component documentation or equipment parts information rather than forcing a sample into the port as a thread gauge.
Match the Fitting Series to the Hose
The correct equipment connection is only half of the replacement decision. The hose attachment must belong to an approved hose-and-fitting combination with a validated assembly procedure.
Check the Complete Crimp Specification
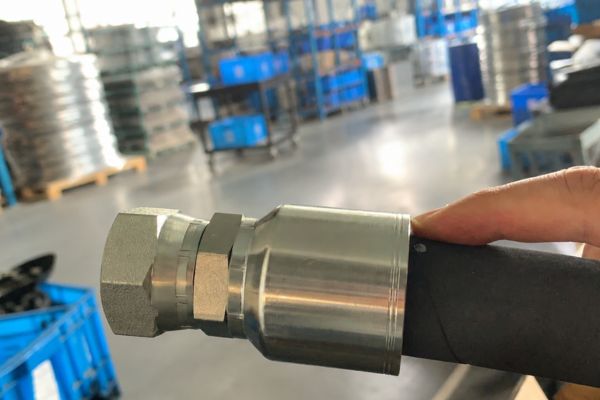
Start with the hose manufacturer and series, construction, and inside diameter or dash size, then identify the fitting stem and ferrule design approved for that hose. Two hoses with the same inside diameter can require different fittings or preparation, so equal dash sizes do not establish compatibility.
Obtain current assembly data covering the following items before preparing the hose:
- Approved hose series, fitting series, and size combination.
- Skive or no-skive requirement and specified hose preparation.
- Required insertion depth and the method used to verify insertion.
- Approved crimper, die selection, and applicable machine setup.
- Final crimp diameter, tolerance, and specified inspection method.
Use the specification for that combination rather than copying settings from a similar ferrule or measuring a used assembly as the manufacturing target. A machine setting and a finished crimp measurement serve different purposes, and the prescribed checks remain necessary after the machine cycle.
Confirm the Replacement Fits the Application
A fitting that matches the hose and thread can still be unsuitable for the installation. Review the operating conditions and installed geometry before approving the replacement assembly.
Evaluate Pressure, Environment, and Clearance Together
Confirm the required working pressure against the approved hose assembly and every relevant component in the connected pressure path, including the hose, fittings, adapters, and port. The lowest applicable rating sets a ceiling; it does not validate an otherwise unapproved combination, and burst pressure is not allowable working pressure. Temperature, fluid compatibility, pressure impulse, corrosion, vibration, and mechanical loading also affect suitability, so use the selected manufacturers’ application information rather than a generic rating assigned to all one-piece fittings.
Compare overall length, elbow angle, orientation, wrench access, and the space needed to install and remove the assembly without twisting or forcing it. A replacement with the same thread can have a different stem length or elbow envelope, changing the hose route near a bracket or adjacent line. Check routing, bend requirements, movement, and support against the hose and equipment instructions, and do not assume that adding another adapter automatically solves a clearance problem without introducing further checks.
Material and surface finish should also be selected for the actual fluid and external exposure, rather than appearance or a universal preference for one alloy. Where an O-ring is part of the connection, confirm the specified seal material and dimensions separately from the fitting body material. Laboratory corrosion-test hours, when provided for a particular product, should not be translated into a promised field service life under unspecified conditions.
Build a Repair Package That Can Be Verified
Complete identification and documented assembly requirements make a replacement reviewable. They also prevent an uncertain emergency substitution from becoming an approved stock item through repeated use.
Prepare the Technical Confirmation Checklist
Assess the port, sealing surfaces, and surrounding body after removal before treating installation as routine. A new fitting cannot restore missing internal threads, and running a tap through a damaged port does not by itself establish that the connection is fit for pressure service. Thread restoration, inserts, or port modifications require an approved repair assessment, including contamination control and the required inspection; replacement of the affected component must remain an option.
For a replacement inquiry or internal work order, collect the information that answers the unresolved technical questions:
- Existing part number, equipment reference, and photographs of the complete connection and sealing face.
- Verified connection standard, thread dimensions, sealing method, and fitting orientation.
- Hose manufacturer, series, construction, size, and required assembly length.
- Hydraulic fluid, working pressure, temperature, and relevant movement or exposure.
- Crimper and validated specification reference, plus quantity and intended repair application.
Do not close gaps with statements such as “same as the sample” when the sample is damaged or its service history is unknown. Identify which details are confirmed and which require manufacturer or engineering approval, and keep unverified alternatives separated from released parts. Before returning the equipment to service, follow the prescribed installation, inspection, and commissioning procedure; never use a hand to check for pinhole leakage or use mismatched components as a temporary high-pressure repair.
Conclusion
One-piece hydraulic hose fittings are useful when their preassembled construction supports an identified, approved hose assembly. They do not remove the need to diagnose the old connection, inspect the equipment port, or verify the replacement’s sealing interface. The most reliable repair starts with confirmed information: hose series, fitting series, thread and seal details, operating conditions, installation dimensions, and current crimp data. Correct matching matters more than a familiar appearance or the lowest unit price. Gather those details before ordering, keep unresolved alternatives out of released stock, and follow the equipment’s return-to-service requirements. That gives the next repair a documented starting point instead of another uncertain sample to copy.
Frequently Asked Questions
Can the ferrule be removed and replaced separately on a one-piece fitting?
Do not assume it can. The retained ferrule arrangement is part of the specific fitting design, and separating or modifying it is not a substitute for selecting the correct approved assembly. Follow the product manufacturer’s instructions.
Can an old crimped fitting be transferred to a new hose?
Do not reuse a permanent crimp fitting unless its manufacturer explicitly permits that procedure. “One-piece” does not mean reusable, and removing an old hose does not establish that the fitting remains acceptable. Field-attachable products have separate assembly and reuse requirements.
Does a swivel nut allow the hose to rotate continuously during operation?
An assembly swivel should not be assumed to function as a live rotary joint. Check whether the product is intended only to assist connection and orientation or is specifically rated for operational rotation. Resolve repeated hose twisting through the approved routing and connection design.
Can a cross-reference number establish that an alternative is interchangeable?
No; use it as an identification lead. Confirm the hose compatibility, connection geometry, pressure and temperature suitability, installation dimensions, and assembly data for the proposed part. Similar catalog descriptions do not replace documented approval.
What should happen if the hose markings are unreadable?
Treat the hose identification as unresolved. Check equipment records, assembly labels, or traceable parts information instead of selecting fittings from inside diameter alone. If compatibility cannot be established, obtain an approved replacement assembly specification.