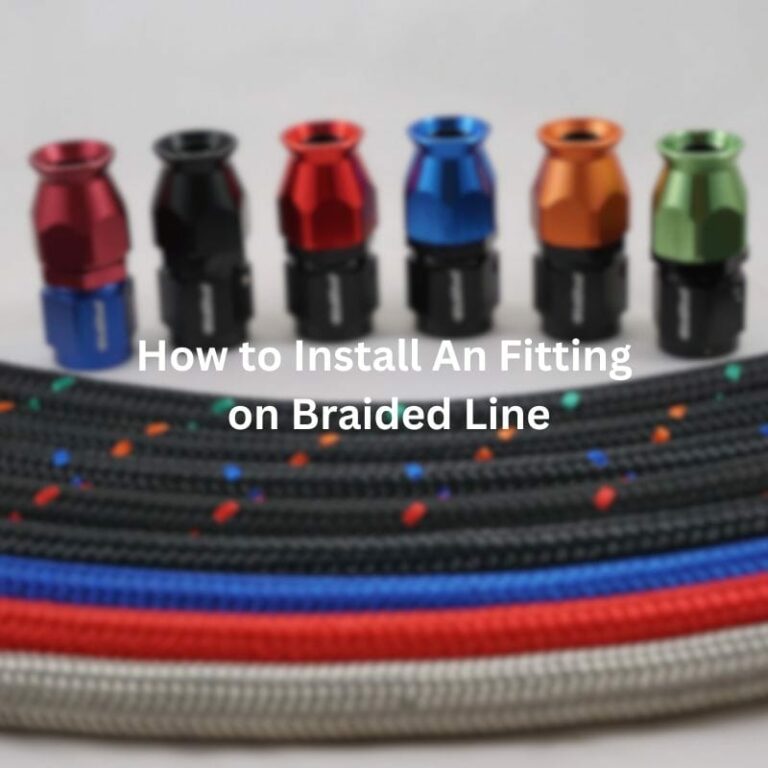
Proper maintenance of AN fittings is essential to ensure the integrity of the entire system, as these fittings often operate under high pressures and extreme conditions. Neglecting their upkeep can lead to leaks, system failures, and costly downtime. This post aims to provide a comprehensive, step-by-step troubleshooting guide for AN fitting repairs. Readers will gain valuable insights into diagnosing common issues, performing effective repairs, and maintaining these critical components to extend their lifespan and enhance system performance.
AN fittings, while designed for durability and high performance, can encounter several common issues that affect their functionality. Understanding these problems and their impacts is crucial for effective troubleshooting and maintenance.
Leaks: One of the most frequent issues with AN fittings is leakage, often due to improper sealing or damaged O-rings. Leaks can lead to fluid loss, reduced system pressure, and potential contamination of the hydraulic or fuel system. This not only compromises performance but can also pose safety risks and lead to costly repairs.
Cracking or Fractures: Over time, exposure to high pressures, extreme temperatures, or corrosive substances can cause cracks or fractures in AN fittings. These physical defects can weaken the fitting, leading to failure under stress. Cracks can result in sudden leaks or catastrophic system failures, which can be dangerous and expensive.
Corrosion: AN fittings, especially those made from aluminum or other susceptible materials, can suffer from corrosion if not properly protected. Corrosion deteriorates the material, affecting the fitting’s integrity and performance. This can result in leaks, weakened connections, and ultimately, system malfunction.
Thread Damage: Threads on AN fittings can become stripped or damaged due to over-tightening, cross-threading, or general wear and tear. Damaged threads compromise the fitting’s ability to create a secure seal, leading to leaks and potential system pressure loss.
Misalignment: Improper alignment during installation can cause stress on AN fittings, leading to leaks or damage. Misalignment can result from incorrect assembly or improper fitting of associated components, affecting the overall performance of the system.
Contamination: Dirt, debris, or foreign particles can enter the fitting and interfere with its function. Contaminants can cause blockages, affect the flow of fluids, and lead to increased wear and tear on the fitting and connected components.
When performing repairs on AN fittings, having the right tools is crucial for accurate and efficient work. Key tools include:
Wrenches: A set of wrenches, including adjustable and open-end types, is necessary for loosening and tightening AN fittings. Specialized AN fitting wrenches or crowfoot wrenches are ideal as they provide a secure grip without damaging the fittings.
Pliers: Needle-nose pliers and slip-joint pliers help in gripping and manipulating small components, especially when dealing with tight spaces or delicate parts.
Torque Wrenches: Accurate torque is vital for ensuring fittings are secured to manufacturer specifications. A torque wrench allows for precise tightening, which helps avoid over-tightening that could damage the fitting or its threads.
Cutting Tools: Tubing cutters or hacksaws are useful for cutting hoses or tubes to the correct length during replacement procedures.
To effectively repair AN fittings, you will need several materials:
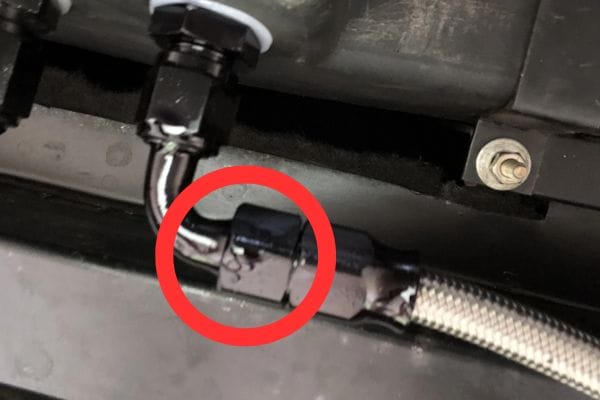
Sealing Compounds: Thread sealants or PTFE (Teflon) tape is used to prevent leaks by sealing the threads of the fitting connections. Ensure you use a sealant compatible with the fluids in your system.
Replacement Parts: Keep a stock of common replacement parts such as O-rings, seals, and gaskets. These parts are essential for replacing worn-out components to restore the fitting’s integrity and functionality.
Cleaning Solutions: Use appropriate cleaning solutions or solvents to remove debris, old sealant, or contaminants from fittings and connecting surfaces before reassembly.
Visual Inspection
The visual inspection is the first step in assessing the condition of AN fittings. Start by examining the fittings and surrounding components for any obvious signs of wear or damage. Look for:
Leaks: Check for any fluid around the fittings, which may indicate a leak. Leaks can be seen as wet spots or pooled fluid.
Damage: Inspect the fittings for cracks, dents, or deformation that could compromise their strength and performance. Ensure that all connections are intact and securely fastened.
Wear: Examine O-rings and seals for signs of aging or deterioration, such as cracking or hardening, which could lead to leaks.
Functional Testing
Once the visual inspection is complete, conduct functional testing to ensure the fittings operate correctly under pressure. This involves:
Pressure Testing: Use a pressure gauge to test the system’s pressure and check for leaks or performance issues. Ensure the fittings can withstand the operational pressure without any signs of failure.
Flow Testing: Verify that fluid flows smoothly through the fittings without any blockages or disruptions. This helps confirm that the fittings are properly aligned and functioning as intended.
Diagnosing issues with AN fittings involves careful observation and systematic evaluation. Begin by:
Visual Examination: Look for visible signs of leakage, corrosion, or physical damage. Leaks may be evident from wet spots or fluid stains around the fitting. Cracks, dents, or deformations can indicate stress or impact.
Pressure Testing: Use a pressure gauge to check the system’s pressure. Compare the readings to the manufacturer’s specifications to ensure the fitting is functioning within its designed limits. Any pressure drop could signal a leak or a malfunction.
Flow Testing: Evaluate the fluid flow through the fitting. A restricted or irregular flow may suggest a blockage or internal damage. Listen for unusual noises, such as hissing or sputtering, which can also indicate problems.
Functional Symptoms: Consider any operational issues, such as inconsistent performance or sudden changes in system behavior. These symptoms can provide clues to the underlying issue.
By combining visual inspections with pressure and flow tests, you can accurately diagnose the common issues affecting your AN fittings.
Once the problem is identified, proceed with disassembly:
Safety Precautions: Before disassembling, ensure that the system is depressurized and drained of fluids. Wear protective gear to avoid injury from pressurized fluid or debris.
Loosening Connections: Use the appropriate wrenches to carefully loosen the AN fitting connections. Avoid using excessive force to prevent damaging the fittings or threads. Employ a controlled, steady pressure to break the connections.
Removing Components: Once loosened, gently remove the fittings and any associated components. Take care not to damage the fittings or surrounding parts during removal. Keep track of the order and orientation of the components for reassembly.
Inspecting Removed Parts: As you disassemble, inspect each part for damage or wear. Note any issues that need addressing and replace any parts that are beyond repair.
Proper disassembly ensures that you can effectively access and repair the fitting without causing additional damage.
After disassembly, thoroughly clean and inspect the components:
Cleaning Procedures: Use suitable cleaning agents or solvents to remove old sealant, debris, or contaminants from the fittings. Ensure that all residues are completely removed to avoid interference with reassembly. For delicate parts, use non-abrasive brushes or cloths to prevent scratches.
Detailed Inspection: Inspect the cleaned components for wear and tear. Check O-rings, seals, and threads for signs of damage or deterioration. Look for any irregularities that could affect the fitting’s performance, such as cracks or excessive corrosion.
Component Replacement: Based on your inspection, decide whether to repair or replace specific components. Worn or damaged O-rings, seals, or threads should be replaced to ensure a proper seal and functionality.
Detailed cleaning and inspection help ensure that you address all potential issues and prevent future problems.
Decide whether to repair or replace parts based on their condition:
When to Repair: If a part is only slightly worn or damaged, and it can be restored to a reliable condition, repair may be sufficient. For example, minor thread damage can sometimes be fixed with a thread repair kit or by carefully re-threading the part.
When to Replace: Replace components that are significantly worn, cracked, or corroded. O-rings and seals that show signs of hardening or cracking should be replaced to prevent leaks. Threaded parts with stripped or damaged threads should be replaced to ensure a secure connection.
Repair Techniques: For repairs, follow manufacturer guidelines and use appropriate tools and techniques. For example, re-tapping threads should be done with precision to avoid further damage.
Replacement Process: When replacing parts, ensure that new components match the specifications of the original ones. Install new O-rings, seals, or other parts carefully, following proper installation procedures to achieve a secure and leak-free connection.
Reassembling AN fittings requires precision to ensure that all components are correctly aligned and securely fastened. Follow these steps for a successful reassembly:
Inspect Parts Before Reassembly: Before reassembling, ensure that all parts are clean and in good condition. Replace any components that showed signs of wear or damage during the inspection and cleaning process.
Apply Sealing Compounds: Apply a suitable thread sealant or PTFE tape to the male threads of the fittings, if required. Ensure even coverage but avoid over-application, as excess sealant can cause blockages or interfere with proper sealing.
Align Components Properly: Carefully align the components to ensure they fit together correctly. Misalignment can cause stress on the fittings, leading to leaks or damage. Hand-tighten the fittings to ensure proper alignment before using tools.
Tighten Connections: Use the appropriate wrenches to tighten the fittings. Follow the manufacturer’s specifications for torque settings to avoid over-tightening, which can damage threads or deform the fitting. Use a torque wrench for precision.
Verify Alignment and Fit: After tightening, check that all components are aligned correctly and that there are no gaps or misalignments. Ensure that the fittings are snug but not overly tightened.
Testing is crucial to verify that the repaired AN fittings are functioning correctly and are free of leaks. Follow these steps to conduct effective testing:
Pressure Test: Reintroduce fluid or pressure to the system gradually. Monitor the pressure gauge to ensure that the system operates within the specified pressure range. If the system holds pressure without any drop, the repair is likely successful. However, if you notice any pressure loss, further investigation may be required.
Check for Leaks: Inspect the reassembled fittings for any signs of leakage. Look for wet spots, dripping, or pooling of fluid around the fittings. Use a leak detection spray or solution if necessary. Apply the solution to the fittings and watch for bubbles, which indicate a leak.
Functional Testing: Test the system’s functionality by running it through its normal operating conditions. Ensure that the fluid flows smoothly and that there are no unusual noises or vibrations. Verify that the system performs as expected without any interruptions or issues.
Recheck Torque Settings: After initial testing, recheck the torque settings on the fittings to ensure they have not loosened or shifted. Make any necessary adjustments to maintain the correct tightness.
Final Inspection: Perform a final visual inspection to ensure that all fittings are secure and that there are no signs of leaks or other issues. Ensure that the system is operating efficiently and safely.
To prolong the life of AN fittings and ensure reliable performance, adhere to these regular maintenance practices:
Routine Inspections: Conduct periodic visual inspections of AN fittings to check for signs of wear, leaks, or damage. Regularly examine the fittings for cracks, corrosion, or any physical deformities that could compromise their integrity.
Clean Regularly: Keep fittings clean by removing dirt, debris, and residues that can cause corrosion or affect performance. Use appropriate cleaning agents and tools, ensuring that no abrasive materials are used that could damage the fittings.
Monitor System Pressure: Regularly check system pressure to ensure it is within the recommended range for your AN fittings. Consistently high pressures can lead to premature wear and potential failures.
Check for Leaks: Perform routine leak tests by visually inspecting for signs of fluid leakage or using leak detection sprays. Address any leaks promptly to prevent fluid loss and potential system damage.
Replace Worn Components: Replace any worn or damaged parts such as O-rings, seals, or gaskets immediately to maintain a proper seal and prevent leaks. Keeping spare parts on hand can facilitate quick replacements.
Preventing issues before they arise is key to maintaining the longevity and performance of AN fittings. Here are some preventative measures to consider:
Proper Installation: Ensure that AN fittings are installed correctly, following the manufacturer’s guidelines. Use the correct tools and techniques to avoid cross-threading, over-tightening, or misalignment, all of which can lead to premature wear or failure.
Use Appropriate Sealants: Apply suitable sealing compounds or PTFE tape as recommended. Avoid overusing sealants, as excess material can cause blockages or interfere with proper fitting and sealing.
Avoid Excessive Pressure: Operate the system within the specified pressure limits for AN fittings. Avoid subjecting the fittings to pressures beyond their rated capacity, as this can lead to stress, leaks, or failures.
Protect from Corrosion: If fittings are exposed to corrosive environments, use protective coatings or materials to shield them from corrosive substances. Store fittings in a dry, clean environment to prevent moisture-related corrosion.
Proper Storage: Store AN fittings in a clean, dry environment away from harsh chemicals or extreme temperatures. Use protective covers or cases to shield the fittings from physical damage or contamination during storage.
In summary, effective AN fitting repair involves a thorough understanding of common issues, precise troubleshooting, and diligent maintenance. With the right tools, knowledge, and adherence to best practices, you can confidently manage AN fitting repairs and maintenance, ensuring your systems remain reliable and operational.
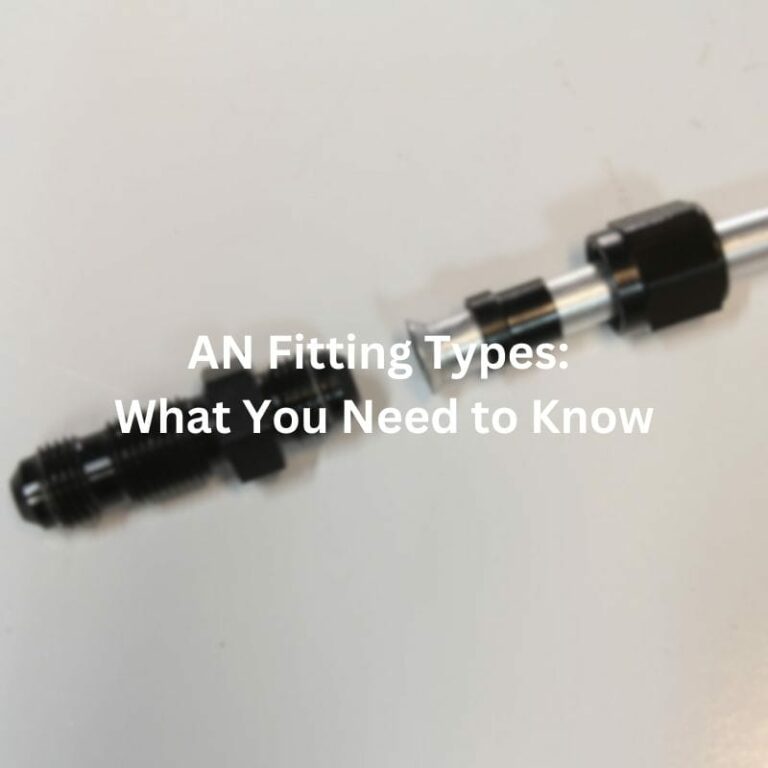
AN fittings, short for Army-Navy fittings, are used in high-pressure hydraulic and fuel systems. They are known for their durable design and are commonly used in aerospace, automotive, and industrial applications.
Common signs of issues include leaks, visible damage or cracks, and irregular fluid flow. Conduct a visual inspection, pressure test, and flow test to diagnose problems.
Essential tools include wrenches, pliers, a torque wrench, and tubing cutters. For cleaning, use appropriate solvents and brushes to remove debris.
Ensure the system is depressurized and drained. Use the correct wrenches to gently loosen and remove the fittings, avoiding excessive force to prevent damage.
Repair minor wear or damage, like re-threading threads or replacing seals, if the component is still structurally sound. Replace parts with significant damage or corrosion, such as cracked fittings or worn O-rings.
Perform regular inspections, clean fittings regularly, monitor system pressure, and use proper sealants. Store fittings in a clean, dry place and protect them from corrosive substances.
Looking for unbeatable prices, top-tier quality, or custom solutions that fit your exact needs? Contact Topa Now!
“Still hesitating which product is right for you?” Send an inquiry and our hydraulics team will provide you with the best solution!