Connecting brass fittings is a fundamental skill essential for various applications such as plumbing, gas lines, refrigeration, and hydraulic systems. Whether you are working on a residential plumbing project, setting up a gas line, or installing a complex hydraulic system, knowing how to properly connect brass fittings ensures a reliable and leak-free connection.
Measure the Length of the Pipe Needed:
Begin by determining the exact length of pipe required for your project. Use a tape measure to measure the distance between the connection points accurately. Mark the pipe with a pencil or marker at the point where it needs to be cut.
Use a Pipe Cutter to Make a Clean, Straight Cut:
Select a pipe cutter suitable for the type of pipe you are using (e.g., copper). Place the pipe cutter around the marked area and tighten the cutter until it is snug around the pipe. Rotate the cutter around the pipe, tightening it slightly after each full rotation. Continue this process until the pipe is cut through. This method ensures a clean, straight cut, which is crucial for a proper fitting connection.
Use a Deburring Tool to Remove Any Burrs from the Cut Pipe End:
After cutting the pipe, burrs or rough edges are often left behind. These need to be removed to ensure a smooth connection. Use a deburring tool, which can be a handheld tool specifically designed for this purpose or an attachment for a drill. Run the tool around the inside and outside edges of the pipe end to remove any burrs or rough spots.
Ensure the Pipe End is Smooth to Prevent Leaks:
After deburring, feel the pipe end with your fingers to make sure it is smooth and even. Any remaining roughness can cause improper seating of the fitting, leading to potential leaks. A smooth pipe end is essential for a secure and leak-free connection.
Wipe the Pipe and Fitting with a Clean Cloth to Remove Dirt and Oil:
Before assembly, clean both the pipe and the fitting thoroughly. Use a clean cloth to wipe away any dirt, dust, or oil. This step ensures that no contaminants interfere with the sealant or the connection.
Use an Appropriate Cleaning Solution if Necessary:
In cases where the pipe and fitting are particularly dirty or greasy, use a suitable cleaning solution. For metal pipes, a solvent-based cleaner can be effective. For other materials, a mild detergent and water may suffice. Ensure the components are completely dry before proceeding to the next step.

Choose the Right Sealant: PTFE Tape or Pipe Dope:
Select an appropriate sealant based on the application and type of fitting. PTFE tape (also known as plumber’s tape) is commonly used for threaded fittings, while pipe dope (a paste sealant) can be used for both threaded and non-threaded connections.
Wrap PTFE Tape Around the Threads of the Pipe in a Clockwise Direction or Apply Pipe Dope Evenly on the Threads:
If using PTFE tape, start at the end of the threads and wrap the tape in a clockwise direction, overlapping each layer slightly. Apply enough tape to cover the threads without excess bulk.
If using pipe dope, apply a thin, even layer over the threads using a brush or your finger. Ensure complete coverage to create a proper seal.
Align the Pipe with the Fitting and Insert It Firmly:
With the sealant applied, align the pipe with the fitting carefully. Insert the pipe into the fitting, pushing it in firmly to ensure it is fully seated. For threaded connections, screw the pipe into the fitting by hand until it is snug.
Ensure the Pipe is Fully Seated in the Fitting:
Double-check that the pipe is fully inserted or screwed into the fitting. A proper fit is crucial for a secure connection and to prevent leaks.
Use Wrenches to Tighten the Fitting:
For threaded fittings, use two wrenches: one to hold the fitting in place and the other to turn the pipe. Tighten the connection until it is secure. For compression fittings, use a wrench to tighten the compression nut.
Avoid Over-Tightening to Prevent Damage:
Be cautious not to over-tighten the connection. Over-tightening can damage the threads or the fitting itself, leading to leaks or future failures. Tighten just enough to ensure a secure and leak-free connection.
By following these detailed steps, you can ensure that your brass fittings are connected properly, providing a reliable and durable solution for your plumbing, gas, refrigeration, or hydraulic systems. Proper preparation, clean components, and careful assembly are key to achieving optimal results.
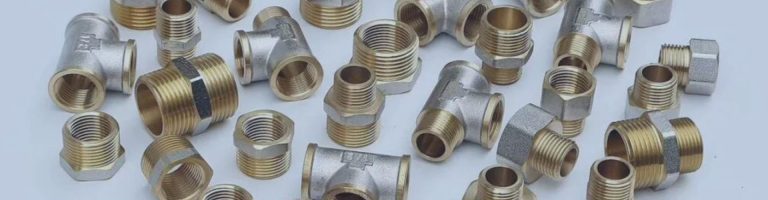
Brass fittings come in various types, each designed for specific applications and connection methods. Understanding the differences and how to properly connect each type ensures a secure and leak-free installation. This section will guide you through the steps for connecting threaded, compression, flare, and push-to-connect brass fittings.
Slide the Compression Nut and Ring onto the Pipe:
Begin by sliding the compression nut onto the pipe, followed by the compression ring (also known as a ferrule). Ensure the ring is positioned correctly, with its tapered end facing the fitting.
Insert the Pipe into the Fitting:
Push the pipe into the compression fitting until it reaches the internal stop within the fitting. This ensures the pipe is fully seated and aligned correctly for a secure connection.
Tighten the Compression Nut with a Wrench:
Slide the compression nut towards the fitting and hand-tighten it onto the threads of the fitting. Use a wrench to further tighten the nut. As you tighten, the compression ring is compressed between the nut and the fitting, creating a tight seal around the pipe. Tighten until the connection is secure, but avoid over-tightening to prevent damage to the pipe or fitting.
Cut and Flare the Pipe End Using a Flaring Tool:
First, cut the pipe to the desired length using a pipe cutter. Ensure the cut is clean and straight. Next, use a flaring tool to create a flare at the end of the pipe. Insert the pipe into the flaring tool, tighten the tool’s clamp, and use the flaring cone to expand the pipe end into a flare. This flare provides a surface for the fitting to seal against.
Fit the Flare Nut and Flare Fitting onto the Pipe:
Slide the flare nut onto the pipe, followed by placing the flared pipe end into the flare fitting. Ensure the flare nut is correctly positioned behind the flare on the pipe.
Tighten the Flare Nut to the Fitting:
Thread the flare nut onto the flare fitting by hand, ensuring it is correctly aligned. Use a wrench to tighten the flare nut, securing the flared pipe end against the fitting. Tighten until the connection is secure, but be careful not to over-tighten, as this can damage the flare or fitting.
Simply Push the Pipe into the Fitting Until It Clicks into Place:
Push-to-connect fittings are designed for quick and easy connections. Simply push the pipe into the fitting until you feel it click into place. The internal mechanism of the fitting grips the pipe securely, creating a tight seal without the need for additional tools or sealants.
Ensure a Secure Connection by Pulling Lightly on the Pipe:
After inserting the pipe, lightly pull on it to ensure it is fully engaged and secure within the fitting. The fitting should hold the pipe firmly in place, indicating a proper connection.
By following these detailed steps for each type of brass fitting, you can ensure a secure and reliable connection, whether you are working with threaded, compression, flare, or push-to-connect fittings. Understanding the specific requirements and techniques for each type of fitting is essential for achieving optimal results in your plumbing, gas, refrigeration, or hydraulic systems.
Even with careful installation, issues can arise with brass fittings. Identifying and resolving these issues promptly is crucial for maintaining the integrity and functionality of your system. Here, we will discuss common problems such as leaks, loose connections, and corrosion, and provide detailed steps to troubleshoot and fix these issues.
Leaks are a common issue in plumbing and hydraulic systems. They can lead to significant damage if not addressed promptly.
Identify the Source of the Leak:
Begin by visually inspecting the system to locate the exact source of the leak. Check around all fittings and joints for any signs of moisture or dripping. Sometimes, leaks can be subtle and may require closer inspection, such as using a flashlight to detect small droplets or damp spots.
Tighten the Fitting:
If the leak is coming from a fitting, use a wrench to tighten it slightly. Be cautious not to over-tighten, as this can damage the threads or the fitting itself. Tightening should be done incrementally, checking the leak after each adjustment.
Reapply Sealant if Necessary:
If tightening the fitting does not stop the leak, you may need to disassemble the connection and reapply the sealant. For threaded connections, remove the fitting, clean the threads thoroughly to remove old sealant, and then reapply PTFE tape or pipe dope. For other types of fittings, inspect the sealing surfaces for any debris or damage before reassembling.

Loose connections can lead to inefficiencies and potential leaks. Ensuring all fittings are securely tightened is crucial for the system’s performance.
Check All Connections:
Regularly inspect all fittings and connections in your system. Gently tug on pipes and fittings to check for any movement. A properly connected fitting should not show any signs of looseness.
Tighten Any Loose Fittings:
Use appropriate tools, such as wrenches, to tighten any loose fittings. For threaded connections, ensure that the threads are not stripped and that the fitting can be tightened properly. For compression fittings, ensure the compression nut is snug and the ferrule is properly seated.
Replace Worn-Out Fittings if Needed:
If a fitting cannot be tightened sufficiently due to wear or damage, it should be replaced. Inspect the fitting and the corresponding pipe end for any signs of wear, damage, or deformation. Replace with a new fitting to ensure a secure connection.
Corrosion and wear can weaken brass fittings over time, leading to leaks and system failures. Regular inspection and maintenance are key to preventing these issues.
Inspect Fittings Regularly for Signs of Corrosion:
Conduct routine inspections of your brass fittings, looking for any signs of corrosion, such as discoloration, pitting, or rust. Pay special attention to areas exposed to harsh conditions, such as moisture or chemicals.
Replace Corroded Fittings Promptly:
If you identify any fittings that show signs of significant corrosion, replace them immediately. Corroded fittings can compromise the integrity of the entire system. When replacing, ensure the new fittings are suitable for the environmental conditions to prevent future corrosion.
Preventative Measures:
To minimize corrosion, consider using protective coatings or treatments on brass fittings, especially in harsh environments. Ensure the system is properly maintained, and any leaks are addressed promptly to prevent moisture accumulation around the fittings.
By following these detailed steps, you can effectively troubleshoot and resolve common issues with brass fittings, ensuring your system remains reliable and efficient. Regular maintenance and prompt attention to any problems are essential for the longevity and performance of your plumbing, gas, refrigeration, or hydraulic systems.
Connecting brass fittings is a straightforward process when armed with the right knowledge and tools. Whether you are working on plumbing, gas, refrigeration, or hydraulic systems, understanding the specific requirements and techniques for each type of fitting ensures secure and leak-free connections.
Should you have any questions or need further assistance, do not hesitate to leave a comment or reach out for professional advice. Properly connected brass fittings are key to the safety and functionality of your systems, and we are here to support you in achieving that goal.
For brass fittings, PTFE tape and pipe dope are commonly used. PTFE tape is ideal for threaded connections, while pipe dope can be used for both threaded and non-threaded fittings.
A fitting is tight enough when it is secure and does not leak. Use a wrench to tighten the fitting until it is snug, but avoid over-tightening to prevent damage. Check for leaks after tightening.
First, identify the source of the leak. Tighten the fitting with a wrench if it is loose. If the leak persists, disassemble the fitting, clean the threads, reapply sealant, and reassemble.
Yes, brass fittings can be used with various types of pipes, including copper, PVC, and PEX. Ensure that the fitting type matches the pipe material and size for a secure connection.
It is recommended to inspect brass fittings at least once a year, or more frequently in harsh environments. Look for signs of discoloration, pitting, or rust, and replace any corroded fittings promptly.
Common tools needed for connecting brass fittings include wrenches, a pipe cutter, a deburring tool, and sealant (PTFE tape or pipe dope). Depending on the type of fitting, you might also need a flaring tool or compression tool.


