In plumbing and a variety of other applications, brass compression fittings ensure leak-free connections that maintain system integrity and efficiency. In this article, we’ll provide a comprehensive, step-by-step guide on how to install brass compression fittings, ensuring you get a tight, leak-free connection every time.
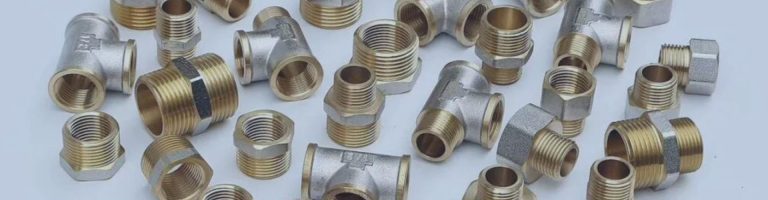
Brass compression fittings are a type of connector used to join two pipes or a pipe to a fixture. These fittings rely on the compression of a brass ring (or ferrule) around the pipe to create a tight seal, ensuring a secure and leak-proof connection. They are commonly used in situations where soldering or welding is not feasible or practical.
Nut: The nut is a threaded component that screws onto the fitting body. When tightened, it compresses the ring around the pipe, creating the seal.
Ring (Ferrule): The ring, also known as a ferrule, is a small brass ring that fits over the pipe. As the nut is tightened, the ring is compressed, forming a tight seal between the pipe and the fitting body.
Fitting Body: The fitting body is the main part of the compression fitting. It contains the internal threads that the nut screws onto and provides the housing for the pipe connection.

Plumbing: Brass compression fittings are widely used in residential and commercial plumbing systems to connect pipes for water supply and distribution.
Gas Lines: Due to their secure sealing capability, these fittings are often used in gas line installations for both natural gas and propane systems.
HVAC Systems: In heating, ventilation, and air conditioning systems, brass compression fittings are used to connect various components and ensure leak-free operation.
Industrial Uses: These fittings are also prevalent in industrial applications, including hydraulic systems, fuel lines, and chemical processing, where reliable and durable connections are essential.
Durability: Brass is a strong and long-lasting material, making these fittings reliable for long-term use.
Ease of Installation: Unlike other types of fittings that may require soldering or specialized tools, brass compression fittings can be installed with basic hand tools.
Resistance to Corrosion: Brass is naturally resistant to corrosion, ensuring the fittings maintain their integrity and performance even in harsh environments.
Choosing the correct size and type of brass compression fitting is crucial for ensuring a secure and leak-free connection. Here are some key considerations:
Size Compatibility: Ensure the fitting size matches the outer diameter of the pipe. Brass compression fittings come in various sizes, so measure the pipe accurately before purchasing.
Type of Fitting: Depending on the application, select the appropriate type of fitting, such as straight connectors, elbows, tees, or couplings. Each type serves different connection needs.
Material Compatibility: Verify that the fitting material is suitable for the pipe material. Brass fittings work well with copper, plastic, and other metal pipes, but it’s essential to ensure compatibility to prevent corrosion or damage.
Before installation, inspect all components of the brass compression fitting to ensure they are free from defects or damage. This step helps avoid issues during and after installation.
Visual Inspection: Check the nut, ring, and fitting body for any visible cracks, deformities, or manufacturing defects.
Thread Inspection: Ensure the threads on the nut and fitting body are intact and free from debris or damage. Damaged threads can lead to poor sealing and leaks.
Ring (Ferrule) Condition: Inspect the compression ring for any signs of wear or distortion. A damaged ring can compromise the integrity of the seal.
Properly cutting the pipe to the required length is essential for a successful installation. Follow these steps for a precise cut:
Measure Accurately: Use a measuring tape to mark the desired length of the pipe. Double-check the measurement to ensure accuracy.
Use the Right Tool: Select a pipe cutter appropriate for the pipe material. For metal pipes, a rotary pipe cutter is ideal, while a plastic pipe cutter works well for plastic pipes.
Straight Cut: Ensure the cut is straight and clean. An angled or jagged cut can cause fitting issues and leaks.
Deburring and cleaning the pipe ends are crucial steps to ensure a secure and leak-free fit.
Deburring Tool: Use a deburring tool to remove any burrs or sharp edges from the cut end of the pipe. Burrs can damage the compression ring and compromise the seal.
Cleaning: Clean the pipe ends with a clean cloth to remove any dirt, debris, or grease. Contaminants can interfere with the sealing process and cause leaks.
Smooth Surface: Ensure the pipe ends are smooth and free from any irregularities. A smooth surface allows the compression ring to form a tight seal around the pipe.
By meticulously preparing for the installation, you can ensure that the brass compression fittings will provide a secure, durable, and leak-free connection. Proper selection, inspection, cutting, and cleaning are fundamental steps in achieving a successful installation.
Properly connecting brass pipe fittings involves several crucial steps to ensure a secure, leak-free joint. This step-by-step guide will help you navigate the process with precision and confidence.
Detailed Instructions:
Prepare the Pipe: Ensure the pipe end is clean, deburred, and cut to the correct length.
Align the Pipe: Hold the pipe in line with the fitting body to ensure a straight and secure connection.
Insert the Pipe: Push the pipe into the fitting body until it reaches the internal stop. Ensure the pipe is fully seated in the fitting to create a proper seal.

Detailed Instructions:
Position the Compression Ring: Slide the compression ring (ferrule) onto the pipe. The ring should be positioned approximately 1/8 inch (3 mm) from the end of the pipe.
Slide the Nut: Place the compression nut over the pipe, ensuring it slides over the compression ring and aligns with the fitting body threads.
Detailed Instructions:
Hand-Tighten First: Begin by hand-tightening the compression nut onto the fitting body. This helps align the components properly and ensures an even compression.
Use Wrenches: Once hand-tightened, use two wrenches to secure the connection. Hold the fitting body with one wrench to prevent it from turning.
Tighten Securely: Use the second wrench to turn the compression nut clockwise. Tighten the nut until you feel resistance, then turn it an additional 1/4 to 1/2 turn to compress the ring and create a seal.
Check for Over-Tightening: Be cautious not to over-tighten, as this can damage the fitting or pipe. The goal is to achieve a snug fit without excessive force.
Common Mistakes:
Over-Tightening: Applying too much force can deform the compression ring and fitting, leading to leaks or damage. Stop tightening as soon as the connection feels snug and secure.
Under-Tightening: Insufficient tightening can result in a weak seal, causing leaks. Ensure the nut is tightened appropriately to compress the ring adequately.
Misalignment: Ensure the pipe, ring, and nut are properly aligned before tightening to avoid uneven compression and potential leaks.
Steps to Take if a Leak is Detected:
Identify the Source: Carefully inspect the area around the fitting to pinpoint the exact location of the leak.
Re-tighten the Nut: Use a wrench to slightly tighten the compression nut further. Be cautious not to over-tighten, as this can damage the fitting or pipe.
Check for Debris: Disassemble the fitting and inspect the components for any debris or dirt that may have caused an improper seal. Clean the components thoroughly before reassembling.
Inspect the Compression Ring: Check the compression ring (ferrule) for any signs of damage or deformation. Replace the ring if necessary.
Replace Components: If the leak persists, consider replacing the compression nut, ring, or fitting body to ensure all parts are in optimal condition.

How to Make Necessary Adjustments if the Fitting is Not Sealed Properly:
Disassemble the Fitting: If re-tightening does not resolve the leak, disassemble the fitting completely.
Inspect the Pipe End: Ensure the pipe end is clean, smooth, and free from burrs or damage. Re-cut and deburr the pipe if necessary.
Reposition the Compression Ring: Place the compression ring slightly further back on the pipe before reassembling it to ensure a better seal.
Reassemble and Tighten: Reassemble the fitting, ensuring all components are properly aligned. Hand-tighten the nut initially, then use a wrench to secure it further.
Re-test for Leaks: After making adjustments, conduct another pressure test to verify that the connection is now leak-free.
Importance of Checking Fittings Periodically:
Regular inspections of your brass compression fittings are crucial to ensure their longevity and reliability. Over time, even the best-installed fittings can develop issues due to wear and tear, environmental factors, or system vibrations. Conducting periodic checks helps identify potential problems before they become significant issues, ensuring the system’s overall integrity and preventing costly repairs or downtime.
Inspection Checklist:
Visual Check: Look for any signs of corrosion, discoloration, or physical damage on the fittings and surrounding areas.
Leak Detection: Inspect for any visible leaks or moisture around the fittings, which can indicate a compromised seal.
Pressure Test: Conduct periodic pressure tests to ensure the fittings maintain their integrity under operational conditions.
System Performance: Monitor the system’s performance for any unusual changes, such as drops in pressure or flow rates, which could indicate fitting issues.
When and How to Re-tighten Fittings if Necessary:
Re-tightening brass compression fittings can be necessary if you notice signs of minor leaks or if fittings have loosened over time due to system vibrations or thermal expansion and contraction.
Steps to Re-tighten:
Preparation: Turn off the system and relieve any pressure before attempting to re-tighten the fittings.
Check Alignment: Ensure the pipe and fitting are still properly aligned. Misalignment can cause leaks and improper sealing.
Hand-Tighten: Start by hand-tightening the compression nut to ensure it’s snug.
Use Wrenches: Use two wrenches – one to hold the fitting body steady and the other to tighten the compression nut. Turn the nut clockwise, tightening it an additional 1/8 to 1/4 turn.
Test for Leaks: After re-tightening, turn the system back on and conduct a leak test to ensure the fitting is now secure.
Signs That a Fitting Needs to Be Replaced and How to Do It:
While re-tightening can often resolve minor issues, there are times when a fitting must be replaced to maintain the system’s integrity.
Signs a Fitting Needs Replacement:
Persistent Leaks: If a fitting continues to leak despite re-tightening, it may be damaged or worn out.
Corrosion: Significant corrosion or rust on the fitting can weaken its structure and lead to failures.
Cracks or Damage: Visible cracks or physical damage to the fitting indicate that it can no longer provide a secure seal.
Worn Compression Ring: If the compression ring is deformed or excessively worn, it won’t create a proper seal.
We hope this guide has provided you with the knowledge and confidence to successfully install brass compression fittings. If you have any questions or would like to share your installation experience, please contact us. Your insights and feedback are valuable to us and other customers. Let’s work together for leak-free connections and reliable installations!
Brass compression fittings are commonly used to join two pipes or a pipe to a fixture in plumbing, gas lines, HVAC systems, and various industrial applications. They provide a secure and leak-free connection without the need for soldering or welding.
Yes, brass compression fittings can be used with plastic pipes. However, it’s important to ensure that the fitting is compatible with the specific type of plastic pipe you are using. Some plastic pipes may require a support sleeve inside the pipe to prevent collapse.
The compression nut should be tightened until you feel resistance, and then give it an additional 1/4 to 1/2 turn. Avoid over-tightening, as this can deform the compression ring and fitting, leading to leaks. If you experience leaks, you may need to tighten the nut slightly more.
While it is possible to reuse brass compression fittings, it is generally not recommended. The compression ring (ferrule) may have deformed during the initial installation, and reusing it could result in an improper seal. For the best results, use a new fitting.
If you detect a leak in your brass compression fitting, first try tightening the nut slightly more. If the leak persists, disassemble the fitting and inspect the components for damage or debris. Replace any damaged parts and reassemble, ensuring the pipe end is clean and properly aligned.
No, Teflon tape or pipe dope is not required with brass compression fittings. These fittings rely on the compression of the ring to create a seal. Using Teflon tape or pipe dope can interfere with the compression process and lead to leaks.


