How to Solder Copper Pipe to Brass Fitting

Introduction

Soldering copper pipe to brass fittings is a critical skill in the fields of plumbing and HVAC (heating, ventilation, and air conditioning). The goal of this post is to provide a comprehensive, step-by-step guide on how to effectively solder copper pipe to brass fittings.

Understanding the Basics

Before diving into the soldering process, it’s crucial to gather all the necessary materials and tools. Having everything at hand will ensure a smooth and efficient workflow, minimizing interruptions and enhancing safety. Here’s a comprehensive list of what you’ll need:

Materials

Copper Pipe: The primary material for the pipe sections of your project. Choose the correct diameter and length for your specific needs.

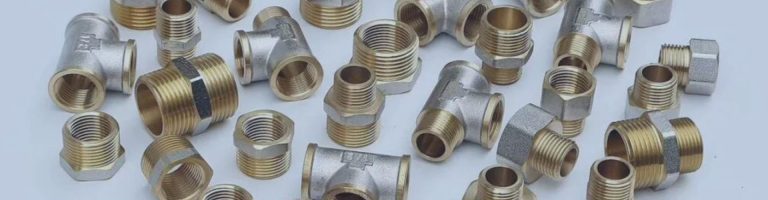
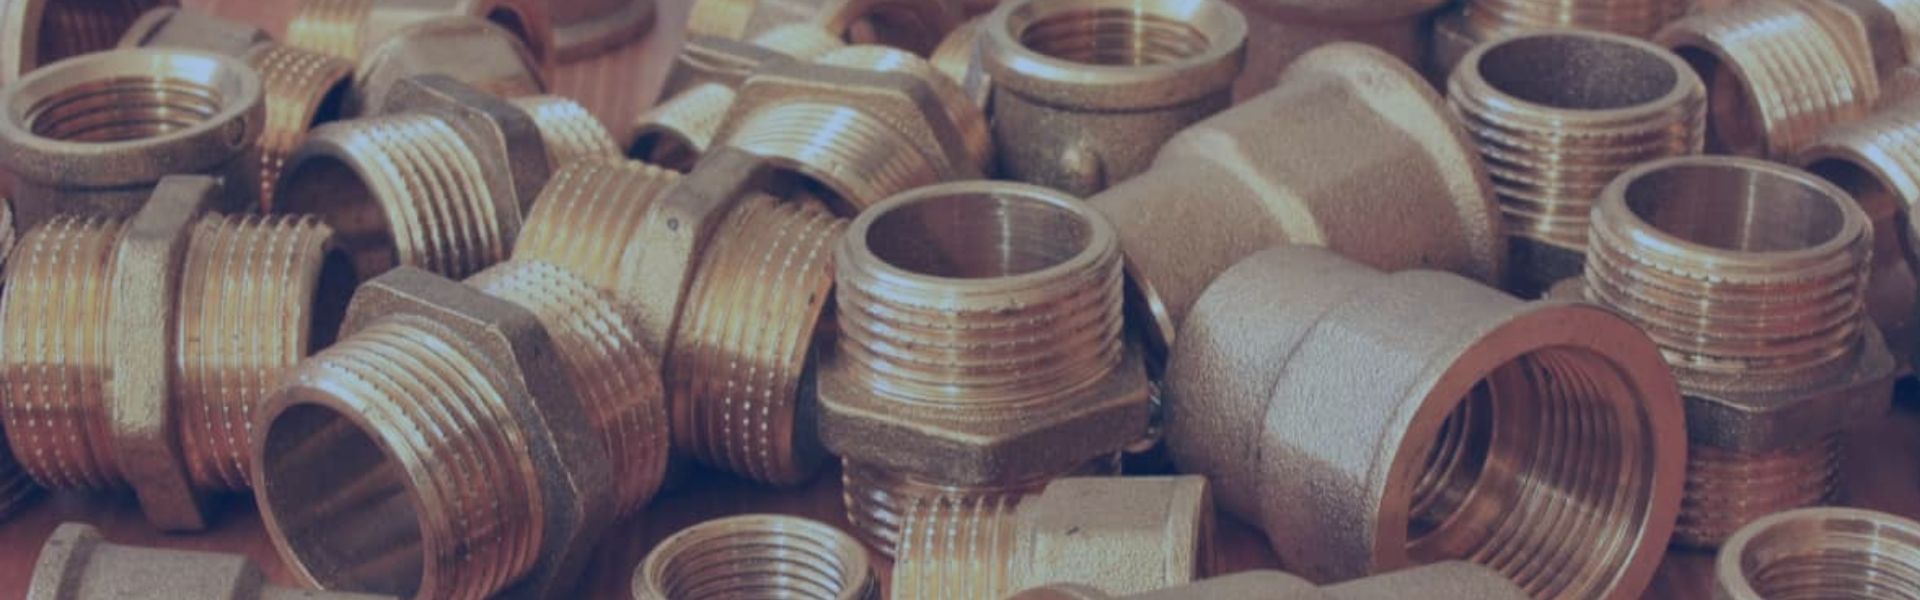
Brass Fitting: Used to connect different sections of copper pipe or to join copper pipe to other types of pipe. Brass fittings are available in various configurations such as elbows, tees, and couplings.

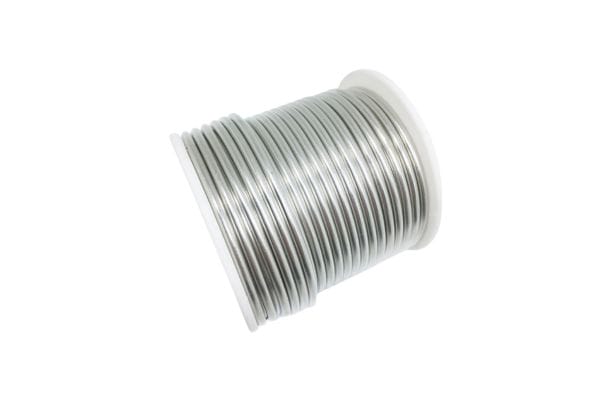
Lead-Free Solder: Essential for creating a strong and safe bond. Lead-free solder is particularly important for potable water systems to prevent lead contamination.

Flux: A chemical cleaning agent that helps the solder flow and bond properly by cleaning the metal surfaces and preventing oxidation.

Emery Cloth or Sandpaper: Used to clean and prepare the surfaces of the copper pipe and brass fitting, ensuring a good bond.

Pipe Cleaning Brush: A cylindrical brush designed to clean the inside of copper pipes and fittings.

Tools

flux

Pipe Cutter: A specialized tool for cutting copper pipes cleanly and accurately. Ensure it’s sharp and in good condition for the best results.

Torch: A propane or MAPP gas torch is used to heat the joint to the correct temperature for soldering. The torch should have a precise flame control feature.

Safety Gear: Includes heat-resistant gloves, safety goggles, and a long-sleeve shirt to protect against burns and splashes.

Heat Shield: A protective barrier to shield surrounding areas from the torch’s flame, preventing accidental fire hazards.

Adjustable Wrenches: For holding and adjusting the fittings securely during the soldering process.

Tape Measure: To measure the length of the copper pipe accurately before cutting.

Marker or Pencil: For marking cutting lines on the copper pipe.

Deburring Tool: Used to remove burrs from the cut end of the pipe, ensuring a smooth, clean edge.

Why Solder Copper to Brass?

Copper and brass are highly valued in plumbing and HVAC systems due to their distinct and complementary properties.

Corrosion Resistance

Copper and brass are both highly resistant to corrosion, which is essential for long-lasting plumbing and HVAC systems. This resistance ensures that the pipes and fittings maintain their integrity and functionality over time, reducing the likelihood of leaks and system failures.

Thermal Conductivity

Copper has excellent thermal conductivity, making it an ideal material for heating and cooling applications. This property allows for efficient heat transfer.

Strength and Durability

Brass fittings offer superior strength and durability, capable of withstanding high pressure and temperature variations. This makes brass an excellent choice for connections that require a robust and reliable seal.

Step-by-Step Guide to Soldering Copper Pipe to Brass Fitting

Preparation

Safety First

Safety is paramount when working with tools and materials that involve high heat and potentially hazardous substances. Here are essential safety tips to follow:

  • Wear Safety Gear: Always wear heat-resistant gloves to protect your hands from burns. Safety goggles are crucial to shield your eyes from sparks, debris, and harmful fumes. Long-sleeved shirts and long pants made of non-flammable materials will protect your skin.
  • Work in a Well-Ventilated Area: Ensure that your workspace is well-ventilated to avoid inhaling harmful fumes produced during the soldering process. If working indoors, use a fan or an exhaust hood to improve ventilation.
  • Fire Safety: Keep a fire extinguisher nearby and be aware of its location and how to use it. Clear the area of any flammable materials and use a heat shield to protect walls and other surfaces from the torch’s flame.
  • Proper Lighting: Make sure your work area is well-lit so you can clearly see the joint and ensure precise application of heat and solder.

Cutting the Copper Pipe

Accurate measurement and clean cuts are essential for a successful soldering job. Follow these steps to measure and cut the copper pipe:

  • Measure the Pipe: Use a tape measure to determine the required length of the copper pipe. Mark the measurement with a pencil or marker.
  • Cut the Pipe: Use a pipe cutter for a clean, straight cut. Position the cutter on the mark, tighten the blade, and rotate the cutter around the pipe. Gradually tighten the blade after each full rotation until the pipe is cut through.
  • Deburr the Pipe: After cutting, use a deburring tool to remove any burrs from the cut end of the pipe. Burrs can impede the fitting process and affect the integrity of the joint.

Cleaning the Pipe and Fitting

Proper cleaning ensures that the solder bonds effectively to the copper pipe and brass fitting:

  • Clean the Pipe: Use an emery cloth or sandpaper to clean the outside of the copper pipe’s end. Rub the cloth or sandpaper around the pipe until it is shiny and free of oxidation and debris.
  • Clean the Fitting: Similarly, clean the inside of the brass fitting using an emery cloth or a pipe cleaning brush. Make sure all surfaces to be joined are clean and shiny.

Applying Flux

  • Choosing the Right Flux
  • Flux is essential in the soldering process as it helps the solder flow and bond by cleaning the metal surfaces and preventing oxidation:
  • Types of Flux: There are several types of flux available, including water-soluble, petroleum-based, and rosin-based flux. For plumbing applications, a water-soluble flux is often recommended as it is easy to clean after soldering.
  • Best Flux for the Job: Choose a flux specifically designed for plumbing or HVAC work, which is typically safe for potable water systems and compatible with both copper and brass.

Applying the Flux

Proper application of flux is critical to ensure a strong bond:

  • Apply Flux to the Pipe: Use a small brush to apply a thin, even layer of flux to the cleaned end of the copper pipe. Ensure the entire surface that will be inserted into the fitting is covered.
  • Apply Flux to the Fitting: Similarly, apply a thin layer of flux to the inside of the brass fitting where it will contact the pipe. This will ensure both surfaces are properly prepared for soldering.

Fitting the Pieces Together

Inserting the Copper Pipe into the Brass Fitting

Ensuring a snug fit without forcing the pieces is key to a successful joint:
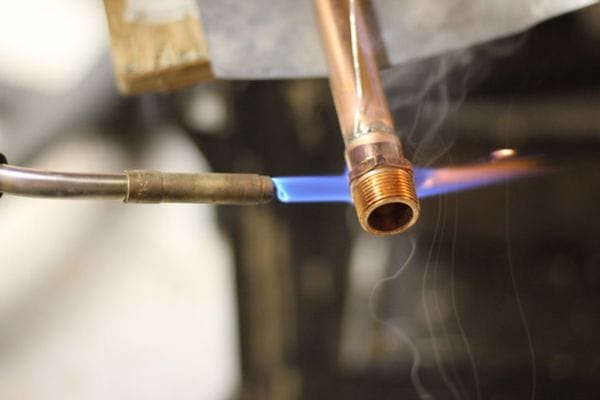
  • Align the Pipe and Fitting: Carefully insert the flux-coated end of the copper pipe into the brass fitting. Rotate the pipe slightly as you push it in to ensure the flux is evenly distributed and the fit is secure.
  • Check the Fit: Make sure the pipe and fitting are aligned correctly and that the pipe is fully seated in the fitting. There should be no gaps between the surfaces to be soldered.
welding brass to copper

Soldering the Joint

Heating the Joint

Proper heating is crucial for a strong, leak-free joint:
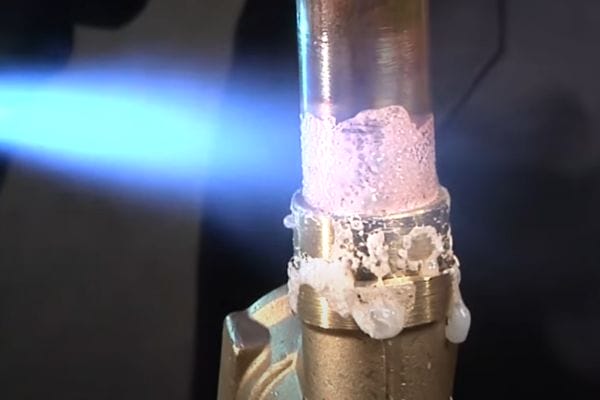
  • Prepare the Torch: Light your propane or MAPP gas torch and adjust it to a medium flame with a sharp, blue cone for precise heating.
  • Heat the Joint Evenly: Begin heating the joint by moving the torch flame around the pipe and fitting it to distribute heat evenly. Avoid overheating any one spot to prevent burning the flux.
  • Heat Until Flux Sizzles: Heat the joint until the flux begins to sizzle and bubble, indicating that the metal is hot enough for soldering.

Applying the Solder

Applying solder at the right moment ensures a secure bond:

  • Apply the Solder: Once the joint is sufficiently heated, touch the tip of the solder wire to the joint. The heat will draw the solder into the gap between the pipe and the fitting through capillary action.
  • Continue Heating: Move the torch as needed to keep the joint hot enough for the solder to flow smoothly and evenly around the joint. Ensure the entire circumference of the joint is covered with solder.
  • Remove Excess Solder: Once the joint is filled, remove the solder and the torch. Allow any excess solder to drip off or wipe it away carefully with a rag.

Allowing the Joint to Cool

Letting the joint cool properly ensures the solder solidifies correctly:

  • Natural Cooling: Allow the joint to cool naturally without disturbing it. Do not touch or move the pipe and fitting until the solder has fully solidified.
  • Inspect the Joint: Once cool, inspect the joint for any gaps or inconsistencies in the solder. A smooth, shiny appearance indicates a good bond.

Troubleshooting Common Issues

Cold Joints

Identifying Cold Joints:

Cold joints occur when the solder does not melt properly or does not adhere correctly to the pipe and fitting, resulting in a weak, unreliable connection. Identifying cold joints is crucial to ensure the integrity of your plumbing or HVAC system.

  • Visual Inspection: A cold joint often appears dull, rough, and uneven compared to a properly soldered joint, which should be smooth and shiny.
  • Physical Test: Cold joints may feel loose or show signs of movement when slight pressure is applied. A properly soldered joint should be solid and immovable.
  • Performance Issues: Cold joints can lead to leaks or reduced system efficiency due to the incomplete bonding of the materials.

Fixing Cold Joints:

  • Reheat the Joint: Carefully reheat the joint with your torch, ensuring that the entire area reaches the appropriate temperature for the solder to melt and flow properly.
  • Apply More Flux: If necessary, add a small amount of flux to the joint to improve the flow of the solder and ensure proper bonding.
  • Add Solder: Apply additional solder to fill any gaps and create a smooth, even joint. Ensure the solder is drawn into the joint by capillary action.
  • Allow to Cool: Let the joint cool naturally without disturbing it. Inspect the joint again to ensure it has a shiny, smooth appearance and is securely bonded.
hot welding

Improper Thread Sealant Application

Too Much Thread Sealant

Applying too much thread sealant, whether Teflon tape or pipe dope, can interfere with the threading process. Excessive sealant can prevent the threads from fully engaging, leading to leaks or weakened connections.

  • Solution: Apply Teflon tape by wrapping it around the male threads two to three times, ensuring even coverage without overwrapping. For pipe dope, use a small brush or applicator to spread an even layer on the threads, avoiding clumps or excess.

Too Little Thread Sealant

Applying too little thread sealant can leave gaps in the threads, allowing fluids or gases to escape. Inadequate coverage fails to create a proper seal, making leaks more likely.

  • Solution: Ensure that the sealant covers all the threads evenly. For Teflon tape, wrap it tightly and ensure it adheres smoothly to the threads. For pipe dope, spread it uniformly with no gaps or missed spots.

Incorrect Pipe Alignment

Misaligned pipes can place undue stress on the fittings, leading to leaks and potential damage. Pipes that are not properly aligned can cause fittings to warp or fail, compromising the entire system.

  • Solution: Before tightening, ensure the pipes are correctly aligned. Hand-tighten the fittings to check for alignment, making any necessary adjustments before using a wrench. Proper alignment reduces stress on the fittings and ensures a secure connection.

Excessive Solder

Excessive solder can create problems such as blockages inside pipes, unsightly joints, and potential weak points. Here’s how to manage and prevent it:

  • Apply Solder Sparingly: When soldering, use just enough solder to fill the joint. Too much solder can lead to drips and uneven distribution.
  • Control the Heat: Overheating can cause the solder to flow excessively. Ensure the torch is set to the appropriate temperature and move it evenly around the joint.
  • Positioning: Position the pipe and fitting horizontally or at a slight angle to control the flow of the solder and prevent it from pooling in one area.

Fixing Excessive Solder:

  • Reheat the Joint: Gently reheat the joint with your torch to soften the excess solder.
  • Remove Excess Solder: Use a clean, heat-resistant cloth to wipe away the softened excess solder. Be careful to avoid disturbing the joint itself.
  • Inspect the Joint: Ensure the joint is smooth and free of excessive solder. If necessary, reapply a small amount of solder to fill any gaps created during the removal process.

Leaky Joints

Diagnosing Leaky Joints:

Leaky joints can compromise the efficiency and safety of your plumbing or HVAC system. Identifying and diagnosing the cause of leaks is essential:

  • Visual Inspection: Look for signs of moisture or water droplets around the joint. Leaky joints may show visible signs of water seepage.
  • Pressure Test: Perform a pressure test by running water or the appropriate fluid through the system and checking for leaks at the joints.
  • Check for Cracks or Gaps: Inspect the joint for any visible cracks, gaps, or areas where the solder did not flow properly.

Repairing Leaky Joints:

  • Drain the System: Ensure the system is drained and dry before attempting repairs.
  • Reheat the Joint: Use your torch to reheat the joint, ensuring the entire area reaches the appropriate temperature for soldering.
  • Apply Flux and Solder: Add a small amount of flux to the joint to improve the flow of the solder. Apply additional solder to fill any gaps or cracks, ensuring a smooth, even joint.
  • Allow to Cool and Test: Let the joint cool naturally without disturbing it. Once cool, perform another pressure test to ensure the leak has been fixed.

Conclusion

In conclusion, soldering copper pipe to brass fittings involves several critical steps: ensuring safety, cutting and cleaning the copper pipe and fittings, using the correct flux, assembling the copper pipe and fittings together, properly heating the joints, and applying the solder correctly. Remember to troubleshoot common faults such as joints that are too cold, too much solder, and leaky joints to ensure a long-lasting, leak-free connection. Practice your soldering skills on scrap to gain confidence before making actual repairs. We invite you to share your experiences, ask questions and provide feedback. Your insights and questions are invaluable and help us improve our work.

FAQ

Use a water-soluble flux specifically designed for plumbing applications. This type of flux is safe for potable water systems and helps ensure a strong, clean bond.

The joint is ready for soldering when the flux begins to sizzle and bubble. This indicates that the metal surfaces are hot enough for the solder to flow and bond properly.

Ensure the joint is evenly heated. If the solder still doesn’t flow, reapply a small amount of flux and heat the joint again to ensure proper adhesion.

Yes, lead-free solder designed for plumbing applications is suitable for both copper and brass. It ensures a safe, durable connection, especially in potable water systems.

Use an emery cloth or sandpaper to clean the surfaces until they are shiny and free of oxidation. This ensures a strong bond between the solder and the metal surfaces.

Ensure that the joint is properly cleaned, fluxed, and heated. Apply the solder evenly around the joint and allow it to cool naturally without disturbance. Performing a pressure test after cooling can help verify that the joint is leak-free.

Contact Topa

Have a question or suggestion? Fill out the form below to get in touch with one of our experts.