Imagine you’re in the middle of a critical operation on a construction site, a farm, or a manufacturing plant, and suddenly, your hydraulic quick coupler refuses to connect. Every minute of downtime translates to lost productivity and increased costs. In this post, we will delve into the common reasons why hydraulic quick couplers might fail to connect, provide a step-by-step troubleshooting guide, and offer preventive measures to avoid future issues.
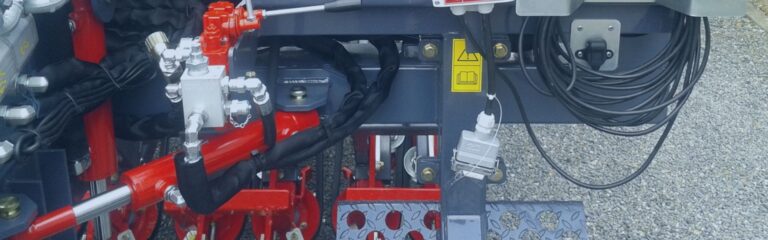
Hydraulic quick couplers are specialized connectors designed to quickly and easily join or separate hydraulic lines without the need for tools. These couplers are crucial in hydraulic systems, allowing for the swift connection and disconnection of hoses, which facilitates maintenance, equipment swaps, and emergency repairs. They are engineered to withstand high pressures and provide a secure, leak-free connection that maintains the integrity and efficiency of the hydraulic system.
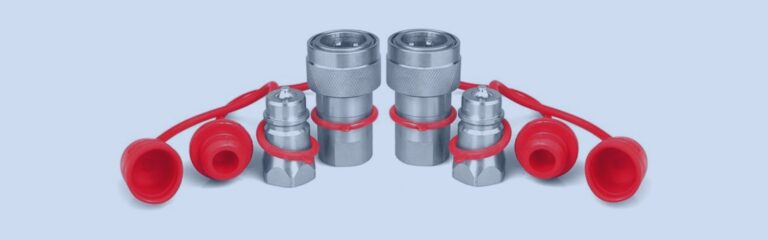
Hydraulic quick couplers come in various types, each suited to different applications and standards:
ISO A Couplers: These are the most common type, featuring a poppet valve design that is widely used in agricultural and industrial applications. They are known for their versatility and reliability in medium-pressure applications.
ISO B Couplers: Featuring a ball valve design, these couplers are commonly used in applications where resistance to dirt and debris is essential. They are ideal for high-pressure systems and are often found in construction and industrial machinery.
Flush Face Couplers: Designed to minimize fluid loss and prevent the ingress of air and contaminants, these couplers are popular in sensitive environments such as food processing and medical equipment. Their smooth face design makes cleaning easy and ensures a clean connection.
Flat Face Couplers: Similar to flush face couplers, these are used in environments where preventing spillage is critical. They are typically used in applications such as skid steer loaders and other heavy equipment.

Hydraulic quick couplers are integral to various industries, providing efficiency and safety in their operations:
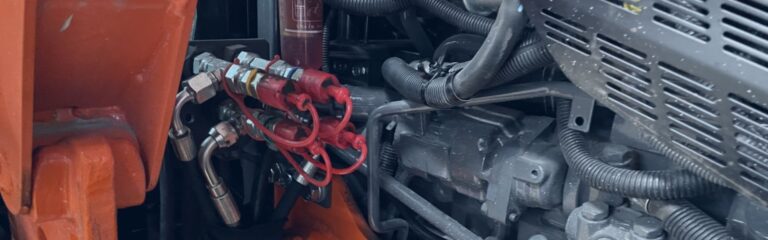
Construction: Quick couplers are used to connect hydraulic attachments like hammers, drills, and buckets, allowing for rapid changes and increased productivity on-site.
Agriculture: In farming equipment, quick couplers facilitate the easy swapping of implements such as plows, harrows, and sprayers, enhancing the versatility and efficiency of agricultural machinery.
Manufacturing: In industrial settings, hydraulic quick couplers are essential for maintaining and modifying production lines, ensuring minimal downtime, and maximizing operational efficiency.
One of the most common reasons hydraulic quick couplers fail to connect is contamination from dirt, dust, and debris. When contaminants infiltrate the coupler, they can obstruct the internal mechanisms, preventing a secure connection. These particles can accumulate over time, especially in harsh environments like construction sites or farms, where equipment is frequently exposed to the elements. To mitigate this issue, regular cleaning and the use of protective caps when couplers are not in use are essential practices.
Hydraulic quick couplers are subject to significant mechanical stress and pressure, leading to natural wear and tear over time. The seals, valves, and connecting surfaces can degrade, resulting in poor alignment and an inability to form a proper seal. When parts become excessively worn, the coupler may not lock correctly, causing fluid leaks or complete disconnection. Regular inspection and timely replacement of worn components are crucial to maintaining the reliability of the hydraulic system.

Proper alignment is critical for the effective connection of hydraulic quick couplers. Misalignment can occur if the hoses or equipment are not properly positioned, leading to an imperfect connection that can result in fluid leaks or system inefficiencies. Ensuring that both coupler ends are aligned correctly and applying even pressure during connection can prevent alignment issues. Additionally, checking for any obstructions or bends in the hoses can help maintain proper alignment.
Hydraulic systems operate under high pressure, and unequal or excessive pressure can hinder the connection of quick couplers. If the pressure is not adequately relieved before attempting to connect, the force can prevent the couplers from locking together. This is particularly common in systems with residual pressure trapped in the lines. To address this, it’s important to relieve system pressure by shutting off the hydraulic system and actuating the control valve to release any trapped pressure before connecting or disconnecting the couplers.
Physical damage to the couplers or hoses is another prevalent issue that can prevent connection. Damage can occur due to rough handling, accidental impacts, or exposure to harsh conditions. Common damages include cracks, bends, or deformations in the quick coupler body and hoses and damaged seals or locking mechanisms. Regular inspection for signs of damage and prompt repair or replacement of affected components can prevent connection problems and ensure the safe operation of the hydraulic system.
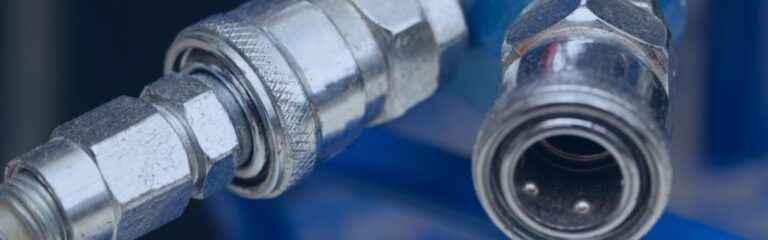
Steps to Visually Inspect the Couplers for Obvious Issues:
Disconnect the System: Ensure the hydraulic system is turned off and depressurized.
Examine Coupler Surfaces: Look for cracks, dents, or deformities on the coupler surfaces.
Check for Debris: Inspect the interior and exterior of the couplers for any dirt, dust, or debris.
Inspect Seals and O-rings: Look for signs of wear, cracks, or damage on the seals and O-rings.
Test Movement: Ensure that the coupler’s moving parts (such as sleeves or valves) move smoothly without sticking.
Methods to Clean Couplers and Remove Debris:
Use Compressed Air: Blow out any loose debris from the coupler using compressed air.
Clean with Solvent: Use a clean cloth and a mild solvent to wipe down the coupler parts, removing any grease or stubborn dirt.
Brush for Tough Debris: For more stubborn contaminants, use a soft-bristle brush to clean crevices and internal components.
Dry Thoroughly: Ensure the coupler is completely dry before attempting to reconnect it.

Ensuring Couplers are Compatible with Each Other:
Check Manufacturer Specifications: Verify that both couplers are designed to work together by checking the manufacturer’s specifications.
Match Types and Sizes: Ensure that the couplers are of the same type (ISO A, ISO B, etc.) and size.
Verify Pressure Ratings: Make sure the pressure ratings of both couplers are compatible to avoid mismatched performance.
Techniques to Relieve Hydraulic Pressure Before Attempting Connection:
Turn Off Equipment: Shut down the hydraulic system completely.
Actuate Control Valves: Move the control valves through all positions to release any trapped pressure in the lines.
Use Pressure Relief Valves: Engage the system’s pressure relief valves to ensure all residual pressure is released.
Check Pressure Gauges: Confirm that the pressure gauges read zero before attempting to connect the couplers.
How to Measure and Adjust System Pressure:
Use a Pressure Gauge: Attach a pressure gauge to the system to get an accurate reading of the current pressure.
Adjust Pressure Settings: If the pressure is too high, use the system’s controls to lower it to the recommended level.
Monitor Pressure Fluctuations: Ensure that the pressure remains stable during operation and does not exceed the coupler’s specifications.
Ensure You Have the Correct Replacement O-Rings and Seals, Along with Necessary Tools: Before starting the replacement process, gather all required tools and parts. This typically includes a pick or seal removal tool, a set of new O-rings and seals that match the specifications of your coupler, hydraulic oil for lubrication, and cleaning supplies. Refer to the manufacturer’s manual to confirm the exact size and type of seals needed.
Carefully Remove the Old Seals and O-rings Using a Pick or Similar Tool: Use a Pick or Seal removal tool to gently pry out the old seals and O-rings. Take care not to scratch or damage the grooves where the seals sit, as this can affect the performance of the new seals.
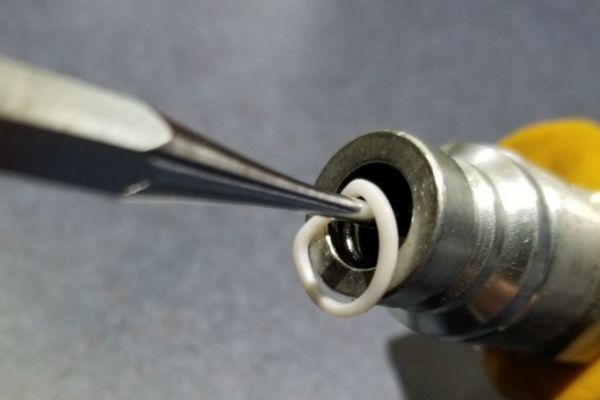
Clean the Grooves Where the Seals Sit to Remove Any Residue or Debris: Once the old seals are removed, thoroughly clean the seal grooves. Use a clean cloth and an appropriate solvent to remove any residue, dirt, or old seal material. Ensuring the grooves are clean is essential for the new seals to sit correctly and function effectively.
Carefully Place the New Seals and O-Rings into Their Respective Grooves, Ensuring They Sit Correctly: Gently press the new seals and O-rings into their grooves, making sure they fit snugly and sit correctly without any twists or kinks. Proper installation is crucial to prevent leaks and ensure the longevity of the seals.
Look for Any Signs of Abrasion, Cracks, or Leaks Along the Length of the Hose: During visual inspections, carefully examine the entire length of each hose for signs of wear and damage. Abrasion marks, cracks, or leaks can indicate that the hose is compromised and may fail under pressure. Pay special attention to areas near fittings and bends where damage is more likely to occur.
Ensure That Fittings Are Not Damaged and Are Securely Attached to the Hoses: Inspect the fittings at the ends of the hoses to ensure they are not damaged, corroded, or loose. Damaged fittings can cause leaks and affect the performance of the hydraulic system. Tighten any loose fittings according to the manufacturer’s specifications, but be careful not to overtighten, as this can cause damage.
Gently Flex the Hoses to Check for Any Stiffness or Brittleness, Which Can Indicate Internal Damage: Gently flex the hoses along their length to feel for any stiffness or brittleness, which can be signs of internal damage or aging. Flexible hoses should bend smoothly without any resistance or cracking sounds. Stiff or brittle hoses are at a higher risk of failure and should be replaced immediately.
If Any Damage Is Found, Replace the Hoses and Fittings Immediately to Maintain System Integrity: If any signs of damage are detected during inspections, replace the affected hoses and fittings immediately. Using damaged components can lead to system failure, safety hazards, and costly downtime.
Regular Maintenance
Importance of Scheduled Maintenance to Prevent Issues: Establish a regular maintenance schedule to inspect, clean, and service all hydraulic components. Regular maintenance helps to identify and address potential problems before they lead to significant issues, ensuring the reliability and longevity of your hydraulic system.
Proper Storage
Best Practices for Storing Hydraulic Components to Avoid Damage: Proper storage of hydraulic components is crucial to prevent damage and extend their lifespan. Store couplers, hoses, and other components in a clean, dry environment away from direct sunlight and extreme temperatures. Use protective caps and covers to keep contaminants out and organize components to avoid unnecessary stress or deformation. Following these best practices can help maintain the performance and reliability of your hydraulic system.
In summary, effectively troubleshooting and maintaining hydraulic quick couplers involves regular inspections, proper cleaning, and ensuring compatibility and alignment. Addressing pressure issues and promptly replacing worn or damaged parts are crucial steps in preventing connection problems. Emphasizing the importance of routine maintenance and storage best practices can significantly enhance the reliability and longevity of your hydraulic systems.
Start by checking for contamination, wear and tear, and ensuring proper alignment. Relieve any residual pressure in the system and inspect for damaged components.
Regular inspections should be scheduled based on the usage frequency and operating conditions, typically ranging from daily to monthly.
Common types include ISO A, ISO B, flush face, and flat face couplers, each designed for specific applications and standards.
Use protective caps when couplers are not in use, regularly clean them, and ensure the working environment is as clean as possible.
Look for cracks, deformities, worn seals, and O-rings, as well as any stiffness or brittleness in hoses.
Turn off the hydraulic system, actuate control valves to release trapped pressure, and ensure pressure gauges read zero before attempting to connect the couplers.

