Preventing one-piece fitting thread mismatch starts with separating visual similarity from technical compatibility. A one-piece hydraulic hose fitting can reduce ferrule selection errors, but it does not remove the need to confirm thread type, sealing method, hose compatibility, and valid crimp data before the hose assembly is made.
Why One-Piece Fitting Thread Mismatch Happens
Similar fittings can hide different sealing systems
A thread mismatch often happens because two fittings look close enough to install, especially when the old part is worn, dirty, or already removed from the machine. The problem is that thread outside diameter, hex size, or general shape does not prove interchangeability.
One-piece fittings can make the hose-end side easier to manage because the fitting stem and ferrule are supplied as one assembled unit. That helps prevent picking a separate ferrule that does not belong with the stem. The port or adapter side still needs full identification. If the wrong thread is forced into place, the result may be thread damage, poor sealing contact, leakage, rework, or a hose assembly that fails after vibration and pressure cycling.
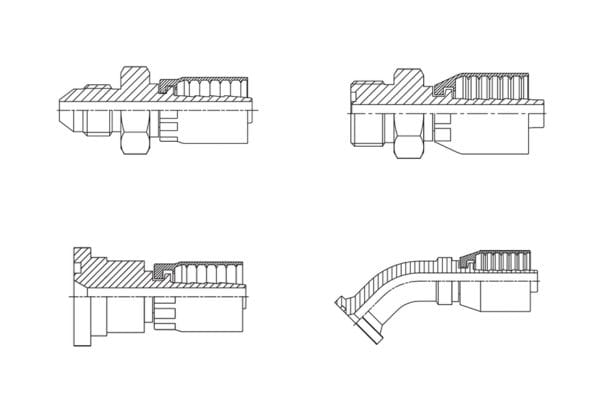
One-piece construction reduces one error, not every error
A one-piece fitting should be understood as a fitting body or stem with the ferrule already combined or fixed as a single assembly. The exact structure depends on the product series. This design can reduce picking and assembly mistakes on the hose end, but it does not automatically guarantee compatibility with every hose, every port, or every crimping setup.
The most common mistake is treating “same dash size” as “same fitting.” Dash size can describe hose ID or nominal connection size, but it does not confirm thread pitch, taper, seat angle, sealing face, material, or crimp specification. A reliable match requires checking both sides of the fitting: the hose attachment side and the connection side.
Confirm the Thread Before You Confirm the Part Number
Measure diameter, pitch, and thread style
The first technical check is the thread itself. Measure the male thread outside diameter or the female thread inside diameter with calipers, then confirm pitch with a thread gauge. For inch threads, count TPI; for metric threads, confirm pitch in millimeters. Do not rely on a ruler, a photo, or an old label unless it is only being used for preliminary sorting.
You also need to decide whether the thread is straight or tapered. NPT and BSPT use tapered thread forms, while many JIC, ORFS, BSPP, Metric, and DIN connections use straight threads with sealing handled elsewhere. A straight-thread fitting installed into a tapered-thread port, or the reverse, can feel partly engaged but still fail to seal correctly. Thread sealant should not be used to compensate for the wrong thread or a damaged sealing surface.
Compare thread standards carefully
Thread standards must be identified as a complete system, not as isolated dimensions. A fitting with a similar diameter and pitch may still use a different flank angle, sealing method, or seat geometry. BSPP and metric threads are a common source of confusion because the diameter can look close in the field. JIC and SAE 45-degree flare can also be mistaken when the angle is not checked.
| What to Check | Why It Matters | Common Risk |
|---|---|---|
| Thread diameter | Narrows the possible standard | Similar sizes can overlap |
| Pitch or TPI | Confirms the thread family | Wrong pitch damages threads |
| Straight or tapered form | Determines how the thread engages | Partial fit with poor seal |
| Seat angle | Confirms metal-to-metal sealing | Leak despite tight torque |
| Sealing face or O-ring | Confirms where sealing occurs | Crushed seal or no seal contact |
Identify the Sealing Method, Not Just the Thread
Check seat angle and sealing face
A hydraulic connection seals at a specific location. Some fittings seal on a flare seat, some on a bonded washer, some on an O-ring face, some on an O-ring boss, and some through thread interference. The thread pulls the connection together, but the sealing face usually determines whether the joint stays dry under pressure.
Use a seat angle gauge when flare-style fittings are involved. For ORFS, inspect the flat face and O-ring groove. For BSPP connections, check whether the seal is made with a washer, cone seat, or other sealing arrangement. For DIN and metric fittings, confirm the tube connection style and seat form instead of assuming that a metric thread means one universal connection.
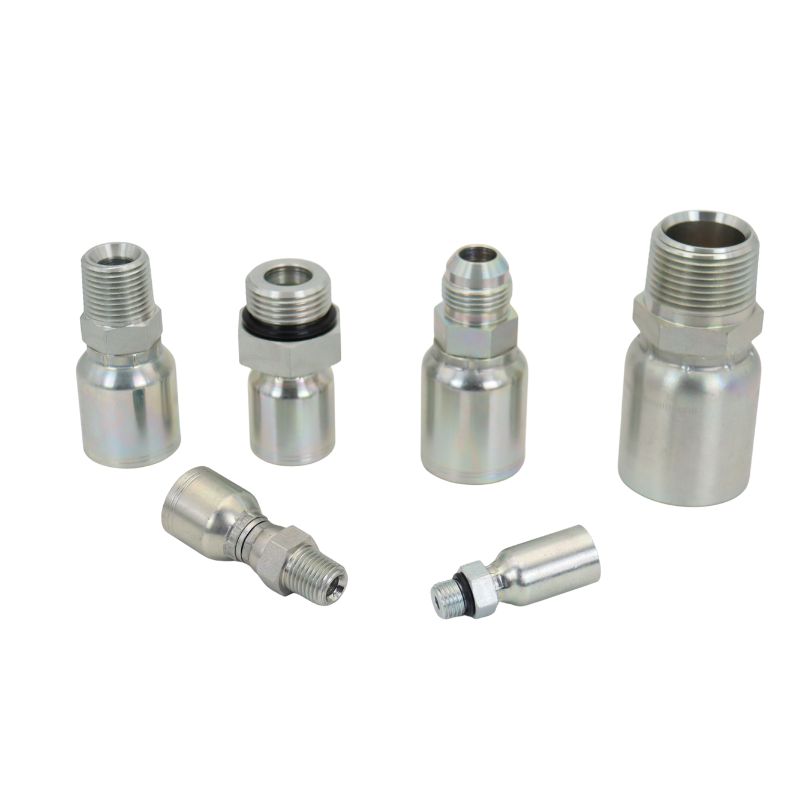
Inspect damage before reuse or replacement
Thread mismatch is not the only cause of leakage. A correctly identified fitting can still leak if the sealing face is scratched, flattened, corroded, or distorted from a previous wrong installation. Before choosing a replacement one-piece fitting, inspect the old fitting and the mating port under good light. Look for crossed threads, crushed O-rings, damaged cone seats, and marks that show the parts were forced together.
If the old assembly failed after a short service life, do not assume the replacement should copy it exactly. The previous part may already have been wrong. In that situation, the better starting point is the equipment port, adapter, hose specification, and available manufacturer data, not only the removed fitting.
Match the Hose End and Crimp Data
Confirm hose ID, construction, and fitting series
The hose side of a one-piece fitting must match the hose ID, hose construction, fitting series, and approved assembly procedure. A fitting intended for one hose family may not be suitable for another hose with the same nominal size. Wire-braid, spiral, compact, thermoplastic, and specialty hoses can require different stem designs, ferrule profiles, insertion depths, and crimp settings.
You should verify the hose manufacturer and series whenever possible. If the hose marking is missing or unreadable, treat the job as higher risk. Cutting the hose and measuring ID may help, but it does not replace identifying construction and pressure rating.
Use current crimp specifications
One-piece construction does not remove the need for crimp data. The correct crimp diameter, die selection, insertion depth, skive or no-skive requirement, and inspection method must come from the applicable hose, fitting, and crimping equipment data. Do not apply a generic crimp diameter across different brands, hose series, or fitting families.
The finished assembly should be checked according to the relevant procedure before it leaves the bench. That may include confirming insertion depth marks, measuring final crimp diameter at the specified location, checking overall fitting orientation, and inspecting for bell-mouth, uneven crimping, or visible hose damage. If the crimp data is unavailable, the safer decision is to stop and verify rather than produce a hose assembly from assumptions.
A Practical Process to Prevent Thread Mismatch
Collect the right information before selection
The fastest way to prevent mismatch is to slow down at the identification step. A clear photo can help with orientation and general style, but it cannot confirm the final part by itself. You need measurements and sealing details before choosing a one-piece hydraulic hose fitting for repair, stock, or repeat assembly work.
Prepare these details before making the match:
- Hose manufacturer, hose series, hose ID or dash size, and visible hose markings
- Male or female connection, thread diameter, pitch or TPI, and straight or tapered thread form
- Seat angle, sealing face, O-ring position, existing part number, and clear photos of the thread and sealing area
- Fitting shape and orientation, such as straight, 45-degree, or 90-degree
- Crimping machine, available die set, insertion depth requirement, and current crimp specification
- Working pressure, temperature, fluid, movement, abrasion exposure, and whether the part is for repair, stock, or production
Verify against the mating component
A fitting should be matched to the actual mating port or adapter whenever possible. If only the old hose assembly is available, record the equipment model, port location, and any adapter stack that was installed with it. Adapters can hide the original port standard, and copying an adapter plus hose end without understanding the connection can carry the same mismatch into the next repair.
For uncertain fittings, compare the measured details with the equipment, hose, fitting, or crimping machine manufacturer’s data. This is especially important for safety-critical equipment, high-pressure impulse service, steering, braking, lifting, mining, agricultural peak-season repairs, and production lines where downtime pressure can lead to rushed decisions.
Common Mismatch Scenarios and Their Consequences
Near-fit threads are high-risk
A near-fit thread is dangerous because it gives the impression of progress. The fitting may start by hand, tighten with resistance, and appear acceptable after torque is applied. Under pressure, however, the sealing surface may not contact correctly, the thread may be weakened, or the joint may loosen under vibration.
The consequences are not limited to leakage. A wrong one-piece fitting can damage an expensive port, contaminate the system with debris, require hose rework, or create a failure point that is difficult to diagnose later. In mobile equipment, the cost of the mistake can include travel time, idle labor, and repeated shutdowns. In a workshop, it can create duplicate picking, labeling, and warranty handling work.
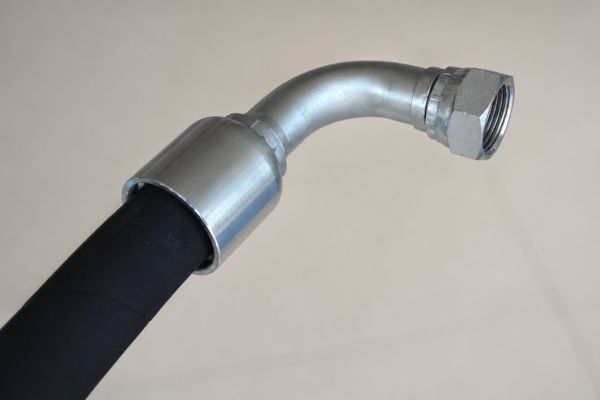
Old fittings can mislead the next repair
Many thread mismatches repeat because the previous replacement becomes the new reference. If a machine arrives with thread sealant on a connection that should seal on a face, or with tool marks around a flare seat, those clues should be treated seriously. They often show that someone tried to make an uncertain connection work.
Do not use sealant, extra torque, or a softer washer as a shortcut for thread or seat mismatch. Those fixes may hide the problem briefly, but they do not restore the designed sealing geometry.
Build a Repeatable Identification Record
Standardize labels and part descriptions
Once a fitting is confirmed, record more than the part number. A useful description should include thread standard, gender, dash size, seat or seal type, fitting angle, hose series, and crimp data reference. This prevents the next person from having to identify the same connection from scratch.
For inventory and repeat repairs, separate confirmed parts from look-alike parts. Bin labels should not rely only on short codes that can be confused during picking. If several standards are common in the same workspace, use location codes or label formats that make thread family and sealing method visible at the point of selection.
Review records after failures or returns
When a hose assembly comes back with leakage or installation problems, the record should make it possible to check what was selected and why. Review thread measurements, sealing method, hose series, crimp setting, and installation conditions. If the part was chosen from a photo only, update the process so future replacements require measurement before release.
A repeatable record is also useful for purchasing and stock planning. It helps identify which one-piece fittings are truly common and which ones are occasional, equipment-specific items. That reduces emergency substitution pressure and makes it easier to avoid risky “close enough” choices during urgent repair work.
Conclusion
Correct thread matching is more important than a similar appearance or the lowest unit price. A one-piece fitting helps simplify the hose-end assembly, but reliable selection still depends on measured thread details, verified sealing geometry, compatible hose construction, and current crimp specifications. Before ordering or assembling, prepare the hose information, thread measurements, sealing method, fitting orientation, operating conditions, and crimping data reference so the replacement can be checked instead of guessed.
FAQ
Can a one-piece fitting prevent all hose assembly mistakes?
No, it mainly reduces the chance of pairing the wrong separate ferrule with the fitting stem. You still need to confirm thread standard, sealing method, hose compatibility, and crimp data.
Is the same dash size enough to confirm a replacement fitting?
No, dash size alone does not confirm thread pitch, seat angle, sealing face, or hose series. Use it as one identification point, not as the final decision.
Can thread sealant fix a small thread mismatch?
No, thread sealant should not be used to repair wrong threads, damaged seats, or an incompatible sealing design. It may mask the issue briefly while leaving the joint mechanically incorrect.
When should manufacturer data be checked?
Check manufacturer data whenever hose series, fitting series, crimp diameter, insertion depth, skiving requirement, pressure suitability, or sealing standard is uncertain. It is also necessary for high-risk or safety-critical applications.
What photos are useful for fitting identification?
Useful photos show the complete fitting, hose marking, thread end, sealing face, seat area, and orientation from several angles. Photos should support measurement, not replace it.