Compression fittings are essential components used in plumbing systems to connect two pipes or a pipe to a fixture securely. Proper installation of compression fittings is crucial to ensure a leak-free connection that remains reliable over time. A correctly installed compression fitting will prevent water from seeping out, thereby avoiding potential water damage and costly repairs. Furthermore, proper installation reduces the likelihood of future maintenance issues. This comprehensive guide aims to provide you with detailed, step-by-step instructions on how to install compression fittings on copper pipes. Additionally, we will share valuable tips and best practices to enhance your installation skills and help you avoid common pitfalls.
Compression fittings are made up of three primary components, each playing a crucial role in ensuring a secure and leak-free connection.
Compression Nut
The compression nut is the outermost part of the fitting. It is threaded and screwed onto the body of the fitting to tighten and secure the connection. As it is tightened, it compresses the ring (ferrule) against the pipe and fitting body, creating a seal.
Compression Ring (Ferrule)
The compression ring, also known as a ferrule, is a small ring that fits around the pipe. When the compression nut is tightened, it presses the ferrule against the pipe and the fitting body, forming a tight seal. Ferrules can be made of metal or plastic, depending on the application.
Compression Seat (Body)
The compression seat, or fitting body, is the main body of the fitting that connects to the pipe. It contains a seat where the ferrule is compressed, ensuring that the pipe is securely held in place. The fitting body typically has threads that allow the compression nut to screw onto it.

Single Ferrule Compression Fitting
Single ferrule compression fittings use one ferrule to create the seal between the pipe and the fitting body. This type is common in many residential and light commercial applications due to its simplicity and ease of installation.
Double Ferrule Compression Fitting
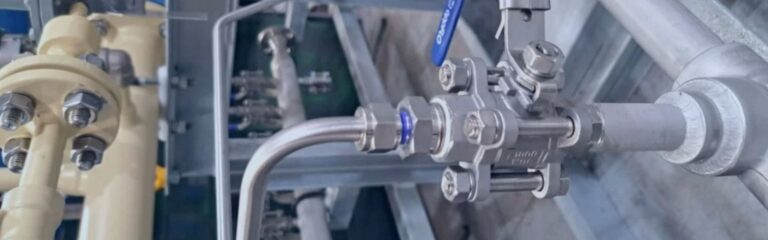
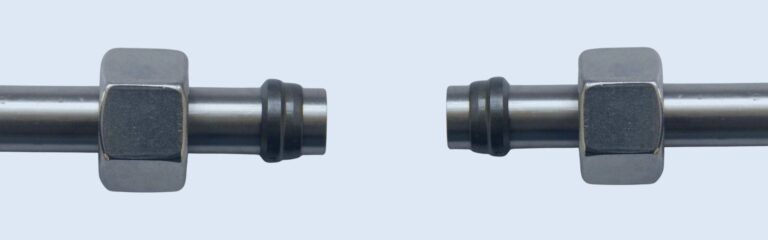
Double ferrule compression fittings use two ferrules (front and back) to create the seal. The front ferrule creates a primary seal and grips the pipe, while the back ferrule provides additional support and helps to prevent leaks. Double ferrule fittings are often used in high-pressure and high-vibration applications due to their enhanced sealing capability and reliability.
Easy to Install
Compression fittings are straightforward and quick to install. They do not require specialized tools or skills, simplifying the installation process.
No Soldering Required
One of the significant advantages of compression fittings is that they do not require soldering. This eliminates the need for open flames or heat, making them safer and more convenient to use, especially in confined spaces or areas with flammable materials.
Versatility and Convenience
Compression fittings are versatile and can be used in a wide range of plumbing applications. They are suitable for both rigid and flexible pipes and can be used with various pipe materials, including copper, plastic, and stainless steel. This versatility makes them an excellent choice for many different plumbing tasks.
Tools required
Materials required
Safety equipment
Importance of Accurate Measurement
Accurate measurement is critical when working with copper pipes, as even a small discrepancy can lead to improper fitting and potential leaks. Precise measurements ensure that the pipe fits perfectly into the compression fitting, providing a secure and reliable connection. Taking the time to measure correctly helps avoid wasting materials and reduces the risk of errors that could compromise the integrity of the plumbing system.
How to Mark the Cutting Point
To mark the cutting point on the copper pipe, first measure the length needed using a tape measure. Place the end of the tape measure at the starting point and extend it to the desired length. Make sure the tape measure is straight and taut to get an accurate measurement. Once you have the correct length, use a marker or a pencil to draw a clear line around the circumference of the pipe at the cutting point. This line will serve as a guide when cutting the pipe, ensuring a straight and accurate cut.
Using a Pipe Cutter
A pipe cutter is the preferred tool for cutting copper pipes, as it provides a clean, straight cut with minimal effort. To use a pipe cutter, place the pipe in the cutter’s jaws, aligning the cutting wheel with the marked line. Tighten the cutter until the cutting wheel lightly touches the pipe. Rotate the cutter around the pipe, gradually tightening the wheel after each full rotation. Continue this process until the pipe is cleanly cut through. Using a pipe cutter ensures a precise cut, which is essential for a secure compression fitting installation.
Ensuring a Clean, Straight Cut
A clean, straight cut is crucial for a proper seal in a compression fitting. Uneven or jagged edges can prevent the ferrule from creating an airtight seal, leading to leaks. To ensure a straight cut, maintain steady pressure on the pipe cutter and rotate it evenly around the pipe. Avoid rushing the process; take your time to achieve a smooth, even cut. If necessary, use a fine file to remove any burrs or rough edges after cutting, ensuring the pipe end is smooth and even.

Why Deburring is Necessary
Deburring is the process of removing sharp edges and burrs from the cut end of the pipe. This step is essential because burrs can interfere with the proper seating of the ferrule and compression nut, potentially causing leaks. Additionally, burrs can create turbulence within the pipe, leading to noise and reduced efficiency in the plumbing system. Deburring ensures a smooth, clean edge, allowing the compression fitting to form a tight, secure seal.
How to Deburr Properly
To deburr the pipe, use a deburring tool or a round file specifically designed for this purpose. Insert the deburring tool into the cut end of the pipe and rotate it around the inner circumference to remove any sharp edges and burrs. Repeat the process on the outer edge of the pipe if necessary. If using a file, gently file the inner and outer edges of the pipe until they are smooth. Take care not to remove too much material, as this can affect the fit of the compression fitting. Once deburring is complete, wipe the pipe end with a clean cloth to remove any metal shavings or debris.
Placing the Nut and Ring onto the Pipe
Begin by sliding the compression nut onto the copper pipe. The nut should be positioned with its threaded end facing the end of the pipe. Next, slide the compression ring (ferrule) onto the pipe, following the nut. The ring should be placed a short distance from the pipe’s end to allow for proper seating when the fitting is assembled. Ensure that both the nut and ring move freely on the pipe and are not forced into position, as this can damage the components.
Ensuring Correct Orientation
The orientation of the compression nut and ring is crucial for a proper seal. The compression nut’s threads should face the end of the pipe, ready to engage with the fitting body. The compression ring should sit snugly on the pipe, with its tapered edge facing the compression seat (body) of the fitting. This orientation ensures that when the nut is tightened, the ring is compressed evenly around the pipe, creating a secure seal. Double-check the placement before proceeding to avoid any issues during installation.
Proper Insertion Technique
Once the nut and ring are correctly positioned, insert the end of the copper pipe into the compression fitting body. Push the pipe in firmly until it reaches the internal stop within the fitting. This ensures that the pipe is fully seated and that the compression ring is correctly aligned with the fitting body. A properly inserted pipe will help form a reliable and leak-free connection.
Checking for a Secure Fit
After inserting the pipe, visually inspect the connection to ensure that the pipe is straight and fully inserted into the fitting body. The compression ring should be positioned evenly around the pipe, and the nut should be ready to thread onto the fitting body without resistance. A secure fit at this stage is crucial for preventing leaks and ensuring the longevity of the connection.

Initial Hand-Tightening
Begin tightening the compression nut by hand. Turn the nut clockwise, threading it onto the fitting body until it becomes finger-tight. Hand-tightening helps to position the compression ring and ensures that the components are properly aligned before using a wrench. This step is essential for preventing cross-threading and ensuring an even compression of the ring.
Using an Adjustable Wrench
Once the nut is hand-tight, use an adjustable wrench to continue tightening. Place the wrench on the nut and turn it clockwise, applying steady pressure. It’s helpful to use a second wrench to hold the fitting body steady while tightening the nut, preventing the pipe from twisting. Tighten the nut until you feel significant resistance, indicating that the compression ring is being properly compressed around the pipe and the fitting body.
Avoiding Over-Tightening
Over-tightening the compression nut can damage the compression ring and the pipe, leading to leaks and potential failure of the connection. As a general rule, once the nut feels snug and you encounter resistance, turn it an additional quarter to half turn with the wrench. This should be sufficient to create a secure seal. If you notice any signs of deformation or if the nut feels excessively tight, stop tightening immediately. It’s better to err on the side of caution and check for leaks after pressurizing the system, rather than risk over-tightening and damaging the components.
Visual Inspection for Proper Alignment
Begin by conducting a thorough visual inspection of the installed compression fitting. Ensure that the pipe is correctly aligned with the fitting body and that there are no visible misalignments or bends. The compression nut should sit flush against the fitting body, with no threads showing between the nut and the body. Proper alignment is crucial for ensuring a secure and leak-free connection.
Checking for Any Visible Gaps
Look closely at the area where the compression nut meets the fitting body. There should be no visible gaps between the nut and the fitting body. Gaps indicate that the compression ring has not been properly compressed and that the connection may not be secure. If you notice any gaps, you may need to slightly tighten the compression nut, taking care not to over-tighten.
Hydrostatic Pressure Testing: One of the most common methods for testing a plumbing connection is hydrostatic pressure testing. This involves filling the system with water and pressurizing it to a level higher than the normal operating pressure. To perform this test, attach a pressure gauge to the system, close all outlets, and slowly fill the system with water. Once filled, increase the pressure to the desired test level, typically 1.5 times the normal operating pressure. Monitor the pressure gauge for any pressure drops, which would indicate a leak.
Air Pressure Testing: Another method is air pressure testing, which uses compressed air instead of water. This method is useful when water is not readily available or when testing in cold weather conditions where water could freeze. Attach an air compressor to the system, close all outlets, and slowly pressurize the system to the desired test level. Use a pressure gauge to monitor the system and listen for any hissing sounds that would indicate air escaping from a leak.
Visual and Auditory Checks: During pressure testing, carefully inspect the entire length of the pipe and the compression fitting for any signs of water or air escaping. Look for droplets of water, moisture around the fitting, or any audible hissing sounds if using air pressure. Pay close attention to the area around the compression nut and fitting body, as this is the most likely point for leaks.
Soapy Water Test: For air pressure testing, you can use a soapy water solution to help identify leaks. Apply the solution to the compression fitting and surrounding area using a spray bottle or a brush. If bubbles form, this indicates air escaping from a leak.
Addressing Leaks: If you identify a leak, first try to tighten the compression nut slightly, using an adjustable wrench. Be careful not to over-tighten, as this can damage the fitting or pipe. If tightening does not stop the leak, you may need to disassemble the fitting, inspect the components for damage, and reassemble it. Ensure that the compression ring and nut are correctly positioned and that the pipe is fully inserted into the fitting body. If the compression ring or nut is damaged, replace them with new components and repeat the installation process.
Proper installation of compression fittings on copper pipes is crucial for ensuring a secure, leak-free connection that will stand the test of time. By carefully following this step-by-step guide, you can confidently install compression fittings on copper pipes with ease. Properly installed compression fittings offer numerous benefits, including ease of installation, no need for soldering, and versatility for various applications. We encourage you to share your experiences, ask questions, and provide feedback on this guide. Your input helps us improve and ensures that we can assist you better in your plumbing projects. If you have any questions or need further assistance, please do not hesitate to contact us.
A compression fitting is a type of coupling used to connect two pipes or a pipe to a fixture without the need for soldering. It uses a compression nut, ring (ferrule), and fitting body to create a secure, leak-free connection.
It is generally not recommended to reuse compression fittings, especially the ferrule, as they can become deformed during the initial installation. Reusing them may lead to leaks. Always use new components for the best results.
Compression fittings should be hand-tightened initially, followed by an additional quarter to half turn using an adjustable wrench. Be cautious not to over-tighten, as this can damage the fitting and cause leaks.
If a compression fitting is leaking, first try tightening the nut slightly with an adjustable wrench. If the leak persists, disassemble the fitting, inspect the components for damage, and reassemble. Replace any damaged parts as necessary.
Teflon tape is not typically needed on compression fittings, as the seal is created by the compression of the ferrule. However, applying a small amount of plumber’s tape to the threads can help ensure a tighter seal if desired.
Yes, compression fittings can be used on both hot and cold water lines. They are designed to handle the temperature and pressure of typical plumbing systems, making them suitable for a variety of applications.


