How to Remove a Brass Push-to-Connect Fitting

How to Remove a Brass Push-to-Connect Fitting

How to Remove a Brass Push-to-Connect Fitting

Introduction

Brass push-to-connect fittings are popular for their ease of installation and reliable performance. However, when it’s time to remove them, having the right knowledge and tools is essential. This guide provides a comprehensive step-by-step process to help you confidently and effectively remove brass push-to-connect fittings.

Understanding Brass Push-to-Connect Fittings

Definition and Description

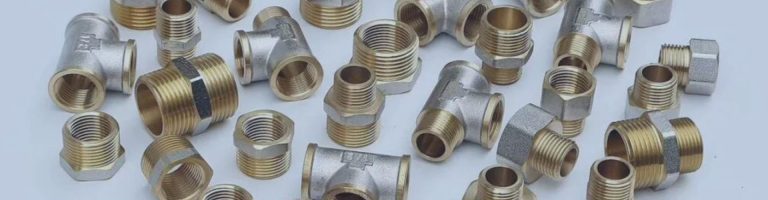
Brass push-to-connect fittings, often referred to as push-fit or quick-connect fittings, are revolutionary components in the plumbing industry designed for rapid and effortless installation. Unlike traditional fittings that require soldering, clamps, or adhesives, these fittings employ a simple push mechanism that locks pipes securely in place. This design makes them an ideal choice for a wide range of plumbing applications, providing an efficient solution for joining pipes made from various materials such as copper, PEX (cross-linked polyethylene), and CPVC (chlorinated polyvinyl chloride). Their versatility and ease of use have made them a popular choice among both DIY enthusiasts and professional plumbers

Components

A typical brass push-to-connect fitting comprises several critical components, each playing a unique role in ensuring a secure and leak-free connection:

Body: The main structure is made of durable brass, which houses all other components. Its robust design ensures longevity and resistance to corrosion, making it suitable for various plumbing environments.

O-ring: Located inside the fitting, the O-ring is crucial for creating a watertight seal around the pipe. This rubber ring compresses against the pipe surface, preventing leaks and ensuring the reliability of the connection.

Grip Ring: This component is designed to grip the pipe firmly, holding it in place once inserted. The grip ring’s teeth dig into the pipe’s surface, providing a secure hold that withstands the pressure and vibrations commonly encountered in plumbing systems.

Collet: The collet is a ring located at the fitting’s entrance. When compressed using a specialized removal tool, it releases the grip on the pipe, allowing for easy disconnection. This feature simplifies maintenance and modifications, making the system more adaptable.

Tools and Materials Needed

To successfully remove a brass push-to-connect fitting, it is important to have the appropriate tools on hand. Here are the essential tools you will need:

Disconnect Clip or Tongs: These are specially designed tools that compress the collet, allowing the pipe to be released from the fitting. Disconnect clips are small, circular devices that fit around the pipe and collet, while disconnect tongs have handles for easier operation. Both tools are essential for safely and effectively removing push-to-connect fittings without damaging the pipe or fitting.

Pipe Cutter: A reliable pipe cutter is necessary if you need to cut the pipe to remove the fitting or to make adjustments to the plumbing system. Pipe cutters provide a clean and precise cut, which is crucial for ensuring a proper connection when reinstalling or replacing fittings.

Bucket or Towel: Always have a bucket or towel on hand to catch any residual water that may be present in the pipes. This helps prevent water damage to your work area and makes the removal process cleaner and more efficient.

Preparatory Steps

Shutting Off the Water Supply

Before beginning the removal process, it’s crucial to turn off the main water supply to prevent any water flow. This step is essential to avoid water spraying from the pipes when you disconnect the fitting. Locate the main water valve, which is typically found near the water meter, and turn it off completely. This ensures that no water will flow through the pipes during the removal process, allowing you to work safely and efficiently.

Relieving Pressure in the System

After shutting off the water supply, it’s important to relieve any residual pressure in the plumbing system. Open the nearest faucet to the fitting you plan to remove and let the water run until it stops. This step helps release any remaining pressure in the pipes, preventing unexpected water sprays that could occur when you disconnect the fitting. Ensuring the system is depressurized will make the removal process smoother and safer.

Clearing the Work Area

A clean and accessible work area is essential for efficiently removing a brass push-to-connect fitting. Clear the area around the fitting by removing any obstacles that could hinder your access or movement. Ensure you have enough space to comfortably use your tools and position yourself properly. Having a clean and organized workspace not only improves efficiency but also reduces the risk of accidents or mistakes during the removal process.

Step-by-Step Guide to Removing the Fitting

Locating the Fitting

The first step in removing a brass push-to-connect fitting is to identify the specific fitting that needs to be removed. Carefully inspect the plumbing system to locate the fitting, ensuring you correctly identify it among other similar components. Check for any nearby pipes, joints, or obstructions that might complicate the removal process.

hydraulic flange seal

Using the Removal Tool

Once you have identified and accessed the fitting, follow these steps to use the removal tool effectively:

Position the Disconnect Clip: Take the disconnect clip or tongs and place them around the pipe, aligning the tool with the fitting’s collet. The collet is the ring at the end of the fitting that holds the pipe in place. Ensure the disconnect clip fits snugly around the pipe and collet for effective compression.

Apply Pressure: Squeeze the disconnect clip to compress the collet. This action disengages the grip ring inside the fitting, which holds the pipe securely. Applying steady and even pressure is crucial to ensure the collet compresses uniformly, releasing its grip on the pipe.

Pull the Fitting: While maintaining pressure on the collet with the disconnect clip, gently pull the fitting away from the pipe. The fitting should slide off smoothly if the collet is properly compressed. If done correctly, the pipe will be free of the fitting without any significant resistance.

Applying Pressure and Removing the Fitting

During the removal process, you might encounter some resistance. Here are some tips to handle this:

Reposition the Disconnect Clip: If the fitting does not slide off easily, check to ensure the disconnect clip is correctly positioned and fully compressing the collet. Sometimes, readjusting the clip’s position can help achieve better compression.

Apply Steady Pressure: Avoid using excessive force, which could damage the pipe or the fitting. Instead, apply steady and even pressure on the disconnect clip. This technique ensures that the collet compresses properly, releasing the grip ring’s hold on the pipe.

Rotate Slightly: If the fitting still resists, gently rotate it back and forth while maintaining pressure on the disconnect clip. This action can help loosen any residual grip and facilitate smoother removal.

Inspecting the Pipe and Fitting

After successfully removing the fitting, it is essential to inspect both the pipe and the fitting for any signs of damage:

Examine the Pipe: Look for any scratches, dents, or deformities on the pipe that could affect its future use. Minor scratches can often be smoothed out, but significant damage may require cutting and replacing a section of the pipe.

Check the Fitting: Inspect the fitting for any visible damage, such as cracks or deformations. Pay particular attention to the O-ring and grip ring, as these components are critical for creating a watertight seal. If the fitting shows any signs of wear or damage, it should be replaced to ensure the integrity of your plumbing system.

Clean the Components: Before reusing the pipe or fitting, clean them thoroughly to remove any debris or residue. A clean surface is essential for achieving a secure and leak-free connection when reinstalling the fitting or installing a new one.

Troubleshooting Common Issues

Stuck Fittings

Sometimes, despite your best efforts, a brass push-to-connect fitting may become stuck and resist removal. Here are several strategies to address this issue:

Reposition the Disconnect Clip: Ensure that the disconnect clip is properly aligned with the collet. Misalignment can prevent the collet from fully compressing, making it difficult to release the fitting. Reposition the clip, making sure it fits snugly around the collet, and try applying pressure again.

Apply Lubricant: A small amount of water or a lubricant such as silicone spray can help reduce friction and ease the fitting of the pipe. Apply a modest amount around the collet and pipe connection, then use the disconnect clip to compress the collet and attempt to remove the fitting again.

Use a Different Tool: Some fittings may require a specific type of removal tool for best results. If the disconnect clip is not working, try using disconnect tongs or another tool designed for your specific fitting type. Different tools can provide varying levels of leverage and pressure, which might be necessary for particularly stubborn fittings.

Damaged Fittings

During the removal process, fittings can occasionally become damaged. If this occurs, it is important to address the damage to ensure the integrity of your plumbing system:

Inspect for Cracks or Deformities: After removing the fitting, thoroughly inspect it for any visible cracks, deformities, or other signs of damage. Even small cracks can lead to leaks or system failures.

Replace Damaged Fittings: If you find any damage, it is best to replace the fitting rather than attempting to reuse it. Using a damaged fitting can compromise the entire plumbing system, leading to more extensive repairs in the future.

Leaks

leak brass push to connect fitting

Leaks are a common issue that can arise after removing and reinstalling fittings. Here’s how to troubleshoot and resolve leaks:

Check for Residual Leaks: After removing the fitting, closely inspect the pipe and fitting for any signs of residual leaks. This can be done by visually inspecting the connection points and feeling for moisture.

Ensure Proper Installation: When installing a new fitting, make sure it is properly aligned and securely connected to the pipe. Push the pipe firmly into the fitting until it seats fully, ensuring the O-ring creates a watertight seal.

Clean and Smooth Pipe Ends: Before reconnecting or installing a new fitting, clean the pipe ends thoroughly. Remove any debris, dirt, or old sealant that could interfere with the connection. Use sandpaper or a pipe-cleaning tool to smooth out any rough edges, ensuring a clean, even surface for the fitting to seal against.

Test the System: After reinstallation, turn the water supply back on and check the connection for leaks. Allow the water to run for a few minutes and inspect the fitting closely. If any leaks are detected, shut off the water, adjust the fitting, and retest.

Cleaning and Maintenance

Cleaning the Pipe Ends

After removing a brass push-to-connect fitting, it is essential to properly clean the pipe ends to ensure a secure and leak-free connection when reinstalling or installing a new fitting. Follow these steps:

Wipe Down the Pipe Ends: Use a clean, dry cloth to thoroughly wipe down the exposed pipe ends. This step removes any dust, dirt, or debris that may have accumulated.

Inspect for Rough Edges: Check the pipe ends for any rough edges, burrs, or imperfections that could hinder a new fitting from sealing properly. Use a fine-grit sandpaper or a pipe deburring tool to smooth out any rough spots.

Ensure Clean Surfaces: Make sure the pipe ends are completely clean and free of any contaminants. A smooth, clean surface is crucial for achieving a watertight seal with the new fitting.

Maintaining Fittings for Reuse

If you plan to reuse the brass push-to-connect fittings, it is important to clean and inspect them carefully to ensure they remain in good working condition:

Thorough Cleaning: Clean the fittings thoroughly with a cloth and, if necessary, a mild soap solution. Ensure all internal and external surfaces are free from debris, dirt, and any residual pipe material.

Inspect for Damage: Carefully inspect the fittings for any signs of wear and tear, such as cracks, deformities, or damaged O-rings. If any part of the fitting is damaged, it should be replaced rather than reused.

Drying: Allow the fittings to dry completely before storing them. Moisture can lead to corrosion, which can compromise the integrity of the fittings over time.

Storage Tips

Proper storage of fittings and tools is essential to maintain their condition and ensure they are readily available when needed:

Designated Storage Area: Assign a specific area for storing fittings and tools. This could be a dedicated shelf, drawer, or storage box in your workshop or garage.

Protection from Dirt and Moisture: Store fittings in a clean, dry place to protect them from dirt, moisture, and physical damage. Using airtight containers or sealed bags can help prevent corrosion and contamination.

Conclusion

Removing brass push to connect fittings requires understanding its components, using the right tools, and following a systematic process. With the right tools and knowledge, removing brass push-in connection fittings can be a simple task. Share your tips, ask questions, or provide feedback at Contact Topa.

FAQ

Yes, brass push-to-connect fittings can be reused if they are in good condition. Ensure they are thoroughly cleaned and inspected for any damage before reusing.

You will need a disconnect clip or tongs to compress the collet and release the fitting. Additionally, having a pipe cutter and a bucket or towel to catch any residual water is recommended.

The fitting should slide off smoothly once the collet is compressed and the grip ring is released. If there is resistance, double-check the alignment of the disconnect clip and apply steady pressure.

Reposition the disconnect clip to ensure it is properly aligned, apply a small amount of lubricant, or use a different removal tool designed for your specific fitting type.

Ensure that the pipe ends are clean and smooth before installing a new fitting. Properly align the fitting and push it firmly onto the pipe until it seats fully to create a watertight seal.

Wear gloves to protect your hands from sharp edges and debris, and use safety glasses to prevent any debris from getting into your eyes. Always turn off the water supply and relieve pressure in the system before starting.

How to Loosen Brass Fittings

How to Loosen Brass Fittings

How to Loosen Brass Fittings

Table of Contents

Introduction

Brass fittings are widely used in various industries due to their durability, resistance to corrosion, and excellent conductivity. However, over time, these fittings can become stuck due to factors like corrosion, debris buildup, or overtightening. Knowing how to effectively loosen brass fittings is crucial for maintenance and repair tasks. This guide will walk you through the process with detailed steps and professional tips.

Tools and Materials Needed

Before starting the task of loosening brass fittings, it is essential to gather all the necessary tools and materials. Proper preparation ensures a smoother process and reduces the risk of damage or injury.

Essential Tools and Materials

Adjustable Wrench

An adjustable wrench is a versatile tool that can fit various sizes of nuts and bolts. It’s crucial for gripping and turning the brass fittings without slipping.

Pliers

Pliers provide additional grip and control, especially useful for smaller fittings or when you need to hold one part steady while working on another.

Pipe Wrench

A pipe wrench is designed for gripping round objects like pipes and fittings. Its adjustable jaws can lock onto fittings firmly, making it easier to apply torque.

Heat Gun or Torch

Applying heat can expand the metal and help break the bond that holds the fitting in place. A heat gun provides controlled heat, while a torch offers more intense heat for tougher jobs.

Penetrating Oil (e.g., WD-40)

Penetrating oil is used to loosen rusted or corroded parts. It seeps into the threads and helps to break down the rust, making it easier to turn the fitting.

Safety Gloves

Safety gloves protect your hands from sharp edges, heat, and chemicals. Choose gloves that provide both protection and dexterity.

Safety Goggles

Safety goggles are essential to protect your eyes from flying debris, sparks, or splashes of penetrating oil.

Rags

Rags are useful for cleaning the area around the fitting, wiping off excess oil, and protecting surfaces from heat or oil spills.

Preparation Steps

Proper preparation is critical to ensure safety and efficiency when loosening brass fittings. Follow these steps to set up your workspace and prepare the fittings for loosening:

Safety First

Wear Safety Gear

Before you start, put on your safety gloves and goggles. This protective gear shields you from potential hazards such as flying debris, sharp edges, and hot surfaces.

Inspect the Area

Clean the Workspace

Ensure that the area around the fitting is clean and free from any obstructions. Remove any dirt, grease, or debris that could interfere with your work.

Check for Corrosion and Damage

Examine the fitting and the surrounding components for signs of corrosion, rust, or physical damage. Corrosion can make fittings more difficult to loosen, and damage might indicate the need for replacement rather than repair.

Identify the Fitting

Determine the Type

Identify the type of brass fitting you are working with. Common types include compression fittings, flare fittings, and threaded fittings. Knowing the type will help you choose the right tools and techniques.

Measure the Size

Measure the size of the fitting to ensure you select the appropriately sized wrench or tool. Using the right size tool is crucial to avoid rounding off or damaging the fitting.

Methods to Loosen Brass Fittings

Using Basic Hand Tools

Choose the Right Wrench

Selecting the correct wrench is crucial for effectively loosening brass fittings. An adjustable wrench is versatile and can be adjusted to fit various sizes of fittings. A pipe wrench, with its serrated jaws, provides a firm grip on round objects like pipes and fittings.

Adjustable Wrench: This tool can be adjusted to the exact size of the fitting, ensuring a snug fit. It’s useful for both small and large fittings.

Pipe Wrench: Ideal for gripping and turning cylindrical objects, the pipe wrench’s jaws tighten as more pressure is applied, making it highly effective for loosening stuck fittings.

loose brass fitting

Secure the Fitting

To prevent damaging the fitting or the connected pipe, it’s important to secure the fitting properly. Use one wrench to hold the fitting stationery and another to turn the nut or fitting.

Position the Wrench: Place the wrench around the fitting and ensure it’s tightly secured. The jaws should grip the fitting firmly without slipping.

Hold Firmly: Use one wrench to hold the fitting steady. This prevents any movement that could cause damage to the pipe or fitting during the loosening process.

Turn Counterclockwise: Use the second wrench to turn the nut or fitting counterclockwise. This is the standard direction for loosening most fittings.

Apply Steady Pressure

Applying steady and even pressure is key to preventing damage to the brass fitting.

Avoid Sudden Movements: Jerky or sudden movements can damage the fitting or strip the threads. Instead, apply gradual, steady pressure.

Consistent Force: Maintain consistent pressure on the wrench until the fitting begins to loosen. If the fitting does not budge, consider using additional methods like applying heat or penetrating oil.

Applying Heat

Understand Thermal Expansion

Heat causes metals to expand. By heating the brass fitting, you can take advantage of this expansion to break the bond between the fitting and the pipe.

Thermal Expansion: Heating the fitting causes it to expand slightly, which can help to break any corrosion or debris that’s holding it in place.

Use a Heat Gun or Torch

Applying heat directly to the fitting can be very effective.

Heat Gun: A heat gun provides controlled heat, which is safer for surrounding materials. Direct the heat gun at the fitting and apply heat evenly.

Torch: A torch provides more intense heat, which can be useful for particularly stubborn fittings. Use caution to avoid overheating.

Attempt to Loosen

After heating, the fitting should be easier to turn.

Timing: Heat the fitting for a few minutes, ensuring the heat is distributed evenly.

Loosen While Warm: While the fitting is still warm, use a wrench to attempt to loosen it. The expansion from the heat should make it easier to turn.

Using Penetrating Oil

Select Penetrating Oil

High-quality penetrating oil is essential for loosening stuck fittings.

Quality Matters: Choose a reputable brand like WD-40, which is designed to penetrate rust and corrosion.

Apply Generously

Applying penetrating oil correctly increases its effectiveness.

Spray Thoroughly: Spray the oil around the fitting, ensuring it reaches the threads and any corroded areas.

Wait: Allow the oil to penetrate for at least 15-20 minutes. For severe corrosion, you may need to wait longer or reapply.

Using Penetrating Oil

Try Loosening

Once the oil has had time to work, attempt to loosen the fitting.

Use a Wrench: Use your wrench to turn the fitting. The penetrating oil should have loosened the rust and debris, making it easier to turn.

Reapply if Needed: If the fitting remains stuck, apply more oil and wait longer before trying again.

Leveraging Impact Tools

Impact Wrench

For particularly stubborn fittings, an impact wrench can provide the necessary torque.

High Torque: An impact wrench delivers high torque, which can break free even the most stubborn fittings.

Safety Precautions

Using an impact wrench requires proper safety measures.

Familiarity: Ensure you understand how to operate the impact wrench safely.

Protective Gear: Wear safety goggles and gloves to protect yourself from any flying debris or accidental slips.

Use the Tool

Follow the correct procedures for using the impact wrench.

Manufacturer’s Instructions: Always follow the manufacturer’s instructions for safe and effective use.

Controlled Use: Apply the wrench to the fitting and use controlled bursts to gradually loosen the fitting.

Combination Methods

Heat and Penetrating Oil

Combining heat and penetrating oil can be particularly effective.

Apply Penetrating Oil First: Spray the fitting with penetrating oil and let it sit for the recommended time.

Apply Heat: After the oil has penetrated, apply heat to the fitting. The combination of oil and heat can break down rust and corrosion more effectively.

Heat and Hand Tools

Using heat in conjunction with hand tools can also be effective.

Heat the Fitting: Apply heat to the fitting as described earlier.

Use Hand Tools: While the fitting is still warm, use your wrench to attempt loosening it. The heat will have expanded the metal, making it easier to turn.

Troubleshooting Common Issues

Stubborn or Corroded Fittings

Identify Corrosion

Corrosion is a common issue with brass fittings, particularly in environments with high moisture or chemical exposure. Identifying corrosion early can help in choosing the right approach to loosen the fitting.

Visual Inspection: Look for green or white deposits around the fitting. These deposits are typical signs of brass corrosion, indicating areas where the fitting might be stuck.

Physical Signs: Corroded fittings may also feel rough or exhibit visible pitting and flaking.

Use a Brass Fitting Extractor

When fittings are severely corroded, traditional tools might not be sufficient. A brass fitting extractor is specifically designed to handle these situations.

Specialized Grip: The extractor has specially designed jaws that can grip corroded and rounded-off fittings more effectively than standard wrenches.

Step-by-Step Use:

  • Position the extractor on the fitting.
  • Tighten the jaws securely around the fitting.
  • Use a wrench or handle to turn the extractor, loosening the fitting.

Prevent Future Corrosion

To avoid dealing with corroded fittings in the future, take preventive measures during installation and maintenance.

Anti-Seize Compound: Apply an anti-seize compound to the threads of the fitting during reinstallation. This compound helps to prevent corrosion by creating a barrier between the metal and environmental elements.

Regular Maintenance: Periodically inspect fittings for early signs of corrosion and apply protective coatings as needed.

broken brass fitting

Damaged Fittings

Assess Damage

Before attempting to loosen or reuse a brass fitting, assess its condition to determine the best course of action.

Visual and Physical Inspection: Check for stripped threads, cracks, or any signs of structural compromise. Use a magnifying glass if necessary for a detailed inspection.

Functional Test: Gently try to turn the fitting. If it moves too easily or wobbles, the threads might be stripped or the fitting might be cracked.

Repair or Replace

Depending on the extent of the damage, you may need to repair or replace the fitting.

Minor Damage:

Thread Repair Kits: For slightly stripped threads, use a thread repair kit to restore the threads.

Sealants and Epoxies: Small cracks can sometimes be sealed with appropriate industrial epoxies.

Extensive Damage:

Replacement: If the fitting is heavily damaged or poses a risk of failure, replace it with a new one. Ensure the replacement is of the same type and size for compatibility.

Proper Installation

To avoid damage during future installations, follow best practices for installing brass fittings.

Avoid Overtightening: Use a torque wrench to apply the manufacturer-recommended amount of torque. Overtightening can strip threads and crack fittings.

Lubricate Threads: Applying a suitable lubricant or anti-seize compound to the threads can help prevent damage during tightening and make future loosening easier.

Tips for Preventing Stuck Brass Fittings

Proper Installation

Use Appropriate Torque: Always refer to the manufacturer’s specifications for the correct torque levels when installing brass fittings. Using a torque wrench can ensure you apply just the right amount of force.

Align Components Correctly: Misalignment during installation can cause undue stress on the fitting, leading to it becoming stuck over time. Ensure that all parts are properly aligned before tightening.

Regular Maintenance

Inspect Periodically: Schedule regular inspections of your brass fittings to catch any signs of wear, corrosion, or damage early. This proactive approach helps in maintaining the integrity of the fittings.

Clean Regularly: Keeping fittings clean from dirt, debris, and corrosive elements can significantly extend their lifespan. Use appropriate cleaning solutions for brass to avoid damage.

Lubricants

Apply Anti-Seize Compounds: Using anti-seize compounds on the threads during installation creates a protective barrier that prevents metal-to-metal contact and subsequent seizing.

Reapply as Needed: During maintenance checks, reapply lubricants or anti-seize compounds to ensure continued protection against corrosion and sticking.

By following these troubleshooting tips and preventive measures, you can effectively manage and maintain brass fittings, ensuring they remain functional and easy to work with over time. Proper care and maintenance are key to preventing common issues and extending the lifespan of your brass fittings.

Conclusion

Loosening brass fittings can be a straightforward task with the right tools and techniques. By following the methods outlined in this guide, you can handle even the most stubborn fittings with confidence. Regular maintenance and proper installation practices will help prevent future issues.

FAQ

If the fitting remains stuck after applying heat and penetrating oil, try the following:

Reapply penetrating oil and let it sit for a longer period, up to 24 hours.

Use an impact wrench to apply more torque.

Consider using a brass fitting extractor if the fitting is severely corroded.

Penetrating oil is specifically designed to penetrate and break down rust and corrosion. Regular lubricants may not be as effective for loosening stuck fittings. It’s recommended to use a high-quality penetrating oil like WD-40 for best results.

To prevent brass fittings from becoming stuck:

Apply an anti-seize compound to the threads during installation.

Avoid overtightening the fittings.

Perform regular maintenance and inspections to detect and address corrosion early.

Using a torch to heat brass fittings is effective, but it should be done with caution:

Keep the flame controlled and directed only at the fitting.

Avoid overheating to prevent damage to the fitting and surrounding components.

Always wear safety goggles and gloves.

Signs that a brass fitting may need replacement include:

Visible cracks or breaks in the fitting.

Stripped or severely damaged threads.

Excessive corrosion that compromises the fitting’s integrity.

Persistent leaks even after tightening or applying sealant.

Yes, many of these methods can be used on other types of metal fittings, such as copper, steel, and aluminum. However, always consider the specific properties and heat tolerance of the metal you are working with to avoid damage.


How to Use Teflon Tape on Brass Fittings

How to Use Teflon Tape on Brass Fittings

How to Use Teflon Tape on Brass Fittings

Table of Contents

Introduction

Brass fittings, known for their durability and resistance to corrosion, are commonly used in plumbing systems for their ability to withstand high pressures and temperatures. One of the most effective methods for sealing threaded connections is using Teflon tape, also known as PTFE (polytetrafluoroethylene) tape or plumber’s tape. This thin, flexible tape is applied to the threads of pipe fittings to create a tight seal that prevents leaks and enhances the longevity of the connection. With the right techniques and a bit of practice, you can achieve leak-free connections.

Understanding Teflon Tape

Teflon Tape on Brass Fittings Topa

What is Teflon Tape?

Teflon tape, formally known as PTFE (polytetrafluoroethylene) tape, is a fundamental tool in the plumbing industry. This versatile, non-adhesive film is commonly referred to as plumber’s tape due to its widespread use in sealing pipe threads. The primary function of Teflon tape is to prevent leaks by filling the minute gaps between threaded connections, ensuring a watertight or airtight seal.

The material composition of Teflon tape allows it to be highly resistant to water, chemicals, and temperature variations, making it an ideal sealing solution for a variety of plumbing applications. Its thin, flexible nature enables it to conform easily to the threads of pipes and fittings, creating a durable seal that can withstand the pressures and conditions typically encountered in plumbing systems.

Types of Teflon Tape

Teflon tape is available in several types, each distinguished by color and intended for specific applications. Understanding the different types of Teflon tape is crucial for selecting the right tape for your plumbing project:

White Teflon Tape: This is the most common type of Teflon tape and is typically used for standard water pipe applications. It is suitable for sealing the threads of most household plumbing connections, including those for faucets, showerheads, and other water fixtures.

Yellow Teflon Tape: Specifically designed for gas lines, yellow Teflon tape is thicker and denser than its white counterpart. It is used to seal the threads of gas pipe connections, ensuring a safe and secure seal that can prevent gas leaks. It is essential for applications involving natural gas, propane, and other gas systems.

Pink Teflon Tape: This heavy-duty tape is used for water lines and is thicker than white Teflon tape, providing a more robust seal. It is often used in commercial and industrial plumbing applications where a stronger, more durable seal is required.

Why Use Teflon Tape with Brass Fittings?

Ensuring a Tight Seal

Brass fittings, like all threaded fittings, have small gaps and imperfections in their threads that can allow water or gas to leak through if not properly sealed. Teflon tape addresses this issue by filling these gaps and creating a tight seal. When wrapped around the threads, the tape conforms to the contours of the threads, effectively plugging any potential leakage paths. This tight seal is crucial in both high-pressure and low-pressure systems to maintain the integrity of the plumbing system.

Preventing Leaks

Leak prevention is one of the primary reasons for using Teflon tape with brass fittings. Leaks can lead to water damage, mold growth, and increased utility bills in water systems. In gas systems, leaks can be hazardous, posing risks of fire or explosion. By using Teflon tape, you create a reliable barrier that prevents fluids or gases from escaping through the threaded connections.

Step-by-Step Guide to Using Teflon Tape on Brass Fittings

Achieving a secure and leak-free connection with brass fittings requires the correct application of Teflon tape. This step-by-step guide will walk you through the process, ensuring that your fittings are properly sealed and ready for use.

Gathering Your Materials

Before you begin, make sure you have all the necessary materials and tools on hand. Having everything ready will make the process smoother and more efficient.

Teflon tape: Choose the appropriate type for your application (e.g., white for water lines, yellow for gas lines).

Brass fittings: Ensure they are the correct size and type for your plumbing project.

Wrench: A suitable wrench for tightening the fittings.

Clean cloth: For cleaning the threads of the fittings.

Preparation

Proper preparation of the brass fittings is crucial for ensuring a secure seal. Follow these steps to get the fittings ready:

Clean the Threads: Use a clean cloth to thoroughly remove any dirt, oil, or debris from the threads of the brass fittings. Clean threads provide a better surface for the Teflon tape to adhere to and create a more effective seal.

Ensure Dryness: Make sure the threads are completely dry before applying the tape. Moisture can interfere with the tape’s ability to adhere properly and may compromise the seal.

use teflon tape Topa

Applying the Teflon Tape

Applying Teflon tape correctly is key to achieving a leak-free connection. Here’s how to do it:

Starting Point: Begin wrapping the tape 1-2 threads back from the end of the fitting. This prevents the tape from getting into the system, where it could potentially cause blockages or other issues.

Direction: Wrap the tape clockwise around the threads. This is the same direction that the fitting will be screwed on. Wrapping in the correct direction ensures that the tape does not unravel when the fitting is tightened.

Number of Wraps: Typically, 3-5 wraps of tape are sufficient to create a good seal. The exact number of wraps may vary depending on the specific fitting and application, but this range generally provides effective coverage.

Smooth Application: As you wrap the tape, ensure it is applied smoothly and evenly without wrinkles or overlaps. A smooth application ensures consistent coverage and a more reliable seal.

Connecting the Fittings

Once the Teflon tape is applied, the fittings can be connected. Follow these steps for proper assembly:

Hand-Tighten First: Start by screwing the fittings together by hand. This initial step ensures that the threads are properly aligned and engaged. Hand-tightening also helps to avoid cross-threading, which can damage the fittings and compromise the seal.

Final Tightening: After hand-tightening, use a wrench to securely tighten the connection. Be cautious not to over-tighten, as excessive force can damage the threads and the Teflon tape, leading to leaks. Tighten the fitting until it feels snug, then give it an additional quarter turn with the wrench.

By following these steps, you can ensure that your brass fittings are properly sealed with Teflon tape, providing a reliable and leak-free connection. This meticulous approach not only prevents leaks but also extends the life of your plumbing system, saving you time and money on future repairs.

Common Mistakes and How to Avoid Them

When using Teflon tape on brass fittings, avoiding common mistakes is essential to ensure a secure, leak-free connection. Understanding these mistakes and knowing how to avoid them can save you time, effort, and potential frustration. Here are the most common pitfalls and how to prevent them.

Using the Wrong Type of Tape

One of the most frequent mistakes is using the incorrect type of Teflon tape for your specific application. Teflon tape comes in different colors, each designed for particular uses.

Solution: Ensure you use the appropriate type of Teflon tape for brass fittings. Typically, white Teflon tape is used for water lines, while yellow tape is for gas lines, and pink tape is for heavy-duty water lines. Always check the tape’s specifications to match them with your project’s requirements.

Topa Teflon Tape on Brass Fittings

Incorrect Application

Proper application of Teflon tape is critical for creating a reliable seal. Incorrect application can lead to leaks and compromised connections.

Wrong Direction:

Mistake: Wrapping the tape counterclockwise can cause it to unravel when the fitting is tightened.

Solution: Always wrap the tape clockwise around the threads. This ensures the tape stays in place as the fitting is tightened.

Inadequate Layers:

Mistake: Using too few layers of tape can result in an insufficient seal, while too many layers can cause difficulty in screwing the fittings together.

Solution: Apply 3-5 wraps of tape for a secure seal. This range provides adequate coverage without excess bulk.

Uneven Application:

Mistake: Wrinkles, overlaps, or gaps in the tape can compromise the seal and lead to leaks.

Solution: Apply the tape evenly and smoothly. Make sure each layer is flat and tight against the threads without overlaps or gaps.

Over-Tightening

Applying excessive force when tightening fittings can damage both the threads and the Teflon tape, leading to potential leaks and reduced connection integrity.

Risks: Over-tightening can strip the threads, deform the fittings, or tear the Teflon tape, compromising the seal.

Solution: Tighten the fitting until it feels snug, then, give it a quarter turn with a wrench. This method ensures a secure connection without over-stressing the threads or the tape.

By avoiding these common mistakes, you can ensure a more reliable and durable seal with your brass fittings. Proper selection and application of Teflon tape, along with careful tightening, will help you achieve leak-free connections and maintain the integrity of your plumbing system.

Troubleshooting and Maintenance Tips

Ensuring your brass fittings sealed with Teflon tape remain leak-free and durable involves regular troubleshooting and maintenance. Here are some essential tips to help you maintain your plumbing connections effectively.

Checking for Leaks

After assembling your brass fittings, it is crucial to check for any signs of leaks to ensure that the connection is secure.

Method:

Run Water Through the Connection: Obs closely observe the connection point once the fittings are assembled and the water supply is turned on.

Inspect for Leaks: Look for any signs of water seeping out from the threads. Even small drips can indicate an improper seal.

Action:

If a Leak is Detected:

Disassemble the Connection: Carefully unscrew the fittings.

Reapply Teflon Tape: Remove the old tape completely from the threads, ensuring no residue is left behind. Clean the threads with a cloth.

Rewrap with New Tape: Apply fresh Teflon tape, ensuring it is wrapped evenly and in the correct direction.

Tighten Again: Reassemble the fittings, hand-tightening first, then using a wrench for the final snug fit.

seal on Brass Fittings

Reapplying Teflon Tape

If you need to disconnect and reconnect fittings for any reason, it’s essential to reapply fresh Teflon tape to maintain a proper seal.

When Needed:

During Maintenance: Anytime fittings are unscrewed and reconnected.

After Leak Detection: If a leak is found and the connection needs to be resealed.

Steps:

Remove Old Tape: Completely strip off the old Teflon tape from the threads. Use a cloth to clean the threads thoroughly, removing any remnants.

Clean the Threads: Ensure the threads are clean and dry.

Rewrap with New Tape: Apply new Teflon tape, starting 1-2 threads back from the end, wrapping clockwise, and ensuring 3-5 layers for a secure seal.

Routine Maintenance

Regular maintenance helps to ensure the longevity and reliability of your plumbing connections.

Regular Checks:

Inspect Connections: Periodically check all Teflon-taped connections for any signs of wear, corrosion, or leaks. This can be done during routine plumbing inspections or whenever you perform maintenance on your plumbing system.

Preventive Measures:

Ensure Fittings Remain Tight: Over time, vibrations and temperature changes can cause fittings to loosen. Check that all fittings are still snug and give them a slight turn with a wrench if necessary.

Check Tape Integrity: Look for signs that the Teflon tape might be deteriorating, such as visible wear or discoloration. If the tape appears compromised, it’s best to reapply the new tape.

By following these troubleshooting and maintenance tips, you can ensure that your brass fittings remain secure and leak-free. Regular checks and proper reapplication of Teflon tape will help maintain the integrity and performance of your plumbing system, preventing potential issues and prolonging the lifespan of your connections.

Conclusion

With the knowledge gained from this guide, you can confidently tackle your next plumbing project. Proper use of Teflon tape is a straightforward yet highly effective method for ensuring long-lasting and secure fittings. For more plumbing tips and professional advice, be sure to follow our blog. We regularly share valuable insights and practical tips to help you with your plumbing projects. If you have any questions or need further assistance, don’t hesitate to reach out to us.

FAQ

Yes, Teflon tape is suitable for most brass fittings used in plumbing. It helps create a tight seal and prevent leaks. However, ensure you use the correct type of tape for your specific application (e.g., white for water lines, yellow for gas lines).

Typically, 3-5 wraps of Teflon tape are sufficient to create a secure seal. This range provides adequate coverage without adding too much bulk, which can make it difficult to screw the fittings together.

Always wrap Teflon tape clockwise around the threads. This ensures that the tape stays in place and doesn’t unravel when the fitting is tightened.

No, Teflon tape should not be reused. Once a fitting has been unscrewed, the tape will be compressed and may not provide an effective seal if reused. Always apply fresh tape when reconnecting fittings.

While brass to brass fittings can sometimes create a tight seal without tape, using Teflon tape is recommended to ensure a leak-free connection. The tape fills any small gaps and provides additional sealing and lubrication.

Yes, Teflon tape can be used with various types of fittings, including PVC, copper, and steel. It is versatile and effective for sealing threaded connections in many plumbing applications. Always ensure you use the appropriate type of tape for the specific material and application.

How to Connect Brass Fittings

How to Connect Brass Fittings

How to Connect Brass Fittings

Table of Contents

Introduction

Connecting brass fittings is a fundamental skill essential for various applications such as plumbing, gas lines, refrigeration, and hydraulic systems. Whether you are working on a residential plumbing project, setting up a gas line, or installing a complex hydraulic system, knowing how to properly connect brass fittings ensures a reliable and leak-free connection.

Step-by-Step Guide to Connecting Brass Fittings

Cutting the Pipe

Measure the Length of the Pipe Needed:

Begin by determining the exact length of pipe required for your project. Use a tape measure to measure the distance between the connection points accurately. Mark the pipe with a pencil or marker at the point where it needs to be cut.

Use a Pipe Cutter to Make a Clean, Straight Cut:

Select a pipe cutter suitable for the type of pipe you are using (e.g., copper). Place the pipe cutter around the marked area and tighten the cutter until it is snug around the pipe. Rotate the cutter around the pipe, tightening it slightly after each full rotation. Continue this process until the pipe is cut through. This method ensures a clean, straight cut, which is crucial for a proper fitting connection.

Deburring the Pipe Ends

Use a Deburring Tool to Remove Any Burrs from the Cut Pipe End:

After cutting the pipe, burrs or rough edges are often left behind. These need to be removed to ensure a smooth connection. Use a deburring tool, which can be a handheld tool specifically designed for this purpose or an attachment for a drill. Run the tool around the inside and outside edges of the pipe end to remove any burrs or rough spots.

Ensure the Pipe End is Smooth to Prevent Leaks:

After deburring, feel the pipe end with your fingers to make sure it is smooth and even. Any remaining roughness can cause improper seating of the fitting, leading to potential leaks. A smooth pipe end is essential for a secure and leak-free connection.

Cleaning the Pipe and Fitting

Wipe the Pipe and Fitting with a Clean Cloth to Remove Dirt and Oil:

Before assembly, clean both the pipe and the fitting thoroughly. Use a clean cloth to wipe away any dirt, dust, or oil. This step ensures that no contaminants interfere with the sealant or the connection.

Use an Appropriate Cleaning Solution if Necessary:

In cases where the pipe and fitting are particularly dirty or greasy, use a suitable cleaning solution. For metal pipes, a solvent-based cleaner can be effective. For other materials, a mild detergent and water may suffice. Ensure the components are completely dry before proceeding to the next step.

seal on Brass Fittings

Applying Sealant

Choose the Right Sealant: PTFE Tape or Pipe Dope:

Select an appropriate sealant based on the application and type of fitting. PTFE tape (also known as plumber’s tape) is commonly used for threaded fittings, while pipe dope (a paste sealant) can be used for both threaded and non-threaded connections.

Wrap PTFE Tape Around the Threads of the Pipe in a Clockwise Direction or Apply Pipe Dope Evenly on the Threads:

If using PTFE tape, start at the end of the threads and wrap the tape in a clockwise direction, overlapping each layer slightly. Apply enough tape to cover the threads without excess bulk.

If using pipe dope, apply a thin, even layer over the threads using a brush or your finger. Ensure complete coverage to create a proper seal.

Inserting the Pipe into the Fitting

Align the Pipe with the Fitting and Insert It Firmly:

With the sealant applied, align the pipe with the fitting carefully. Insert the pipe into the fitting, pushing it in firmly to ensure it is fully seated. For threaded connections, screw the pipe into the fitting by hand until it is snug.

Ensure the Pipe is Fully Seated in the Fitting:

Double-check that the pipe is fully inserted or screwed into the fitting. A proper fit is crucial for a secure connection and to prevent leaks.

Tightening the Connection

Use Wrenches to Tighten the Fitting:

For threaded fittings, use two wrenches: one to hold the fitting in place and the other to turn the pipe. Tighten the connection until it is secure. For compression fittings, use a wrench to tighten the compression nut.

Avoid Over-Tightening to Prevent Damage:

Be cautious not to over-tighten the connection. Over-tightening can damage the threads or the fitting itself, leading to leaks or future failures. Tighten just enough to ensure a secure and leak-free connection.

By following these detailed steps, you can ensure that your brass fittings are connected properly, providing a reliable and durable solution for your plumbing, gas, refrigeration, or hydraulic systems. Proper preparation, clean components, and careful assembly are key to achieving optimal results.

Connecting Different Types of Brass Fittings

Brass fittings come in various types, each designed for specific applications and connection methods. Understanding the differences and how to properly connect each type ensures a secure and leak-free installation. This section will guide you through the steps for connecting threaded, compression, flare, and push-to-connect brass fittings.

Compression Fittings

Slide the Compression Nut and Ring onto the Pipe:

Begin by sliding the compression nut onto the pipe, followed by the compression ring (also known as a ferrule). Ensure the ring is positioned correctly, with its tapered end facing the fitting.

Insert the Pipe into the Fitting:

Push the pipe into the compression fitting until it reaches the internal stop within the fitting. This ensures the pipe is fully seated and aligned correctly for a secure connection.

Tighten the Compression Nut with a Wrench:

Slide the compression nut towards the fitting and hand-tighten it onto the threads of the fitting. Use a wrench to further tighten the nut. As you tighten, the compression ring is compressed between the nut and the fitting, creating a tight seal around the pipe. Tighten until the connection is secure, but avoid over-tightening to prevent damage to the pipe or fitting.

Flare Fittings

Cut and Flare the Pipe End Using a Flaring Tool:

First, cut the pipe to the desired length using a pipe cutter. Ensure the cut is clean and straight. Next, use a flaring tool to create a flare at the end of the pipe. Insert the pipe into the flaring tool, tighten the tool’s clamp, and use the flaring cone to expand the pipe end into a flare. This flare provides a surface for the fitting to seal against.

Fit the Flare Nut and Flare Fitting onto the Pipe:

Slide the flare nut onto the pipe, followed by placing the flared pipe end into the flare fitting. Ensure the flare nut is correctly positioned behind the flare on the pipe.

Tighten the Flare Nut to the Fitting:

Thread the flare nut onto the flare fitting by hand, ensuring it is correctly aligned. Use a wrench to tighten the flare nut, securing the flared pipe end against the fitting. Tighten until the connection is secure, but be careful not to over-tighten, as this can damage the flare or fitting.

Push-to-Connect Fittings

Simply Push the Pipe into the Fitting Until It Clicks into Place:

Push-to-connect fittings are designed for quick and easy connections. Simply push the pipe into the fitting until you feel it click into place. The internal mechanism of the fitting grips the pipe securely, creating a tight seal without the need for additional tools or sealants.

Ensure a Secure Connection by Pulling Lightly on the Pipe:

After inserting the pipe, lightly pull on it to ensure it is fully engaged and secure within the fitting. The fitting should hold the pipe firmly in place, indicating a proper connection.

By following these detailed steps for each type of brass fitting, you can ensure a secure and reliable connection, whether you are working with threaded, compression, flare, or push-to-connect fittings. Understanding the specific requirements and techniques for each type of fitting is essential for achieving optimal results in your plumbing, gas, refrigeration, or hydraulic systems.

Troubleshooting Common Issues

Even with careful installation, issues can arise with brass fittings. Identifying and resolving these issues promptly is crucial for maintaining the integrity and functionality of your system. Here, we will discuss common problems such as leaks, loose connections, and corrosion, and provide detailed steps to troubleshoot and fix these issues.

Leaks

Leaks are a common issue in plumbing and hydraulic systems. They can lead to significant damage if not addressed promptly.

Identify the Source of the Leak:

Begin by visually inspecting the system to locate the exact source of the leak. Check around all fittings and joints for any signs of moisture or dripping. Sometimes, leaks can be subtle and may require closer inspection, such as using a flashlight to detect small droplets or damp spots.

Tighten the Fitting:

If the leak is coming from a fitting, use a wrench to tighten it slightly. Be cautious not to over-tighten, as this can damage the threads or the fitting itself. Tightening should be done incrementally, checking the leak after each adjustment.

Reapply Sealant if Necessary:

If tightening the fitting does not stop the leak, you may need to disassemble the connection and reapply the sealant. For threaded connections, remove the fitting, clean the threads thoroughly to remove old sealant, and then reapply PTFE tape or pipe dope. For other types of fittings, inspect the sealing surfaces for any debris or damage before reassembling.

leak brass push to connect fitting

Loose Connections

Loose connections can lead to inefficiencies and potential leaks. Ensuring all fittings are securely tightened is crucial for the system’s performance.

Check All Connections:

Regularly inspect all fittings and connections in your system. Gently tug on pipes and fittings to check for any movement. A properly connected fitting should not show any signs of looseness.

Tighten Any Loose Fittings:

Use appropriate tools, such as wrenches, to tighten any loose fittings. For threaded connections, ensure that the threads are not stripped and that the fitting can be tightened properly. For compression fittings, ensure the compression nut is snug and the ferrule is properly seated.

Replace Worn-Out Fittings if Needed:

If a fitting cannot be tightened sufficiently due to wear or damage, it should be replaced. Inspect the fitting and the corresponding pipe end for any signs of wear, damage, or deformation. Replace with a new fitting to ensure a secure connection.

Corrosion and Wear

Corrosion and wear can weaken brass fittings over time, leading to leaks and system failures. Regular inspection and maintenance are key to preventing these issues.

Inspect Fittings Regularly for Signs of Corrosion:

Conduct routine inspections of your brass fittings, looking for any signs of corrosion, such as discoloration, pitting, or rust. Pay special attention to areas exposed to harsh conditions, such as moisture or chemicals.

Replace Corroded Fittings Promptly:

If you identify any fittings that show signs of significant corrosion, replace them immediately. Corroded fittings can compromise the integrity of the entire system. When replacing, ensure the new fittings are suitable for the environmental conditions to prevent future corrosion.

Preventative Measures:

To minimize corrosion, consider using protective coatings or treatments on brass fittings, especially in harsh environments. Ensure the system is properly maintained, and any leaks are addressed promptly to prevent moisture accumulation around the fittings.

By following these detailed steps, you can effectively troubleshoot and resolve common issues with brass fittings, ensuring your system remains reliable and efficient. Regular maintenance and prompt attention to any problems are essential for the longevity and performance of your plumbing, gas, refrigeration, or hydraulic systems.

Conclusion

Connecting brass fittings is a straightforward process when armed with the right knowledge and tools. Whether you are working on plumbing, gas, refrigeration, or hydraulic systems, understanding the specific requirements and techniques for each type of fitting ensures secure and leak-free connections.

Should you have any questions or need further assistance, do not hesitate to leave a comment or reach out for professional advice. Properly connected brass fittings are key to the safety and functionality of your systems, and we are here to support you in achieving that goal.

FAQ

For brass fittings, PTFE tape and pipe dope are commonly used. PTFE tape is ideal for threaded connections, while pipe dope can be used for both threaded and non-threaded fittings.

A fitting is tight enough when it is secure and does not leak. Use a wrench to tighten the fitting until it is snug, but avoid over-tightening to prevent damage. Check for leaks after tightening.

First, identify the source of the leak. Tighten the fitting with a wrench if it is loose. If the leak persists, disassemble the fitting, clean the threads, reapply sealant, and reassemble.

Yes, brass fittings can be used with various types of pipes, including copper, PVC, and PEX. Ensure that the fitting type matches the pipe material and size for a secure connection.

It is recommended to inspect brass fittings at least once a year, or more frequently in harsh environments. Look for signs of discoloration, pitting, or rust, and replace any corroded fittings promptly.

Common tools needed for connecting brass fittings include wrenches, a pipe cutter, a deburring tool, and sealant (PTFE tape or pipe dope). Depending on the type of fitting, you might also need a flaring tool or compression tool.

Do Brass Fittings Contain Lead

Do Brass Fittings Contain Lead

Do Brass Fittings Contain Lead?

Introduction

Brass fittings are essential components used extensively across various industries, including plumbing, HVAC (heating, ventilation, and air conditioning), and many industrial applications. These fittings are known for their durability, corrosion resistance, and ability to withstand high temperatures, making them a preferred choice for joining pipes and other equipment. Brass, an alloy primarily composed of copper and zinc, often includes additional elements to enhance specific properties. The primary aim of this post is to address common concerns regarding the presence of lead in brass fittings. By the end of this post, readers will have a clearer understanding of the potential risks and the steps they can take to ensure their fittings are safe and compliant with current regulations.

What is Brass?

Definition and General Composition

raw brass material Topa

Brass is a versatile alloy primarily composed of copper and zinc. The ratio of these two metals can vary, resulting in different properties and grades of brass. Typically, brass contains about 60-70% copper and 30-40% zinc. The combination of these metals produces a material that is both strong and malleable, making it suitable for a wide range of applications. The copper content gives brass its characteristic color and enhances its corrosion resistance, while zinc provides additional strength and rigidity.

Variations in Alloying Elements

In addition to copper and zinc, brass may include other alloying elements to impart specific properties. For instance, small amounts of lead are often added to improve machinability, making the brass easier to cut and shape. Other elements like tin, iron, aluminum, and manganese may also be included to enhance characteristics such as corrosion resistance, strength, and hardness. These variations in alloying elements allow brass to be tailored for specific uses and performance requirements.

Beta Brass: Beta brasses have a higher zinc content, typically between 37% and 45%, and contain a mix of alpha and beta phases. The presence of the beta phase increases the alloy’s hardness and strength, but it also makes the material less ductile. Beta brasses are often used in applications where strength and wear resistance are critical.

Alpha-Beta Brass (Duplex Brass): These brasses contain zinc in the range of 37% to 45% and have a microstructure consisting of both alpha and beta phases. They offer a balance between ductility and strength, making them suitable for a variety of applications, including casting and forging.

Common Applications of Each Type

Alpha Brass: Due to their ductility and ease of forming, alpha brasses are commonly used in the manufacturing of intricate components such as locks, gears, hinges, and decorative items. They are also widely used in plumbing and electrical applications.

Beta Brass: The increased strength and hardness of beta brasses make them ideal for high-stress applications such as fasteners, bearings, and high-strength fittings. They are also used in environments where resistance to wear and fatigue is essential.

Alpha-Beta Brass: These versatile brasses are used in a wide range of applications, including automotive components, marine hardware, and large-scale industrial fittings. Their balanced properties make them suitable for parts that require both moderate ductility and strength.

Lead in Brass

Historical Use of Lead in Brass

Reasons for Adding Lead to Brass

Lead has historically been added to brass alloys for several reasons. One of the primary reasons is to improve machinability. Lead acts as a lubricant during the machining process, allowing for smoother cutting and shaping of brass components. This makes the manufacturing process more efficient and cost-effective. Additionally, lead enhances the alloy’s overall corrosion resistance, which is particularly beneficial in plumbing and industrial applications where brass fittings are exposed to moisture and other corrosive elements.

Typical Lead Content in Traditional Brass Alloys

Traditional brass alloys often contain small amounts of lead, typically ranging from 1% to 3%. This small addition significantly improves the ease of machining without drastically altering the mechanical properties of the brass. However, even these low levels of lead can pose health and environmental risks, which have led to increased scrutiny and regulation over time.

Health and Environmental Concerns

Potential Health Risks Associated with Lead Exposure

Lead is a toxic metal that poses significant health risks, especially with prolonged exposure. Ingesting or inhaling lead particles can lead to serious health issues, including neurological damage, developmental delays in children, and various other medical conditions such as hypertension and kidney damage. Because lead can leach into drinking water from brass fittings, it is a particular concern in plumbing systems. Even low levels of lead exposure can accumulate in the body over time, causing chronic health problems.

Environmental Impact of Lead-Containing Brass Fittings

The environmental impact of lead-containing brass fittings is another major concern. When lead leaches into soil and water sources, it can contaminate the ecosystem, affecting plants, animals, and human populations. Lead pollution can disrupt the natural balance, causing long-term damage to the environment. Furthermore, the disposal and recycling of lead-containing brass fittings pose additional environmental hazards, as improper handling can lead to further contamination.

Regulatory Standards and Compliance

International Standards and Regulations

To address the health and environmental concerns associated with lead in brass fittings, several international standards and regulations have been established:

EPA (Environmental Protection Agency): In the United States, the EPA regulates lead content in drinking water through the Safe Drinking Water Act. The Lead and Copper Rule mandates actions to reduce lead levels in drinking water, setting the action level at 15 parts per billion (ppb).

RoHS (Restriction of Hazardous Substances Directive): The European Union’s RoHS directive restricts the use of certain hazardous materials, including lead, in electrical and electronic equipment. This regulation aims to minimize environmental and health impacts by controlling lead content in various products.

NSF/ANSI 61: This standard, developed by NSF International and the American National Standards Institute, sets health effects criteria for many water system components, including brass fittings. It specifies the maximum allowable lead content in products that come into contact with drinking water.

Differences in Regulations Across Regions

United States: The US has stringent regulations regarding lead content in plumbing materials. The Reduction of Lead in Drinking Water Act, effective since January 2014, requires that plumbing products must not contain more than 0.25% lead on a weighted average across their wetted surfaces.

Europe: European regulations, particularly under the RoHS directive, limit lead content in electrical and electronic equipment to 0.1%. Additionally, the European Drinking Water Directive sets specific limits for lead in drinking water and materials in contact with it.

Other Regions: Different countries and regions have varying levels of regulation. For example, Australia follows similar guidelines to the US and Europe, emphasizing the need for low-lead or lead-free materials in plumbing systems.

Alternatives to Lead-Containing Brass Fittings

Lead-Free Brass Alloys

Composition and Benefits of Lead-Free Brass

To address the concerns associated with lead in brass fittings, various lead-free brass alloys have been developed. These alloys use alternative elements to achieve similar or enhanced properties without the health and environmental risks posed by lead. Common substitutes include:

Silicon Brass: Silicon is added to brass to improve machinability and corrosion resistance, serving as a lead-free alternative. Silicon brass maintains good mechanical properties and is suitable for a wide range of applications.

Bismuth Brass: Bismuth can replace lead in brass alloys to enhance machinability. Bismuth does not pose the same health risks as lead, making it a safer alternative for use in plumbing and drinking water systems.

Tin Brass: Adding tin to brass increases corrosion resistance and mechanical strength, providing a durable and lead-free option for fittings and fixtures.

Performance Comparison with Traditional Brass Alloys

Machinability: Lead-free brass alloys like silicon and bismuth brass offer comparable machinability to traditional leaded brass. These alternatives ensure that manufacturing processes remain efficient without compromising safety.

Corrosion Resistance: Lead-free brass alloys generally exhibit excellent corrosion resistance, making them suitable for use in harsh environments and water systems.

Mechanical Properties: Lead-free brass alloys maintain or enhance the mechanical properties of traditional brass, including strength, ductility, and wear resistance. This ensures they can be used in demanding applications without sacrificing performance

stainless steel materials Topa

Stainless Steel

Pros: Stainless steel is highly resistant to corrosion, durable, and has excellent mechanical properties. It is suitable for a wide range of applications, including plumbing, industrial, and food processing environments. Stainless steel does not contain lead and is safe for use in drinking water systems.

Cons: Stainless steel can be more expensive than brass and is sometimes more challenging to machine and work with. Additionally, its hardness can make it less suitable for certain applications where softer materials are preferred.

Plastic (PVC, CPVC, PEX)

Pros: Plastic fittings are lightweight, corrosion-resistant, and easy to install. They are often more cost-effective than metal alternatives and are suitable for a variety of plumbing and industrial applications. Plastic materials do not pose the same health risks as lead-containing brass.

Cons: Plastic fittings may have lower mechanical strength and durability compared to metal fittings. They can be prone to damage from UV exposure and may not be suitable for high-temperature or high-pressure applications.

Copper

Pros: Copper is naturally resistant to corrosion, has excellent thermal conductivity, and is easy to work with. It is widely used in plumbing and HVAC systems and does not contain lead.

Cons: Copper can be more expensive than brass and other materials. It may also be susceptible to corrosion in certain environments, such as acidic or high-sulfur conditions.

Composite Materials

Pros: Composite materials, often made from a combination of plastic and metal, offer a balance of strength, corrosion resistance, and ease of installation. They can be designed to meet specific application requirements and do not contain lead.

Cons: Composite materials can vary in quality and performance, depending on their composition and manufacturing process. They may also be more expensive than traditional materials.

Identifying Lead-Free Brass Fittings

Even with careful preparation and attention to detail, mistakes can happen when connecting brass pipe fittings. Understanding common errors and knowing how to troubleshoot them can help ensure a secure and leak-free installation. Here are some common mistakes and troubleshooting tips:

Certification Marks and Labels

Common Certification Marks Indicating Lead-Free Compliance

When searching for lead-free brass fittings, it is crucial to recognize the certification marks that indicate compliance with lead-free standards. Some of the common certification marks include:

NSF/ANSI 61: This certification indicates that the product meets the health effects requirements for materials that come into contact with drinking water.

NSF/ANSI 372: This certification specifically indicates that the product complies with the lead content requirements of 0.25% or less.

Purchasing Tips

When purchasing lead-free brass fittings, consider the following tips to ensure compliance and quality:

Questions to Ask Suppliers and Manufacturers

Certification Verification: Ask suppliers or manufacturers to provide certification documents or proof of compliance with NSF/ANSI 61, NSF/ANSI 372, or other relevant standards.

Material Composition: Inquire about the specific alloy composition of the brass fittings to confirm the absence of lead or the presence of acceptable substitutes such as silicon or bismuth.

Testing and Quality Assurance: Ask about the testing procedures and quality assurance measures in place to ensure the products meet lead-free standards.

Regulatory Compliance: Confirm that the products comply with local and international regulations, especially if imported from other regions.

Ensuring Compliance with Local Regulations and Standards

Research Local Regulations: Familiarize yourself with the specific lead content regulations in your region. Different areas may have varying requirements, and it is crucial to ensure the products meet local standards.

Check Certification Databases: Use online databases provided by certification bodies (e.g., NSF, CSA) to verify the certification status of products and manufacturers.

Stay Updated on Standards: Regulations and standards can evolve. Keep abreast of any updates or changes to ensure ongoing compliance with the latest requirements.

Work with Reputable Suppliers: Choose suppliers and manufacturers with a proven track record of providing lead-free products. Reputable companies are more likely to adhere to standards and offer reliable, compliant fittings.

Conclusion

Prioritizing safety and compliance when selecting brass fittings is essential for protecting health and the environment. By understanding the composition of brass, recognizing the risks associated with lead, and choosing certified lead-free alternatives, you can make informed decisions that benefit everyone involved. By utilizing these resources and staying informed, you can ensure that your brass fittings meet the highest standards of safety and compliance, contributing to a healthier and more sustainable future.

FAQ

Lead was added to brass fittings to improve machinability and corrosion resistance. It acts as a lubricant during the machining process, making it easier to cut and shape brass components, and enhances the alloy’s overall durability.

Exposure to lead can lead to serious health issues, including neurological damage, developmental delays in children, hypertension, and kidney damage. Even low levels of lead exposure can accumulate in the body over time, causing chronic health problems.

Various regulations limit lead content in brass fittings, including the EPA’s Safe Drinking Water Act in the US, the RoHS directive in the European Union, and NSF/ANSI standards. These regulations typically limit lead content to 0.25% or less in products used in drinking water systems.

Lead-free brass fittings often carry certification marks such as NSF/ANSI 61 or 372. Look for labels indicating “Lead-Free” or “No-Lead,” and verify the certification status through recognized bodies like NSF International, CSA, or UL.

Alternatives include lead-free brass alloys that use silicon, bismuth, or tin as substitutes, as well as other materials like stainless steel, plastic (PVC, CPVC, PEX), and copper. These materials offer similar or enhanced properties without the health risks associated with lead.

When purchasing brass fittings, ask suppliers for certification documents, proof of compliance with NSF/ANSI standards, information on the alloy composition, and details about their testing and quality assurance procedures. Ensure the products meet local and international regulatory requirements.

Contact Topa

Save 30% on maintenance costs with our easy-install hydraulic fittings. Contact Now!