How to Remove a Compression Fitting

How to Remove a Compression Fitting

How to Remove a Compression Fitting

Table of Contents

Introduction

Understanding how to remove them correctly can prevent damage to pipes and ensure the longevity and efficiency of the system. Compression fittings, consisting of a nut, a ferrule, and a fitting body, are commonly used to join two pipes or a pipe to a fixture without the need for soldering. They offer a reliable and leak-free connection, making them a popular choice in various applications, from household plumbing to hydraulic machinery. This guide aims to provide you with a comprehensive, step-by-step process for safely and effectively removing compression fittings, ensuring you can handle this task with confidence and precision.

Understanding Compression Fittings

What is a Compression Fitting?

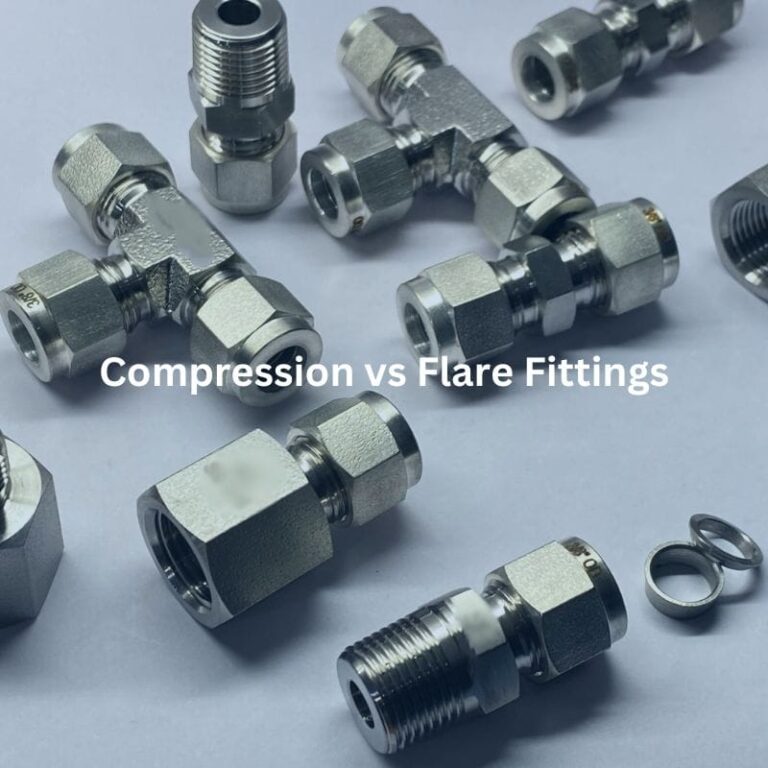
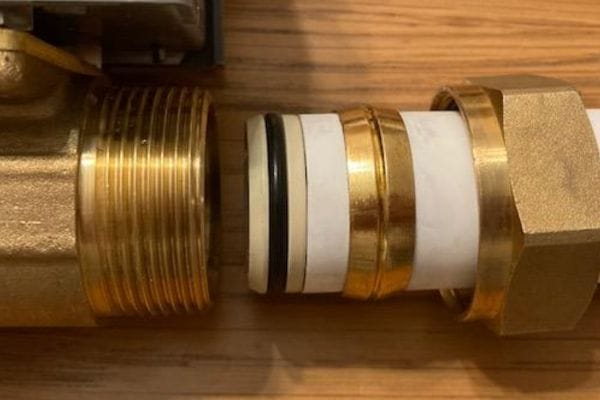
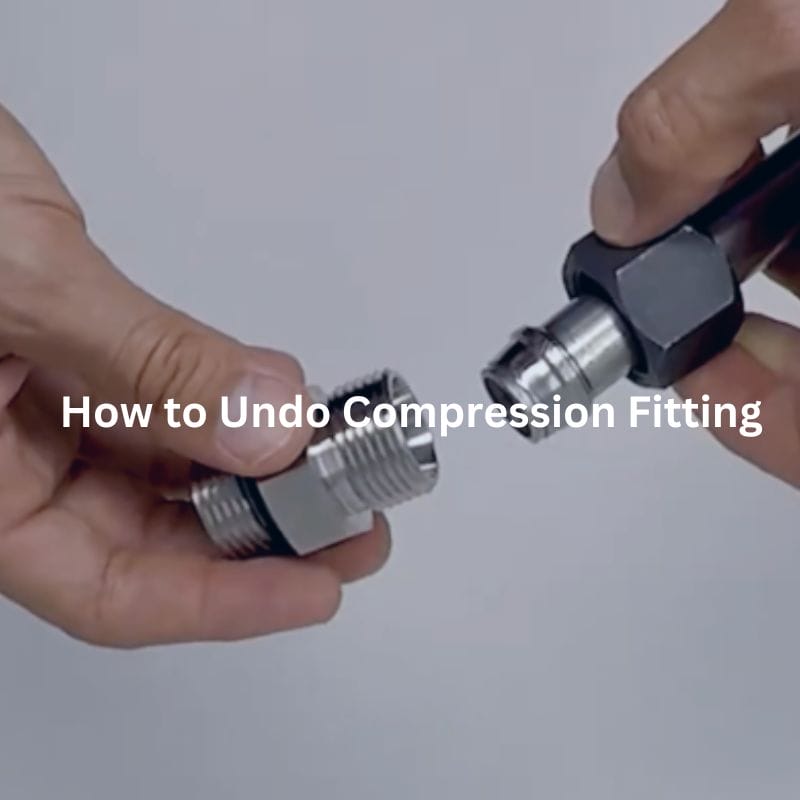
A compression fitting is a type of coupling used to connect two pipes or a pipe to a fixture. This connection method involves compressing a ring (the ferrule) onto the pipe by tightening a nut, creating a secure and leak-free joint. Compression fittings are commonly used because they provide a robust and reliable connection without the need for soldering, making them ideal for both temporary and permanent installations.
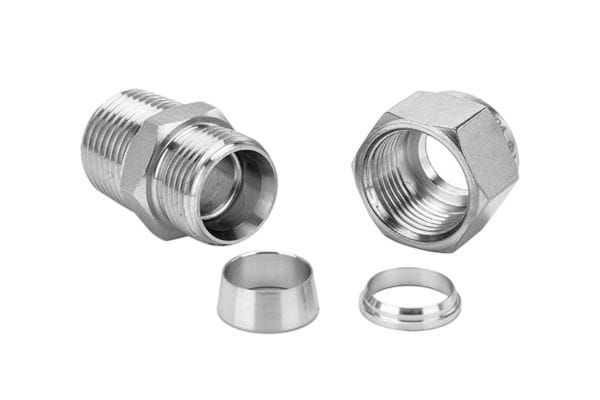
Components

Compression Nut: This is the outermost component that threads onto the fitting body. When tightened, it compresses the ferrule onto the pipe, creating a seal.

Ferrule (or Olive): A ring, typically made of brass or copper, that fits around the pipe. The ferrule is compressed between the nut and the fitting body, forming a tight seal around the pipe.

Fitting Body: The central part of the fitting, connects to the pipe or fixture. It has a threaded section where the compression nut is screwed onto and a seat where the ferrule is compressed against, ensuring a secure connection.

Metric Compression ferrule Fittings

Applications

Compression fittings are widely used in various applications due to their versatility and ease of installation:

Plumbing: They are commonly used in household water supply lines, such as connecting faucets, toilet supply lines, and other fixtures.

Hydraulic Systems: In industrial settings, compression fittings are used in hydraulic lines to join pipes and components that carry fluids under pressure.

Gas Lines: Compression fittings are also used for connecting gas lines, provided they are made of materials that are compatible with the gas type and meet safety standards.

Refrigeration and Air Conditioning: These fittings are utilized in refrigeration and HVAC systems for their ability to withstand high pressure and provide a secure seal.

Advantages and Disadvantages

Advantages:

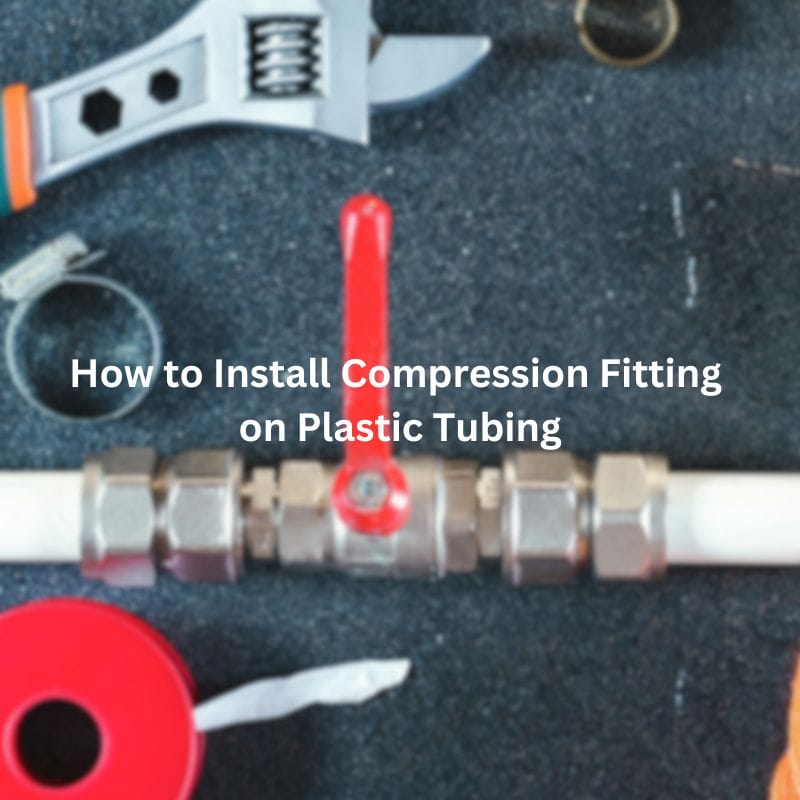
Ease of Installation: Compression fittings do not require specialized tools or soldering, making them easy to install, even for DIY enthusiasts.

Versatility: They can be used with a variety of pipe materials, including copper, plastic, and steel.

Reliability: When properly installed, compression fittings provide a leak-free connection that can withstand significant pressure.

Reusability: These fittings can be disassembled and reused, making them ideal for temporary installations or situations where changes may be necessary.

Disadvantages:

Risk of Leaks: If not installed correctly, compression fittings can leak. Proper tightening and alignment are crucial to ensure a secure seal.

Limited Vibration Resistance: Compression fittings may loosen over time in systems that experience significant vibrations, requiring periodic inspection and maintenance.

Pressure Limitations: While suitable for many applications, compression fittings may not be ideal for extremely high-pressure systems, where welded or brazed connections are more appropriate.

Material Compatibility: The materials of the fitting and the pipe must be compatible to avoid galvanic corrosion, which can lead to leaks and system failures over time.

Understanding the fundamentals of compression fittings, including their components, applications, and the pros and cons of their use, is essential for anyone involved in plumbing or hydraulic systems. This knowledge ensures that these fittings are used effectively and safely, providing reliable connections in a variety of settings.

Step-by-Step Guide to Removing a Compression Fitting

Preparation Steps

Safety Precautions

Before starting any work on removing a compression fitting, it is crucial to ensure safety. The most important step is to turn off the water supply or depressurize the hydraulic system. This prevents any accidental release of water or fluid, which can cause damage or injury. In plumbing systems, locate the main water shutoff valve and turn it off. For hydraulic systems, follow the manufacturer’s instructions to safely release pressure from the system.

Workspace Setup

A well-prepared workspace is essential for efficient and safe removal of compression fittings. Clear the area around the fitting to ensure you have enough space to work comfortably. Cover nearby surfaces with protective materials to prevent damage from any spilled water or fluid. Ensure proper lighting in the workspace to see the fitting and the tools you are using. Having a clean and organized workspace reduces the risk of accidents and makes the task easier.

Inspect the Fitting

Before proceeding with the removal, inspect the compression fitting for any signs of damage or corrosion. Look for cracks, rust, or any deformation in the fitting, nut, or pipe. Identifying these issues early can help you take necessary precautions and avoid further damage during the removal process. If the fitting is severely corroded or damaged, it may require additional steps or tools to remove it safely.

Turn off the Water Supply or Depressurize the System

Plumbing Systems:

Locate the Main Water Shutoff Valve: The main water shutoff valve is usually found near the water meter or where the main water line enters your house. It could be in a basement, crawlspace, or utility room. Knowing the location of this valve is crucial in case of emergencies and for routine maintenance tasks like removing compression fittings.

Shut Off the Water Supply: Turn the valve clockwise to close it. This action stops the flow of water into your home, ensuring no water will escape when you start working on the compression fitting.

Drain Remaining Water: Open a faucet at the lowest point in your house to drain any remaining water in the system. This step helps to relieve pressure and prevents water from spilling out when you disconnect the compression fitting. It’s also advisable to open a faucet at a higher level to allow air to enter the system and ensure all water drains out completely.

Hydraulic Systems:

Turn Off the Power to the Pump: Begin by turning off the power supply to the hydraulic pump. This prevents any unintentional operation of the pump while you are working on the system.

Open a Pressure Release Valve: Locate and open the pressure release valve to depressurize the system. This step is crucial to avoid any sudden release of pressurized fluid, which can be dangerous.

Drain the Fluid: Allow the hydraulic fluid to drain into a suitable container. Ensure the container is large enough to hold all the fluid and is made of a material that is compatible with the fluid to avoid any chemical reactions. Follow the manufacturer’s instructions for safe disposal of the hydraulic fluid.

Undo Compression Fitting

Loosen the Compression Nut
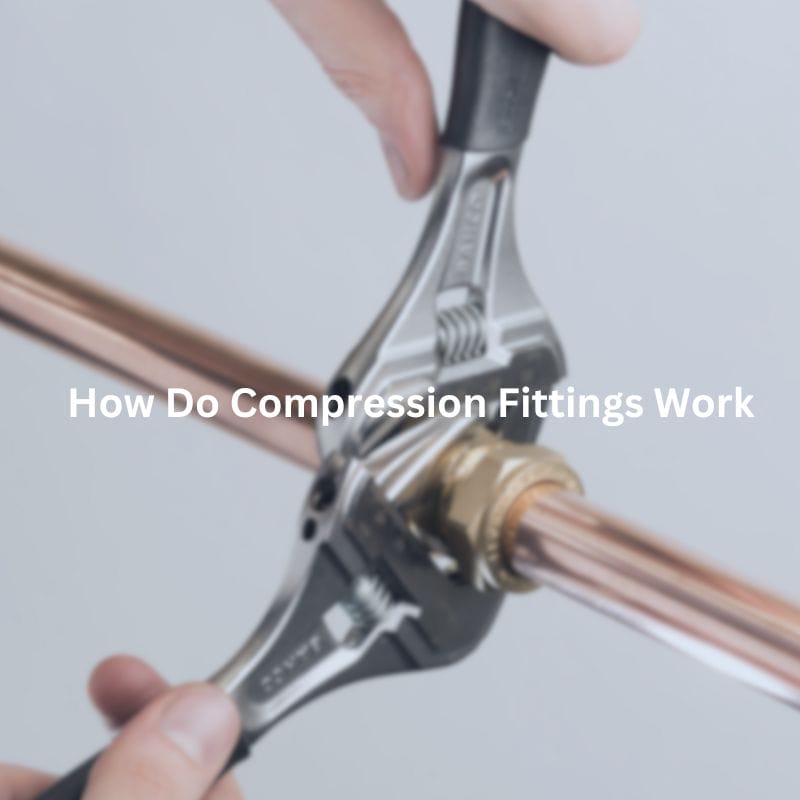
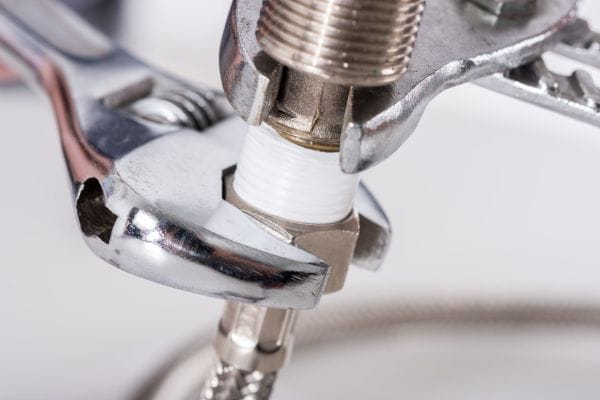
Using a Wrench:

Select the Appropriate Size Wrench: Use a wrench that fits snugly around the compression nut to avoid slipping and rounding off the edges of the nut.

Position the Wrench on the Nut: Place the wrench on the compression nut and make sure it is securely in place.

Turn Counterclockwise to Loosen: Apply steady pressure to turn the wrench counterclockwise. It may require some effort, especially if the fitting has been in place for a long time.

Prevent the Fitting Body from Turning: Use a second wrench to hold the fitting body steady. This prevents the entire fitting from turning, which could twist and damage the connected pipes.

Dealing with Stubborn Nuts:

Apply Penetrating Oil: If the nut is difficult to loosen, apply a penetrating oil around the threads. Allow the oil to sit for a few minutes to penetrate and break down any corrosion or debris.

Use Gentle but Firm Pressure: When reattempting to loosen the nut, apply gentle but firm pressure. Avoid using excessive force, which could strip the nut or damage the fitting.

Tapping the Wrench: Lightly tap the wrench with a hammer to help break the nut free. This technique can be useful for loosening stubborn nuts without applying too much force.

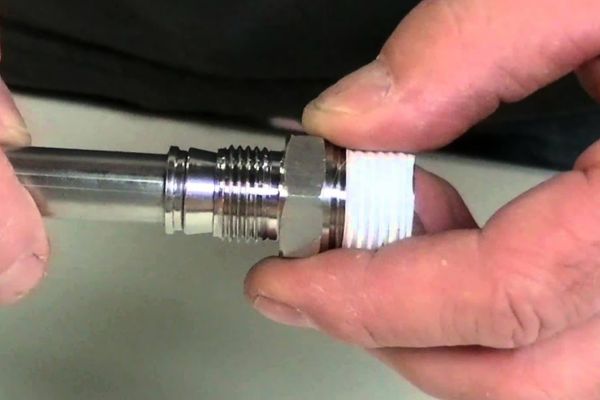
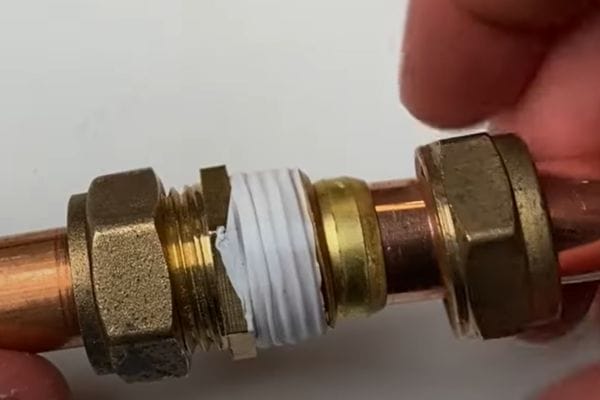
Remove the Compression Nut and Ferrule

Continue Turning the Nut by Hand: Once the nut is loosened, continue turning it by hand to remove it completely. This allows you to control the process and prevent damage.

Slide the Nut and Ferrule Off the Pipe: Carefully slide the compression nut and ferrule off the pipe. If the ferrule is stuck, gently twist it back and forth while pulling it off the pipe. Be patient to avoid damaging the pipe.

Use Pliers if Necessary: If the ferrule is particularly stubborn, you can use a pair of pliers to gently grip and twist it off. Be cautious not to apply too much pressure, which could deform the pipe.

Remove the Pipe from the Fitting

Detaching the Pipe:

Gently Pull the Pipe Out: With the nut and ferrule removed, carefully pull the pipe out of the fitting body.

Use a Twisting Motion: If the pipe is difficult to remove, use a gentle twisting motion while pulling. This can help break any remaining seal and make the removal easier.

Check for Obstructions: Ensure no obstructions or debris inside the fitting could be causing difficulty in removing the pipe.

Inspect the Removed Components

Inspecting for Damage or Wear:

Examine the Compression Nut: Look for any signs of damage, such as cracks or stripped threads. A damaged nut should be replaced to ensure a secure connection when reassembling.

Inspect the Ferrule: Check the Ferrule for any signs of wear, deformation, or corrosion. A worn or damaged ferrule will not create a proper seal and should be replaced.

Check the Fitting Body: Inspect the fitting body for any signs of damage or corrosion. Ensure the seating area where the ferrule sits is clean and smooth.

Examine the Pipe: Look for any cracks, deformities, or signs of wear on the pipe. If the pipe is damaged, it may need to be cut back or replaced before reassembly.

Troubleshooting Common Issues

Stuck Compression Nuts

Apply Penetrating Oil: One of the most effective methods for loosening a stuck compression nut is to use a penetrating oil. Apply the oil generously around the threads of the nut and let it sit for at least 10-15 minutes. This helps to break down any rust or debris that might be causing the nut to stick.

Use Heat: Applying heat can expand the metal and help break the bond. Use a heat gun or a propane torch to heat the nut gently. Be cautious not to overheat and damage surrounding materials. Heat the nut for a few minutes and then try loosening it again with a wrench.

Tapping the Nut: Lightly tapping the nut with a hammer can help to loosen it. This can break the rust or debris holding it in place. Tap around the nut and then try to turn it with a wrench.

Using a Cheater Bar: A cheater bar is an extension added to a wrench to increase leverage. Attach the cheater bar to your wrench and apply steady pressure to turn the nut. This additional leverage can often provide the extra force needed to loosen a stuck nut.

Cutting the Nut: As a last resort, you can use a hacksaw or a rotary tool with a cutting disc to carefully cut through the nut. Make sure to avoid damaging the pipe. Once the nut is cut, it should come off easily.

Compression Fitting Leaking Causes

Damaged Pipes

Assess the Damage: Inspect the pipe thoroughly to determine the extent of the damage. Look for cracks, dents, or bends that could affect the pipe’s integrity.

Cutting the Pipe: If the damage is localized, use a pipe cutter to remove the damaged section. Ensure the cut is clean and straight. Measure and mark the pipe before cutting to avoid removing more than necessary.

Smoothing Edges: After cutting the pipe, use a deburring tool or sandpaper to smooth the edges. This prevents rough edges from damaging the new fitting and ensures a proper seal.

Using Repair Sleeves: For small cracks or holes, you can use a pipe repair sleeve or clamp. These are designed to provide a temporary or permanent fix by clamping over the damaged area and sealing it.

Replacing the Pipe: In cases of extensive damage, it might be necessary to replace the entire section of the pipe. Measure and cut a new piece of pipe to the required length and install it using appropriate fittings.

Corroded Fittings

Cleaning Corroded Fittings: For minor corrosion, use a wire brush to clean the fitting. Scrub away the rust and debris until the metal surface is clean. For more stubborn corrosion, use a rust remover or soak the fitting in a vinegar solution.

Applying Anti-Seize Compound: After cleaning, apply an anti-seize compound to the threads of the fitting. This helps to prevent future corrosion and makes it easier to remove the fitting in the future.

Using Corrosion-Resistant Materials: Consider replacing corroded fittings with ones made of corrosion-resistant materials, such as brass or stainless steel. These materials are more durable and less likely to corrode.

Protective Coatings: Apply a protective coating or sealant to the fitting to prevent moisture and air from reaching the metal surface. Products like pipe sealant or plumber’s tape can help protect the fitting from corrosion.

Regular Maintenance: Inspect your fittings regularly for signs of corrosion. Clean and apply anti-seize compound periodically to maintain their condition. Regular maintenance helps to catch and address corrosion issues early before they become significant problems.

By addressing these common issues with compression fittings, you can ensure that your plumbing or hydraulic system remains reliable and efficient. Taking the time to properly troubleshoot and maintain your fittings helps to prevent leaks, reduce downtime, and extend the lifespan of your system.

Conclusion

In summary, this guide has provided detailed steps on safely and effectively removing compression fittings, including turning off the water supply or depressurizing the system, loosening the compression nut, removing the nut and ferrule, detaching the pipe, and inspecting the removed components. Proper removal techniques are crucial to avoid damage to your pipes and fittings, ensuring the integrity and longevity of your system. We encourage you to share your experiences, ask any questions you may have, or seek professional help if needed to ensure the best results in your plumbing or hydraulic projects.

FAQ

A compression fitting is a type of coupling used to connect two pipes or a pipe to a fixture without the need for soldering, consisting of a nut, ferrule, and fitting body.

Signs that a compression fitting may need to be removed include leaks, visible corrosion, or damage to the fitting or connected pipes.

Essential tools include two wrenches (one for the nut and one for the fitting body), penetrating oil, a pipe cutter, and safety gear such as gloves and safety glasses.

While the compression nut and fitting body can often be reused if undamaged, the ferrule is typically not reusable and should be replaced to ensure a proper seal.

Apply penetrating oil and let it sit for a few minutes, use heat to expand the metal, or gently tap the nut with a hammer. As a last resort, you can carefully cut the nut.

Regularly inspect and clean fittings, apply anti-seize compound, use corrosion-resistant materials like brass or stainless steel, and apply protective coatings to prevent moisture and air from reaching the metal surface.

How Do Compression Fittings Work

How Do Compression Fittings Work

How Do Compression Fittings Work?

Introduction

Hydraulic compression fittings consist of three main parts: the compression nut, the compression ring (also known as the ferrule), and the compression fitting body. When tightened, the ferrule compresses against the pipe or tube, forming a tight seal. This mechanism is widely used in plumbing, gas lines, hydraulic systems, and automotive applications due to its simplicity and effectiveness. The purpose of this article is to educate readers on the intricacies of compression fittings, including how they work, the different types available, and their diverse applications. By understanding the working mechanism, types, and applications of compression fittings, readers can make informed decisions and ensure the optimal performance of their piping systems.

What are Compression Fittings?

Compression fittings are essential components in piping and tubing systems, designed to create secure, leak-proof connections without the need for soldering, welding, or other complex joining methods. These fittings are known for their reliability and ease of installation, making them indispensable in various industries. Commonly used in plumbing, gas lines, hydraulic systems, and other applications, compression fittings are ideal where quick and reliable connections are required.

These fittings work by compressing a ferrule, also known as an olive, onto the pipe or tube to create a tight seal. The process involves tightening a compression nut, which presses the ferrule against the fitting body, securing the pipe or tube in place.

Components of Compression Fittings

Ferrule:

The ferrule, a small ring typically made of metal or plastic, is a crucial component of compression fittings. It fits around the pipe or tube and is essential for creating a tight seal. When the compression nut is tightened, the ferrule is compressed against the pipe or tube, deforming slightly to grip it securely and prevent leaks. Ferrules are available in various materials and designs, including single and double ferrule types, each offering different levels of sealing efficiency and suitability for specific applications.

Compression Nut:

The compression nut is a threaded component that screws onto the body of the fitting. Its primary role is to compress the ferrule onto the pipe or tube, ensuring a secure connection. The nut must be tightened to the correct torque to achieve a leak-proof seal without damaging the ferrule or the pipe. This component is usually made of the same material as the fitting body to ensure compatibility and durability.

Compression Fitting Body:

The body of the compression fitting is the main component that connects to the pipe or tube. It has a seat where the ferrule and pipe/tube are positioned and threaded to accommodate the compression nut. The fitting body is designed to support the components and facilitate the compression process. It also provides a pathway for the fluid or gas being transported, ensuring smooth flow and minimal resistance.

Compression tractor hydraulic fitting adapters supplier in china

Materials Used in Compression Fittings

Brass:

Brass compression fittings are widely used due to their durability, corrosion resistance, and suitability for both hot and cold water systems. Brass is an alloy of copper and zinc, offering excellent strength and malleability. These fittings are commonly used in plumbing and heating applications because they can withstand high temperatures and pressures. Additionally, brass fittings are easy to work with and provide a reliable, long-lasting connection.

Stainless Steel:

Stainless steel fittings offer excellent strength and corrosion resistance, making them ideal for high-pressure and high-temperature applications. Stainless steel is an alloy of iron, chromium, and other elements, providing exceptional durability and resistance to oxidation and rust. These fittings are often used in chemical processing, food and beverage production, and marine environments where exposure to corrosive substances is common. Stainless steel fittings are known for their longevity and ability to maintain a secure seal under extreme conditions.

Plastic:

Plastic compression fittings are lightweight and resistant to chemicals, often used in applications where metal fittings are unsuitable. These fittings are typically made from high-performance plastics such as polyethylene (PE), polyvinyl chloride (PVC), or polybutylene (PB). Plastic fittings are ideal for use in irrigation systems, water treatment facilities, and chemical transport lines due to their resistance to corrosion and chemical degradation. They are also easy to install and require minimal maintenance.

How Do Compression Fittings Work?

Compression fittings are a simple yet effective solution for creating secure, leak-proof connections in various piping and tubing systems. They work by compressing a ferrule onto the pipe or tube to form a tight seal. This mechanism involves three main components: the ferrule, the compression nut, and the fitting body. When properly assembled and tightened, these components work together to ensure a durable and reliable connection.

Explanation of the Working Mechanism

Compression fittings operate based on the principle of compressing a ferrule, which is placed around the pipe or tube. The compression nut is then tightened onto the fitting body, squeezing the ferrule and causing it to deform slightly. This deformation allows the ferrule to grip the pipe or tube securely, creating a seal that prevents fluids or gases from leaking. The effectiveness of this mechanism depends on the precise alignment and tightening of the components, ensuring a snug fit and a leak-proof connection.

How the Ferrule Compresses to Create a Seal

The ferrule, a small ring usually made of metal or plastic, plays a crucial role in creating the seal. When the compression nut is tightened, it presses the ferrule against the fitting body and the pipe or tube. This compression forces the ferrule to deform slightly, gripping the pipe or tube tightly. The deformation of the ferrule creates a barrier that prevents fluids or gases from escaping, ensuring a leak-proof seal. The material and design of the ferrule are critical factors in its ability to create an effective seal, with different materials offering varying levels of flexibility and strength.

Role of the Compression Nut

The compression nut is the component that applies the necessary force to the ferrule to create the seal. As the nut is tightened, it pushes the ferrule against the fitting body, compressing it onto the pipe or tube. The amount of force applied by the compression nut must be sufficient to create a secure seal without damaging the components. Over-tightening can cause the ferrule to deform excessively or even damage the pipe or tube, compromising the integrity of the connection. Therefore, it is essential to follow the manufacturer’s recommendations for tightening the compression nut to achieve the optimal seal.

Compression Connections Topa

How the Fitting Body Integrates the Components

The fitting body provides the structure and alignment needed for the connection. It has a seat where the ferrule and pipe or tube are positioned, and it is threaded to accommodate the compression nut. The fitting body ensures that the ferrule is properly aligned and compressed, allowing it to create an effective seal. Additionally, the fitting body provides a pathway for the fluid or gas being transported, ensuring smooth flow and minimal resistance. The design of the fitting body, including the material and threading, is critical to the overall performance of the compression fitting.

Step-by-Step Process of Installation

Preparing the Pipe/Tube:

Cut the pipe or tube to the required length: Use a pipe cutter or saw to ensure a clean, square cut. A clean cut is essential for creating a reliable seal.

Deburr the cut ends: Use a deburring tool or file to remove any sharp edges or debris from the cut ends of the pipe or tube. This step is crucial to prevent damage to the ferrule and ensure a smooth, tight seal.

Assembling the Components:

Slide the compression nut onto the pipe or tube: Ensure the threaded side of the nut faces the end of the pipe or tube.

Place the ferrule onto the pipe or tube: Position the ferrule close to the end of the pipe or tube.

Insert the pipe or tube into the fitting body: Push the pipe or tube into the fitting body until it sits firmly against the internal stop. Ensure that the ferrule and compression nut are properly aligned with the fitting body.

Tightening the Nut:

Hand-tighten the compression nut onto the fitting body: Start by hand-tightening the nut to ensure proper alignment of the components.

Use a wrench to tighten the nut further: Typically, this involves one to one and a half additional turns, depending on the manufacturer’s recommendations. Use two wrenches if necessary—one to hold the fitting body and one to tighten the nut.

Avoid over-tightening: Over-tightening can damage the ferrule, pipe, or tube and compromise the seal. Follow the manufacturer’s guidelines for the correct amount of torque.

Types of Compression Fittings

Compression fittings come in various types, each designed to meet specific needs and applications. Understanding the differences between these types can help users select the appropriate fitting for their specific requirements.

Standard Compression Fittings

Standard compression fittings are the most commonly used type of compression fittings. They consist of a compression nut, a ferrule (or ferrules), and a fitting body. These fittings are versatile and can be used with various piping and tubing materials, including copper, plastic, and metal.

Single Ferrule vs Double Ferrule:

Single Ferrule:

Single ferrule compression fittings use one ferrule to create a seal. The ferrule is compressed between the nut and the fitting body, deforming to grip the pipe or tube securely. Single ferrule fittings are simpler and generally easier to install but may not provide as secure a seal as double ferrule fittings in high-pressure applications.

Double Ferrule:

Double ferrule compression fittings use two ferrules: a front ferrule and a back ferrule. The front ferrule provides a tight seal by deforming against the pipe or tube, while the back ferrule grips the pipe or tube securely. This two-ferrule system ensures a more reliable seal and better performance in high-pressure and high-vibration applications. Double ferrule fittings are commonly used in industrial and instrumentation applications where reliability is crucial.

Flare Compression Fittings

Flare compression fittings are designed for use with metal tubing, such as copper and aluminum. These fittings require the end of the tubing to be flared out using a flaring tool before assembly. The flared end of the tubing fits into the fitting body, and the compression nut is tightened to secure the connection.

Usage and Advantages:

Usage:

Flare compression fittings are widely used in gas and fuel lines, refrigeration, and air conditioning systems. They are suitable for high-pressure applications and environments where a robust and leak-proof connection is essential.

Advantages:

Flare fittings provide a strong and durable connection that can withstand high pressures and vibrations. The flared end of the tubing creates a large sealing surface, ensuring a reliable seal. These fittings are also reusable, making them an economical choice for applications where disassembly and reassembly may be required

Tips for Proper Installation and Maintenance

Proper installation and maintenance of compression fittings are crucial to ensuring their performance and longevity. Here are some best practices and tips to follow:

Best Practices for Installation

Ensuring Clean Cuts on Pipes/Tubes:

Clean, Square Cuts: Use a pipe cutter or a fine-toothed saw to make clean, square cuts on the pipes or tubes. This ensures that the ends fit properly into the fitting body, which is essential for a good seal.

Deburring: After cutting, remove any burrs or sharp edges using a deburring tool. Burrs can damage the ferrule and compromise the seal.

Avoiding Over-Tightening:

Hand Tightening First: Initially, hand-tighten the compression nut to ensure the components are properly aligned.

Use a Wrench Correctly: Tighten the nut further with a wrench, typically one to one and a half additional turns. Avoid over-tightening, as this can deform the ferrule or damage the pipe, leading to leaks or failures.

Hydraulic Compression Fitting teflon tape

Regular Maintenance Tips

Periodic Inspections:

Visual Checks: Regularly inspect compression fittings for any signs of wear, corrosion, or leaks. Look for moisture, rust, or discoloration around the fittings.

Functional Tests: Periodically test the system under operational conditions to ensure there are no leaks or performance issues.

Identifying Signs of Wear or Damage:

Wear and Tear: Look for signs of wear such as cracks, deformities, or corrosion on the fittings. The presence of these signs indicates that the fittings may need to be replaced.

Leaks: Even small drips or moisture around the fitting can indicate a problem. Address leaks immediately to prevent more significant issues.

Replacing Components as Needed:

Timely Replacement: Replace any worn or damaged components promptly to maintain the integrity of the system. This includes the ferrule, compression nut, or the entire fitting if necessary.

Using Correct Parts: Always use the correct replacement parts specified by the manufacturer to ensure compatibility and performance.

Troubleshooting Common Issues

Identifying and Fixing Leaks

Causes and Solutions:

Improper Installation: One common cause of leaks is improper installation. Ensure that the pipe or tube is fully inserted into the fitting body and that the ferrule is correctly positioned.

Damaged Components: Leaks can also result from damaged ferrules or compression nuts. Inspect these components and replace them if they are damaged.

Over-Tightening or Under-Tightening: Adjust the tightness of the compression nut if it is too loose or too tight. Refer to the manufacturer’s guidelines for the correct torque.

Dealing with Stuck or Seized Fittings

Safe Removal Techniques:

Lubricants: Apply a penetrating oil or lubricant to the threads of the compression nut. Allow it to sit for a few minutes to loosen any corrosion or debris.

Proper Tools: Use the correct tools, such as two adjustable wrenches, to avoid damaging the fitting or the pipe. One wrench should hold the fitting body while the other loosens the compression nut.

Gentle Heating: If the fitting is still stuck, apply gentle heat using a heat gun to expand the metal slightly. Be cautious to avoid overheating and damaging the fitting.

Ensuring Long-Term Reliability

Preventive Measures:

Regular Maintenance: Schedule regular maintenance checks to identify and address potential issues before they become significant problems.

Use Quality Components: Invest in high-quality compression fittings and components that meet or exceed industry standards. This ensures better performance and durability.

Proper Installation: Always follow best practices and manufacturer’s guidelines during installation to prevent issues caused by improper installation.

Conclusion

Compression fittings are indispensable components in a variety of piping and tubing systems, offering secure, leak-proof connections without the need for soldering or welding. Understanding the nuances of compression fittings is crucial for anyone working with piping systems, as it ensures proper selection, installation, and maintenance, thereby preventing leaks and ensuring system integrity.

FAQ

Compression fittings are used to create secure, leak-proof connections in piping and tubing systems without the need for soldering, welding, or other complex joining methods. They are commonly used in plumbing, gas lines, hydraulic systems, and various industrial applications.

Compression fittings work by compressing a ferrule onto the pipe or tube to create a tight seal. When the compression nut is tightened, it squeezes the ferrule against the fitting body and the pipe or tube, forming a secure, leak-proof connection.

Compression fittings are typically made from materials such as brass, stainless steel, and plastic. Brass is durable and corrosion-resistant, stainless steel offers excellent strength and high-temperature resistance, and plastic fittings are lightweight and resistant to chemicals.

To install a compression fitting, first cut the pipe or tube to the required length and deburr the ends. Slide the compression nut and ferrule onto the pipe or tube, then insert it into the fitting body. Hand-tighten the nut, and then use a wrench to tighten it further, typically one to one and a half additional turns.

A compression fitting is properly tightened when the compression nut is secured enough to create a leak-proof seal but not over-tightened to the point of damaging the ferrule or the pipe. Follow the manufacturer’s guidelines for the correct torque or number of turns.

Regular inspections and maintenance are recommended to ensure the longevity and effectiveness of compression fittings. Periodic visual checks for signs of wear, corrosion, or leaks, and functional tests under operational conditions should be conducted. Replace any worn or damaged components as needed.


How to Install Compression Fitting on Plastic Tubing

How to Install Compression Fitting on Plastic Tubing

How to Install Compression Fitting on Plastic Tubing

Introduction

Compression fittings are essential components used across various industries, including hydraulic systems, plumbing, and more, to create secure, leak-free connections between different sections of tubing or piping. Proper installation of compression fittings is crucial for ensuring optimal performance and longevity of the system, as incorrect installation can lead to leaks, system inefficiencies, and potential failures. This post aims to provide a comprehensive, step-by-step guide on installing compression fittings on plastic tubing.

Preparing the Plastic Tubing

Selecting the Right Tubing

Choosing the correct type of plastic tubing is crucial for ensuring a successful installation of compression fittings. There are several types of plastic tubing commonly used in hydraulic and plumbing applications, including PVC (polyvinyl chloride), PEX (cross-linked polyethylene), and PE (polyethylene). Each type of tubing has its unique properties and advantages. For instance, PVC tubing is known for its rigidity and durability, making it suitable for high-pressure applications. PEX tubing is flexible and resistant to freezing, which is ideal for both hot and cold water supply lines. PE tubing is lightweight and flexible, often used in low-pressure applications such as irrigation systems.

It’s essential to match the tubing diameter with the fitting size to ensure a secure and leak-free connection. Using the wrong diameter can lead to improper fitting installation, which may cause leaks or system failures. Always refer to the manufacturer’s specifications to confirm the correct tubing size for your specific fittings.

Cutting the Tubing

Once you have selected the appropriate tubing, the next step is to cut it to the required length. Accurate measurement is key to ensuring that the tubing fits perfectly within the system without any excess or shortage. Use a measuring tape to determine the precise length needed, and mark the cut point with a marker.

For cutting the tubing, a pipe cutter is the best tool as it provides a clean, straight cut without deforming the tubing. Place the tubing in the pipe cutter and rotate the cutter around the tubing, tightening it gradually until the tubing is cut through. A clean cut is essential for ensuring a proper fit with the compression fitting, as any irregularities can compromise the connection.

Deburring the Edges

After cutting the tubing, it’s important to remove any burrs or rough edges left on the cut end. Burrs can hinder the fitting installation and potentially cause leaks. Using a deburring tool or a utility knife, carefully remove any burrs from the inner and outer edges of the tubing. This step ensures that the tubing will fit smoothly into the compression fitting without causing damage to the fitting components.

Properly deburred edges contribute to a secure and reliable connection, preventing potential issues that may arise from rough or uneven surfaces. Taking the time to prepare the tubing correctly will ultimately enhance the performance and longevity of your compression fitting installation.

By following these steps—selecting the right tubing, cutting it accurately, and deburring the edges—you’ll ensure that your plastic tubing is well-prepared for the installation of compression fittings, leading to a durable and efficient system.

Step-by-Step Installation Process

Slide the Nut and Ferrule onto the Tubing

The first step in the installation process is to correctly position the components of the compression fitting onto the tubing. Begin by sliding the compression nut onto the end of the plastic tubing. Ensure the nut’s threads are facing the open end of the tubing. Following the nut, slide the ferrule (also known as the olive) onto the tubing. The ferrule is typically a small, ring-like component that plays a critical role in creating a tight seal when compressed. Make sure the ferrule is oriented correctly according to the manufacturer’s instructions, usually with its tapered end facing towards the fitting body.

Insert the Tubing into the Fitting Body

Next, insert the prepared end of the plastic tubing into the compression fitting body. It’s crucial to push the tubing all the way into the fitting until it bottoms out. A properly seated tubing ensures that the ferrule can effectively create a seal around the tubing when compressed. Verify that the tubing is straight and aligned correctly with the fitting body to prevent any misalignment that could lead to leaks or weak connections. Double-check to ensure the ferrule and nut remain in their correct positions during this process.

Compression Fitting on Plastic Tubing

Tighten the Nut

With the tubing fully seated in the fitting body, begin tightening the compression nut. Start by hand-tightening the nut to bring the components together and ensure they are aligned correctly. Hand-tightening helps to snug the nut against the ferrule and the fitting body without cross-threading or misalignment.

Once the nut is hand-tight, use a wrench to continue tightening the nut. Hold the fitting body steady with another wrench to prevent it from turning. Gradually tighten the nut in small increments, ensuring even pressure is applied around the ferrule. It is important not to over-tighten the nut, as excessive force can deform the ferrule or damage the tubing, leading to potential leaks or failure of the fitting. Generally, turning the nut an additional one-half to three-quarters of a turn with the wrench after hand-tightening is sufficient, but always refer to the manufacturer’s guidelines for the exact amount of tightening required.

By following these steps carefully—sliding the nut and ferrule onto the tubing, inserting the tubing fully into the fitting body, and properly tightening the nut—you will achieve a secure and leak-free connection. Proper technique in each step ensures the longevity and reliability of your compression fitting installation, essential for maintaining the integrity of the hydraulic or plumbing system.

Testing the Connection

Visual Inspection

After completing the installation of the compression fitting, the first step in testing the connection is a thorough visual inspection. Check the alignment of the tubing with the fitting to ensure it is straight and fully seated in the fitting body. Inspect the nut and ferrule to confirm they are correctly positioned and tightened appropriately. Look for any signs of stress or deformation on the tubing and fitting components. Ensuring proper alignment and tightness at this stage can help prevent potential issues when the system is pressurized.

Leak Testing

Once the visual inspection is complete, proceed with leak testing to verify the integrity of the connection. There are several methods to test for leaks, each suitable for different applications and levels of pressure.

Pressure Test

For systems that will operate under pressure, perform a pressure test by gradually introducing pressure into the system. Monitor the pressure gauge to ensure it maintains the desired pressure level without any drop, which would indicate a leak. Allow the system to remain pressurized for a specific period, as recommended by the manufacturer, to confirm the stability of the connection.

Soapy Water Test

For a quick and effective method to detect leaks, use a soapy water solution. Apply the soapy water around the connection, particularly at the junction of the tubing and fitting. Look for bubbles forming, which would indicate escaping air or fluid from a leak. This method is especially useful for low-pressure applications or preliminary leak detection.

Compression Fitting Leaking rust

Troubleshooting Common Issues

If leaks are detected during the testing phase, it is essential to identify the source and address the issue promptly to ensure a secure connection.

Identifying Leaks:

Carefully inspect the fitting and tubing to locate the exact point of the leak. Leaks can occur due to several reasons, such as improper seating of the tubing, misalignment, or inadequate tightening of the nut.

Re-tightening:

If the leak is minor, it may be resolved by re-tightening the compression nut. Use a wrench to tighten the nut gradually, applying additional torque in small increments. Be cautious not to over-tighten, as this can damage the ferrule or tubing.

Re-installing:

For persistent leaks or significant issues, disassemble the fitting and inspect the components for any defects or damage. Ensure the tubing is cut cleanly and deburred correctly. Re-install the fitting, following the step-by-step installation process to achieve a proper connection. Sometimes replacing the ferrule or nut may be necessary if they are damaged or deformed.

Tips for Ensuring a Secure Connection

Proper Alignment

Ensuring proper alignment of the tubing is critical for a secure and leak-free connection. When installing the compression fitting, make sure the tubing is straight and properly seated within the fitting body. Misalignment can cause the ferrule to compress unevenly, leading to an inadequate seal and potential leaks. To achieve proper alignment:

Check the Tubing: Before installation, inspect the tubing for any bends or warping. Straighten the tubing if necessary to ensure it fits snugly into the fitting body.

Insert Fully: Push the tubing into the fitting until it bottoms out. This ensures that the ferrule can properly compress around the tubing to create a tight seal.

Hold Steady: During tightening, hold the fitting body steady with a wrench to prevent it from turning and causing misalignment.

Avoiding Over-tightening

Over-tightening the compression nut is a common mistake that can damage the fitting components and tubing, leading to leaks and connection failures. The goal is to apply just enough force to compress the ferrule and create a seal without deforming the tubing or the fitting. To avoid over-tightening:

Initial Hand-Tightening: Start by hand-tightening the nut to bring the components together and ensure they are correctly aligned.

Use a Wrench: Use a wrench to tighten the nut further, typically an additional one-half to three-quarters of a turn after hand-tightening. This provides enough compression to seal the ferrule without over-stressing the components.

Follow Manufacturer’s Guidelines: Always refer to the manufacturer’s instructions for the recommended amount of torque. Different fittings and tubing materials may require specific tightening procedures.

Check for Resistance: During tightening, if you feel excessive resistance or the nut becomes very difficult to turn, stop and check the installation. Excessive force can indicate over-tightening.

Regular Maintenance

Periodic inspection and maintenance of compression fittings are essential to ensure their continued performance and prevent potential issues. Regular maintenance involves:

Visual Inspections: Routinely check the fittings and tubing for signs of wear, corrosion, or damage. Look for any indications of leaks, such as moisture or discoloration around the fittings.

Tightness Check: Periodically check the tightness of the compression nuts. Over time, temperature fluctuations and vibrations can cause fittings to loosen. Re-tighten the nuts if necessary, following the recommended procedures to avoid over-tightening.

Replace Worn Components: If any components, such as the ferrule or tubing, show signs of wear or damage, replace them promptly. Using worn or damaged parts can compromise the integrity of the connection.

Advanced Installation Techniques

Using Thread Seal Tape

Thread seal tape, also known as PTFE tape or plumber’s tape, is commonly used to ensure a tight seal in threaded connections. While compression fittings typically do not require thread seal tape because the ferrule creates the seal, there are instances where it can be beneficial:

When to Use: Use thread seal tape on the male threads of the compression fitting if you are connecting it to a threaded component, such as a valve or adapter, to prevent leaks at the threaded connection point.

How to Use: Wrap the tape around the male threads in the direction of the thread spiral (usually clockwise). Apply 2-3 layers of tape, ensuring it covers the threads evenly without overlapping too much. Smooth the tape with your fingers to ensure it adheres well to the threads before screwing the fitting into place.

Hydraulic Compression Fitting teflon tape

Multiple Fittings in a System

When installing and aligning multiple fittings in a hydraulic system, maintaining proper alignment and avoiding cross-threading are crucial for system integrity:

Planning the Layout: Plan the layout of the system to ensure that all tubing runs are as straight and direct as possible, minimizing bends and turns.

Sequential Installation: Install fittings sequentially, starting from one end of the system and working towards the other. This helps in maintaining alignment and prevents any misalignment issues.

Alignment Tools: Use alignment tools or fixtures to hold the fittings and tubing in place during installation. This ensures that all components are aligned correctly before tightening the nuts.

Handling Different Plastic Tubing Materials

Different types of plastic tubing have unique characteristics that require specific handling during installation:

PVC Tubing: PVC is rigid and can be prone to cracking if not cut and deburred properly. Use a sharp pipe cutter and ensure the edges are smooth. Avoid excessive bending, which can stress the material.

PEX Tubing: PEX is flexible and can be bent around corners without the need for elbows or fittings. Ensure the tubing is straightened out where it connects to the fittings. PEX can be expanded or compressed, so use the appropriate tools for the type of PEX you are using.

PE Tubing: PE tubing is lightweight and flexible, suitable for low-pressure applications. Ensure that PE tubing is properly supported to prevent sagging. Cut the tubing cleanly and use a deburring tool to smooth the edges.

Conclusion

In summary, installing compression fittings on plastic tubing involves careful preparation, precise cutting, proper alignment, and thorough testing to ensure a secure and leak-free connection. By following the step-by-step guide, including the selection of the right tubing, correct placement of the nut and ferrule, and mindful tightening of the nut, you can achieve reliable and durable fittings. Feel free to leave comments or reach out for further clarification and assistance.

FAQ

Compression fittings are compatible with various types of plastic tubing, including PVC (polyvinyl chloride), PEX (cross-linked polyethylene), and PE (polyethylene). Always ensure the tubing type matches the specifications of the fitting.

Thread seal tape is generally not required for the compression part of the fitting. However, it can be used on the male threads if the compression fitting is being connected to another threaded component to ensure a tight seal.

After hand-tightening the nut, use a wrench to give it an additional one-half to three-quarters of a turn. Be careful not to over-tighten, as this can damage the ferrule or tubing.

If you notice a leak, first try tightening the compression nut slightly more. If the leak persists, disassemble the fitting, inspect for damage, and ensure the tubing is cut cleanly and properly deburred before reassembling.

Make sure the tubing is straight and fully seated in the fitting body. Hold the fitting body steady with a wrench while tightening the nut to maintain proper alignment and prevent misalignment.

Regular maintenance is important. Perform visual inspections periodically, checking for signs of wear, corrosion, or leaks. Ensure that the fittings remain tight and replace any components showing signs of damage or wear.

Compression Fitting Leaking Causes and Solutions

Compression Fitting Leaking: Causes and Solutions

Compression Fitting Leaking: Causes and Solutions

Table of Contents

Introduction

Compression fittings are essential components used in various piping and tubing systems to connect two pipes or tubes. These fittings are widely valued for their ability to create a secure, leak-free seal without the need for welding, soldering, or other complex joining methods. This article aims to shed light on the common causes of leaks in compression fittings and provide practical solutions to address these issues. By exploring the typical reasons for leaks and offering actionable solutions, this article will equip you with the knowledge to maintain and troubleshoot your compression fittings effectively.

What are Compression Fittings?

Compression fittings are mechanical components used to connect two pipes or tubes, ensuring a secure and leak-proof joint. They are commonly used in plumbing, gas lines, hydraulic systems, and various other applications requiring a reliable connection. Compression fittings work by compressing a ferrule (a ring or sleeve) onto the pipe or tube as the fitting is tightened. This compression creates a tight seal between the fitting, the ferrule, and the pipe or tube, preventing leaks. The typical compression fitting consists of three parts: the compression nut, the compression ring (ferrule), and the compression seat. When the nut is tightened, it forces the ferrule against the pipe and the fitting body, creating a seal that is both strong and flexible enough to handle slight misalignments and vibrations in the system.

Types of Compression Fittings

Single Ferrule Fittings

Single ferrule fittings, as the name suggests, utilize one ferrule to create the seal. These fittings are simpler in design and easier to install, making them suitable for applications where ease of use is a priority. The single ferrule compresses directly onto the pipe, forming a seal that is typically sufficient for low to moderate-pressure applications. They are commonly used in residential plumbing and low-pressure industrial systems.

Double Ferrule Fittings

Double ferrule fittings use two ferrules to create the seal: a front ferrule and a back ferrule. The front ferrule creates a seal with the fitting body and the pipe, while the back ferrule grips the pipe, ensuring a secure connection. This design provides a more robust and reliable seal, making double ferrule fittings ideal for high-pressure and high-vibration environments. They are often found in hydraulic systems, chemical processing plants, and other demanding industrial applications.

Common Causes of Compression Fitting Leaking

Improper Installation

Incorrect Tightening

One of the most common causes of leaks in compression fittings is improper tightening. If the fitting is not tightened enough, it can lead to insufficient compression of the ferrule, resulting in a weak seal and potential leaks. Conversely, over-tightening can damage the ferrule or deform the pipe, compromising the integrity of the seal. Achieving the correct level of tightness is crucial, typically following the manufacturer’s guidelines to ensure a secure, leak-proof connection.

Misalignment of the Fitting

Another frequent issue is the misalignment of the fitting during installation. If the pipe and fitting are not properly aligned, the ferrule may not seat correctly, leading to an uneven seal. This misalignment can cause leaks even if the fitting is otherwise correctly tightened. Ensuring that the pipe and fitting are perfectly aligned before tightening is essential to prevent this type of leak.

Wear and Tear

Aging of Materials

Over time, the materials used in compression fittings can degrade, especially if they are exposed to harsh conditions. Aging can cause the ferrules to lose their ability to compress effectively, leading to leaks. Regular inspection and timely replacement of old or worn fittings are necessary to maintain a leak-free system.

Exposure to Harsh Environments

Compression fittings that are exposed to extreme temperatures, corrosive substances, or other harsh environmental conditions can deteriorate faster than those in more benign environments. Corrosion, in particular, can weaken the metal components of the fitting, making them prone to leaks. Using fittings made from materials resistant to the specific environmental conditions they will face can help mitigate this issue.

Compression Fitting Leaking Causes

Poor Quality Materials

Substandard Manufacturing

Compression fittings manufactured with substandard materials or poor quality control can be a significant source of leaks. Inferior metals or plastics may not perform as well under pressure, leading to failures in the seal. It is crucial to purchase fittings from reputable manufacturers who adhere to strict quality standards to avoid these problems.

Use of Incompatible Materials

Using fittings made from materials that are incompatible with the pipes or the fluids being transported can also cause leaks. For example, a brass fitting may not be suitable for use with certain chemicals that can cause it to corrode or degrade. Ensuring material compatibility is key to maintaining the integrity of the connection and preventing leaks.

Vibration and Movement

Mechanical Vibrations

In many industrial applications, systems experience significant mechanical vibrations that can loosen compression fittings over time. These vibrations can gradually weaken the seal, leading to leaks. To counteract this, it is important to use fittings designed to withstand vibration or to implement additional support and dampening measures to reduce the impact of vibrations on the fittings.

Frequent Movements Leading to Loosening

Systems that involve frequent movement or adjustments can also cause compression fittings to loosen. Each movement can incrementally reduce the tightness of the fitting, eventually leading to leaks. Regular checks and re-tightening, as needed, can help maintain a secure seal in systems subject to frequent movement.

Incorrect Size or Type

Mismatched Fittings

Using compression fittings that do not match the size or specifications of the pipes they are intended to connect can result in leaks. A fitting that is too large or too small will not create an effective seal. It is essential to ensure that the fittings are the correct size and type for the pipes being used.

Use of Wrong Type for Specific Applications

Different applications may require specific types of compression fittings. Using a fitting designed for low-pressure applications in a high-pressure system, for example, can lead to failure and leaks. Understanding the requirements of your application and selecting the appropriate type of fitting is crucial to prevent leaks and ensure the longevity of the system.

Identifying a Compression Fitting Leak

Visual Inspection

Signs of Leaks

The first step in identifying a compression fitting leak is a thorough visual inspection. Look for visible signs such as moisture, water stains, or residue around the fitting. Even a small amount of liquid can indicate a potential leak. Also, check for any signs of corrosion or rust, which can be a byproduct of leaking fluid.

Areas to Check on the Fitting

Focus your inspection on the key areas where leaks are most likely to occur. These include the junctions where the fitting connects to the pipe and around the compression nut. Pay special attention to any areas where the fitting looks distorted or improperly aligned. The ferrule area should also be scrutinized, as this is where the seal is formed.

Functional Testing

Pressure Testing

Pressure testing is an effective way to detect leaks that are not immediately visible. This involves applying a specified pressure to the system and monitoring it over time. If the pressure drops, it could indicate a leak in the fitting. Pressure gauges can help determine if the system maintains the correct pressure or if there is a slow loss that needs addressing.

Fluid Flow Testing

Another method to identify leaks is fluid flow testing. This involves observing the flow of fluid through the system and checking for any discrepancies. A leak can cause a drop in fluid flow or an unexpected fluctuation. By measuring the flow rate at various points in the system, you can pinpoint the location of a leak.

Brass Compression Fittings wrap

Common Indicators

Drips or Puddles

One of the most obvious indicators of a leak is the presence of drips or puddles around the fitting. Even small drips can accumulate over time, leading to larger puddles and more significant problems. Regularly checking for these signs, especially in areas prone to leaks, can help you catch and fix issues early.

Decreased System Performance

A decrease in system performance can also signal a leak in a compression fitting. This might manifest as reduced pressure in a hydraulic system, lower flow rates in plumbing, or diminished efficiency in a gas line. If you notice that your system is not performing as well as it should, a leak could be the culprit. Identifying and repairing leaks promptly can help restore optimal performance and prevent further damage.

By conducting thorough visual inspections, employing functional testing methods, and being aware of common indicators, you can effectively identify and address leaks in compression fittings. Early detection is crucial for maintaining the integrity and efficiency of your piping systems.

Solutions to Fix Compression Fitting Leaks

Regular Maintenance and Inspection

Scheduled Inspections

Regular inspections are crucial for maintaining the integrity of compression fittings. Schedule periodic checks to look for signs of wear, corrosion, or loosening. This proactive approach helps identify potential issues before they become significant problems.

Preventative Maintenance Practices

Tightening Checks: Regularly check the tightness of the compression fittings, especially in systems subject to vibrations.

Cleaning: Keep the fittings clean and free from debris that could interfere with the seal.

Replacement of Worn Components: Replace any components showing signs of wear or damage to prevent leaks.

Addressing Vibration Issues

Methods to Minimize Vibrations

Secure Mounting: Ensure pipes and fittings are securely mounted to minimize movement.

Use of Flexible Hoses: In areas prone to vibration, consider using flexible hoses to absorb the movement and reduce stress on the fittings.

Vibration Dampening: Install vibration-dampening supports or pads to absorb mechanical vibrations and protect the fittings.

Use of Vibration-Dampening Supports

Vibration-dampening supports can significantly reduce the impact of vibrations on compression fittings. These supports are designed to cushion the pipes and fittings, preventing loosening and leaks. Use them in areas with high mechanical activity or where frequent movements occur.

Material Quality Assurance

Choosing High-Quality Fittings

Investing in high-quality compression fittings is essential for ensuring long-term reliability and performance. Choose fittings from reputable manufacturers known for their stringent quality control and superior materials.

Verification of Material Compatibility

Ensure the materials of the fittings are compatible with the pipes and the fluids being transported. Using incompatible materials can lead to corrosion, degradation, and eventual leaks. Verify compatibility based on industry standards and manufacturer recommendations.

Fixing Wear and Tear

Identify Wear and Tear

Regularly inspect the fittings for signs of wear and tear, such as visible cracks, corrosion, or deformation. Pay attention to the ferrules, nuts, and pipe surfaces where they make contact.

Replace Worn Components

Remove the Old Fitting: Carefully disassemble the fitting by loosening the compression nut and removing the ferrule and pipe from the fitting body.

Inspect the Pipe End: Check the pipe end for any damage. If the pipe is compromised, cut back the damaged section and prepare the new end as described in the installation guide.

Install a New Fitting: Follow the proper installation techniques to install a new compression fitting. Ensure that the replacement fitting is of high quality and compatible with the pipe and fluid being transported.

Use Corrosion-Resistant Materials

In environments where corrosion is a concern, opt for compression fittings made from corrosion-resistant materials such as stainless steel or brass. These materials can withstand harsh conditions better than standard metals, reducing the likelihood of leaks caused by material degradation.

Apply Protective Coatings

Consider using protective coatings or treatments on the fittings and pipes to enhance their resistance to wear and tear. These coatings can provide an additional layer of protection against environmental factors, extending the lifespan of the fittings.

By implementing these solutions, you can effectively address and prevent leaks in compression fittings caused by wear and tear. Proper installation, regular maintenance, quality assurance, vibration management, correct sizing, and addressing wear and tear are all essential components of a leak-free system.

Conclusion

In summary, leaks in compression fittings can arise from several common causes, including improper installation, wear and tear, poor quality materials, vibration, and incorrect sizing or type selection. To address these issues, it is essential to follow proper installation techniques, perform regular maintenance and inspections, ensure material quality, minimize vibrations, and select the correct size and type of fittings. Proper installation and maintenance of compression fittings are crucial for ensuring leak-free and reliable connections in various applications. By adhering to best practices, such as correct tightening, regular inspections, using high-quality materials, and addressing wear and tear, you can prevent common issues that lead to leaks.

FAQ

The most common causes include improper installation, wear and tear, poor quality materials, mechanical vibrations, and using incorrect size or type of fittings.

Ensure the pipes are clean and cut squarely, align the pipes and fittings correctly, and tighten the compression nut according to the manufacturer’s guidelines without over-tightening.

First, check for proper alignment and tightness. If the leak persists, disassemble and inspect the fitting for damage or wear, and replace any compromised components.

Regular inspections should be scheduled based on the system’s operating conditions, but typically, every 6 to 12 months is recommended for most applications.

Stainless steel and brass are commonly used materials that offer good resistance to corrosion and are suitable for most environments.

No, for high-pressure applications, you should use double ferrule fittings which provide a more robust seal. Always ensure the fittings are rated for the specific pressure of your system.

Teflon Tape on Compression Fittings How to Use It

Teflon Tape on Compression Fittings: How to Use It

Teflon Tape on Compression Fittings: How to Use It

Table of Contents

Introduction

When it comes to plumbing and hydraulic systems, one common area of confusion is the use of Teflon tape on compression fittings. Many people mistakenly believe that Teflon tape is necessary for creating a secure seal on these fittings, while others argue it’s entirely unnecessary and can even cause problems. In this post, we will explore the appropriate use of Teflon tape on compression fittings, delving into its benefits, potential issues, and best practices for achieving optimal results.

What is Teflon tape?

Teflon tape, also known as PTFE (Polytetrafluoroethylene) tape or plumber’s tape, is a thin, flexible tape used primarily for sealing pipe threads. It is made from a high-molecular-weight polymer that provides excellent non-stick properties and high resistance to chemicals, making it ideal for use in various piping applications. The tape is typically white, although other colors are available for different applications.

Types of Teflon Tape

Standard Teflon Tape: This is the most commonly used type, suitable for general-purpose sealing of water, air, and gas pipe threads. It is usually white and can be used in temperatures ranging from -450°F to 500°F.

High-Density Teflon Tape: This tape is thicker and denser than standard Teflon tape, offering better-sealing properties and durability. It is often used in applications where a more robust seal is required, such as in high-pressure systems.

Gas Line Teflon Tape: Specifically designed for gas line applications, this tape is typically yellow and meets industry standards for sealing gas pipe threads. It is resistant to gas and hydrocarbons, ensuring a secure seal for gas connections.

teflon tape Topa

Applications of Teflon Tape

Teflon tape is widely used in plumbing and hydraulic systems to seal pipe threads and prevent leaks. Its primary function is to fill the gaps and irregularities in the threads, creating a tighter seal that prevents fluid or gas from escaping. Common applications include:

Water supply lines: Teflon tape is used on threaded joints in water supply lines to prevent leaks and ensure a secure connection.

Hydraulic systems: In hydraulic systems, Teflon tape is used to seal connections and prevent hydraulic fluid leaks.

Air and gas lines: Teflon tape is used on threaded joints in air and gas lines to ensure a leak-free connection and maintain system pressure.

Advantages

Non-stick surface: The non-stick properties of Teflon tape make it easy to apply and remove, allowing for easy disassembly of connections when needed.

Chemical resistance: Teflon tape is highly resistant to chemicals, making it suitable for use in various industrial applications where exposure to harsh chemicals is common.

Temperature tolerance: Teflon tape can withstand a wide range of temperatures, from extreme cold to high heat, without degrading or losing its sealing properties.

Flexibility: The tape’s flexibility allows it to conform to the shape of the threads, filling in gaps and creating a secure seal.

Compatibility of Teflon Tape with Compression Fittings

Misconceptions about the necessity of Teflon tape on compression fittings:

There are several common misconceptions about the use of Teflon tape on compression fittings. Many people mistakenly believe that Teflon tape should be applied to the threads of compression fittings to ensure a leak-proof seal. This misunderstanding likely stems from the widespread use of Teflon tape on threaded pipe connections, where it is indeed essential to fill gaps and prevent leaks. However, compression fittings function differently, relying on the mechanical force exerted by tightening the nut to compress the ferrule against the pipe and fitting body, thus creating a seal. Applying Teflon tape to compression fitting threads does not enhance the seal and can interfere with the proper compression needed for a secure connection.

Manufacturer recommendations:

Manufacturers of compression fittings generally advise against the use of Teflon tape on their products. This recommendation is based on the design and function of compression fittings, which do not rely on thread sealing to prevent leaks. The primary sealing mechanism in a compression fitting is the ferrule, which creates a seal when it is compressed between the nut and the fitting body. Adding Teflon tape can create a false sense of security, leading to improperly tightened connections and potential leaks. Furthermore, excess Teflon tape can shred and contaminate the fluid or gas passing through the system, causing additional problems.

When to Use and When to Avoid

Situations where Teflon tape is beneficial:

While Teflon tape is generally not recommended for compression fittings, there are specific scenarios where its use might be considered:

Threaded pipe connections: When dealing with threaded pipe connections that are part of the same system as compression fittings, Teflon tape can be used on the threaded connections to ensure a leak-free seal.

Preventing galling: In some cases, a small amount of Teflon tape might be used on the threads of compression fittings to prevent galling or seizing, especially when dealing with stainless steel fittings. However, care must be taken to avoid over-application and to ensure that the tape does not interfere with the sealing surface of the ferrule.

Temporary fixes: For temporary repairs or quick fixes, Teflon tape might provide a short-term solution, but it should not be relied upon for permanent installations.

Cases where Teflon tape can cause issues:

Interference with compression: Applying Teflon tape to the threads of compression fittings can interfere with the proper compression of the ferrule, leading to a poor seal and potential leaks. The tape can prevent the nut from being tightened adequately, compromising the integrity of the connection.

Contamination: Excess Teflon tape can shred during assembly and contaminate the fluid or gas passing through the system. This contamination can cause blockages, damage to equipment, and reduced system performance.

False sense of security: Relying on Teflon tape to seal compression fittings can lead to improperly tightened connections. Users might believe that the tape alone provides a sufficient seal, neglecting the importance of properly compressing the ferrule.

Incompatibility with certain materials: Teflon tape may not be compatible with all materials used in compression fittings, particularly some plastics, which can be affected by the chemicals in the tape. This can compromise the integrity of the fitting and lead to leaks or failures.

How to Properly Apply Teflon Tape on Compression Fittings

Preparation

Gather Tools and Materials: Ensure you have Teflon tape, a pipe wrench, a clean cloth, and a wire brush.

Inspect the Fitting: Check the compression fitting and pipes for any damage, wear, or deformities that might affect the seal.

Clean the Threads: Use a wire brush to remove any debris, dirt, or old tape from the threads of the fitting and pipe. Wipe down the threads with a clean cloth to ensure they are free of contaminants. Proper cleaning ensures a tight seal and prevents leaks.

Teflon Tape on Compression Fittings

Applying the Tape

Start the Tape: Hold the end of the Teflon tape against the male threads of the fitting. Begin wrapping the tape around the threads in a clockwise direction (when looking at the end of the pipe). Wrapping in the correct direction ensures the tape does not unravel when the fitting is assembled.

Wrap Evenly: Apply the tape evenly and tightly, overlapping each layer by about half the width of the tape. This overlap ensures complete coverage and a better seal.

Number of Wraps: Generally, 2-3 wraps of standard Teflon tape are sufficient for most applications. For high-density tape, 1-2 wraps may be enough. Too many wraps can prevent the fitting from tightening properly, while too few may not provide an adequate seal.

Cover the Threads: Ensure that the tape covers the entire threaded area but does not extend past the threads onto the pipe. Excess tape beyond the threads can interfere with the sealing surface of the ferrule.

Assembling the Fitting

Insert the Pipe into the Fitting: Slide the nut and ferrule over the pipe, then insert the pipe into the fitting body.

Tighten by Hand: Begin tightening the nut onto the fitting body by hand, ensuring it threads on smoothly without cross-threading. Hand-tightening helps to align the threads properly and starts the compression process.

Use a Wrench: Once the nut is hand-tight, use a pipe wrench to further tighten the nut. Typically, 1-1.5 additional turns with the wrench are sufficient to compress the ferrule and create a secure seal. Avoid overtightening, as this can deform the ferrule and fitting, leading to leaks.

Check for Leaks: After assembly, test the connection by running water or applying the system’s operating pressure. Inspect for any signs of leaks. If leaks are detected, tighten the fitting slightly more and retest.

Benefits of Using Teflon Tape on Compression Fittings

Improved Sealing

Fills Gaps: Teflon tape helps fill any small gaps or imperfections in the threads, ensuring a tighter fit and better seal. This is particularly important in ensuring that the compression fitting remains leak-free over time.

Smooth Thread Engagement: The tape provides a smoother surface for the threads to engage, reducing the likelihood of leaks that can occur due to misalignment or thread damage. This can be particularly beneficial in systems where vibration or pressure changes are common, helping to maintain a stable and secure connection.

Supplementary Seal: Although the primary seal in compression fittings is created by the compression of the ferrule, Teflon tape can act as a secondary barrier, adding an extra layer of protection against leaks.

Ease of Disassembly

Lubrication Effect: Teflon tape acts as a lubricant on the threads, which can help prevent the galling or seizing of metal components, particularly in stainless steel fittings. This lubrication makes it easier to disassemble the fittings without damaging the threads.

Simplifies Maintenance: The use of Teflon tape can simplify future maintenance tasks. If a fitting needs to be disassembled for any reason, the tape helps ensure that the threads remain intact and can be easily reassembled. This is especially useful in environments where regular inspections and maintenance are required.

Reusable Threads: By protecting the threads from direct metal-to-metal contact, Teflon tape helps preserve the integrity of the threads, allowing them to be reused multiple times without significant wear.

Teflon Tape fail

Corrosion Resistance

Barrier Protection: Teflon tape creates a barrier between the metal threads and the environment, which can help prevent moisture and corrosive substances from coming into contact with the threads. This is particularly important in outdoor or harsh environments where exposure to the elements can lead to rust and corrosion.

Chemical Resistance: The chemical resistance properties of Teflon tape make it suitable for use in a wide range of applications, including those involving aggressive chemicals. It helps protect the threads from chemical attack, ensuring a longer lifespan for the fittings.

Alternatives to Teflon Tape

Pipe Dope (Thread Sealant)

Definition: Pipe dope, also known as thread sealant, is a paste-like substance applied to the threads of pipe joints. It fills the gaps and seals the threads to prevent leaks.

Application: Applied directly to the threads before assembly, pipe dope creates a chemical bond that helps prevent leaks. It is particularly useful in situations where the threads may be slightly damaged or irregular.

Types: There are various types of pipe dope, each formulated for specific applications, such as those resistant to high temperatures, pressure, or specific chemicals.

Anaerobic Sealants

Definition: Anaerobic sealants are liquid adhesives that cure in the absence of air. When applied to the threads of pipe joints, they harden to form a strong, leak-proof seal.

Application: These sealants are applied to the threads and begin to cure once the fitting is assembled, creating a durable bond that is resistant to vibration and temperature fluctuations.

Types: Anaerobic sealants come in different formulations, including those designed for high-pressure systems, high temperatures, or specific chemicals.

Comparative Analysis

Pipe Dope (Thread Sealant)

Pros:

Versatility: Effective on a wide range of materials, including metal and plastic.

Flexibility: Remains flexible after curing, allowing for adjustments without breaking the seal.

Easy Application: Simple to apply with a brush or applicator.

Cons:

Messiness: Can be messy to apply and may require cleanup.

Curing Time: This may require time to cure before the system can be pressurized.

Compatibility: Not all formulations are compatible with all types of pipes or chemicals.

Anaerobic Sealants

Pros:

Strong Seal: Creates a strong, durable seal that is resistant to vibration and thermal cycling.

Chemical Resistance: Highly resistant to a wide range of chemicals, making them suitable for industrial applications.

No Mess: Cleaner application compared to pipe dope, as it is a liquid that cures without residue.

Cons:

Permanent: Once cured, the seal can be difficult to break, making disassembly challenging.

Curing Conditions: Requires the absence of air to cure properly, which may not be suitable for all applications.

Specificity: This must be chosen carefully to match the specific materials and conditions of the system.

Situations Where Alternatives Are Preferable

High-Pressure Systems: Anaerobic sealants are often preferred in high-pressure systems due to their ability to create a robust and vibration-resistant seal.

Chemical Exposure: In environments with high chemical exposure, anaerobic sealants or specialized pipe dope formulations that offer superior chemical resistance are preferred.

Temperature Extremes: Anaerobic sealants and specific high-temperature pipe dopes are better suited for systems exposed to extreme temperatures.

Ease of Disassembly: When future disassembly is anticipated, pipe dope might be preferable due to its flexibility and ease of adjustment.

Metal Pipes: For metal pipe connections, both pipe dope and anaerobic sealants are effective, but the choice may depend on the specific requirements of the system, such as pressure and temperature.

By understanding the various alternatives to Teflon tape, their advantages, and their limitations, users can select the most appropriate sealing method for their specific application. This ensures reliable, leak-free connections that are tailored to the demands of their plumbing or hydraulic systems.

Conclusion

In this post, we have explored the nuances of using Teflon tape on compression fittings, highlighting its benefits, potential issues, and alternatives. Following best practices when applying Teflon tape or choosing alternative sealing methods is crucial for achieving the best results in your plumbing or hydraulic systems. For further assistance or inquiries about our products, feel free to contact us.

FAQ

No, Teflon tape is not typically necessary for compression fittings as they rely on the compression of the ferrule to create a seal. Applying tape to the threads can interfere with proper compression and lead to leaks.

For most applications, 2-3 wraps of standard Teflon tape are sufficient. For high-density tape, 1-2 wraps may be enough. Ensure the tape is applied evenly and tightly.

Teflon tape is generally safe for use with most metals and plastics, but it’s important to check manufacturer guidelines for compatibility, especially with certain plastic materials.

Alternatives include pipe dope (thread sealant) and anaerobic sealants. Each has its pros and cons and should be chosen based on the specific requirements of your system.

If you detect a leak, disassemble the fitting, clean the threads thoroughly, reapply the appropriate amount of tape, and reassemble. Ensure the tape is applied in the correct direction and the fitting is properly tightened.

No, Teflon tape should not be reused once it has been applied and removed. Always use fresh tape to ensure a proper seal and avoid potential leaks.

How to Undo Compression Fitting

How to Undo Compression Fitting

How to Undo Compression Fitting

Table of Contents

Introduction

Compression fittings are essential components that join pipes or tubes in various systems, from household plumbing to complex industrial hydraulic setups. These fittings consist of a nut, a ferrule, and a fitting body that work together to create a secure, leak-proof connection. They are commonly used in plumbing, gas lines, and hydraulic systems due to their reliability and ease of installation. This guide will walk you through the step-by-step process of safely and effectively undoing compression fittings. You will learn about the necessary tools and materials, safety precautions, and troubleshooting tips to handle any issues that may arise.

Understanding Compression Fittings

Compression fittings are mechanical connectors used to join two pipes or tubes securely. They are widely favored in various applications for their ability to create strong, leak-proof seals without the need for soldering or welding. These fittings rely on the compression of a metal ferrule against the pipe to form a tight connection, making them a popular choice in plumbing, gas, and hydraulic systems.

Key Components

Nut: The nut is the outer part of the compression fitting, typically hexagonal, which allows for easy tightening and loosening with a wrench.

Ferrule: Also known as an olive, the ferrule is a small ring made of metal or plastic that gets compressed between the nut and the fitting body, ensuring a tight seal around the pipe.

Fitting Body: This is the main part of the compression fitting that houses the ferrule and receives the nut. It connects to the pipe and provides the pathway for fluid or gas.

Types of Compression Fittings

Single Ferrule Compression Fitting

Single-ferrule compression fittings use one ferrule to create the seal between the pipe and the fitting body. The ferrule is compressed as the nut is tightened, causing it to grip the pipe securely.

Advantages: Simplicity and ease of use, making them suitable for less critical applications where ease of installation and cost-effectiveness are priorities.

Common Uses: Household plumbing, low-pressure gas lines, and hydraulic systems.

Double Ferrule Compression Fitting

Double ferrule compression fittings utilize two ferrules to achieve a more reliable seal. The front ferrule creates the primary seal by compressing against the pipe, while the back ferrule grips the pipe and helps secure the fitting.

Advantages: Enhanced sealing capabilities and better resistance to vibration and pressure, making them ideal for high-pressure and critical applications.

Common Uses: Industrial hydraulic systems, high-pressure gas lines, and other applications require a more robust connection.

Why Compression Hydraulic Fittings Get Stuck

Corrosion

Explanation: Over time, metal components of compression fittings can be exposed to various environmental factors such as moisture, chemicals, and fluctuating temperatures. This exposure can cause corrosion, a chemical reaction that deteriorates the metal. As corrosion progresses, it can lead to the bonding of the components, making them difficult to separate. Corroded fittings may also lose their structural integrity, leading to potential leaks and system failures.

Prevention: To mitigate corrosion, it’s crucial to implement regular maintenance and inspection schedules. Applying anti-corrosion coatings on the fittings can provide a protective barrier against moisture and chemicals. Utilizing corrosion-resistant materials, such as stainless steel or specially treated alloys, can also significantly reduce the risk of corrosion. Additionally, ensuring that the working environment is dry and clean can help prolong the lifespan of the fittings.

Compression Fitting Leaking rust

Overtightening

Explanation: When a compression fitting is overtightened, it can cause deformation of the ferrule and the pipe it is securing. This excessive force creates high friction and compresses the components too tightly, making them challenging to loosen later. Moreover, overtightening can cause the ferrule to bite too deeply into the pipe, making it nearly impossible to remove without damaging the pipe or fitting.

Prevention: Preventing overtightening involves following the manufacturer’s guidelines for torque specifications. Using a torque wrench allows for precise application of force, ensuring the fitting is tightened just enough to create a seal without causing damage. Training personnel on the correct installation techniques and the importance of avoiding overtightening is also essential.

Temperature Fluctuations

Explanation: Compression fittings, like all metal components, expand and contract with temperature changes. In environments with significant temperature fluctuations, this thermal cycling can cause the metal parts to seize up over time. The repeated expansion and contraction can lead to the components becoming tightly bound together, making them difficult to separate without causing damage.

Prevention: To combat the effects of temperature fluctuations, it’s important to use fittings that are specifically designed to handle the temperature ranges of the application. Insulating the fittings and the surrounding pipes can help stabilize the temperature and reduce thermal stress. Additionally, regular monitoring and maintenance can catch potential issues early, allowing for corrective action before the fittings become stuck.

Age and Wear

Explanation: Compression fittings are subject to wear and tear from continuous use. Over time, the repeated stress of tightening and loosening, along with the flow of fluids or gases, can degrade the threads and other parts of the fitting. This degradation can cause the components to stick, making it difficult to undo the fitting without causing further damage.

Prevention: Regularly inspecting the fittings for signs of wear and tear and replacing old or worn components can help maintain the integrity of the system. Proper lubrication during installation and periodic maintenance can reduce friction and wear, prolonging the life of the fittings. Establishing a schedule for routine maintenance and component replacement is key to preventing age-related issues.

Contamination

Explanation: Dirt, debris, and other contaminants can accumulate in the threads and sealing surfaces of a compression fitting, causing the components to bind together. In harsh environments, where fittings are exposed to dust, grime, or corrosive substances, the likelihood of contamination is higher. These contaminants can interfere with the fitting’s operation and make it difficult to loosen.

Prevention: Keeping the fittings clean during installation and maintenance is essential to prevent contamination. Using caps or plugs to protect the open ends of pipes and fittings can help keep debris out. Regular cleaning and inspection can catch contamination issues early, allowing for timely cleaning or replacement of affected components.

Compression Fitting Leaking Causes

Improper Installation

Explanation: Incorrect installation practices, such as misalignment of the pipes or using incompatible materials, can lead to compression fittings becoming stuck. Misaligned pipes can create uneven stress on the fitting, making it difficult to undo. Similarly, using materials that are not compatible with the fitting can cause binding and other issues.

Prevention: Ensuring proper alignment of pipes during installation is crucial for the correct operation of compression fittings. Following best practices and manufacturer instructions can help avoid issues related to improper installation. Using compatible materials and verifying that all components meet the specifications for the application can also prevent problems. Training personnel on proper installation techniques is an essential step in maintaining a reliable system.

How to Remove Stuck Compression Hydraulic Fittings

Removing stuck compression hydraulic fittings can be a challenging task, but with the right techniques and tools, it can be done effectively. Here’s a detailed guide to help you through the process:

Tools and Materials Needed

  • Two appropriately sized wrenches (one adjustable and one fixed)
  • Penetrating lubricant (such as WD-40)
  • Heat gun or hairdryer
  • Pipe cutter (if necessary)
  • Soft mallet or hammer
  • Ferrule puller tool (optional)
  • Safety gear (gloves and safety glasses)
  • Step-by-Step Guide to Removing Stuck Compression Hydraulic Fittings

Safety First

Turn Off the System: Begin by ensuring that the hydraulic system is completely powered down and depressurized. This step is crucial to prevent any accidental release of hydraulic fluid or gas, which could cause injury or damage to the equipment. Locate and close all relevant valves and bleed any remaining pressure from the system. Double-check that the system is entirely safe to work on before proceeding.

Wear Safety Gear: Personal protective equipment (PPE) is essential for safety. Put on sturdy gloves to protect your hands from sharp edges and potential fluid exposure. Safety glasses are also necessary to shield your eyes from any debris or fluid splashes. If the environment is noisy, consider using ear protection as well.

Apply Penetrating Lubricant

Lubricate the Threads: Once safety measures are in place, spray a generous amount of penetrating lubricant (such as WD-40) onto the threads of the fitting. This lubricant helps to break down any corrosion or debris that may be causing the fitting to stick. Allow the lubricant to penetrate the threads for at least 10-15 minutes. For heavily corroded fittings, you may need to apply the lubricant multiple times and let it sit longer.

Use Heat (If Necessary)

Apply Heat to the Fitting: If the fitting remains stuck after the application of lubricant, the next step is to use heat. Using a heat gun or hairdryer, gently heat the fitting evenly around its circumference. The goal is to expand the metal parts slightly, which can help to break the bond caused by corrosion or overtightening. Apply heat for a few minutes, moving the heat source around to avoid overheating any single spot.

Caution: Be careful not to overheat the fitting, especially if there are plastic components or flammable materials nearby. Excessive heat can damage the fitting or adjacent parts and pose a safety risk. Keep a fire extinguisher nearby as a precaution.

Position the Wrenches

Secure the Fitting Body: With the lubricant and heat applied, it’s time to position the wrenches. Place one wrench on the fitting body to hold it steady. Ensure the wrench is securely positioned to prevent it from slipping. This wrench will provide the necessary counterforce while you work on loosening the nut.

Position the Second Wrench: Place the second wrench on the nut of the fitting. Make sure it is properly aligned with the nut to avoid rounding off the corners. A snug fit is essential to ensure you can apply adequate force without damaging the nut.

Undo Compression Fitting

Loosen the Nut

Turn Counterclockwise: Apply steady pressure to the wrench on the nut, turning it counterclockwise. If the nut begins to move, continue turning until it is fully loosened. Use slow and steady pressure to avoid stripping the threads or damaging the fitting.

Leverage Techniques: If the nut is very tight and does not budge easily, use a piece of pipe over the handle of the wrench to gain additional leverage. This technique, known as “cheater bar,” provides more force without requiring excessive strength. Be cautious when using extra leverage to avoid applying too much force and damaging the fitting or the pipe.

Remove the Ferrule and Pipe

Gently Separate the Ferrule: Once the nut is loose, slide it back along the pipe. If the ferrule is stuck, use a soft mallet or hammer to gently tap it. A ferrule puller tool can also help remove the ferrule without damaging the pipe. Apply gentle and consistent pressure to avoid deforming the pipe or ferrule.

Handle Stuck Ferrules: For particularly stubborn ferrules, apply a bit more lubricant and gently twist the ferrule back and forth while pulling it away from the pipe. Using padded pliers can help grip the ferrule without scratching it. Be patient and avoid using excessive force, which could damage the components.

Inspect and Clean Components

Check for Debris: Inspect the fitting body, nut, and ferrule for any debris, corrosion, or damage. Look for signs of wear that could affect the fitting’s performance. Use a clean cloth or brush to remove any loose debris.

Clean the Fitting: If there is significant buildup, use a mild solvent or cleaning solution to thoroughly clean the components. Ensure all parts are completely dry before reassembly. Cleaning the fitting thoroughly ensures a proper seal and prevents future issues.

Reassemble or Replace Components

Evaluate Component Condition: Determine if any parts need to be replaced due to wear or damage. Inspect the threads, ferrule, and pipe for signs of degradation. Replace any compromised components to ensure a proper seal when reassembled. Using high-quality replacement parts can extend the lifespan of the fitting.

Reassembly: Follow proper reassembly techniques, ensuring all parts are correctly aligned and tightened according to manufacturer specifications. When tightening the nut, use a torque wrench if available to apply the correct amount of force. Avoid overtightening, which can lead to the same issues you just resolved.

Final Checks: Once reassembled, turn the system back on and check for leaks. If any leaks are detected, gently tighten the fitting until the leak stops. Conduct a final inspection to ensure everything is secure and functioning correctly.

By following these detailed steps, you can successfully remove stuck compression hydraulic fittings and maintain the integrity and reliability of your hydraulic systems. Regular maintenance and proper installation techniques will help prevent future issues, ensuring smooth and efficient operation.

Conclusion

In this guide, we’ve covered the essential steps for safely and effectively removing stuck compression hydraulic fittings. Regular maintenance and proper installation practices can prevent fittings from becoming stuck in the future. If you encounter particularly stubborn fittings, don’t hesitate to seek professional assistance to avoid causing further damage.

FAQ

If the fitting remains stuck after using lubricant and heat, try gently tapping it with a soft mallet to loosen any corrosion. If it’s still not moving, you may need to use a ferrule puller tool or seek professional assistance to avoid damaging the fitting or pipe.

It depends on the condition of the fitting. If the components are not damaged or excessively worn, they can be reused. However, if there is significant wear, corrosion, or deformation, it’s best to replace the fitting to ensure a secure and leak-proof connection.

To prevent fittings from getting stuck, follow proper installation techniques, avoid overtightening, and use corrosion-resistant materials. Regular maintenance and inspection, as well as applying anti-corrosion coatings, can also help prolong the life of the fittings.

Use a penetrating lubricant like WD-40, which is designed to penetrate rust and corrosion. This type of lubricant is effective at loosening stuck fittings and is safe for use on metal components.

Yes, having the right tools is crucial. You should use appropriately sized wrenches, a heat gun or hairdryer, a soft mallet, and possibly a ferrule puller tool. Additionally, a torque wrench can help ensure you do not overtighten the fittings during reassembly.

Signs that a compression fitting should be replaced include visible cracks, severe corrosion, deformation of the ferrule or nut, and threads that are stripped or worn. If the fitting does not create a proper seal or continues to leak after reassembly, replacement is necessary.

Contact Topa

Save 30% on maintenance costs with our easy-install hydraulic fittings. Contact Now!