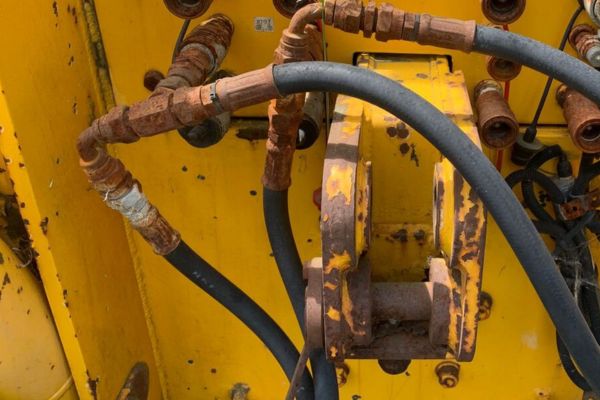
A hose looks perfectly fine, but fails suddenly on a high-cycle machine. This failure wasn’t from a single pressure spike, but from constant stress. What caused this hidden fatigue?
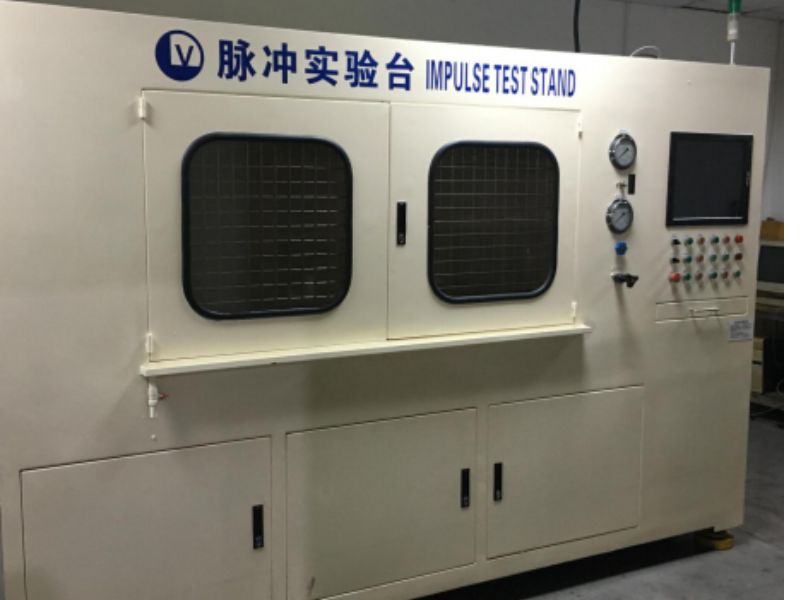
An impulse test is a rigorous laboratory procedure that subjects a hydraulic hose assembly to repeated pressure cycles. It simulates real-world stress to verify its durability and lifespan under dynamic, flexing conditions.
I’ve had many conversations about this with customers like Tony, who run demanding operations from construction in Africa to manufacturing in Asia. They understand that a hose failure on a critical piece of equipment is a disaster. What they sometimes don’t realize is that most hose failures are not loud, dramatic bursts. They are quiet fatigue failures that develop over time. A burst test tells you a hose is strong enough not to explode. An impulse test tells you if a hose is tough enough to survive its job day after day. It’s the difference between strength and endurance, and for most hydraulic applications, endurance is what truly matters.
Why is Impulse Testing More Important Than Just a Burst Test?
You know your hose won’t burst from static pressure. But will it survive thousands of bending and pressure cycles every day? This is a different, more common failure.
A burst test measures raw strength. An impulse test measures endurance. It proves a hose can withstand the repetitive stress cycles and pressure spikes that define most real hydraulic applications, making it a better predictor of service life.
Think of it like comparing two athletes. A powerlifter might be able to lift 300 kg one time. This an incredible display of maximum strength, similar to a burst test. But could that powerlifter run a 42-kilometer marathon? Probably not. A marathon runner, on the other hand, demonstrates incredible endurance, the ability to withstand stress over a long period. This is the impulse test. In most hydraulic systems, especially on mobile equipment like excavators or in factory automation, the hose acts more like a marathon runner than a powerlifter. It must endure, not just for one powerful lift, but for hundreds of thousands of repetitions.
Strength vs. Endurance in Hose Design
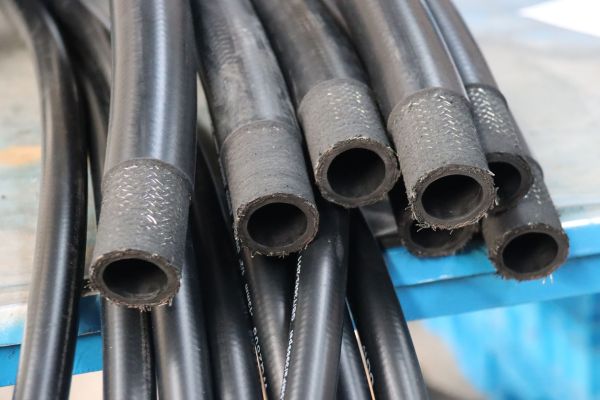
A burst rating only tells you the maximum pressure a new, static hose can contain before it ruptures. This is an important quality check, but it doesn’t reflect how a hose is actually used. An impulse test is designed to find the fatigue point. The wire reinforcement in a hose gets bent back and forth, just like bending a metal paperclip. You can bend a paperclip once with no problem. But bend it back and forth in the same spot twenty times, and it will weaken and snap. This is metal fatigue, and it’s exactly what an impulse test is designed to replicate and measure in a hose’s wire reinforcement layers.
Predicting Real-World Service Life
Because the impulse test so closely mimics real-world conditions, it is a far better predictor of how long a hose will last in a specific application. A hose with a higher impulse rating will almost certainly have a longer, more reliable service life on a dynamic machine than a hose that only has a good burst rating. For savvy buyers from quality-focused regions like Europe and the Americas, inquiring about impulse test data is a standard part of vetting a new supplier. It shows they understand what truly creates a durable product.
How is an Impulse Test Actually Performed?
You hear about these complex tests, but what actually happens in the lab? It can seem like a secret process, making it hard to trust the results you can’t see.
The hose assembly is bent to a specific radius, filled with hot oil, and then a machine rapidly cycles the pressure from near zero up to a test pressure (often 133% of working pressure) for hundreds of thousands of repetitions.
This is not a simple on-and-off pressure test. It is a highly controlled and aggressive procedure designed to push the hose to its limits, simulating a lifetime of hard work in just a few days. Our factory partners rely on these machines to validate every hose type we offer. Let’s break down the key parameters that make the test so challenging.
The Key Test Parameters
For an impulse test to be valid, it must follow strict rules set by international standards. The main components are:
- Temperature: The test isn’t done with cool fluid. It uses hydraulic oil heated to a high temperature, often 100°C (212°F) or even 121°C (250°F), to simulate the harsh operating temperatures inside a machine. Heat softens the rubber and accelerates aging, making the test much harder.
- Pressure: The pressure cycles don’t just go up to the hose’s working pressure. They go significantly above it, typically to 125% or 133% of the maximum allowable working pressure. This over-pressurization adds another layer of stress.
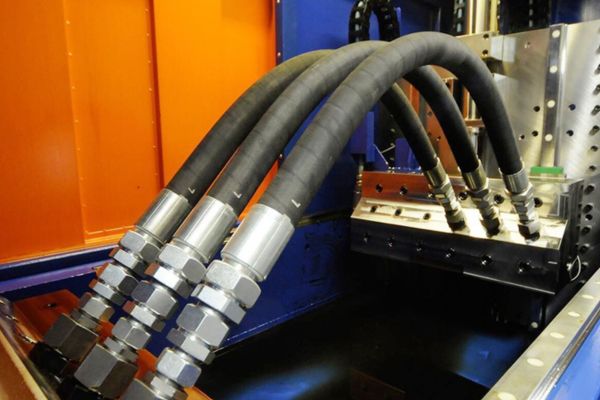
- Bend Radius: The hose isn’t tested while straight. It is bent into a tight “U” shape at the minimum bend radius specified by the standard. This forces the hose to flex under pressure, which is the most strenuous condition.
- Cycle Count: The test runs for a set number of cycles. For a standard two-wire hose, this might be 200,000 cycles. For a high-performance spiral hose, it could be 500,000 cycles or more.
The Shape of the Impulse Wave
The pressure cycle itself is also carefully controlled. It’s not a gentle rise and fall. The pressure must ramp up very quickly, hold at the peak, and then drop rapidly. This fast rate of pressure change creates a shockwave effect within the hose, putting immense stress on the crimps and the wire reinforcement. It’s this combination of heat, pressure, and flexing that makes the impulse test the ultimate proof of a hose’s durability.
What Do International Standards Like SAE and EN Demand for Impulse Testing?
How can you be sure a hose from one brand is as durable as another? Without common rules, it’s impossible to compare products and trust the quality claims.
Standards like SAE J343 and various EN standards define the exact test parameters: temperature, test pressure, bend radius, and the minimum number of impulse cycles a hose must survive without failing to earn its rating.
These standards are the backbone of the global hydraulics industry. They ensure that a hose marked “EN 857 2SC” from Topa has passed the same minimum endurance test as a hose with the same marking from any other major manufacturer in the world. This gives professional buyers the confidence to source globally. It turns a brand’s quality claim into a verified, measurable fact. While many manufacturers test to a higher standard, these specifications represent the minimum passing grade.
A Comparison of Common Impulse Standards
Different hose constructions are designed for different levels of impulse severity. The standards reflect this with varying cycle requirements.
| Hose Standard | Typical Application | Minimum Cycles | Test Pressure (% of W.P.) |
| EN 853 1SN / SAE 100R1AT | Medium Pressure, Standard Duty | 150,000 | 133% |
| EN 853 2SN / SAE 100R2AT | High Pressure, Standard Duty | 200,000 | 133% |
| EN 857 2SC | High Pressure, Compact/Flex | 200,000 | 133% |
| EN 856 4SP | Very High Pressure, Spiral | 400,000 | 133% |
| EN 856 4SH | Extreme Pressure, Spiral | 500,000 | 133% |
| SAE 100R12 | Heavy Duty, 4-Spiral | 500,000 | 133% |
Why This Matters for Your Business
When you see these codes on a hose, you are looking at a certified level of endurance. It allows you to select the right product based on the known demands of your application. For a static transfer line, a 150,000 cycle hose might be fine. But for the main boom on a large excavator that is constantly moving, specifying a hose that meets or exceeds a 400,000 or 500,000 cycle standard is a wise investment in reliability and uptime. This knowledge allows you to move beyond simply comparing prices and start comparing true performance value.
What Constitutes a “Failure” in an Impulse Test?
The hose survives the test, but how do we define “survive?” Is a small leak okay? Without a clear definition of failure, the test results are meaningless.
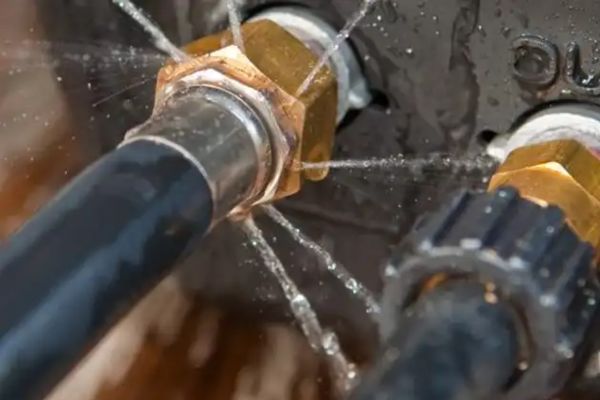
A failure is defined as any leakage of the test fluid through the hose body or at the fitting connection before the hose has completed the required number of cycles. There is no acceptable level of leakage.
The standard is absolute: the hose must contain the hot, high-pressure fluid for the entire duration of the test. A single drop of oil before the final cycle is counted means the hose has failed. This strict pass/fail criterion is necessary to ensure safety and reliability. The failures typically occur in one of two places.
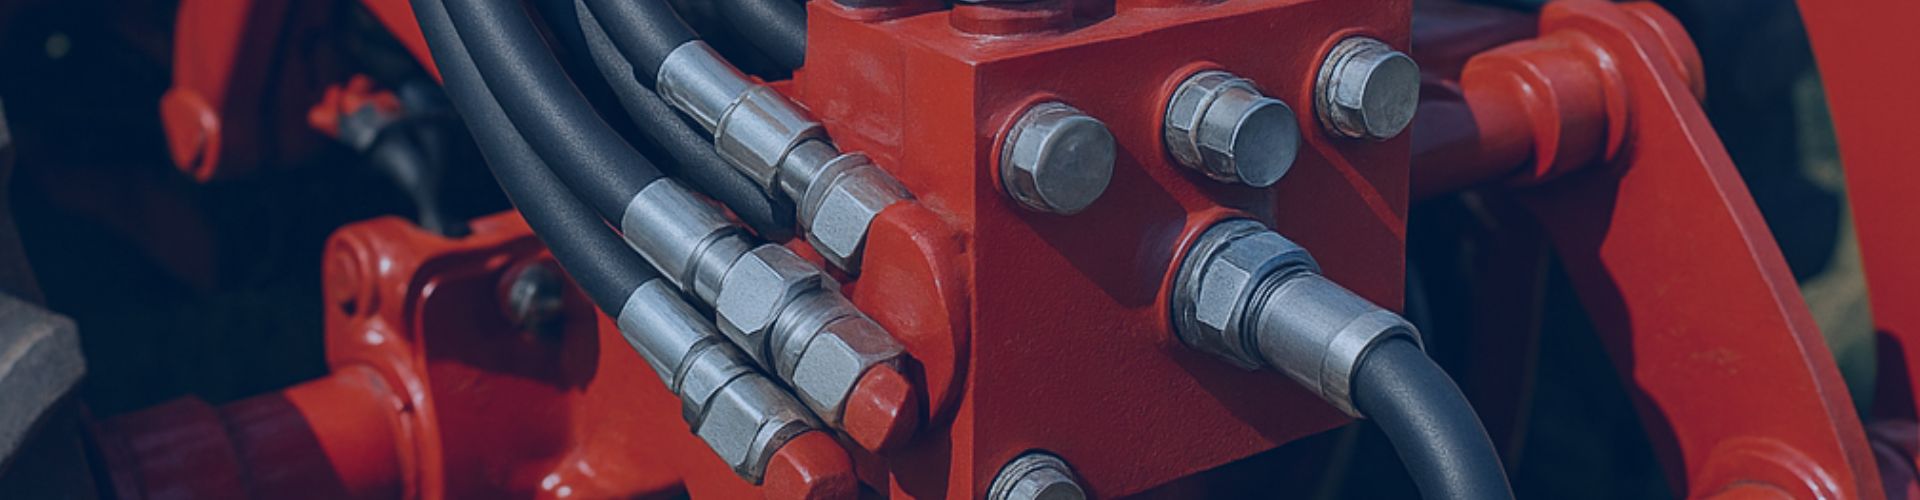
Failure at the Hose-Fitting Connection
Often, the weakest point of a hydraulic assembly is not the hose itself, but the crimp—the point where the fitting is attached. During an impulse test, the repeated high-pressure shockwaves constantly try to push the hose out of the fitting. If the crimp is not perfect, it can create a tiny path for leakage to begin. This is why we, at Topa, are so insistent on using a matched system of our hoses with our fittings and our specific crimp dimensions. It’s the only way to guarantee the connection is strong enough to survive the test and perform reliably in the field.
Failure Through the Hose Body
If the crimp holds, the next point of failure is typically the wire reinforcement within the hose body. After hundreds of thousands of cycles of being bent and pressurized, individual wires in the reinforcement layers can begin to fatigue and snap. Once enough wires in one area have broken, they can no longer contain the pressure from the inner tube. The pressure then forces oil through the tiny gap, which then seeps through the outer cover. This is a classic fatigue failure and is rarely a dramatic burst. More often, it starts as a small, steady weep, which is exactly why regular machine inspections are so important.
How Does Impulse Testing Simulate Real-World Machine Conditions?
A lab test seems sterile and disconnected from the dirty, chaotic reality of your job site. How can a machine in a lab really replicate what your equipment goes through?
The test combines the three most destructive forces a hose faces: high pressure, high temperature, and constant flexing. This combination accurately mimics the stress on a hose used on an excavator boom, a factory press, or a vehicle’s steering system.
Let’s use a very common example that many of my customers deal with: the hydraulic hoses on an excavator arm. This is one of the most demanding environments for a hose and perfectly illustrates why impulse testing is so relevant.
The Excavator Boom Example
Think about the main hose that runs along the boom to the bucket cylinder. Every time the operator lifts the boom, the hose is pressurized. When they lower it, the pressure drops. When they curl the bucket, another hose is pressurized. When they extend the digging arm, the hoses are physically stretching and contracting. In a single minute of digging, these hoses are subjected to multiple pressure cycles, flexing, and movement, all while hot hydraulic fluid is flowing through them. The impulse test, by combining high-pressure cycles, heat, and a tight bend, is essentially a super-accelerated version of one minute of hard digging, repeated hundreds of thousands of times.
The High-Cycle Factory Press Example
Another perfect example is a hydraulic press in a manufacturing facility, perhaps in one of the industrial zones in South Korea or Japan where we have clients. These machines can cycle every few seconds, stamping out parts. They often run 24 hours a day. A hose on such a press could see over a million pressure cycles in a single year. The only way to have confidence that a hose can survive this incredibly demanding environment is to know it has passed a rigorous, high-cycle impulse test. It proves the hose is designed for industrial-grade endurance.
Besides the Hose Itself, What Else Affects Impulse Life?
You bought the best impulse-rated hose, but it still failed early. It’s frustrating when you invest in quality and don’t get the expected life. What else could be wrong?
The advertised impulse life is for a perfectly installed hose. In the real world, factors like routing the hose with too tight a bend, external abrasion, and extreme temperatures can drastically reduce its service life.
A high-quality, high-impulse-rated hose is only the first step. Proper installation and maintenance are just as important for achieving a long service life. Even the best hose will fail prematurely if it is installed incorrectly. When I consult with clients on reducing their maintenance costs, we often focus on these external factors.
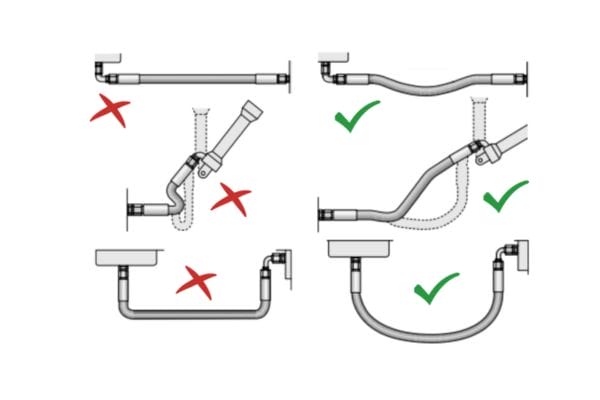
The Critical Role of Installation Routing
Every hose has a specified “Minimum Bend Radius” (MBR). This is the tightest curve it can be bent into without causing damage. Bending a hose sharper than its MBR is a very common installation error. It creates a pinch point that crushes the wire reinforcement on the inside of the bend and over-stretches it on the outside. This creates a massive weak spot that will fail from fatigue very quickly, no matter how high its impulse rating is. Additionally, twisting a hose during installation puts constant stress on the wire braids, which will also lead to a greatly reduced service life.
The Impact of Abrasion and Temperature
The outer cover of the hose is designed to protect the wire reinforcement from the elements. If the hose is routed where it can rub against a piece of metal or another hose, this cover will eventually wear away. Once the wire reinforcement is exposed to moisture, it will rust. Rusted wire loses its strength and fatigue resistance, leading to a premature failure. Likewise, operating a hose consistently above its rated temperature will accelerate the aging of the rubber compounds, making them brittle and prone to cracking. Using protective sleeves can guard against abrasion, and ensuring proper system cooling can mitigate temperature effects, helping you get the full value from your high-quality hose.
Conclusion
An impulse test is the ultimate proof of a hose’s endurance. It guarantees the hose is built to survive the dynamic stress of real-world use, ensuring reliability.