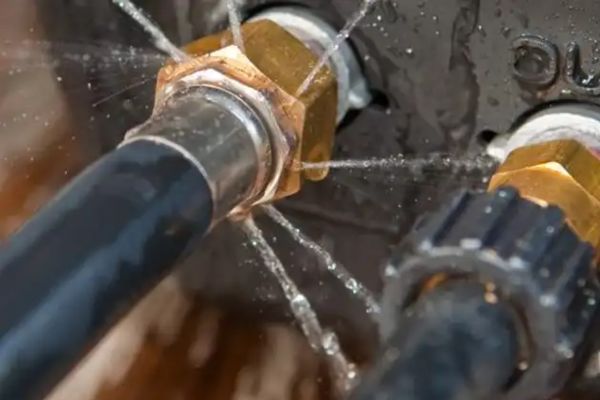
Your machine suddenly stops with a loud bang. A hose has violently detached from its fitting, spraying hydraulic fluid everywhere. This dangerous failure brings your work to a complete stop.
This “blow-off” failure is almost always caused by an incorrect assembly process. The key is to investigate the cause, not just replace the part, to prevent it from happening again. Repair means a full replacement using correct components and procedures.
Why Do Hydraulic Fittings Fail at the Crimp?
You just installed a brand new hose assembly, and it failed at the fitting. It’s frustrating and makes you question the quality of the components you just bought.
This failure is rarely due to a bad part. It’s almost always caused by an incorrect crimp diameter, using mismatched hose and fitting brands, or improper hose preparation before crimping.
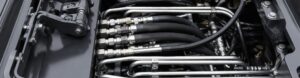
The crimp is the heart of the hose assembly. It’s where the mechanical strength of the fitting is permanently joined to the hose body. This connection must be strong enough to withstand pressure, vibration, and flexing. The vast majority of blow-off failures happen because this connection was flawed from the very beginning. Understanding these common errors is the first step toward prevention.
The Dangers of Over-Crimping
It might seem logical that a tighter crimp is a stronger crimp. This is a dangerous misconception. When a fitting’s collar (the ferrule) is over-crimped, the excessive force crushes the hose. More importantly, it can fracture the high-tensile steel wire reinforcement inside the hose. These wires are what give the hose its pressure rating. An over-crimped fitting has already created a severe weak point by damaging this reinforcement. The connection may hold for a while, but under pressure spikes and flexing, the damaged wires will quickly fatigue and break, leading to a sudden failure.
The Weakness of Under-Crimping
This is the most common cause of a hose blowing straight out of its fitting. If the crimp is too loose, the fitting’s internal teeth (or “barbs”) do not bite deeply enough into the hose reinforcement. The connection relies only on friction. While this might be enough to hold the hose at low pressures, as soon as the system reaches its working pressure, the force is great enough to push the hose right out of the fitting. It’s like trying to hold a rocket with a loose grip. An under-crimped assembly is a ticking time bomb.
The Critical Error of Mismatched Components
This is a risk I constantly warn my customers about. A hydraulic hose from Manufacturer A and a fitting from Manufacturer B are not designed to work together. Each manufacturer engineers their hose and fittings as a matched system. The hose’s dimensions and the fitting’s tolerances are proprietary. Mixing them creates an unvalidated assembly with an unknown crimp specification and an unknown pressure rating. As a supplier, Topa provides precise crimp specifications for Topa hoses used with Topa fittings. Using this matched system is the only way to guarantee a secure, reliable, and safe connection.
What Are the Telltale Signs of an Impending Fitting Failure?
A catastrophic failure seems to happen without any warning at all. This unpredictability makes routine equipment use feel risky and stressful.
Failures are rarely instant. A diligent visual inspection can reveal clear warning signs. Look for weeping oil, visible cracks on the fitting, or hose cover damage right at the edge of the crimp.
Prevention is always better than repair. Training yourself and your operators to spot the early warning signs of a failing crimp is one of the most effective maintenance strategies you can implement. A failing assembly will almost always give you a hint that something is wrong before it lets go completely.
The Number One Warning Sign: Leakage
The most obvious sign of a problem is hydraulic fluid weeping or dripping from the point where the hose enters the fitting collar. This indicates that the seal is no longer intact. It might be due to an under-crimp that is starting to let go, or it could be a sign that the inner tube of the hose has been damaged by an over-crimp. Any leak, no matter how small, is a sign that the assembly’s integrity is compromised and that it needs to be replaced immediately.
Physical Damage to the Fitting
Take a close look at the fitting’s collar itself. Do you see any small, hairline cracks forming? These are stress fractures. They can be caused by excessive system vibration, or sometimes they indicate an extremely over-crimped ferrule that is cracking under the strain. If you see cracks, the fitting is failing and must be taken out of service.
Hose Degradation Near the Crimp
The area where the hose exits the fitting is a point of high stress, especially if the hose is flexing. Inspect the hose cover in this exact spot. Is it cracked, abraded, or bulging? A bulge is a particularly dangerous sign, as it indicates the wire reinforcement has broken, and the inner tube is starting to bubble out under pressure. This is a sign of imminent and catastrophic rupture.
What is the Correct Procedure for Identifying the Exact Cause of Failure?
A hose has blown off its fitting. You need to know precisely why it happened to ensure the replacement assembly doesn’t suffer the same fate.
A simple post-mortem investigation will reveal the cause. You must systematically inspect the failed assembly: examine the hose end, the fitting ferrule, and measure the crimp diameter against the manufacturer’s specifications.
When a customer in a place like Romania or Chile has a failure, I guide them through this exact process over the phone. Don’t just throw the failed assembly away. It holds the secret to why it failed. A few minutes of investigation can save you from repeating a costly and dangerous mistake.
Step 1: Examine the End of the Hose
Look at the portion of the hose that was inside the fitting.
- Pulled out cleanly: If the hose end looks relatively undamaged and seems to have just slipped out, the cause was almost certainly an under-crimp. The fitting didn’t have enough grip.
- Shredded or crushed: If the wire reinforcement is torn apart and the hose end is mangled, the likely cause is an over-crimp or a mismatched fitting. The excessive force destroyed the hose from the inside.
Step 2: Inspect the Fitting Ferrule
Now look at the metal collar that blew off the hose.
- No obvious damage: If the ferrule looks intact, this again points to an under-crimp.
- Cracked or fractured: If the ferrule itself is broken, this points to extreme over-crimping or a defective fitting. The force required to crimp it was so great that it made the metal brittle.
Step 3: Measure the Crimp Diameter (If Possible)
If you have another assembly made at the same time by the same person, you can perform the most important check. Using a set of calipers, measure the outside diameter of the crimped ferrule. Compare this measurement to the crimp specification chart provided by the manufacturer for that exact hose and fitting combination. Even a tiny deviation from the specified diameter can be the root cause of the failure.
| Observation | Likely Cause | Corrective Action |
| Hose pulled out, looks clean | Under-Crimped | Crimp to the correct, smaller specification. |
| Hose end is shredded and torn | Over-Crimped | Crimp to the correct, larger specification. |
| Ferrule is cracked | Extreme Over-Crimping | Recalibrate crimper; check crimp specifications. |
| Hose & fitting from different brands | Mismatched Components | Use a matched hose and fitting system (e.g., Topa). |
How Do You Properly Build a Replacement Hose Assembly?
You’ve identified the cause of failure. Now you must build a new assembly that is safe and reliable. A single mistake in this process can lead to another failure.
Building a durable assembly requires a precise, five-step method: correctly identify and match components, cut the hose cleanly, mark the insertion depth, use a calibrated crimper with the correct die, and verify the final crimp diameter.
This is the process we train our partners on. There are no shortcuts to safety. Every step is critical to the final quality of the assembly. Taking your time and being meticulous here is what separates a professional, reliable repair from a temporary, risky patch.
Step 1: Positive Component Identification
Ensure you are using the correct hose and fittings for the application’s pressure and fluid type. Most importantly, use a matched system from a single manufacturer.
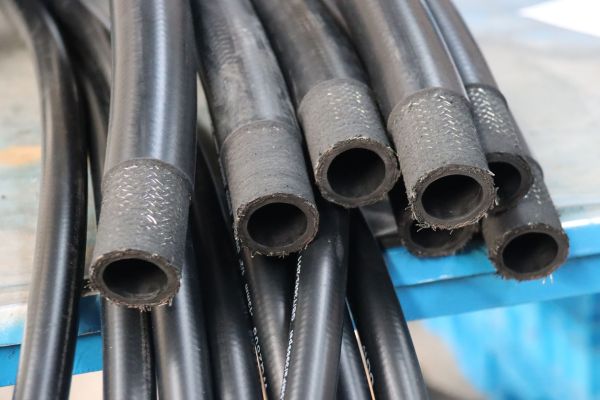
Step 2: Cut the Hose Cleanly and Squarely
Use a proper hose saw, not a hacksaw. A hacksaw will fray the wire reinforcement and leave rubber debris inside the hose. The cut must be perfectly square (at a 90-degree angle) to ensure the hose sits flush inside the fitting.
Step 3: Mark the Insertion Depth
Push the fitting onto the end of the hose until it bottoms out. Then, pull it back slightly. Use a paint pen or chalk to mark the hose at the edge of the ferrule. This mark ensures you know the hose is fully inserted during the crimping process.
Step 4: The Critical Crimping Process
Select the correct die set for the hose and fitting size you are using. Place the assembly in the crimper and activate the machine until it completes its cycle. The die set closes to a predetermined diameter, which is what controls the crimp.
Step 5: Final Inspection and Verification
This is the most important step. Use calipers to measure the finished crimp diameter. Measure in several places around the ferrule to check for consistency. Compare this dimension to the manufacturer’s crimp chart. If it is within the specified tolerance, the assembly is good. If not, you must cut it off and start again.
Can a Failed Hose Assembly Ever Be Reused or Repaired?
You have a fitting that looks perfectly fine that blew off an old hose. It seems incredibly wasteful and expensive to just throw it away.
Absolutely not. For safety, you must never reuse any component of a failed or used hose assembly. The crimping process permanently deforms the fitting, and the hose’s integrity is always compromised.
This is a question I get from very price-conscious buyers, and my answer is always the same, firm “no.” The few dollars you might save by trying to reuse a fitting are not worth the immense risk of another, potentially more violent, failure. The liability, danger, and cost of another failure far outweigh the cost of a new fitting.
Why Reusing Fittings is Unsafe
A hydraulic fitting is designed to be crimped once. The process of compressing the metal ferrule is called “cold working.” It changes the grain structure of the metal, making it harder but also more brittle. Trying to put it on a new hose and re-crimp it is extremely dangerous. The fitting has already been stressed to its limit and is highly likely to crack or fail under pressure. There is no safe way to reuse a crimp-style fitting.
The Illusion of “Repairing” a Hose
A hydraulic hose is a composite product with multiple, bonded layers. Once it has failed—whether it’s a leak, a cut, or a blow-off—its internal structure is permanently compromised. There are no safe clamps, patches, or sealants that can reliably contain hydraulic pressure. Any attempt at a “repair” is just creating a weak point that will fail again. The only safe and professional solution is the complete replacement of the entire hose assembly.
What Role Does Machine Operation Play in Preventing Failures?
You built a perfect assembly using matched parts and precise techniques, but it still failed prematurely. This is frustrating and suggests another factor is at play.
The hose assembly is part of a larger system. How the machine is operated and how the hose is installed are just as important as the assembly itself. Incorrect routing and severe pressure spikes can kill even the best hoses.
When a customer tells me they are experiencing repeated failures on a specific machine, my first questions are about the installation and application. A hose assembly does not exist in a vacuum. It lives in a harsh environment. Protecting it from this environment is a key part of ensuring a long service life.
The Impact of Incorrect Routing
Every hose has a minimum bend radius. Routing a hose on a tighter bend than specified will cause it to fail quickly right at the fitting, as this is where the flexing stress is concentrated. Likewise, twisting a hose during installation puts a constant torsional load on the wire reinforcement, which can lead to loosening of the crimp over time. Hoses must be routed in gentle curves without any twist.
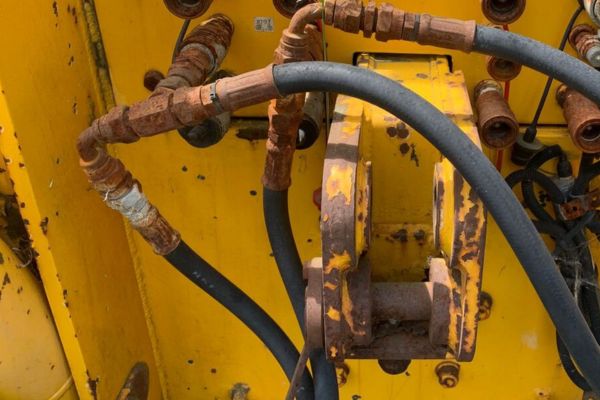
The Threat of External Abrasion
If a hose is allowed to rub against another hose or a metal part of the machine, its protective outer cover will be worn away. Once the steel wire reinforcement is exposed to moisture, it rusts. Rusted wire loses its strength and fatigue resistance, creating a weak spot that can easily lead to a burst or blow-off. Using protective sleeves or clamps can prevent this type of damage.
The Effect of System Pressure Spikes
Some applications are inherently more violent than others. A system with quick-acting valves can create severe hydraulic shock or pressure spikes. While a hose’s safety factor is designed to handle some of this, extreme and constant pressure spikes can fatigue a crimp connection over time. Sometimes, engineering controls like pressure accumulators may be needed to tame a particularly violent system and extend the life of all its components, including the hose assemblies.
Conclusion
Fitting blow-offs are not random. They are preventable with quality matched components, precise assembly techniques, and proper installation. Your safety and uptime depend on getting these details right.