Your equipment is down in the field with a burst hose. A reusable fitting seems like the perfect, quick fix, but using the wrong one can lead to an even more dangerous assembly failure.
To match reusable fittings correctly, you must first identify the exact hose standard (e.g., SAE 100R2AT). Then, select the two-piece fitting specifically engineered for that hose’s unique dimensions. Finally, follow a precise, step-by-step assembly process without mixing brands.
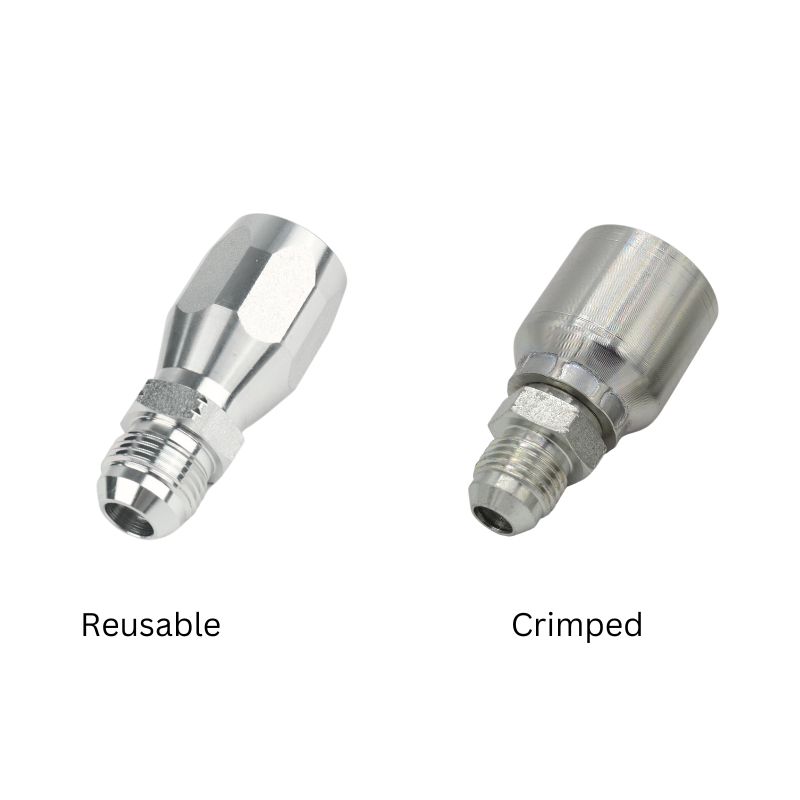
The main appeal of reusable hydraulic fittings is their remarkable convenience. They offer the ability to create a secure hose assembly in the field, far from a workshop, using only basic hand tools. This capability can turn a day of costly downtime into a repair that takes mere minutes. However, this convenience is balanced by a strict set of rules. Unlike a factory-crimped fitting that is permanently swaged onto a hose, a reusable fitting relies on a precise mechanical connection. Ignoring the fundamental principles of matching, assembly, and application is not just bad practice; it is a direct invitation for catastrophic failure.
What Makes a Fitting ‘Reusable’ Anyway?
The term “reusable” sounds simple, but you’re unsure what makes it different from a standard crimp fitting. How can it create a secure seal without a high-tonnage press?
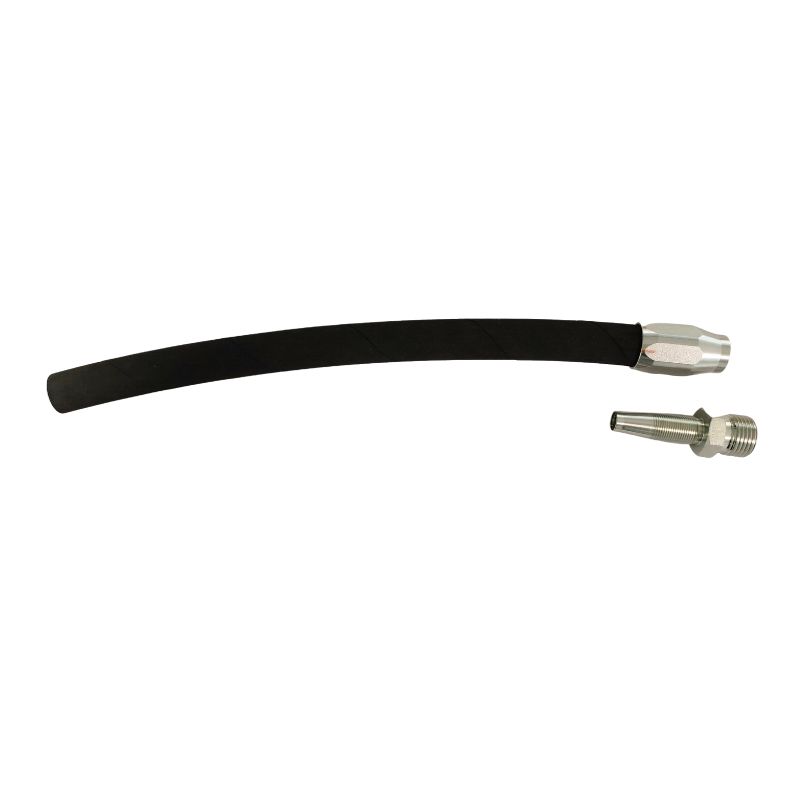
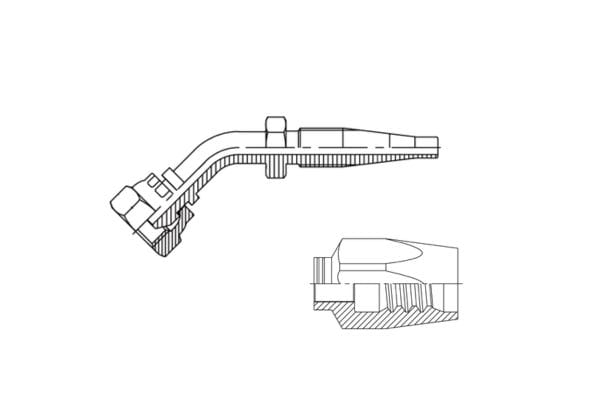
A reusable fitting is a two-piece mechanical assembly: a socket and a nipple. It works by screwing together, compressing the hose between the socket’s internal threads and the nipple’s body, creating a strong seal without permanent deformation.
A Mechanical Marvel
The genius of the reusable fitting lies in its purely mechanical design. It consists of two distinct, precision-machined components. The first is the **socket**, which is essentially a steel collar with an internal thread. This thread is typically a left-hand thread, meaning it screws onto the hose’s outer cover in the opposite direction of normal fasteners. The second piece is the nipple (also called the stem), which is the part that inserts into the hose’s inner tube and has the final connection end (like a JIC or NPT thread).
The assembly process is a sequence of powerful mechanical actions. First, the socket is screwed onto the hose, with its threads biting firmly into the outer rubber cover. Once the socket is in place, the lubricated nipple is screwed into the socket using a standard right-hand thread. As the nipple advances into the socket, its tapered body forces its way into the hose’s inner tube, creating an outward pressure. This action traps and compresses the hose wall powerfully between the exterior of the nipple and the interior of the socket. The result is a robust, high-pressure seal created entirely by the torque applied with wrenches, a stark contrast to a crimp fitting that is permanently squeezed onto the hose by a hydraulic crimper.
Why Is Matching Hose and Fitting So Critical?
You have a 1/2″ hose and a 1/2″ reusable fitting, so they should be compatible, right? This common assumption is one of the most frequent and dangerous mistakes made in field repairs.
Hoses with the same inner diameter can have drastically different wall thicknesses and outer diameters depending on their pressure rating and standard. A reusable fitting is engineered for the exact dimensions of a specific hose type, and mismatching will lead to failure.
A Game of Millimeters
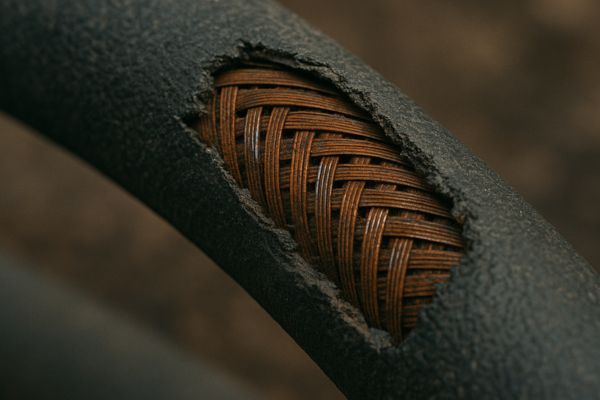
The term “1/2-inch hose” only refers to its inner diameter (ID). It says nothing about the hose’s construction, which is the most critical factor for fitting selection. A one-wire braid hose (SAE 100R1AT) has a much thinner overall wall thickness than a two-wire braid hose (SAE 100R2AT) of the same ID. This difference in outer diameter (OD) can be significant. A reusable fitting is not a universal clamp; it is a precision-engineered system. The internal dimensions of the socket and the external dimensions of the nipple are designed to work with the specific wall thickness of ONE type of hose.
Attempting to use a fitting designed for an R2AT hose on a thinner R1AT hose will result in an insecure connection. The fitting will feel like it has tightened, but the socket will not have sufficiently compressed the hose wall, leading to a dangerous blow-off under pressure. Conversely, trying to force a fitting for an R1AT hose onto a thicker R2AT hose is often physically impossible or, if forced, can damage the hose’s reinforcement. It is absolutely crucial to identify the layline on the hose to determine its standard and then select the reusable fitting explicitly marked for that standard.
| Hose Standard | Construction | Typical OD for 1/2″ ID | Fitting Compatibility Issue |
| SAE 100R1AT | 1 Wire Braid | ~22.1 mm (0.87″) | Requires specific 100R1AT fitting. |
| SAE 100R2AT | 2 Wire Braid | ~24.6 mm (0.97″) | OD is too large for an R1AT fitting. |
| SAE 100R5 | Textile Cover, 1 Wire Braid | ~25.4 mm (1.00″) | Requires a completely different style of “skive” reusable fitting. |
How Do You Properly Assemble a Reusable Fitting?
You have the correctly matched parts, but you’re worried about the assembly process. Without the right technique, you risk damaging the components or creating a leak-prone connection from the start.
Proper assembly is a methodical process: cut the hose square, lubricate the parts, screw the socket fully onto the hose, then screw the nipple into the socket, leaving a specific small gap to indicate a correct seal.
A Precise, Step-by-Step Procedure
Achieving a safe and leak-free seal with a reusable fitting requires following a meticulous process. Rushing or skipping a step will compromise the integrity of the final assembly.
Step 1: Cut the Hose Squarely
Use a fine-toothed hose saw or a cut-off wheel to ensure the end of the hose is perfectly flat and square. An angled cut will prevent the hose from bottoming out correctly inside the socket, leading to a weak connection. After cutting, lightly tap the hose end on a bench to clear any rubber or wire debris from the tube.
Step 2: Install the Socket
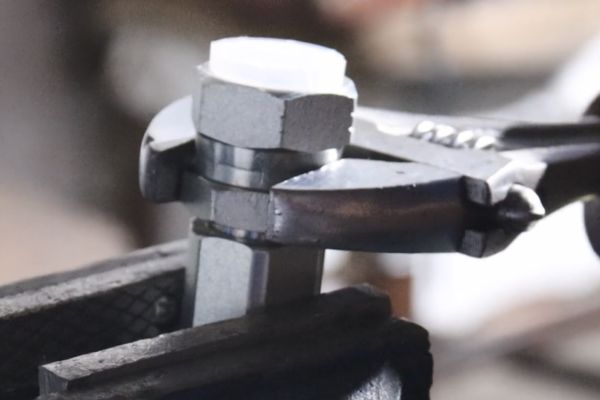
Secure the hex of the socket in a vise. It is crucial to lubricate the hose’s outer cover with hydraulic oil or a specific assembly lube. Push the hose into the socket and begin turning it **counter-clockwise**. Continue turning until the hose firmly bottoms out inside the socket. Some procedures recommend backing it off a quarter turn, but always consult the specific manufacturer’s instructions.
Step 3: Lubricate and Install the Nipple
Generously lubricate the threads of the nipple and the inside of the hose tube. This step is critical; without lubrication, the threads can gall, and you will get a false sense of tightness, resulting in an improper seal. Insert the nipple into the socket and begin tightening it clockwise by hand.
Step 4: Tighten to the Correct Gap
Use wrenches to tighten the nipple into the socket. The goal is NOT to tighten it until the nipple hex touches the socket. A proper assembly will leave a small, deliberate clearance gap between the nipple hex and the socket face, typically between 0.8mm and 1.5mm (1/32″ to 1/16″). This gap is visual confirmation that the hose has been compressed correctly. No gap means over-tightening; too large a gap means it’s too loose.
What Are the Most Common Assembly Mistakes?
Your new reusable assembly failed prematurely, and you are trying to understand what went wrong. It is highly likely that one of several common, but critical, errors were made during assembly.
The most frequent mistakes include mismatching hose and fitting types, mixing components from different brands, forgetting to lubricate the threads, over-tightening and eliminating the assembly gap, and trying to reuse a damaged hose.
Avoiding the Traps
While the assembly process is straightforward, several common pitfalls can lead directly to failure. Being aware of these traps is key to creating reliable assemblies every time.
- The Mismatch and Brand Mixing: This is the cardinal sin. As previously discussed, using a fitting not explicitly designed for the hose standard is a recipe for disaster. This also extends to mixing brands. A socket from one manufacturer and a nipple from another may look similar, but slight variations in thread pitch, taper, or material can create a weak point that fails under pressure. Always use a matched set from a single, reputable manufacturer.
- Forgetting Lubrication: This is a surprisingly common oversight. Attempting to assemble the fitting dry creates immense friction. This friction can prevent the parts from seating correctly and can damage or gall the threads, making future disassembly impossible. More dangerously, it gives a false torque reading, making you think the fitting is tight when it hasn’t achieved the proper compression on the hose.
- Over-Tightening and Closing the Gap: The instinct to tighten a fitting as much as possible is incorrect here. The design relies on a specific amount of compression. When you tighten the nipple so much that it bottoms out against the socket (closing the gap), you are applying excessive force. This can crush the hose, cut through the wire reinforcement, and create a stress point that is weaker than the rest of the hose. The gap is your indicator of success.
- Reusing a Damaged or Old Hose: The fitting is reusable; the hose is not. Once a hose has been assembled, compressed, and used, its structure is permanently altered at the fitting location. Never cut off a failed end and attempt to install a reusable fitting on a piece of old, brittle, or internally worn hose. Always start with a fresh, new length of the correct hose.
When Should You AVOID Using a Reusable Fitting?
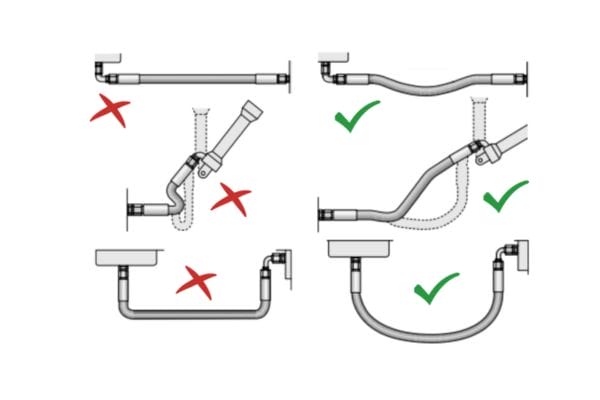
The convenience of reusable fittings is undeniable. But are there specific applications where choosing one over a permanent crimp fitting would be an unwise or unsafe decision?
Yes. Reusable fittings should be avoided in systems with extreme vibration or very high-pressure impulses. They are also unsuitable for spiral-reinforced hoses (like 4SP/4SH) and in applications requiring certified, factory-level assembly integrity.
Knowing the Limitations
While excellent for field repairs, a reusable fitting is not always the optimal choice. A factory-made crimp assembly is a single, integrated unit that generally offers superior performance in certain demanding conditions.
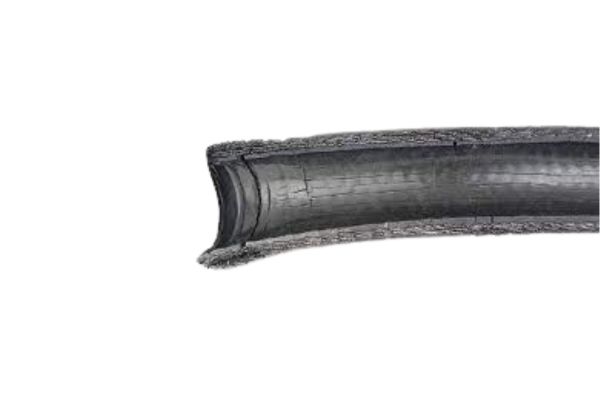
- Spiral-Reinforced Hose: Hoses like EN 856 4SP and 4SH are built with four or six layers of spirally wound wire to handle extreme pressure and impulses. The mechanical screw-together design of reusable fittings cannot properly grip this type of reinforcement. Spiral hose always requires permanent crimp fittings, often of a specialized “skive” design.
- Extreme Vibration and Impulse: In applications with constant, severe vibration or rapid, high-frequency pressure spikes (like on a hydrostatic drive), the mechanical threads of a reusable fitting could theoretically work loose over time. A permanent crimp fitting is a solid, 360-degree connection that is more resistant to these forces.
- OEM and Certified Assemblies: For liability and safety reasons, many original equipment manufacturers specify that only factory-made crimp assemblies be used on their equipment. Replacing a failed hose with a field-made reusable assembly could void the equipment’s warranty or violate safety certifications, especially in critical applications like aircraft or man-lifts.
- When Safety is Paramount: If a hose failure could lead to serious injury or catastrophic damage, a professionally made crimp assembly from a reputable shop is always the safest and most reliable choice. Reusable fittings are for convenient repair, not for compromising on safety in critical systems.
Conclusion
Reusable fittings are invaluable tools for field repair, but their convenience demands respect for the process. Proper use requires precise matching, meticulous assembly, and a clear understanding of their operational limitations to prevent dangerous failures.
At Topa, we understand the need for both factory-level reliability and field-level convenience. We manufacture a complete range of high-quality crimp fittings and perfectly matched reusable fittings to meet your specific needs. Contact our team to ensure you get the right components for a safe and durable hydraulic system.