“Taboos” in Hydraulic System Design banner

“Taboos” in Hydraulic System Design: Details You Can’t Afford to Ignore!

Hydraulic system design isn’t just about connecting pipes and hoping for the best—it’s a delicate balance of pressure, precision, and proper planning. One overlooked detail, like using the wrong thread or routing a pipe at the wrong angle, can lead to serious problems: leaks, pressure loss, system failures, or even workplace accidents. And here’s the kicker—most of these mistakes are 100% preventable. That’s why in this article, we’re diving deep into the “taboos” of hydraulic system design. These are the things that don’t always make it into the manuals but can make or break your entire setup. If you’re designing, installing, or troubleshooting hydraulic systems, these are the details you can’t afford to ignore.

Using the Wrong Threads: The Silent System Killer

Threaded connections might look simple on the surface, but choosing the wrong type can quietly sabotage your entire hydraulic system. And here’s the scary part—it often doesn’t fail immediately. A poor thread match might hold for days or even weeks before pressure fluctuations or vibrations expose the weak link. By the time you notice a leak, you could be dealing with serious downtime, costly repairs, or even a complete system breakdown.

NPT vs BSP vs Metric Threads: What’s Compatible and What’s Not

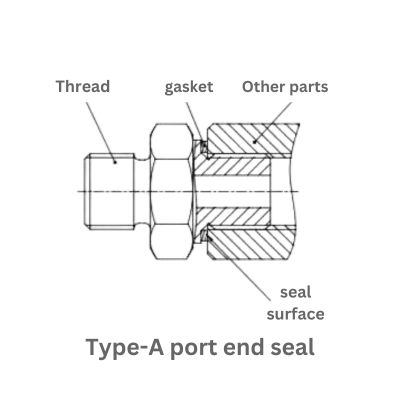
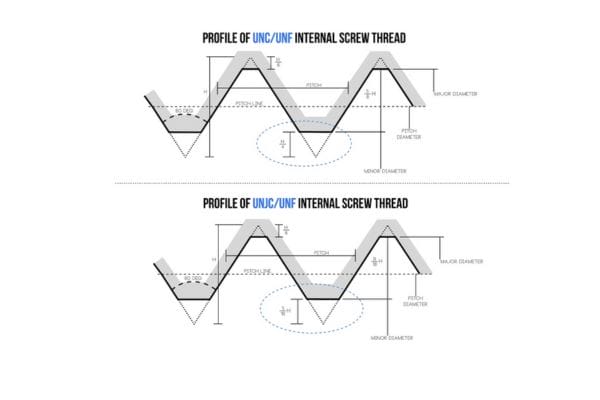
Let’s break it down. NPT (National Pipe Taper), BSP (British Standard Pipe), and Metric threads are not interchangeable. Their thread angles, pitch, and sealing methods are completely different. For example, NPT threads seal through a wedging action as the threads tighten, while BSPP (a subtype of BSP) often relies on a bonded seal like an O-ring. Metric threads? They add a whole new layer of variation with fine and coarse pitches.

Mixing them—even just once—can result in threads not fully seating, cross-threading, or worse, a connection that seems tight but slowly leaks under pressure. If your system uses components from multiple suppliers or countries, the risk of mixing thread standards goes up. One mismatched thread in a high-pressure environment is like a ticking time bomb.

Why Improper Thread Types Lead to Leaks and Failures

When thread types don’t match, several things can go wrong. You might experience micro-leaks that reduce system pressure over time. Or, under load, the mismatched threads could deform—permanently damaging the fitting and the port it connects to. In high-pressure applications, this can escalate into a catastrophic failure.

Even worse, because the threads look like they fit, technicians might unknowingly force them together using extra torque, further damaging both the male and female sides of the connection. The result? Damaged parts, safety hazards, and unplanned maintenance costs. A simple thread mix-up can mean thousands of dollars lost and a massive headache for everyone involved.

Thread Compatibility Checks Before Installation

Prevention is easier (and cheaper) than fixing a failure. Always check thread compatibility before assembling any hydraulic component. Use a thread gauge or go-to identification guide to verify whether you’re dealing with NPT, BSP, or Metric.

Even better? Standardize your thread types across your system whenever possible. Label components clearly, keep a reference chart in your workshop, and educate your team on the risks of mixing threads. When in doubt, don’t guess—double-check the spec sheet or consult with the manufacturer. It might add five minutes to your install time, but it could save you days of downtime later.

Ignoring Pressure Ratings: A Dangerous Oversight

Pressure ratings aren’t just numbers on a spec sheet—they’re the line between a system that runs smoothly and one that could blow out under stress. Yet, pressure mismatches remain one of the most common—and dangerous—mistakes in hydraulic system design. Whether it’s an underrated fitting or a misused hose, ignoring these limits can compromise your entire operation.

“Taboos” in Hydraulic System Design

Understanding Pressure Rating Mismatch in Fittings and Components

Every hydraulic component—fittings, hoses, valves, even the oil block—has a maximum rated pressure it’s designed to handle. This pressure rating is determined through rigorous testing, and exceeding it can cause deformation, leaks, or sudden failure.

The problem is, in real-world builds, people often mix components with different pressure ratings. Maybe it’s because of availability, budget, or simple oversight. You might install a hose rated for 2,000 PSI in a system that spikes at 3,000 PSI during peak operation. At first, everything seems fine… until one day, it’s not.

These mismatches can create weak points in the system—spots where pressure builds up and exceeds what that part can tolerate. That’s when failures occur, and often without warning.

What Happens When Components Can’t Handle Your System Pressure

The consequences of mismatched pressure ratings vary, but they’re never good. Here’s what can go wrong:

It’s not just about protecting the component—it’s about protecting everything downstream from the failure.

Selecting Fittings and Hoses Based on Real-World Working Pressure

Here’s the thing: your system’s “working pressure” isn’t always consistent. There are pressure spikes, surges, and load fluctuations you need to account for. That’s why selecting components based on peak pressure, not just nominal operating pressure, is so important.

Use these simple tips:

It’s tempting to save money by using cheaper or leftover parts—but when it comes to pressure, cutting corners costs much more in the long run.

Pipe Routing Chaos: Common Layout Mistakes

You could select all the right fittings and hoses—but if your routing is a mess, the whole system is at risk. Improper pipe routing is one of the sneakiest hydraulic system design mistakes because the issues don’t always appear right away. But over time, poor layout leads to excessive wear, vibration, joint stress, and eventually… system failure.

Let’s talk about what not to do—and how to fix it.

How Poor Routing Increases Wear, Vibration, and Failure

When hydraulic lines are routed too tightly, cross over each other, or take sharp angles, several things happen:

Over time, these small issues compound, and before you know it, you’ve got a system with multiple failure points just waiting for the right pressure spike or temperature swing.

“Taboos” in Hydraulic Systems Design

Best Practices to Reduce Pipe Stress and Routing Issues

Here are simple but effective layout habits that dramatically improve system life and reliability:

Good routing isn’t just about organization—it’s about performance, safety, and saving costs down the road.

Tube Bending Radius and Its Overlooked Importance

This one’s easy to ignore but has a huge impact: bending a tube too tightly weakens its structure. Every pipe and hose has a minimum bend radius specified by the manufacturer. Exceeding this causes:

A good rule of thumb: never bend a pipe tighter than its rated radius, and if you’re cold-bending steel tubes, always check wall thinning doesn’t exceed 15%.

Forgetting About Cleanliness: Contamination is a Killer

Here’s a harsh truth: most hydraulic failures are caused by contamination—not component defects. And yet, pipe and system cleanliness is often treated like an afterthought. Dust, metal shavings, rust, or even leftover oil from manufacturing can quietly enter the system and wreak havoc on valves, seals, and pumps.

The worst part? You usually don’t see the damage coming until it’s too late.

contamination quick Coupling

Pipe Cleanliness Standards You Should Never Skip

Before any hydraulic pipe or tube goes into service, it must be properly cleaned. Not “kind of clean.” Surgically clean. Here’s what proper pipe preparation looks like:

Skipping any of these steps increases the risk of contaminants entering the system during start-up—and they don’t just “pass through.” They circulate and gradually grind down every moving part they touch.

How Dirty Pipes Damage Components and Reduce System Life

Even microscopic particles in your hydraulic fluid can:

It’s not just about one faulty component—it becomes a system-wide issue. Contaminated oil turns your entire system into a slow-moving disaster.

Cleaning and Protecting Steel Tubes Before Assembly

You don’t need a clean room to maintain high standards. Here’s what you can do:

Cleanliness might not be the flashiest part of hydraulic design, but it’s one of the most important. A few minutes of extra care upfront can save thousands of dollars and hours of repair work later on.

Flange Connections: When Threads Just Aren’t Enough

Threads are great—until they’re not. In many hydraulic systems, especially those dealing with high pressure, heavy flow, or extreme vibration, threaded connections just can’t hold up. That’s where flange connections come into play. They’re not just stronger—they’re safer, easier to maintain, and better suited for the tough conditions industrial hydraulics often face.

If you’ve ever had a threaded connection shake loose or leak under high stress, it’s probably time to give flanges the attention they deserve.

When to Use Flanges Over Threaded Connections

So, how do you know when to switch from threads to flanges? Here are some clear indicators:

Threads are great for flexibility and lower-pressure applications, but for heavy-duty or mission-critical systems, flanges are the better long-term investment.

Flange Connection Standards You Need to Follow

Just like threads, flanges come with their own standards—and yes, they matter. Mixing incompatible flange types or failing to meet the right spec can create major sealing and safety issues.

Here are a few key ones to know:

Always check your pressure class, bolt torque values, and gasket/O-ring compatibility before installation. It’s not just about connecting metal—it’s about making a pressure-tight, vibration-resistant, and safe seal.

Why Large Diameter or Vibrating Systems Require Flanges

Imagine running a 50mm hydraulic pipe at 250 bar (3,600 psi) in a system that vibrates constantly—like in heavy mining or offshore equipment. Threads in this scenario? They’re a weak point waiting to fail.

Flanges excel here for several reasons:

If your system has serious flow or movement, flanges aren’t just a nice option—they’re essential.

Forgetting the “Basics”: Schematic and Porting Errors

It’s often the small stuff that trips people up. You can have the most advanced components and perfectly rated fittings, but if your hydraulic schematic is unclear, or your ports are misidentified, you’re setting the entire system—and your technicians—up for failure. These “basic” details are the foundation of good hydraulic design, and overlooking them can lead to installation delays, miswiring, system damage, and even safety hazards.

Let’s break down why these often-skipped steps matter more than you think.

Common Hydraulic Schematic Errors That Confuse Technicians

Hydraulic schematics are like the GPS of your system. If the map is wrong, the technician is lost.

Here are some of the most common mistakes:

Clear, standardized schematics save time, reduce mistakes, and improve system maintainability. Sloppy diagrams do the opposite.

Improper Port Location and Marking Issues

Let’s talk about port placement. You’d be surprised how often systems are built with ports in the wrong place, or worse—not marked at all.

Common problems include:

The fix? Design your ports with real-world usage in mind. Leave enough space for wrenches and human hands. And always, always mark ports clearly with engraved or printed identifiers.

Missing Identifiers That Lead to Costly Installation Errors

This one’s easy to prevent but happens all the time.

Imagine a technician installing hoses on-site and finding no labeling on the oil block. Now they have to either trace every hose back manually, or guess. In worst-case scenarios, ports get connected backward—causing immediate malfunctions, blown seals, or even safety shutdowns.

Best practices include:

In short, the time you spend labeling and mapping pays off many times over in fewer mistakes, smoother installations, and faster troubleshooting.

Misalignment and Vibration: The Long-Term Killers

Hydraulic systems don’t always fail because of a single dramatic mistake. Often, it’s the slow, silent killers—like misalignment and vibration—that wear down your components over time. You won’t see the damage immediately. But give it a few weeks or months, and you’ll start noticing leaks, fatigue cracks, and unpredictable failures that seem to come out of nowhere.

The truth? If your components aren’t aligned or mounted properly, your system’s lifespan is already ticking down.

The Impact of Poor Hydraulic Components Alignment

Misalignment happens when hoses, pipes, valves, or pumps are installed at angles or positions that strain the connections—even when they’re just sitting idle.

Here’s what can go wrong:

Even minor misalignment, if sustained under pressure, leads to performance loss, shortened component life, and more frequent maintenance cycles.

How Vibration Leads to Fatigue Cracks and Hose Failure

Vibration is like the slow drip of hydraulic doom.

It may come from nearby engines, heavy equipment, or even internal system dynamics—but if it’s constant, it’s destructive.

Here’s how it chips away at your system:

The result? Downtime, oil spray hazards, and a maintenance bill no one saw coming.

Mounting Techniques to Reduce Long-Term Wear

Good mounting is like insurance for your hydraulic components. It reduces stress, absorbs shock, and gives your system a fighting chance against the wear and tear of real-world operation.

Here are some practical tips:

Proactive mounting and alignment might not look flashy, but it’s what separates short-lived systems from long-lasting, high-performance setups.

Conclusion

Designing a hydraulic system isn’t just about making things move—it’s about making them move safely, reliably, and efficiently over the long haul. As we’ve seen, small oversights like thread mismatches, poor pipe routing, ignoring pressure ratings, or sloppy schematic details can lead to big-time failures. But the good news? Every one of these “taboos” is avoidable with the right mindset and attention to detail. Designing like a pro means thinking beyond basic functionality. It means planning for vibration, accounting for pressure surges, prioritizing cleanliness, and always asking: Will this still perform perfectly a year from now? So take your time, double-check everything, and treat every fitting, diagram, and bolt like it matters—because in hydraulic systems, it absolutely does.


FAQ

What’s the most common cause of hydraulic system failure?

Contamination is one of the top causes, often due to poor pipe cleanliness or unfiltered fluid.

Can I mix NPT and BSP threads in the same system?

No—these threads are not compatible and mixing them can lead to leaks or stripped connections.

How do I know if a hose bend is too tight?

Always follow the manufacturer’s minimum bend radius. If it looks kinked or flattened, it’s too tight.

When should I use a flange instead of a threaded connection?

Use flanges for large diameters (≥40mm), high pressure, or systems exposed to strong vibration.

Do I need to pressure test my system after installation?

Yes—testing at 1.5x the working pressure is standard practice to ensure there are no leaks or weak points.

How should hydraulic ports be marked?

Each port should be clearly labeled (e.g. P, T, A, B) near the opening, at least 6mm from the edge, and must match the schematic.

Hydraulic Fitting Buying banner

Hydraulic Fitting Buying: Avoid These 7 Common Pitfalls

Sourcing hydraulic fittings from an international supplier may sound simple, but it’s not. A wrong thread, mismatched standards, or unclear quote can quickly turn a cheap deal into an expensive nightmare. These aren’t just technical issues, but production delays, lost revenue and security risks waiting to happen. And if you’re also dealing with jet lag, language barriers and unclear specifications, the frustration only grows. Through real-life examples, proven solutions and experience, Topa will show you how to source smarter and safer – no matter where your suppliers are located.

Choosing the Wrong Thread or Fitting Type

Let’s be honest—thread confusion is one of the top reasons hydraulic fittings get returned, or worse, installed incorrectly. We’ve seen customers lose money on unusable stock, waste time chasing adapters, or damage their machinery all because one small detail—thread type—was overlooked.

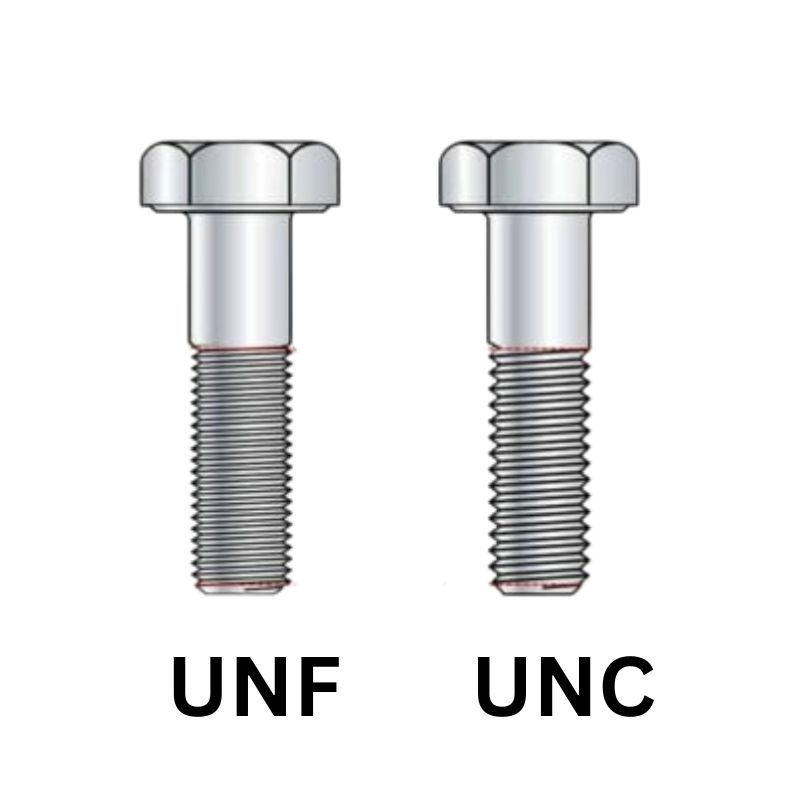
And it’s not their fault. With so many thread standards—BSP, NPT, JIC, ORFS, DIN, METRIC, UNF—it’s easy to assume they’re interchangeable. Spoiler: they’re not.

So how do these threads actually differ?

If you don’t know what’s installed in your system, guessing isn’t worth the risk. Threads that look identical at a glance often have different angles, pitches, and sealing methods. Even a 1mm difference in pitch or thread diameter can cause leaks—or worse, cross-threading that ruins your ports.

Here’s how to avoid this trap

Pro tip: If you’re unsure, don’t wait until after production to figure it out. Talk to your supplier before ordering. A good supplier will be able to confirm the thread based on machine brand, country of origin, or even just a photo with measurements.

At Topa, we’ve helped hundreds of clients avoid compatibility issues by confirming thread types upfront. And when needed, we even suggest adapter solutions to make non-standard systems work without a full redesign.

Overlooking Local Standards or System Requirements

It’s easy to assume that hydraulic fittings are universal—but they’re not. And overlooking local system standards is one of the fastest ways to end up with leaky connections, damaged ports, or entire shipments that just don’t fit. We’ve seen it too often: a buyer places a bulk order based on appearance alone, only to realize once the fittings arrive that the sealing method or tolerance doesn’t match their local system.

Let’s break it down.

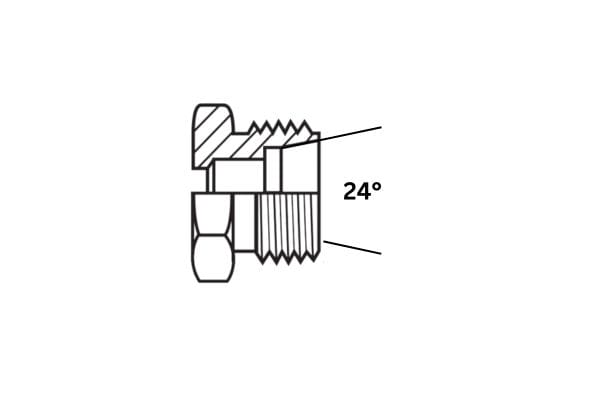
Different regions follow different hydraulic engineering standards. A 24° cone DIN fitting from Germany won’t mate correctly with an American ORFS or NPT port. A BSPP fitting used across the UK, India, and Australia has a parallel thread, while NPT fittings used in North and South America have a tapered thread. Even if the thread sizes appear similar, the sealing mechanism is completely different.

And it’s not just about threads.

This gets even more complicated in regions where equipment is imported from multiple countries. One machine might use BSP fittings, another DIN Metric, and another NPT. That’s why blindly applying a “standard” solution across all equipment doesn’t work.

Here’s how to stay ahead of the problem

Localization isn’t just a technical detail—it’s a strategy. When you choose fittings that match your region’s expectations, you reduce installation errors, minimize system downtime, and keep your customers happy.

Need help figuring out if your current system can be localized for easier sourcing? We’ve got engineers who can assist—just send a quick message with the equipment brand or country of use.

Ignoring Total Cost: Mold Fees, Shipping, Duties, and More

Many buyers focus solely on unit price when evaluating overseas suppliers—but that’s just the tip of the iceberg. The real cost of your hydraulic fittings often includes tooling, logistics, and paperwork, and if those costs catch you off guard, your profit margins vanish fast.

Let’s say you’re sourcing a custom hydraulic adapter. You receive a quote for $0.80 per piece—great, right? But what wasn’t included?

Suddenly, that $0.80 fitting becomes $1.50 or more—and if you didn’t factor that in, you’re stuck explaining to your manager or end client why the cost doubled.

We’ve seen cases where buyers were surprised by:

At Topa, we believe cost transparency is not optional—it’s mandatory. That’s why we always provide:

What you can do

The cheapest product is often not the cheapest overall. Smart buyers look beyond the surface price and partner with suppliers who lay everything out clearly, from quote to shipment.

Underestimating the Risk of Dimensional Errors or Surface Defects

When you’re sourcing hydraulic fittings, especially from overseas, it’s tempting to focus on price and lead time. But here’s the harsh truth: a fitting that doesn’t fit, leaks, or corrodes early is worthless—no matter how cheap it was. And unfortunately, issues like dimensional mismatch, poor surface finish, or inconsistent quality are more common than many buyers realize.

hydraulic fitting size chart Topa

Let’s talk real-world problems:

One of our clients in Europe received a bulk shipment from a different supplier before switching to us. More than 30% of the fittings had burrs or threading issues. The backlash? Lost time, urgent replacements, and customer complaints. They came to Topa and immediately requested tighter quality control—and we delivered.

Here’s how we eliminate these risks at Topa

For custom fittings, we go a step further:

What can buyers do to reduce risk?

Whether you’re dealing with OEM systems, aftermarket repairs, or distribution sales, your reputation is tied to the quality of the fittings you provide. Don’t let hidden flaws turn into visible failures. When you work with Topa, you’re not just buying fittings—you’re buying a process that’s built around consistency, traceability, and zero-defect mindset.

Poor Communication Slows Everything Down

In international sourcing, poor communication isn’t just annoying—it’s expensive. Delayed quotes, unanswered emails, and mixed messages between teams can cost you days, even weeks. And if your project is time-sensitive (which most are), that lag could mean missed deadlines, delayed shipments, or lost contracts.

Let’s face it—buyers hate:

These aren’t just minor frustrations—they destroy trust.

We get it. You need a supplier who treats your time like it matters. That’s why at Topa, we built our communication process around speed, clarity, and accountability.

Here’s what we do differently

What you can expect as a Topa customer

Buyers choose Topa not just for pricing or product range—but because we make their job easier. That starts with crystal-clear, fast communication from day one.

No Visibility into Production or Shipping Status

For buyers managing multiple projects across time zones and tight deadlines, one thing is non-negotiable: transparency. If you don’t know where your order stands, you can’t plan production, make delivery commitments to your customer, or keep your boss off your back. And unfortunately, too many suppliers go silent once the payment clears.

You know the story:

That kind of black box supply chain creates anxiety, damages trust, and puts your business at risk. Whether you’re a distributor preparing for a product launch or a maintenance team with a machine down, delays with no updates can ripple into lost revenue, idle equipment, or missed client deadlines.

At Topa, we do things differently.

Topa hydraulic fitting transportation

Here’s how we keep you in the loop—every step of the way:

Live Order Tracking

Once your order is placed, we generate a custom production schedule with key milestones—drawing confirmation, machining, plating, inspection, and packing. You’ll get updates at each step, either by email or your preferred messaging platform.

Pre-Dispatch Packaging Photos

Before shipment, we send high-res photos of:

Shipping Timeline + Tracking Number

We provide the exact shipping date in advance, and once your order ships, we send the real-time tracking link (DHL, FedEx, sea freight, etc.)—plus PDFs of the commercial invoice, packing list, and any required compliance documents.

Early Warning System

If something unexpected happens—raw material delays, plating queue backup, port congestion—we’ll tell you immediately. No sugar-coating, no last-minute surprises.

Why this matters

Topa isn’t just a supplier—we’re your behind-the-scenes partner. We know that visibility builds trust, and that trust builds long-term business.

Lack of Technical Support Before and After Sales

Hydraulic fittings may look simple—but when you’re dealing with different thread types, sealing standards, and pressure ratings, a tiny mistake can cause major headaches. One mismatched fitting, and you’re facing leaks, rework, or angry end users. Unfortunately, many suppliers treat fittings like “commodity parts” and skip the most critical step: technical support.

We’ve heard the frustration before:

That’s a real problem. Because when you’re spending money—especially on custom parts or large orders—you need answers, not silence.

At Topa, we take technical support seriously—before and after the sale.

Here’s what we provide to support your engineering and purchasing team:

Pre-Sales Engineering Support

Technical Resources

After-Sales Support

Hydraulic buyers aren’t just purchasing metal—they’re investing in reliability, safety, and ease of mind. If a supplier can’t help you before production or after delivery, you’re left carrying all the risk.

At Topa, we stand beside you from drawing to delivery—and even after installation.

Conclusion

Need help to identify a thread? Want samples to test quality before bulk buying? Have a custom fitting design that needs quoting? Send us a photo, drawing, or even just a part number. We’ll take it from there. Contact Topa today — and get hydraulic fittings that fit your system, your timeline, and your standards.


FAQ

Is the quality of Topa fittings compatible with Parker or Eaton?

Yes. We meet ISO/SAE standards and use high-grade materials at a more affordable price.

What if I pick the wrong threads?

We offer a thread matching service. Please send us your samples or photos and we will confirm before production.

Do you charge mold fee for customized parts?

Only for the first time mold charge. If the quantity meets MOQ, we will refund the mold charge. All charges are quoted in advance.

How do I know which thread type I need – BSP, NPT or Metric?

Send us a photo, part number or basic measurements and we will help you determine the correct thread type before you place your order.

Can I get drawings or samples before mass production?

Yes. For customized parts, we can provide drawings and send samples for testing before official production.

Are there any hidden costs such as tooling fees or shipping costs?

No, there are not. We provide comprehensive, transparent quotes with all costs – tooling, packaging, shipping and documentation – clearly outlined up front.

Hydraulic Fitting Custom Orders Step-by-Step Guide banner

Hydraulic Fitting Custom Orders: Step-by-Step Guide

Standard fittings might work in theory — but when you’re dealing with heavy machinery, high-pressure systems, or compact equipment layouts, “close enough” just isn’t good enough. Trying to squeeze a generic part into a non-standard setup leads to leaks, early wear, and even system failure. It’s frustrating, costly, and totally avoidable. That’s why more businesses are turning to hydraulic fitting custom solutions. Whether you need a unique thread type, tighter tolerances, or special materials, custom hydraulic fittings are designed around your system — not the other way around. For industries like OEM manufacturing and construction, precision matters. And with options tailored for high-pressure applications, tight spaces, or corrosive environments, custom fittings give you the compatibility and reliability your operation demands — no compromises.

Gathering Your Application Details

Ordering a hydraulic fitting custom product without sharing the right specs is like ordering a tailored suit without giving your measurements — it just won’t fit right. To avoid costly mistakes, delays, or performance issues, this is where you want to be crystal clear. The more detailed info you give your supplier upfront, the smoother your entire custom order process will go.

This part isn’t just about telling your supplier what you want — it’s about giving them what they need to deliver a fitting that actually works with your hoses, your system, and your application environment.

Fitting Specifications Your Supplier Needs

Before machining even begins, your supplier needs a solid blueprint of what you’re after. Here’s what you should always have ready (or request help defining):

Pro tip: Providing photos or samples of your existing part can fast-track the process — especially when working with an overseas custom fitting manufacturer.

Agriculture Hydraulics Topa

Compatibility with Hose Assemblies and Hydraulic Systems

Even a perfectly manufactured fitting is useless if it doesn’t match your hose assembly or integrate properly into your hydraulic setup. Think of your system as a chain — and the fitting is one of the links. If that link doesn’t line up, the whole chain fails.

When placing a custom hydraulic fitting order, make sure to share:

This is especially relevant if you’re trying to match fittings to legacy equipment, international machinery, or multiple brands within the same system. Compatibility goes beyond just physical dimensions — you’re looking at performance, seal integrity, and maintenance access too.

Matching Pressure Ratings and Environments

Hydraulic systems don’t all run the same. Some deal with mild, low-pressure flows. Others? They’re running full tilt under hundreds of bar or working outdoors in heat, mud, or freezing rain. Your custom fittings need to survive real-world abuse, not just look good on paper.

Let your supplier know about:

For example, if you’re ordering custom hydraulic fittings for offshore applications, corrosion resistance is a top priority. In contrast, if you’re fitting a compact excavator, space-saving design and vibration tolerance might matter more than material cost.

Don’t forget to bring up any industry standards your fitting must meet — like SAE, ISO, or DIN. Some customers also request hydraulic fitting testing reports as part of their quality checklist, especially for equipment going to regulated industries.

Choosing the Right Thread Type: BSP, NPT, or JIC?

When it comes to custom hydraulic fittings, one of the most overlooked — yet critical — decisions is the thread type. Get it right, and everything fits like a glove. Get it wrong, and you’re dealing with mismatched connections, leaks, and wasted time. In global B2B trade, where equipment might come from multiple countries or systems, understanding thread types isn’t just helpful — it’s absolutely necessary.

BSP vs NPT: What’s the Difference and Why It Matters

BSP (British Standard Pipe) and NPT (National Pipe Tapered) are both widely used, but they’re not interchangeable — and trying to force one into the other is a recipe for leaks.

Here’s the tricky part: at first glance, BSP and NPT threads can look almost identical — but their thread pitch, angle (55° for BSP, 60° for NPT), and sealing mechanism are completely different. Mixing them up can cause major problems in high-pressure fittings or OEM hydraulic fittings, where tight seals are essential.

When placing a custom hydraulic fitting order, always clarify the thread type — especially if your equipment is sourced globally.

Where JIC Fittings Work Best

JIC (Joint Industry Council) fittings are another popular choice, especially in high-pressure hydraulic systems. They use a 37° flare seating surface, which provides a strong mechanical seal and reduces the chance of leaks, even under heavy vibration or pressure cycling.

Here’s where JIC fittings shine:

JIC fittings are also a go-to in custom hydraulic adapter fittings, especially when mixing thread standards or integrating into U.S.-made machinery. They’re reusable, easy to install, and support a wide range of hose and tube assemblies.

If you’re working on a custom fitting order for systems that need frequent service or endure harsh usage, it’s worth considering whether JIC threads are the best fit for your design.

Dealing with Global Connection Standards

One of the biggest challenges in international hydraulic projects is thread compatibility across regions. Machines built in the U.S. may use NPT or JIC threads. European equipment typically uses BSP or metric. Japanese systems often come with JIS (Japanese Industrial Standard) threads.

If your system includes components from multiple countries, you’ll need custom hydraulic fittings that act as adapters — converting thread types without sacrificing seal quality or flow.

To make the ordering process smoother, it helps to:

A reliable hydraulic fitting supplier will understand these variations and can design fittings that bridge multiple standards, saving you the hassle of using extra adapters or risking system performance.

Material Selection: Brass, Steel, or Stainless Steel?

When it comes to hydraulic fitting custom orders, material selection is more than just a technical checkbox — it’s directly tied to your fitting’s performance, lifespan, and even safety. Choosing the wrong material can lead to corrosion, cracks, or failure under pressure. Choosing the right one means fewer maintenance headaches, longer service intervals, and a better fit for your specific application environment.

So, how do you decide between brass, carbon steel, and stainless steel? Each one has its own pros, cons, and ideal use cases — and understanding these can help you avoid costly missteps in your next custom fitting project.

How to Choose Between Hydraulic Fitting Materials

Not all materials behave the same way — especially when you’re dealing with hydraulic systems that handle high pressure, corrosive fluids, or extreme temperatures. Here’s a quick breakdown of your main options:

When placing a custom hydraulic fitting order, consider these key questions:

If your system is indoors, low-pressure, and fluid-friendly — brass might be a great fit. If you’re powering construction equipment, carbon steel is likely your go-to. And if you’re dealing with offshore oil rigs or food production? Stainless steel is probably non-negotiable.

Hydraulic Adapters materials

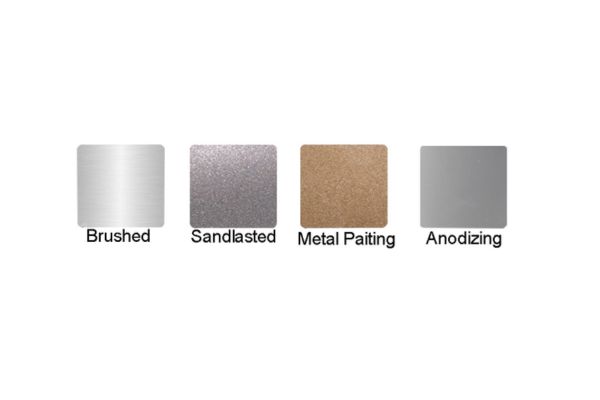
Corrosion Resistance, Plating Options, and Surface Treatment

For many B2B buyers, corrosion resistance is a key deciding factor — especially in bulk hydraulic fittings where even small failures can lead to costly replacements.

Here’s where surface treatments come into play:

If you need fittings for coastal, humid, or corrosive environments, it’s worth investing in better plating or switching to stainless altogether. You can also ask your hydraulic fitting supplier for test data or salt spray test results if you’re unsure.

Many customers also consider surface treatments not just for protection but for appearance — especially when ordering custom logo fittings or branded parts for resale.

Zinc-Plated vs Stainless: What Lasts Longer?

This is one of the most common comparisons — and the answer depends on your application. Here’s how they stack up:

If you’re building OEM hydraulic systems for construction equipment, you might lean toward zinc-plated carbon steel fittings to keep costs manageable without sacrificing strength. But if you’re supplying hydraulic solutions for marine, food-grade, or chemical processing applications, then stainless steel custom hydraulic fittings are often the only safe choice.

Sizing It Right: How to Use a Hydraulic Fitting Size Chart

In the world of hydraulic systems, size really does matter — and guessing just isn’t an option. One of the most common issues in custom hydraulic fittings is mismatched dimensions. Whether it’s an incorrect thread pitch or a slightly off outer diameter, the result is usually the same: leaks, pressure drops, or complete connection failure. That’s why knowing how to use a hydraulic fitting size chart is critical when placing a custom order.

This isn’t just about “getting the number right.” It’s about ensuring complete compatibility with your hose assembly, thread standard, and connection style. So if you’re sourcing custom hydraulic fittings for OEM machinery, high-pressure systems, or international equipment, make sure sizing is at the top of your checklist.

Understanding Diameter, Thread Pitch, and Tolerance

Let’s break down the three main factors you need to understand when using a size chart:

When reading a fitting size chart, you’ll often see combinations like “1/2-14 NPT” or “M18x1.5”. Here’s what that means:

Using the wrong combination may seem like a small detail, but it can cause massive problems in your hose assembly or lead to system-wide failures in industrial environments.

Why “Close Enough” Doesn’t Work in Hydraulics

In carpentry, being off by 1mm might not matter much. In hydraulics? That same millimeter could mean a loss of thousands of PSI, fluid leakage, or early wear on critical components. Especially in custom hydraulic fittings, close enough is never good enough.

Here’s why precision matters:

If you’re ordering in bulk hydraulic fittings, a consistent size spec ensures interchangeability and prevents delays on the assembly line. Even slight dimensional errors can multiply into major inefficiencies at scale.

That’s why it’s best to double-check:

If you’re unsure, your hydraulic fitting supplier should be able to assist you with size verification. Some also provide measuring tools, guides, or digital charts that make it easier to match parts accurately.

Don’t Skip This: Testing, Inspection, and Quality Control

You can have the perfect material, flawless thread type, and tight design — but if your custom hydraulic fittings fail under pressure, none of that matters. That’s where testing, inspection, and quality control (QC) come in. This stage is the invisible backbone of your order, and skipping it (or working with a supplier who cuts corners) can cost you big — in both money and reputation.

Whether you’re sourcing parts for OEM machinery, high-pressure construction systems, or global distribution, QC ensures what arrives in your box is exactly what you ordered — and that it actually works.

How Fittings Are Tested for Leaks, Strength, and Accuracy

Reputable manufacturers will run multiple types of tests to validate that your fittings meet both design and performance standards:

Some customers also request third-party inspection reports, especially when ordering for large-scale industrial or international use. If you’re reselling, these test results can even become part of your documentation for end users.

Hydraulic Pressure Testing

The Role of Fitting Tolerance in Performance

One of the most underrated factors in fitting design is tolerance — the acceptable variation between the drawing and the finished part. In high-pressure hydraulic systems, even tiny deviations can cause major issues.

Tight tolerances matter because they:

When placing a hydraulic fitting custom order, talk to your supplier about critical tolerance areas, especially in threaded and sealing sections. Overly loose tolerances may reduce cost, but they can also create future failures in the field — and that’s never worth it.

Why QC Is Your Secret Weapon

Here’s the thing: Quality Control isn’t just a final step — it’s your silent sales tool. Every properly machined, pressure-tested, leak-free fitting reinforces your brand’s reputation. For buyers and engineers, it builds trust. For resellers and distributors, it reduces returns and warranty claims.

If you’re offering custom logo fittings, nothing damages your image faster than a product that doesn’t perform. That’s why strong QC is worth asking about during the quote process. Some suppliers include a quality checklist or inspection photos in the packaging — a nice touch that reassures your customer and shows you care.

Think of QC not as a cost, but as an insurance policy that protects your time, your order, and your brand.

Packaging, Branding, and Shipping: Finishing Touches

You’ve spent time perfecting your custom hydraulic fittings — now let’s make sure they arrive safe, look professional, and leave a strong impression. Whether you’re ordering for your own workshop, for resale, or as an OEM, packaging and delivery aren’t just logistics — they’re part of the customer experience.

Done right, these final touches can elevate your brand and keep your fittings damage-free from the factory to your warehouse.

Custom Logo Fittings and Branded Packaging

Want to stand out from your competition? Add your identity directly to your fittings.

Your custom fitting manufacturer should be able to handle these requests with low or reasonable MOQs. It’s a small investment that goes a long way — especially when you’re building a trusted name in the hydraulic supply chain.

Shipping Process, Options, and Timelines

After inspection and packaging, your order is ready to move. Shipping custom hydraulic fittings involves both planning and protection.

Common options include:

Ask your supplier for:

Depending on the country, you may also need to clarify HS codes or special certifications — your supplier should help guide you through that.

hydraulic fitting transportation Topa

Keeping Fittings Safe in Transit

Hydraulic fittings are tough — but threads, sealing surfaces, and plating can still get damaged during transport if not packed properly.

Look for:

A damaged fitting is more than just an inconvenience — it can delay installations, affect your client’s trust, and cause costly rework. Taking extra care in the packaging phase pays off with fewer complaints and smoother handoffs.

Final Thoughts

Need help with your next custom fitting order? Our team is here to help — from design to delivery. Whether you’re working on a one-off prototype or a bulk OEM order, we’ll guide you every step of the way. Contact us for free drawings, samples, and quotes today.


FAQ

What’s the minimum order quantity for custom hydraulic fittings?

MOQ typically starts at 100–500 pieces, depending on the fitting type, material, and complexity. Small sample orders are usually available.

How long does it take to produce a custom hydraulic fitting order?

Most orders are completed within 6–8 weeks after sample approval. Complex designs or large volumes may take slightly longer.

Can I get a sample before placing a bulk order?

Yes. We highly recommend samples for testing and verification. Most suppliers offer 1–5 pieces for approval before mass production.

Can you match fittings to my existing hose brand?

Absolutely. Just provide your hose specifications or a sample, and we’ll ensure full compatibility with your hose assembly.

What materials can I choose for custom fittings?

Options include carbon steel, stainless steel (304/316), and brass. Surface treatments like zinc plating or nickel plating are also available.

Do you offer logo customization and branded packaging?

Yes. We can laser-etch your logo on fittings and provide custom labels, bags, or boxes for branding and resale.

5 Hidden Causes of Hydraulic Oil Leaks banner

5 Hidden Causes of Hydraulic Oil Leaks in Industrial Systems

In high-pressure industrial settings, hydraulic oil leaks remain a major issue, causing 70% of system failures and significant financial loss. Conventional maintenance—replacing seals and tightening hydraulic fittings—often falls short, as hidden design flaws go unaddressed. These flaws lead to recurring leaks, safety risks, environmental harm, and costly downtime. Only by targeting the root design issues can facilities achieve lasting reliability and reduce the ongoing burden of hydraulic failures.

I. The Microscopic Precision Gap: Seal Groove Design Flaws

At the heart of many hydraulic oil containment failures lies an easily overlooked detail: the precision of seal groove dimensions. These seemingly minor design elements play an outsized role in system reliability, yet they frequently receive insufficient attention during the design phase.

The Critical Tolerance Factor

The relationship between hydraulic cylinder seal groove tolerance specifications and leak prevention is more critical than engineers often realize. In high-pressure hydraulic systems, even microscopic deviations can create significant problems. Consider a real-world case from a manufacturing facility where a hydraulic cylinder experienced persistent leakage despite multiple seal replacements. Upon detailed investigation, engineers discovered that the seal groove axial tolerance exceeded specifications by merely 0.1mm—a deviation invisible to the naked eye. This minor imperfection caused the O-ring to experience uneven compression under 21MPa pressure, resulting in side extrusion and a substantial leak rate of 0.8L/min.

5 Hidden Causes of Hydraulic Oil Leaks

Surface Finish: The Invisible Leak Path

Beyond dimensional accuracy, surface roughness represents another crucial factor in hydraulic oil containment that often escapes proper scrutiny. Research demonstrates that when surface roughness exceeds Ra1.6μm, seal contact stress distribution uniformity decreases by approximately 42%, creating microscopic channels through which pressurized fluid can escape.

These findings highlight the importance of hydraulic seal surface roughness requirements in preventing oil leakage. Modern hydraulic systems operating at pressures above 20MPa require surface finishes of Ra≤0.4μm on sealing surfaces to ensure reliable containment. This level of finish eliminates the microscopic valleys that can form potential leak paths under pressure.

Advanced Solutions for Precision Sealing

Preventing hydraulic oil leaks with FEA optimization has emerged as a best practice among leading equipment manufacturers. Finite element analysis allows engineers to simulate seal behavior under various pressure conditions, optimizing compression ratios between 15-25% to balance sealing effectiveness against excessive compression that could damage the seal material.

Implementation of these precision-focused approaches requires attention to both design and manufacturing processes:

By addressing these microscopic details during the design phase, manufacturers can eliminate a significant percentage of hydraulic oil leaks before equipment ever reaches the field.

II. Vibration-Induced Hydraulic Connection Failures

While static design elements like seal grooves form the foundation of leak prevention, dynamic factors—particularly vibration—represent another hidden cause of hydraulic oil leaks that frequently escapes proper consideration during system design.

The Resonance Effect on Hydraulic Fittings

Vibration-induced hydraulic fitting leakage occurs when mechanical oscillations gradually loosen threaded connections or create fatigue in components. This phenomenon becomes particularly problematic when the natural frequency of hydraulic components aligns with the operating frequency of nearby equipment, creating a resonance that amplifies vibration effects.

A revealing case study comes from a construction equipment manufacturer where a loader experienced persistent leakage from pump suction line fittings. Detailed frequency analysis revealed that the suction line had a natural frequency of 87Hz—almost perfectly matching the engine’s vibration frequency at certain RPMs. This resonance created vibration acceleration peaks exceeding 8g (well above the 5g industry standard limit), resulting in connection loosening and an annual oil loss of 3.2L from a single fitting.

Pipeline Layout Design Considerations

Optimal hydraulic hose routing to prevent leaks requires thoughtful three-dimensional planning that goes beyond simply connecting points A and B. Modern design approaches utilize topological optimization software to determine ideal routing paths that minimize stress concentrations and vibration effects.

A key consideration in this process is reducing the number of 90° bends, which not only create pressure drop but also serve as stress concentration points where vibration effects are amplified. Each 90° bend eliminated from a hydraulic line design reduces potential leak points and improves overall system reliability.

Vibration Dampening Strategies

Implementing effective hydraulic system vibration dampening solutions requires a multi-faceted approach. Strategic installation of hydraulic accumulators (sized at approximately 1:10 ratio to system volume) helps absorb pressure pulsations that contribute to vibration. Meanwhile, composite rubber-metal mounting brackets provide isolation between hydraulic components and vibration sources.

Advanced vibration mitigation approaches include:

These measures collectively create a more stable hydraulic system environment, significantly reducing the likelihood of vibration-induced oil leaks throughout the equipment’s service life.

III. Thermal Management Deficiencies

Temperature control represents the third hidden cause of hydraulic oil leaks, with thermal effects often overlooked during system design despite their profound impact on seal performance and system integrity.

The Temperature-Seal Degradation Relationship

Understanding temperature effects on hydraulic oil seal lifespan is crucial for designing leak-resistant systems. Research consistently demonstrates that elevated temperatures accelerate chemical degradation in elastomeric seal materials. The industry rule of thumb—that seal life decreases by half for every 10°C increase above 65°C—has significant implications for system design.

This temperature sensitivity varies by material. Nitrile rubber (NBR) seals, commonly used in hydraulic systems, experience dramatically accelerated aging at elevated temperatures. At 90°C, NBR seals may age eight times faster than at normal operating temperatures, rapidly losing elasticity and sealing capability.

High-Temperature factory

Case Analysis: Extreme Temperature Consequences

A compelling example of high-temperature hydraulic oil leak prevention failure comes from a 4000T injection molding machine that experienced persistent leakage issues. Investigation revealed oil temperatures reaching 92°C during extended operation—well beyond the recommended maximum of 65°C. This thermal stress caused the NBR seals to deteriorate from their original hardness of 70±5 Shore A to just 52 Shore A, with compression set increasing to 38% (far exceeding the 25% maximum allowable limit).

The consequences extended beyond just fluid loss. The degraded seals allowed contaminants to enter the system, accelerating wear on precision components and creating a cascade of reliability issues throughout the hydraulic system.

“What makes thermal degradation particularly insidious is its gradual nature,” explains maintenance engineer Carlos Mendez. “Unlike a sudden failure, temperature-induced seal degradation happens incrementally over weeks or months, making it difficult to connect cause and effect without careful monitoring and analysis.”

Cooling System Design Innovations

Effective hydraulic oil cooling system design for leak prevention requires moving beyond simplistic approaches to implement targeted cooling strategies. Modern systems increasingly utilize plate heat exchangers with heat transfer coefficients of 3000W/m²·K or greater, providing efficient cooling even in compact installations.

Innovative tank designs represent another advancement in thermal management. Dual-layer spiral flow configurations guide oil through optimized cooling paths, increasing heat dissipation by up to 65% compared to conventional tank designs. These improvements maintain lower average oil temperatures, significantly extending seal life and reducing leak potential.

Implementation considerations for effective thermal management include:

By addressing thermal management as a critical design factor rather than an afterthought, engineers can significantly extend seal life and reduce the incidence of temperature-related hydraulic oil leaks.

IV. Connection and Thread Design Inadequacies

The fourth hidden cause of hydraulic leakage lies in connection and thread design choices that may seem minor but have outsized impacts on system integrity.

The Fitting Selection Dilemma

Developing a comprehensive pressure-rated hydraulic fitting selection guide is essential for system designers, as different fitting types offer varying pressure capabilities and reliability characteristics. The selection process must account for not just maximum pressure ratings but also pressure cycling, vibration exposure, and temperature fluctuations.

Common fitting types and their characteristics include:

The Torque Factor in Hydraulic Connections

Understanding hydraulic fitting torque specifications to prevent leaks is crucial yet frequently overlooked. The relationship between applied torque and sealing effectiveness follows a bell curve rather than a linear progression—both insufficient and excessive torque lead to leakage.

A revealing case study comes from an excavator hydraulic pump that experienced persistent leakage from an NPT threaded connection. Analysis showed the connection had been overtightened by approximately 20%, creating distortion in the sealing surfaces that reduced contact stress by 40%. This seemingly minor installation error resulted in a persistent leak that eluded multiple repair attempts.

“The misconception that ‘tighter is better’ causes countless hydraulic leaks,” explains maintenance trainer Sarah Johnson. “Proper torque creates optimal stress distribution across sealing surfaces. Exceed that torque, and you’re actually reducing sealing effectiveness while potentially damaging components.”

leak at connection

Advanced Connection Technologies

Implementing advanced hydraulic connection systems for zero-leak performance requires moving beyond conventional fittings to embrace newer technologies specifically designed for challenging applications. Composite sealing systems that combine 24° cone faces with supplementary O-rings provide redundant sealing mechanisms that maintain integrity even under extreme conditions.

Installation practices are equally important, with digital torque tools now considered essential for critical connections. These tools provide precise torque application with ±3% accuracy and maintain records of installation parameters for quality assurance purposes.

Forward-thinking organizations are implementing comprehensive connection management protocols that include:

These measures collectively address the connection-related factors that contribute to hydraulic oil leaks, creating more reliable systems with significantly reduced maintenance requirements.

V. Material Compatibility Oversights

The fifth and final hidden cause of hydraulic leakage involves material compatibility issues—particularly between seals and hydraulic fluids—that can undermine even the most carefully designed systems.

Chemical Interaction Between Seals and Fluids

Implementing thorough hydraulic seal material compatibility testing is essential yet frequently overlooked during system design. The chemical interaction between elastomeric seals and hydraulic fluids is complex, with factors including temperature, pressure, and fluid additives all influencing compatibility.

These interactions can manifest in several ways:

Real-World Failure Analysis

A compelling example of biodegradable hydraulic oil leak problems comes from a marine hydraulic system that experienced catastrophic seal failures shortly after switching to an environmentally friendly hydraulic fluid. Investigation revealed that while the FKM (fluorocarbon) seals used throughout the system were generally considered compatible with the new fluid, they experienced excessive swelling—28% volumetric expansion compared to the 15% maximum allowable limit.

This swelling altered the seals’ mechanical properties and fit within their grooves, ultimately leading to seal lip tearing and significant leakage. The case highlights how even seemingly appropriate material combinations can fail when subjected to real-world operating conditions.

Material Selection and Validation Protocols

Developing effective hydraulic seal material selection for extreme environments requires a systematic approach that considers all operating parameters. Best practices include:

Conclusion

The payoff is substantial: reducing oil loss by up to 50%, cutting downtime, boosting safety, and enhancing sustainability. As system demands rise, only proactive, design-driven strategies will ensure long-term reliability and performance.


FAQ

What are the common causes of hydraulic fluid leaks?

Common causes include damaged seals, loose fittings, aging lines, design flaws, vibration effects and thermal expansion.

What are the effects of hydraulic fluid leakage?

Leaks can lead to reduced equipment efficiency, environmental contamination, safety hazards, increased maintenance costs and unplanned downtime.

How can I quickly recognize if there is a leak in my hydraulic system?

Check for oil stains around the equipment, a drop in hydraulic fluid level, abnormal system pressure, or unusual noises and performance degradation.

Can a hydraulic fluid leak be repaired on its own?

Small leaks can be temporarily repaired by replacing seals or tightening fittings, but a professional should check and treat the underlying problem.

How to prevent hydraulic oil leaks?

Ensure proper construction at the design stage, use compatible materials, maintain good assembly accuracy, and regularly maintain and inspect the system.

Is hydraulic oil leakage a normal wear phenomenon?

No, it is not. Although the system will age, persistent or frequent leaks are usually the result of poor design or maintenance and should be dealt with promptly.

Loose Hydraulic Fittings 3 Minutes to Leak-Free Operation

Loose Hydraulic Fittings? 3 Minutes to Leak-Free Operation

Hydraulic systems are vital in today’s industrial operations, yet loose fittings remain a leading cause of oil leaks—contributing to over 40% of fluid-related failures. These leaks not only waste resources but also pose safety risks, environmental concerns, and costly downtime exceeding $10,000 per hour. Frustratingly, repeated quick fixes during maintenance often fail to solve the root issue, leading to recurring problems. The good news? With proper techniques and a clear understanding of fitting mechanics, most leaks can be permanently resolved in just three minutes—breaking the costly cycle and restoring long-term system reliability.

Understanding Loose Hydraulic Fittings

Before diving into the repair process, it’s essential to understand why hydraulic fittings loosen in the first place. Recognizing the root causes of vibration-induced hydraulic fitting leakage creates the foundation for effective repairs.

Loose Hydraulic Fittings

Common Causes of Fitting Loosening

Hydraulic fittings rarely loosen without reason. Several factors contribute to this common problem:

Vibration effects represent perhaps the most significant challenge. Industrial equipment generates constant vibration during operation, which gradually works against threaded connections. Each vibration cycle applies microscopic forces that, over time, overcome the friction holding threads together. Heavy equipment like excavators and loaders are particularly susceptible, with studies showing vibration acceleration peaks exceeding 8g in some applications.

Thermal cycling also plays a major role in loosening fittings. As hydraulic systems heat up during operation and cool during downtime, metal components expand and contract. This continuous cycle creates minute movements in threaded connections. Systems that experience wide temperature swings—from cold morning startups to peak operating temperatures exceeding 80°C—are especially vulnerable to this phenomenon.

Improper initial installation remains a surprisingly common issue. Hydraulic fittings require specific torque values for optimal performance. Under-tightening creates obvious leak paths, but over-tightening can be equally problematic, causing thread deformation, seal damage, and paradoxically, easier loosening under vibration. Research indicates that fittings tightened 20% beyond recommended torque values show a 40% reduction in vibration resistance.

Seal degradation compounds these problems. As elastomeric seals age, they lose resilience and can no longer maintain effective sealing pressure. This degradation accelerates when systems operate at elevated temperatures or when incompatible fluids attack seal materials.

Warning Signs to Watch For

Early detection of hydraulic oil leak symptoms can prevent minor issues from developing into major failures. Recognizing these warning signs allows for timely intervention:

Visual indicators provide the most obvious clues. Fresh oil droplets or wet surfaces around fittings indicate active leaks, while dust accumulation patterns—where airborne particles stick to thin oil films—reveal slow seepage that might otherwise go unnoticed. Pay particular attention to fittings located near vibration sources or those subjected to thermal cycling.

Audible indicators can alert you to leaks even when visual inspection is difficult. A hissing sound from a fitting under pressure indicates fluid escaping through a restricted path. This sound often becomes more pronounced during pressure spikes or when the system is first pressurized after maintenance.

Performance indicators may signal leaks before they become visually apparent. Unexplained pressure drops, erratic actuator movement, or increased cycle times can all result from internal or external leakage. Modern equipment with pressure monitoring capabilities may show these symptoms through diagnostic codes or performance warnings.

The 3-Minute Emergency Repair Protocol

When a leaking hydraulic fitting threatens to halt operations, this streamlined protocol allows for quick, effective repairs. By following these five steps—each carefully timed—you can resolve most fitting leaks in just three minutes.

Step 1: Safe System Shutdown

Safe pressure relief for hydraulic system maintenance forms the critical first step in any repair process. Begin by powering down the equipment according to manufacturer guidelines. Never attempt to tighten or manipulate fittings on pressurized systems, as this can result in injection injuries or fluid burns.

Once the power source is disabled, relieve residual pressure by activating hydraulic actuators or opening relief valves. For systems with accumulators, follow specific bleed procedures to ensure complete depressurization. Verify pressure gauges read zero before proceeding.

During this step, also position containment materials to capture any fluid that may escape during the repair process. This prevents environmental contamination and creates a safer work environment by eliminating slip hazards.

Step 2: Inspection and Diagnosis

Effective hydraulic fitting leak detection methods allow for quick problem identification. Begin with visual inspection, looking for obvious signs of leakage, thread damage, or seal extrusion. Use a clean cloth to wipe the area, making small leaks more apparent.

For fittings that show no obvious damage but are suspected leak sources, apply leak detection fluid (similar to soapy water) and watch for bubbles forming under residual pressure. This technique can reveal microscopic leak paths not visible to the naked eye.

Identify the specific fitting type during this phase—whether it’s NPT/BSPT tapered thread, JIC 37° flare, ORFS (O-ring face seal), or compression type. Each requires slightly different repair approaches. Also note whether the leak occurs at the thread interface or at the sealing surface, as this distinction guides the repair strategy.

Step 3: Cleaning and Preparation

Properly preparing hydraulic fittings for leak-free connections is essential for lasting repairs. Begin by thoroughly cleaning both mating surfaces using a lint-free cloth. Remove all traces of hydraulic fluid, as even thin oil films can prevent proper thread engagement or seal compression.

For threaded connections, inspect the threads for damage, deformation, or contamination. Use a wire brush to clean external threads and compressed air (if available) to clear internal threads. Remove all old thread sealant or PTFE tape residue, as these materials can prevent proper fitting engagement when reapplied over existing layers.

For face-sealing connections like ORFS fittings, inspect the sealing surfaces for scratches, nicks, or deformation. Even minor damage to these precision surfaces can create leak paths. Clean O-rings or replace them if they show signs of damage, compression set, or chemical attack.

Loose Hydraulic Fittings repair

Step 4: Reassembly and Tightening

Understanding hydraulic fitting torque specifications to prevent leaks is crucial for effective repairs. Different fitting types require specific assembly techniques:

For NPT/BSPT tapered thread fittings, apply appropriate thread sealant or PTFE tape. When using tape, wrap in the direction of thread engagement (usually clockwise when viewing the male thread end-on) to prevent the tape from unwinding during assembly. Apply 3-4 layers for most applications, covering all engaged threads but leaving the first thread exposed to prevent sealant from entering the hydraulic system.

When tightening, use properly sized wrenches to prevent fitting or port damage. For NPT connections, the general rule is 2-3 turns past finger-tight for sizes up to 1/2 inch, with larger sizes requiring fewer turns. However, always consult specific torque specifications when available.

For JIC 37° flare fittings, ensure the sealing surfaces are clean and undamaged. Tighten until the surfaces make initial contact, then apply an additional 1/6 to 1/4 turn. Over-tightening these fittings can damage the sealing surfaces, creating leak paths rather than eliminating them.

For ORFS fittings, verify the O-ring is properly seated in its groove before assembly. Tighten until the metal surfaces make contact, then apply the manufacturer-specified torque. These fittings rely on precise O-ring compression, making proper torque critical.

Step 5: Testing and Verification

Verifying hydraulic system integrity after fitting repair requires a methodical approach. Begin with a low-pressure test by starting the system briefly and maintaining minimum pressure. Inspect the repaired fitting for any signs of leakage before proceeding to normal operating pressure.

Once the initial test confirms basic sealing, gradually increase system pressure while continuing to monitor the fitting. This progressive approach prevents sudden pressure spikes that might dislodge marginally secured connections.

For critical applications, consider marking the fitting with a torque-stripe (a paint mark across both the fitting and its mounting surface). This visual indicator makes it easy to identify if the fitting rotates or loosens during subsequent operation.

Fitting-Specific Solutions

Different hydraulic fitting types require specific approaches to ensure leak-free performance. Understanding these variations improves repair outcomes.

Threaded Connection Repairs

NPT hydraulic fitting leak prevention techniques focus on proper thread engagement and sealant application. These tapered pipe threads rely on both the thread interference and sealant material to prevent leakage. When repairing these connections, ensure threads are clean and undamaged before applying fresh sealant.

For optimal results with NPT fittings, consider using anaerobic liquid thread sealants rather than PTFE tape for high-pressure applications. These products fill microscopic gaps between threads and cure to form a pressure-resistant seal. Apply to male threads only, and avoid excess sealant that might contaminate the hydraulic system.

JIC 37° flare fittings rely on metal-to-metal contact between precisely machined surfaces. When these fittings leak, the most common cause is damage to the sealing surfaces. Inspect both the male cone and female flare for nicks, scratches, or deformation. Minor damage can sometimes be repaired using a flaring tool to recut the female surface or a fine file followed by emery cloth to smooth the male cone.

ORFS (O-Ring Face Seal) Fitting Solutions

ORFS hydraulic fitting maintenance procedures focus primarily on the O-ring and its sealing surfaces. These fittings provide excellent leak resistance but require careful handling during maintenance. When servicing ORFS connections, always replace the O-ring rather than reusing it, as these components take a compression set after initial use.

When selecting replacement O-rings, ensure material compatibility with the hydraulic fluid. Standard nitrile (NBR) O-rings work well with mineral-based hydraulic oils, but synthetic fluids or biodiesel blends may require specialized materials like FKM (Viton) or HNBR.

Proper alignment during reassembly is critical for ORFS fittings. The O-ring must seat evenly in its groove without twisting or pinching. Thread the fitting by hand until the O-ring contacts the mating surface, then apply torque according to manufacturer specifications. Over-tightening can crush the O-ring, while under-tightening may allow it to extrude under pressure.

Compression Fitting Fixes

Compression fitting leak repair for hydraulic lines requires attention to both the ferrule and tube preparation. These fittings create a seal by deforming a metal ferrule (sleeve) onto the tube surface. When leaks occur, the most common causes are improper tube preparation, incorrect assembly sequence, or damaged components.

Begin repairs by completely disassembling the fitting and inspecting the ferrule. Look for uneven deformation, cracks, or signs that the ferrule was installed backward. The ferrule should show uniform compression marks around its circumference.

Tube preparation plays a crucial role in compression fitting performance. The tube end must be cut square, deburred thoroughly, and cleaned of all contaminants. For stainless steel tubing, which has a tendency to work-harden, annealing the end before ferrule installation can improve sealing.

During reassembly, follow the correct sequence: slide the nut onto the tube first, followed by the ferrule with its tapered end facing the fitting body. Insert the tube fully into the fitting body before tightening the nut. For most hydraulic compression fittings, tighten the nut 1-1/4 turns past finger-tight for initial installation, or 1/4 turn past finger-tight when reassembling an existing connection.

Preventing Future Loosening Issues

While the 3-minute repair protocol addresses immediate leaks, implementing preventive measures creates long-term system reliability.

Preventive Maintenance Schedule

Establishing a preventive maintenance schedule for hydraulic fittings significantly reduces unexpected failures. Develop inspection routines based on equipment operating hours, with more frequent checks for components exposed to severe conditions.

During scheduled maintenance, visually inspect all accessible fittings for signs of leakage or loosening. Use calibrated torque wrenches to verify critical connections remain at specified values. Document all findings, including torque readings and observed conditions, to track patterns and predict potential failures before they occur.

For systems with historical leak problems, consider implementing ultrasonic leak detection as part of regular maintenance. This technology can identify developing leaks before they become visible, allowing for planned repairs rather than emergency responses.

Anti-Loosening Technologies

Vibration-resistant hydraulic fitting solutions provide additional security for critical connections. Thread-locking compounds offer a simple yet effective approach. These products fill the microscopic gaps between male and female threads, creating resistance to vibration-induced loosening.

Select the appropriate thread-locking compound based on application requirements. Low-strength formulations (typically blue) allow for future disassembly using hand tools, making them ideal for components requiring periodic maintenance. Medium-strength products (usually blue or green) provide greater vibration resistance while still allowing disassembly with standard tools. High-strength compounds (typically red) create nearly permanent bonds requiring heat for removal, suitable only for connections intended to remain assembled for the equipment’s lifetime.

Mechanical locking devices provide alternatives for applications where chemical thread-lockers are impractical. These include lock washers, jam nuts, safety wire, and proprietary locking systems. For critical hydraulic connections, consider combination approaches—such as proper torque application plus a mechanical locking device—to provide redundant protection against loosening.

Environmental Considerations

Understanding environmental factors affecting hydraulic oil leak development helps prevent recurrence. Temperature fluctuations represent a significant challenge, particularly for equipment operating outdoors or in variable conditions. Where possible, insulate hydraulic components to moderate temperature swings and reduce thermal expansion effects.

Vibration isolation techniques can dramatically improve fitting reliability. Identify vibration sources within the equipment and implement appropriate countermeasures. These might include flexible hose sections to decouple rigid components, rubber isolation mounts for hydraulic pumps or motors, or mass dampers to alter resonant frequencies.

Corrosion prevention strategies also play a role in long-term fitting integrity. External corrosion can damage fitting surfaces and make them difficult to remove during maintenance, while internal corrosion can affect sealing surfaces. Use appropriate protective coatings on external surfaces and maintain proper fluid cleanliness to prevent internal corrosion.

When to Call a Professional

While the 3-minute repair protocol addresses many common fitting issues, some situations require specialized expertise.

Recognizing Repair Limitations

Understanding when to seek professional hydraulic system leak repair services prevents minor problems from escalating into major failures. Complex system integration issues—particularly those involving electronic controls, multiple interconnected circuits, or specialized functions—often require expertise beyond basic mechanical skills.

High-pressure systems operating above 5,000 PSI (345 bar) demand specialized knowledge and tools. At these pressures, standard repair approaches may prove inadequate or even dangerous. Similarly, systems using specialized fittings or proprietary connection technologies may require manufacturer-specific tools and training.

Safety considerations should always guide repair decisions. If a fitting is located in a difficult-to-access area, requires special tools you don’t possess, or if the system contains hazardous fluids, consulting a professional represents the prudent choice.

Selecting Qualified Technicians

When professional assistance becomes necessary, understanding certified hydraulic system repair technician qualifications helps ensure quality results. Look for technicians with industry-recognized certifications such as those from the International Fluid Power Society (IFPS) or manufacturer-specific training programs.

Experience considerations should include both general hydraulic knowledge and familiarity with your specific equipment type. A technician with decades of experience on industrial hydraulic systems might not be the best choice for mobile equipment repairs, as these applications present unique challenges.

Equipment capabilities also matter. Professional service providers should possess proper diagnostic tools, including pressure testing equipment, contamination analysis capabilities, and precision measuring instruments. For complex systems, look for providers with simulation software that can model system behavior under various conditions.

Conclusion

True success lies in tackling both the leak and its root cause, whether it’s vibration, thermal cycling, or poor installation. This shifts maintenance from reactive to proactive. With consistent application, this approach cuts leaks, boosts reliability, and delivers major savings in cost, downtime, and environmental impact.


FAQ

What types of hydraulic fittings does this method apply to?

It is applicable to most common hydraulic system connection types such as threaded, flanged and quick release couplings.

Does it really only take 3 minutes to fix a leak?

Yes, most joint leaks can be repaired in less than 3 minutes under normal operating conditions, following standard procedures.

Do I need special tools?

No expensive equipment is required, just common hydraulic tools such as wrenches, cleaning materials and appropriate seals.

Does this method require shutting down the entire system?

For safety and effectiveness, it is recommended to operate without pressure, so a temporary shutdown is required for pressure relief and repair.

How can I ensure that there is no further leakage after the repair?

Long-term leak-free operation can be achieved by checking the root cause and taking complementary measures.

Who is suitable to operate this program?

It can be operated by maintenance technicians with basic training. The process is simple, safe and efficient, and is suitable for quick on-site treatment of leaks.

Hydraulic Fitting Seal Forms banner

Hydraulic Fitting Seal Forms: How to Differentiate?

Hydraulic fittings (commonly referred to as hydraulic connectors) come in a variety of sealing forms. Each form has its specific structure and application scenarios. The sealing types of hydraulic fittings can mainly be divided into two categories: Flat Seals and Tapered Surface Seals, along with some other special sealing forms.

Flat Sealing Forms

Flat sealing relies on the use of various sealing elements that create a sealing face when compressed between the mating surfaces of hydraulic fittings. These sealing elements are typically made of materials such as rubber, metal, or composite materials, depending on the specific application and requirements. The primary goal of flat sealing is to prevent leakage by maintaining a tight, reliable seal under pressure. Below are the main types of flat sealing forms commonly used in hydraulic systems:

E-type Column End Seals

Features: The E-type column end fitting typically features an outer thread end that is machined with a ring groove. This groove is designed to accommodate a filler seal, such as an ED seal (Elastic Ductile seal), which is installed into the groove. The presence of this groove ensures that the sealing element stays in place and provides a tight seal when the fitting is tightened.

Materials: The ED seal used in this type is usually made of an elastomer, such as nitrile rubber, which provides flexibility and resilience, enhancing the seal’s ability to adapt to varying pressure conditions and preventing fluid leakage.

Application: E-type seals are ideal for situations where higher sealing performance is required, such as in high-pressure systems or those involving aggressive fluids that demand strong and durable seals. The combination of the groove and the ED seal ensures a high level of sealing integrity, preventing leaks even under demanding conditions.

Type A port end seal Topa

A-type Column End Seals

Features: The A-type column end fitting is designed with an outer thread end that incorporates a positioning cone surface. This conical surface serves as the primary sealing area and requires the installation of a copper washer or composite sealing washer to complete the seal. The washer’s function is to compress and create a reliable sealing interface when the fitting is tightened.

Materials: Copper washers or composite materials are commonly used in this type of seal. Copper washers offer excellent compressibility and resilience, making them suitable for high-temperature applications. Composite washers, which may combine metals with elastomers, provide enhanced flexibility and better performance in dynamic systems.

Application: A-type column end seals are typically used in systems where there is a need to prevent radial movement of the sealing washer, such as in cases where the fitting may be subjected to vibration or movement. The conical surface ensures that the washer stays in position, providing a stable and leak-free seal even in applications with significant mechanical forces.

Hinged Bolt Seals

Features: Hinged bolt seals use a unique assembly that involves hinged bolts and hinged joints. This design allows the connection to be sealed via the pressure exerted by the bolt connection, which compresses the sealing element, often an O-ring or gasket, between the two mating surfaces. The hinged design facilitates easy installation and disassembly.

Materials: The sealing element used in hinged bolt seals is typically an elastomeric O-ring, which provides excellent sealing under moderate pressures and temperatures. The O-ring is usually made from materials like nitrile or fluorocarbon rubber, depending on the compatibility with the hydraulic fluid and the operating environment.

Application: This type of seal is ideal for applications where space is limited, or where the system needs to be frequently disassembled for maintenance or replacement of components. The hinged design allows for easy access and quick removal of the fittings without requiring specialized tools or extensive labor, making it ideal for use in compact systems or machinery that undergoes frequent maintenance.

Flange Seals

Features: Flange seals are commonly used in hydraulic systems where the fitting is connected via a flange. These seals are typically achieved through a combination of flange connectors, split flanges, and O-rings or other sealing elements. The O-ring, placed in a groove on the mating flange surface, forms the primary sealing mechanism, while the flanged connection itself provides the necessary mechanical strength to withstand high pressures.

Materials: Flange seals often use O-rings made from elastomers such as nitrile, EPDM (ethylene propylene diene monomer), or Viton, depending on the fluid and temperature requirements. The flanges themselves are typically made from steel or other durable metals to ensure the fitting can handle the mechanical stresses of high-pressure systems.

Application: Flange seals are widely used in applications requiring high-pressure connections, such as in pumps, motors, hydraulic cylinders, and connections between high-pressure hoses and machinery. Their versatility and ability to create tight, secure seals make them ideal for heavy-duty industrial equipment that operates under high loads and pressures. Flange seals also provide easy disassembly and reassembly, making them suitable for systems that require periodic maintenance.

Tapered Surface Sealing Forms

Tapered surface sealing relies on the precise fit between a tapered surface and the sealing element to form an effective seal. In this form of sealing, the connection is achieved through the contact of conical or tapered surfaces, which tightly compress the sealing material. This type of sealing is ideal for situations where higher mechanical strength and reliable performance under pressure are required. Hydraulic pipe fittings with tapered surface sealing generally include the following types:

Flared Seals

Features: Flared seals have a fitting end that incorporates a flared structure, such as a 37° or 45° flare. The flare is designed to fit into a matching tapered surface, providing a tight seal through metal-to-metal contact. When the fitting is tightened, the flared end of the pipe is compressed against the mating surface of the fitting, ensuring that the seal is maintained by the tight, frictional fit.

Materials: Flared seals typically involve the use of copper or brass for the flared end, while the fitting may be made from stainless steel or other durable metals. The hardness of the metal allows for a secure and long-lasting seal under pressure.

Application: Flared seals are most commonly used for connections between copper pipes and thin-walled steel pipes. They are particularly suitable for high-pressure systems, such as those in hydraulic systems, automotive applications, and aerospace equipment. The robust nature of the flared connection makes it resistant to vibration and pressure changes, which is important in systems that endure constant movement or fluctuating pressure levels.

30° Tapered Seals

Features: The 30° tapered seal features an outer thread end that incorporates a groove designed to position the sealing element, often an O-ring. The inner thread end has a 30° tapered structure that ensures the fitting mates precisely with the O-ring to form a tight seal. When the fitting is tightened, the tapered surface pushes the O-ring against the inner side of the fitting, providing an excellent seal that prevents fluid leakage.

Materials: The O-ring used in these seals is usually made of elastomeric materials, such as nitrile, Viton, or EPDM, depending on the pressure and temperature requirements of the system. The 30° taper itself is typically made from high-strength metals, such as stainless steel or alloy steel, which are resistant to corrosion and wear.

Application: 30° tapered seals are commonly used in connections between valve bodies and fittings in hydraulic systems. They are also frequently found in system pressure measurement ports and other components that require precise, leak-free connections. This sealing form is ideal for situations where the sealing performance needs to withstand high pressures and the system must remain secure under extreme operational conditions.

DIN 2353 Metric Thread

24° Tapered Seals (Composite Sealing)

Features: The 24° tapered seal is a composite sealing system that combines metal-to-metal hard sealing with the flexibility of an O-ring elastic seal. The metal-to-metal contact occurs on the tapered surfaces of the fitting, while the O-ring provides an additional layer of sealing by compressing against the metal surface. This dual approach ensures a high level of sealing reliability, as the metal-to-metal contact handles the bulk of the sealing, while the O-ring provides extra compression to prevent any leakage.

Materials: The 24° tapered seal typically uses a combination of durable metals for the fitting and an elastomeric O-ring made of materials like nitrile rubber, fluorocarbon, or silicone, depending on the fluid compatibility and temperature resistance needed.

Application: This sealing form is highly effective in environments that require a reliable seal under both high pressure and temperature fluctuations. It is often used in systems where both metal-to-metal sealing and elastic sealing are beneficial, such as in hydraulic and pneumatic systems, heavy machinery, or industrial equipment. The 24° taper allows for a stronger seal under higher working pressures, while the O-ring enhances the overall sealing performance, making this type of seal ideal for more demanding applications.

Other Special Sealing Forms

In addition to flat and tapered surface seals, hydraulic systems also use other specialized sealing forms, each designed to meet the specific requirements of different working environments. These special seals often offer unique advantages such as ease of installation, durability, or adaptability to certain system configurations. Below are some common types of special sealing forms, including Sleeve-type Seals and other variants, each with its distinct characteristics:

Sleeve-type Seals

Features: Sleeve-type seals consist of a sleeve (often a metal or composite material) that is placed over the fitting or pipe. This sleeve is then compressed to form a seal, typically in combination with an elastomeric sealing element, such as an O-ring or gasket. The sleeve helps distribute the compressive force evenly across the sealing surface, improving the integrity of the seal and reducing the risk of damage or wear.

Materials: The sleeve is typically made of durable metals such as stainless steel or aluminum, while the sealing element (such as an O-ring or gasket) is made from elastomers like nitrile, Viton, or EPDM, depending on the chemical and temperature conditions of the fluid being sealed.

Application: Sleeve-type seals are often used in applications where flexibility and easy installation are required, as well as in systems that need to be disassembled frequently for maintenance or inspection. They are commonly found in hydraulic cylinders, pumps, and high-pressure systems where there is a need to prevent leakage while also allowing for easy repair or replacement of seals.

V-Ring Seals

Features: The V-ring seal consists of a flexible elastomeric ring that is shaped like the letter “V.” When compressed, the V-shape creates a dynamic seal by pressing against the mating surface, providing an effective barrier against leakage. These seals are particularly useful in rotating shaft applications or where there is movement between the components.

Materials: V-rings are typically made from rubber compounds, including nitrile, silicone, or polyurethane, which offer good resistance to wear, abrasion, and chemical exposure.

Application: V-ring seals are commonly used in rotating machinery, such as pumps, motors, and compressors. Their ability to adapt to varying pressures and speeds makes them ideal for sealing in applications that involve movement or rotation, such as in the automotive, agricultural, and heavy machinery industries.

Cup Seals

Features: A cup seal is a type of hydraulic seal that resembles the shape of a “cup” or “sleeve.” When compressed, the cup shape allows the seal to expand and create a tight, reliable barrier against leaks. This design is particularly useful in dynamic sealing applications, where the seal must accommodate changes in pressure or movement.

Materials: Cup seals are typically made from elastomeric materials like rubber or polyurethane, which provide flexibility and durability. Some designs also include a metal insert to add strength and prevent excessive wear.

Application: Cup seals are often used in hydraulic cylinders and pistons, where they perform in both static and dynamic sealing environments. They are especially effective in systems where there is a need to withstand high-pressure differentials or where the seal must prevent both internal and external leakage.

O-Ring Seals with Backup Rings

Features: O-rings with backup rings combine a standard O-ring with an additional ring placed behind the O-ring to prevent it from extruding into the gap between the sealing surfaces when exposed to high pressure. The backup ring can be made of hard materials like PTFE (polytetrafluoroethylene) or other composite materials, which help distribute pressure more evenly.

Materials: The O-ring is usually made from rubber materials like nitrile or silicone, while the backup ring is typically made from PTFE, metal, or a combination of these materials.

Application: These seals are commonly used in high-pressure applications where standard O-rings might be prone to extrusion or damage. Backup rings are often found in critical hydraulic systems, high-temperature environments, and applications such as pistons, cylinders, and pumps.

Radial Seals

Features: Radial seals create a sealing barrier by exerting pressure radially against the surface they seal. These seals are typically used in rotary applications where there is relative motion between the sealing elements and the surface to be sealed. They are designed to withstand radial forces and ensure a tight, leak-free seal under varying pressures.

Materials: Radial seals are made from various elastomers, depending on the fluid being sealed and the operating conditions. Materials like nitrile, Viton, and polyurethane are common choices due to their ability to withstand pressure, temperature, and abrasion.

Application: Radial seals are commonly used in rotary shafts, gears, and pumps where the sealing element is exposed to dynamic motion. They are particularly useful in sealing applications involving rotating machinery, such as in the automotive, aerospace, and industrial sectors.

Spring-loaded Seals

Features: Spring-loaded seals use a metal spring to apply continuous pressure to the sealing element, ensuring consistent compression against the sealing surfaces. This type of seal is particularly effective in dynamic sealing applications where there is movement or vibration, as the spring helps maintain the seal even under changing conditions.

Materials: The sealing element is often made from elastomers, while the spring is typically made from stainless steel or other corrosion-resistant metals. The combination of the spring and the elastomer ensures both durability and flexibility.

Application: Spring-loaded seals are commonly used in applications where pressure fluctuations or vibration could cause seal failure, such as in pumps, valves, and rotary equipment. The spring ensures that the seal maintains contact with the mating surface, reducing the risk of leakage even in demanding conditions.

Conclusion

In summary, hydraulic pipe fittings have a wide variety of sealing forms, each with its unique features and application scenarios. When selecting and using hydraulic pipe fittings, it is essential to consider factors such as the specific working requirements, pressure levels, and medium characteristics to ensure the sealing performance and reliability of the fittings.


FAQ

What is a hydraulic fitting seal?

A hydraulic pipe fitting seal is a component used to prevent fluid leakage between two connected pipes or fittings. It ensures that the hydraulic system maintains pressure and operates efficiently.

What are the main types of hydraulic pipe fitting seals?

The main types are flat seals, tapered surface seals, and special sealing forms such as sleeve-type seals, V-ring seals, and cup seals. Each has unique features for different applications.

How does a flared seal work?

A flared seal uses a fitting end with a flared structure that creates a tight, metal-to-metal seal when the pipe is compressed against the fitting. This type is commonly used for high-pressure connections between copper and steel pipes.

When should I use a 30° tapered seal?

A 30° tapered seal is ideal for connections between valve bodies and fittings, or pressure measurement ports. It uses a tapered thread and an O-ring to ensure a leak-free connection under pressure.

What is a sleeve-type seal?

A sleeve-type seal is a specialized sealing component that consists of a sleeve over the fitting, often combined with an O-ring or gasket. It provides flexibility and is often used in systems that require frequent maintenance or easy disassembly.

What are backup rings, and when are they needed?

Backup rings are used in conjunction with O-rings to prevent extrusion under high pressure. They are necessary for high-pressure applications to maintain the integrity of the O-ring and ensure a reliable seal.

Top Aluminum Fitting Surface Treatment Types You Need banner

Top Aluminum Fitting Surface Treatment Types You Need

Aluminum fitting surface treatment is process used to enhance the surface properties of aluminum components. The right treatment ensures that aluminum fittings can withstand harsh environments, resist wear and tear, and maintain a high quality finish throughout their service life.

Anodizing Aluminum

What Is Anodizing and How Does It Work?

Explaining the anodizing process

Anodizing is an electrochemical process that involves immersing aluminum in an acid bath and applying an electric current. The result? A durable, corrosion-resistant oxide layer forms on the surface of the aluminum. Unlike paint or coatings that sit on top of the material, the anodized layer becomes an integral part of the aluminum itself, making it much stronger and longer-lasting.

This process works by causing the surface of the aluminum to react with oxygen in the electrolytic bath. During the anodizing process, the aluminum atoms at the surface bond with oxygen ions to form aluminum oxide (Al2O3), which is much harder than the original metal.

How anodizing creates a thicker, protective oxide layer

The anodizing process not only increases the thickness of the aluminum’s natural oxide layer but also enhances its protective qualities. The aluminum oxide layer can range from a few microns to over 100 microns in thickness, depending on the specific needs and desired finish.

This thickened oxide layer provides superior protection against environmental elements, such as water, air, and chemicals. The oxide acts as a barrier that prevents corrosion by resisting the intrusion of elements that would normally damage or degrade the aluminum surface.

The science behind anodizing: chemical reactions and the aluminum surface

The anodizing process relies on an electrolytic reaction. When the aluminum is submerged in an acid bath (usually sulfuric acid) and an electric current is applied, the aluminum reacts with the oxygen ions from the bath, forming aluminum oxide. This oxide is tightly bonded to the metal’s surface, making it highly durable and resistant to abrasion. Unlike traditional coatings, the anodized layer is chemically bonded, meaning it won’t peel or chip.

The formation of the oxide layer is controlled, and the result is an exceptionally tough, resistant surface that is capable of handling both physical wear and harsh environmental conditions. This makes anodized aluminum ideal for demanding industrial applications.

Anodizing Aluminum

The Benefits of Anodized Aluminum

Enhanced corrosion resistance

One of the primary benefits of anodizing aluminum is its enhanced resistance to corrosion. The thickened oxide layer acts as a protective shield, preventing moisture, chemicals, and salts from penetrating the surface of the aluminum. This is especially valuable in outdoor and industrial settings where aluminum fittings are exposed to harsh weather conditions, pollution, and corrosive environments like coastal areas or chemical processing facilities.

Because the anodized layer is part of the aluminum itself, it won’t chip or peel off like paint, making anodizing the ideal choice for long-term corrosion protection.

Improved wear resistance

Anodizing also significantly improves the wear resistance of aluminum. The aluminum oxide layer is incredibly hard—much harder than the base metal itself. This makes anodized aluminum highly resistant to scratches, dents, and abrasions, making it perfect for applications where the material will endure frequent handling, friction, or exposure to wear and tear.

For example, anodized aluminum is often used in aerospace and automotive applications where parts are exposed to high levels of mechanical stress and environmental conditions.

Aesthetic enhancements

Anodizing aluminum isn’t just about function; it can also enhance the material’s visual appeal. The anodizing process can create a range of finishes, from a subtle matte or satin look to more vibrant, colored surfaces. By incorporating dyes into the anodizing process, aluminum can be anodized in a range of colors, including black, bronze, gold, blue, and more.

The coloring process is deeply integrated into the oxide layer, meaning the colors are permanent and resistant to fading. This is why anodized aluminum is often used in consumer goods like electronics, kitchenware, and architectural features, where both aesthetic appeal and performance are important.

Hard anodizing vs. Decorative anodizing

While both hard anodizing and decorative anodizing create an oxide layer on the aluminum’s surface, there are distinct differences between the two.

Hard anodizing is a thicker, more robust form of anodizing. It is often used when the goal is to improve the aluminum’s mechanical properties, such as increasing its hardness and wear resistance. This type of anodizing is ideal for industrial applications where the aluminum parts will be subject to heavy use, like in the aerospace or automotive sectors.

Decorative anodizing is thinner and typically used for aesthetic purposes. It enhances the appearance of the aluminum, making it more attractive, while still offering some level of corrosion resistance. This type is commonly used for products like furniture, electronics, and architectural finishes.

Understanding the difference between these two types of anodizing is crucial in selecting the right treatment for your aluminum fittings, as the required level of durability or appearance will dictate the type of anodizing process.

Powder Coating Aluminum

What Is Powder Coating for Aluminum Fittings?

Powder coating is a dry finishing process that involves applying a fine powder to the surface of aluminum fittings. The powder, made from a mixture of resin, pigment, and additives, is electrostatically charged and sprayed onto the aluminum surface. Once applied, the powder-coated fittings are heated in an oven, causing the powder to melt, fuse, and form a tough, durable coating.

Unlike traditional liquid paints, which contain solvents and need to be applied in multiple layers, powder coating is more efficient, produces a thicker, more consistent finish, and doesn’t release harmful fumes. The result is a highly protective, smooth finish that is both aesthetically pleasing and long-lasting.

Advantages of Powder Coating Over Other Aluminum Finishes

Superior Durability and Wear Resistance

Powder coating creates a hard, protective layer that is highly resistant to scratches, chips, and abrasions. This makes it ideal for aluminum fittings that will be exposed to heavy use or harsh environments. The tough finish can withstand impacts better than most other types of finishes, such as paints, which tend to chip and peel over time.

Excellent Corrosion Protection

One of the standout benefits of powder coating is its superior resistance to corrosion. The thick coating forms a barrier between the aluminum and environmental elements such as water, chemicals, and UV rays, making it much less likely to corrode compared to untreated or anodized aluminum. This makes powder coating an excellent option for outdoor, marine, or industrial applications where aluminum fittings are exposed to the elements.

Environmentally Friendly

Powder coating is a more eco-friendly finish compared to other methods. It contains no solvents or harmful chemicals, making it safer for both the environment and the workers applying it. Additionally, any excess powder that doesn’t adhere to the aluminum can be collected and reused, reducing waste.

The Power of Aluminum Plating

How Aluminum Plating Enhances Corrosion Resistance

Aluminum plating is an excellent method for improving the corrosion resistance of aluminum fittings. The plating process involves applying a thin layer of another metal (typically nickel, chrome, or zinc) to the surface of the aluminum. This layer forms a barrier that shields the aluminum from environmental factors like moisture, chemicals, and extreme temperatures—elements that can cause oxidation and corrosion.

Aluminum itself is naturally resistant to corrosion due to the formation of a thin oxide layer on its surface. However, in some harsh environments or industrial applications, this natural protection may not be enough. By adding a metal plating, such as nickel or chrome, the aluminum fittings receive an additional layer of protection, making them even more resistant to rust and corrosion. This is especially important in industries where the components will be exposed to chemicals, saltwater, or other corrosive agents.

For example, nickel-plated aluminum has excellent corrosion resistance, making it ideal for components that must withstand humid or salty environments, such as in marine or automotive applications. Additionally, the plating helps to protect the base material from wear and tear, ensuring the aluminum parts last longer and perform more efficiently.

Aluminum Plating

Types of Aluminum Plating

There are several different methods of aluminum plating, each offering specific advantages depending on the intended application and performance needs of the aluminum fittings.

Electroplating

Electroplating is the most common method of plating aluminum and involves using an electric current to deposit a thin layer of metal (often nickel, chrome, or gold) onto the aluminum surface. The process involves immersing the aluminum in a solution containing metal ions and passing an electrical current through the solution, causing the metal to adhere to the surface of the aluminum. Electroplating is used for a variety of applications where improved corrosion resistance and aesthetic appeal are desired.

Hot-Dip Galvanizing

Hot-dip galvanizing involves dipping aluminum components into a molten bath of zinc, which forms a protective coating. While this method is more commonly used for steel, it can be applied to aluminum fittings to offer superior protection against corrosion. The zinc coating bonds with the aluminum, creating a long-lasting barrier that resists rust and wear.

Electroless Plating

Electroless plating is a method that doesn’t require an electrical current to apply the metal coating. Instead, the plating solution contains chemicals that induce a chemical reaction, allowing the metal to deposit onto the aluminum surface. This process is often used to apply nickel, copper, or other metals to aluminum.

Chrome Plating

Chrome plating involves depositing a thin layer of chromium onto the aluminum surface. This not only improves corrosion resistance but also enhances the aesthetic appeal of the aluminum, giving it a mirror-like finish. Chrome plating is often used for high-end applications where both durability and appearance are important.

Aluminum Polishing

The Process of Polishing Aluminum Fittings

Polishing aluminum is a process that smooths the metal’s surface to a high-gloss finish. This involves several steps, each aimed at removing imperfections, scratches, and oxidization from the aluminum surface. The goal is to achieve a shiny, mirror-like surface that not only looks visually appealing but also has enhanced performance characteristics.

Preparation: Cleaning the Surface

Before polishing begins, the aluminum surface must be thoroughly cleaned to remove any dirt, oil, or contaminants. A clean surface ensures that the polishing compounds can work effectively. This cleaning is typically done using mild detergents or specific cleaning solutions designed for metal surfaces.

Sanding: Smoothing Out Imperfections

The next step is sanding. Aluminum parts are typically sanded with a series of progressively finer abrasive papers or pads. This process helps to remove any rough spots, scratches, or oxidation from the metal. Coarse grits are used first to smooth out the surface, followed by finer grits to refine the finish and remove any remaining imperfections.

Polishing: Using Abrasive Compounds

Once the sanding is complete, polishing compounds are applied to the aluminum surface. These compounds contain fine abrasives that help to further smooth the surface and enhance its shine. Typically, a rotary polisher or buffing wheel is used in this stage to achieve a smooth and reflective finish. The polishing compound is spread onto the wheel, and the aluminum part is buffed to a high gloss. The type of polish used depends on the desired level of shine, with some compounds designed for achieving mirror-like finishes and others intended for satin or matte finishes.

Finishing Touch: Sealing the Surface

To preserve the polished finish and protect the surface, a sealing or protective layer may be applied. This could be a clear protective coating or an anodized layer to prevent tarnishing or oxidation. This step is especially important if the aluminum will be exposed to harsh environments, as it can help maintain the reflective surface for longer.

Chemical Film for Aluminum

What Is Chemical Film and How Is It Applied?

Chemical film, also known as chromate conversion coating or Alodine, is a thin protective layer applied to aluminum fittings to enhance their resistance to corrosion. This coating is created through a chemical reaction in which the aluminum surface is treated with a solution containing chromates or other chemicals. Unlike anodizing, which involves an electrolytic process, chemical film creates a more uniform coating without altering the aluminum’s surface thickness. The coating bonds chemically with the aluminum to form a thin, protective layer.

The Application Process:

Cleaning: The aluminum surface must first be thoroughly cleaned to remove any dirt, oil, or oxidation. This is typically done with an acid solution or detergent designed for aluminum.

Chemical Bath: The cleaned aluminum is then submerged in a chemical bath containing a chromate solution. During this process, the chromates react with the surface of the aluminum, forming a protective layer. This coating is very thin, often just a few microns thick.

Rinsing and Drying: After the aluminum is coated, it is rinsed and dried to ensure the coating is stable and free of excess chemicals.

Sealing (Optional): In some cases, the chemical film can be further sealed with an additional coating to enhance its protective qualities, although the film itself is usually sufficient for most applications.

Chemical film coatings are available in various colors, typically shades of gold, yellow, or clear, providing a range of aesthetic options depending on the application.

Advantages of Chemical Film for Aluminum Fittings

Superior Corrosion Protection

The primary benefit of a chemical film coating is its ability to provide excellent corrosion resistance. By creating a protective barrier on the surface of the aluminum, the coating prevents moisture, salt, and other corrosive agents from attacking the metal. This makes it ideal for aluminum fittings exposed to harsh environments, such as marine, automotive, and industrial applications. The thin, effective coating offers protection without compromising the dimensional tolerances of the aluminum.

Lightweight and Thin Coating

Unlike other protective coatings that add bulk or thickness to the aluminum, the chemical film layer is incredibly thin, which helps maintain the original weight and size of the part. This is particularly important in industries like aerospace or automotive, where minimizing weight is crucial to performance.

Enhanced Paint Adhesion

One of the advantages of chemical film is its ability to improve the adhesion of paint and other coatings. The chemical film provides a rougher surface for paints to adhere to, ensuring that the painted finish lasts longer and performs better. This makes it a popular choice for aluminum parts that will be painted, such as in the aerospace and construction industries.

Electrical Conductivity

Chemical film coatings are often used in applications where electrical conductivity is still required. Unlike anodizing, which insulates the aluminum surface, the thin chemical film layer does not significantly affect the electrical conductivity of the metal. This makes it suitable for components in electrical systems, including connectors, circuit boards, and more.

Mechanical Finishes

What Are Mechanical Finishes for Aluminum Fittings?

Mechanical finishes for aluminum fittings involve using physical methods to alter the surface texture and appearance of the metal. Unlike chemical treatments like anodizing or plating, mechanical finishes typically involve abrasive techniques or tools that physically modify the surface, such as sanding, brushing, or blasting. These methods can be used to achieve various textures and effects, from a smooth matte finish to a more rugged, industrial look.

Mechanical finishing is an essential process in industries where aesthetics, performance, and durability are important. These finishes improve the functionality of the aluminum by enhancing its resistance to wear and corrosion, while also offering specific design features that align with the product’s intended use.

Some of the key mechanical finishing techniques used for aluminum fittings include brushing, sanding, bead blasting, and polishing, each offering distinct benefits based on the desired outcome.

Aluminum Fitting Surface Treatment Types

Common Types of Mechanical Finishes

Brushed Finish

A brushed finish is achieved by using a fine abrasive to create parallel, uniform scratches on the surface of the aluminum. The result is a smooth, matte texture with a slight sheen, often referred to as a satin finish. Brushed finishes are widely used in both functional and decorative applications, giving the aluminum an industrial look without being too reflective.

Advantages of Brushed Finish:

Aesthetic appeal: Offers a sleek, modern look while hiding fingerprints and scratches.

Scratch resistance: The texture helps to mask surface imperfections, making it a popular choice for items that undergo regular use, such as appliances, furniture, and automotive parts.

Non-reflective: The brushed surface does not create glare, making it ideal for parts used in bright environments.

Sandblasted Finish

Sandblasting, or bead blasting, involves propelling small abrasive particles (often silica sand or glass beads) against the surface of the aluminum at high velocity. This creates a uniform, matte, slightly textured finish. Sandblasting is often used when a more rustic or industrial look is desired, as it creates a rougher, less polished texture compared to other finishes.

Advantages of Sandblasted Finish:

Textural enhancement: Ideal for creating a matte or satin finish with a distinct texture.

Enhanced grip: Sandblasted aluminum has a rougher surface that provides a better grip, making it useful for items like handrails, tool handles, or any part requiring friction or traction.

Durability: The surface is more resistant to corrosion and oxidation due to the rough texture that helps to hold protective coatings better.

Polished Finish

Polishing aluminum fittings involves smoothing the surface to a high gloss. This is often done using buffing wheels and polishing compounds. The result is a shiny, mirror-like finish that can significantly improve the aesthetic appeal of aluminum parts. Polishing can be done either by hand or with machinery and is commonly used for high-end products or where a reflective surface is required.

Advantages of Polished Finish:

Reflective appearance: Provides a mirror-like shine that is visually striking.

Smooth texture: Reduces the risk of corrosion and improves surface cleanliness by creating a smooth, non-porous layer.

Aesthetic appeal: Polished aluminum is often used in luxury goods, automotive parts, and consumer electronics to create a high-end look.

Shot Peening

Shot peening is a process where tiny spherical media (often steel or ceramic) are blasted at the aluminum surface to induce compressive stresses. This process doesn’t just alter the texture but strengthens the material by improving its fatigue resistance. It’s often used in aerospace, automotive, and industrial applications where the aluminum parts need to resist high stress and cyclic loading.

Advantages of Shot Peening:

Increased strength: The compressive stress improves the material’s fatigue resistance, making it more durable in high-stress environments.

Resistance to cracking: Helps to reduce the likelihood of cracking or surface failure under stress.

Improved lifespan: Ideal for aluminum fittings that will undergo repeated stress or mechanical loading, such as engine parts or components in high-performance machines.

Conclusion

Ultimately, investing in the right surface finishing for aluminum fittings ensures that your components not only perform better but also last longer, offering significant cost savings over time. Whether you are in aerospace, automotive, construction, or any other industry, selecting the right surface treatment can give you the durability, aesthetics, and protection your aluminum fittings need to thrive in even the most demanding conditions.


FAQ

What is aluminum anodizing?

Anodizing is an electrochemical process that creates a protective oxide layer on the surface of aluminum. This increases corrosion resistance, wear durability, and allows for a range of aesthetic finishes.

How does powder coating differ from anodizing?

While both processes protect aluminum, powder coating involves applying a dry powder that is cured to form a thick, colorful finish, offering better impact resistance. Anodizing, on the other hand, forms a durable oxide layer that enhances corrosion resistance and can provide various aesthetic effects but doesn’t add thickness like powder coating.

Why is aluminum plating used?

Aluminum plating, typically done through electroplating or thermal spraying, provides an additional layer of aluminum over another metal to increase corrosion resistance, improve wear resistance, and give a smooth, reflective surface.

Can aluminum plating be used for decorative purposes?

Yes, aluminum plating is often used for decorative purposes, especially in automotive, electronics, and consumer products. The shiny finish provides aesthetic appeal while also offering protection against corrosion.

Is anodizing aluminum a permanent finish?

Yes, anodizing is a permanent finish because the oxide layer forms as part of the aluminum itself, making it resistant to chipping, peeling, or fading over time.

Which aluminum surface treatment is best for marine applications?

For marine applications, aluminum anodizing or aluminum plating are ideal because they offer superior corrosion resistance in salty, humid environments, extending the lifespan of aluminum fittings.

UNJF vs UNF banner

UNJF vs UNF: Understanding the Thread Variations

UNF threads, with their fine pitch, are ideal for applications requiring high strength and tight tolerances, while UNJF threads, designed for high-precision industries like aerospace, are tailored for more specialized, high-stress environments. The right thread type enhances performance, improves safety, and prevents mismatched parts or system failure, making it essential to match thread variations to specific project demands.

What Are UNJF vs UNF Threads?

Definition and History of UNF Threads

UNF threads, or Unified National Fine threads, are part of the Unified Thread Standard (UTS), which was introduced in the early 20th century to standardize threads in the United States. The UNF thread series was developed to offer a fine-pitched thread option, providing higher precision and stronger fastenings compared to coarse threads. This fine-pitch design allowed for greater holding power in smaller spaces, making it ideal for applications requiring high tension and minimal space. UNF threads are commonly used in a wide range of mechanical systems, from automotive to industrial machinery, where tight tolerance and high strength are necessary.

The UNF thread series has become one of the most widely adopted hydraulic fitting standards in the United States and globally, particularly in manufacturing, automotive, and construction sectors. Over time, variations such as UNC (Unified National Coarse) and UNJ (Unified National Aerospace) were introduced to cater to different needs, but UNF threads have remained a staple due to their versatile and reliable design.

The Rise of UNJF Threads: Why Was It Introduced?

The UNJF thread series, or Unified National Fine Thread Aerospace series, was introduced to meet the stringent demands of the aerospace and defense industries. The evolution from UNF to UNJF was driven by the increasing need for higher precision, better performance under extreme conditions, and tighter tolerances in high-stress environments.

Unlike UNF threads, which were designed for general mechanical applications, UNJF threads were engineered specifically to handle the extreme forces encountered in aerospace applications. These forces include high vibrations, pressure changes, and severe temperature variations. Additionally, the aerospace industry required a standardized thread that could guarantee the safety and integrity of components, given the critical nature of the equipment and the potentially hazardous consequences of failure.

UNJF threads are crafted with stricter tolerances and are designed to provide greater load-bearing capabilities. They are often used in aircraft, satellites, and military equipment, where failure is not an option. The introduction of UNJF threads represented a significant leap forward in thread technology, offering aerospace engineers a fastener that could withstand the rigorous demands of their field.

UNF vs UNJF Thread

The Key Differences in Design and Application

While UNF and UNJF threads share similarities due to their common origin under the Unified Thread Standard, several key differences set them apart:

Thread Geometry: UNF and UNJF threads have different thread forms, with UNJF threads featuring a slightly altered geometry to accommodate higher load-bearing capacities. The design of the UNJF threads allows them to handle more stress, making them better suited for the aerospace and defense industries. While UNF threads are precise and reliable for general mechanical applications, UNJF threads are specially designed to endure extreme conditions.

Tolerance and Precision: UNJF threads are manufactured with much stricter tolerances than UNF threads. These tighter tolerances ensure that each fastener fits exactly, providing improved performance in environments where precision is critical. This is why UNJF threads are often used in the aerospace sector, where minute variations in fastener performance can lead to catastrophic failure. The added precision ensures that even under high-stress conditions, the fasteners hold securely.

Applications: UNF threads are versatile and widely used in many industries, including automotive, construction, and general manufacturing, where strong connections are needed but extreme performance is not required. They are typically used in applications like bolts, screws, and other fasteners where standard mechanical systems are in play.

On the other hand, UNJF threads are specifically engineered for high-performance industries, particularly aerospace and defense. These threads are designed for components that will experience extreme vibrations, high temperatures, and demanding mechanical loads, such as aircraft engines, spacecraft, and military-grade machinery.

Thread Pitch: The pitch (distance between threads) in UNF threads is finer than that of UNC threads but is generally not as fine as that found in UNJF threads. The UNJF thread pitch is optimized for applications where vibration resistance and load-bearing capacity are crucial, making them the preferred choice for highly specialized, high-stakes systems.

UNF vs UNJF: What’s the Real Difference?

Thread Pitch Comparison: Fine Threads vs. Coarse Threads

One of the most notable differences between UNF and UNJF threads lies in their thread pitch. Thread pitch refers to the distance between adjacent threads on a fastener, and it plays a significant role in determining the strength and application of a thread.

UNF Thread Pitch: UNF threads are considered fine threads, meaning the threads are closely spaced compared to coarse threads (such as UNC threads). The fine pitch provides higher precision and allows for a greater number of threads in a given length, which results in a finer, more compact connection. This makes UNF threads ideal for applications where a higher level of strength and tension control is required within a limited space. Fine threads also offer better resistance to vibration loosening, making them more suitable for mechanical systems exposed to fluctuating forces.

UNJF Thread Pitch: UNJF threads, on the other hand, have an even finer thread pitch than UNF threads. The tighter pitch of UNJF threads is specifically designed to provide maximum strength and load distribution, making them highly suitable for applications where safety, high tension, and extreme environmental conditions are critical. This is especially important in aerospace, where components may be exposed to tremendous forces, temperature fluctuations, and vibrations. The finer threads in UNJF offer superior precision and greater durability under stress.

In essence, while both UNF and UNJF threads fall under the “fine thread” category, UNJF threads are a refinement of UNF, engineered for even higher performance in specialized applications.

Thread Form and Its Impact on Strength

The thread form refers to the geometric shape of the thread, which directly influences how well the threads fit together, the strength of the fastener, and its ability to bear loads.

UNF Thread Form: UNF threads have a V-shaped thread form, which is common in many thread types. This shape provides a good balance of strength and ease of manufacturing, making it suitable for a variety of applications, from general machinery to automotive and industrial uses. The V-shaped form of UNF threads offers a decent amount of tensile strength and resistance to shear forces, but it’s not designed for the extreme loads and vibrations found in highly demanding fields.

UNJF Thread Form: UNJF threads also use a V-shaped thread form but with slightly modified angles and dimensions to handle higher loads and perform better under pressure. The modifications in the UNJF thread form help distribute forces more evenly across the thread, improving its shear strength and torque resistance. This makes UNJF threads more capable of handling stress in high-precision, high-performance applications, such as aerospace and defense industries, where failure is not an option.

The thread form of UNF and UNJF is closely related to their strength capabilities. The more finely tuned thread form of UNJF offers enhanced durability, making it a preferred choice for systems that must withstand extreme environmental and mechanical stresses.

Size Differences: UNF vs UNJF Thread Diameter

Another key difference between UNF and UNJF threads lies in their size and diameter.

UNF Thread Diameter: UNF threads come in a wide range of sizes, with diameters ranging from small precision fasteners to larger bolts and screws. UNF threads are commonly used in sizes ranging from 1/4 inch to 3 inches in diameter, offering flexibility for a variety of general industrial applications. The fine-pitch design of UNF allows for tight tolerances, making it suitable for high-strength, compact connections, especially where space is at a premium.

UNJF Thread Diameter: UNJF threads generally feature the same diameter range as UNF threads but with specific sizes designed to meet the needs of aerospace and specialized industries. While the diameters of UNF and UNJF may overlap, the UNJF threads are made with higher precision and stricter tolerances. They are specifically designed to ensure a more accurate and secure fit, even in extreme conditions. The diameter tolerance in UNJF threads is tighter, making them ideal for applications where failure is not an option, such as in aircraft components, satellites, and military systems.

Thread Geometry: The Science Behind the Shape

Thread Angle, Pitch, and Depth in UNF vs UNJF

Each aspect of thread geometry—angle, pitch, and depth—plays a significant role in determining how well the threads perform under load.

Thread Angle:

UNF Threads: The standard thread angle for UNF threads is 60 degrees, which is the same as the common V-shaped thread form. This angle strikes a balance between strength and ease of manufacture, making UNF threads suitable for general-purpose applications.

UNJF Threads: Although UNJF threads also use the 60-degree thread angle, their design includes finer tolerances and modifications to optimize the thread’s performance in critical environments like aerospace. The angle is optimized for better load distribution, which helps improve the fastener’s overall strength and resistance to failure, especially in high-stress environments.

Thread Pitch:

UNF Threads: The pitch (distance between threads) of UNF threads is fine but relatively standard when compared to other thread types. This provides a good balance of grip and thread strength, making it ideal for general mechanical and industrial uses. Fine-pitched threads also offer better resistance to vibration-induced loosening.

UNJF Threads: UNJF threads typically have a finer pitch than UNF threads, which improves thread engagement. A finer pitch allows for greater precision, better load distribution, and higher stress resistance. This is crucial in industries like aerospace, where even slight variations in thread engagement can compromise the entire system’s integrity.

Thread Depth:

UNF Threads: The depth of UNF threads is designed to balance strength and ease of installation. The thread depth is sufficient for most industrial applications, ensuring that the fastener has the required strength without being too deep to interfere with other components.

UNJF Threads: UNJF threads have a deeper thread depth that increases the overall surface area of the thread engagement. This deeper engagement ensures that the threads hold more securely under tension and shear forces. This makes UNJF threads ideal for applications where the fastener must withstand higher levels of stress, such as in aircraft engines or other critical systems.

UNF and UNC

The Impact of Geometry on Durability and Strength

The geometry of UNF and UNJF threads has a direct impact on the durability and strength of the fastener. Thread geometry influences how well the threads distribute forces, resist wear, and interact with the mating part.

UNF Thread Durability: UNF threads are known for their resilience in general mechanical applications. The fine pitch and standard thread form allow UNF threads to provide excellent resistance to vibration and torsional forces. However, due to their standard tolerances and geometry, UNF threads are more suited for moderate load applications where extreme precision and load-bearing capacity are not as critical. In terms of durability, UNF threads hold up well under typical industrial conditions, though they may not perform as effectively in high-stress environments.

UNJF Thread Strength and Durability: UNJF threads are engineered with much more precise geometry, which plays a significant role in improving their strength and durability. The finer pitch, tighter tolerances, and deeper thread depth allow UNJF threads to handle higher levels of tension, shear, and vibration. These threads provide greater contact area between the fastener and the mating component, distributing loads more evenly. As a result, UNJF threads are more durable, offering superior resistance to wear and fatigue. They are highly resistant to stripping, thread fatigue, and other types of mechanical failure, which is why they are favored in high-performance industries such as aerospace and military applications.

Bolt Sizing and Screw Sizing: Choosing the Right Fit

Why Correct Sizing Is Essential for Fastener Performance

Correct sizing is crucial when selecting bolts and screws for any mechanical assembly, as it directly influences the performance, safety, and longevity of the fastener. Using improperly sized fasteners can lead to a range of issues, including loose connections, thread stripping, failure under stress, and vibration-induced loosening.

When the bolt or screw is too small, it may not provide sufficient clamping force or resist the mechanical loads applied to it. On the other hand, if the fastener is too large, it can put excessive stress on the surrounding material, potentially leading to thread damage or compromised structural integrity. Additionally, incorrect sizing can affect the tightening torque and may not provide the proper thread engagement, resulting in unstable connections.

For both UNF and UNJF threads, precise sizing ensures that the fastener fits perfectly with the corresponding hole or nut, optimizing the strength of the connection and improving the overall reliability of the assembly. This is especially important in industries like aerospace, automotive, and manufacturing, where fasteners must withstand extreme stresses.

How to Measure UNF and UNJF Bolts and Screws

Measuring bolts and screws correctly is essential for selecting the right size and ensuring compatibility with the mating threads. For both UNF and UNJF threads, the measurement process involves determining several key dimensions:

Thread Diameter:

The diameter of the bolt or screw is one of the most important measurements. It refers to the outermost diameter of the threaded portion of the fastener.

For UNF and UNJF fasteners, the diameter is typically measured using a micrometer or a caliper, ensuring the measurement is taken at the widest point of the threads. Common sizes range from 1/4 inch to 3 inches for UNF and UNJF fasteners.

Thread Pitch:

Pitch refers to the distance between adjacent threads and is measured in threads per inch (TPI) for UNF and UNJF threads. The thread pitch is essential for ensuring that the threads of the bolt or screw will properly engage with the corresponding nut or hole.

To measure pitch, use a thread pitch gauge or count the number of threads within a set length (typically 1 inch) to determine the TPI. This is especially important for UNF and UNJF threads, as the precise pitch is what differentiates these threads from other types like UNC (coarse threads).

Thread Length:

Thread length is the portion of the bolt or screw that has threads. It is important to measure the length of the threaded section to ensure that it properly engages with the nut or threaded hole.

For UNF and UNJF bolts and screws, ensure the threaded length matches the requirements for the application—whether it’s a shallow engagement for general use or a deeper engagement for high-performance applications.

Bolt Length (Overall):

In addition to the threaded portion, the overall length of the bolt or screw must be measured. This determines how deep the bolt or screw can be inserted into the corresponding part and is essential for applications where a specific insertion depth is required.

Shank Diameter (Non-threaded portion):

In some cases, the shank diameter (the non-threaded portion of the bolt) may also need to be measured, particularly if the fastener needs to pass through a hole in a component before the threads engage. For UNF and UNJF bolts, the shank diameter must match the clearance hole to ensure proper fit and alignment.

The Importance of Accurate Bolt Diameter and Pitch

Accurate measurement of bolt diameter and pitch is essential for ensuring proper fit and optimal performance.

Bolt Diameter: The diameter of the bolt or screw must match the corresponding hole size or nut, as even slight variations can cause improper thread engagement, leading to a weaker connection. An incorrectly sized diameter can cause the threads to be too tight or too loose, leading to poor torque control, stripped threads, or inconsistent clamping forces.

Thread Pitch: The thread pitch is especially critical for UNF and UNJF threads, as these fine-pitched threads are designed to interlock precisely with the mating threads. If the pitch does not match, the threads may not engage fully, resulting in incomplete fastening, vibration loosening, and weakened connections. The finer pitch of UNF and UNJF threads allows for better control over torque and more resistance to fatigue, but only when the pitch is measured and matched correctly.

Conclusion

Choosing the right thread type—UNF or UNJF—depends on your application’s requirements. Understanding the differences between these threads is crucial for ensuring the performance, safety, and longevity of mechanical systems. The right choice prevents costly failures, enhances efficiency, and ensures reliable, secure connections in both every day and high-precision applications.


FAQ

What is the difference between UNF and UNJF threads?

UNF threads are fine-pitched threads used for general mechanical applications, while UNJF threads are a specialized version with tighter tolerances and stronger performance for high-stress environments, such as aerospace.

Can I use UNF fasteners instead of UNJF?

It depends on your application. UNF fasteners are suitable for most industrial applications, but UNJF fasteners are designed for high-precision and high-stress environments. Always consider the performance demands before substituting one for the other.

What industries use UNF threads?

UNF threads are commonly used in industries like automotive, machinery, and general manufacturing where strength, precision, and vibration resistance are important.

Why are UNJF threads used in aerospace?

UNJF threads are used in aerospace because they offer superior strength, durability, and precision, making them ideal for handling high vibrations, pressure, and temperature changes found in aerospace applications.

How do I measure the pitch of UNF and UNJF threads?

You can measure the pitch of UNF and UNJF threads using a thread pitch gauge or by counting the number of threads in one inch of the fastener.

What happens if I use the wrong thread size?

Using the wrong thread size can lead to poor thread engagement, weakening the connection and potentially causing stripped threads, loose fasteners, or even system failure under stress. Proper sizing is essential for ensuring a secure and durable fit.

Chemical and Surface Heat Treatment Topa

Chemical and Surface Heat Treatment of Metal Materials Explained

Heat treatment of metal materials is a technology that changes the internal or surface structure of the material through the process of heating, holding, and cooling to improve its properties. Heat treatment process occupies an important position in mechanical manufacturing, especially in the processing of metal materials, which can improve the physical properties of the workpiece, mechanical properties, corrosion resistance, etc., and these improvements are usually achieved through changes in microstructure, which are difficult to detect with the naked eye.

Heat Treatment Overview

Definition and Basic Principles

Heat treatment is a process in which metal fittings are heated to a specific temperature, held at that temperature for a period, and then cooled at a controlled rate (either quickly or slowly). The primary objective of heat treatment is to alter the microstructure of the metal, which in turn enhances its mechanical properties such as hardness, strength, toughness, and ductility.

The core aim of heat treatment is to modify the metal’s microstructure at the atomic or crystalline level. This can involve processes like grain size alteration or phase transformation (such as austenite to martensite), which lead to significant improvements in the material’s physical properties. For example, by controlling the cooling rate, heat treatment can determine whether a material becomes hard, tough, or resistant to wear.

In most heat treatment processes, the changes are not visible to the naked eye, but they result in significant improvements in the material’s performance, making it more suitable for a wide range of industrial applications. Heat treatment is often employed to optimize metal alloys, making them more durable and reliable in demanding environments.

Characteristics of Heat Treatment Processes

Heat treatment differs from other manufacturing processes in several key ways. Unlike mechanical or chemical processing techniques, heat treatment does not change the external shape or overall chemical composition of the workpiece. Instead, it focuses on the internal microstructure and surface properties to improve performance. This is typically achieved by modifying the arrangement of the material’s atoms or crystals, which can significantly affect the metal’s strength, toughness, or resistance to fatigue.

The benefits of heat treatment are primarily realized through changes in the metal’s microstructure. For example, processes like grain coarsening or phase transformation can drastically improve mechanical properties such as hardness and tensile strength, while also enhancing material characteristics like resistance to corrosion and wear. These microstructural changes occur at the atomic level, often invisible to the naked eye, but they are crucial in determining the material’s performance.

Because heat treatment involves precise control over temperature and cooling rates, it can be tailored to achieve specific material properties, depending on the requirements of the application. Some heat treatments may result in a softer, more ductile material ideal for forming, while others may produce a hardened surface that is resistant to wear and tear.

In industrial applications, heat-treated components are commonly used in machinery, tools, automotive parts, and aerospace components, where high-performance materials are essential for functionality and safety. The ability to control and enhance these properties through heat treatment provides manufacturers with a valuable tool to produce components with superior performance characteristics.

Overall Heat Treatment

Overall heat treatment is a vital process in metallurgy that involves heating the entire workpiece to a specific temperature and then cooling it in a controlled manner. This method is designed to alter the internal microstructure of the metal, optimizing its mechanical properties such as hardness, strength, toughness, and ductility. Unlike surface treatments, overall heat treatment affects the entire mass of the material, making it suitable for components that require uniform performance throughout.

The heat treatment process is critical for improving the material’s behavior under stress, extending its lifespan, and ensuring it meets the specific performance standards required for its intended application.

Annealing

Process: Annealing involves heating the metal to a predetermined temperature, followed by a slow cooling process, typically in the furnace or air. The cooling rate is deliberately controlled to achieve the desired material properties.

Purpose: The primary goal of annealing is to relieve internal stresses that may have been induced during previous manufacturing steps (like forging or casting). Additionally, it softens the material, improves ductility, and enhances its machinability. By refining the grain structure, annealing also makes the material more uniform and stable, which is particularly beneficial for metals that will undergo further shaping or forming processes.

Applications: Annealing is widely used in industries where components need to be shaped or welded without compromising their material properties. It is commonly applied to steel, copper, aluminum, and other alloys to prepare them for further processing.

Annealing

Normalizing

Process: Normalizing involves heating the metal to a temperature slightly above its critical temperature (the point at which the material’s crystal structure transforms), and then allowing it to cool in still air. The cooling is done at a controlled rate to avoid rapid temperature changes.

Purpose: The main goal of normalizing is to refine the metal’s grain structure and enhance its mechanical properties. This process promotes a uniform, fine-grained microstructure, which enhances strength and toughness. It also improves the material’s hardness and wear resistance, especially in carbon steels.

Applications: Normalizing is commonly used in steel production, particularly for medium and high-carbon steels. It is also beneficial for improving the consistency of large components or materials that are not suitable for quenching.

Quenching

Process: Quenching involves rapidly cooling a heated metal, typically by immersion in water, oil, or other quenching media. The metal is heated to a high temperature, usually above the critical temperature, and then suddenly cooled to “trap” the material in a hardened state.

Purpose: The primary purpose of quenching is to harden the material by increasing its strength and wear resistance. Rapid cooling prevents the metal’s microstructure from returning to a softer phase, such as ferrite, resulting in a more robust, hardened state (e.g., martensite in steel).

Caveats: While quenching significantly increases hardness, it also makes the material more brittle due to the stresses created by rapid cooling. As a result, quenching is often followed by tempering to restore some of the lost toughness and reduce brittleness.

Applications: Quenching is widely used in manufacturing tools, cutting tools, gears, and high-strength machine components that require superior hardness and wear resistance. It is particularly essential in the production of high-carbon steels and alloy steels.

Tempering

Process: After quenching, the metal often needs to be tempered to reduce brittleness and increase toughness. Tempering involves reheating the quenched material to a lower temperature (usually between 150°C and 650°C, depending on the desired properties), then cooling it at a controlled rate. This reduces internal stresses caused by the rapid quenching process.

Purpose: The goal of tempering is to strike a balance between hardness and toughness. While quenching makes the material very hard, it also makes it brittle. Tempering reduces this brittleness by promoting a more stable microstructure, which enhances toughness and ductility without significantly reducing the hardness achieved during quenching.

Applications: Tempering is used extensively in the production of steel tools, structural components, and springs where a combination of hardness, toughness, and flexibility is needed. It is often the final step in the heat treatment process for carbon and alloy steels, ensuring the material is suitable for heavy-duty applications.

Surface Heat Treatments

Surface heat treatment focuses on altering the properties of a metal’s surface layer while leaving its internal microstructure largely unchanged. This targeted modification of the surface is critical for improving the performance characteristics of materials, particularly in components that experience high levels of wear, friction, or stress. By enhancing the surface hardness, wear resistance, and fatigue strength, surface heat treatment ensures that the material can perform better in demanding applications, all while maintaining the desirable properties of the bulk material, such as toughness and ductility.

Surface heat treatments are typically employed when the functional requirements demand improved surface performance, but without altering the underlying core properties of the metal. These processes are highly effective in extending the lifespan of components subjected to harsh working conditions, such as gears, shafts, and engine parts.

Carburizing

Process: Carburizing is a surface hardening process in which carbon is diffused into the surface of low-carbon steel by heating it in a carbon-rich environment, typically in a furnace or a gas atmosphere. After the steel is exposed to the carbon source, the material is rapidly quenched to lock in the hardened surface layer.

Purpose: The primary goal of carburizing is to produce a hard, wear-resistant surface while maintaining a softer, tougher core. This creates a material that has excellent wear resistance on the outside but retains high toughness and shock resistance in the core, which is crucial for components that experience both high surface wear and impact loading.

Applications: Carburizing is commonly used for parts that require high surface hardness and wear resistance, such as gears, crankshafts, camshafts, and other high-performance automotive and industrial components.

Carburizing

Nitriding

Process: Nitriding involves introducing nitrogen into the surface of a steel or alloy at elevated temperatures, typically in the range of 500–550°C. This process forms hard, nitrogen-rich compounds (like iron nitrides) on the surface of the material, which significantly enhances its hardness.

Purpose: Unlike carburizing, nitriding does not require quenching, which helps reduce dimensional changes and distortion. The surface treatment increases the hardness, wear resistance, and corrosion resistance of the material, making it ideal for parts that operate in corrosive environments or under high wear conditions.

Applications: Nitriding is often used for components such as valves, pistons, turbine blades, and other precision mechanical parts where surface durability and resistance to corrosion are critical.

Induction Hardening

Process: Induction hardening uses electromagnetic induction to heat a localized area of the workpiece to a high temperature, typically using high-frequency alternating currents. Once the desired surface temperature is reached, the part is rapidly quenched, usually in water or oil, to achieve hardening.

Purpose: This process is particularly effective for hardening specific areas of a part, such as the outer surfaces of shafts, gears, or bearings, without affecting the core properties. The surface becomes hard and wear-resistant, while the core remains tough and ductile, which is ideal for components subjected to cyclic loading or high-impact conditions.

Applications: Induction hardening is commonly used in automotive and industrial applications for parts like gears, shafts, and other components that require localized hardening to resist wear and fatigue while maintaining a strong core.

Other Treatments

Solution Treatment

Process:

Solution treatment involves heating an alloy to a high temperature range (typically 980°C to 1250°C), maintaining a constant temperature within the single-phase region to allow excess phases to dissolve into the solid solution. After a specific period, the material is rapidly cooled, usually by water or oil quenching, to preserve the dissolved state.

Purpose:

Achieving a Single-Phase Austenitic Structure: By heating the alloy to a high temperature, all phases dissolve into the solid solution, resulting in a uniform microstructure.

Improving Ductility and Toughness: This treatment helps enhance the plasticity and toughness of materials, preparing them for subsequent treatments like precipitation hardening.

Solid Solution Strengthening: Dissolving different phases improves the material’s hardness, toughness, and resistance to corrosion.

Relieving Internal Stresses: Solution treatment eliminates internal stresses within the material, which is important for further processing or forming.

Cryogenic Treatment

Process:

Cryogenic treatment involves cooling a material, typically after quenching, to extremely low temperatures, usually between -40°C and -80°C, using mediums like dry ice or liquid nitrogen. The material is held at this low temperature for a period, allowing for uniform cooling, before gradually bringing it back to room temperature.

Purpose:

Enhanced Wear Resistance: Cryogenic treatment helps transform retained austenite into martensite, increasing hardness and wear resistance.

Reduced Residual Stresses: It reduces internal stresses, improving dimensional stability in precision components.

Improved Toughness: The treatment can also enhance the material’s toughness by reducing brittleness, particularly in high-strength steels.

Refined Microstructure: The process refines the grain structure, which can improve the overall mechanical properties of the material.

Aging

Process:

Aging, or precipitation hardening, is a heat treatment process that involves heating a material (often an alloy) to a specific temperature, holding it there for a set period, and then cooling it. This process promotes the precipitation of fine particles within the material, which strengthens the solid solution by obstructing dislocation movement.

Purpose:

Increased Strength and Hardness: Precipitation hardening forms fine precipitates that hinder dislocation motion, increasing the material’s strength and hardness.

Control of Material Properties: The aging process can be adjusted to achieve specific material properties, such as increased hardness or improved corrosion resistance.

Improved Wear Resistance: The strengthening phase formed during aging also improves the wear resistance of the material.

Enhanced Thermal Stability: The treatment increases the material’s ability to resist deformation and degradation at high temperatures.

blackening

Blackening

Process:

Blackening (also known as black oxide coating) is a surface treatment that forms a protective oxide layer on the metal, typically using a chemical bath. The metal is immersed in a bath containing oxidizing agents, and a thin black oxide layer is formed on the surface, which provides both corrosion resistance and an attractive finish.

Purpose:

Corrosion Resistance: The black oxide layer offers some protection against corrosion, preventing rust and oxidation, especially in mild conditions.

Improved Appearance: It provides an aesthetically pleasing, uniform black finish to the metal, often used in consumer goods or decorative applications.

Reduced Friction: The process can reduce friction and wear, making it suitable for parts subject to regular movement or interaction.

Enhanced Durability: In some cases, blackening can enhance the durability of components by reducing surface oxidation under exposure to certain environments, although it’s not as protective as other coatings like galvanizing or anodizing.

Applications of Surface Heat Treatments

Surface heat treatments play a critical role in enhancing the surface properties of materials while preserving the desirable characteristics of the core. These techniques are widely used in industries where components are subjected to high wear, corrosion, or fatigue, such as automotive, aerospace, manufacturing, and tooling. Below are two prominent applications of the surface heat treatments process that significantly improve the performance of metal parts.

Induction Hardening (High-Frequency Hardening)

Process: Induction hardening involves locally heating a specific area of a workpiece using electromagnetic induction, followed by rapid cooling (quenching). The heating is typically done using high-frequency currents, which focus the heat on the surface layer of the metal, leaving the inner core unaffected.

Purpose: The primary goal of induction hardening is to increase the surface hardness and wear resistance of the component while keeping the core relatively soft and tough. This technique allows manufacturers to selectively harden parts without affecting their entire structure.

Applications: Induction hardening is commonly used for components like gears, shafts, camshafts, and tool parts that require a high surface hardness for wear resistance but need to maintain internal toughness for strength and shock resistance. It is especially useful for parts that experience concentrated, localized stresses, such as gears in transmissions or high-speed motors.

Advantages: The process offers precise control over the depth and location of the hardened zone. It also allows for quick processing times, minimizing energy consumption compared to traditional methods like furnace hardening. Additionally, the parts are hardened without altering the overall dimensions, making it ideal for complex geometries.

Laser Cladding (Laser Surface Alloying)

Process: Laser cladding, also known as laser surface alloying, uses a high-powered laser beam to melt a metal powder or wire feed that is applied to the surface of a workpiece. The heat generated by the laser causes the surface to melt, and the added material bonds to the substrate, forming a new layer of hard, wear-resistant metal.

Purpose: This process creates a hard, corrosion-resistant surface on the workpiece. The cladded layer can improve the material’s resistance to wear, corrosion, oxidation, and other harsh environmental factors. Laser cladding can also be used to repair worn-out components or to add new properties to existing materials without affecting the bulk material’s integrity.

Applications: Laser cladding is widely used in industries such as aerospace, automotive, and power generation. For example, it is commonly applied to turbine blades, molds, and dies, as well as engine components that require a hard surface capable of withstanding high-temperature conditions. It is also utilized for adding wear-resistant coatings to parts that are exposed to frictional wear.

Advantages: One of the significant advantages of laser cladding is its precision. The laser beam can be tightly controlled, ensuring that the coating is applied only to the targeted areas, reducing material waste. Additionally, the process can be used to apply a wide variety of materials, including alloys with specialized properties for corrosion or wear resistance. Furthermore, the rapid cooling of the cladded layer can result in improved hardness and metallurgical bonding between the surface layer and the base material.

Selection and Optimization of Heat Treatment Processes

The selection and optimization of heat treatment processes are crucial steps in achieving the desired material properties for a specific application. Heat treatment allows manufacturers to tailor a material’s mechanical properties, such as hardness, strength, toughness, and wear resistance, to meet the demands of different industries and applications.

Key Factors for Selecting Heat Treatment Processes:

Material of the Workpiece

The material composition is one of the most important factors in selecting a heat treatment process. Different metals and alloys respond differently to heat treatment. For example, steel alloys may undergo processes like carburizing or nitriding to enhance surface hardness, while aluminum alloys might require aging to improve strength.

The carbon content in steel, for example, plays a significant role in determining which heat treatment processes are applicable. High-carbon steels may be more suitable for processes like quenching, while low-carbon steels often undergo carburizing to improve their surface hardness.

Intended Use of the Component

The function of the part or component in its intended application dictates the required material properties. For example, parts that experience high stress, wear, or fatigue, such as gears, bearings, or tools, may require surface hardening methods like induction hardening or nitriding.

In contrast, parts that need high ductility, toughness, and formability, such as structural components or machine parts, may require annealing or normalizing processes to relieve internal stresses and improve machinability.

Size and Geometry of the Workpiece

The size and shape of the workpiece influence the heat treatment process chosen. Larger components may require more controlled heating and cooling rates to ensure uniform temperature distribution, while smaller parts can often be treated more rapidly and with greater precision.

The geometry of the workpiece also matters. For complex shapes, localized heat treatment methods, such as induction hardening, may be more appropriate for selectively hardening specific areas of the part without affecting the entire structure.

Required Performance Characteristics

Different applications require different combinations of material properties. For instance, high wear resistance and surface hardness may be required for components like cutting tools or gears, which would necessitate surface treatments like carburizing, nitriding, or laser hardening.

On the other hand, components that need a balance of hardness and toughness, such as structural parts or suspension components, may benefit from overall heat treatment processes like quenching followed by tempering to achieve an optimal combination of strength and ductility.

How to Optimize Heat Treatment Processes

Optimizing the heat treatment process involves selecting the most appropriate method based on the specific needs of the application. This requires a detailed analysis of the following:

Tailoring Process Parameters to Material Needs

Adjusting factors such as temperature, cooling rates, and time is essential to achieving the desired material properties. For example, controlling the cooling rate in quenching determines whether the material becomes brittle or retains its toughness. Fine-tuning the parameters ensures that the material achieves the right combination of hardness, toughness, and other properties.

Selecting the Right Method for the Application

Based on the application, the heat treatment method should be chosen to achieve the required mechanical properties. For example, carburizing may be optimal for improving wear resistance on parts like gears and shafts, while nitriding may be more suitable for parts that require improved fatigue resistance and corrosion resistance, such as engine components or turbine blades.

For applications requiring selective hardening, induction hardening is ideal, as it allows for precise control over which areas of the part are hardened.

Considering the Size and Production Efficiency

Larger batches or high-production volumes often require heat treatment processes that are efficient and scalable, such as furnace-based methods (annealing, normalizing). In contrast, smaller batch production or more complex geometries may benefit from more localized treatments such as induction hardening or laser hardening, where precision and speed are critical.

Minimizing Distortion and Residual Stresses

Optimizing the heat treatment process also involves minimizing distortions and residual stresses that can occur during heating and cooling. Techniques like controlled cooling or post-treatment stress relieving may be required to ensure the part maintains its shape and dimensional accuracy after heat treatment.

Balancing Cost and Performance

In industrial applications, cost-effectiveness is often a crucial factor. The selected heat treatment method should not only meet the performance requirements but also fit within budget constraints. For example, while processes like carburizing or nitriding offer excellent surface performance, they may be more expensive and time-consuming compared to simpler processes like annealing or normalizing.

Conclusion

In conclusion, while chemical and surface heat treatments already play a crucial role in improving the performance and longevity of metal hydraulic fitting components, ongoing developments in technology, environmental sustainability, and precision manufacturing promise to further enhance the effectiveness and efficiency of these processes. As industries continue to demand more advanced and specialized materials, heat treatment will remain a critical tool for ensuring that metal components can meet the increasingly complex and rigorous demands of modern manufacturing.


FAQ

What is heat treatment?

Heat treatment is a process used to alter the physical and mechanical properties of a metal by heating and cooling it in a controlled way. This process can improve characteristics such as hardness, strength, and durability.

What are the types of heat treatment?

The main types of heat treatment are overall heat treatment, surface treatment, and chemical heat treatment (which alters the material’s surface chemistry).

Why is heat treatment important in manufacturing?

Heat treatment is essential because it improves the material’s performance, extending its lifespan and ensuring it can withstand wear, stress, and fatigue in demanding environments like automotive, aerospace, and tooling.

What is carburizing?

Carburizing is a heat treatment process where carbon is introduced into the surface layer of steel at high temperatures to create a hard, wear-resistant surface while maintaining a tough, ductile core.

How does nitriding improve metal properties?

Nitriding involves introducing nitrogen into the surface of the steel, creating a hard, wear-resistant layer that also enhances corrosion resistance, making it ideal for components subjected to high wear, like gears and turbine blades.

How can I optimize the heat treatment process for my parts?

Optimizing heat treatment involves choosing the appropriate method based on the material, part size, and required properties. Factors like the workpiece’s intended use, required hardness, and wear resistance should guide your decision-making.

    Hydraulic Oil Basics banner

    Hydraulic Oil Basics: Everything You Need to Know

    Hydraulic oil is a specially formulated fluid used in hydraulic systems to transmit power. These systems rely on pressurized fluid to move parts or machinery, and hydraulic oil serves as the medium for transferring that power.

    The Hydraulic Oil Basics: How It Works

    Hydraulic systems are powerful and efficient tools used in a wide range of industries, from construction to manufacturing. At the heart of these systems lies hydraulic oil, a special fluid that transmits force and energy to perform various tasks. In this section, we’ll delve deeper into the science behind how hydraulic fluid works, the role of fluid dynamics, and why oil pressure and lubrication are critical to system efficiency.

    Fluid Dynamics: How Hydraulic Oil Powers Machinery

    Fluid dynamics is the study of how fluids—like hydraulic oil—move and interact with their environment. In a hydraulic system, fluid dynamics governs how the oil moves through pipes, pumps, valves, and actuators to transmit power.

    Hydraulic systems operate by creating pressure in a confined space. When hydraulic oil is pumped into the system, it is forced through tubes and valves, moving at a high speed and creating pressure. The pressure generated in the oil allows the hydraulic system to perform various functions such as lifting, rotating, or pushing machinery components.

    The key to understanding how hydraulic oil powers machinery lies in the Pascal’s Law, which states that when pressure is applied to a confined fluid, the pressure is transmitted equally in all directions. This principle allows hydraulic systems to generate significant force from a small amount of fluid. As the hydraulic oil moves through the system, it transmits this pressure to hydraulic cylinders, pistons, and other actuators, making heavy machinery capable of performing tasks that would otherwise require much more effort or power.

    For example, when you press a button to raise a crane’s arm or push a lever to lift a load, the hydraulic oil’s ability to transmit pressure effectively powers the machinery. Hydraulic fluid is ideal for this because it can carry force over long distances without losing energy, even under high pressure.

    Understanding Oil Pressure and its Role in System Efficiency

    Oil pressure is at the core of how hydraulic systems function. It is the force exerted by the hydraulic oil on the system’s components, such as pistons, valves, and cylinders. The pressure created in the hydraulic system allows oil to flow through the system, generating the power necessary to perform a variety of tasks.

    The pressure within a hydraulic system must be carefully regulated for the system to function efficiently. Too much pressure can lead to system failure or damage to components, while too little pressure can cause sluggish performance, insufficient power output, or even the inability to complete tasks.

    Several factors determine the pressure within a hydraulic system:

    Pump Output: The hydraulic pump generates the pressure needed to move the oil through the system. The pump’s capacity, combined with the system’s resistance, determines the maximum pressure that can be achieved.

    System Design: The layout of the hydraulic system, including the size of pipes, valves, and actuators, plays a role in the pressure buildup. Narrow pipes or restrictive valves can create resistance that affects pressure, while larger components or more efficient designs can help maintain steady pressure levels.

    Oil Viscosity: The viscosity of the hydraulic oil (how thick or thin it is) plays a key role in maintaining oil pressure. Oils with a higher viscosity create more resistance to flow, which can affect pressure. However, oils that are too thin may not create enough resistance, leading to insufficient pressure.

    Temperature: Temperature fluctuations affect hydraulic oil viscosity. At higher temperatures, oil tends to become less viscous (thinner), which may reduce the pressure in the system. In colder temperatures, oil thickens and creates more resistance to flow, potentially increasing pressure. Maintaining the correct oil temperature is crucial for optimal performance.

    Hydraulic Fluid Change

    Pressure Lubrication: Keeping Your Equipment Running Smoothly

    Pressure lubrication refers to the use of hydraulic oil to lubricate moving components within a hydraulic system under pressure. The primary function of lubrication in any machine is to reduce friction between moving parts, preventing wear and tear, and ensuring smooth operation. Hydraulic oil’s role in pressure lubrication is particularly critical because it not only lubricates but also carries the pressure needed to perform heavy-duty tasks.

    When hydraulic oil flows through the system, it not only powers the machinery but also coats the moving parts, such as pistons, cylinders, and gears. This creates a thin film of oil between the surfaces of these parts, reducing friction and minimizing metal-on-metal contact.

    Here’s why pressure lubrication is essential for system longevity and efficiency:

    Reduces Wear and Tear: Constant movement and pressure can wear down metal parts in hydraulic systems. The oil film created by hydraulic fluid prevents direct contact between these parts, which significantly reduces friction and wear. This means components last longer and require fewer repairs.

    Prevents Overheating: Lubrication helps dissipate heat generated by friction. As hydraulic oil flows through the system, it absorbs heat from moving components and carries it away, helping to prevent overheating. Overheating is a major cause of hydraulic oil degradation and system failure.

    Maintains System Efficiency: By reducing friction and preventing damage, pressure lubrication ensures that the system runs at peak efficiency. Less friction means less energy is lost in the form of heat, and the system can perform tasks more quickly and with less power. This not only saves energy but also ensures that machinery operates smoothly without unnecessary stress on its components.

    Contaminant Control: Hydraulic oil also helps to carry away contaminants like dirt, metal particles, and debris that may enter the system. By trapping these particles in the oil and filtering them out, the oil prevents contaminants from damaging sensitive components and maintains system integrity.

    Different Types of Hydraulic Oil: Which One Do You Need?

    Hydraulic oil is not a one-size-fits-all product. Depending on the nature of your hydraulic system, the operating environment, and your specific requirements, different types of hydraulic oils will be more suitable for your machinery.

    Mineral Oil vs. Synthetic Hydraulic Oil: What’s the Difference?

    When it comes to choosing hydraulic oil, one of the most fundamental decisions is whether to go with mineral oil or synthetic hydraulic oil. Each has its own set of advantages and applications, and understanding the differences between them is key to selecting the right oil for your system.

    Mineral Oil Hydraulic Oil

    Mineral oil is derived from crude oil through a refining process. It has been the standard choice for hydraulic systems for many years, and it is often favored due to its availability and cost-effectiveness. Mineral oils are typically used in less demanding hydraulic applications, such as standard construction equipment, low-pressure systems, and machinery that doesn’t operate in extreme temperatures.

    Advantages of Mineral Oil:

    Cost-effective and widely available.

    Provides good lubrication for most common systems.

    Available in a wide range of viscosities for different operational needs.

    Suitable for systems operating in moderate temperature ranges.

    Disadvantages of Mineral Oil:

    Lower thermal and oxidative stability compared to synthetic oils.

    More prone to contamination and degradation over time.

    Not as effective in extreme temperatures or high-pressure systems.

    Synthetic Hydraulic Oil

    Synthetic hydraulic oils, on the other hand, are engineered fluids made from specially synthesized chemical compounds. They are designed to offer superior performance, especially in high-performance systems or extreme conditions. These oils are more resistant to temperature variations, oxidation, and contamination, making them ideal for high-pressure, high-temperature environments such as aerospace, military, and heavy industrial applications.

    Advantages of Synthetic Oil:

    Better thermal stability and resistance to oxidation.

    Performs well in extreme temperatures (both high and low).

    Longer service life due to reduced degradation.

    Superior anti-wear properties and less evaporation loss.

    Improved fluid efficiency and reduced friction.

    Disadvantages of Synthetic Oil:

    Higher initial cost compared to mineral oils.

    May not be necessary for lower-pressure, less-demanding systems.

    Hydraulic Oil Basics

    Understanding Biodegradable Hydraulic Oil and Its Environmental Benefits

    As environmental concerns continue to grow, there has been an increasing demand for biodegradable hydraulic oils. These oils are designed to break down naturally when exposed to the environment, minimizing their impact on ecosystems if spillage occurs. Biodegradable oils are made from renewable resources like vegetable oils or esters, and they are often used in environmentally sensitive areas, such as forestry, agriculture, and offshore operations.

    Key Benefits of Biodegradable Hydraulic Oils:

    Environmentally Friendly: They break down much faster than traditional mineral oils, reducing the risk of long-term contamination of soil, water, and wildlife.

    Renewable and Sustainable: Many biodegradable oils are made from renewable sources like plant-based oils, making them more sustainable compared to mineral oils.

    Reduced Toxicity: In case of leakage or spill, biodegradable oils are less toxic to aquatic life and wildlife, minimizing the environmental damage.

    Common Applications for Biodegradable Hydraulic Oils:

    Forestry equipment, where oils are often exposed to the environment.

    Marine vessels and offshore platforms where oil spills can be devastating to marine ecosystems.

    Agricultural machinery operating in sensitive areas, like near water bodies.

    Drawbacks of Biodegradable Hydraulic Oils:

    Higher Cost: Biodegradable oils tend to be more expensive due to the sourcing of raw materials and the manufacturing process.

    Shorter Shelf Life: They may have a shorter shelf life compared to mineral oils and require more frequent changes.

    Overview of Common Hydraulic Oil Types: AW, HM, HLP

    Hydraulic oils come in a variety of formulations, each designed to meet specific needs depending on the operating environment and the machinery involved. Below are some of the most common types of hydraulic oil you’ll encounter.

    AW (Anti-Wear) Hydraulic Oil AW oils are specifically formulated with additives that protect hydraulic components from wear. These oils are used in systems where wear prevention is crucial, especially in pumps, motors, and other moving parts. AW oils help extend the lifespan of hydraulic components by providing extra protection against friction and wear.

    Key Features of AW Oils:

    Excellent anti-wear properties to protect against mechanical wear.

    Commonly used in general industrial applications, such as manufacturing machinery and construction equipment.

    Protects against corrosion and rust, extending component life.

    Best For: Mid-range hydraulic applications with moderate pressure and standard operating conditions.

    HM (Hydraulic Mineral) Oil HM oils are mineral-based oils that offer good anti-wear properties and are commonly used in general-purpose hydraulic systems. These oils are suitable for medium to high-pressure systems where wear prevention and high lubrication are important. HM oils are also formulated to resist oxidation and contamination, extending their service life.

    Key Features of HM Oils:

    Good anti-wear additives to protect system components.

    Suitable for moderate to high-pressure systems.

    Resists oxidation and degradation for longer operational life.

    Available in a variety of viscosities to suit different system needs.

    Best For: Hydraulic systems with moderate to high pressure, like manufacturing equipment, cranes, and hydraulic presses.

    HLP (High-Pressure Lubricant) Oil HLP oils are formulated for high-pressure systems where extreme conditions demand superior protection. These oils are designed to withstand the high shear forces generated in high-pressure hydraulic systems. HLP oils provide excellent lubrication, reduce wear, and enhance the overall performance of pumps and motors under stress.

    Key Features of HLP Oils:

    Specifically formulated for high-pressure applications.

    Excellent oxidative stability to withstand high temperatures.

    Ideal for systems with high load and pressure conditions, such as injection molding machines or heavy-duty industrial presses.

    Includes additives to improve rust protection, anti-foam properties, and wear resistance.

    Best For: High-pressure, high-load systems that need robust performance, like construction machinery, mining equipment, and oil rigs.

    Choosing the Right Hydraulic Oil for Your System

    Selecting the correct hydraulic oil is essential to ensuring the optimal performance and longevity of your hydraulic system. Choosing the wrong oil can lead to poor system performance, excessive wear, overheating, and increased maintenance costs. In this section, we will cover the key factors you need to consider when choosing hydraulic oil, the role of viscosity, and how to match hydraulic oil to your hydraulic pump and machinery for peak efficiency.

    Hydraulic Oil Selection

    When selecting hydraulic oil, it’s important to take into account the specific requirements of your hydraulic system. Different systems have different needs based on factors like pressure, temperature, load, and speed. Here are the most important factors to consider when choosing hydraulic oil:

    Operating Pressure and Load The operating pressure of your hydraulic system determines the level of stress the oil will be under. Systems operating at high pressure require oils with higher viscosity and anti-wear additives to protect the system components. If your system operates at lower pressure, you can often use oils with lower viscosity for improved flow and efficiency.

    Operating Temperature The temperature at which your hydraulic system operates plays a significant role in determining which oil is best suited for your needs. Hydraulic oils must maintain their viscosity under varying temperature conditions. High temperatures can cause the oil to thin out, which may reduce lubrication effectiveness, while low temperatures can make oil too thick, increasing system resistance. Be sure to choose an oil with a viscosity that suits the operating temperature range.

    System Speed If your system involves high-speed components such as motors or pumps, you’ll need oil that is designed to handle the increased shear forces. High-speed systems benefit from oils that maintain a stable viscosity and perform well under heat stress. Lower-speed systems, on the other hand, may do well with oils that are thinner or have better flow characteristics.

    Environmental Conditions Consider whether your hydraulic system is operating in harsh or environmentally sensitive conditions. If you’re using hydraulic equipment in an area where oil leaks can have significant environmental impacts, biodegradable hydraulic oils may be the right choice. Additionally, environmental factors like humidity, dust, or exposure to chemicals can affect oil performance and may require oils with specific additives or enhanced protection.

    Viscosity and Its Impact on Hydraulic System Performance

    Viscosity is one of the most important factors in hydraulic oil selection because it directly impacts the performance, efficiency, and reliability of your hydraulic system. Viscosity is a measure of the oil’s thickness or resistance to flow. It determines how easily the oil can flow through the system and how well it can maintain pressure.

    High Viscosity Oils with higher viscosity are thicker and flow more slowly, making them ideal for systems that operate under high pressure or high load. These oils provide better lubrication under intense conditions and can help protect components from wear and tear. However, high-viscosity oils are not ideal for systems that require high flow rates or are exposed to low temperatures.

    Best for: High-pressure systems, slow-moving hydraulic machinery, and environments with high temperatures.

    Low Viscosity Low-viscosity oils are thinner and flow more easily, which makes them suitable for systems with high-speed components or lower operating pressures. These oils help to reduce energy loss and improve system efficiency. However, they may not offer the same level of protection in high-pressure or heavy-load applications.

    Best for: Low-pressure systems, high-speed machinery, and environments with cold temperatures.

    Viscosity Index (VI) The viscosity index is a measure of how the viscosity of an oil changes with temperature. Hydraulic oils with a high VI remain relatively stable in viscosity over a wide range of temperatures, ensuring consistent performance under varying operating conditions. Oils with a low VI, on the other hand, may become too thick in cold conditions or too thin at high temperatures.

    Choosing the Right Viscosity: Always refer to the manufacturer’s recommendations for the specific viscosity grade required for your hydraulic system. The most common viscosity grades are ISO VG 32, ISO VG 46, and ISO VG 68, but the best choice depends on factors like temperature range, system load, and operating speed.

    Shear Stability Some hydraulic oils, particularly those with synthetic components, are designed for better shear stability. Shear stability refers to the oil’s ability to retain its viscosity under high mechanical stress and high-speed operation. Choosing a shear-stable oil ensures that the oil’s viscosity doesn’t break down, maintaining effective lubrication over time.

    How to Match Hydraulic Oil to Your Hydraulic Pump and Machinery

    The choice of hydraulic oil should also be aligned with the specific components of your hydraulic system, including your hydraulic pump, motors, valves, and cylinders. Here’s how to match hydraulic oil to your equipment:

    Hydraulic Pumps

    The hydraulic pump is responsible for pressurizing the oil and driving the system, so it requires oil that has both sufficient viscosity and lubricating properties to protect its internal components. Pumps generally work better with oils that have anti-wear additives, especially in high-pressure applications where friction and heat can cause significant wear. Be sure to use oil with the correct viscosity to avoid cavitation (air bubbles in the oil) and to maintain optimal pump performance.

    Hydraulic Motors

    Hydraulic motors rely on the oil to transmit torque and rotational energy. They require an oil that can handle high speeds, pressure, and mechanical forces. Oils with high shear stability and good lubricating properties are crucial here to prevent premature wear.

    Hydraulic Cylinders

    Hydraulic cylinders rely on the oil to exert force and produce movement. Cylinders typically experience both high pressure and significant wear due to the constant movement of their internal seals and rods. Oils with high anti-wear protection and appropriate viscosity are essential to ensure smooth, long-lasting operation.

    Valves and Filters

    Hydraulic valves control the flow of oil within the system, while filters help keep contaminants out. Both require oils that are clean and free from excessive contaminants. It’s essential to use oil that doesn’t degrade quickly or generate harmful particles that could clog valves or filters.

    Hydraulic Oil Contamination: Prevention and Management

    Hydraulic oil contamination is one of the leading causes of hydraulic system failure. Contaminants like dirt, water, and metal particles can cause increased wear, system inefficiency, and even catastrophic breakdowns if not properly managed. Understanding how contamination affects performance and adopting strategies to prevent and manage contamination is essential for the longevity and reliability of hydraulic systems.

    What is Fluid Contamination and How Does It Affect Performance?

    Fluid contamination refers to the presence of unwanted particles, liquids, or gases in hydraulic oil that can degrade its quality and performance. These contaminants typically enter the hydraulic system through leaks, maintenance procedures, or environmental factors, and they can significantly impact the efficiency and longevity of the system.

    The most common types of contaminants found in hydraulic oil include:

    Solid Particles: Dirt, dust, metal shavings, rust, and wear debris from system components.

    Water: Water can enter the system through condensation or leaks, often causing emulsification of the oil.

    Air: Entrained air can lead to cavitation (formation of bubbles) in pumps, causing damage and reduced performance.

    Gases: Nitrogen or other gases can dissolve in the oil and affect its lubricating ability.

    Contamination can cause several issues, including:

    Increased Wear: Solid particles and metal shavings can scratch and wear down critical components like pumps, valves, and cylinders, leading to premature failure.

    Reduced Lubrication: Water and air contamination can degrade the oil’s lubricating properties, leading to friction, overheating, and more wear on system parts.

    Blockages and Clogging: Solid particles can clog filters, valves, and small passages in the system, impairing fluid flow and reducing system efficiency.

    Corrosion: Water contamination can cause rusting and corrosion of metal parts, leading to the degradation of seals, pumps, and valves.

    Overheating: Contaminated oil may not effectively dissipate heat, leading to overheating, which can further degrade the oil and damage components.

    System Downtime: Ultimately, contamination can lead to increased downtime for repairs and maintenance, affecting production schedules and operational costs.

    Signs of Hydraulic Oil Contamination and How to Spot Them

    Detecting contamination early is crucial for preventing severe damage and reducing downtime. Here are some common signs that your hydraulic oil may be contaminated and how to spot them:

    Sudden Drop in System Pressure

    What It Means: If your system suddenly starts showing a drop in pressure or is underperforming, it could be due to clogging caused by solid contaminants, or degraded oil caused by water or air contamination.

    How to Spot It: Monitor your pressure gauges for inconsistencies, especially during load changes. If the pressure drops unexpectedly, contamination might be causing flow restriction or damage to system components.

    Excessive Heat or Overheating

    What It Means: Contaminated oil, particularly with water or air, has reduced heat transfer capabilities. As a result, your hydraulic system may overheat, potentially leading to further oil degradation and system failure.

    How to Spot It: Monitor the temperature of your hydraulic oil using temperature sensors or gauges. If the oil temperature rises above the recommended operating range without a clear reason, contamination could be the culprit.

    Increased Wear on Components

    What It Means: Contaminants such as dirt, metal particles, and debris can cause excessive wear on key components like hydraulic pumps, valves, and cylinders. This leads to lower system efficiency and premature failure.

    How to Spot It: Listen for unusual sounds such as grinding or excessive noise in the pump or motor. Also, check for signs of wear or damage on moving parts, such as scoring or rough surfaces.

    Oil Discoloration or Change in Appearance

    What It Means: Contaminants such as water or particles can cause noticeable changes in the appearance of hydraulic oil. Oil discoloration, cloudiness, or emulsification can signal contamination.

    How to Spot It: Visually inspect the hydraulic oil. Healthy oil typically has a clear, clean appearance, but if the oil looks cloudy, milky, or darkened, it may contain water or particulate contamination.

    Poor Hydraulic Response or Sluggish Operation

    What It Means: If your system components are moving slower or less smoothly than usual, it could indicate that contaminants have reduced the oil’s flow properties or lubricating ability.

    How to Spot It: Notice any delay or sluggishness in the response time of cylinders, valves, or motors. This can indicate internal friction, clogging, or changes in the oil’s viscosity due to contamination.

    Increased Filter or Strainer Blockages

    What It Means: Contaminants like dirt, wear particles, and sludge can quickly clog filters or strainers, making the system less efficient and leading to higher maintenance requirements.

    How to Spot It: Keep track of your oil filter’s performance and change intervals. If you notice that filters are getting clogged much quicker than usual, it may indicate contamination in the hydraulic oil.

    Best Practices for Preventing Hydraulic Oil Contamination

    Preventing hydraulic oil contamination is critical to maintaining system performance and avoiding costly repairs. Here are some best practices for keeping your hydraulic oil clean and your system running smoothly:

    Implement a Regular Maintenance Schedule

    Conduct regular maintenance checks to monitor the condition of your hydraulic oil and system components. Schedule oil changes, filter replacements, and system inspections at regular intervals.

    Use High-Quality Filters and Change Them Regularly

    Filters are your first line of defense against contaminants. Use high-quality filters that are designed to trap both large and small particles.

    Ensure Proper Sealing and Tight Fitting

    Leaks allow contaminants such as dirt and moisture to enter the system. Check seals, fittings, and gaskets for wear or damage and replace them when necessary.

    Control Moisture and Humidity

    Moisture is one of the most damaging contaminants to hydraulic oil, leading to rust, corrosion, and oil emulsification. Store hydraulic oil in a dry environment, and ensure your system is sealed against water ingress.

    Cleanliness During Oil Changes

    During oil changes or when topping up oil, make sure the oil is kept clean and free from contaminants. Always use clean, properly stored oil to avoid introducing debris or dirt into the system.

    Conclusion

    By understanding the importance of proper oil selection, contamination prevention, and maintenance, you can avoid costly repairs, reduce downtime, and improve system efficiency. Keep an eye on emerging trends in hydraulic oil technology, and implement a maintenance strategy that ensures your equipment continues to run at peak performance for years to come.


    FAQ

    How do I know my hydraulic fluid needs to be changed?

    Hydraulic fluid replacement intervals depend on a variety of factors, such as the system’s operating load, the cleanliness of the fluid, and environmental conditions. In general, if the hydraulic fluid becomes discolored, foul smelling, or shows visible contamination, it may mean that the oil has degraded and replacement should be considered.

    Can I mix different types of hydraulic fluids?

    Mixing different types of hydraulic fluids is not recommended, especially mineral vs. synthetic or different brands of hydraulic fluids. Mixing fluids may result in degradation of the fluid’s performance, affect lubrication, and may even cause damage to the system. When changing fluids, it is best to use the same type of oil as the original fluid and clean the system to avoid mixing.

    What are some common contaminants in hydraulic fluids?

    Common contaminants in hydraulic fluids include solid particles (e.g., dirt, metal shavings), moisture, air, and gas. Solid particles can increase friction and lead to component wear; moisture can cause fluid emulsification or corrosion of metal parts; and air can affect fluid flow and lead to cavitation problems.

    How does hydraulic fluid viscosity affect system performance?

    The viscosity of the hydraulic fluid determines its flow and lubrication. A fluid with too high a viscosity will increase system resistance and result in power loss, while a fluid with too low a viscosity may not provide adequate lubrication and increase component wear.

    How can hydraulic systems prevent fluid contamination?

    The key to preventing fluid contamination is to keep the system clean. First, fluid filters should be inspected and replaced regularly, and a highly efficient filtration system should be used to remove particulate contaminants. Second, ensure that the seals of the hydraulic system are intact to avoid moisture, dust, etc. from entering the system. Finally, check the quality of the fluid regularly to detect contamination problems in time and take appropriate cleaning or replacement measures.

    What are the environmental options for hydraulic fluids?

    As environmental regulations continue to get stricter, more and more environmentally friendly hydraulic fluids are being developed. One of the more common environmentally friendly options is biodegradable hydraulic fluids, which use renewable materials.

    Contact Topa

    Looking for unbeatable prices, top-tier quality, or custom solutions that fit your exact needs? Contact Topa Now!