Hydraulic systems are fundamental in a range of industries, including construction, manufacturing, and agriculture. Poor connections can lead to leaks, pressure drops, and system failures, which can be costly and dangerous. This guide aims to provide a thorough, step-by-step approach to connecting hydraulic fittings. It will cover the types of fittings, necessary tools, safety precautions, detailed connection procedures, common troubleshooting techniques, and advanced tips for ensuring optimal system performance and reliability.
Compression Fittings
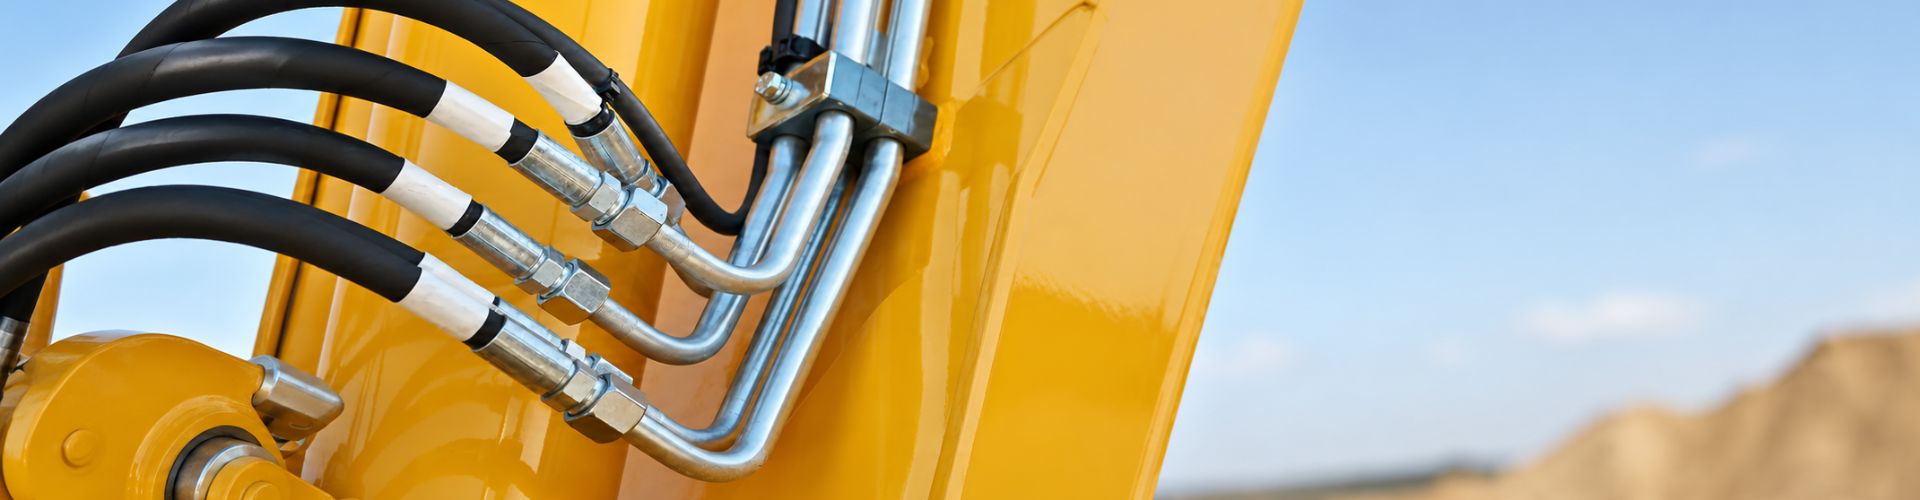
Compression fittings use a compressive force to secure the fitting to the hose. These fittings are ideal for high-pressure applications due to their ability to create a tight seal. They are commonly used in environments where reliability under high pressure is critical, such as in industrial machinery and heavy equipment.
Threaded Fittings
Threaded fittings are the most common type found in hydraulic systems. They come in various thread standards, including:
NPT (National Pipe Tapered): Commonly used in North America, NPT threads are tapered to create a seal.
BSP (British Standard Pipe): Used widely in Europe and Asia, BSP threads can be either tapered (BSPT) or parallel (BSPP).
SAE (Society of Automotive Engineers): These threads are standardized for use in automotive and industrial applications.
Threaded fittings are versatile and easy to connect, making them suitable for a wide range of hydraulic applications.
Crimp Fittings
Crimp fittings are typically used in permanent installations. They require a crimping tool to attach the fitting securely to the hose. This type of fitting is known for its strength and reliability, making it suitable for high-pressure and high-vibration environments. Crimp fittings are often found in industrial machinery, construction equipment, and hydraulic systems that require a permanent, leak-proof connection.
Push-to-Connect Fittings
Push-to-connect fittings are user-friendly and are often used in low-pressure systems. These fittings allow for quick connections without the need for tools, making them ideal for applications where frequent assembly and disassembly are required. They are commonly used in pneumatic systems, laboratory equipment, and other applications where ease of connection is a priority.

Hydraulic fittings are made from materials that ensure durability and compatibility with different fluids. The choice of material depends on the specific requirements of the application, including pressure, temperature, and the type of fluid used.
Stainless Steel
Stainless steel is known for its corrosion resistance and strength. It is ideal for applications exposed to harsh environments, such as marine and chemical processing industries. Stainless steel fittings can withstand high pressure and are suitable for both high and low-temperature applications.
Brass
Brass offers good corrosion resistance and is easy to work with. It is often used in low to medium-pressure applications and is suitable for use with water, oil, and air. Brass fittings are common in plumbing, heating, and industrial applications where moderate strength and corrosion resistance are required.
Aluminum
Aluminum is lightweight and suitable for less demanding applications. It is often used in pneumatic systems and low-pressure hydraulic applications. Aluminum fittings are valued for their ease of installation and resistance to corrosion, but they are not suitable for high-pressure environments.
Cutting the Hose:
Select the Right Hose Cutter:
Choosing the correct hose cutter is essential for achieving a clean and precise cut. Hose cutters designed specifically for hydraulic hoses ensure that the ends of the hose are not damaged, which is crucial for a secure fit. These cutters typically have sharp, durable blades that can make clean cuts without fraying the hose material.
Measure and Mark:
Accurate measurement is vital to ensure the hose is cut to the correct length. Use a measuring tape to determine the exact length needed for the installation. Mark the hose clearly at the point where it needs to be cut. Use a fine-tipped marker or chalk to make a visible mark.
Cutting Technique:
Proper cutting technique is important to prevent contamination and ensure a clean cut. Place the hose in the cutter so that the marked spot aligns with the cutting blade. Apply steady and even pressure to the cutter to make a clean, square cut. Avoid using tools like saws or knives, which can leave debris inside the hose. Debris can lead to contamination of the hydraulic system, causing blockages and potential damage to the components.

Apply Grease: Begin by applying a thin layer of grease to the fitting. This step is crucial as it reduces friction during the installation process, making it smoother and preventing seizing or galling. It ensures the fitting slides into place more easily, minimizing the risk of damage to both the fitting and the hose.
Check for Compatibility: Before applying the grease, verify that it is compatible with the hydraulic fluid and the materials used in the system. Incompatible grease can cause chemical reactions that might degrade the hose or fittings, leading to premature failure. Refer to the manufacturer’s specifications for recommended lubricants to ensure compatibility.
Select the Correct Tool: Depending on the type of fitting being used, choose the appropriate crimping tool. Manual crimping tools are suitable for smaller jobs, while hydraulic crimping tools are needed for larger, more robust fittings. Ensure that the tool is properly calibrated and in good working condition to achieve a consistent and secure crimp.
Align the Fitting: Insert the hose into the fitting, ensuring it is properly aligned. Misalignment can cause improper sealing, leading to leaks. Take care to follow the alignment guides on the crimping tool or the fitting itself.
Crimping Process: Follow the manufacturer’s instructions for the crimping process. Apply consistent pressure to the crimping tool to achieve a secure and uniform crimp. After crimping, inspect the crimped area for any signs of irregularities or damage. A proper crimp should be even and free of any sharp edges or distortions.
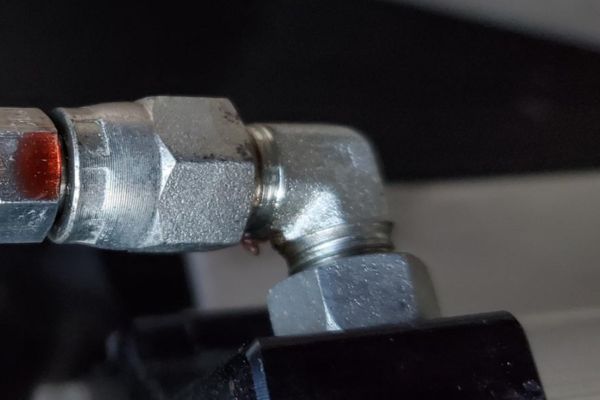
Thread the Fitting: For threaded fittings, start by hand-threading the fitting onto the hose or component. Ensure the threads are aligned correctly to avoid cross-threading, which can damage the threads and compromise the seal.
Tighten with Wrenches: Use the appropriate wrenches to tighten the fittings. Apply moderate force to secure the fitting without over-tightening. Over-tightening can strip the threads or cause cracks in the fittings, leading to potential leaks.
Check Thread Engagement: Verify that the fitting is fully engaged and properly seated. A secure connection ensures the integrity of the hydraulic system and prevents leaks. Check the manufacturer’s specifications for the correct torque values and use a torque wrench if necessary to achieve the proper tightness.
Visual Check: Begin by visually inspecting the connected fittings. Look for any signs of misalignment, improper seating, or visible damage. Ensure there are no gaps or uneven connections that could compromise the system’s integrity. Misaligned fittings can cause leaks and reduce the efficiency of the hydraulic system.
Leak Inspection: Check for potential leaks around the fitting areas. Use a leak detection solution or soapy water to identify any escaping fluid. Apply the solution around the connections and look for bubbles forming, which indicate a leak. This step is crucial to ensure that the system is sealed correctly and functioning properly.
Pressurize Gradually: Gradually pressurize the hydraulic system to its operating pressure. This slow increase allows you to monitor the connections closely and catch any issues early before the system reaches full pressure. Rapid pressurization can cause sudden failures that are harder to control and fix.
Monitor for Leaks: As the system reaches its operating pressure, carefully monitor the fittings for any signs of leaks. If any leaks are detected, depressurize the system immediately and tighten the connections as necessary. Leaks can lead to significant performance issues and potential safety hazards, so addressing them promptly is critical.
Final Inspection: Once the system is fully pressurized and no leaks are present, conduct a final inspection. Ensure all fittings are secure and properly aligned. This final check confirms that the system is ready for operation and that all connections are stable and leak-free. This step ensures the long-term reliability and efficiency of the hydraulic system.
Pressure Buildup:
Release Pressure: Before attempting to connect hoses, release any built-up pressure in the system. Residual pressure can make it difficult to connect hoses and could potentially cause injury or equipment damage. Use the system’s pressure release mechanism or manually release pressure by loosening the fittings carefully.
Misalignment:
Ensure Proper Alignment: Misalignment between hoses and fittings can prevent secure connections and lead to leaks. Before connecting, ensure that the hoses and fittings are properly aligned. Use alignment tools if necessary to achieve perfect alignment. Proper alignment ensures that the fittings sit correctly, providing a secure and leak-free connection.
Identifying the Source:
Check Connections and Seals: To identify leaks, inspect all connections and seals thoroughly. Look for signs of hydraulic fluid around the fittings, which indicate a potential leak. Using a leak detection solution can help pinpoint the exact location of the leak.
Resealing or Replacing Fittings:
Reseal or Replace: If leaks are detected, first try to reseal the connection by tightening the fittings. If the leak persists, the fitting or seal might be faulty. Replace the defective fitting or seal to restore the system’s integrity. Ensure that all replacements are compatible with the system’s specifications to prevent future issues.

Proper maintenance of hydraulic hose assemblies is crucial to ensure the longevity and efficiency of the system. Here are some essential maintenance tips:
Regular Inspection:
Preventive Measures:
Operational Best Practices:
Routine Maintenance:
Documentation and Training:
In conclusion, connecting hydraulic fittings properly is essential for maintaining the efficiency and safety of hydraulic systems. This guide has provided a comprehensive overview of the steps involved, including understanding the types of fittings, preparing hoses, attaching fittings, and checking for proper fit. Regular maintenance and troubleshooting common issues can prevent failures and extend the system’s lifespan. Always follow proper procedures and consider seeking professional assistance for complex installations or persistent problems. Ensuring that your hydraulic systems are well-maintained and correctly assembled will result in optimal performance and reliability.
Common causes include poor installation practices, inferior quality components, incorrect fitment, contaminants in the hydraulic fluid, wear and tear over time, and environmental factors such as extreme temperatures and chemical exposure.
Prevent leaks by ensuring proper installation, using high-quality components, maintaining clean hydraulic fluid, regularly inspecting fittings for wear and damage, and implementing protective measures against environmental factors.
Signs of a leak include visible fluid around the fitting, reduced system pressure, unusual noises during operation, and hydraulic fluid on surrounding surfaces or components.
Using the correct size and type ensures a proper seal, prevents misalignment and excessive strain on the connections, and avoids potential system failures and leaks.
Hydraulic systems should be inspected regularly, with routine checks recommended at least once a month. More frequent inspections may be necessary for systems operating under extreme conditions.
Yes, environmental conditions such as extreme temperatures, high humidity, and exposure to chemicals can accelerate the degradation of hydraulic fittings, leading to leaks.


