A symptom is not yet a root cause. A leak photo, loose connection, pulled hose, corroded part, or returned fitting shows what was observed, but it does not establish why it happened or who is responsible. One-piece fitting warranty claim analysis should preserve the failed assembly, verify part and batch identity, reconstruct hose and crimp configuration, separate connection-side from hose-side evidence, and compare service conditions with approved requirements. The investigation then moves from observation to hypotheses, verification, containment, root cause, and responsibility. When key records or components are missing, the correct conclusion may be insufficient evidence—not “product defect not found” and not an unsupported assignment of blame.
Preserve Evidence Before Starting Diagnosis
The first action is to make the condition safe and prevent evidence from being altered. Stop the equipment, isolate the hydraulic system, release pressure and stored energy, secure raised loads, and follow applicable lockout and equipment procedures. Never touch or search for a suspected high-pressure leak with a hand; use an approved safe method and appropriate protective equipment.
Once safe, photograph the assembly in its installed context before disconnecting it. Capture hose routing, clamps, bend locations, abrasion, port alignment, contamination, guards, and the precise wet or damaged area. Wide views explain the load path; close views preserve surface evidence.
Protect the failed components and records
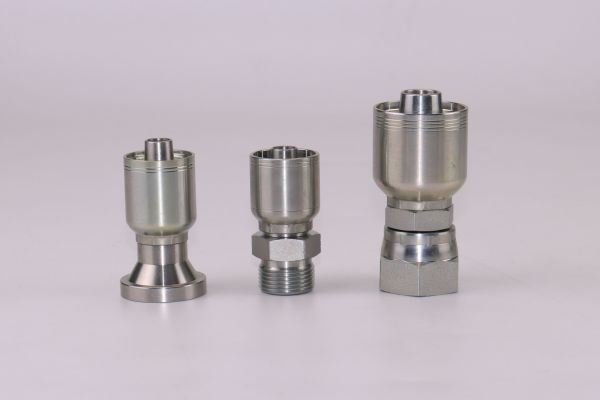
Remove components only under an approved procedure. Keep the fitting, hose section, mating adapter or port where relevant, seals, clamps, and debris associated with the event. Cap openings, avoid cleaning sealing faces, and do not cut through the suspected failure zone unless an agreed examination plan requires it.
Label each item with claim identifier, location in the assembly, removal orientation, and chain-of-custody information. Preserve machine logs, maintenance records, work orders, assembly travelers, crimp records, and earlier photos. Reworking the fitting, wiping the leak path, or discarding the hose can eliminate the evidence needed to distinguish product, assembly, installation, and application causes.
| Evidence | What it can show | What it cannot prove alone |
| Installed-condition photos | Routing, clamps, bend, contamination, visible leak area | Internal damage, exact pressure, or root cause |
| Part and batch marks | Product identity and traceability path | Conformity or application suitability by themselves |
| Returned fitting and hose | Physical condition, wear, deformation, failure location | Original condition if cleaned, cut, or altered |
| Assembly and crimp records | Listed hose, fitting, tooling, settings, and inspection | That the recorded process was actually followed without corroboration |
| Service data | Fluid, pressure events, temperature, hours, maintenance, application | Product defect without linking conditions to physical evidence |
| Material or test results | Specific measured characteristics under stated methods | Responsibility beyond the tested question |
Verify Product Identity, Batch, and Assembly Configuration
An investigation cannot compare the assembly with requirements until it knows what was installed. Record the fitting part number, batch or lot, orientation, port connection, hose-side size, stem/ferrule series, markings, finish, and seal components. If a batch number is missing, document that limitation and search controlled purchase, receiving, and production records without inventing a match.
The hose record should include manufacturer, full series, construction, hose ID or dash size, and available lot information. Same dash size does not prove compatibility because hose OD, cover, reinforcement, and compression behavior may vary by series. Identify the exact approved hose-and-fitting combination and applicable revision.
Reconstruct the assembly process
Retrieve preparation instructions, skive or no-skive status, insertion control, crimp equipment, die set, target and measurement location, operator or station record, and inspection results. Do not infer an insertion depth or acceptable crimp diameter from another series. Use current or historically applicable approved data for the actual production date.
A one-piece fitting normally has a stem and ferrule preassembled, attached, or retained together, but this does not guarantee correct hose selection or crimping. Confirm that the returned components are the intended pair and look for evidence of unauthorized mixing, substitution, or rework.
When records conflict, preserve both versions and identify which source had authority at the time. A later drawing revision should not be applied retrospectively unless change control explicitly establishes that relationship.
Separate Connection-Side Evidence from Hose-Side Evidence
The leak location narrows hypotheses but does not assign responsibility. Connection-side leakage involves the port interface; hose-side leakage or pull-off involves the stem, ferrule, hose, preparation, insertion, and crimp relationship. Fluid can travel along surfaces and emerge away from its origin, so clean-path assumptions must be verified safely.
Connection-side branch
Inspect thread identity and condition, pitch or TPI, straight or tapered form, male or female arrangement, seat angle, sealing face, O-ring or other seal, mating component, alignment, and signs of cross-threading or repeated tightening. For ORFS, review the O-ring, groove, flat face, and mating face. For JIC, review both 37-degree flare surfaces and alignment. For tapered threads, use the specified sealing method and inspect thread damage.
Do not treat thread sealant as proof that the connection was correct. It cannot repair an incompatible standard, wrong seat, damaged face, incorrect O-ring, or cross-threading. A fitting that threads into a port may still have the wrong sealing interface.
Hose-side and crimp branch
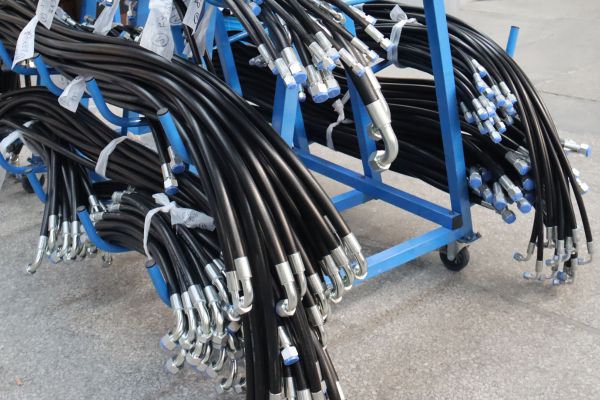
Inspect the failure location relative to the ferrule, insertion evidence, hose cover, reinforcement, tube where safely exposed under an approved plan, ferrule deformation, stem condition, and signs of twist or bend near the fitting. Compare actual crimp measurements only with the approved data and measurement location for that exact combination.
An approximate outside measurement cannot prove internal engagement. Likewise, a hose pull-off does not automatically prove a defective fitting; it may involve incorrect hose series, preparation, insertion, crimp, tooling, component identity, or service loading. Each hypothesis needs evidence.
Reconstruct Fluid, Pressure, Temperature, and Installation
Product conformity and application suitability are related but separate questions. Record normal and abnormal pressure conditions, impulse or spikes where data exists, fluid identity and concentration, internal and ambient temperature, equipment duty, service duration, and maintenance events. Do not invent missing values from the machine category.
Pressure suitability is limited by the lowest-rated component in the complete assembly or circuit. The fitting, hose, adapter, port, coupling, and other components may have different limits. A product can match its drawing yet be unsuitable for an unapproved fluid, temperature, pressure cycle, or environment.
Examine the installed load path
Review hose length, bend radius, straight allowance near fittings, twist, clamps, abrasion, movement, external impact, heat, corrosion, and port alignment. A hose forced between misaligned ports can transmit side load and vibration into an otherwise correct connection. A hose that is too short may remain under tension; one that is too long may rub or kink.
Check installation and service history for component replacement, repeated disassembly, seal replacement, rerouting, tightening, pressure adjustments, contamination events, or impact. Record facts and source quality. A verbal recollection can guide questions but should not be treated as equivalent to a controlled maintenance record.
Classify Cause Families Through Branching Evidence
Cause classification should follow verified observations rather than a generic list. Begin with the failure location and ask which evidence supports or contradicts each branch. Maintain more than one live hypothesis until discriminating evidence is available.
Product or assembly branch
The product branch considers material, dimension, thread, sealing face, O-ring, plating, stem, ferrule, or manufacturing conformity against approved requirements. Evidence may include dimensional results, material records, batch comparison, and physical examination. A single damaged return may not represent the batch.
The assembly branch considers hose selection, preparation, insertion, fitting/ferrule identity, die, crimp target, crimp location, equipment condition, and inspection. A recorded setting supports the reconstruction but should be corroborated by the returned assembly and process controls where possible.
Installation, application, and handling branch
The installation branch considers alignment, tightening procedure, hose twist, elbow clocking, routing, clamps, bend, cleanliness, and damage during installation. The application branch considers pressure, impulse, temperature, fluid, vibration, movement, external environment, and equipment changes.
The handling branch covers transport, storage, corrosion exposure, damaged threads or faces, incorrect caps, contamination, and post-failure alteration. These conditions may predate installation or occur during return shipment, so chain-of-custody evidence matters.
Insufficient-evidence branch
Choose insufficient evidence when missing identity, records, mating parts, service data, or altered components prevent a supported conclusion. This differs from product defect not found, which indicates that defined examinations did not identify a product nonconformity within their scope. Neither conclusion proves another cause unless evidence supports it.
Decide Whether Further Testing Is Justified
Testing should answer a specific unresolved hypothesis and be capable of changing the decision. Do not order broad laboratory work simply to make the claim file look complete. Define the question, specimen, method, reference, limitations, destructive effects, and decision rule before testing.
Further examination may be justified when the physical evidence is preserved, the characteristic is relevant to the failure mode, and routine inspection cannot resolve it. Examples can include controlled dimensional review, material or coating analysis, seal evaluation, surface examination, or comparison with retained lot samples when the approved investigation plan requires them.
Protect against destructive sequencing errors
Perform nondestructive documentation and measurements before cutting, cleaning, sectioning, or otherwise altering the return. If several parties need access, agree on the examination sequence and retain representative material where practical. A destructive test that removes the suspected origin can prevent later independent review.
Testing is usually not justified when the sample identity cannot be established, damage occurred after the event, or the result would not distinguish the active hypotheses. State the limitation rather than presenting an expensive but irrelevant result as certainty.
Build the Claim File and Set the Responsibility Boundary
The final claim file should separate observed symptom, preserved evidence, verified facts, hypotheses, examinations, root-cause conclusion, containment, corrective action, and responsibility disposition. Avoid blending customer statements, investigator inference, and measured results into one narrative.
Before responsibility is assigned, confirm:
- Exact fitting, batch, hose series, dash, and assembly configuration or documented gaps.
- Connection-side and hose-side failure locations and examination results.
- Approved drawing, hose/fitting combination, and crimp-data revisions.
- Fluid, pressure, temperature, routing, installation, and service evidence.
- Cause-family evaluation with supporting and contradicting facts.
- Test rationale, methods, results, and limitations.
- Containment scope and treatment of related stock or assemblies.
- Clear distinction among confirmed cause, not found, and insufficient evidence.
Assign responsibility only to the extent supported by the root cause and contractual framework. A confirmed product nonconformity may support product responsibility; a verified assembly or installation error supports a different disposition. Mixed causes may require shared corrective actions. Unknown evidence should remain unknown rather than being converted into blame.
Containment should be proportional and traceable. Identify affected lots or configurations, preserve safe operations, and review similar assemblies when evidence warrants it. Do not recall or clear unrelated products merely to appear decisive, and do not release potentially related stock while a material safety question remains unresolved.
Conclusion
A reliable claim investigation begins by preserving the assembly and separating symptoms from causes. Verify fitting, batch, hose series, preparation, insertion, crimp, mating connection, and service conditions before developing product, assembly, installation, application, or handling hypotheses. Use testing only when it can resolve a defined question, and protect evidence before destructive work. Missing records or altered returns may justify an insufficient-evidence conclusion; they do not justify an unsupported finding against either party. One-piece fitting warranty claim analysis should end with traceable facts, stated limitations, proportionate containment, corrective actions, and a responsibility decision no broader than the evidence. Record unresolved questions for future follow-up. Prepare the complete claim file and preserve the failed components before making commercial or technical commitments.
FAQ
Can a claim be investigated without a batch number?
Yes, but the missing batch limits traceability and may prevent a batch-level conclusion. Use controlled order and receiving records where available, and state any identity uncertainty explicitly.
What if hose and crimp records are missing?
Reconstruct available evidence from the returned assembly and controlled system records, but do not invent the setup. Missing combination or crimp data may require an insufficient-evidence disposition.
Does leak location prove which component failed?
No, fluid can travel and emerge away from its origin. Safely inspect the full connection, hose-side assembly, mating component, route, and service evidence before assigning a cause.
Can a damaged returned part still support analysis?
It may support limited observations if the post-event damage is documented and distinguishable. Cleaning, cutting, corrosion, or transport damage can prevent conclusions about the original failure condition.
When is laboratory testing needed for a fitting claim?
Use it when a preserved specimen and defined method can resolve a relevant hypothesis that routine inspection cannot. State the test’s scope and limitations, and document the item before destructive examination.