In the world of hydraulic systems, a single leak or loose connection can bring operations to a grinding halt, causing costly downtime and potential safety hazards. In these scenarios, the reliability and efficiency of hydraulic fittings are paramount. This article aims to provide a comprehensive understanding of push lock fittings, a popular and efficient solution in various industries. We will explore their design, functionality, advantages, applications, and best practices for use. By the end of this article, you will have a thorough grasp of how push lock fittings work and why they are an essential component in maintaining secure and efficient hydraulic connections.
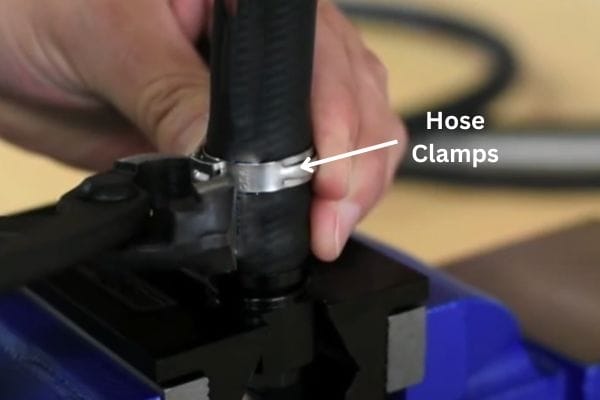
Push lock fittings are a type of hydraulic fitting designed for ease of use and reliability. They consist primarily of three main components: the threaded end, the barbed end. The threaded end allows for secure attachment to a hydraulic system, ensuring a tight seal that prevents leaks. The barbed end is designed to grip the hose firmly when inserted, creating a secure connection that can withstand high pressures. Hose clamps are then used to further secure the hose to the fitting, preventing it from slipping off under pressure.
The development of push lock fittings can be traced back to the growing need for more efficient and reliable hydraulic connections in the mid-20th century. As industries such as automotive, construction, and agriculture expanded, the demand for hydraulic systems that could be quickly assembled and disassembled without specialized tools grew. Traditional fittings, which required significant time and expertise to install, were no longer sufficient. Push lock fittings emerged as a solution, offering a simple, tool-free installation process while maintaining a high level of reliability and durability.
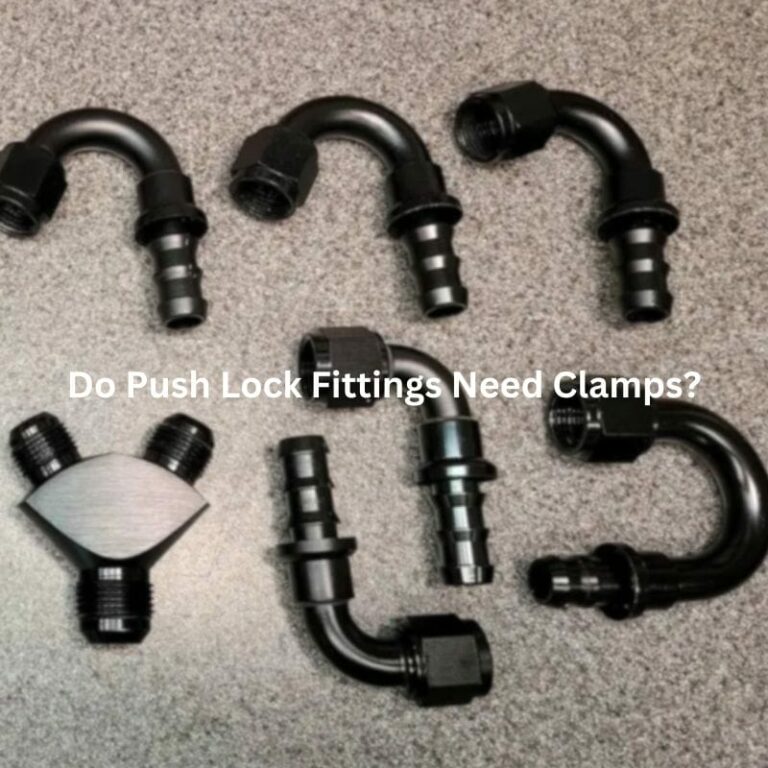
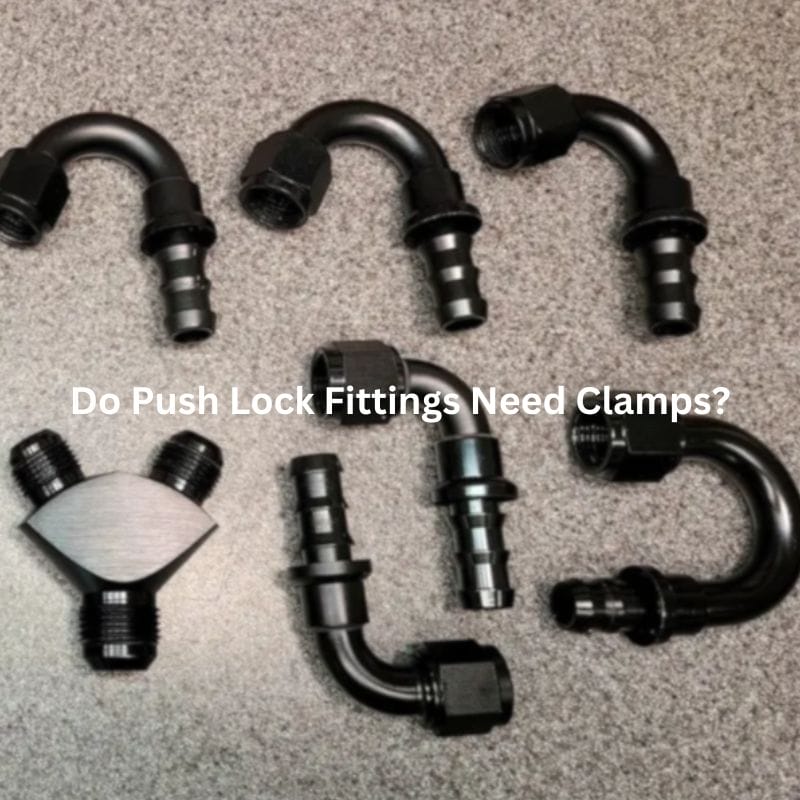
There are several types of push lock fittings, each designed for specific applications and hose types. Some of the most common types include:
Straight Push Lock Fittings: These are the most basic type of push lock fitting, featuring a straight design that allows for direct, inline connections. They are commonly used in applications where space is not an issue and a straightforward connection is needed.
Elbow Push Lock Fittings: These fittings have a 90-degree angle, making them ideal for applications where hoses need to be routed around obstacles or where space is limited. They help in maintaining a neat and efficient hose layout.
Tee Push Lock Fittings: Designed to split a single hose line into two, tee fittings are used in applications where multiple hydraulic lines need to be run from a single source. This type of fitting is essential in complex hydraulic systems.
Swivel Push Lock Fittings: These fittings allow for rotational movement, which can be crucial in applications where the hose needs to move without causing stress or wear. Swivel fittings help reduce hose fatigue and extend the life of the hydraulic system.
Reducer Push Lock Fittings: Used to connect hoses of different diameters, reducer fittings are essential when integrating various parts of a hydraulic system with differing hose sizes. They ensure a smooth transition and secure connection between different hose sizes.
Push lock fittings are engineered to provide a reliable and easy-to-install solution for hydraulic connections. Their design includes three primary components:
Threaded End: This part of the fitting is designed to be screwed into a hydraulic system. It features precise threading that ensures a tight, leak-proof connection to the corresponding threaded port or fitting in the system. The threads are typically coated with a sealant or made from materials that provide additional sealing properties, such as brass or stainless steel.
Barbed End: The barbed end of the fitting is specifically designed to grip the inner wall of the hose. It features a series of ridges or barbs that increase in diameter as they move away from the fitting’s body. These barbs create a mechanical grip on the hose, preventing it from being pulled off easily under pressure. The barbed design ensures a strong, secure connection that can withstand significant hydraulic pressures.

Installing push lock fitting is a straightforward process that can be done without specialized tools. Here is a step-by-step guide:
Measure and Cut: Measure the length of the hose needed for your application and cut it to size using a sharp hose cutter or knife. Ensure the cut is clean and straight to provide a better seal.
Inspect the Hose End: Check the cut end of the hose for any debris or irregularities. A smooth, clean end will ensure a better connection with the fitting.
Lubricate (Optional): Although not always necessary, a small amount of lubricant can be applied to the hose end to make insertion easier. Use a lubricant compatible with the hose material and hydraulic fluid.
Align and Push: Align the cut end of the hose with the barbed end of the fitting. Push the hose onto the fitting, ensuring it goes over all the barbs. It may require some force, but it should slide on relatively smoothly.
Check for Proper Fit: Ensure the hose is fully seated on the fitting, covering all the barbs. This is crucial for creating a secure connection.
Position the Clamp: Place a hose clamp over the hose where it fits onto the barbed end of the fitting. Ensure it is positioned over the barbs to maximize the grip.
Tighten the Clamp: Using a screwdriver or a hose clamp tool, tighten the clamp until it is snug but not so tight that it damages the hose. The clamp should compress the hose against the barbs, creating a secure and leak-proof connection.
The functionality of push lock fittings hinges on their ability to create a secure seal and maintain it under various conditions. Here’s how they work:
Mechanical Grip: The barbs on the fitting create a mechanical grip on the hose. When the hose is pushed onto the fitting, the barbs catch on the inner wall of the hose, preventing it from being pulled off easily. This grip is further enhanced when the hose is pressurized, as the pressure pushes the hose more firmly against the barbs.
Compression Seal: The hose clamp adds an extra layer of security by compressing the hose against the barbs. This compression not only holds the hose in place but also helps create a seal that prevents hydraulic fluid from leaking out. The tight fit between the hose and the barbs, combined with the pressure from the clamp, ensures a leak-proof connection.
Pressure Handling: Push lock fittings are designed to handle high pressures commonly found in hydraulic systems. The combination of the barbed design and the hose clamp ensures that the hose remains securely attached to the fitting, even under significant pressure fluctuations.
Ease of Maintenance: One of the key advantages of push lock fittings is their ease of maintenance. If a connection needs to be disassembled for any reason, the hose can be removed and reattached quickly without specialized tools. This makes maintenance tasks more efficient and reduces downtime.
Appearance:
Push Lock Fittings: They consist of a barbed end for the hose and a threaded end for connecting to the hydraulic system, often appearing less bulky due to the absence of complex components.
Traditional Fittings: Traditional fittings, such as compression fittings or flare fittings, usually have a more complex appearance with multiple parts like nuts, ferrules, and bodies. These fittings often look more robust and intricate due to the additional components required for sealing and securing the connection.
Function:
Installation Complexity: Traditional fittings often require more steps and specialized tools for installation. For example, compression fittings require tightening nuts and ferrules, while flare fittings need the hose end to be flared before being screwed together.
Seal Reliability: Push lock fittings rely on the mechanical grip of the barbs and the compression provided by the hose clamp to create a secure seal. Traditional fittings, on the other hand, depend on the precise fitting of components and the compression of ferrules or the flared hose end to achieve a seal.
Appearance:
Push Lock Fittings: Push lock fittings have a straightforward and compact design with a barbed end and a threaded end. They often appear simpler and less bulky compared to quick-connect fittings.
Quick Connect Fittings: These fittings are designed for rapid connection and disconnection and often feature a more complex appearance with a larger body. They usually include a socket and a plug, with a built-in mechanism like a push-button or a collar for quick release.
Function:
Ease of Use: Quick connect fittings are designed for the fastest possible connection and disconnection. They typically require just a push or a pull to connect or disconnect, making them ideal for applications where speed is crucial.
Installation Time: While push lock fittings are relatively easy to install, they still require pushing the hose onto the barbed end and securing it with a hose clamp. Quick-connect fittings can be connected and disconnected in seconds without any additional tools or components.
Seal and Security: Both types of fittings provide reliable seals, but the mechanism is different. Push lock fittings rely on the barbs gripping the hose and the hose clamp securing it in place. Quick connect fittings use a built-in sealing mechanism, such as O-rings, to create a leak-proof connection when the plug is inserted into the socket.
Visual Inspection: Regularly inspect the fittings and hoses for any visible signs of fluid leakage. Look for wet spots, drips, or puddles around the fittings.
Pressure Test: Perform a pressure test to identify leaks that are not easily visible. Increase the system’s pressure and observe the fittings for any signs of escaping fluid.
Listening: Listen for any hissing sounds, which can indicate a leak, especially in high-pressure systems.
Tighten Hose Clamps: Ensure the hose clamps are properly tightened. A loose clamp can cause the hose to leak. Use a screwdriver or clamp tool to secure the clamps without overtightening, which could damage the hose.
Re-seat the Hose: If the hose is not fully seated on the barbed end, it can cause a leak. Disconnect the hose, reapply a small amount of lubricant if necessary, and push the hose back onto the fitting until it is fully seated.
Replace Worn Components: If the fitting or hose shows signs of wear or damage, such as cracks or abrasions, replace them with new components to restore a leak-proof connection.
Check for Compatibility: Ensure that the hose and fitting are compatible in terms of size and material. Incompatible components can lead to poor seals and leaks.
Hose Slippage: Preventing and Addressing Hose Slippage
Proper Installation: Ensure the hose is pushed fully onto the barbed end of the fitting during installation. The hose should cover all the barbs to ensure a secure grip.
Correct Clamp Placement: Position the hose clamp directly over the barbed section of the fitting. The clamp should be centered over the barbs to provide maximum retention.
Use High-Quality Clamps: Use high-quality, durable hose clamps that are designed for the specific hose and fitting. Stainless steel clamps are recommended for their strength and resistance to corrosion.
Avoid over-tightening: Do not overtighten the clamps, as this can damage the hose and reduce its ability to grip the barbs. Tighten the clamp just enough to secure the hose without deforming it.
Re-secure the Hose: If the hose has slipped off, re-seat it by pushing it back onto the fitting until it covers all the barbs. Re-tighten the hose clamp to secure it in place.
Inspect for Damage: Check the hose for any signs of damage caused by slippage, such as stretching or abrasions. Replace the hose if necessary.
Use Additional Clamps: In some cases, using two hose clamps placed side by side can provide extra security and prevent slippage, especially in high-pressure applications.
Recognizing Signs of Wear:
Cracks and Splits: Inspect the fittings and hoses for any visible cracks, splits, or abrasions. These can indicate wear and potential points of failure.
Corrosion: Look for signs of corrosion, especially on metal components. Corrosion can weaken the fittings and lead to leaks or failure.
Discoloration: Discoloration or changes in the material’s appearance can indicate chemical degradation or exposure to harsh conditions.
Loss of Flexibility: Check the hose for any loss of flexibility. A hose that becomes stiff or brittle is more likely to crack and fail.
Knowing When to Replace Fittings:
Frequent Leaks: If a fitting or hose frequently leaks despite repeated attempts to fix it, it may be time to replace the components.
Visible Damage: Replace any fitting or hose that shows visible signs of wear, such as cracks, splits, or severe abrasions.
Corroded Components: Replace any fitting that shows significant signs of corrosion, as this can compromise the integrity of the connection.
Age and Usage: Consider the age and usage of the fittings and hoses. Over time, even the highest-quality components will wear out. Regularly replace them as part of routine maintenance to prevent unexpected failures.
In summary, push lock fittings offer a reliable, easy-to-install solution for hydraulic connections, with distinct advantages over traditional and quick connect fittings. They are designed for efficiency, secure sealing, and minimal maintenance, making them suitable for a wide range of applications. If you’re looking for durable and hassle-free hydraulic connections, consider integrating push lock fittings into your systems. For more information and to explore our range of push lock fittings, visit our product page. Trust in the simplicity and dependability of push lock fittings to keep your operations running smoothly and efficiently.
Push lock fittings are hydraulic fittings designed for easy installation and secure connections, featuring a barbed end for the hose and a threaded end for system attachment.
Simply push the hose onto the barbed end of the fitting, ensure it is fully seated, and secure it with a hose clamp.
Yes, push lock fittings are designed to handle high pressures commonly found in hydraulic systems, providing reliable and leak-proof connections.
Check and tighten the hose clamp, ensure the hose is fully seated on the barbed end, and inspect for any damage to the hose or fitting.
Regularly inspect push lock fittings as part of your maintenance routine, checking for signs of wear, damage, or leaks to ensure continued reliability.
Push lock fittings are compatible with various hose types, but it’s important to ensure that the hose and fitting materials are compatible and that the hose is the correct size for the fitting.


