Proper installation of push lock fittings is crucial to ensure the efficiency and longevity of any fluid or gas transfer system. Understanding the correct installation process is essential to prevent leaks, maintain pressure, and ensure the overall safety and effectiveness of the system. This guide aims to provide readers with a comprehensive understanding of how to install push lock fittings correctly. By following this step-by-step guide, readers will learn about the necessary tools and materials, safety precautions, and detailed installation procedures.
Push lock fittings are specialized connectors used to join hoses and tubes securely and efficiently. Unlike traditional fittings that require crimping tools, push lock fittings are designed for quick and easy installation by simply pushing the hose onto the fitting. This makes them highly convenient for various applications where time and ease of use are critical. The internal structure of push lock fittings, along with the use of hose clamps, ensures a tight seal, which helps prevent leaks and maintain system pressure.
Push lock fittings typically consist of several key components:
Threaded End: This end of the fitting is designed to screw into a mating component or device. It provides a secure connection to the system.
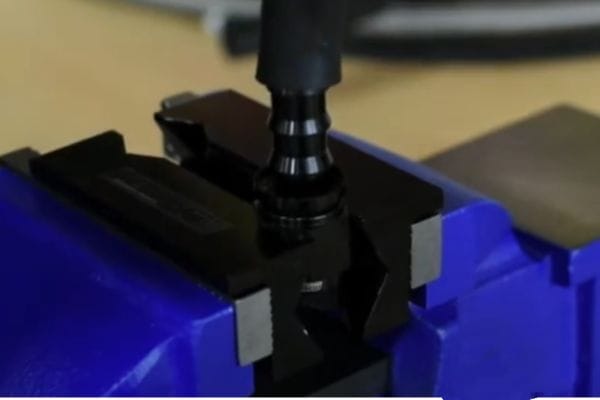
Hose End with Barbed Structure: The hose end is barbed, which means it has a series of ridges or bumps. These barbs grip the inside of the hose tightly, ensuring that the hose does not slip off easily once installed.
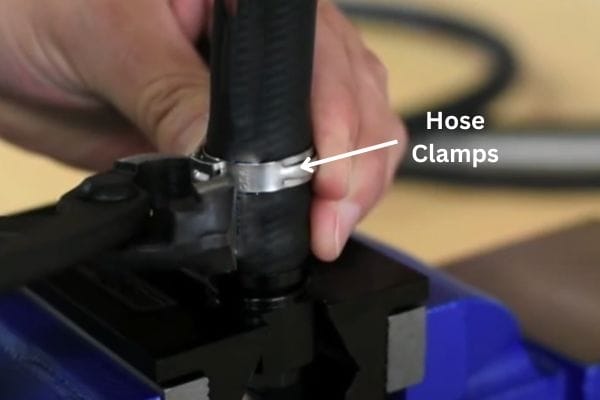
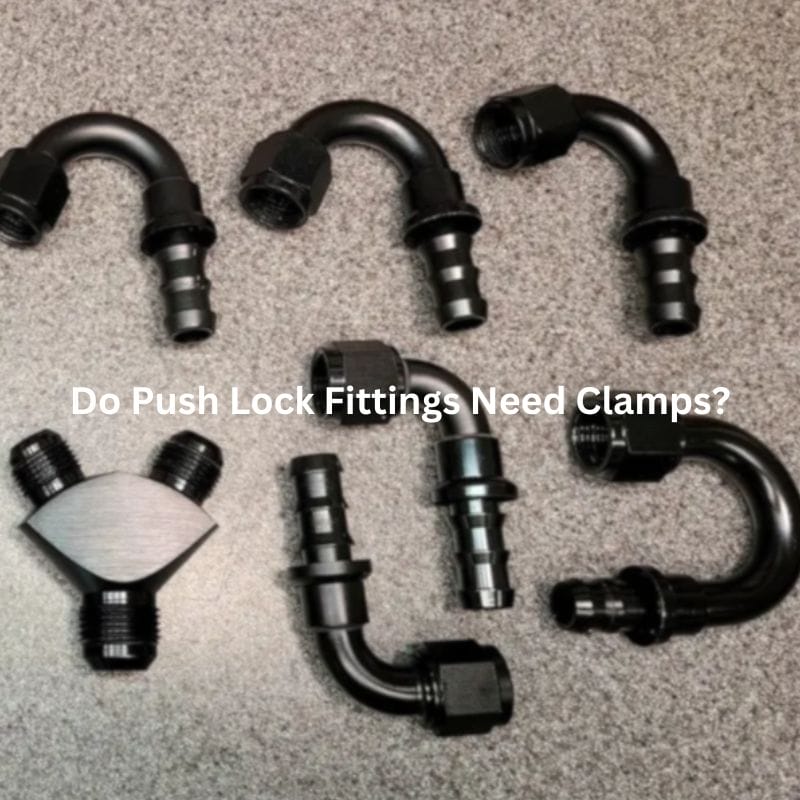
Hose Clamps: Push lock fittings are used in conjunction with hose clamps. After the hose is pushed onto the barbed end, a hose clamp is tightened around the hose, securing it in place and creating a seal to prevent leaks.

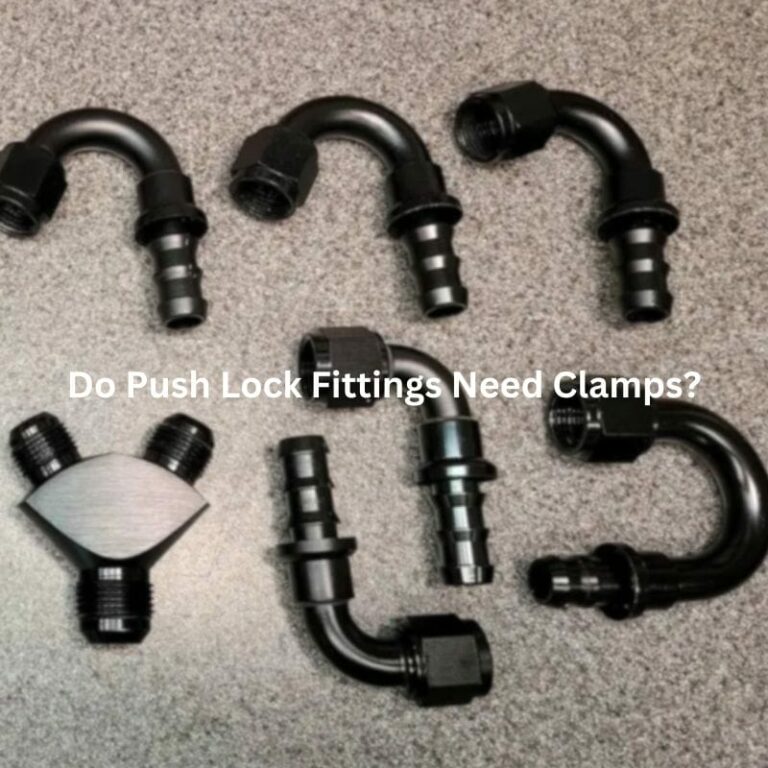
Push lock fittings come in various shapes and configurations to meet different needs:
Straight Fittings: Used for connecting two hoses in a straight line. These are the most common types and are used in many standard applications.
Elbow Fittings: These fittings have a 90-degree bend, allowing hoses to connect at an angle. They are ideal for routing hoses in tight spaces where a straight connection is not possible.
Tee Fittings: Designed to connect three hoses, forming a ‘T’ shape. These are used in applications where a single hose needs to be split into two different directions.
Y Fittings: Similar to tee fittings but with a ‘Y’ shape, used for splitting one hose into two at a different angle.
Straight Fittings: Commonly used in automotive fuel lines, industrial fluid systems, and general plumbing.
Elbow Fittings: Frequently used in automotive coolant systems, hydraulic systems in machinery, and any application where space constraints are a concern.
Tee Fittings: Used in pneumatic systems, irrigation setups, and any scenario where fluid needs to be distributed to multiple locations.
Y Fittings: Often found in HVAC systems, laboratory setups, and specific industrial applications requiring precise fluid distribution.
Push lock fittings are made from various materials, each chosen for its specific properties and suitability for different applications:
Brass: Known for its durability, corrosion resistance, and ease of machining, brass is a popular choice for many push lock fittings.
Stainless Steel: Offers excellent corrosion resistance, especially in harsh environments. Stainless steel fittings are ideal for applications involving chemicals or saltwater.
Aluminum: Lightweight and resistant to corrosion, aluminum fittings are often used in automotive and aerospace applications where weight is a critical factor.
Plastic: Lightweight and resistant to corrosion, plastic fittings are used in applications where the operating pressures and temperatures are lower.
List of Necessary Tools
Hose Cutters: Essential for making clean and precise cuts in the hose.
Hose Clamps: Used to secure the hose onto the fitting, ensuring a tight seal and preventing leaks.
Screwdriver or Nut Driver: Needed to tighten the hose clamps securely.
Lubricant: Helps in easing the hose onto the fitting, reducing friction and making the installation process smoother.
List of Materials
Push Lock Fittings: The primary components that connect the hoses to the system. Available in various types like straight, elbow, and tee fittings.
Hoses: Must be compatible with the push lock fittings and suitable for the specific application (e.g., hydraulic hoses, fuel hoses, etc.).
Hose Clamps: To secure the hose onto the push lock fittings and ensure a leak-proof connection.
Wearing protective gear is crucial to ensure personal safety during the installation process. Safety glasses protect your eyes from flying debris or splashes from lubricants. Work gloves safeguard your hands from cuts, abrasions, and chemical exposure. Always prioritize safety by wearing appropriate protective equipment.
Inspecting Hoses and Fittings for Any Damage
Before starting the installation, thoroughly inspect the hoses and fittings for any signs of damage. Look for cracks, fraying, or other visible defects in the hose. Check the fittings for any signs of wear, rust, or deformation. Using damaged components can lead to leaks and system failures, so it’s important to ensure all parts are in good condition.
Ensuring Compatibility of Hose and Fittings
Compatibility between the hose and fittings is essential for a secure and reliable connection. Verify that the hose material and diameter match the specifications of the push lock fittings. Check the manufacturer’s guidelines to ensure that the hose and fittings are suitable for the intended application, considering factors like temperature, pressure, and the type of fluid or gas being transported.
Proper Measurement Techniques
Accurate measurement is crucial to ensure the hose fits perfectly without any slack or excess length. Measure the hose from end to end using a tape measure, marking the exact point where the cut needs to be made. Make sure to add a little extra length for any adjustments that may be needed during installation.
Tools and Methods for Cutting the Hose Cleanly
Using the right tools is essential for a clean cut. A sharp hose cutter, utility knife, or fine-toothed hacksaw can be used. Ensure the tool is sharp to prevent fraying or uneven cuts. Place the hose on a stable surface and make a straight, clean cut perpendicular to the hose’s length to ensure a smooth edge. This will facilitate easier fitting insertion and create a better seal.
Removing Any Debris or Obstructions
After cutting the hose, inspect the cut end for any debris, burrs, or obstructions. These can prevent the fitting from seating properly and may cause leaks. Use a small brush or compressed air to clean out any particles from inside the hose. Ensuring a clean, smooth surface is essential for a secure connection.
Lubricating the Hose End (If Necessary)
In some cases, lubricating the hose end can make it easier to push the hose onto the fitting. Use a small amount of lubricant that is compatible with the hose material and the fluid or gas being transported. Apply it sparingly to the inside of the hose end to reduce friction during installation.
Techniques for Securely Inserting the Fitting into the Hose
Hold the hose firmly and align it with the barbed end of the fitting. Push the hose onto the fitting with a steady, even pressure. If necessary, twist the hose slightly while pushing to help it slide over the barbs. Ensure that the hose is pushed onto the fitting until it reaches the fitting’s base.
Ensuring the Fitting is Fully Seated
Once the hose is pushed onto the fitting, check that it is fully seated. The hose should cover all the barbs and reach the fitting’s shoulder or base. This ensures that the fitting is securely in place and minimizes the risk of leaks.
Using Hose Clamps to Secure the Connection
Select an appropriate hose clamp that fits the diameter of the hose and the fitting. Place the hose clamp over the end of the hose where it meets the fitting. Position the clamp so it sits over the barbed section of the fitting, ensuring an even and secure grip.
Proper Tightening Techniques
Using a screwdriver or a nut driver, tighten the hose clamp evenly. Avoid over-tightening, which can damage the hose or fitting, or under-tightening, which can lead to leaks. The clamp should be snug enough to hold the hose firmly in place without causing deformation. Once tightened, check the clamp to ensure it is secure and evenly positioned.
Inspecting the Connection for Leaks or Weaknesses
After securing the connection, visually inspect the hose and fitting for any signs of gaps, misalignment, or damage. Look for any signs of stress or strain on the hose. Gently tug on the hose to ensure it is firmly attached and does not slip off the fitting.
Pressure Testing the System
To ensure the installation is leak-proof, conduct a pressure test. Gradually apply pressure to the system while monitoring the connection for any signs of leaks. If a leak is detected, release the pressure and recheck the fitting and hose clamp, adjusting as necessary. Repeat the pressure test until the system holds pressure without any leakage. This step confirms the integrity and reliability of the connection, ensuring safe and efficient operation.
Over-Tightening or Under-Tightening Clamps
One of the most common mistakes during installation is improper tightening of the hose clamps. Over-tightening can damage the hose or the fitting, causing deformation and potential leaks. On the other hand, under-tightening can result in a loose connection, which also leads to leaks. To avoid these issues, tighten the clamps just enough to secure the hose firmly without causing any visible damage. Using a torque wrench can help ensure the correct amount of force is applied.
Using Incompatible Hose and Fittings
Another frequent mistake is using hoses and fittings that are not compatible with each other. Different materials have varying properties, and not all hoses and fittings work well together. Ensure that the hose and fitting materials are compatible and suitable for the intended application, considering factors like temperature, pressure, and the type of fluid or gas being transported.
Regular Inspection Schedules
To maintain the integrity of the push lock fittings and the overall system, establish a regular inspection schedule. Inspect the hoses and fittings periodically for any signs of wear, damage, or leaks. This proactive approach helps in identifying potential issues before they become major problems, ensuring continuous and reliable operation.
Signs of Wear and When to Replace Fittings
During inspections, look for signs of wear such as cracks, fraying, or bulging in the hose. Check the fittings for corrosion, rust, or any other visible damage. If any of these signs are present, it’s time to replace the affected components. Regular replacement of worn-out parts prevents failures and extends the lifespan of the system.
Identifying and Fixing Leaks
Leaks can occur due to various reasons, such as improper installation, worn-out components, or incompatible materials. To identify leaks, conduct a visual inspection and a pressure test. If a leak is detected, recheck the tightness of the hose clamps and the positioning of the hose on the fitting. Adjust as necessary and repeat the pressure test until the leak is resolved.
Addressing Fitting Loosening Over Time
Over time, fittings may become loose due to vibration, temperature changes, or natural wear and tear. Regularly check the tightness of the hose clamps and fittings as part of the maintenance routine. If a fitting becomes loose, re-tighten it carefully, ensuring it is secure without over-tightening. If the issue persists, consider replacing the clamp or fitting to ensure a reliable connection.
In summary, installing push lock fittings involves several crucial steps: accurately measuring and cutting the hose, preparing the hose end, securely inserting the fitting, tightening hose clamps correctly, and thoroughly checking the installation for leaks. Proper installation and regular maintenance are essential to ensure the reliability and efficiency of your system. By following these guidelines, you can achieve a secure and leak-free connection.
It is generally not recommended to reuse push lock fittings, as the barbs may wear down and not create a secure seal after multiple uses. Always use new fittings for best results.
Use a lubricant that is compatible with the hose material and the fluid or gas being transported. Silicone-based lubricants are commonly used for this purpose.
Ensure that the hose covers all the barbs and reaches the shoulder or base of the fitting. A properly seated hose will not show any gaps and will feel secure when gently tugged.
If a leak is detected, check the tightness of the hose clamp and the positioning of the hose on the fitting. Re-tighten or adjust as necessary. If the leak persists, consider replacing the hose or fitting.
Regular inspections should be conducted at least every few months, depending on the application. Check for signs of wear, damage, or leaks during each inspection.
Push lock fittings should be used with hoses that are specifically designed to be compatible with them. Always verify compatibility based on the hose material, diameter, and the application’s requirements.


