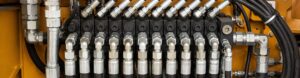
Is your hydraulic system experiencing premature component wear, sluggish performance, or frequent breakdowns? Contaminated pipelines are often the silent culprit, leading to costly repairs, but a proper flushing process can prevent these issues.
The core method for flushing a hydraulic pipeline involves using an oil pump to circulate fluid from the reservoir through the pipeline, gradually increasing and stabilizing system pressure via a relief or unloading valve in a closed-loop circuit. This process, which may include pressure pulses from an accumulator, effectively dislodges and removes contaminants, crucial for maintaining system cleanliness and reliability.
What is Hydraulic Pipeline Flushing, and Why is it Critical?
Have you ever wondered why your newly installed hydraulic system might still fail prematurely? Ignoring the cleaning process of new or repaired pipelines can introduce hidden contaminants that sabotage performance from day one.
Hydraulic pipeline flushing is the systematic circulation of hydraulic fluid or a specialized flushing fluid through a system’s pipelines at controlled pressures and flow rates to dislodge and remove solid contaminants. It is critical because it prevents premature wear of components, maintains fluid purity, improves system efficiency, and significantly extends the overall lifespan of hydraulic machinery.

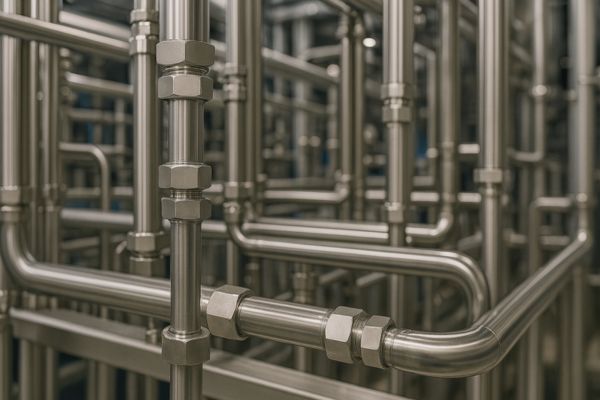
Before a hydraulic system begins its operational life, or after any significant maintenance or repair work, the internal surfaces of its pipelines can harbor a surprising amount of debris. This can include residual welding slag, metal shavings from manufacturing, rust particles, sand, or even textile fibers. These seemingly small impurities become abrasive agents when suspended in hydraulic fluid. They act like tiny knives, continuously grinding away at the precision-machined surfaces of pumps, valves, and cylinders, leading to accelerated wear, component malfunction, and ultimately, system failure.
The Purpose of Flushing
The primary goals of hydraulic pipeline flushing are clear and directly impact system performance.
- Removal of Particulate Contaminants: This is the most immediate objective. Flushing physically mobilizes and carries away solid particles that would otherwise cause abrasive wear to delicate internal components. This includes fine metallic debris, welding spatter, sand, sealing compounds, and other installation residues.
- Achieving Target Fluid Cleanliness: Modern hydraulic systems often specify stringent contamination levels (e.g., ISO 4406 codes). Flushing aims to bring the system’s fluid to, and maintain it at, these required cleanliness standards. This is crucial for the efficient and reliable operation of proportional valves, servo valves, and high-precision pumps.
- Protection of Sensitive Components: By proactively removing contaminants, flushing protects expensive and difficult-to-replace components such as hydraulic pumps, motors, and control valves from premature failure due to abrasive wear or blockages. This helps maintain the system’s precise operational characteristics.
- Prevention of System Failures and Downtime: Contamination is a leading cause of hydraulic system breakdowns. By ensuring a clean system from the outset, flushing dramatically reduces the likelihood of unexpected failures, costly repairs, and lost production time. It’s a fundamental step in ensuring operational readiness and continuous performance.
Flushing is not a one-time event for a system’s life. It is often necessary after any major repair or component replacement, especially if the system has been opened to the atmosphere for an extended period, allowing new contaminants to enter.
How Do You Prepare for an Effective Hydraulic Pipeline Flushing Operation?
Feeling overwhelmed by the sheer number of steps before you even start the pump for flushing? Inadequate preparation leads to inefficient flushing, missed contaminants, and repeated efforts, costing precious time and resources.
Preparing for an effective hydraulic pipeline flushing operation involves careful initial system configuration, selecting the appropriate flushing fluid, setting up specialized flushing equipment with filtration and conditioning, and implementing strict safety protocols. These preparatory steps ensure that the flushing process is thorough, efficient, and safe, preventing the reintroduction of contaminants.
Initial System Configuration
Setting up the system correctly is the first critical step to ensure contaminants are trapped, not recirculated.
- Bypassing Sensitive Components: Components like hydraulic pumps, servo valves, proportional valves, and cylinders are sophisticated and expensive. They can be damaged by high flow rates, pressure surges, or concentrated contaminants during initial flushing. Therefore, these sensitive components should be temporarily bypassed or isolated using blanking plates or temporary piping.
- Installation of Temporary Flushing Lines: Where necessary, temporary bypass lines or larger-diameter hoses should be installed. These lines help achieve higher flow velocities in specific sections and ensure that the flushing circuit is complete, allowing fluid to circulate through all target areas without obstruction or dead ends.
- Isolation of Ancillary Circuits: Any non-essential or dead-end circuits should be isolated or blocked off to ensure that the flushing flow is directed efficiently through the primary system. This prevents fluid from becoming stagnant in unused branches and ensures all active pathways are thoroughly cleaned.
Flushing Fluid Selection
The choice of fluid directly impacts flushing efficiency and system compatibility.
- Actual System Fluid: Whenever possible, use the same type of hydraulic fluid that the system will ultimately operate with. This ensures compatibility with existing seals and materials and avoids the need for a separate oil change after flushing.
- Dedicated Flushing Fluid: In some cases, a specialized flushing fluid (often with lower viscosity or specific cleaning additives) might be used. However, if a dedicated flushing fluid is used, a subsequent complete drain and refill with the actual system fluid will be necessary.
- Filtration Level: Ensure the flushing fluid itself is very clean before starting the process. It is advisable to pre-filter the flushing oil to a level at least one or two ISO codes cleaner than the target cleanliness of the system.
Equipment Setup
The right equipment ensures controlled conditions for thorough cleaning.
- Flushing Rig/Cart: A dedicated flushing rig typically includes a powerful pump, a reservoir for the flushing fluid, and a robust filtration system (often with multiple stages of fine filtration, e.g., 3-micron filters). Some rigs also incorporate heaters and coolers.
- Heaters and Coolers: Maintaining the flushing fluid at an optimal temperature (often 50-60°C or 122-140°F) is critical. Higher temperatures reduce fluid viscosity, allowing for more turbulent flow, which helps dislodge particles more effectively. A heater maintains this temperature, while a cooler prevents overheating during prolonged circulation.
- Circulation Pump: A pump capable of delivering sufficient flow rate to achieve turbulent flow (Reynolds number > 4000) within the target pipelines. This high velocity helps dislodge adhered contaminants.
- Instrumentation: Inline pressure gauges, flow meters, and an online particle counter are essential tools. The particle counter provides real-time data on fluid cleanliness, confirming when the flushing target has been met.
- Temporary Valves: Install temporary ball valves or gate valves to control flow direction, isolate sections, and create bypass loops as needed during the flushing sequence.
Thorough preparation lays the groundwork for a successful and effective hydraulic pipeline flushing operation, setting the stage for a clean and reliable system.
What are the Steps for Building Pressure and Circulating Fluid in Flushing?
Are you unsure about the precise sequence for flushing your pipelines, or worried about damaging components during the process? Improper pressure management and circulation can leave contaminants behind or even cause leaks.
Effectively flushing a hydraulic pipeline involves a three-step process: first, fluid filling and air bleeding at low pressure to ensure the entire system is saturated; second, gradual pressure increase with intermittent holding to check for leaks and confirm integrity; and finally, stabilized pressure circulation in a continuous loop, often in both directions, until contamination levels meet specified standards.

Step 1: Fluid Filling and Air Bleeding
This initial phase prepares the system for full circulation by removing air.
- Initiate Pump at Low Pressure: Start the hydraulic pump at a very low pressure, typically between 1 to 2 MPa (150 to 300 psi). This gentle start minimizes stress on the system and prevents sudden surges. The pump draws clean flushing oil from the dedicated reservoir of the flushing rig.
- Inject Fluid into Pipelines: Direct the low-pressure fluid into the entire pipeline that needs flushing. Ensure the fluid systematically fills all sections, including horizontal and vertical runs, carefully chosen to allow air to rise.
- Bleed Air from High Points: As the fluid fills the system, continuously monitor and open air bleed valves located at all high points of the pipeline. Air pockets can lead to cavitation, erratic operation, and hinder effective flushing. Keep these valves open until a continuous, bubble-free stream of hydraulic fluid flows out, confirming that all air has been expelled and the system is fully charged with oil. Confirm no air resistance is felt.
- Verify System Full: Once all bleed points show clear oil flow, close the air bleed valves. The system should now be completely filled with flushing fluid, ready for pressure build-up.
Step 2: Gradual Pressure Increase
This phase subtly tests system integrity while gently dislodging particles.
- Isolate Return Path: Close the main return valve or any bypass valves that would allow fluid to freely return to the reservoir. This creates a backpressure, allowing the system pressure to increase.
- Slowly Adjust Relief Valve: Incrementally increase the setting of the system’s relief valve (or the relief valve on the flushing rig). Raise the pressure slowly, in steps of 0.5 to 1 MPa (75 to 150 psi) at a time.
- Hold and Inspect: After each pressure increment, hold the pressure steady for 2 to 3 minutes. During this holding period, meticulously inspect all weld joints, flange connections, and hydraulic fittings (reusable and otherwise) for any signs of seepage or leakage. Early detection of minor leaks prevents larger issues later. If no leaks are observed, proceed to the next pressure increment.
- Continue to Design Flushing Pressure: Continue this step-by-step process until the system reaches its designated flushing pressure. Common design flushing pressures range from 2.5 MPa (360 psi), 4 MPa (580 psi), to 6.3 MPa (915 psi), depending on the system’s normal operating pressure and material strength.
- Optional: Accumulator Pressure Pulsing: If the hydraulic system includes a discharge valve-accumulator combination, use it after the initial filling. By allowing the accumulator to discharge momentarily, a controlled pressure pulse is generated. This sudden surge and drop in pressure creates a dynamic force within the pipeline, effectively “shocking” and dislodging stubborn contaminants adhered to the inner pipe walls, significantly enhancing flushing efficiency.
Step 3: Stabilized Pressure Circulation
The main cleaning phase, where contaminants are continuously filtered.
- Open Return Path for Circulation: Once the target flushing pressure is reached and maintained without leaks, carefully open the return oil line (or redirect flow to the filter unit on the flushing rig) to establish a continuous, closed-loop circulation.
- Maintain Stable Pressure: Use a return throttle valve or a temporary high-pressure valve to precisely regulate and maintain the flushing segment’s pressure at the predetermined target value. Consistent pressure ensures effective turbulent flow throughout the pipeline.
- Bi-Directional Flushing: For optimal cleaning, execute both forward and reverse circulation. Reversing the flow direction helps dislodge particles that might have settled in specific areas or been trapped by one-way flow. Alternating directions ensures that all surfaces are subjected to turbulent flow and dislodged contaminants.
- Continuous Online Contamination Monitoring: Operate the flushing sequence continuously until an online particle counter indicates that the fluid contamination level has reached or surpassed the required cleanliness standard (e.g., ISO 4406 code). This is the definitive indicator for when the flushing process is complete.
By following these detailed steps, you ensure a hydraulic pipeline that is not just clean, but reliably purged of performance-degrading contaminants, ready for optimal operation.
Why is “Gradual Pressure Increase with Leak Checks” So Important?
Do you ever bypass careful pressure checks to save time, only to encounter catastrophic leaks or system failures later? Skipping critical steps in pressure testing compromises safety and the integrity of your entire hydraulic setup.
“Gradual pressure increase with leak checks” is paramount because it systematically tests the integrity of every connection and component, preventing sudden ruptures or major fluid spills. This step-by-step approach allows for early detection of minor leaks or structural weaknesses under controlled conditions, ensuring safety and confirming that the hydraulic pipeline can withstand operational pressures without catastrophic failure.
The Dangers of Rapid Pressure Surges
Rushing the pressure build-up can have severe, costly consequences.
- Sudden Ruptures: Applying full design pressure to an untested or newly assembled pipeline instantly can cause weak welds, improperly torqued fittings, or compromised flanges to burst. This can lead to explosive fluid release, component damage, and significant safety hazards from high-pressure fluid injection injuries.
- Major Fluid Spills: A sudden rupture or major leak results in a massive loss of expensive hydraulic fluid, leading to environmental contamination and extensive cleanup costs. This is not only wasteful but also a significant operational disruption.
- Hidden Damage: Even if a rupture does not occur immediately, rapid pressure application can cause underlying stress or micro-cracks in components that might lead to premature failure later, during normal operation. This “hidden damage” makes troubleshooting incredibly difficult.
- Component Overload: Sensitive components, even if bypassed, can be indirectly affected by system shock from a sudden pressure spike if insulation is not perfect.
The Benefits of a Gradual, Monitored Approach
A measured increase in pressure provides crucial advantages for system integrity and safety.
- Early Leak Detection: Small leaks or seepage at fittings, flanges, or welds are often invisible at very low pressures. As the pressure incrementally rises, these minor imperfections become apparent. Detecting and addressing them early, when the system is under minimal stress, is far easier and safer than waiting until full operational pressure.
- Verification of Sealing Effectiveness: The “hold and inspect” period at each pressure increment allows the connection points (especially reusable hydraulic fittings) to fully seat and stabilize. It confirms that the seals and mechanical joints are capable of handling increasing stress before moving to the next level. This verifies the quality of assembly.
- Prevention of Catastrophic Failures: By identifying and rectifying potential weak points in a controlled, stepwise manner, the risk of a catastrophic failure (e.g., a burst pipe or a complete fitting blowout) during actual operation is drastically reduced. This protects personnel, equipment, and the surrounding environment.
- Confirmation of Structural Integrity: This process effectively performs a low-stress proof test on the entire pipeline. It ensures that the structural components of the piping system—the pipes themselves, bends, and supports—can withstand the intended operational pressure without deforming or cracking.
- Peace of Mind: Successfully completing the gradual pressure increase and leak check process provides engineers and operators with confidence in the system’s mechanical integrity, allowing subsequent operational phases to proceed with greater assurance.
This meticulous approach, requiring patience and attention to detail, fundamentally underpins the safety and long-term reliability of any hydraulic system. It ensures that when the system finally goes into full operation, it does so with every connection verified and every weld tested.
Conclusion
Effectively flushing a hydraulic pipeline is a systematic and critical process, fundamental for ensuring the longevity and reliability of any hydraulic system. From meticulous preparation, controlled pressure application, and continuous circulation to crucial temperature management and final strength testing, each step is designed to eliminate contaminants that can otherwise cripple expensive components.
For reliable hydraulic solutions and components that stand the test of time, partner with Topa. Contact us today to discuss your hydraulic hose needs and ensure your systems operate with unparalleled efficiency and dependability.
FAQ
What is hydraulic pipeline flushing?
Hydraulic pipeline flushing is the process of circulating clean hydraulic or flushing fluid through a system’s pipelines to remove dirt, metal particles, welding slag, and other contaminants before operation. It ensures system reliability and prevents premature wear.
Why is flushing necessary before using a new system?
Even new pipelines contain residues from manufacturing or installation. If not removed, these contaminants can damage pumps, valves, and cylinders, leading to system failure. Flushing cleans the system and ensures long-term performance.
What fluid should be used for flushing?
Most systems use the same hydraulic oil that will later operate in the system to ensure compatibility with seals and materials. In some cases, a special low-viscosity flushing oil with cleaning additives is used.
How do you know when flushing is complete?
Flushing is complete when the oil’s cleanliness level meets the system’s target, often defined by ISO 4406 codes. A particle counter confirms that the contamination has been reduced to acceptable limits.
Why is pressure built up gradually during flushing?
Gradually increasing pressure allows operators to safely test all joints and fittings for leaks. It helps detect weak spots early and prevents sudden pipe bursts or costly oil spills.
How often should hydraulic pipelines be flushed?
Pipelines should be flushed before the first system start-up and after major repairs, component replacements, or long periods of inactivity. This keeps the system clean, efficient, and reliable.