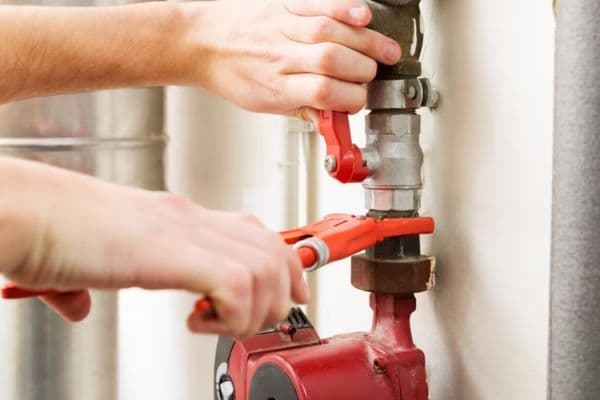
Proper installation of a ball valve is essential for achieving a leak-free, reliable system that functions efficiently over time. Whether in a household plumbing setup or an industrial application, a well-installed ball valve helps maintain consistent fluid flow, minimizes leaks, and extends the valve’s lifespan.
Understanding Different Types of Ball Valves
Ball valves come in several types, each designed for specific applications and offering unique installation methods. Selecting the correct ball valve type is essential for achieving reliable performance and preventing issues like leaks or pressure loss.
Threaded Ball Valves
Overview:
Threaded ball valves are one of the most commonly used types in both residential and industrial applications. These valves have threaded ends that connect directly to threaded pipes, making them easy to install and replace. They’re widely used for low- to medium-pressure systems and are ideal for quick shutoff needs, such as in water supply lines, gas pipelines, and general-purpose plumbing.
Installation:
Installing a threaded ball valve involves wrapping the male threads with PTFE (Teflon) tape or applying a pipe thread sealant to ensure a tight seal and prevent leaks. The valve is then screwed onto the pipe manually and tightened with a wrench. Care should be taken not to overtighten, as this can damage the threads and cause leaks.
Compression Ball Valves
Overview:
Compression ball valves are commonly used in residential plumbing, especially for water supply lines. These valves do not require threaded connections; instead, they rely on compression fittings to secure the valve to the pipe. This design makes them ideal for systems where soldering or threading isn’t practical, and they’re often seen in applications like kitchen and bathroom plumbing.
Installation:
To install a compression ball valve, you need to slide a compression nut and ring (ferrule) onto each pipe end. Once the valve is in position, the compression nuts are tightened using a wrench, creating a tight, leak-proof seal around the pipe. Compression valves are simple to install and remove, making them convenient for temporary installations or future maintenance.

Flanged Ball Valves
Overview:
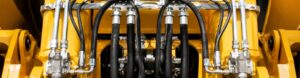
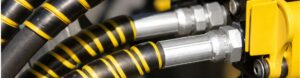
Flanged ball valves are used in larger pipelines and industrial systems where secure and stable connections are essential. These valves have flanges on each end that are bolted to matching flanges on the pipe, creating a robust, leak-resistant seal. Flanged valves are typically found in high-pressure or high-temperature applications, such as in water treatment plants, oil and gas pipelines, and chemical processing systems.
Installation:
Installing a flanged ball valve involves aligning the flanges on the valve with those on the pipeline. Bolts are then inserted through the flanges and tightened in a crisscross pattern to ensure even pressure distribution, which helps prevent leaks. Because of their size and the need for precise alignment, flanged valves may require additional support during installation.
Welded Ball Valves
Overview:
Welded ball valves provide a permanent, secure connection for high-pressure or high-temperature applications. These valves are welded directly to the pipeline, ensuring there are no threaded or bolted connections that could potentially leak. Welded valves are commonly used in situations where frequent disassembly is unnecessary, such as in industrial gas lines, HVAC systems, and other critical infrastructure.
Installation:
Installing a welded ball valve requires welding equipment and expertise, as improper welding can damage the valve or compromise the pipeline. The valve must be positioned accurately, and a welder fuses it to the pipeline. Due to the permanent nature of this installation, welded valves are generally not used where future removal or replacement is anticipated.
Selecting the Right Ball Valve for Your System
Choosing the correct ball valve type is crucial for long-term system performance and leak prevention. Here are some factors to consider:
Application: For residential plumbing, compression or threaded valves are often sufficient. In contrast, industrial systems may benefit from flanged or welded valves for added stability and durability.
Pressure and Temperature: Threaded and compression valves are suitable for low- to medium-pressure systems, while flanged and welded valves handle higher pressures and temperatures effectively.
Pipe Compatibility: Ensure the valve type matches your pipe material and size. For example, compression valves work well with copper or PEX pipes, whereas flanged and welded valves are typically used with metal pipes in industrial settings.
Ease of Maintenance: If easy removal and maintenance are priorities, threaded or compression valves offer simple installation and disassembly. For permanent applications with minimal maintenance, welded valves may be ideal.
Step-by-Step Guide for Installing Threaded Ball Valves
Step 1: Turn Off the Water or Fluid Supply and Drain the System
Safety First
Before beginning any valve installation, it’s essential to shut off the main water or fluid supply to the system where the valve will be installed. This step prevents unexpected fluid flow during the installation process, which could lead to spills or accidents. For pressurized systems, be sure to release any remaining pressure to ensure a safe working environment.
Locate the main shutoff valve and close it fully.
Open a nearby faucet or drain valve in the system to relieve any residual pressure and allow remaining fluid to drain out.
Wait for the system to fully depressurize before proceeding to avoid any pressure surges during installation.
Why This Step Matters
Turning off the supply and draining the system not only keeps you safe but also prevents fluid from entering the valve area during installation, which could lead to leaks or contamination of the pipe threads.
Step 2: Prepare the Pipe Ends
Clean and Dry the Pipe Ends
A secure installation requires clean, dry pipe ends. This step ensures that the valve will thread on smoothly and that the connection will be leak-free. Residue, old sealant, and debris can interfere with the seal, so taking the time to clean the pipe ends is critical.
Use a cloth or a small wire brush to remove any dirt, grease, or old pipe thread sealant from the pipe threads.
Inspect the threads for any signs of wear or damage that might compromise the seal. If the threads are damaged, consider re-threading the pipe or replacing that section.
Ensure the pipe ends are completely dry, as moisture can affect the sealant’s adhesion.
Why This Step Matters
Clean threads create a better connection, allowing the sealant to adhere properly and the valve to thread smoothly. This prevents potential leaks and extends the life of the valve.
Step 3: Apply PTFE Tape or Pipe Thread Sealant
Seal the Threads for a Leak-Free Connection
Using PTFE (Teflon) tape or a liquid pipe thread sealant is essential for creating a watertight seal on threaded connections. The sealant fills any small gaps between the threads, reducing the risk of leaks.
Wrap PTFE tape around the male threads of the pipe. Start at the end of the threads and wrap clockwise 2–3 times, ensuring the tape is evenly applied without bunching. For most applications, PTFE tape is sufficient and provides a reliable seal.
Alternatively, you can apply pipe thread sealant (sometimes called “pipe dope”) to the threads. Using a brush or applicator, spread a thin, even layer of sealant around the threads.
Avoid applying tape or sealant on the first thread closest to the pipe end, as this can reduce the risk of excess material entering the pipeline.
Step 4: Attach the Ball Valve
Hand-Tighten, Then Use a Wrench
Attaching the ball valve requires threading it onto the pipe securely without over-tightening. Over-tightening can damage the threads and compromise the seal, leading to potential leaks.
Begin threading the ball valve onto the pipe by hand to get a snug fit. Starting by hand helps ensure the threads align correctly and reduces the chance of cross-threading.
Once hand-tightened, use an adjustable wrench to secure the valve. Apply gentle pressure, turning the valve until it is tight but stopping short of over-tightening.
Avoid using excessive force, as this can strip or damage the threads. If it feels very resistant, double-check that the threads are clean and aligned.
Tip: If you encounter resistance, stop and check that the threads are not cross-threaded. Attempting to force a misaligned valve can damage the connection and lead to leaks.
Step 5: Check Alignment and Valve Handle Position
Ensure Accessibility and Proper Function
Before finishing the installation, it’s important to check the alignment of the valve and confirm that the handle is positioned correctly. Proper alignment ensures easy operation of the valve and prevents strain on the connections.
Position the valve handle so that it is accessible and easy to turn for on/off control. Make sure there is enough space for the handle to rotate fully without obstruction.
Align the valve with the pipe, ensuring that it sits straight and without tension. Misalignment can cause stress on the threads and lead to leaks.
Step 6: Turn On the Supply and Test for Leaks
Check for Leaks and Confirm Proper Installation
Once the ball valve is securely in place, it’s time to test the connection by restoring the fluid supply and checking for any leaks.
Slowly turn the main supply back on, allowing the fluid to flow gradually into the system. This gentle approach helps prevent sudden pressure surges.
Inspect the connection around the ball valve, especially the threaded area. Look for any visible drips or leaks around the threads.
If you see any drips, use the wrench to tighten the valve slightly until the leak stops. Avoid over-tightening, as this can damage the threads.
Test the valve’s operation by turning the handle to open and close positions, ensuring it moves smoothly and creates a proper seal.
Installing Compression Ball Valves
Compression ball valves are commonly used in plumbing applications, especially in residential water supply lines, due to their simple installation process that doesn’t require threading or soldering. Instead, they use compression fittings, which makes them ideal for DIY installations and temporary setups. Here’s a step-by-step guide for installing a compression ball valve.
Step 1: Shut Off and Drain the System
Ensure Safety Before Installation
Before installing the compression ball valve, it’s essential to shut off the water or fluid supply to prevent unexpected leaks or spills. For pressurized systems, ensure that any residual pressure is released for safe handling.
Locate and close the main shutoff valve for the system.
Open a nearby faucet or drain valve to relieve any remaining pressure and allow fluid to drain out from the pipe where you’ll be working.
Double-check for any residual fluid or pressure by tapping or shaking the pipe gently. Once confirmed, you can proceed with installation.
Step 2: Prepare the Pipes and Fittings
Clean and Attach Compression Components
Preparing the pipe ends and attaching the necessary components, such as compression nuts and rings (also called ferrules), is crucial for creating a secure, leak-proof connection.
Clean the pipe ends thoroughly using a cloth or steel wool to remove any dirt, debris, or corrosion that could interfere with the compression fitting’s seal.
Slide a compression nut onto each pipe end, followed by a compression ring (ferrule). Make sure the nuts and rings are oriented correctly; the nut goes on first, followed by the ring, with the tapered side of the ferrule facing toward the valve.
Inspect the pipe ends for smoothness and ensure they are free from burrs, which could prevent a proper seal. If there are burrs or irregularities, use a pipe cutter or deburring tool to smooth them out.
Step 3: Position the Compression Ball Valve
Align the Valve with the Pipe Ends
Positioning the valve correctly ensures a stable connection and easy operation. With compression valves, alignment is key to avoid unnecessary stress on the fittings.
Insert each prepared pipe end (with the compression nut and ring already attached) into the compression fitting on the valve. Make sure the pipes are inserted all the way into the valve’s fitting to achieve a secure connection.
Check the alignment of the pipes and valve, making sure the valve is positioned straight and that the handle is accessible and oriented correctly for easy on/off control.
Ensure there is enough space around the valve for smooth operation of the handle, especially in confined areas where maneuverability may be limited.

Step 4: Tighten the Compression Nuts
Secure the Compression Fittings to Create a Leak-Proof Seal
The final step in installing a compression ball valve is tightening the compression nuts, which secures the valve to the pipe and creates a water-tight seal.
Use an adjustable wrench to tighten each compression nut securely around the valve’s compression fitting. It’s essential to apply steady pressure but avoid overtightening, as this can damage the nut or the ferrule.
Hold the valve in place with one hand or with a second wrench to keep it steady while tightening the nuts. This helps prevent twisting or shifting, which could affect the alignment and lead to leaks.
Tighten each nut until it is snug and secure. If you notice resistance, it’s generally an indication that the fitting is sealing properly. However, don’t overtighten, as this could deform the ferrule and compromise the seal.
Installing Flanged Ball Valves
Flanged ball valves are commonly used in large-scale and industrial applications due to their durability, ability to handle high pressures, and ease of installation. The flanged connection provides a strong seal that can withstand significant force, making these valves ideal for applications in water treatment, oil and gas pipelines, and other demanding environments.
Step 1: Turn Off and Drain the System
Ensure Safety by Depressurizing the System
Before installing a flanged ball valve, it’s essential to shut off the fluid or gas supply to the system. Releasing all pressure is critical for safety and to prevent leaks during installation.
Shut off the main supply valve or close any other valves that control the flow to the area where you’ll be installing the new flanged valve.
Open a drain valve or nearby faucet to release any remaining pressure in the system. Allow the fluid to drain completely to avoid spills or pressure surges when installing the new valve.
Confirm the system is fully depressurized by checking for any residual fluid or pressure. This extra step helps ensure a safe working environment and prevents accidental discharge of fluids.
Step 2: Prepare the Flanges
Clean and Inspect the Flange Faces for a Proper Seal
To ensure a leak-free connection, it’s essential to prepare the pipe flanges where the ball valve will be installed. Clean, smooth flange faces help create a reliable seal when the valve is bolted into place.
Clean both flange faces using a cloth or wire brush to remove any dirt, grease, rust, or debris. Contaminants on the flange surfaces can prevent a tight seal and lead to leaks.
Inspect the flange surfaces for any scratches, cracks, or other damage. Flaws on the flange faces can prevent a uniform seal and may cause leaks over time.
Check the gasket to ensure it is in good condition. If it’s worn or damaged, replace it with a new one that matches the flange size and material requirements.
Step 3: Align the Flanged Valve Between the Pipe Flanges
Position the Valve for Proper Alignment and Stability
Proper alignment of the valve is crucial for ensuring that the flanges connect evenly, which prevents stress on the bolts and maintains a reliable seal.
Position the flanged valve between the pipe flanges, making sure the valve’s bolt holes align perfectly with the holes on the pipe flanges.
Insert bolts through the aligned holes, ensuring that the valve is centered between the flanges. This is particularly important in large or heavy-duty installations where even minor misalignment can affect performance.
Check that the valve handle is accessible and that it has sufficient room to turn fully for on/off control. Adjust the alignment if needed to ensure the valve operates smoothly without obstruction.
Step 4: Tighten Bolts in a Crisscross Pattern
Ensure a Uniform Seal by Tightening in Sequence
A uniform seal is essential for preventing leaks in flanged connections. By tightening bolts in a crisscross pattern, you distribute the force evenly across the flange, which helps avoid gaps or misalignment.
Begin by hand-tightening each bolt to hold the valve in place and to make minor alignment adjustments if necessary.
Use a wrench or torque wrench to tighten the bolts in a crisscross pattern. Start with one bolt, then move diagonally across to the opposite bolt. Repeat this sequence, working your way around the flange until all bolts are snug.
For a more secure and precise fit, use a torque wrench to tighten each bolt to the recommended torque specified by the valve or flange manufacturer. This ensures that the bolts are neither too loose nor over-tightened, which could damage the flange or compromise the seal.
Perform a final check to ensure that all bolts are evenly tightened, adjusting as needed to maintain a balanced and secure fit.
Conclusion
Each type of valve has unique requirements that, when followed, ensure effective operation and reduce the likelihood of leaks, which can be costly and disruptive. By taking the time to prepare, align, and tighten connections correctly, you help extend the valve’s lifespan and maintain system efficiency, minimizing future maintenance needs.
FAQ
What tools do I need to install a ball valve?
Basic tools include an adjustable wrench, pipe cutter, PTFE tape (for threaded valves), and possibly a torque wrench for flanged valves.
Can I install a ball valve without shutting off the main supply?
No, it’s essential to shut off and drain the system to prevent leaks and ensure safety during installation.
How tight should I make the connections on a threaded valve?
Start by hand-tightening, then use a wrench until secure. Avoid over-tightening to prevent thread damage.
Do I need PTFE tape for all types of ball valves?
PTFE tape is typically needed for threaded valves but not for compression or flanged valves, which have their own sealing mechanisms.
What should I do if my ball valve leaks after installation?
For minor leaks, try tightening the connection slightly. If leaks persist, check the sealant and alignment, and consider re-installing if necessary.
When should I consult a professional for ball valve installation?
For complex installations, like welded valves or high-pressure systems, consulting a professional ensures secure and safe installation.