Hydraulic hose fittings are crucial components in various industrial applications, ensuring the efficient transfer of fluids under high pressure. When these fittings fail, the consequences can be severe, leading to costly downtime and potential safety hazards. Understanding how to quickly and effectively repair hydraulic hose fittings is essential for maintaining productivity and safety. This post aims to provide expert tips for both immediate on-site fixes and long-term repair solutions, helping you minimize downtime and maintain optimal performance in your hydraulic systems.
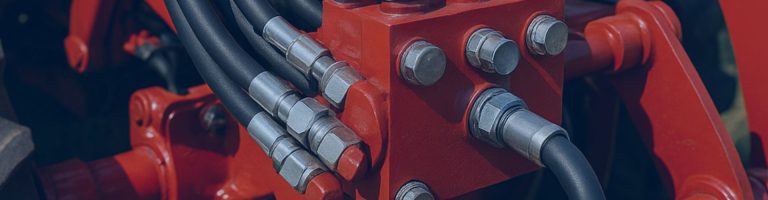
Hydraulic hose fittings are integral components in hydraulic systems, designed to connect hoses to various system parts such as pumps, valves, and cylinders. These fittings ensure the seamless flow of hydraulic fluid under high pressure, enabling the system to function effectively and efficiently. Given their critical role, understanding the different types of fittings and the common causes of their failures is essential for maintaining the reliability of hydraulic systems.
Understanding the common causes of hose fitting failures can help in preventing issues and ensuring the longevity of hydraulic systems:
Wear and Tear:
Over time, hydraulic hose fittings are subjected to repeated use and exposure to harsh conditions, leading to gradual degradation. Factors such as friction, pressure cycles, and environmental exposure contribute to wear and tear, eventually causing fittings to weaken and fail.
Improper Installation:
Incorrect installation practices are a significant cause of premature fitting failure. This includes using the wrong type of fitting, not following manufacturer guidelines, or not ensuring a secure and tight connection. Improper installation can lead to leaks, reduced system efficiency, and increased risk of fitting blowouts.
Environmental Factors:
Hydraulic hose fittings are often exposed to extreme environmental conditions, including temperature fluctuations, chemicals, and physical abrasion. High temperatures can cause fittings to expand and contract, leading to material fatigue. Exposure to chemicals can cause corrosion, while physical abrasion can wear down the surface of the fittings, compromising their integrity.

Recognizing the signs of failing hose fittings is essential for timely maintenance and repair, preventing more severe system failures:
Leaks:
Visible fluid leakage around the fitting area is a clear indicator of fitting failure. Leaks can occur due to cracks, loose connections, or damaged sealing surfaces. Regular inspection for leaks can help identify problems early and prevent fluid loss and contamination.
Pressure Drops:
A sudden drop in system pressure suggests a problem with the hydraulic hose fittings. Pressure drops can occur when there is a partial blockage, a significant leak, or a fitting that is not securely connected. Monitoring system pressure can help detect issues before they lead to complete system failure.
Visible Damage:
Cracks, corrosion, or other visible damage to the fittings indicate the need for repair or replacement. Regular visual inspections of the fittings and hoses can help identify signs of damage early. Look for any signs of wear, rust, or deformation that could compromise the fitting’s performance.
In many situations, the ability to perform quick fixes on hydraulic hose fittings can be the difference between significant downtime and continued operation. These temporary repairs are essential to keep operations running smoothly until a more permanent solution can be implemented.
Temporary repairs are critical for immediate issues that arise unexpectedly. Here are two effective methods for quick on-site repairs:
Using Hose Clamps:
Hose clamps are a reliable and straightforward solution for temporarily stopping leaks in hydraulic hoses. When a leak is detected, placing a hose clamp over the affected area can help contain the fluid and prevent further leakage. Here’s how to use hose clamps effectively:
Selection: Choose a clamp that fits the diameter of the hose snugly.
Placement: Position the clamp directly over the leak.
Tightening: Use a screwdriver or wrench to tighten the clamp until the leak is stopped. Be careful not to over-tighten, as this can damage the hose further.
Applying Sealants and Tapes:
Hydraulic sealants and self-fusing silicone tapes are excellent for quickly patching minor leaks. These materials are designed to withstand high pressure and create a temporary seal that prevents fluid from escaping.
Sealants: Apply hydraulic sealant around the leaking area, ensuring it covers the entire circumference of the hose. Allow the sealant to set as per the manufacturer’s instructions before testing the repair.
Silicone Tapes: Wrap self-fusing silicone tape tightly around the leak, overlapping each layer to ensure a secure seal. The tape bonds to itself, forming a durable, waterproof barrier.

Implementing a quick fix requires careful attention to detail and adherence to safety protocols. Here’s a step-by-step guide to ensure effective and safe repairs:
Identifying the Problem:
Preparing the Site and Equipment:
Implementing the Temporary Fix:
Testing the Repair:
Practical Tips for On-Site Repairs
For a more permanent solution to hydraulic hose fitting issues, it’s essential to follow detailed and precise repair procedures. These steps ensure the longevity and reliability of the repaired fittings, preventing future failures and maintaining system efficiency.
Proper Disconnection Techniques:
Selecting the Right Replacement Fittings:

Crimping and Swaging:
Welding and Soldering:
Ensuring a Secure Fit:
Pressure Testing for Leaks:
Hydraulic hose fitting repairs are an essential skill for maintaining the efficiency and safety of hydraulic systems. By understanding the causes of failures, having the right tools, and following expert tips for quick and permanent repairs, you can minimize downtime and ensure the longevity of your equipment. Implement these strategies to keep your operations running smoothly and effectively.
It’s recommended to perform brief daily inspections, more thorough weekly inspections, and comprehensive monthly inspections to ensure early detection of wear, leaks, or other potential issues.
Common signs include visible fluid leaks, sudden drops in system pressure, and visible damage such as cracks or corrosion on the fittings.
Yes, with the right tools and knowledge, you can perform temporary and even permanent repairs. However, for complex issues or if you’re unsure, it’s best to consult a professional.
Basic tools include wrenches, screwdrivers, pliers, and a utility knife. Specialized equipment like a hydraulic crimping machine, hose cutters, and a pressure testing kit are also essential for more complex repairs.
Regular inspections, proper installation practices, using high-quality materials, and ensuring your team is well-trained in handling and maintenance procedures are key steps in preventing failures.
Immediately depressurize the system, inspect the area to locate the leak, and apply a temporary fix such as a hose clamp or hydraulic sealant. Follow up with a permanent repair as soon as possible to ensure the system’s reliability.


