When a one-piece fitting crimp is out of specification, quarantine the assembly and related work before changing the machine or attempting repair. The next step is to separate a measurement error from a true nonconforming crimp, then verify component identity, insertion, tooling, program, machine status, and current reference data. Immediate recalibration, adjustment, or re-crimping can erase the original evidence and expand the problem. This STOP–VERIFY–RELEASE workflow helps hose-shop quality staff contain the batch, identify a supported cause, select an approved disposition, and restart only after a documented first piece passes.
STOP: Quarantine Before Troubleshooting
The first response is containment, not correction. Keep the measured assembly, related components, tooling, and process records in their as-found condition until the evidence has been captured.
Isolate the assembly and affected batch
Mark the nonconforming piece with a unique hold identifier and prevent it from entering service. Stop the job on the relevant machine. Segregate uncrimped components, in-process pieces, and finished assemblies produced since the last accepted inspection point or another technically justified trace point.
Do not discard the failed piece, remove its fitting, re-crimp it, or use it for a pressure check unless an approved investigation plan authorizes that action. The original assembly may show component position, profile, marks, or other evidence needed to distinguish cause.
Record the as-found condition
Capture the actual readings, measurement positions, instrument identity, operator or inspector, time or production sequence, machine, die set, active program or setup, and instruction revision. Photograph the crimp profile when permitted, preserving orientation so a ferrule feature can be correlated with a die position.
If the assembly was removed from equipment, stop and isolate the hydraulic system, release pressure and stored energy, secure raised loads, and follow lockout and equipment instructions. Never feel for a high-pressure leak by hand or loosen a connection under pressure.
VERIFY: Decide Whether the Measurement Is Valid
Before treating the part as a true dimensional failure, verify that the measurement system and method were correct. This protects against unnecessary machine adjustment while ensuring that a real failure is not dismissed.
Check the instrument
Confirm the measuring device is the approved type, has suitable resolution, carries a valid calibration status, is clean and undamaged, and passes any required zero or reference check. Examine contact surfaces for debris or wear. Do not substitute an uncontrolled tool because it gives a more favorable reading.
Repeat the measurement only as the inspection procedure permits. If a second qualified person checks the part, both inspectors should use the same controlled method and record their individual results. Repeated measurement is verification, not permission to select the best value.
Check location and technique
Use the specified locations, number of readings, orientation, and timing after crimping. Avoid seams, flash, raised identification, die marks, or other features excluded by the procedure. Keep the instrument square to the measured surface and apply consistent measuring force.
Classify the result:
- Measurement error identified: correct the method or instrument issue, document it, and re-evaluate the held piece under the approved procedure.
- Result confirmed out of specification: maintain quarantine and continue the investigation.
- Measurement remains uncertain: escalate to the responsible quality authority; do not release or adjust the process.
No numerical tolerance should be invented. The current approved crimp data for the exact hose, fitting, size, machine basis, and process supplies the acceptance limits.
VERIFY: Confirm Hose, Fitting, and Reference Identity
A valid measurement can be compared with the wrong specification. Confirm that the components at the machine match the traveler and the reference used for acceptance.
Verify the hose and fitting pair
Read the hose layline and record the manufacturer, complete series, size, construction when required, and lot information. Confirm the fitting’s complete part number, series, size, orientation, connection, and required traceability. Inspect whether the one-piece stem and ferrule remain the intended preassembled combination and have not been mixed or damaged.
Matching dash sizes do not prove compatibility. Hose construction, inside and outside dimensions, reinforcement, stem design, and ferrule geometry can differ. The combination must appear in current approved manufacturer compatibility and crimp records.
Verify the controlled specification
Check the document number and revision against the active traveler, machine program, and document-control system. Confirm that the referenced row applies to the exact hose and fitting code rather than a neighboring size, another series, or a competitor cross-reference. A Parker or other brand number cannot authorize a Topa assembly or crimp setting.
If the component pair is wrong or the applicable data are unavailable, keep all related work on hold. Do not solve a document gap by choosing the closest nominal target.
VERIFY: Audit Machine, Dies, and Program
When identity and measurement are valid, audit whether the crimper executed the approved setup. Record the setup before making any change.
Inspect configuration and tooling
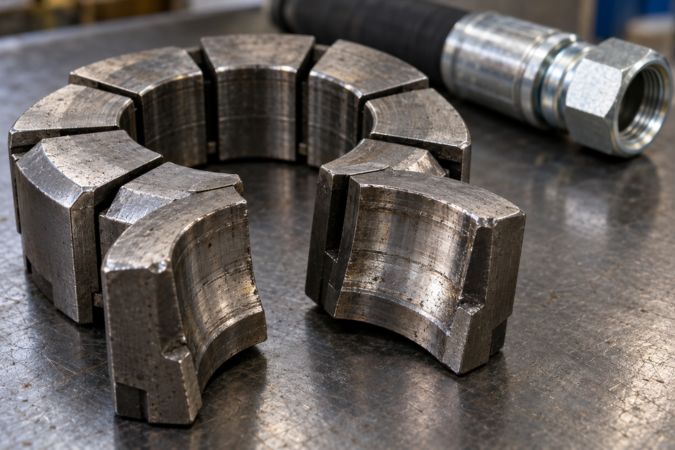
Confirm the machine asset, die set, adapters, master die or bowl, spacers, and other controlled tooling against the instruction. Verify tooling identification, seating, cleanliness, segment movement, and visible condition. Look for debris, incorrect assembly, damage, corrosion, or uneven wear without creating an unofficial wear threshold.
Suspect tooling belongs in quarantine for qualified assessment. Do not grind, polish, substitute a segment, or continue production because an average diameter appears close to the target.
Review program and machine status
Compare the active program or setup values with the current controlled source. Check that the correct job was selected and that no offset, correction, manual mode, or prior-job setting remains active. Review required machine verification, calibration, alarm, and maintenance status.
Do not recalibrate merely because one part failed. Recalibration is appropriate only through the equipment and quality procedures after the investigation shows it is required. An unjustified calibration change can remove evidence and introduce a new variable.
VERIFY: Examine Preparation, Insertion, and Alignment
The finished dimension can be affected by the way the hose and fitting were prepared and positioned. Inspect these factors without assuming the machine is the only cause.
Review the hose end and insertion record
Confirm the hose was cut and prepared according to the current instruction. Look for an unsquare cut, damaged reinforcement, contamination, incorrect skive or no-skive preparation, or another visible departure. Verify that the external insertion mark was taken from the approved product-specific reference and checked before crimping.
Insertion depth is not the same as crimp diameter. A correct dimensional result cannot prove insertion, and a correct insertion mark cannot prove the crimp result. Both controls must be evaluated separately.
Check fitting and ferrule position
Inspect whether the ferrule, stem, hose, and any orientation feature were aligned and seated as required before the cycle. Consider whether handling allowed the hose to back out or an elbow to rotate. Record unusual marks, asymmetry, or evidence of loading at an angle.
Do not force a poorly fitting combination, add an unapproved lubricant, or alter preparation to make the assembly reach a reference. Quarantine damaged or questionable parts and use a qualified technical review.
TRACE: Define the Scope of Related Assemblies
The investigation must address product made before the failure was detected. The scope should follow evidence rather than a convenient fixed quantity.
Find the last accepted checkpoint
Review first-piece results, periodic measurements, tooling checks, machine logs, program changes, component lot changes, maintenance events, and operator observations. Determine the most recent point at which the exact setup had acceptable documented evidence. If records are incomplete or a trend shows drift, expand the window.
Trace affected work by:
- hose and fitting codes and lots;
- machine and tooling identity;
- program and instruction revision;
- production time or sequence;
- first-piece and in-process readings;
- setup, maintenance, and abnormal-event records.
Do not include unrelated assemblies solely because they were made on the same day, and do not exclude a related assembly because it looks normal.
Also compare the sequence of recorded readings rather than treating each result in isolation. A gradual shift may justify an earlier trace point, while a sudden change linked to a tooling, program, or component event may narrow the window. Record the reasoning so another reviewer can reproduce the boundary decision.
Maintain separate status for each population
Distinguish uncrimped components, suspect finished assemblies, known accepted product before the trace point, and trial pieces produced during investigation. Label and physically or electronically segregate each group. This prevents the held population from being mixed back into accepted stock.
DECIDE: Use an Approved Disposition
Disposition follows verified facts and authorized procedures. The goal is not to save every assembly; it is to prevent an unsupported part from entering service.
Consider the permitted outcomes
Depending on the quality system and technical evidence, an authorized disposition may include scrap, additional inspection, applicable testing, engineering review, or another documented action. Release requires evidence that addresses the identified risk and covers the affected population.
Re-crimping or salvaging a failed hose assembly is prohibited unless a specific approved and validated procedure permits it for that exact condition. Additional compression can damage the hose or fitting and can hide the original cause. Do not reuse visibly damaged hose or fittings.
Record cause and corrective action separately
Root cause describes why the nonconformity occurred; disposition describes what happens to affected product; corrective action reduces recurrence. Do not write “operator error” without evidence. Document the verified cause, contributing conditions, affected scope, decision authority, and the specific changes made to tooling, setup, documents, training, component control, or measurement where supported.
RELEASE: Restart Through a Controlled First Piece
Removing the suspected cause does not automatically release the process. Restart requires a fresh setup audit and first-piece approval.
Restore the approved configuration
Verify component identity, current instruction, machine, dies, tooling condition, program, calibration or verification status, preparation, insertion method, and measurement system. Document any repaired or replaced tooling and any approved program or document revision. Ensure obsolete data cannot be selected at the workstation.
Produce a new first piece only after the configuration is complete. Measure it by the approved method, record actual readings and visual checks, and obtain the required signoff. A single acceptable dimension does not waive compatibility or other required inspection and testing.
Apply the restart protocol
Use this record-and-restart sequence:
- Preserve the original failure and as-found setup.
- Verify measurement validity and exact reference.
- Confirm component identity and compatibility.
- Establish the supported cause and affected scope.
- Authorize product disposition and corrective action.
- Restore the controlled setup and approve a new first piece.
- Release production and held product only under documented authority.
If any checkpoint remains unresolved, the correct decision is STOP, not a provisional release.
Conclusion
An out-of-specification crimp requires evidence preservation before process change. Quarantine the assembly and related batch, verify the instrument and measurement method, and confirm that the exact hose, fitting, and current crimp instruction were used. Audit machine, dies, program, preparation, insertion, and alignment without assuming the first suspected cause is correct. Trace related production to a justified accepted checkpoint, then use an authorized disposition; never re-crimp or salvage by improvisation. Restart only after corrective action, full setup verification, and a documented first-piece release. This STOP–VERIFY–RELEASE method turns a one-piece fitting crimp out of specification into a controlled quality decision rather than a hidden adjustment.
Frequently Asked Questions
Should the crimper be adjusted immediately after one failed reading?
No, first preserve the setup and verify the measurement, parts, reference, tooling, and program. Immediate adjustment can hide the cause or create another uncontrolled condition.
Can I re-measure until one reading passes?
No, follow the approved number and location of measurements and record the results. Selecting a favorable reading is not a valid inspection method.
Does a failed diameter always mean the crimper is faulty?
No, component identity, insertion, preparation, tooling, setup, and measurement can also produce the result. Evidence must isolate the cause before repair or calibration.
How many earlier assemblies should be quarantined?
Use the last accepted evidence and production traceability to define the scope. Expand it when records, trends, tooling events, or component changes show the condition may have started earlier.
Can an engineering review release a failed assembly?
Only through the organization’s authorized disposition process and evidence appropriate to the exact condition. An informal opinion or visual check cannot override controlled acceptance requirements.