You just made a hose assembly in the field, but it’s leaking. Precious hydraulic fluid is dripping, the machine is down, and the pressure is on you to fix it fast.
A leak in a reusable fitting is almost always caused by one of five issues: component mismatch, improper hose preparation, incorrect assembly, damage to the fitting or hose, or exceeding the system’s pressure limits. Identifying the exact cause is the key to a reliable fix.
Did You Match the Fitting to the Hose?
You have a fitting and a hose that are the same size, but they won’t seal. You’ve re-assembled it three times, and the leak persists, wasting your time and expensive fluid.
A reliable seal starts with a perfect match. Fittings and hoses from different manufacturers or even different product lines from the same manufacturer are not guaranteed to work together. They are designed as a system.

A System, Not Just Parts
The single most common mistake I see installers make is treating hydraulic fittings and hoses as interchangeable commodities. They are not. A 1/2″ hose from one brand and a 1/2″ reusable fitting from another may look like they should work, but they are engineered with tiny, critical differences. A reputable manufacturer like us at Topa designs our fittings to match the specific dimensions and material properties of our hoses.
Why a Match is Critical
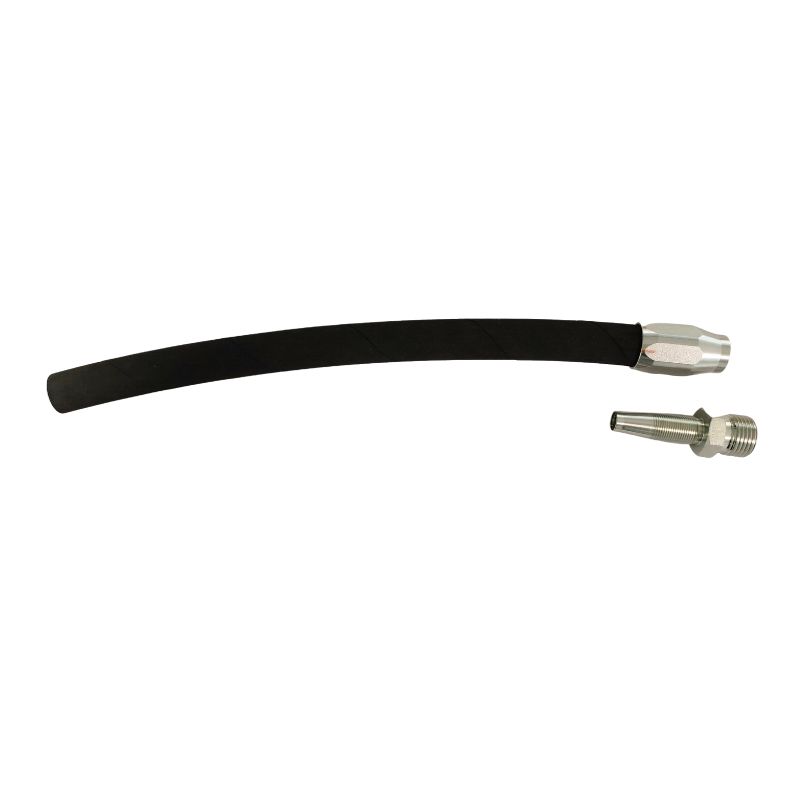
The seal in a reusable fitting is created by two precise actions: the socket’s internal threads gripping the outer cover of the hose, and the nipple expanding the inner tube of the hose against the inside of the socket.
- Hose Outer Diameter (OD): If the hose OD is slightly too small for the fitting’s socket, the threads won’t get a secure enough grip. If it’s too large, you might not be able to assemble it at all, or you might cut and damage the hose cover during assembly.
- Hose Inner Diameter (ID) and Tube Thickness: The nipple is designed to expand a tube of a specific thickness. If the tube is too thick, the nipple can’t be inserted fully. If it’s too thin, the nipple won’t create enough compression to form a seal against the socket.
Was the Hose Prepared Correctly?
You made a new hose assembly, and it looks perfect, but there’s a slow weep right at the socket. You can’t find any obvious flaws, but the leak won’t stop.
The foundation of a good seal is a perfect hose end. A cut that is not perfectly square, a frayed wire braid, or an incorrectly skived end will create a hidden leak path before assembly even begins.
The Craftsmanship of the Cut
You can have the best, perfectly matched components, but if the hose isn’t prepared with precision, it will fail. A reusable fitting relies on the hose end being a clean, stable foundation for the mechanical seal.
The Importance of a Square Cut
The cut must be a perfect 90 degrees to the centerline of the hose.
- Why? When the nipple is inserted, it must press evenly against the hose material. An angled cut means the nipple will apply more pressure to one side than the other. This uneven pressure creates a gap and a direct path for fluid to escape.
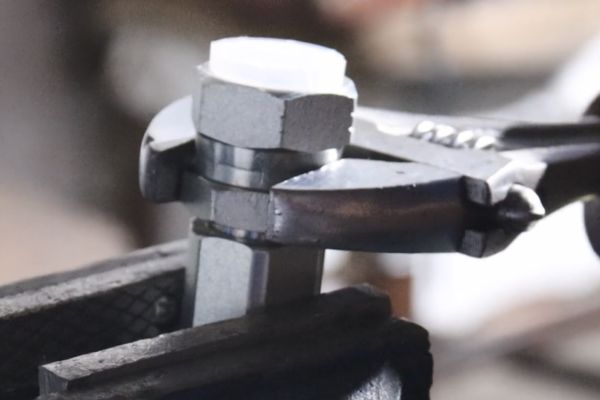
- How? Never use a hacksaw or bolt cutters. These tools crush and fray the hose. Use a proper fine-toothed hose saw or, ideally, a dedicated abrasive cut-off wheel designed for hydraulic hose. This ensures a clean, square, and smooth finish.
To Skive or Not to Skive?
Skiving is the process of removing a portion of the hose’s outer cover (and sometimes inner tube) to expose the wire reinforcement. Whether you need to skive depends entirely on the fitting design.
- Non-Skive Fittings: Most modern reusable fittings are “non-skive.” Their sockets are designed with sharp, specially designed threads that bite through the outer cover to grip the wire reinforcement directly. Using a non-skive fitting on a skived hose will result in a leak, as the socket OD is now too loose.
- Skive Fittings: Older designs or fittings for very high-pressure, multi-spiral hoses often require skiving. This requires a special tool to remove the cover to a precise length. If you fail to skive a hose for a skive-type fitting, you will not be able to assemble it. If you skive too much or too little, you create a leak path.
Always check the manufacturer’s instructions. A mistake here is an automatic failure.
Did You Follow the Correct Assembly Procedure?
You muscled a fitting together, tightening it as hard as you could. Now, fluid is seeping out. You feel like you’ve damaged a brand new, expensive component.
Assembly is a process of finesse, not force. Using the proper lubrication and following the manufacturer’s specific tightening instructions are the most critical steps to creating a seal without damaging the components.
The Art of Assembly
I instruct my team and our customers that assembling a reusable fitting is like following a recipe. If you skip a step or get the measurements wrong, the result will be disappointing. The most common procedural errors are related to lubrication and tightening.
Lubrication is Not Optional
You must lubricate the components before assembly. Use the same type of hydraulic oil that will be in the system, or a manufacturer-approved assembly lubricant. NEVER use grease, motor oil, or thread-locking compounds.
- Where to Lube: Apply a light coat of oil to the threads of the fitting nipple and the socket. Critically, you must also apply oil to the inside of the hose and liberally coat the end of the hose being inserted into the socket.
- Why it’s Critical: The lubricant reduces friction, preventing the hose cover from tearing as it’s screwed into the socket. It also allows the nipple to thread in smoothly without galling and ensures that your wrench torque is being used to create clamping force, not just to overcome friction.
The Two-Step Tightening Process
- Installing the Socket: Place the fitting socket in a vise. Push the lubricated hose end into the socket and screw it in counter-clockwise (for standard right-hand thread fittings) until the hose bottoms out against the shoulder inside the socket. Back the hose off about a quarter turn. This step is to ensure it is fully seated.
- Installing the Nipple: Now, lubricate the threads of the nipple. Screw the nipple into the socket clockwise. You will feel resistance as the nipple starts to expand the hose tube. Continue tightening until there is a gap of approximately 0.8mm to 1.5mm (1/32″ to 1/16″) between the nipple hex and the socket. Do NOT tighten the nipple until it bottoms out on the socket, as this can crack the socket or damage the threads. This small gap is the visual confirmation of a correct assembly.
Is the Fitting or Hose Damaged?
You’re trying to reuse a fitting from an old hose assembly to save money. No matter how clean you get it or how carefully you assemble it, it has a persistent, weeping leak.
“Reusable” does not mean “indestructible.” Any nick, scratch, or piece of debris on the fitting’s sealing surfaces, or any crack in an old hose, will compromise the connection and cause a leak.
A Thorough Pre-Flight Inspection
Before you even think about re-assembling a used fitting, you must perform a detailed inspection. The sealing surfaces are precision-machined, and even minor damage can be fatal to the connection.
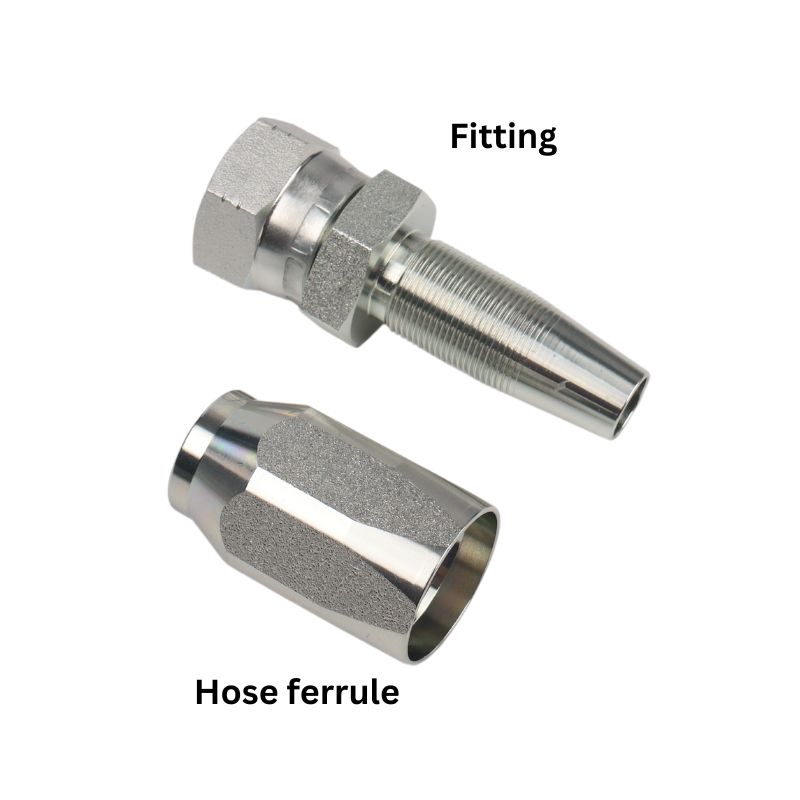
Inspecting the Fitting Components
- The Socket: Look inside the socket. Are the threads clean and sharp? Check for any embedded rubber or wire from the previous hose. Use a pick and a wire brush to clean them out completely. Any debris left behind will prevent the new hose from seating correctly. Also, inspect the outside of the socket for any cracks, especially around the hex.
- The Nipple: This is often the point of failure. The conical tip of the nipple is a primary metal-to-metal sealing surface. Examine it under a good light for any scratches, nicks, or signs of corrosion. Any imperfection here is a guaranteed leak path. Also, check the threads for damage or galling from a previous over-tightening.
Inspecting the Hose
Never put a brand-new fitting (or a perfectly good used one) on a bad piece of hose.
- Age and Hardness: Is the hose old? Press on the cover. If it feels brittle and hard, or if you can see tiny cracks in the outer cover (a sign of weather and ozone damage), the hose tube on the inside is likely also hardened. A hard tube will not compress and seal properly.
- Damage: Inspect the length of the hose for any cuts, abrasions, or kinks. A kink can damage the internal wire reinforcement and create a weak spot that will eventually fail under pressure.
If you have any doubt about the condition of a fitting component or the hose, do not use it. The cost of a new part is nothing compared to the cost of failure in the field.
Are You Exceeding the System’s Limits?
The hose assembly you made is perfect, but it keeps failing at the fitting after a few hours of hard use on a piece of demolition equipment. The hose seems to be “spitting out” of the fitting.
Every hose assembly has a maximum working pressure. If your system experiences pressure spikes, extreme vibrations, or high temperatures that exceed these limits, the mechanical grip of the reusable fitting will fail.
Respecting the Engineering
A reusable fitting is a robust piece of hardware, but it is not infallible. It’s an engineered component with defined limits. Leaks that appear during operation, especially catastrophic failures, are often a sign that these limits are being pushed too far.
Understanding Pressure
- Maximum Working Pressure: This is the highest pressure the hose assembly is rated to handle on a continuous basis. It is determined by the weakest link in the system—either the hose’s rating or the fitting’s rating, whichever is lower.
- Pressure Spikes (Hydraulic Shock): This is the silent killer of hose assemblies. When a valve closes suddenly or a cylinder bottoms out, it can create a momentary pressure wave that is many times higher than the system’s normal working pressure. If these spikes repeatedly exceed the fitting’s rating, they will slowly stretch the socket and loosen its grip on the hose, leading to failure. If you suspect this is happening, pressure monitoring or the installation of an accumulator may be necessary.
Other Environmental Factors
- Vibration and Side Loading: Reusable fittings are strong, but they are not designed to be structural members. Excessive machine vibration or a hose being pulled at a sharp angle (side-loading) puts immense stress on the fitting connection. This constant stress can fatigue the metal and work the hose loose over time. Ensure proper hose routing with clamps to isolate the fitting from vibration and strain.
- Temperature: Extreme heat can bake the rubber of the hose, making it hard and brittle. Extreme cold can make it stiff. In either case, the hose loses the pliability needed to maintain a seal under pressure. Always use a hose and fitting rated for the temperature range of your application.
Did You Back Off After Seating the Hose?
You meticulously followed every step, but the hose still weeps. You are sure you seated the hose all the way into the socket, so what could be wrong?
A common but subtle error is forgetting to back the hose off slightly after bottoming it out in the socket. This tiny step is crucial for allowing the nipple to properly expand and seal the inner tube.
The Final, Critical Adjustment
This small step is one of the most frequently overlooked details in the assembly instructions, yet it’s based on the core mechanics of how the fitting works. Let me explain exactly why it’s so important.
When you screw the hose into the socket, you are driving it forward until it makes firm contact with the internal “bottom” or shoulder of the socket. At this point, the hose is under compression. It is squeezed between the socket threads and the internal shoulder. If you immediately try to screw in the nipple, the nipple has to fight against this compression. It cannot properly enter, expand, and flare the inner tube of the hose to create the primary pressure seal. The nipple might feel tight, but it’s not because it has formed a seal; it’s tight because it’s jammed against a compressed, unyielding rubber tube.
By **backing the hose out a quarter-turn**, you relieve this compression. You create a tiny, essential space. This space gives the hose tube room to move and flare outwards as the nipple advances. This controlled flaring action is what presses the tube firmly against the inside wall of the socket, creating the robust, high-pressure seal you need. Skipping this step is like trying to hammer a nail into a piece of wood that has no room to expand—it just won’t seat properly. This simple quarter-turn is the difference between a frustrating leak and a perfectly sealed, professional-grade hose assembly.
Conclusion
A leaking reusable fitting is a solvable problem. By systematically checking for mismatches, ensuring perfect preparation and assembly, inspecting for damage, and respecting system limits, you can build reliable, leak-free hose assemblies every time.
At Topa, we manufacture our reusable hydraulic fittings and hoses to the highest standards of quality and precision. We provide clear instructions and the expert support you need to get the job done right. Partner with us for components you can trust.