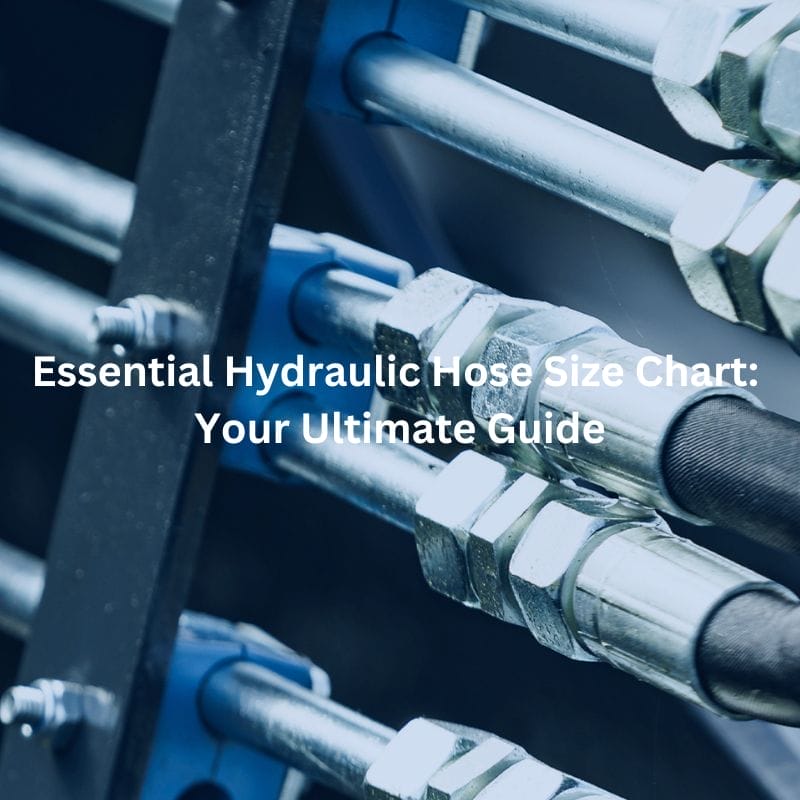
Essential Hydraulic Hose Size Chart: Your Ultimate Guide
Table of Contents
Introduction
One crucial aspect of these systems is the hydraulic hose, which ensures fluid transmission under varying pressures. Proper hose sizing is paramount to maintain system integrity and performance. This guide aims to provide comprehensive insights into hydraulic hose size charts, helping professionals make informed decisions for their hydraulic systems.
Understanding Hydraulic Hoses
Definition and Functions of Hydraulic Hoses
Hydraulic hoses are flexible tubes designed to convey hydraulic fluid between various components of a hydraulic system. These hoses play a crucial role in the operation of machinery and equipment by enabling the transfer of pressurized fluids to actuators, motors, valves, and other hydraulic components. The primary functions of hydraulic hoses include:
Fluid Conveyance: Transport hydraulic fluid from one component to another.
Pressure Tolerance: Withstand the system’s operational pressure without failure.
Flexibility: Allow movement between connected components without leakage or damage.
Vibration Damping: Absorb and reduce the effects of system vibrations and shocks.
Common Materials and Construction
Hydraulic hoses are typically constructed from several layers to ensure durability, flexibility, and resistance to various environmental factors. The most common materials used include:
Inner Tube: Made from synthetic rubber or thermoplastic, this layer must be compatible with the hydraulic fluid and designed to minimize permeation and degradation.
Reinforcement Layer: Composed of braided or spiral layers of textile, wire, or a combination of both, this layer provides the necessary strength to withstand high pressures.
Outer Cover: This protective layer, made from synthetic rubber, thermoplastic, or other durable materials, shields the hose from environmental damage, abrasion, chemicals, and UV exposure.

Types of Hydraulic Hoses
Hydraulic hoses are categorized based on their pressure-handling capacity and specific applications. The main types include:
Low-Pressure Hoses:
Applications: Suction and return lines in hydraulic systems.
Characteristics: Typically made with a single braid or textile reinforcement, these hoses are designed to handle lower pressures and are more flexible.
Medium-Pressure Hoses:
Applications: General industrial applications, such as hydraulic tools and machinery.
Characteristics: Often reinforced with one or two braids of wire, these hoses are suitable for moderate pressure ranges and provide a balance between flexibility and strength.
High-Pressure Hoses:
Applications: Heavy-duty applications, including construction equipment, mining, and industrial hydraulic systems.
Characteristics: Reinforced with multiple layers of high-tensile wire or spiral wound wire, these hoses can handle extremely high pressures and are designed for rigorous environments where durability and reliability are paramount.
Basics of Hydraulic Hose Sizing
Accurate hose sizing is critical to prevent issues such as hose failure or system inefficiency. Several key factors influence hose sizing:
Pressure
Working Pressure
Working pressure refers to the constant pressure that the hose will experience during regular operation. Selecting a hose with an appropriate working pressure rating is essential to ensure the hose can handle the system’s continuous pressure without degradation. This rating is typically specified by the hose manufacturer and must align with the hydraulic system’s requirements. For instance, if a system operates at a steady 2,000 psi, the hose chosen must have a working pressure rating that meets or exceeds this level.
Burst Pressure
Burst pressure is the maximum pressure that the hose can withstand before it fails or ruptures. This is significantly higher than the working pressure and serves as a safety threshold. Understanding the burst pressure is crucial for applications where pressure spikes might occur. For example, a hose with a working pressure of 2,000 psi might have a burst pressure of 8,000 psi, providing a fourfold safety margin. It’s vital to ensure the burst pressure is adequately higher than the maximum system pressure to prevent catastrophic failures.
Safety Margin
A safety margin, also known as a safety factor, is an additional buffer incorporated into the hose selection to account for unexpected pressure spikes and operational anomalies. This margin ensures that the hose can handle occasional over-pressurization without risking failure. Industry standards often recommend a safety factor of 4:1, meaning the burst pressure should be four times the working pressure. For instance, if the system’s maximum operating pressure is 2,000 psi, the hose should have a burst pressure of at least 8,000 psi to accommodate this safety factor.
Fluid Type
Chemical Compatibility
Chemical compatibility between the hydraulic hose material and the hydraulic fluid is crucial to prevent hose degradation and failure. Hydraulic fluids vary widely in their chemical composition, ranging from petroleum-based oils to synthetic fluids and water-based solutions. Each type of fluid interacts differently with hose materials, so selecting a hose that can withstand the specific chemical makeup of the fluid is essential.
Petroleum-Based Fluids: These are the most common hydraulic fluids and are compatible with many standard hose materials such as nitrile rubber and synthetic rubber.
Synthetic Fluids: These include phosphate esters and polyalphaolefins, which may require specialized hose materials like Viton or Teflon to ensure longevity and prevent chemical degradation.
Water-Based Fluids: These can be more corrosive and may require hoses made from materials with superior corrosion resistance, such as EPDM or thermoplastics.
Fluid Viscosity
Fluid viscosity, or the thickness of the hydraulic fluid, significantly affects the flow rate and pressure within the hose. Viscosity influences how easily the fluid can be pumped through the system and the level of friction generated within the hose.
Low Viscosity Fluids: These fluids flow more easily, reducing internal friction and pressure drop. However, they may require hoses with tighter seals to prevent leakage.
High Viscosity Fluids: These fluids are thicker and require more pressure to move through the system. They generate more friction, which can lead to higher pressure drops and increased wear on the hose.
Properly matching the hose to the fluid viscosity ensures efficient system operation and minimizes wear and tear on the hose. Consideration of fluid viscosity is critical for:
Flow Rate: Ensuring the hydraulic system delivers the correct amount of fluid to the actuators and other components.
Pressure Drop: Minimizing the loss of pressure as the fluid moves through the hose.
Heat Generation: Reducing friction-induced heat, which can degrade both the hose and the hydraulic fluid over time.
Environment
Hydraulic hoses often operate in harsh conditions, which can significantly affect their performance and lifespan. It is crucial to consider the environmental factors they will be exposed to when selecting a hose.
Abrasion
Abrasion is the physical wear and tear a hose experiences when it comes into contact with other surfaces. This can occur in tight spaces where hoses rub against machinery or other hoses. To mitigate abrasion:
Protective Sleeves: Use sleeves or wraps to shield the hose from contact with abrasive surfaces.
Abrasion-Resistant Materials: Select hoses made from materials designed to withstand wear, such as polyurethane or nitrile rubber with a textured outer cover.
Chemicals
Exposure to harsh chemicals or solvents can degrade hose materials, leading to leaks or failures. Important considerations include:
Chemical Compatibility: Ensure the hose material is resistant to any chemicals it may encounter. This might include specialized materials like PTFE (Teflon) or EPDM rubber.
Protective Coatings: Some hoses are available with special coatings that provide additional chemical resistance.
Weather Conditions
Hoses used outdoors must resist various weather conditions, including UV rays, ozone, moisture, and extreme temperatures. Consider the following:
UV Resistance: UV rays can cause hoses to crack and degrade over time. UV-resistant materials or protective coverings can extend hose life.
Ozone Resistance: Ozone can also cause cracking and degradation. Selecting hoses with ozone-resistant materials is crucial for outdoor applications.
Moisture and Temperature Extremes: Hoses must be able to operate in a wide range of temperatures and humidity levels. Materials like EPDM and silicone are known for their resistance to temperature extremes and moisture.
Flexibility Requirements
Flexibility is essential for hoses that need to bend and flex during operation. Considerations for flexibility include:
Bend Radius: The minimum radius a hose can bend without kinking. A smaller bend radius allows for tighter installations.
Material Flexibility: Hoses made from flexible materials like thermoplastics or silicone can handle frequent movement without cracking.
Reinforcement Type: The type and amount of reinforcement can affect flexibility. Braided hoses are generally more flexible than spiral-wound hoses.
Industry Standards
Industry standards, such as those from the Society of Automotive Engineers (SAE) and the International Organization for Standardization (ISO), provide guidelines for hose sizing to ensure safety and compatibility. These standards include:
SAE Standards: Specific guidelines for hose dimensions, performance, and testing methods.
ISO Standards: International guidelines that standardize hose specifications globally.
Example of Industry Standards:
SAE J517: Covers various types of hoses used in hydraulic systems.
ISO 18752: Specifies requirements for hoses used in hydraulic applications, focusing on performance across different pressure ranges.
Components of a Hydraulic Hose Size Chart
A hydraulic hose size chart is an essential tool for selecting the right hose for specific applications. It typically includes the following components:
Inner Diameter (ID)
The inner diameter (ID) is the internal size of the hose, and it is crucial for determining the fluid flow capacity. The correct ID ensures that the hose can handle the required flow rate without causing excessive pressure drops or fluid turbulence. If the ID is too small, it can restrict fluid flow, leading to inefficiencies and potential damage to the system. Conversely, an ID that is too large may result in unnecessary material costs and space usage.
Outer Diameter (OD)
The outer diameter (OD) is the external size of the hose, which is important for fitting compatibility. The OD includes the hose’s inner tube, reinforcement layers, and outer cover. Proper OD measurements ensure that the hose fits correctly with connectors, clamps, and other system components. Mismatched ODs can lead to fitting failures and leaks, compromising the system’s integrity and safety.
Length
The overall length of the hose ensures that it reaches between components without strain or unnecessary tension. Correct hose length is critical to prevent issues such as kinking, stretching, or excessive wear. When measuring for length, it is essential to consider the hose’s routing path, including bends and potential movement. A hose that is too short can cause stress on connections, while one that is too long may lead to entanglement or excessive sagging.
Bend Radius
The bend radius is the minimum radius the hose can bend without damage. This is essential for routing hoses in tight spaces and ensuring they can flex without kinking or cracking. A smaller bend radius allows for more flexibility in routing but must be balanced against the hose’s structural integrity. Understanding the bend radius helps in designing hose layouts that maintain system performance and reliability.
Measuring Hydraulic Hose Size
Accurate measurement of hydraulic hose size is essential to ensure compatibility and optimal performance of the hydraulic system. Here’s how to measure the different dimensions accurately:
Inner Diameter (ID)
To measure the inner diameter:
Use Calipers: Insert the caliper tips into the hose and expand them until they touch the inner walls. Ensure the calipers are perpendicular to the hose to avoid skewed measurements. Read the measurement displayed on the calipers for the inner diameter.
Hose ID Gauge: Alternatively, use a hose ID gauge, which is specifically designed to measure the inner diameter of hoses. Insert the gauge into the hose and read the size directly from the tool.
Accurate ID measurement is crucial to ensure the hose can handle the required fluid flow without causing excessive pressure drop. A proper ID measurement ensures that the hose will not restrict fluid flow, leading to system inefficiency or potential damage.

Outer Diameter (OD)
To measure the outer diameter:
Use Calipers: Place the caliper around the hose and measure the external width. Ensure the calipers are snug but not compressing the hose. This ensures an accurate measurement of the OD.
Multiple Points: Measure the OD at several points along the hose to account for any variations or deformities. This ensures that the hose’s outer diameter is consistent and will fit properly in its designated application.
Accurate OD measurement is important for fitting compatibility and ensuring the hose fits properly in the designated space without causing abrasion or wear. The OD measurement helps in selecting appropriate clamps, protective sleeves, and routing paths for the hose, ensuring it operates effectively within the hydraulic system.
Length
To measure the hose length:
Measure End-to-End: Use a measuring tape to measure the hose from one end to the other, including the fittings if they are part of the hose assembly.
Allow for Movement: Consider any movement or flexing the hose will need to perform during operation. This helps in ensuring that the hose length is appropriate to prevent strain or unnecessary tension.
Correct length measurement prevents issues like kinking, stretching, or sagging, ensuring the hose functions effectively and reliably within the system. A well-measured hose length contributes to the overall durability and performance of the hydraulic system.
Bend Radius
To determine the bend radius:
Bend the Hose: Gradually bend the hose to form a curve.
Check for Kinks or Damage: Measure the radius of the curve, ensuring it is within the hose’s specified minimum bend radius. Use a bend radius gauge or a template to verify the measurement.
Ensuring the correct bend radius is vital to maintaining the hose’s integrity and performance, especially in applications requiring flexibility and tight routing. Proper bend radius measurement helps in designing hose layouts that maintain system performance and reliability without compromising the hose’s structural integrity.
Conclusion
Proper sizing is crucial to ensure system efficiency, prevent failures, and extend the lifespan of hydraulic components. By considering factors such as pressure, temperature, fluid type, and environmental conditions, professionals can select the appropriate hoses for their specific applications. For further reading and detailed references, please contact Topa for more details!
FAQ
Why is proper hydraulic hose sizing important?
Proper sizing ensures efficient fluid flow, prevents leaks and failures, and extends the lifespan of hydraulic components.
How do I measure the inner diameter (ID) of a hydraulic hose?
Use calipers or a hose ID gauge to measure the inside width accurately.
What tools are needed to measure the outer diameter (OD) of a hose?
Use calipers to measure the external width, ensuring the measurement is accurate and consistent.
What should I consider when selecting a hydraulic hose?
Consider factors such as pressure, temperature, fluid type, environmental conditions, and compatibility with fittings.
How do I ensure the correct bend radius for a hydraulic hose?
Gradually bend the hose to its minimum bend radius and measure using a bend radius gauge or template to ensure it does not kink or get damaged.
Where can I find industry standards for hydraulic hose sizing?
Refer to guidelines from the Society of Automotive Engineers (SAE) and the International Organization for Standardization (ISO).


