Hydraulic Fitting Leak Repair banner Topa

Hydraulic Fitting Leak Repair: Troubleshooting Made Easy

Hydraulic fitting leak repair is crucial for maintaining system efficiency because even small leaks can lead to significant operational problems. A leak in your hydraulic system reduces the overall performance and wastes valuable hydraulic fluid, increases energy consumption, and causes unnecessary wear on components. Ignoring hydraulic leaks can result in severe consequences such as decreased productivity, system failures, environmental damage due to fluid spillage, and increased maintenance costs.

Common Hydraulic Fitting Issues That Lead to Leaks

Hydraulic fittings play a vital role in ensuring the proper functioning of hydraulic systems. However, over time, several common issues can cause these fittings to leak, leading to system inefficiencies and costly repairs. Understanding these issues is crucial to maintaining the integrity of your hydraulic system and preventing further damage. Let’s take a look at some of the most common causes of hydraulic fitting leaks.

Worn Out Seals and O-Rings

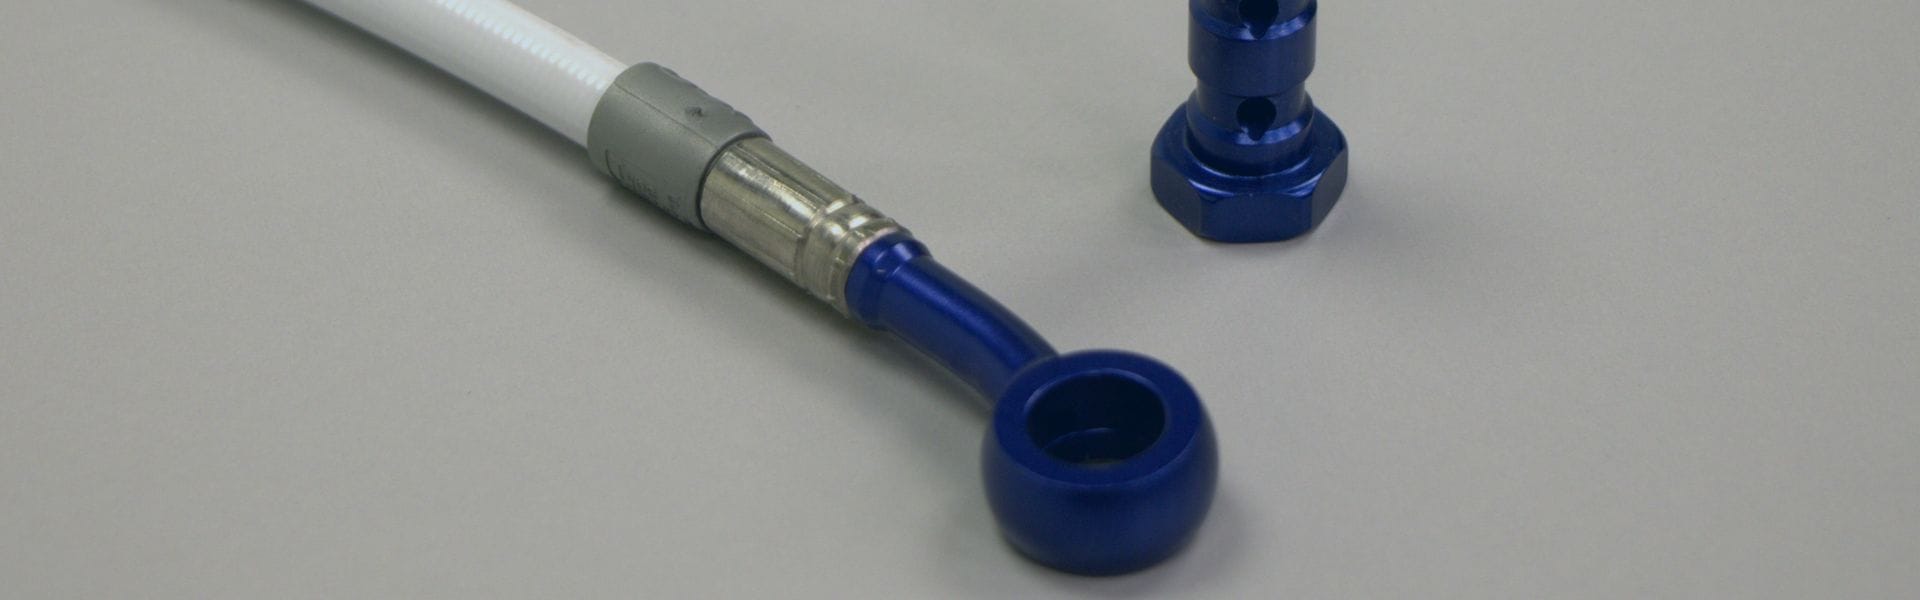
One of the primary culprits of hydraulic fitting leaks is the deterioration of seals and O-rings. These components are responsible for creating a tight seal between fittings, preventing fluid from escaping. Over time, seals can wear out due to constant pressure, heat, and friction, resulting in leaks that can compromise the system’s performance.

Incorrect Fitting Installation or Tightening

Improper installation or insufficient tightening of hydraulic fittings can lead to leaks at the connection points. If the fittings are not aligned correctly or tightened to the appropriate torque specifications, the seal can fail, allowing fluid to escape. It’s important to follow manufacturer guidelines to avoid these installation errors.

Corrosion and Damage to Hydraulic Fittings

Corrosion is a significant issue for hydraulic fittings, especially in environments exposed to moisture, chemicals, or extreme temperatures. Over time, corrosion can weaken the material of the fittings, creating cracks or holes where fluid can leak out. Regular inspection and maintenance are key to identifying and replacing corroded fittings before they cause major system problems.

Hydraulic Fitting Leaks Reasons

Misalignment and Vibration-Induced Leaks

Misalignment of hydraulic fittings, whether due to improper installation or system movement, can cause undue stress on the connections, leading to leaks. Additionally, vibration from the machinery can loosen fittings or cause micro-cracks to form over time. Ensuring that fittings are properly aligned and secured can prevent these types of leaks.

How to Detect a Hydraulic Fitting Leak Early

Early detection of hydraulic fitting leaks is essential for maintaining the performance and longevity of your hydraulic system. By identifying leaks early, you can prevent costly repairs and avoid system failures. There are several signs and methods to detect hydraulic leaks before they become a major issue. Let’s explore how to spot hydraulic fitting leaks early.

Symptoms of Hydraulic Fitting Leaks

The most obvious symptom of a hydraulic fitting leak is visible fluid loss. However, other subtle signs can indicate a leak before it becomes visible:

Drop in System Pressure: A decrease in hydraulic pressure often signals a leak, as the system struggles to maintain the required pressure due to fluid loss.

Unusual Noises: A hissing or whistling sound from the fitting area could indicate escaping hydraulic fluid.

Fluid Stains: Look for oil stains or puddles near fittings or joints. Over time, even small leaks can accumulate and create noticeable marks on the surface.

Excessive Heat: Leaks can cause the hydraulic system to overheat, as the system works harder to compensate for lost fluid.

Increased System Wear: A loss of fluid can lead to less lubrication, causing components to wear down faster than usual.

Tools and Techniques for Leak Detection

Detecting hydraulic fitting leaks requires the right tools and techniques. Here are some common methods for identifying leaks in your system:

Visual Inspection: Regularly inspect hydraulic fittings for visible signs of leakage or wear. This is the simplest method but can miss smaller leaks that are harder to detect.

Ultrasonic Leak Detectors: These devices can pick up high-frequency sounds emitted by small leaks, even if the fluid isn’t visible to the naked eye.

Dye Injection: Introducing a colored dye into the system allows you to trace the leak’s source by observing where the dye escapes.

Soap Solution Method: Applying a soap solution to fittings and connections can create bubbles when there is a leak. This method is effective for pinpointing small leaks.

Using Hydraulic Pressure Testing to Spot Leaks

Hydraulic pressure testing is one of the most reliable ways to detect leaks, especially for those hidden in hard-to-see areas. Here’s how it works:

Applying Pressure: The system is pressurized beyond its normal operating range (within safe limits) to reveal any leaks that wouldn’t normally show up at standard pressures.

Monitoring Pressure Drops: A drop in system pressure during testing is a clear indication of a leak. This method helps locate leaks that may not be visible or audible during regular operations.

Leak Isolation: Pressure testing allows you to isolate specific sections of the hydraulic system, making it easier to identify the exact location of the leak and take targeted action.

Step-by-Step Guide to Hydraulic Fitting Leak Repair

Repairing hydraulic fitting leaks efficiently requires a systematic approach to ensure that the root cause is addressed and the system is restored to its optimal performance.

Assessing the Problem: Visual Inspection and Pressure Testing

The first step in repairing a hydraulic fitting leak is identifying the source of the issue. Here’s how to assess the problem effectively:

Visual Inspection: Start by visually inspecting all hydraulic fittings, hoses, and connections. Look for obvious signs of fluid leakage, corrosion, damage, or wear around the fittings. Check for any pooling fluid or stains, which are common indicators of a leak.

Pressure Testing: After a visual inspection, perform a pressure test on the hydraulic system to check for leaks that may not be visible during normal operation. Apply pressure to the system (within safe limits) and monitor the pressure gauge. A significant drop in pressure indicates a leak, allowing you to isolate the problematic area.

Listen for Sound: Use a stethoscope or ultrasonic leak detector to listen for any hissing or high-frequency sounds emitted by small leaks. This technique can be especially helpful in finding hard-to-spot leaks.

By combining these methods, you can effectively locate the general area where the leak is occurring.

Identifying the Type of Leak: Pinpointing the Exact Location

Once you’ve identified that a leak exists, it’s crucial to pinpoint its exact location to proceed with the repair. Here’s how to go about it:

Check the Fittings and Connections: Focus on the connections where hoses meet fittings, as these are common areas for leaks. Look for damaged seals, O-rings, or threads that might not be properly sealed.

Use a Leak Detection Dye: Injecting a leak detection dye into the hydraulic system can help you pinpoint the exact location of the leak. The dye will escape with the fluid, allowing you to visually track the leak with a UV light.

Soap Solution: For minor leaks, applying a soap solution to fittings can help identify the precise location. If bubbles form, it indicates a leak at that specific point.

Pressure Hold Test: Perform a pressure hold test, where you apply pressure to the system and hold it for a set amount of time. If the pressure drops, the area where the leak occurs can be found by isolating sections of the system.

Once you’ve accurately identified the exact location of the leak, you can decide on the appropriate repair method.

seal on Brass Fittings

Choosing the Right Sealing Method for Your Fitting

After pinpointing the leak, the next step is choosing the right sealing method. The best approach depends on the type of fitting and the severity of the leak. Here are a few options:

O-Ring Replacement: If the leak is caused by a damaged or worn-out O-ring, replacing the O-ring with a new, compatible one is often the best solution. Ensure that the new O-ring is the right size and made of the appropriate material for the system’s operating conditions.

Sealant Application: For minor leaks, a hydraulic system sealant may be sufficient. Choose a high-quality sealant that’s designed for the specific material and pressure of your hydraulic fittings. Apply the sealant carefully to prevent excess from contaminating the system.

Thread Sealing Tape or Paste: For threaded hydraulic fittings, using a thread sealant or PTFE tape can help prevent leaks. Make sure to apply the right amount of sealant to the threads, and avoid over-tightening, which can damage the fitting.

Fitting Replacement: If the fitting is severely corroded or damaged, the best option may be to replace it entirely. Over time, some fittings lose their integrity and can’t be repaired effectively. In these cases, replacing the fitting ensures a longer-lasting solution.

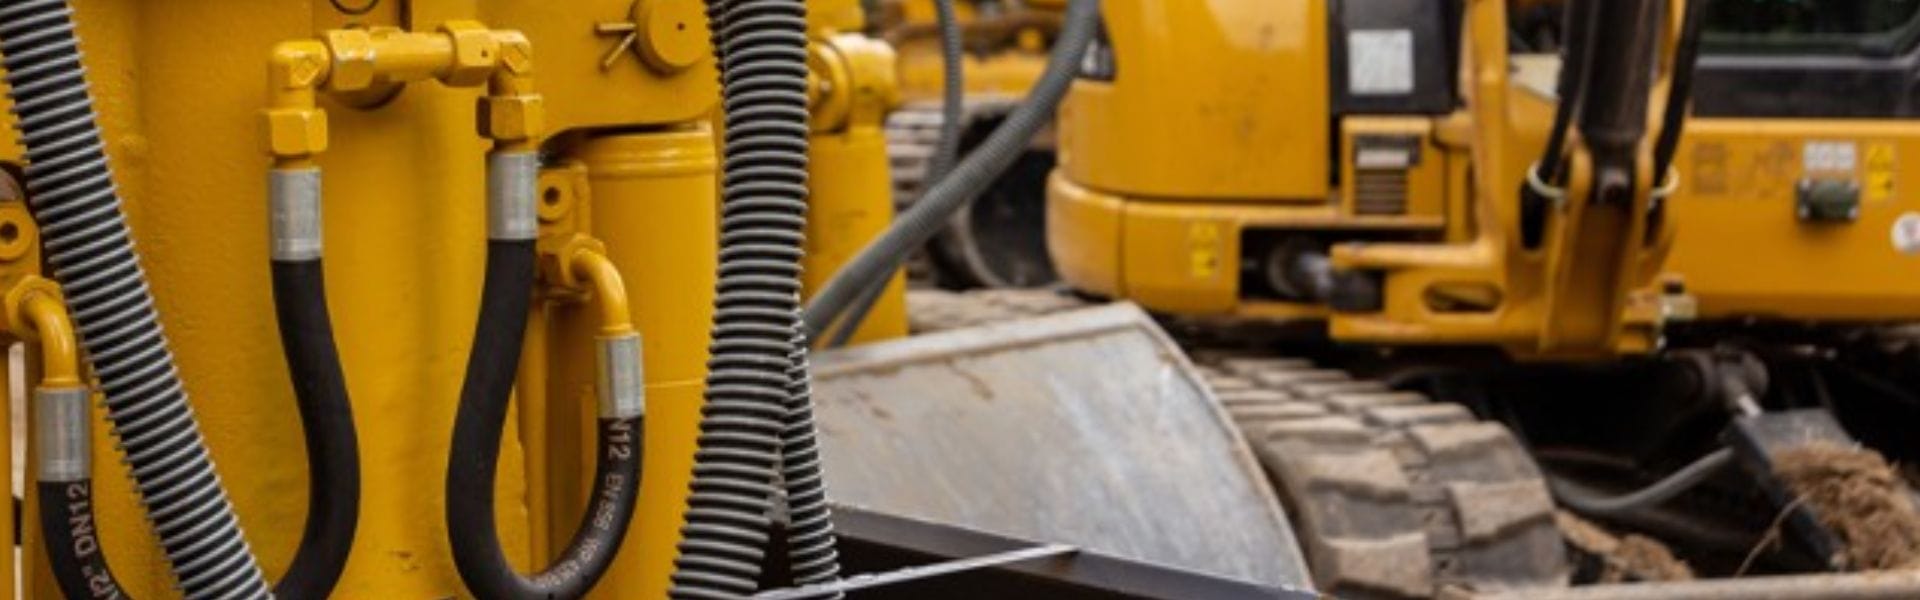
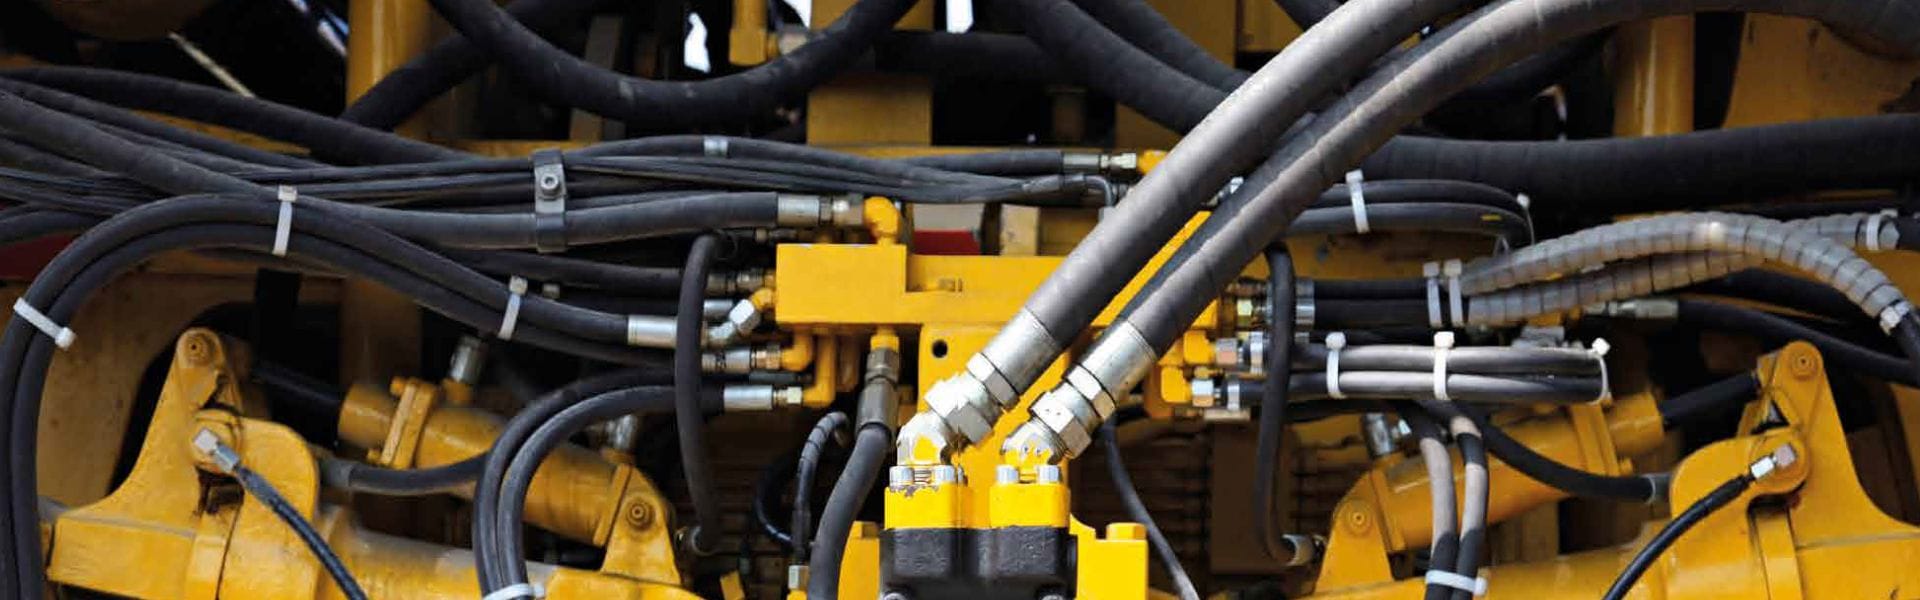
Fixing Hydraulic Hose Leaks: Quick and Effective Solutions

Hydraulic hose leaks can cause serious disruptions to your system’s performance, leading to fluid loss, pressure drops, and potential damage to other components. Addressing hose leaks promptly is essential for maintaining system efficiency and minimizing downtime.

Identifying Hose Failures That Lead to Leaks

The first step in fixing hydraulic hose leaks is identifying the specific cause of failure. Some common reasons for hose leaks include:

Abrasion and Wear: Hoses can wear out due to constant movement, friction, or contact with sharp edges, leading to punctures or cuts.

Hydraulic Fluid Contamination: Contaminants, such as dirt or moisture, can damage the hose material and cause leaks.

Excessive Pressure or Temperature: Over-pressurization or exposure to extreme temperatures can weaken the hose, causing it to rupture or crack.

Improper Installation: Incorrect fitting or hose routing can result in kinks, bends, or stress points that lead to leaks.

By carefully inspecting hoses for these issues, you can quickly identify which hoses need to be repaired or replaced.

Tools for Hydraulic Hose Repair

Having the right tools for hydraulic hose repair makes the job faster, safer, and more effective. Some essential tools include:

Hose Cutter: A clean, straight cut is essential for proper fitting and sealing, so a quality hose cutter is a must-have tool.

Crimping Tool: Used to attach hydraulic hose fittings securely, ensuring there are no leaks at the connections.

Hose Fitting Inserts: Inserts help prevent the hose from collapsing under pressure, providing a better seal.

Pressure Testing Kit: A pressure testing kit helps verify whether the hose repair is successful by confirming that the system is holding pressure properly.

Cleaning Tools: Brushes, cleaning solvents, and cloths to remove contaminants from hoses and fittings before reassembly.

These tools ensure that hydraulic hose repairs are carried out effectively and safely.

When to Replace vs. Repair a Hydraulic Hose

In some cases, repairing the hose might not be enough, and replacing it is the better solution. Here’s how to decide:

Repair: If the leak is minor (such as a small puncture or small crack in the outer layer), and the hose material is still intact, you can repair it by replacing the fittings or patching the affected area.

Replace: If the hose is excessively worn, cracked, or corroded, or if the leak is in an area that cannot be easily repaired, it’s best to replace the entire hose. Always replace hoses that show significant signs of wear, as continuing to use them can result in catastrophic system failure.

Sealing Hydraulic Fittings: The Ultimate Leak Prevention Strategy

Sealing hydraulic fittings properly is key to preventing leaks and ensuring the hydraulic system operates at peak efficiency. Whether you’re installing new fittings or repairing existing ones, the right sealing method will keep your system leak-free.

Choosing the Right Sealant for Hydraulic Fittings

Choosing the right sealant is critical for ensuring a secure and long-lasting seal. Here are some things to consider when selecting a sealant for hydraulic fittings:

Compatibility: Ensure that the sealant you choose is compatible with the hydraulic fluid and the material of the fitting. For example, certain sealants may not work well with petroleum-based oils or may degrade when exposed to specific chemicals.

Pressure Rating: The sealant must be able to withstand the system’s pressure without breaking down or leaking. Check the pressure rating of the sealant to ensure it can handle the conditions of your hydraulic system.

Temperature Tolerance: The sealant should also be able to tolerate high temperatures, especially in systems that operate in extreme conditions or that involve high heat generation.

Some commonly used sealants for hydraulic fittings include PTFE thread sealant tape, anaerobic sealants, and thread sealant pastes that are designed specifically for hydraulic systems.

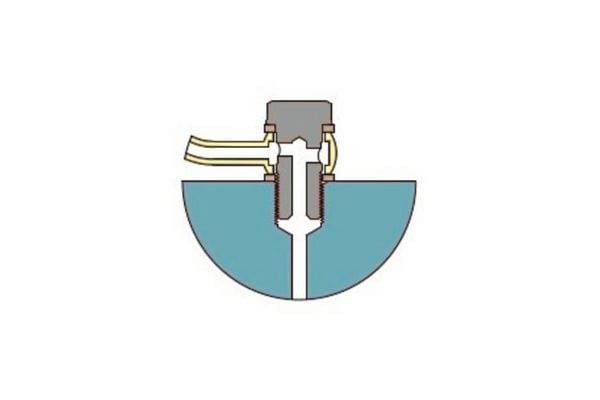
How to Properly Seal Hydraulic Fittings to Prevent Leaks

Properly sealing hydraulic fittings requires the following steps:

Clean the Surface: Before applying sealant, clean the threads and surfaces of the hydraulic fitting and hose to remove any debris, dirt, or old sealant. This ensures a proper bond and prevents contamination.

Apply the Sealant: For thread fittings, apply a thin, even layer of sealant to the male threads. For O-rings and other seals, lightly lubricate the seal to ensure a proper fit without over-applying.

Tighten the Fittings: Tighten the fittings according to manufacturer specifications. Avoid over-tightening, as this can damage the fitting or cause excess strain on the seal.

Check for Leaks: After tightening, perform a pressure test to ensure the system holds pressure and there are no signs of leaks around the fittings.

By carefully following these steps, you can prevent leaks and maintain a reliable hydraulic system.

Common Sealant Mistakes and How to Avoid Them

Even the best sealant won’t work if it’s not applied properly. Here are some common mistakes to avoid when sealing hydraulic fittings:

Overuse of Sealant: Applying too much sealant can lead to excess material that can contaminate the hydraulic fluid or cause clogs in the system. Always use the recommended amount for a clean and effective seal.

Using the Wrong Sealant Type: Not all sealants are designed for high-pressure or high-temperature environments. Make sure the sealant is suitable for your system’s specific conditions.

Not Cleaning the Fittings First: Applying sealant to a dirty or corroded surface will prevent the sealant from bonding properly, leading to leaks. Always clean and inspect the fitting before sealing.

Under-Tightening Fittings: Even with the right sealant, a loose fitting won’t create a proper seal. Be sure to tighten the fittings according to the manufacturer’s torque specifications.

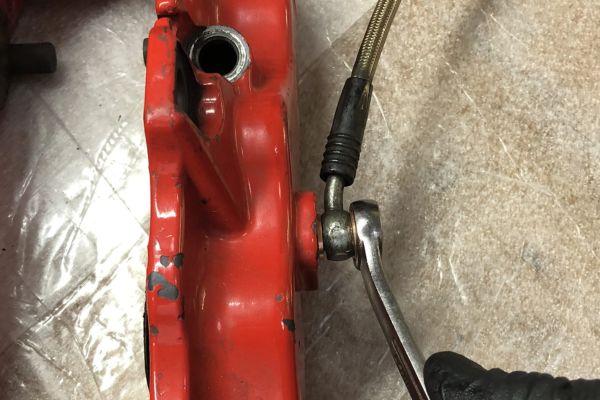
Hydraulic Coupling Leak Repair: Specialized Techniques

Hydraulic couplings are integral components in hydraulic systems, used to connect hoses and pipes to allow the flow of fluid. When a leak occurs at a coupling, it can cause significant performance issues and pose safety risks. Repairing hydraulic coupling leaks requires specific knowledge and techniques to ensure that the issue is resolved effectively.

What Are Hydraulic Couplings and Why They Leak

Hydraulic couplings are mechanical devices used to join two hydraulic lines or components, ensuring a secure and leak-free connection. They are typically made of materials such as steel, stainless steel, or brass, and come in various types, including threaded, quick-connect, and flanged couplings. While these components are designed to withstand high pressure and stress, several factors can cause leaks:

Worn Seals or O-Rings: Seals and O-rings inside the coupling may degrade over time due to wear, chemical exposure, or high temperature, leading to fluid leaks.

Improper Installation: Incorrectly installed couplings, whether overtightened or cross-threaded, can cause leaks at the connection points.

Corrosion and Wear: Exposure to harsh environmental conditions, including moisture, salt, or chemicals, can cause couplings to corrode and weaken, leading to leakage.

Over-Pressurization: Excessive pressure in the hydraulic system can exceed the coupling’s capacity, causing deformation or rupture, which leads to leaks.

By understanding these common causes, you can more easily diagnose and address hydraulic coupling leaks in your system.

How to Repair Hydraulic Coupling Leaks Quickly

Repairing a hydraulic coupling leak requires a quick and effective approach to minimize system downtime. Here are the steps to follow for a speedy repair:

Shut Down the System: Before attempting any repairs, ensure that the hydraulic system is shut off and pressure is released from the lines to avoid accidental fluid spillage or injury.

Identify the Leak Source: Perform a thorough inspection to locate the exact point of the leak. Look for visible signs of fluid escaping from the coupling, check for damaged seals or O-rings, and assess whether there is any corrosion or physical damage.

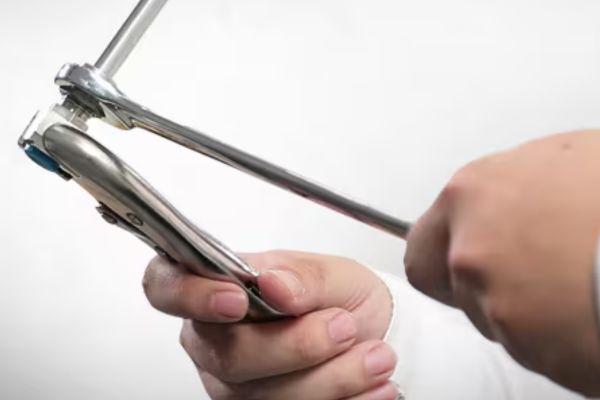
Disassemble the Coupling: If the leak is due to worn seals or O-rings, carefully disassemble the coupling. Use appropriate tools, such as wrenches or pliers, to remove the coupling without damaging it. Take note of the coupling’s orientation to ensure proper reinstallation.

Replace Seals or O-Rings: If the leak is caused by a damaged seal, replace it with a new, compatible one. Ensure that the new O-ring or seal is correctly sized and made of material suitable for the hydraulic fluid and system pressure.

Clean and Inspect the Components: Clean the internal and external surfaces of the coupling and any other components that are part of the connection. Inspect the coupling for cracks, wear, or corrosion, and replace any parts that appear damaged beyond repair.

Reassemble the Coupling: Reassemble the coupling, ensuring that all parts are aligned correctly and tightened to the recommended torque specification. Use a thread sealant or O-ring lubricant to prevent future leaks.

Pressure Test the System: After reassembly, perform a pressure test to check for leaks. If the pressure holds and no fluid escapes from the repaired area, the repair has been successful.

Common Mistakes in Hydraulic Coupling Leak Repair

When repairing hydraulic coupling leaks, there are a few common mistakes that can hinder the repair process or lead to further damage. Here’s what to avoid:

Over-tightening the Coupling: One of the most common mistakes is over-tightening the coupling during reassembly. This can damage the coupling threads, O-rings, or seals, causing future leaks or even breakage. Always follow the manufacturer’s recommended torque settings.

Using Incompatible Seals or O-Rings: Using the wrong type or size of seal or O-ring can prevent the coupling from sealing properly, leading to continued leaks. Always use the manufacturer-recommended parts for replacements.

Neglecting to Inspect for Other Issues: Sometimes, a coupling leak may be a symptom of a larger issue, such as excessive system pressure or poor alignment. Failing to check the entire system could result in the same problem recurring shortly after repair.

Not Cleaning the Components Thoroughly: Dirt, debris, or old sealant left in the coupling can compromise the new seal, leading to leaks. Ensure that all parts are thoroughly cleaned before reassembly.

Conclusion

Maintaining a leak-free hydraulic system is vital for productivity, safety, and cost-efficiency. By taking a proactive approach to leak prevention and repair, and staying on top of regular inspections and maintenance, you ensure that your system performs at its best, with minimal downtime.


FAQ

What causes hydraulic fitting leaks?

Hydraulic fitting leaks are usually caused by worn-out seals or O-rings, incorrect installation, over-tightening, corrosion, or excessive pressure. Proper maintenance and using high-quality components can help prevent leaks.

How can I detect a hydraulic fitting leak early?

Early detection can be done through visual inspection, a pressure test, applying a leak detection dye, or listening for leaks using ultrasonic tools. These methods can help identify leaks before they cause major damage.

What are the best tools for repairing hydraulic fitting leaks?

Essential tools include a hose cutter, crimping tool, pressure testing kit, wrenches, and cleaning supplies. These tools help ensure a quick and efficient repair process.

Can I repair a hydraulic fitting leak myself?

Yes, many hydraulic fitting leaks can be repaired with the right tools and knowledge. However, for major leaks or system-wide issues, it’s advisable to consult a professional to ensure proper repairs and avoid further damage.

When should I replace a hydraulic hose instead of repairing it?

If the hose is severely worn, cracked, or damaged beyond repair, it’s best to replace it. A minor puncture or leak can be repaired, but extensive wear or corrosion typically requires full hose replacement to maintain system safety.

How can I prevent hydraulic fitting leaks in the future?

To prevent future leaks, regularly inspect fittings, hoses, and seals. Proper installation, correct torque settings, and routine maintenance checks will help avoid leaks and ensure a reliable hydraulic system.

How to Install a Hydraulic Hose Banjo Fitting Easily banner

How to Install a Hydraulic Hose Banjo Fitting Easily

The purpose of the banjo fitting is to create a secure, leak-proof connection between hydraulic hoses and the equipment they’re attached to. It allows hydraulic fluid to flow from one part of the system to another while preventing spills or leaks. The banjo fitting’s design also enables tight, compact installations in areas with limited space, making it especially useful in complex machinery.

Key Components of a Hydraulic Hose Banjo Fitting

Understanding the banjo fitting structure

A hydraulic hose banjo fitting is a unique type of connector used in hydraulic systems. The fitting typically has a flat, circular design with a hole in the middle to allow hydraulic fluid to flow through. This structure is what gives it the “banjo” shape, which is similar to the body of a musical instrument. The fitting usually consists of three main parts:

Body: The main part of the banjo fitting, typically made of stainless steel, brass, or aluminum, that houses the hydraulic fluid passage.

Bolt: A bolt runs through the center of the fitting, securing it to the connected components. It ensures a tight, leak-free seal when tightened to the correct torque specifications.

Sealing surfaces: The sealing surfaces, typically located on the fitting and the mating part (like a hydraulic flange or the hose itself), are critical for preventing fluid leaks. These surfaces may have an O-ring or a flat washer to help ensure a tight, secure seal.

This structure allows the banjo fitting to connect hoses and other hydraulic components even in tight spaces, where a traditional straight fitting may be difficult to install.

What is a banjo bolt and how it works

The banjo bolt is an essential part of the banjo fitting assembly. It is a specially designed bolt that passes through the center of the fitting and helps secure it to the hose or the equipment in the hydraulic system. The banjo bolt is crucial for:

Securing the fitting: The banjo bolt tightens the fitting into place, ensuring a secure connection between the hose and the equipment.

Allowing fluid flow: The bolt has a hole through its length, allowing hydraulic fluid to pass through it. This hole aligns with the central passage of the banjo fitting, enabling fluid transfer between the connected parts.

Creating a seal: When tightened, the bolt presses against the sealing surfaces of the fitting and the connected components, preventing fluid leaks.

How to Install a Hydraulic Hose Banjo Fitting

Preparing the hose and fitting for installation

Before beginning the installation of a hydraulic hose banjo fitting, it’s essential to properly prepare both the hose and the fitting to ensure a smooth and secure connection. Follow these steps:

Select the right hose: Ensure the hydraulic hose is the correct size, material, and pressure rating for the application. The hose should be compatible with both the fitting and the hydraulic system.

Cut the hose to the proper length: Measure and cut the hydraulic hose to the required length, ensuring it fits neatly between the components that will be connected.

Deburr the hose ends: After cutting the hose, use a deburring tool to smooth out any rough edges. This helps prevent damage to the fitting or seals during installation.

Inspect the fitting: Ensure the banjo fitting is clean, free from debris, and in good condition. Check for any cracks, wear, or signs of corrosion that could affect the connection’s integrity.

How to clean and inspect hydraulic components

Proper cleaning and inspection of hydraulic components, including the hose, fitting, and associated parts, are critical to prevent contamination and ensure the longevity of the hydraulic system. Here’s how to do it:

Clean the hose: Use a lint-free cloth and a solvent (approved for hydraulic systems) to clean the inside and outside of the hydraulic hose. Any dirt or debris left inside the hose can obstruct fluid flow and cause damage.

Inspect the fitting: Visually inspect the banjo fitting for any signs of damage, such as cracks, worn threads, or deformation. If the fitting is damaged or corroded, replace it before installation.

Check the sealing surfaces: Ensure that the sealing surfaces (such as the O-ring or washer) on both the fitting and the hose are intact. These surfaces need to be free from nicks, cuts, or debris to create a proper seal.

Inspect the banjo bolt: Check the banjo bolt for any damage, corrosion, or wear. A damaged bolt may not provide a secure connection or could lead to leaks.

Install Hydraulic Hose Banjo Fitting

Attaching the banjo fitting to the hose assembly

Once you’ve prepared the hose and fitting, it’s time to attach the banjo fitting to the hose assembly. Follow these steps:

Align the fitting: Position the banjo fitting correctly over the hose end. Ensure that the sealing surfaces are properly aligned with the corresponding parts of the hose assembly. Be mindful of the fitting’s orientation to avoid twisting the hose during installation.

Insert the banjo bolt: Insert the banjo bolt through the center of the fitting and the hydraulic hose. The bolt should pass through the fitting and the hose end and align with the threaded hole on the connecting equipment or component.

Add sealing washers or O-rings: If your banjo fitting requires sealing washers or O-rings, place them on either side of the fitting to ensure a secure, leak-proof connection. Some banjo fittings use metal sealing washers, while others rely on rubber O-rings to form the seal.

Position the assembly: Gently position the entire assembly into place on the equipment or component you’re connecting to. Ensure that the fitting is aligned and properly seated to prevent stress on the hose and fitting.

Common Mistakes to Avoid When Installing a Banjo Fitting

Installing a hydraulic hose banjo fitting might seem straightforward, but even small mistakes during the process can lead to system failure, leaks, or reduced performance. Here are some of the most common mistakes to avoid when installing a banjo fitting:

Over-tightening or Under-tightening the Banjo Bolt

One of the most critical steps in installing a banjo fitting is tightening the banjo bolt to the correct torque. Over-tightening or under-tightening the bolt can lead to serious issues.

Over-tightening: If you apply too much torque to the banjo bolt, it can damage the threads on the fitting or the bolt, strip the connection, or cause excessive pressure on the sealing surfaces. This may lead to cracks, leaks, or even breakage of the bolt. Additionally, over-tightening can distort the hose, leading to stress fractures and ultimately reducing its lifespan.

Under-tightening: On the other hand, not tightening the banjo bolt enough can result in a loose connection. This creates gaps between the sealing surfaces, which can lead to hydraulic fluid leaks, loss of pressure, and compromised performance of the hydraulic system. Under-tightening also increases the risk of the banjo bolt loosening over time due to vibrations or pressure changes.

Failing to Properly Align the Hose

Improper hose alignment is another common mistake during the installation of a banjo fitting. If the hose is not properly aligned, it can cause several issues:

Twisting the hose: If the hose is twisted when the fitting is installed, it can create internal stress within the hose, leading to premature wear, hose failure, or restricted fluid flow. Twisting the hose also increases the risk of leaks due to poor fitting alignment.

Incorrect fitting orientation: If the banjo fitting is not aligned correctly with the attached equipment or hose, it can cause excessive pressure on the connection, leading to leaks, component damage, or performance issues. The hose may also rub against other parts of the machine, causing abrasion and wear over time.

Kinks and bends: A poorly aligned hose can also result in sharp bends or kinks in the hose. These issues can restrict fluid flow and damage the hose, reducing system efficiency.

Ignoring Sealant and Sealing Techniques

Hydraulic systems rely heavily on sealing to maintain pressure and prevent leaks. Failing to use the correct sealant or ignoring sealing techniques can result in poor sealing, fluid leaks, or compromised system performance.

Using the wrong sealant: It’s essential to use the right sealant or gasket material to ensure a secure, leak-free connection. Some banjo fittings require O-rings, while others may use metal washers or gaskets. Using the wrong type of sealant can lead to improper sealing and leaks under high pressure.

Improper installation of seals: Even when the correct sealant is used, improper installation can lead to seal failure. If the O-ring, gasket, or washer is not seated properly or is damaged during installation, it won’t form a proper seal. This could result in leaks, reduced fluid pressure, or system failure.

Over-tightening seals: Some people believe that over-tightening the banjo fitting will improve the seal, but this can damage the sealant material. Too much pressure can distort or tear O-rings and washers, leading to leaks and compromising the fitting’s performance.

Additional Tips to Avoid Installation Mistakes:

Check for debris: Always ensure the hose and fitting are clean and free from dirt, debris, or metal shavings before installation. These contaminants can damage the sealing surfaces and cause leaks or performance issues.

Verify fitting compatibility: Double-check that the banjo fitting is the right size and material for your hydraulic system. Using the wrong fitting can lead to leaks, poor performance, or even damage to your hydraulic equipment.

How to Ensure a Leak-Free Hydraulic Hose Banjo Fitting

Hydraulic systems depend on the ability to maintain pressure and avoid fluid loss. Even small leaks can lead to system inefficiency, increased maintenance costs, and safety hazards. Ensuring a leak-free hydraulic hose banjo fitting is critical to achieving optimal system performance and reliability. Here’s how to make sure your installation is airtight.

The Importance of Sealing in Hydraulic Systems

Sealing plays a crucial role in maintaining the integrity and efficiency of a hydraulic system. In a hydraulic circuit, the goal is to create a closed-loop where fluid is transmitted under pressure from one component to another. Any leak, no matter how small, can:

Reduce system pressure: Leaks can cause a drop in the operating pressure, which affects the performance of hydraulic machinery.

Waste hydraulic fluid: Hydraulic fluid is costly, and any leak wastes precious resources. A leak also contaminates the work environment, leading to additional cleanup costs.

Cause safety hazards: Leaking hydraulic fluid can pose serious safety risks, especially in high-pressure systems. It can create fire hazards, contaminate equipment, and damage the surrounding environment.

Damage components: When fluid leaks out of a connection, air may enter the system, which can lead to cavitation, erosion, or even complete failure of hydraulic components.

Proper sealing ensures that hydraulic fluid is contained under pressure, optimizing the system’s performance and lifespan. This is why achieving a tight, secure seal in the hydraulic hose banjo fitting is so essential.

Using the Right Sealing Materials for Banjo Fittings

Selecting the appropriate sealing materials is a key step in ensuring a leak-free connection. Different sealing materials are designed to handle various pressures, temperatures, and fluid types. Here’s what you need to consider:

O-rings: Many banjo fittings use O-rings to create a tight seal between the fitting and the connected component. O-rings are made from materials like rubber, elastomers, or synthetic compounds that provide flexibility and excellent sealing capabilities. However, it’s essential to use the right O-ring material for the hydraulic fluid in use, as some materials degrade when exposed to certain chemicals or temperatures.

Material selection: Nitrile rubber (NBR) is commonly used for petroleum-based fluids, while Viton is ideal for higher temperatures or aggressive fluids. Fluorocarbon O-rings are often used for extreme chemical compatibility.

    Sealing Washers: Some banjo fittings require metal or composite sealing washers instead of O-rings. These washers create a metal-to-metal seal and are often used in high-pressure applications. Copper washers are common because they are malleable and conform to surfaces easily, providing a reliable seal.

    Ensure proper washer size: Always use washers that match the size of the banjo fitting and the corresponding mating part. A washer that is too large or too small can cause improper sealing and lead to leaks.

      Thread Sealant or PTFE Tape: In some instances, thread sealants or PTFE tape (Teflon tape) may be used to help seal the threads of the banjo bolt. However, this is typically not needed for banjo fittings with sealing washers or O-rings. Overuse of sealant can also make it harder to achieve the correct torque and may interfere with proper sealing.

      Use sparingly: When using thread sealant, make sure to apply a small amount to the threads only. Avoid getting sealant on the sealing surfaces, as it could prevent a proper seal and lead to leaks.

        Gaskets: Some applications may require gaskets in addition to or instead of washers and O-rings. Gaskets are used to create a larger sealing surface and are typically made from rubber, cork, or fiber material. Gaskets help distribute the load more evenly across the sealing surfaces, reducing the risk of leaks.

        install banjo bolt fitting

        Banjo Fitting Torque Specs for Leak Prevention

        Applying the correct torque to the banjo bolt is crucial for ensuring a leak-free connection. Both over-tightening and under-tightening the bolt can cause leaks. Here’s how to get it right:

        Manufacturer’s Torque Specifications: Always refer to the manufacturer’s recommended torque specifications for the banjo bolt. The correct torque ensures the fitting is tight enough to prevent leaks but not so tight that it damages the fitting or sealing components. These specifications are usually provided in foot-pounds (ft-lbs) or Newton-meters (Nm).

        Typical torque range: Banjo bolts are typically torqued in the range of 20-60 ft-lbs, but it is crucial to verify the exact specifications for your specific fitting and application.

          Use a Torque Wrench: To ensure that the correct torque is applied, always use a calibrated torque wrench. This tool allows you to apply the precise amount of force without over-tightening or under-tightening the bolt. It is the best way to achieve consistent, accurate torque across all connections.

          Tighten in Steps: Rather than tightening the banjo bolt all at once, apply torque gradually in increments. Start by tightening the bolt slightly, then gradually increase the torque until it reaches the desired setting. This helps ensure that the sealant materials (such as O-rings or washers) seat properly without being over-compressed.

          Check for Leaks After Installation: After tightening the bolt, always check for leaks. You can do this by applying a small amount of hydraulic fluid around the connection or using a leak detection fluid. If you notice any fluid seeping from the connection, stop and recheck the torque.

          Re-torque if necessary: If the fitting leaks after initial tightening, it’s possible that the bolt wasn’t torqued enough or that the sealant material was not seated properly. Re-torque the bolt to the correct specification and check again.

            Ensure Even Torque Distribution: When tightening the banjo bolt, make sure to apply pressure evenly. Uneven torque application can distort the fitting or damage the seals, increasing the likelihood of leaks.

            Banjo Fitting Torque: Getting It Right for Optimal Performance

            When it comes to hydraulic systems, banjo fitting torque is crucial for ensuring optimal performance, reliability, and safety. Torque refers to the amount of rotational force applied to tighten the banjo bolt, which secures the fitting to the hydraulic hose and the corresponding equipment. Applying the correct amount of torque prevents leaks, maintains system pressure, and extends the life of the components.

            Understanding the Correct Banjo Fitting Torque Specs

            The correct torque specs for a banjo fitting depend on several factors, including the size and material of the fitting, the hose, and the hydraulic system. Each manufacturer will provide torque specifications tailored to their components, but here’s what you need to know to understand torque requirements:

            Manufacturer Recommendations: Always refer to the manufacturer’s guidelines for the specific banjo fitting you are using. These specifications will provide the exact torque range (usually in foot-pounds or Newton-meters) for the banjo bolt. For example, a typical torque spec might range from 20-60 ft-lbs, but it can vary depending on the application and fitting size.

            Size of the Banjo Bolt: The torque specification often depends on the diameter and threading of the banjo bolt. Larger bolts typically require higher torque values, while smaller bolts require less force. Be sure to match the torque specification with the correct size of the bolt and fitting.

            Material of the Fitting and Bolt: Banjo fittings and bolts come in various materials, such as stainless steel, brass, or carbon steel. Different materials require different torque values due to their varying strength and elasticity. For example, stainless steel fittings may require a lower torque setting compared to brass fittings to avoid over-stressing the components.

            Operating Pressure: The operating pressure of the hydraulic system also plays a role in determining the correct torque. Systems that operate under higher pressure may require a tighter connection to prevent leaks or failure under load. Make sure to check if your system has specific requirements based on its operating pressure.

            How to Use a Torque Wrench for Hydraulic Fittings

            Using a torque wrench properly is key to achieving the correct torque when installing a banjo fitting. Here’s how you can ensure you apply the right amount of torque:

            Choose the Right Torque Wrench: Select a calibrated torque wrench that’s designed for the torque range specified by the manufacturer. There are two main types of torque wrenches:

            Click-type torque wrenches: These make a distinct “click” sound when the correct torque value is reached, alerting you that the desired force has been applied.

            Beam-type torque wrenches: These are more basic and indicate the torque level using a dial or beam. However, they are less precise than click-type wrenches and may not be as reliable for critical applications.

            Make sure the torque wrench is calibrated and in good working condition before use.

            Set the Desired Torque: Adjust the torque wrench to the manufacturer’s recommended value. If you’re using a click-type torque wrench, simply turn the dial or knob to set the required torque in ft-lbs or Nm. If you’re using a beam-type wrench, ensure the beam is set to the correct reading before starting.

            Tighten the Banjo Bolt: Place the torque wrench onto the banjo bolt and begin tightening. If you’re using a click-type wrench, keep turning until you hear the “click.” This sound means you have reached the correct torque. If using a beam-type wrench, carefully monitor the reading as you tighten and stop when you reach the recommended value.

            Tighten Gradually in Steps: It’s best to tighten the banjo bolt in stages rather than all at once. Start by applying a small amount of torque, then increase it gradually in increments, tightening the bolt in a crisscross pattern if applicable. This ensures even pressure distribution across the sealing surfaces.

            Avoid Over-Tightening: Be mindful not to exceed the recommended torque. Over-tightening can damage the fitting, bolt, or sealing materials, potentially leading to leaks or weakened connections.

            Re-check the Torque: After you’ve torqued the banjo bolt to the specified value, it’s a good idea to double-check the torque, especially if the fitting has been subjected to any vibrations or stress after initial tightening. Reapply the torque wrench to ensure it’s still properly tightened.

            Conclusion

            Mastering the installation of a hydraulic hose banjo fitting will pay off by boosting your hydraulic system’s performance, reducing maintenance costs, and ensuring the safety of both equipment and personnel. By adhering to best practices and understanding the importance of proper installation, you’ll set yourself up for success in any hydraulic system application.


            FAQ

            What is a hydraulic hose banjo fitting?

            A hydraulic hose banjo fitting is a type of connector used in hydraulic systems to link hoses to other components. It features a unique design with a banjo bolt and a hole in the fitting, allowing hydraulic fluid to flow through the connection while maintaining a tight seal.

            Why is proper torque important for banjo fitting installation?

            Proper torque ensures a leak-proof seal, prevents over-tightening or under-tightening, and helps maintain the integrity of the fitting and hose connection. Incorrect torque can lead to leaks, system inefficiency, or even component damage.

            How do I know the correct torque for a banjo fitting?

            The correct torque value for a banjo fitting is usually specified by the manufacturer. It can vary depending on the size, material, and application. Always refer to the manufacturer’s guidelines or product datasheets to find the exact torque specifications.

            Can I use any sealant with banjo fittings?

            It’s important to use the correct sealing material specified by the manufacturer, such as O-rings, washers, or gaskets. While some installations may require thread sealants, applying the wrong sealant can interfere with the fitting’s performance, so follow manufacturer recommendations.

            What tools do I need to install a banjo fitting?

            To install a banjo fitting, you’ll need basic tools such as a wrench for tightening the banjo bolt, a torque wrench to apply the correct torque, and cleaning supplies to ensure all components are free from debris before installation.

            How can I check if the banjo fitting is properly installed?

            After installation, check for leaks by applying a small amount of hydraulic fluid or using a leak detection solution around the connection. If you notice any leakage, recheck the torque and ensure that the fitting and sealing materials are properly aligned and seated.

            Avoid Leaks! How to Tighten Hydraulic Fittings the Right Way banner

            Avoid Leaks! How to Tighten Hydraulic Fittings the Right Way

            When hydraulic fittings are correctly tightened, they ensure secure, leak-proof connections, allowing fluid to flow efficiently and preventing contaminants from entering the system. Improper tightening, whether too tight or too loose, can cause leaks, pressure loss, contamination, and joint failure, ultimately reducing system efficiency and increasing repair costs. Correctly tightened fittings help maintain pressure retention, minimize wear and tear, and prolong equipment lifespan, ensuring safer, more efficient operation.

            Common Causes of Leaks in Hydraulic Fittings

            Hydraulic systems are designed to operate under high pressure, and maintaining leak-free connections is crucial for performance and safety. Even a small leak can lead to significant issues such as loss of pressure, system inefficiency, or even catastrophic failures. Understanding the common causes of hydraulic fitting leaks can help prevent these problems and ensure your system remains operational. Below are the key causes of leaks in hydraulic fittings:

            Faulty Installation and Incorrect Tightening

            One of the most common causes of leaks in hydraulic systems is improper installation of the fittings. Whether it’s due to human error, incorrect tools, or rushed work, faulty installation can create weak points in the hydraulic system. Here’s how poor installation leads to leaks:

            Improper Alignment of Fittings:

            If the fittings are not aligned properly during installation, they may not form a complete seal, allowing hydraulic fluid to escape. Misaligned fittings often happen when the hoses or pipes are not positioned correctly, creating uneven pressure on the connection.

            Incorrect Tightening Torque:

            Hydraulic fittings require a precise amount of torque to ensure a secure, leak-proof seal. Tightening too loosely can lead to gaps where fluid can escape, while over-tightening can damage the fitting or cause the seal to deform. Both scenarios result in leaks.

              Failure to Follow Manufacturer Guidelines:

              Every hydraulic fitting and connection has specific installation instructions, including recommended torque values and installation techniques. Failing to follow these instructions can lead to improperly sealed fittings, causing leaks. Always check the specifications before installing new fittings.

                Lack of Proper Sealing:

                During installation, it’s essential to ensure that the proper sealant (such as thread sealant or O-rings) is applied correctly. Neglecting this step or using the wrong type of sealant can result in gaps where fluid can leak out.

                Hydraulic Fluid Contamination leak

                  Poor Quality Fittings or Seal Failures

                  Even with correct installation, the quality of the hydraulic fittings themselves plays a significant role in preventing leaks. Low-quality fittings, damaged components, or poor manufacturing can compromise the integrity of the connection and lead to leaks. Common issues include:

                  Material Defects in Fittings:

                  Fittings made from substandard materials are more likely to corrode, crack, or wear out over time. Corrosion or cracks in the fitting create spaces for hydraulic fluid to escape. Always choose high-quality fittings made from durable, corrosion-resistant materials such as stainless steel or brass.

                    Degraded or Damaged Seals:

                    Seals, including O-rings and gaskets, are designed to prevent fluid from leaking out of the fitting. Over time, seals can degrade due to chemical exposure, extreme temperatures, or wear. A damaged or aged seal may lose its ability to form a proper seal, resulting in leaks.

                    Using the wrong seal material for the specific hydraulic fluid or environment can also lead to premature seal failure.

                      Manufacturing Defects:

                      Hydraulic fittings that are poorly manufactured may have irregularities, such as uneven threading, which can prevent them from forming a proper seal. Additionally, improper machining can result in fittings that do not meet industry standards, which can lead to leaks even with proper installation.

                        Incorrect Fitting Type:

                        Not all fittings are suited for every application. Using the wrong type of fitting, such as a low-pressure fitting in a high-pressure system, can result in leaks or system failure. Always verify that the fittings are compatible with the system’s pressure and fluid characteristics.

                          External Factors: Vibration, Temperature, and Environmental Conditions

                          Hydraulic fittings are often exposed to harsh conditions that can cause wear and lead to leaks if not accounted for during installation and maintenance. Three main external factors—vibration, temperature fluctuations, and environmental conditions—can negatively affect hydraulic fittings and contribute to leaks:

                          Vibration:

                          Hydraulic systems, especially those in machinery or vehicles, are subject to constant vibration. Over time, vibration can cause hydraulic fittings to loosen or shift, creating gaps in the connection and allowing fluid to leak. This is particularly common with flexible hose connections.

                          Vibration-induced loosening can be minimized by using locknuts, vibration-dampening materials, or regular inspections to ensure fittings remain secure.

                            Temperature Fluctuations:

                            Hydraulic systems often operate in environments with significant temperature changes. Both high and low temperatures can cause materials to expand or contract, affecting the tightness of the fitting. For example, excessive heat may cause seals to soften and lose their sealing ability, while cold temperatures can cause fittings to contract and become brittle.

                            It’s essential to choose fittings and seals that can withstand the temperature extremes of your operating environment. In some cases, temperature-resistant materials may be required to prevent leaks.

                              Environmental Conditions:

                              Exposure to harsh environmental conditions such as rain, dust, chemicals, or corrosive substances can accelerate wear and tear on hydraulic fittings. Corrosion, for example, can weaken the structure of fittings, leading to cracks and leaks.

                              To mitigate the risk of environmental damage, ensure that fittings are properly coated for corrosion resistance and that hoses and connections are kept clean and free from contaminants.

                                Pressure Surges:

                                In some systems, pressure can fluctuate due to changes in flow rate, valve operation, or external load. These sudden surges in pressure can stress hydraulic fittings, causing them to weaken or loosen over time, especially if the fittings are not rated for those pressure changes.

                                  How to Tighten Hydraulic Fittings the Right Way: Step-by-Step

                                  Ensuring hydraulic fittings are tightened properly is key to maintaining system efficiency and preventing leaks. Below is a detailed, step-by-step guide to tightening hydraulic fittings the right way, ensuring secure, leak-proof connections and system integrity.

                                  Step 1: Inspecting the Fitting and Hose for Damage

                                  Before you even begin tightening hydraulic fittings, it’s essential to inspect both the fitting and the hose or pipe for any visible damage. A fitting that is cracked, corroded, or worn down may not form a proper seal, no matter how well it’s tightened. Here’s what to check for:

                                  Check the Fitting: Inspect the fitting for any cracks, dents, or signs of corrosion. Pay special attention to the threads, as damaged or worn threads will prevent a tight, leak-free seal.

                                  Inspect the Hose or Pipe: Look for any wear, cuts, or bulging on the hydraulic hose. Damaged hoses can result in weak connections and increase the risk of fluid leakage. If you find any defects, replace the damaged components before proceeding.

                                  Check Seals: Ensure that O-rings, gaskets, or compression seals are in good condition. Damaged seals can lead to leaks even if the fitting is tightened correctly.

                                  Step 2: Choosing the Right Hydraulic Fitting for Your System

                                  Choosing the correct hydraulic fitting is crucial to ensure it can handle the system’s pressure, flow, and fluid type. Using the wrong type of fitting can cause leaks, system inefficiency, and even catastrophic failure. Consider the following when selecting hydraulic fittings:

                                  Fitting Type: Determine whether you need a straight, elbow, or tee fitting, or a specific type like a compression or flare fitting. The right fitting type should match the configuration of your hydraulic system.

                                  Pressure and Flow Requirements: Ensure that the fitting is rated for the pressure and flow rates your system operates under. Over or under-rated fittings may fail under pressure.

                                  Material Compatibility: Choose the right material (e.g., stainless steel, brass, or carbon steel) based on your system’s fluid type and environmental conditions. Some materials may corrode or degrade with certain chemicals or extreme temperatures.

                                  Size and Thread Compatibility: Ensure that the fitting size, thread type (e.g., NPT, BSP), and connection type are compatible with the hose, pipe, and other components in your system.

                                  install ferrule fitting

                                  Step 3: Applying the Correct Sealant (Thread Sealant, O-rings, and Compression Seals)

                                  Proper sealing is essential for preventing leaks. Various sealing methods are depending on the type of fitting, and choosing the right one ensures a secure, leak-proof connection. Follow these guidelines for applying seals:

                                  Thread Sealant: If your hydraulic fitting uses threaded connections, apply the correct thread sealant or pipe thread tape (Teflon tape) to the male threads. This will help prevent leaks from threaded joints. Be sure to use the appropriate type of sealant for the hydraulic fluid and system pressure.

                                  O-Rings: For fittings that rely on O-rings, ensure that the O-ring is made from the appropriate material (e.g., nitrile, Viton) that is compatible with your hydraulic fluid. Lubricate the O-ring lightly with a compatible lubricant to prevent damage during installation.

                                  Compression Seals: If using compression fittings, make sure the ferrules (compression rings) are properly seated on the pipe and fitting. These seals rely on compression to form a tight seal, so avoid overtightening, which can damage the seal.

                                  Step 4: Properly Aligning the Fitting

                                  Alignment is key to ensuring the fitting forms a secure and leak-free seal. Misalignment can cause uneven pressure and lead to leaks. Here’s how to align the fitting properly:

                                  Ensure Proper Alignment of Hoses and Pipes: Before tightening, check that the hoses or pipes are aligned with the fitting. If the hose or pipe is angled incorrectly, it may stress the fitting or cause the connection to loosen over time. Make sure the components are positioned straight and parallel to one another.

                                  Avoid Twisting the Hose: When installing the fitting, avoid twisting or bending the hose sharply. Excessive twisting can weaken the hose and affect the fitting’s ability to form a proper seal.

                                  Align Threads and Fitting Properly: Make sure the threads of the fitting align perfectly with the threads on the hose or pipe. Cross-threading can cause damage to both the fitting and the connection, leading to leaks and eventual failure.

                                  Step 5: Tightening Using Correct Torque Settings

                                  Once the fitting is aligned and the seals are applied, it’s time to tighten the fitting using the correct torque. Tightening a hydraulic fitting too much or too little can cause leaks, damage, or failure. Follow these guidelines to tighten the fitting correctly:

                                  Use the Correct Torque Value: Check the manufacturer’s specifications for the recommended torque settings for your specific hydraulic fitting. This is critical to ensure the connection is tight enough to prevent leaks but not so tight that it causes damage.

                                  Use a Torque Wrench: A torque wrench is the most accurate tool to ensure you’re applying the correct amount of force. Set the wrench to the specified torque value and tighten the fitting slowly, applying even pressure.

                                  Tighten Gradually: Start by hand-tightening the fitting, then use the torque wrench to reach the recommended torque. Tighten the fitting in stages, especially for larger fittings or high-pressure systems.

                                  Check for Leaks: After tightening, inspect the fitting for leaks by applying pressure to the system and checking around the fitting for any signs of escaping fluid. If leaks persist, recheck the torque setting and ensure the sealant and O-rings are properly applied.

                                  Preventing Leaks: Key Sealing Methods for Hydraulic Fittings

                                  Leaks in hydraulic systems can lead to costly downtime, reduced efficiency, and potential safety hazards. To prevent leaks, it’s essential to use the right sealing methods when installing hydraulic fittings. There are several techniques for ensuring leak-proof connections, each suited to specific applications and types of fittings. Understanding these methods can help keep your hydraulic system secure and functional.

                                  O-Ring Seals vs. Threaded Seals: Which Is Best?

                                  Hydraulic fittings commonly rely on O-rings or threaded seals to create leak-proof connections. Both methods have their advantages and disadvantages, and the choice depends on the type of fitting and application. Here’s a comparison to help you decide which sealing method is best for your hydraulic system:

                                  O-Ring Seals

                                  O-rings are rubber rings that fit into grooves in the fitting, creating a seal when compressed between two surfaces. They are typically used in fittings like flanges, unions, and valves.

                                  How They Work:

                                  O-rings are highly effective for creating tight seals without the need for excessive tightening.

                                  Advantages:

                                  Flexible and Versatile: O-rings can handle both dynamic and static sealing applications, making them ideal for a wide range of hydraulic systems.

                                  Pressure Resistance: When properly installed, O-rings can withstand high-pressure environments.

                                  Easy to Replace: O-rings are relatively inexpensive and easy to replace, allowing for quick maintenance when necessary.

                                  Disadvantages:

                                  Material Sensitivity: O-rings are sensitive to temperature, fluid type, and pressure. Choosing the wrong material for the O-ring (e.g., using an O-ring made of nitrile in a system with high heat) can lead to degradation and leaks.

                                  Installation Care: O-rings require careful installation to avoid damaging them. Incorrect installation or contamination can cause them to fail.

                                  Threaded Seals

                                  How They Work:

                                  Threaded seals rely on the tightness of threaded connections to prevent leaks. Often, these seals use tapered threads (like NPT) or straight threads with additional sealing components such as thread sealants or gaskets.

                                  Advantages:

                                  Simple and Durable: Threaded seals are straightforward to use and are often a reliable solution for static connections where little to no movement occurs.

                                  High Strength: Threaded connections can handle high pressure and are less likely to deform under stress compared to O-ring seals.

                                  Disadvantages:

                                  Potential for Leaks: Threaded seals can leak if the fitting is not tightened properly or if the threads are damaged.

                                  Thread Wear: Over time, threads can wear out, reducing their effectiveness and requiring replacements or re-threading.

                                  Which Is Best?

                                  O-Ring Seals are typically best for dynamic connections or where flexibility is needed, such as in hydraulic hoses or systems exposed to varying temperatures and pressures.

                                  Threaded Seals are often used for static, high-pressure applications where the fitting will not be subject to constant motion or thermal cycling.

                                  Ultimately, the best choice depends on the specific needs of your hydraulic system, including pressure, temperature, and movement.

                                  Compression Fittings and Their Leak-Proof Design

                                  Compression fittings are designed to form a leak-proof seal through mechanical compression. They are often used in applications that require a reliable, tight connection between pipes or tubes in hydraulic systems. Here’s an overview of how compression fittings work and why they are favored for leak prevention:

                                  How Compression Fittings Work

                                  Compression fittings consist of several key components:

                                  Compression Nut: This is the outer part of the fitting that is tightened around the pipe or tube.

                                  Ferrule (or Compression Ring): The ferrule is the key to creating a tight seal. It is placed inside the fitting, and when the nut is tightened, the ferrule compresses against the pipe or tube, forming a secure seal.

                                  Fitting Body: The body holds all the components in place and ensures the connection is secure.

                                  When the compression nut is tightened, the ferrule compresses around the pipe, forming a tight connection without the need for thread sealing tape or other additives. The design of compression fittings makes them ideal for systems where leak-proof sealing is critical, especially for high-pressure applications.

                                  Advantages of Compression Fittings

                                  Easy to Install: Compression fittings are relatively easy to install and require minimal tools. They are often used in both low and high-pressure hydraulic systems.

                                  Reliable Seal: The compression mechanism creates a reliable, leak-proof seal without requiring excessive tightening.

                                  Versatile: Compression fittings are available in various materials (e.g., brass, stainless steel) and sizes, making them suitable for a range of applications.

                                  No Need for Sealants: Compression fittings typically do not require additional sealants or thread tape to form a seal, which simplifies installation and reduces the risk of sealant contamination.

                                  Common Applications

                                  Hydraulic Hose Connections: Compression fittings are widely used to connect hoses and pipes in hydraulic systems.

                                  Instrumentation Lines: These fittings are used in instrumentation and measurement systems, where precise sealing is required to prevent leaks in sensitive components.

                                  Using Thread Sealant: When and How to Apply It

                                  Thread sealant is a material applied to the threads of a fitting to help prevent leaks. It is often used with threaded hydraulic fittings to ensure a tighter, more secure seal. Here’s when and how to apply thread sealant effectively:

                                  When to Use Thread Sealant

                                  Thread sealants should be used when:

                                  Working with Threaded Fittings: For fittings with threads such as NPT or BSP, thread sealant helps fill in gaps and ensure a tight seal.

                                  High-Pressure Applications: In high-pressure hydraulic systems, thread sealant helps prevent leaks that could occur due to the slight gaps between the threads.

                                  Dissimilar Materials: When connecting fittings made from different materials (e.g., brass to steel), thread sealant can help account for slight differences in thread alignment and prevent leaks.

                                  How to Apply Thread Sealant

                                  Clean the Threads: Before applying thread sealant, clean both the male and female threads thoroughly to remove dirt, rust, and old sealant. This ensures the sealant bonds properly and doesn’t cause contamination.

                                  Apply Sealant Evenly: Apply the thread sealant evenly to the male threads of the fitting. Use a small amount of sealant to avoid excess that could spill into the system. Avoid applying sealant to the first few threads to ensure that the sealant doesn’t interfere with the connection.

                                  Avoid Over-Application: Excess sealant can cause clogging or contamination in the hydraulic system. Apply just enough to fill in the gaps between the threads, and ensure the excess is wiped away.

                                  Tighten the Fitting: After applying the thread sealant, tighten the fitting to the manufacturer’s recommended torque specification. This will ensure the sealant is evenly distributed and the connection is tight.

                                  Types of Thread Sealants

                                  Teflon Tape (PTFE Tape): This is one of the most common types of thread sealant. It’s easy to apply and is effective for sealing threaded connections, but it’s best suited for lower-pressure systems.

                                  Liquid Thread Sealants: These are often preferred for high-pressure applications, as they offer better sealing capabilities and are resistant to hydraulic fluids.

                                  How Under-tightening Can Lead to Catastrophic Failures

                                  Under-tightening is just as dangerous as over-tightening. Fittings that are not tightened enough may fail to form a proper seal, leading to leaks, loss of pressure, and system malfunctions. Here’s how under-tightening can cause catastrophic failures in hydraulic systems:

                                  Leaks and Loss of Pressure

                                  What to Look For: If a fitting is under-tightened, hydraulic fluid may leak from the connection, which can result in a noticeable drop in pressure within the system.

                                  Consequences: Even small leaks can result in significant pressure loss, which affects system efficiency. Leaks also allow contaminants to enter the system, potentially damaging critical components like pumps, valves, and seals.

                                  Vibration-Induced Loosening

                                  What to Look For: In systems where vibration is a concern (such as in machinery or vehicles), an under-tightened fitting can loosen over time. This can be especially problematic in high-pressure systems.

                                  Consequences: As the fitting loosens, it may cause further leaks, or worse, complete separation under pressure, leading to system failure and potential hazards.

                                  Poor Fluid Flow

                                  What to Look For: Under-tightened fittings can cause gaps or misalignments between the fitting and the hose or pipe. This can restrict the flow of hydraulic fluid, causing the system to work harder and less efficiently.

                                  Consequences: Reduced fluid flow results in decreased system performance, wasted energy, and potential damage to components like valves, pumps, or actuators.

                                  Contamination of the Hydraulic System

                                  What to Look For: A loose fitting increases the risk of dirt, dust, and other contaminants entering the hydraulic system, especially if fluid is leaking around the connection.

                                  Consequences: Contaminants in the system can cause wear on components, blockages, and even complete system failure if not addressed.

                                  Conclusion

                                  Hydraulic systems operate under high pressure, and even small leaks or improperly tightened fittings can cause serious issues—from pressure loss and system inefficiency to safety hazards. By understanding the importance of correct tightening techniques, using the right tools, and regularly maintaining your system, you can avoid the pitfalls that lead to leaks, damage, and expensive repairs.


                                  FAQ

                                  Why is it important to properly tighten hydraulic fittings?

                                  Properly tightening hydraulic fittings ensures a leak-proof seal, maintaining system pressure, preventing fluid contamination, and enhancing the overall safety and efficiency of the hydraulic system.

                                  What happens if I over-tighten a hydraulic fitting?

                                  Over-tightening can cause thread damage, deform the fitting or seals, and lead to cracked or warped components. This compromises the seal, potentially resulting in leaks and system failure.

                                  How can I tell if a hydraulic fitting is under-tightened?

                                  Signs of under-tightening include visible leaks, loss of system pressure, and poor fluid flow. In some cases, vibration can also cause the fitting to loosen further, leading to catastrophic failures.

                                  What tools should I use to tighten hydraulic fittings?

                                  A calibrated torque wrench is essential for applying the correct amount of torque. It helps prevent over-tightening or under-tightening, ensuring consistent and reliable connections.

                                  How often should I inspect hydraulic fittings?

                                  It’s recommended to inspect hydraulic fittings regularly, especially in high-vibration environments or after maintenance. Perform visual checks for leaks, wear, or damage and retighten fittings as necessary.

                                  What are the common sealing methods for hydraulic fittings?

                                  Common sealing methods include O-rings, thread sealants, and compression fittings. Each method ensures a tight, leak-proof connection, with the choice depending on the type of fitting and system requirements.

                                  Contact Topa

                                  Save 30% on maintenance costs with our easy-install hydraulic fittings. Contact Now!