One-Piece Fitting Crimp Out of Specification What to Check Next

One-Piece Fitting Crimp Out of Specification: What to Check Next

When a one-piece fitting crimp is out of specification, quarantine the assembly and related work before changing the machine or attempting repair. The next step is to separate a measurement error from a true nonconforming crimp, then verify component identity, insertion, tooling, program, machine status, and current reference data. Immediate recalibration, adjustment, or re-crimping can erase the original evidence and expand the problem. This STOP–VERIFY–RELEASE workflow helps hose-shop quality staff contain the batch, identify a supported cause, select an approved disposition, and restart only after a documented first piece passes.

STOP: Quarantine Before Troubleshooting

The first response is containment, not correction. Keep the measured assembly, related components, tooling, and process records in their as-found condition until the evidence has been captured.
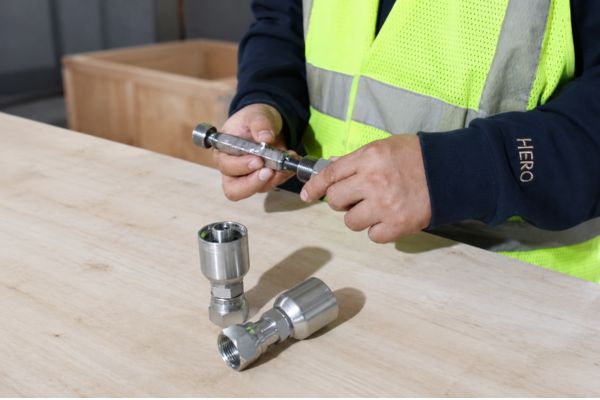
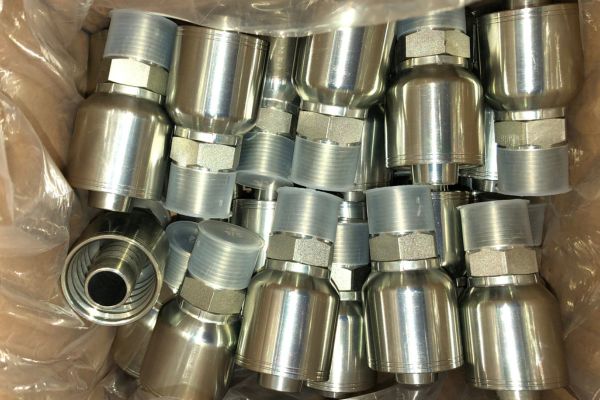
check connection side

Isolate the assembly and affected batch

Mark the nonconforming piece with a unique hold identifier and prevent it from entering service. Stop the job on the relevant machine. Segregate uncrimped components, in-process pieces, and finished assemblies produced since the last accepted inspection point or another technically justified trace point.

Do not discard the failed piece, remove its fitting, re-crimp it, or use it for a pressure check unless an approved investigation plan authorizes that action. The original assembly may show component position, profile, marks, or other evidence needed to distinguish cause.

Record the as-found condition

Capture the actual readings, measurement positions, instrument identity, operator or inspector, time or production sequence, machine, die set, active program or setup, and instruction revision. Photograph the crimp profile when permitted, preserving orientation so a ferrule feature can be correlated with a die position.

If the assembly was removed from equipment, stop and isolate the hydraulic system, release pressure and stored energy, secure raised loads, and follow lockout and equipment instructions. Never feel for a high-pressure leak by hand or loosen a connection under pressure.

VERIFY: Decide Whether the Measurement Is Valid

Before treating the part as a true dimensional failure, verify that the measurement system and method were correct. This protects against unnecessary machine adjustment while ensuring that a real failure is not dismissed.

Check the instrument

Confirm the measuring device is the approved type, has suitable resolution, carries a valid calibration status, is clean and undamaged, and passes any required zero or reference check. Examine contact surfaces for debris or wear. Do not substitute an uncontrolled tool because it gives a more favorable reading.

Repeat the measurement only as the inspection procedure permits. If a second qualified person checks the part, both inspectors should use the same controlled method and record their individual results. Repeated measurement is verification, not permission to select the best value.

Check location and technique

Use the specified locations, number of readings, orientation, and timing after crimping. Avoid seams, flash, raised identification, die marks, or other features excluded by the procedure. Keep the instrument square to the measured surface and apply consistent measuring force.

Classify the result:

No numerical tolerance should be invented. The current approved crimp data for the exact hose, fitting, size, machine basis, and process supplies the acceptance limits.

VERIFY: Confirm Hose, Fitting, and Reference Identity

A valid measurement can be compared with the wrong specification. Confirm that the components at the machine match the traveler and the reference used for acceptance.

Verify the hose and fitting pair

Read the hose layline and record the manufacturer, complete series, size, construction when required, and lot information. Confirm the fitting’s complete part number, series, size, orientation, connection, and required traceability. Inspect whether the one-piece stem and ferrule remain the intended preassembled combination and have not been mixed or damaged.

Matching dash sizes do not prove compatibility. Hose construction, inside and outside dimensions, reinforcement, stem design, and ferrule geometry can differ. The combination must appear in current approved manufacturer compatibility and crimp records.

Verify the controlled specification

Check the document number and revision against the active traveler, machine program, and document-control system. Confirm that the referenced row applies to the exact hose and fitting code rather than a neighboring size, another series, or a competitor cross-reference. A Parker or other brand number cannot authorize a Topa assembly or crimp setting.

If the component pair is wrong or the applicable data are unavailable, keep all related work on hold. Do not solve a document gap by choosing the closest nominal target.

VERIFY: Audit Machine, Dies, and Program

When identity and measurement are valid, audit whether the crimper executed the approved setup. Record the setup before making any change.

Inspect configuration and tooling

Confirm the machine asset, die set, adapters, master die or bowl, spacers, and other controlled tooling against the instruction. Verify tooling identification, seating, cleanliness, segment movement, and visible condition. Look for debris, incorrect assembly, damage, corrosion, or uneven wear without creating an unofficial wear threshold.

Suspect tooling belongs in quarantine for qualified assessment. Do not grind, polish, substitute a segment, or continue production because an average diameter appears close to the target.
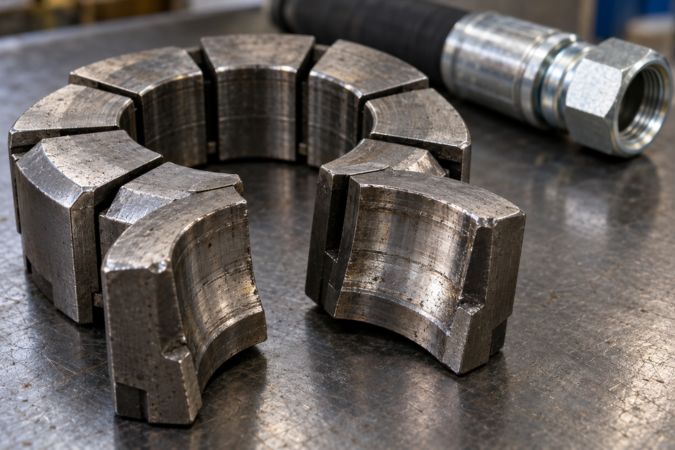
Worn hydraulic hose crimper dies

Review program and machine status

Compare the active program or setup values with the current controlled source. Check that the correct job was selected and that no offset, correction, manual mode, or prior-job setting remains active. Review required machine verification, calibration, alarm, and maintenance status.

Do not recalibrate merely because one part failed. Recalibration is appropriate only through the equipment and quality procedures after the investigation shows it is required. An unjustified calibration change can remove evidence and introduce a new variable.

VERIFY: Examine Preparation, Insertion, and Alignment

The finished dimension can be affected by the way the hose and fitting were prepared and positioned. Inspect these factors without assuming the machine is the only cause.

Review the hose end and insertion record

Confirm the hose was cut and prepared according to the current instruction. Look for an unsquare cut, damaged reinforcement, contamination, incorrect skive or no-skive preparation, or another visible departure. Verify that the external insertion mark was taken from the approved product-specific reference and checked before crimping.

Insertion depth is not the same as crimp diameter. A correct dimensional result cannot prove insertion, and a correct insertion mark cannot prove the crimp result. Both controls must be evaluated separately.

Check fitting and ferrule position

Inspect whether the ferrule, stem, hose, and any orientation feature were aligned and seated as required before the cycle. Consider whether handling allowed the hose to back out or an elbow to rotate. Record unusual marks, asymmetry, or evidence of loading at an angle.

Do not force a poorly fitting combination, add an unapproved lubricant, or alter preparation to make the assembly reach a reference. Quarantine damaged or questionable parts and use a qualified technical review.

TRACE: Define the Scope of Related Assemblies

The investigation must address product made before the failure was detected. The scope should follow evidence rather than a convenient fixed quantity.

Find the last accepted checkpoint

Review first-piece results, periodic measurements, tooling checks, machine logs, program changes, component lot changes, maintenance events, and operator observations. Determine the most recent point at which the exact setup had acceptable documented evidence. If records are incomplete or a trend shows drift, expand the window.

Trace affected work by:

Do not include unrelated assemblies solely because they were made on the same day, and do not exclude a related assembly because it looks normal.

Also compare the sequence of recorded readings rather than treating each result in isolation. A gradual shift may justify an earlier trace point, while a sudden change linked to a tooling, program, or component event may narrow the window. Record the reasoning so another reviewer can reproduce the boundary decision.

Maintain separate status for each population

Distinguish uncrimped components, suspect finished assemblies, known accepted product before the trace point, and trial pieces produced during investigation. Label and physically or electronically segregate each group. This prevents the held population from being mixed back into accepted stock.

DECIDE: Use an Approved Disposition

Disposition follows verified facts and authorized procedures. The goal is not to save every assembly; it is to prevent an unsupported part from entering service.

Consider the permitted outcomes

Depending on the quality system and technical evidence, an authorized disposition may include scrap, additional inspection, applicable testing, engineering review, or another documented action. Release requires evidence that addresses the identified risk and covers the affected population.

Re-crimping or salvaging a failed hose assembly is prohibited unless a specific approved and validated procedure permits it for that exact condition. Additional compression can damage the hose or fitting and can hide the original cause. Do not reuse visibly damaged hose or fittings.
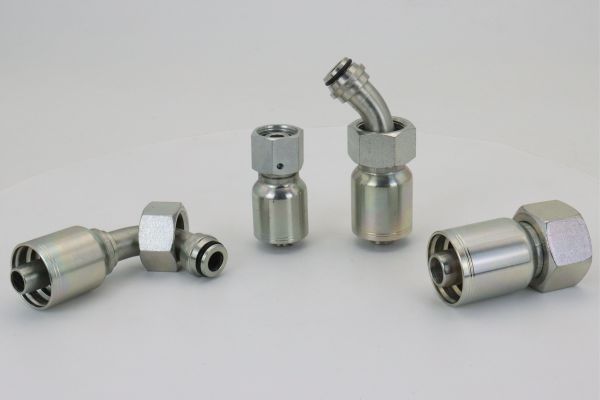
Standard crimp Fitting

Record cause and corrective action separately

Root cause describes why the nonconformity occurred; disposition describes what happens to affected product; corrective action reduces recurrence. Do not write “operator error” without evidence. Document the verified cause, contributing conditions, affected scope, decision authority, and the specific changes made to tooling, setup, documents, training, component control, or measurement where supported.

RELEASE: Restart Through a Controlled First Piece

Removing the suspected cause does not automatically release the process. Restart requires a fresh setup audit and first-piece approval.

Restore the approved configuration

Verify component identity, current instruction, machine, dies, tooling condition, program, calibration or verification status, preparation, insertion method, and measurement system. Document any repaired or replaced tooling and any approved program or document revision. Ensure obsolete data cannot be selected at the workstation.

Produce a new first piece only after the configuration is complete. Measure it by the approved method, record actual readings and visual checks, and obtain the required signoff. A single acceptable dimension does not waive compatibility or other required inspection and testing.

Apply the restart protocol

Use this record-and-restart sequence:

If any checkpoint remains unresolved, the correct decision is STOP, not a provisional release.

Conclusion

An out-of-specification crimp requires evidence preservation before process change. Quarantine the assembly and related batch, verify the instrument and measurement method, and confirm that the exact hose, fitting, and current crimp instruction were used. Audit machine, dies, program, preparation, insertion, and alignment without assuming the first suspected cause is correct. Trace related production to a justified accepted checkpoint, then use an authorized disposition; never re-crimp or salvage by improvisation. Restart only after corrective action, full setup verification, and a documented first-piece release. This STOP–VERIFY–RELEASE method turns a one-piece fitting crimp out of specification into a controlled quality decision rather than a hidden adjustment.

Frequently Asked Questions

Should the crimper be adjusted immediately after one failed reading?

No, first preserve the setup and verify the measurement, parts, reference, tooling, and program. Immediate adjustment can hide the cause or create another uncontrolled condition.

Can I re-measure until one reading passes?

No, follow the approved number and location of measurements and record the results. Selecting a favorable reading is not a valid inspection method.

Does a failed diameter always mean the crimper is faulty?

No, component identity, insertion, preparation, tooling, setup, and measurement can also produce the result. Evidence must isolate the cause before repair or calibration.

How many earlier assemblies should be quarantined?

Use the last accepted evidence and production traceability to define the scope. Expand it when records, trends, tooling events, or component changes show the condition may have started earlier.

Can an engineering review release a failed assembly?

Only through the organization’s authorized disposition process and evidence appropriate to the exact condition. An informal opinion or visual check cannot override controlled acceptance requirements.
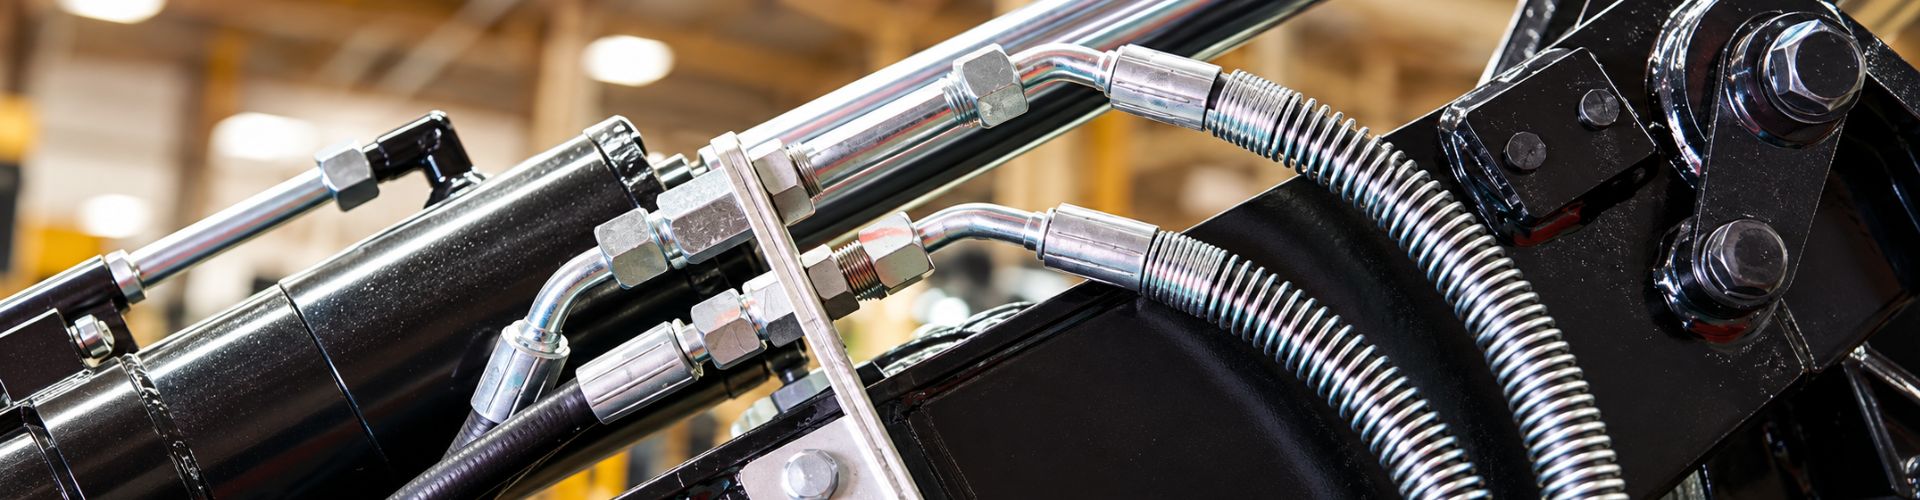

How to Inspect One-Piece Fittings After Long-Term Storage

How to Inspect One-Piece Fittings After Long-Term Storage?

A fitting that has remained in a stock bin for a long period should be released by condition and evidence, not by age alone. Before assembly, inspect one-piece fittings from long-term stock for positive identity, traceability, protected connection surfaces, seal condition, corrosion, packaging history, and current hose-and-crimp compatibility. Long storage does not automatically make a part unusable, but an unknown storage history can hide mixed SKUs, missing caps, damaged plating, contaminated seats, or obsolete instructions. The correct outcome may be release, hold, expanded re-inspection, or rejection, depending on the approved criteria and the significance of what is found.

Make the Release Decision at the Stock Bin

Do not move old stock directly from a shelf into an active crimping job. Create a controlled review point where the material remains segregated until its identity, condition, and technical basis are accepted.

Packing and stock

Define the unit being assessed

Identify whether the review covers a sealed carton, opened inner pack, mixed tote, individual fitting, or defined lot. Keep original labels, packing information, and any date or batch records with the material. If pieces from different containers have already been combined, record that loss of separation because it affects the confidence of any sampling or traceability decision.

Avoid describing the material only as “old fittings.” Record why it is being reviewed: routine release, urgent repair demand, inventory relocation, damaged packaging, a missing cap, visible discoloration, or an incomplete label. The reason helps determine which evidence and inspection depth are appropriate.

Do not assign a universal shelf life

Metal fitting bodies, finishes, O-rings, protective materials, and packaging do not all age in the same way. Storage environment, contamination, moisture, temperature, sunlight, chemical exposure, carton condition, handling, and seal material can matter more than elapsed time alone. Use manufacturer data, contractual requirements, and the organization’s approved shelf-life rules where they exist.

A date code may establish traceability without functioning as an automatic expiration date. Conversely, a recent date does not excuse corrosion, a damaged sealing face, or an unidentified part. The release decision must combine applicable time controls with actual condition and current technical documentation.

Recover Identity and Traceability Before Inspection

Condition checks cannot approve a fitting whose exact SKU is unknown. Similar one-piece fittings may differ in connection, seat, dash size, stem geometry, ferrule design, material, or crimp requirements while appearing nearly identical.

Verify the part against controlled records

Compare the carton and inner-pack labels with the item master, purchase record, controlled drawing, or other approved product definition. Confirm the full SKU, description, connection, size, straight or elbow form, hose-side series, material or finish when relevant, and lot or batch link required by the quality system.

Use product markings and physical features to support the comparison, but do not reconstruct identity from appearance alone. A photo, thread engagement, or approximate dimension can narrow candidates; it cannot establish the final fitting model when multiple products share visible features.

Treat label gaps as a hold condition

Faded labels, handwritten substitutions, partial codes, separated inner bags, or disagreement between carton and part markings require clarification. Do not relabel a container from memory or copy the code from a nearby bin. Preserve the existing evidence, identify the source location, and place the material in a controlled hold area.

Traceability requirements depend on the product and application, but the decision should be explicit. If identity can be recovered through approved measurements and records, document who made that determination and what evidence was used. If it cannot, the fitting must not enter a pressure-containing assembly merely because it physically resembles active stock.

Examine Threads, Seats, O-Rings, and Machined Faces

Connection and sealing surfaces deserve careful inspection because small damage can affect engagement or leakage. Assess them under suitable lighting and with the inspection methods permitted by the product specification.

check connection side

Inspect without altering evidence

Look for damaged thread entry, flattened or crossed flanks, dents, burrs, embedded debris, corrosion, impact marks, or contamination. On flare, cone, flat-face, or other sealing interfaces, check for scratches, nicks, raised damage, staining, and missing protection. For O-ring designs, verify that the seal is present only when the product definition requires it and inspect accessible condition without stretching or removing it unnecessarily.

Do not chase threads, polish seats, scrape corrosion, add lubricant, or replace an O-ring unless an approved rework or maintenance instruction authorizes the exact action and replacement material. Unauthorized cleaning can remove evidence, damage finishes, introduce contamination, or create an assembly that no longer matches its released configuration.

Distinguish appearance from possible functional damage

Light color variation or a packaging rub may be cosmetic in some specifications, while corrosion at a sealing face, damaged thread entry, or a cut O-ring can be functionally important. The inspector should describe location, extent, and type of condition rather than label everything “rust” or “scratch.” Compare observations with approved visual standards, drawings, and acceptance criteria.

When the distinction is uncertain, hold the item for technical evaluation. Do not create an acceptance limit by eye. The absence of a visible defect also does not prove thread form, seat angle, material, or pressure suitability; those characteristics still depend on identity and controlled data.

Review Plating, Corrosion, and Protective Caps

The surface finish and protective closures show how the fitting may have interacted with its storage environment. Their condition helps determine whether inspection should remain routine or expand to more parts and features.

Map corrosion to functional locations

Observe the fitting body, wrench flats, ferrule, threads, sealing area, crevices, and hose-side openings. Record whether a condition is isolated, repeated across the package, associated with a torn bag, or concentrated near a missing cap. Do not treat a stated salt-spray result as a prediction of storage or field life; actual exposure and damage still need examination.

Surface discoloration away from functional areas may have a different consequence from pitting, flaking, or corrosion near a seal, thread, retention feature, or pressure boundary. Acceptance requires the applicable specification. Never approve visibly damaged pressure-containing hardware simply because the defect can be wiped or hidden.

Treat caps as evidence, not decoration

Protective caps and plugs help shield threads, seats, O-rings, and internal passages from impact and contamination. Check that the correct areas remain covered, that closures are intact, and that no cap material has degraded or transferred to the fitting. A missing cap is not automatic proof of damage, but it increases the need to inspect the exposed area and understand the opened-package history.

Do not install an unidentified cap that may contact or deform a sealing feature. If protection must be restored, use the approved packaging instruction after the fitting has been evaluated and its disposition recorded.

Reconstruct Packaging and Opened-Carton History

Packaging condition can reveal moisture, dust, impact, mixing, or repeated handling that is not obvious from one top-layer sample. Review the package before removing or cleaning parts.

Inspect the container as part of the evidence

Check carton integrity, inner bags, dividers, labels, desiccants or protective materials when specified, water marks, oil or chemical contamination, crushing, punctures, and foreign material. Photograph relevant conditions before disturbing them. Compare the number and identity of inner packs with inventory records when available.

An intact outer carton does not guarantee that an inner bag remained sealed, and a damaged carton does not prove every fitting is unusable. Use the pattern of exposure to choose a risk-based inspection scope under the approved plan. Do not invent a universal sample size.

Conditions that justify closer review include:

Account for repeated opening and movement

Find out whether the carton was previously issued, partially returned, transferred between warehouses, stored near washdown or chemicals, or opened for earlier inspections. Repeated access can separate parts from labels and introduce mixed SKUs even when no corrosion is present.

Keep inspected and uninspected pieces separated during the review. If the history is unavailable, record it as unknown rather than assuming ideal storage. Unknown history may justify expanded inspection or technical review depending on application risk.

Confirm the Technical Data Are Still Current

A physically sound fitting can still be unsuitable if the product definition or approved hose combination has changed. Release must connect the stored SKU to current drawings, compatibility information, and assembly instructions.

Check drawing and product revision status

Confirm that the stored part matches the current controlled drawing or that an approved change record defines continued use of the older revision. Review connection geometry, sealing features, stem and ferrule configuration, material or finish requirements, and any changed identification marks relevant to the SKU.

Do not assume that old and new revisions are interchangeable. A change may affect only documentation, or it may alter a functional characteristic. The responsible technical authority should determine applicability when the revision history is unclear.

thread protection

Reconfirm hose and crimp compatibility

Match the fitting to the exact hose manufacturer, hose series, construction, size, and current approved crimp process. Verify preparation, insertion, machine, die set, measurement method, and acceptance data as required. Same dash size does not prove that a long-stored fitting remains approved with today’s hose stock or tooling.

If the compatibility chart or crimp instruction is missing, obsolete, or conflicting, hold the fitting for clarification. Do not revive an old handwritten setting or substitute data from a neighboring fitting series.

Assign a Controlled Disposition

Use explicit outcomes so material does not drift from inspection back into active bins without authorization. The actual disposition authority and criteria must come from the quality system and product requirements.

Never use “clean and use,” “looks acceptable,” or “probably the same” as an undocumented fifth category. If sorting is authorized, maintain separation between accepted, rejected, and unevaluated pieces and retain the relationship to the original lot.

Before releasing long-term stock, confirm:

Conclusion

Long storage should trigger an evidence-based condition review, not an automatic pass or failure. Establish the exact SKU and traceability first, then inspect threads, sealing surfaces, O-rings, exposed machined areas, finish, corrosion, caps, and package history without altering the evidence. Confirm that the drawing revision, hose combination, and crimp instructions still apply to the stored part. Cosmetic variation and functional damage must be separated through approved criteria, never invented limits. Use clear release, hold, re-inspect, or reject outcomes and keep each population segregated until disposition is complete. To inspect one-piece fittings from long-term stock responsibly, prepare the identity records, storage history, current technical documents, inspection observations, and authorized decision before any fitting reaches the crimper.

Frequently Asked Questions

Do one-piece fittings have a universal shelf life?

No, shelf-life controls depend on the product, seals, packaging, storage environment, manufacturer information, and applicable quality requirements. Use approved product-specific rules rather than a single age limit.

Can light discoloration be cleaned off before inspection?

Not unless an approved procedure permits that action. Record the original condition first because cleaning may hide corrosion, damage the finish, or contaminate sealing surfaces.

Should an old O-ring be replaced automatically?

No, replacement requires the correct seal identity and an authorized procedure for the fitting. An unapproved seal or installation method can create a new compatibility and leakage risk.

Is intact plating enough to release an old fitting?

No, plating condition is only one part of the decision. Identity, threads, sealing features, internal cleanliness, packaging history, current drawings, and hose-and-crimp compatibility also require review.

What should happen to fittings with missing labels?

Place them on hold until identity and traceability can be established through an approved method. Do not release them based only on appearance, approximate dimensions, or the neighboring stock location.

How to Store One-Piece Hydraulic Fittings for Long-Term Inventory

How to Store One-Piece Hydraulic Fittings for Long-Term Inventory

A fitting found months after receipt may still have a readable bin label while its sealing face is scratched, cap is missing, finish shows corrosion, or lot identity has been mixed. To store one-piece hydraulic fittings long-term, preserve both physical condition and traceable identity from receiving through issue. That requires suitable packaging, environmental control, protected connection surfaces, segregated SKUs and lots, disciplined handling of opened cartons, and scheduled reviews based on actual risk. It does not require inventing a universal storage life, humidity limit, or replacement interval.

Map the Risks Before Assigning Storage Locations

Long-term protection starts by identifying how the warehouse can damage or confuse the fittings. A dry-looking room and closed carton do not automatically control every exposure.

Consider the full storage path

Map receiving, inspection, repacking, movement, picking, cycle counting, and return-to-stock activities. Moisture can enter during transport or temperature changes; caps can be lost during sampling; mixed lots can occur at replenishment; and connection ends can contact metal bins during picking. A fitting protected on a high shelf may still be damaged repeatedly at the workbench.

Review roof and wall leaks, condensation points, doors, wash areas, chemical storage, salt or outdoor air, floor cleaning, dust, and temperature cycling. Also consider load stability, vibration, forklift contact, falling objects, and shelf edges. The purpose is to select controls appropriate to the actual environment rather than declare a generic room “safe.”

hydraulic tee adapter storage

Classify the product’s vulnerable features

One-piece fittings keep the stem and ferrule preassembled or retained, which may reduce separate-part mixing. They still contain vulnerable threads, seats, sealing faces, O-ring grooves or seals when present, ferrule edges, hose-side features, finishes, and identification marks. Different end configurations need different physical protection.

Do not infer corrosion resistance or storage durability from color. Material and finish must be verified from controlled product records, and field suitability later depends on fluid, temperature, corrosion exposure, pressure, and the complete assembly.

Preserve the Original Protective Package

Manufacturer or controlled incoming packaging should remain intact when it is clean, dry, identifiable, and suitable for continued storage. Unnecessary repacking creates new contact, mixing, and labeling risks.

Inspect packaging at receipt

Check cartons, bags, dividers, desiccant or barrier material when specified, caps and plugs, labels, and evidence of water, crushing, tearing, contamination, or corrosion. Record damage against the receiving lot before moving product into normal stock. Do not place a damp carton on the shelf simply because its contents have not yet been inspected.

Keep packaging instructions tied to the relevant product or supplier record. Avoid adding unapproved oil, corrosion inhibitor, wrapping, or cleaning chemical; a substance that protects one finish may contaminate a sealing surface, elastomer, hose, or hydraulic system.

Repack only through a defined method

When packaging must be replaced, use clean, compatible material and reproduce the required segregation and identification. Prevent fittings from rubbing against one another. Heavy fittings should not crush smaller parts or press connection ends through thin bags.

Label the new package before transferring parts so identity is never temporarily lost. Record the original lot, quantity, repack date, reason, and responsible person when the warehouse system requires it.

Protect Threads, Seats, and Sealing Faces

Connection protection is a primary storage control because small dents, contamination, or scratches can prevent correct engagement or sealing. Caps and plugs are functional safeguards, not cosmetic accessories.

Use the correct protective device

Keep the specified cap, plug, sleeve, or divider on each vulnerable end. The protector should fit without damaging threads, deforming an O-ring, contacting a critical seat, or leaving residue. Do not force a nearly matching cap onto a different thread or use adhesive tape directly on a sealing surface unless the controlled packaging method explicitly permits it.

After inspection or picking, replace protection immediately. A tray of uncapped fittings left on a bench can collect abrasive particles or suffer contact damage before it returns to the bin.

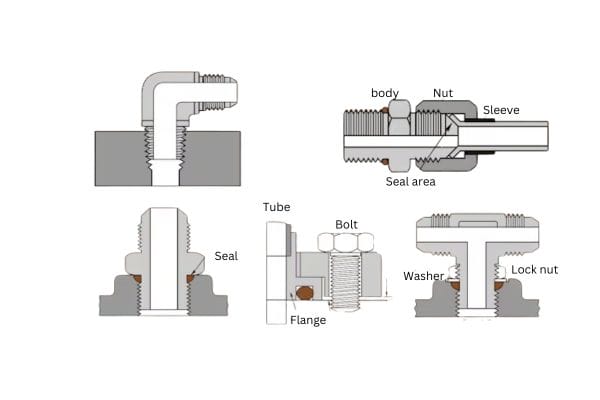
Hydraulic Fitting Sealing Methods

Prevent metal-to-metal contact

Use compartments, dividers, trays, or individual wraps appropriate to fitting weight and geometry. Arrange elbows and long fittings so their own mass does not drive a thread or seat into another part. Keep connection ends away from shelf edges, steel bin walls, staples, and loose hardware.

If a protector is missing or a sealing face has contacted another object, move the fitting to hold status for evaluation. Do not wipe a damaged surface and return it to stock based only on a quick visual impression.

Control Moisture, Corrosion, and Shelf Exposure

Environmental controls should prevent condensation, wetting, contaminant deposition, and prolonged contact with unsuitable surfaces. The correct limits and packaging system depend on documented product and warehouse requirements.

Manage moisture sources

Store fittings away from leaks, exterior doors, wet processes, direct floor contact, and locations with repeated warm-cold cycling when condensation is possible. Keep cartons off concrete floors and allow inspection around pallets or shelves. Address water entry at its source instead of relying only on extra wrapping.

Where a controlled humidity or barrier system is specified, monitor and maintain it under the facility procedure. Do not invent a universal humidity percentage for all fittings, finishes, packaging, and climates. Use documented material and packaging requirements plus observed warehouse risk.

Choose stable shelf placement

Shelves must support the load without sagging and protect stock from impact. Place dense cartons where they can be handled safely without dropping or dragging. Avoid overstacking, unstable piles, and positions where a forklift tine or ladder routinely contacts the package.

Separate fittings from corrosive chemicals, batteries, wash products, salt, dust-generating work, and materials that can transfer contamination. Keep food, drinks, and unrelated maintenance parts out of hydraulic-component bins.

Segregate SKUs, Sizes, and Lots

Preserving identity is as important as preventing corrosion. A clean fitting in the wrong bin can cause an incorrect assembly, leakage, rework, or equipment downtime.

Design bins around error risk

Use a unique controlled location for each complete fitting code unless the warehouse system has a validated alternative. Do not group parts only by visual similarity, dash size, or connection family. Straight, 45-degree, and 90-degree forms, male and female connections, different thread systems, and similar ferrules can be confused during fast picking.

Labels should show the full SKU or part number, plain-language description where useful, unit of measure, and barcode or system identifier when used. Avoid handwritten abbreviations that collapse distinct series into the same name.

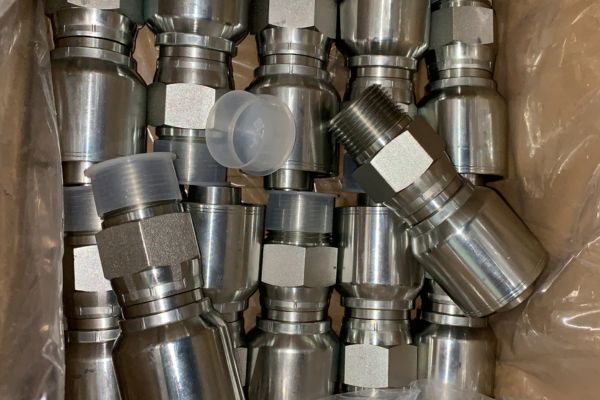
Mixed SKU Packing

Maintain lot traceability

Keep lots separated physically or through a controlled location and inventory system. Apply the organization’s approved rotation method, but do not assume oldest stock is automatically acceptable for use. Rotation manages inventory sequence; it does not replace condition review or technical approval.

When consolidating partial cartons, preserve every lot relationship. If the system cannot represent mixed lots accurately, do not combine them. A small saving in shelf space is not worth losing the ability to trace affected stock.

Control Opened Cartons and Partial Quantities

Opened packaging creates the highest routine opportunity for caps, labels, and lot control to fail. A defined open-carton method keeps the remainder equivalent to protected stock.

Open only what the job requires

Pick from one identified carton or lot at a time where practical. Use a clean surface and return unused fittings promptly. Count parts without dumping them into a mixed tray, and keep labels with the original contents rather than on a removable lid that can be exchanged.

Before resealing, check:

Relabel without breaking traceability

Replace a damaged label from the inventory record and original source documentation, not from appearance. Use a second-person verification when similar SKUs could be confused. Do not copy a part number from a neighboring bin.

If identity cannot be reconstructed with controlled evidence, quarantine the stock. A technically correct fitting with uncertain identity cannot be safely selected for assembly.

Review Stored Stock According to Risk

Storage review should be regular enough to detect deterioration and control failures, but no single inspection interval applies to every warehouse, finish, package, or turnover pattern.

Set review triggers

Base review frequency on environmental history, packaging type, material and finish documentation, product value and criticality, handling frequency, prior damage, storage duration, and facility changes. Add event-driven reviews after a leak, flood, heating or ventilation failure, relocation, shelf collapse, chemical spill, or evidence of condensation.

Review the environment and system as well as sample parts. Repeated missing caps may point to poor picking practice; corrosion concentrated on one shelf may indicate a building or airflow issue; mixed lots may reveal a replenishment-control failure.

Inspect without creating damage

Use a sampling or inspection plan authorized by the quality system. Handle fittings with clean practices, protect sealing surfaces, and return acceptable samples to their original identified package. Record the SKU, lot, location, condition observed, action, and reviewer.

This storage review detects and prevents deterioration. It does not establish whether aged or questionable stock is fit for a specific hose assembly or application; that separate decision may require controlled inspection, technical records, or qualified approval.

Use a Warehouse Control Checklist

A concise checklist makes preventive controls visible during receiving, shelving, picking, and review. Adapt it to the documented requirements for the actual product and facility.

Receiving and placement

Picking and ongoing control

These controls preserve evidence and condition until a later selection decision is made. They do not promise unlimited shelf life.

Conclusion

Long-term fitting storage succeeds when condition and identity are protected together. Map moisture, contact, handling, and labeling risks; retain suitable original packaging; and guard threads, seats, sealing faces, and hose-side features with the correct protectors. Keep cartons off the floor, control condensation and contamination, separate complete SKUs and lots, and apply a disciplined method to opened packages. Review stock according to documented product needs, warehouse history, handling frequency, and abnormal events rather than a universal interval. Quarantine any part with uncertain identity or condition instead of returning it to saleable stock. These practices help store one-piece hydraulic fittings long-term without claiming a fixed storage life or making the separate fitness-for-use decision.

Frequently Asked Questions

How long can one-piece hydraulic fittings remain in storage?

There is no universal storage life for every material, finish, package, and environment. Use product documentation, packaging requirements, condition reviews, traceability, and an authorized fitness decision when stock is questionable.

Should caps and plugs stay on fittings inside closed cartons?

Yes, when they are part of the specified protection system. The carton does not prevent fittings from contacting one another or protect an exposed sealing surface during opening and handling.

Can fittings from two lots share one bin?

Only when the inventory system and physical controls preserve each lot’s identity. If mixed lots cannot be traced accurately, keep them in separate locations or packages.

Is visible color change enough to reject a stored fitting?

Not by itself, because appearance may have several causes and acceptance depends on controlled criteria. Quarantine the item and obtain qualified inspection rather than cleaning it and returning it automatically.

Should desiccant be added to every package?

No, use desiccant or barrier packaging only when the documented packaging system calls for it. Uncontrolled additions may be ineffective, become saturated, contaminate parts, or create false confidence.

Contact Topa

Save 30% on maintenance costs with our easy-install hydraulic fittings. Contact Now!