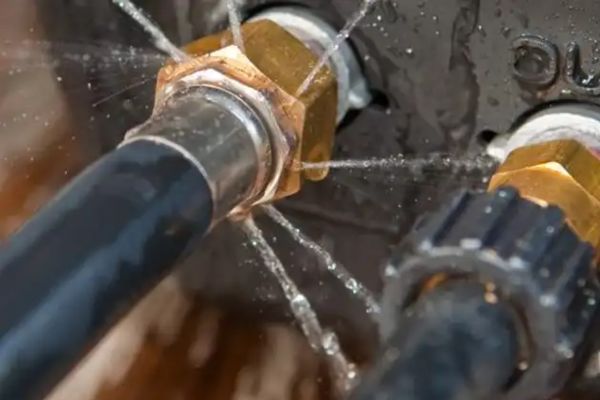
A single, faulty reusable hydraulic fitting can bring a multi-ton machine to a standstill. The failure might seem sudden, but the warning signs were likely visible long before, hidden in tiny defects on the fitting itself.
A proper inspection involves a visual and tactile check of the fitting’s threads, plating, and sealing surfaces before assembly. Using simple tools like a light, magnifier, and calipers can help you spot defects that cause leaks and catastrophic failures.
When Are the Critical Moments to Inspect a Fitting?
You’re busy, and stopping to inspect every single part seems time-consuming. You wonder if you can skip it sometimes, or if there are specific moments when an inspection is absolutely essential.
Inspection is non-negotiable at three key points: upon receiving a new shipment, immediately before assembling a new hose, and when troubleshooting an existing leak or system issue.
Building Inspection into Your Workflow
Making inspection a routine habit rather than an afterthought is the key to preventing problems. Each inspection point serves a different purpose in protecting your operations.
- Upon Receiving a New Shipment: This is your first line of defense. When a new box of fittings arrives from a supplier, you should spot-check a random sample. This isn’t just about counting parts; it’s about verifying the overall quality of the batch. Does it match the quality you paid for? Are there signs of damage from shipping? Identifying a problem at this stage is crucial. It allows you to address any quality issues with the supplier before the faulty parts are mixed into your general inventory and cause problems down the line.
- Before Assembling a New Hose: This is the most critical inspection. The fitting is in your hand, just moments away from being installed. This is your last chance to catch any defects. A fitting can be dropped, mishandled in the parts bin, or have a rare manufacturing flaw. Taking 60 seconds to look it over ensures that the component you are about to permanently attach to a hose is perfect, saving you the time and material cost of having to cut it off and start over due to a leak.
- When Troubleshooting an Existing System: If a hose assembly is leaking, your first instinct might be to just tighten it. A better approach is to depressurize the system, disconnect the fitting, and inspect it. Is the seat damaged? Are the threads galled? Is there a crack? Inspection during troubleshooting turns you from a guesser into a diagnostician, allowing you to find the true root cause of the problem.
What Basic Tools Do You Need for a Thorough Inspection?
You want to inspect your fittings properly, but you don’t have a high-tech lab. You’re worried you might need expensive equipment to do a meaningful check on the parts you receive.
You only need a few simple tools for an effective inspection. A bright light source, a basic magnifying glass, a thread pitch gauge, and a set of digital calipers are enough to spot most critical defects.
Equipping Yourself for Quality Control
You don’t need a metrology lab to perform a world-class inspection. The goal is to enhance your natural senses to spot imperfections. Here’s a basic toolkit anyone can assemble:
- Bright Light Source: Many defects are hiding in the shadows, especially inside the fitting. A small, bright LED flashlight or a well-lit workbench is your most important tool. You cannot find what you cannot see.
- Magnifying Glass: A simple 5x or 10x magnifying glass is a game-changer. It makes tiny cracks, burrs on threads, and scratches on sealing surfaces immediately obvious. These are defects that are nearly invisible to the naked eye but are major sources of leaks.
- Thread Pitch Gauge: This simple tool, which looks like a set of keys, allows you to instantly verify the thread profile of a fitting. By matching the gauge’s leaves to the fitting’s threads, you can confirm you have the correct part (e.g., metric vs. UNF) and check for any deformities in the thread shape.
- Digital Calipers: A set of inexpensive digital calipers is incredibly useful for spot-checking critical dimensions. You can measure the flare angle on a JIC fitting or check if the hex size is consistent. It helps you quantify what your eyes might only suspect.
This simple, affordable toolkit empowers you to move beyond a simple visual glance and perform a truly diagnostic inspection of your components.
How Do You Inspect the Threads for Critical Defects?
The threads are where the fitting holds everything together under pressure. A problem here can lead to a connection that won’t tighten properly, leaks constantly, or fails catastrophically.
Inspect threads by looking and feeling for sharpness, uniformity, and cleanliness. Use a light and magnifier to spot metal burrs, signs of cross-threading damage, or galling, which look like torn or ripped metal.

Reading the Story in the Threads
The threads of a fitting tell you the story of its manufacturing quality and its service history. Here is a checklist for what to look for:
- Check for Burrs and Debris: On a new fitting, roll it in your hands under a bright light. The crests of the threads should be clean and smooth. Any tiny flecks of metal, known as burrs, are a sign of poor machining. These burrs can break off during assembly, contaminate your hydraulic system, or create a leak path.
- Look for Signs of Damage: On a used fitting, look for evidence of improper installation. Cross-threading will appear as flattened or distorted threads near the start of the fitting. Galling is even more serious; it looks like the metal has been torn or smeared. A fitting with any visible thread damage should never be reused.
- Verify the Thread Form: Use your thread pitch gauge. The teeth of the correct leaf should mesh perfectly into the fitting’s threads with no gaps or rocking. This confirms the thread type and size. On a brand-new fitting, this verifies the manufacturer’s accuracy. On a used fitting, it can reveal if the threads have been stretched or deformed under excessive torque.
A fitting’s ability to create a strong, leak-proof connection begins and ends with the integrity of its threads.
| Thread Defect | What it Looks Like | Consequence |
| Burrs | Tiny, sharp flecks of metal on thread edges | Contamination, prevents proper seating |
| Cross-threading | Flattened or mangled starting threads | Will not tighten correctly, will leak |
| Galling | Smeared, torn, or ripped metal appearance | Destroys sealing ability, seizes parts |
| Stretching | Incorrect pitch, doesn’t match gauge | Lost clamping force, will loosen or leak |
How Can You Judge the Plating and Material Quality?
You are holding two fittings that look almost identical. How can you tell if one is made from high-grade steel with a durable finish, and the other is a cheap imitation that will rust and fail?
Assess the plating for a thick, uniform color with no blotches or scratches. A quality fitting will also feel substantial and heavy for its size, indicating a high-grade steel rather than a weaker, lighter alloy.
Looking Beyond the Surface
The plating on a fitting is its armor against the environment. A weakness in this armor will lead to corrosion, which will eventually compromise the fitting’s strength and sealing ability.
- The Uniformity Test: Hold the fitting under a bright light and rotate it slowly. The color and luster of the zinc plating should be consistent across all surfaces, including the flats of the hex and down into the threads. Be wary of fittings with a blotchy, uneven, or overly thin appearance, as these are signs of a rushed, low-quality plating process.
- The Scratch Test: On a fitting you are sacrificing for testing, you can lightly scratch it in an inconspicuous area with a sharp tool. A high-quality, thick plating will resist scratching. A cheap, thin “flash plating” will flake off easily, exposing the raw steel underneath.
- The Weight Test: This is a more subjective but still valuable test. When you handle fittings every day, you develop a feel for them. If you pick up a fitting that feels unusually light for its size, it could be a sign that the manufacturer has used an inferior, weaker grade of metal to save costs. Trust your hands; they can often detect a quality difference that your eyes might miss.
What Are the Most Critical Sealing Surfaces to Inspect?
You know the threads are important, but where exactly does the fitting create its primary seal? Misunderstanding this can lead you to overlook the most common sources of leaks.
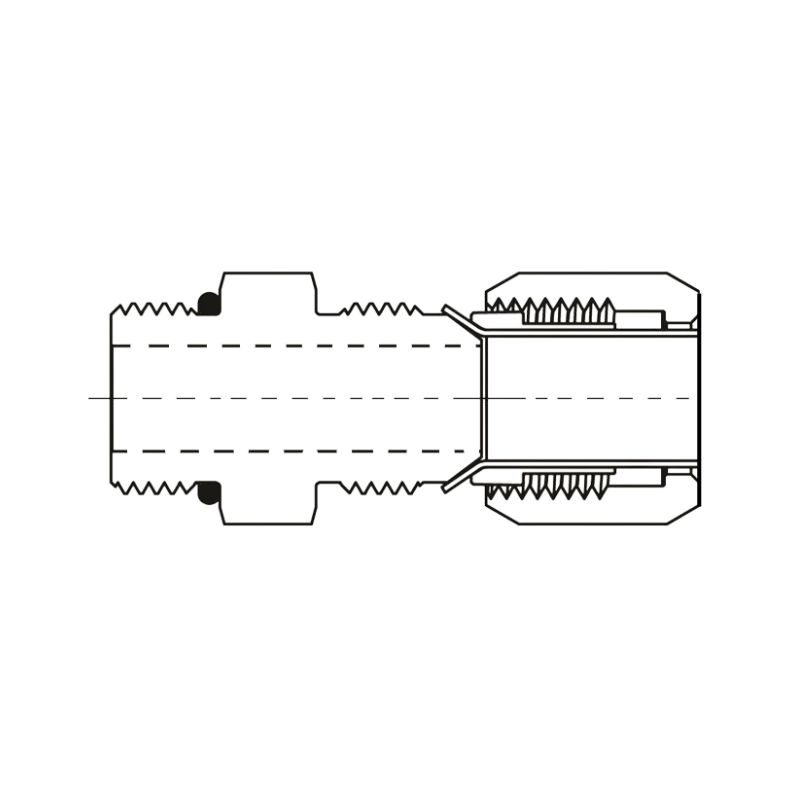
The primary seal is not made by the threads. On reusable fittings, it’s the 360-degree compression of the hose between the socket and nipple. On the connecting end, it’s the tapered seat or O-ring face.
Focus Where it Matters Most
While threads provide the clamping force, the actual fluid seal happens at very specific, highly machined surfaces. Any damage here, no matter how small, is a critical failure.
- Internal Seal (Socket and Nipple): On the reusable fitting itself, the seal is formed by the powerful compression of the hose. Your inspection here focuses on the components before assembly. The inner surface of the socket should be clean and have well-formed threads to grip the hose. The nipple’s tapered end should be perfectly smooth, as this is what forms the seal against the hose’s inner tube.
- External Seal (The Connection Point): When you connect the hose assembly to a machine or another tube, the seal happens at the fitting’s end. This is most often a tapered metal-to-metal seat. For JIC fittings, this is the 37-degree flare. For BSPP, it might be a 60-degree cone. This surface must be absolutely pristine. Use your magnifying glass and look for even the tiniest nick, scratch, or piece of debris. A scratch you can barely feel with your fingernail is wide enough for hydraulic fluid under 3,000 PSI to leak through. If the seal uses an O-ring (like in an ORFS fitting), the ring must be pliable and free of cuts, and the metal face it seals against must be perfectly flat and smooth.
Always protect these surfaces. A fitting dropped on a concrete floor is likely to have a damaged sealing seat, rendering it useless.
Can You Safely Reuse a Previously Installed Fitting?
The whole point of a “reusable” fitting is to use it again. But how can you be certain that a fitting that has been in service is safe to put back on a new hose?
A used fitting is safe to reuse only after a rigorous inspection. You must verify there are no cracks, the threads are not stretched or galled, and the sealing seats are not deformed or scratched.
A Reuse-or-Reject Checklist
Reusing fittings is a smart way to save money, but only if it’s done safely. A failed fitting costs far more than a new one. Before reusing any fitting, put it through this strict pass/fail test.
- Thoroughly Clean and Disassemble: First, clean all the grime and oil off the exterior. Then, carefully disassemble the socket from the nipple. This allows you to inspect every surface.
- Check for Cracks: This is the number one safety check. Pay close attention to the hex corners and the area where the nipple meets the threads. Use your magnifier. Any visible crack, no matter how small, means the fitting has been over-stressed and must be discarded immediately.
- Inspect Threads for Deformation: Compare the used threads against a new fitting or a thread gauge. Look for any signs of stretching (a change in pitch) or flattening. Check for galling from the previous installation. Damaged threads will not provide reliable clamping force.
- Examine the Sealing Seat: This is where most reused fittings fail inspection. Look at the 37-degree flare or cone seat. It’s common to see a slight polished ring where it sealed against its counterpart, which is normal. However, if you see a deep indentation, a distorted shape, or any scratches, the seat has been permanently deformed and will not seal reliably a second time.
Conclusion
A systematic inspection is your most powerful tool for building leak-free, reliable hydraulic systems, turning a simple component into a guarantee of operational uptime and safety.
Don’t leave the integrity of your equipment to chance. At Topa, every hydraulic fitting we produce is manufactured to a standard that welcomes scrutiny. Contact us today to source high-quality, reliable hydraulic fittings that will pass your inspection every time.
FAQ
When should I inspect a hydraulic fitting?
Always inspect upon receiving new shipments, right before assembling a hose, and when troubleshooting a leak or system problem.
What basic tools do I need for fitting inspection?
A bright light, magnifying glass, thread pitch gauge, and digital calipers are enough to spot most defects.
What thread defects cause leaks?
Burrs, cross-threading, galling, or stretched threads all compromise sealing and must be corrected or the fitting replaced.
How can I check plating and material quality?
Look for uniform plating color and thickness, resistance to scratching, and a solid, heavy feel that indicates high-grade steel.
Which sealing surfaces are most critical to inspect?
The internal clamp area between socket and nipple, and the external sealing seat (flare, cone, or O-ring face) must be flawless.
Can I safely reuse a fitting?
Yes—only after confirming it’s free of cracks, thread damage, and sealing seat deformation. Otherwise, replace it.