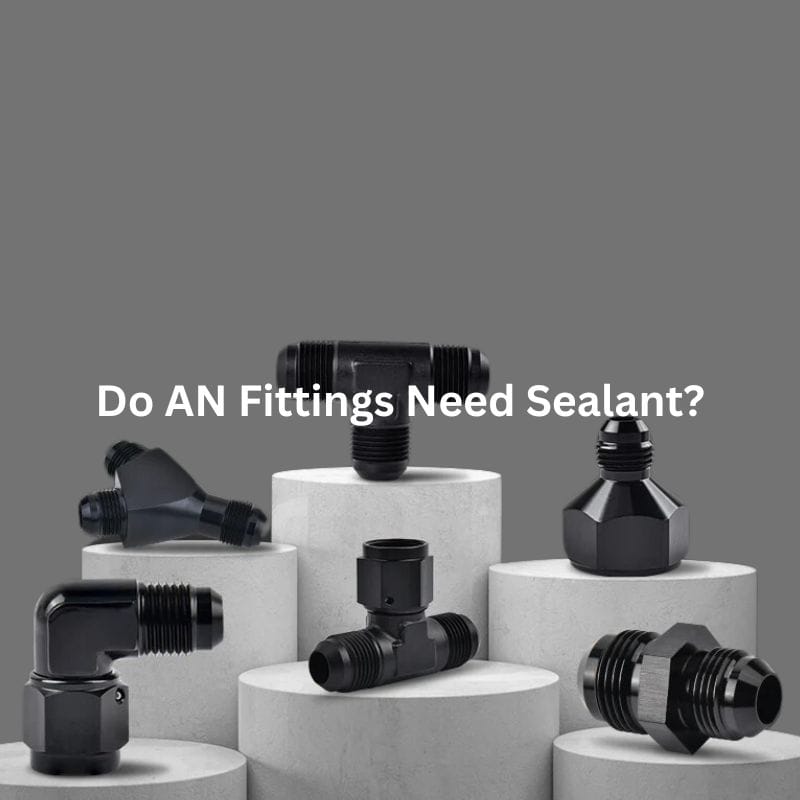
Do AN Fittings Need Sealant

Do AN Fittings Need Sealant?

Do AN Fittings Need Sealant?

Introduction

AN fittings are specialized connectors used extensively in hydraulic systems to ensure secure and leak-free connections. These fittings, known for their durability and precision, play a critical role in various industries, including automotive, aerospace, and industrial hydraulics. Proper sealing in hydraulic systems is paramount to prevent leaks, which can lead to system inefficiencies, safety hazards, and costly downtime. This article aims to address a common question among industry professionals: Do AN fittings need sealant?

The Role of Sealant in Hydraulic Fittings

Sealants play a crucial role in hydraulic systems by addressing two primary needs: preventing leaks and enhancing connection strength. Leaks in hydraulic systems can cause significant issues, including loss of pressure, reduced efficiency, potential damage to equipment, and safety hazards. By using sealants, connections are fortified against the risk of leakage, ensuring the system operates smoothly and efficiently. Additionally, sealants can improve the overall strength of the connections, providing extra security in high-pressure environments and preventing fittings from loosening due to vibrations or thermal expansion.

Types of Sealants

There are several types of sealants used in hydraulic systems, each serving specific purposes:

Thread Sealant (Liquid and Tape): Liquid thread sealants are applied directly to the threads before assembly, creating a tight seal as they cure. Teflon tape, a common thread sealant, is wrapped around the threads to fill any gaps and create a seal when the fitting is tightened.

O-rings and Gaskets: These are pre-formed seals made from materials such as rubber, silicone, or metal. They are placed between mating surfaces to prevent leaks. O-rings are commonly used in static and dynamic sealing applications, while gaskets are typically used in static applications.

How Sealants Work

Sealants function through two main mechanisms:

Chemical Bonding: Certain liquid sealants cure through a chemical reaction, forming a solid, durable bond that fills any gaps between threads or surfaces. This chemical bond provides a robust seal that resists pressure, temperature changes, and chemical exposure.

Physical Barrier: Sealants like Teflon tape and O-rings create a physical barrier that blocks the passage of fluids. Teflon tape fills the space between threads, while O-rings and gaskets compress to fill gaps, preventing fluid from escaping.

Do AN Fittings Need Sealant?

Do not apply to An flare fitting

AN fittings are engineered with a unique seal design that typically eliminates the need for additional sealants. The sealing mechanism in AN fittings relies on two main features:

Flare and Cone Interface: AN fittings utilize a 37-degree flare at the end of the tubing that mates with a corresponding cone-shaped seat within the fitting. When tightened, the flare and cone interface creates a secure, leak-proof metal-to-metal seal. This design ensures that the seal is maintained under high pressure without the need for extra sealants.

Metal-to-Metal Seal: The precision-engineered metal surfaces of AN fittings are designed to mate perfectly, forming a tight seal that is both robust and reliable. This metal-to-metal contact eliminates the gaps and spaces that could otherwise lead to leaks, making sealants unnecessary in most cases.

Factors to Consider

Application-Specific Requirements

When deciding whether AN fittings need sealant, it’s crucial to consider the specific requirements of the application, including:

High-Pressure vs. Low-Pressure Systems: In high-pressure hydraulic systems, the integrity of the seal is paramount. AN fittings are designed to handle high pressures without additional sealant, relying on their metal-to-metal seal. In low-pressure systems, the need for sealant might be less critical, but the robust design of AN fittings still generally negates the necessity for sealant.

Temperature Extremes: Hydraulic systems operating under extreme temperatures require reliable seals that can withstand thermal expansion and contraction. AN fittings’ metal-to-metal seals are effective across a wide range of temperatures, making them suitable for use without sealants in both hot and cold environments.

Material Compatibility

The materials used for AN fittings and their compatibility with the hydraulic fluid and the system’s environment are also important factors:

Aluminum, Steel, Stainless Steel AN Fittings: The choice of material for AN fittings can affect their performance in different environments. Aluminum fittings are lightweight and corrosion-resistant, making them ideal for applications where weight is a concern. Steel fittings offer high strength and are suitable for high-pressure applications, while stainless steel fittings provide excellent corrosion resistance in harsh environments.

Chemical Resistance and Reactivity: It’s important to ensure that the material of the AN fittings is compatible with the hydraulic fluid and any other chemicals in the system. Incompatible materials can lead to corrosion, leaks, and system failure. Sealants, if used, should also be compatible with both the fittings and the fluid to avoid chemical reactions that could compromise the seal.

Installation Best Practices

Proper installation techniques are critical to ensuring the reliability of AN fittings without the need for sealants:

Proper Torque Specifications: Applying the correct torque during installation is essential to achieve a secure metal-to-metal seal. Over-tightening or under-tightening can lead to leaks and fitting failure. Manufacturer guidelines should be followed to ensure the correct torque is applied.

Avoiding Over-Tightening: Over-tightening AN fittings can damage the sealing surfaces, compromising the integrity of the metal-to-metal seal. It’s important to follow best practices, such as using a torque wrench and adhering to specified torque values, to avoid over-tightening.

By considering these factors—application-specific requirements, material compatibility, and installation best practices—professionals can ensure that AN fittings perform reliably without the need for additional sealants.

Alternatives to Sealant

Using AN Fittings Without Sealant

AN fittings are designed to provide a reliable seal without the need for additional sealants. Here are some scenarios where the sealant is unnecessary and the associated benefits and potential drawbacks:

Scenarios Where Sealant is Unnecessary:

Standard Hydraulic Systems: In typical hydraulic applications where AN fittings are properly installed and maintained, the metal-to-metal seal provided by the flare and cone interface is usually sufficient to prevent leaks.

High-Pressure Applications: AN fittings are specifically designed to handle high-pressure environments, making them suitable for use without sealant in systems where maintaining pressure integrity is crucial.

Temperature-Variable Environments: The precision engineering of AN fittings ensures that they can maintain a reliable seal even under temperature fluctuations, eliminating the need for additional sealant.

Benefits and Potential Drawbacks

Benefits:

Leak Prevention: The metal-to-metal seal of AN fittings is highly effective at preventing leaks without the need for sealant, reducing maintenance and downtime.

Durability: AN fittings are less likely to degrade or fail over time compared to seals reliant on chemical sealants, which can wear out or become ineffective.

Simplified Maintenance: Without the need for sealant, installation, and maintenance become simpler and cleaner, avoiding the mess and potential for contamination that sealants can cause.

Potential Drawbacks:

Initial Installation Precision: Achieving a leak-free seal with AN fittings requires precise installation. Any damage to the sealing surfaces or improper torque can lead to leaks.

Potential for Misapplication: In some cases, users might mistakenly apply sealant, thinking it will enhance the seal, which can cause issues such as contamination or improper fitting seating.

Ensuring a Proper Seal Without Sealant

To ensure a reliable seal using AN fittings without the need for sealant, it’s important to focus on proper installation practices:

Importance of Clean and Undamaged Threads:

Clean Threads: Before installation, make sure that all threads are clean and free from debris, dirt, or old sealant residue. Contaminants can prevent proper seating of the flare and cone, leading to leaks.

Undamaged Threads: Inspect the threads for any damage, such as nicks, burrs, or deformities. Damaged threads can compromise the integrity of the seal. If threads are damaged, it’s best to replace the fitting or tubing end.

Correct Installation Techniques:

Proper Torque Application: Use a torque wrench to apply the correct amount of torque as specified by the manufacturer. Over-tightening or under-tightening can cause leaks or damage the fitting.

Aligning Fittings Properly: Ensure that the tubing and fitting are properly aligned before tightening. Misalignment can prevent the flare and cone from seating correctly, leading to an incomplete seal.

Avoid Over-Tightening: Over-tightening can deform the sealing surfaces, leading to leaks. Follow manufacturer guidelines and use a torque wrench to avoid this common mistake.

How to Use Sealant for AN Fittings

While AN fittings are designed to create a reliable seal without additional sealants, there are instances where using a sealant might be considered. If you choose to use sealant, it’s crucial to apply it correctly to ensure the integrity of the fitting. Here is a detailed guide on how to use sealant for AN fittings:

Choose the Right Sealant

Thread Sealant: Use a thread sealant that is compatible with the materials of your fittings and the fluids in your system. Liquid thread sealants are often preferred for their ease of use and reliability.

Teflon Tape: If you opt for Teflon tape, make sure it is designed for hydraulic systems and compatible with the materials and fluids used.

AN Fittings Sealant

Prepare the Fittings

Clean the Threads: Ensure the threads of both the fitting and the tubing are clean and free from any debris, dirt, or old sealant. Use a brush or cloth to remove any contaminants.

Inspect for Damage: Check the threads for any signs of damage, such as nicks, burrs, or deformities. Damaged threads should be replaced to ensure a proper seal.

Applying Liquid Thread Sealant

Apply Evenly: Apply a small amount of liquid thread sealant to the male threads of the AN fitting. Spread it evenly around the threads, avoiding excess sealant that could contaminate the system.

Avoid the First Thread: Leave the first thread or two free of sealant to ensure that excess sealant does not enter the hydraulic system.

Allow to Cure: Follow the manufacturer’s instructions regarding curing time. Some sealants require a certain amount of time to set before the system can be pressurized.

Applying Teflon Tape

Wrap the Tape: Begin wrapping the Teflon tape around the male threads, starting from the second thread. Wrap in the direction of the threads (usually clockwise) to ensure the tape doesn’t unravel when the fitting is tightened.

Ensure Coverage: Wrap the tape around the threads 2-3 times, ensuring it covers the threads completely but does not create a bulky layer.

Press and Smooth: Press the tape into the threads to smooth it out and ensure it adheres well.

Assembling the Fittings

Align Properly: Align the fitting and the tubing correctly before starting to tighten. Proper alignment is crucial to avoid cross-threading and ensure a good seal.

Tighten to Specification: Use a torque wrench to tighten the fitting to the manufacturer’s specified torque. Over-tightening can damage the fitting and compromise the seal, while under-tightening can lead to leaks.

Check for Leaks: After assembly, pressurize the system and check for leaks. If leaks are detected, re-tighten the fittings slightly and recheck. If leaks persist, disassemble, reapply sealant, and reassemble.

Tips and Best Practices

Follow Manufacturer Instructions: Always follow the sealant manufacturer’s instructions for application and curing. Different products have specific requirements.

Avoid Overuse: Use only the necessary amount of sealant. Excessive use can lead to contamination and other issues.

Regular Inspection: Regularly inspect fittings for signs of leaks or wear. Reapply sealant as needed during routine maintenance.

Avoid These Mistakes When Using Sealant with AN Fittings

While applying sealant to AN fittings can be beneficial in certain situations, it’s crucial to avoid common mistakes that can compromise the integrity of the fitting and the hydraulic system. Here are key mistakes to avoid:

Using Sealant When Not Needed

Unnecessary Application: AN fittings are designed to create a reliable metal-to-metal seal without additional sealants. Applying sealant when it’s not required can lead to contamination and improper sealing.

Manufacturer Guidelines: Always refer to the manufacturer’s recommendations. Many AN fitting producers advise against using sealants on their products.

Over-Tightening the Fittings

Damage to Sealing Surfaces: Over-tightening can deform the sealing surfaces of the flare and cone, leading to leaks and potential fitting failure.

Proper Torque: Use a torque wrench to apply the correct amount of torque as specified by the manufacturer to avoid over-tightening.

Applying Too Much Sealant

Excess Sealant: Using too much liquid sealant or wrapping too many layers of Teflon tape can cause the sealant to squeeze into the hydraulic system, leading to contamination and blockages.

Even Application: Apply a thin, even layer of liquid sealant or 2-3 wraps of Teflon tape to ensure proper sealing without excess material.

Incorrect Sealant Selection

Compatibility Issues: Not all sealants are suitable for use with hydraulic systems or compatible with the materials of the fittings and the hydraulic fluid.

Right Product: Choose a sealant specifically designed for hydraulic systems and ensure it is compatible with the materials and fluids involved.

Not Allowing Sealant to Cure

Premature Pressurization: Some liquid thread sealants require a curing period to form a proper bond. Pressurizing the system before the sealant has cured can result in leaks.

Curing Time: Follow the manufacturer’s instructions regarding the required curing time before pressurizing the system.

Incorrect Tape Wrapping

Wrong Direction: Wrapping Teflon tape in the wrong direction can cause it to unravel when the fitting is tightened.

Proper Technique: Wrap the tape in the direction of the threads (usually clockwise) to ensure it stays in place during assembly.

Conclusion

In summary, AN fittings are meticulously designed to create a reliable metal-to-metal seal, which typically negates the need for additional sealants. However, understanding when and how to use sealant correctly can be beneficial in specific scenarios. Following best practices, such as ensuring clean and undamaged threads, applying the correct torque, and choosing the right sealant, can enhance the reliability and efficiency of hydraulic systems.  

FAQ

AN fittings typically do not require sealant because they are designed to create a reliable metal-to-metal seal. However, in some cases, a thread sealant can be used if recommended by the manufacturer.

If sealant is necessary, use a compatible liquid thread sealant or Teflon tape designed for hydraulic systems. Ensure it is suitable for the materials and fluids in your application.

Yes, over-tightening can damage the sealing surfaces, leading to leaks. Always use a torque wrench and follow the manufacturer’s specified torque values to avoid over-tightening.

Check for proper alignment, ensure the threads are clean and undamaged, and verify that the fitting is tightened to the correct torque. If leaks persist, disassemble, clean, and reapply sealant if necessary, then reassemble correctly.

Wrap Teflon tape around the male threads 2-3 times, starting from the second thread, and wrap in the direction of the threads (usually clockwise) to ensure it stays in place during tightening.

Using excessive sealant can lead to contamination and improper sealing. Apply a thin, even layer of liquid sealant or a moderate amount of Teflon tape to achieve a proper seal without excess material.

An Fitting Install Troubleshooting Common Issues

An Fitting Install: Troubleshooting Common Issues

An Fitting Install: Troubleshooting Common Issues

Table of Contents

Introduction

AN fittings, known for their durability and precision, are commonly used in various applications such as automotive, aerospace, and industrial machinery. These fittings ensure secure, leak-free connections that are essential for system efficiency and safety. However, improper installation can lead to misalignment, leaks, and system failures. Troubleshooting and resolving common issues promptly can prevent costly downtime and potential hazards. This post aims to provide readers with valuable insights and practical solutions for addressing common installation problems, ultimately enhancing the reliability and longevity of their hydraulic systems.

Understanding AN Fittings

AN (Army-Navy) fittings are standardized connectors used primarily in fluid transfer systems. They feature a 37-degree flare fitting, designed to provide a secure and reliable connection. AN fittings come in various sizes, typically designated by a dash number indicating the size in 1/16-inch increments (e.g., -4, -6, -8). Common types of AN fittings include straight, elbow, tee, and bulkhead fittings, each designed for specific routing and connection needs.

Materials and Specifications

AN fittings are commonly made from high-quality materials such as aluminum, stainless steel, and brass. Aluminum fittings are lightweight and corrosion-resistant, making them ideal for automotive and aerospace applications. Stainless steel fittings offer superior strength and durability, suitable for high-pressure and high-temperature environments. Brass fittings provide good corrosion resistance and are often used in plumbing and general industrial applications. Specifications for AN fittings include precise thread dimensions, material grades, and pressure ratings, ensuring they meet the rigorous demands of various systems.

Common Uses and Benefits of AN Fittings

AN fittings are widely used in industries where the reliable fluid transfer is critical. In the automotive industry, they are used for fuel, brake, and oil lines due to their high-performance capabilities and ease of installation. In aerospace, AN fittings are essential for hydraulic and fuel systems, ensuring safe and efficient aircraft operation. Industrial machinery and equipment also rely on AN fittings for hydraulic and pneumatic systems, benefiting from their durability and leak-proof connections. The key benefits of AN fittings include their high pressure and temperature tolerance, ease of assembly and disassembly, and the ability to create custom configurations for specific applications.

Step-by-Step Installation Guide

Cutting the Hose

Measure the Required Length

Begin by accurately measuring the required length of the hose or tube. Use a tape measure or ruler to ensure precision. Mark the hose with a marker or tape to indicate where the cut will be made.

Cut the Hose

Use a high-quality tube cutter or hacksaw to cut the hose at the marked location. Ensure the cut is clean and straight to avoid any sealing issues later. A straight cut ensures a uniform contact surface for the fitting.

For best results, use a tube cutter designed for the specific type of hose material (e.g., rubber, PTFE, or stainless steel braided). This helps maintain the integrity of the hose and ensures a clean cut.

cut rubber hose

Deburring the Hose

Remove Sharp Edges

After cutting the hose, use a deburring tool to remove any sharp edges or burrs from the cut end. Burrs can interfere with the fitting assembly and may cause leaks or damage to the fitting.

Carefully run the deburring tool around the inside and outside edges of the hose to create a smooth, clean surface. This step is crucial for ensuring a secure fit with the AN fitting.

Inspect the Hose

After deburring, visually inspect the hose end to ensure all burrs and sharp edges have been removed. The hose end should be smooth and even and ready for fitting installation.

Installing the Hose End

Slide the Fitting Nut and Sleeve

Slide the AN fitting nut onto the hose, followed by the sleeve (or ferrule). Ensure the sleeve is oriented correctly according to the fitting type. The sleeve is designed to create a tight seal when the fitting is assembled.

For braided hoses, take extra care to ensure the braid is evenly distributed around the fitting body. This helps achieve a secure and uniform seal.

Insert the Hose into the Fitting Body

Insert the hose into the fitting body until it bottoms out. Ensure the hose is fully seated within the fitting body to create a proper seal.

For hoses with a braided cover, ensure the braid is not obstructing the fitting body and is properly aligned.

Securing the Fitting

Lubricate the Threads

Lubricate the threads of the fitting and nut with a compatible lubricant. This reduces friction during assembly and helps prevent galling or thread damage.

Use a lubricant that is compatible with the hose and fitting materials as well as the fluid type used in the system.

Hand-Tighten the Nut

Hand-tighten the nut onto the fitting body. This initial tightening helps ensure the fitting components are properly aligned before using a wrench.

Secure the Fitting in a Vice

Place the fitting into a vice with soft jaws to avoid damaging the fitting surface. Soft jaws provide a secure grip without marring the fitting.

Tighten the Nut with a Wrench

Use a wrench to tighten the nut onto the fitting body. Follow the manufacturer’s recommended torque specifications to avoid over-tightening, which can cause damage or deformation to the fitting.

Tighten the nut until you feel a slight resistance, then give it an additional turn to ensure a secure fit. Do not over-tighten, as this can lead to issues such as stripped threads or crushed fittings.

An Fitting Install hydraulic hose

Common Installation Issues

Overview of Potential Problems During Installation

When installing AN fittings, various issues can arise that compromise the integrity and performance of the connections. Being aware of these common problems and understanding how to address them is crucial for ensuring a successful and leak-free installation. Below are some of the most frequent issues encountered during AN fitting installation:

Misalignment

Symptoms

Visible gaps between fitting components.

Uneven contact surfaces.

Difficulty in threading the nut onto the fitting body.

Causes

Incorrect hose cutting or deburring.

Improper insertion of the hose into the fitting body.

Misalignment of the fitting components before tightening.

Solutions

Ensure the hose is cut straight and deburred properly.

Carefully insert the hose into the fitting body until it bottoms out.

Align the fitting components correctly before tightening the nut.

Use a vice with soft jaws to hold the fitting securely while ensuring proper alignment.

Over-Tightening or Under-Tightening

Symptoms

Over-tightening: Stripped threads, crushed fitting components, or difficulty in disassembling the fitting.

Under-tightening: Loose connections, leaks, or components that can be moved by hand.

Causes

Not following the manufacturer’s torque specifications.

Using excessive force when tightening the nut.

Insufficient tightening, leads to a weak seal.

Solutions

Always use a torque wrench to achieve the recommended torque specifications.

Avoid using excessive force when tightening the fitting.

Double-check the tightness of the fitting to ensure it is secure but not over-tightened.

Cross-Threading

Symptoms

Difficulty in threading the nut onto the fitting body.

Visible damage to the threads.

Misalignment between the nut and fitting body.

Causes

Misalignment of the fitting components before threading.

Forcing the nut onto the fitting body at an incorrect angle.

Damaged or contaminated threads.

Solutions

Inspect the threads for damage or contamination before assembly.

Ensure proper alignment of the fitting components before threading.

Thread the nut onto the fitting body by hand initially to avoid cross-threading.

If cross-threading occurs, disassemble the fitting and inspect the threads. Repair or replace damaged threads as needed.

Inadequate Lubrication

Symptoms

Increased friction during assembly.

Difficulty in tightening the nut onto the fitting body.

Potential damage to the threads or fitting components.

Causes

Not using lubricant during assembly.

Using an incompatible lubricant.

Insufficient application of lubricant.

Solutions

Apply a compatible lubricant to the threads of the fitting and nut before assembly.

Ensure even distribution of the lubricant to reduce friction.

Reapply lubricant as needed during assembly to maintain smooth threading.

Contamination and Debris

Symptoms

Leaks or poor sealing performance.

Damage to the fitting components during assembly.

Blockages or obstructions in the fluid flow.

Causes

Contaminants or debris in the hose, fittings, or assembly area.

Inadequate cleaning of components before installation.

Failure to protect open ends of hoses or fittings during storage.

Solutions

Clean all components thoroughly before assembly to remove any contaminants or debris.

Use protective covers or caps to keep hoses and fittings clean during storage and handling.

Inspect the assembly area for cleanliness and ensure it is free from debris.

Troubleshooting Misalignment

Symptoms of Misalignment in AN Fittings

Visible Gaps: There are noticeable gaps between the fitting components.

Uneven Contact Surfaces: The surfaces of the fitting do not sit flush against each other.

Threading Difficulty: Difficulty in threading the nut onto the fitting body, indicating components are not aligned correctly.

Leaks: Presence of leaks at the connection point due to improper sealing.

Causes of Misalignment and How to Prevent It

Incorrect Hose Cutting: An uneven or angled cut can cause the hose to sit improperly in the fitting.

Prevention: Use a tube cutter or saw to make a clean, straight cut. Always deburr the cut ends.

Improper Insertion: The hose is not fully inserted into the fitting body.

Prevention: Ensure the hose is pushed fully into the fitting body until it bottoms out.

Component Misalignment: Fitting components are not aligned correctly before tightening.

Prevention: Align all components properly before threading the nut. Use visual and tactile checks to confirm alignment.

Step-by-Step Troubleshooting Guide

Identifying Misalignment

Visual Inspection:

Check the fitting for any visible gaps between components.

Ensure that all surfaces are flush and even.

Threading Test:

Try threading the nut onto the fitting body by hand. If it doesn’t thread smoothly, misalignment is likely.

Leak Check:

Pressurize the system and check for leaks around the fitting. Leaks often indicate misalignment.

Correcting the Angle and Ensuring Proper Alignment

An Fitting Install

Disassemble the Fitting:

Carefully disassemble the fitting by unscrewing the nut and separating the components.

Inspect Components:

Inspect the fitting components for any signs of damage or debris. Clean all parts thoroughly.

Align the Hose:

Reinsert the hose into the fitting body, ensuring it is fully seated and aligned correctly. For braided hoses, make sure the braid is evenly distributed.

Align the Components:

Place the fitting components together, ensuring they are aligned properly. The nut should easily engage the threads of the fitting body without force.

Reassembling the Fitting

Lubricate the Threads:

Apply a compatible lubricant to the threads of the fitting and the nut to facilitate smooth assembly.

Hand-Tighten the Nut:

Begin threading the nut onto the fitting body by hand. Ensure it threads smoothly without resistance, indicating proper alignment.

Secure the Fitting:

Place the fitting in a vice with soft jaws to prevent damage. Use a wrench to tighten the nut to the manufacturer’s specified torque.

Final Inspection:

Perform a final visual inspection to confirm there are no gaps and all components are flush.

Pressure Test:

Pressurize the system and check for leaks to ensure the fitting is properly aligned and secured

Preventing and Fixing Cross-Threading

Identifying Cross-Threading Issues

Symptoms:

Difficulty in threading the nut onto the fitting body.

Visible damage or deformation of the threads.

Misalignment between the nut and fitting body.

Resistance or binding when tightening the nut.

Causes of Cross-Threading During Installation

Misalignment: The fitting components are not properly aligned before threading.

Forcing the Nut: Applying excessive force to thread the nut onto the fitting body at an incorrect angle.

Damaged Threads: Pre-existing damage or debris on the threads.

Best Practices to Prevent Cross-Threading

Proper Alignment: Ensure all components are aligned correctly before threading.

Hand-Threading First: Always start threading the nut by hand to avoid applying excessive force.

Thread Inspection: Inspect threads for damage or debris before installation.

Importance of Lubrication

Role of Lubrication in AN Fitting Installation

Reducing Friction: Lubrication reduces friction between threads, making assembly easier and preventing thread damage.

Ensuring Proper Torque: Helps achieve the correct torque without over-tightening.

Preventing Galling: Protects threads from galling, which can cause permanent damage.

Types of Lubricants Suitable for AN Fittings

Anti-Seize Compounds: Suitable for preventing galling in metal-to-metal contact.

Hydraulic Oil: Compatible with the system’s fluid and materials.

Silicone-Based Lubricants: Offer good protection and compatibility with various materials.

Signs of Inadequate Lubrication

Increased Friction: Difficulty in tightening the nut onto the fitting body.

Thread Damage: Visible damage or galling on the threads.

Poor Sealing: Leaks due to improper torque application.

Managing Contamination and Debris

Common Sources of Contamination and Debris

Environmental Factors: Dust, dirt, and debris from the installation environment.

Handling: Contamination is introduced during handling and assembly.

Residual Manufacturing Debris: Particles left from the manufacturing process.

Impact of Contaminants on Fitting Performance

Leaks: Contaminants can prevent proper sealing, leading to leaks.

Damage: Debris can cause wear and damage to fitting components.

Flow Obstruction: Contaminants can block or restrict fluid flow, reducing system efficiency.

Preventive Measures to Keep Fittings Clean

Clean Work Area: Maintain a clean and organized work environment.

Protective Covers: Use caps or plugs to protect fitting ends during storage and handling.

Regular Cleaning: Clean fittings and tools regularly to prevent contamination.

Conclusion

In this post, we’ve covered the essential steps and best practices for installing AN fittings, including identifying and troubleshooting common issues such as misalignment, cross-threading, inadequate lubrication, and contamination. Proper installation and meticulous attention to these details are crucial to ensuring the reliability and performance of your hydraulic systems. By following the outlined procedures and preventive measures, you can achieve leak-free and durable connections. If you encounter any challenges or need further assistance, don’t hesitate to seek professional advice to ensure the optimal functioning of your system.

FAQ

AN fittings are primarily used in hydraulic systems for creating secure, leak-free connections. They are commonly found in automotive, aerospace, and industrial applications.

To prevent cross-threading, always start threading the nut onto the fitting body by hand, ensuring proper alignment. Avoid using excessive force and inspect the threads for damage or debris before installation.

Use a compatible lubricant such as anti-seize compounds, hydraulic oil, or silicone-based lubricants. Ensure the lubricant is suitable for the materials and fluid type used in your system.

Signs of misalignment include visible gaps between fitting components, uneven contact surfaces, and difficulty in threading the nut onto the fitting body. Misalignment can also lead to leaks.

Clean AN fittings with a clean, lint-free cloth to remove surface dirt. For stubborn contaminants, use a suitable solvent or cleaning solution, rinse thoroughly, and allow the fittings to dry completely before installation.

Proper torque ensures that the fitting is securely tightened without over-tightening, which can cause damage or deformation. Using a torque wrench to achieve the manufacturer’s recommended torque specifications helps maintain the integrity and performance of the connection.

An to NPT Fitting

An to NPT Fitting

Male An flare to male NPT thread adapter, for use with oil, fuel line systems. Topa offers straight/45-degree/90-degree elbow AN adapters, you can check the pictures below.

If you have any questions of An to NPT fitting, please contact us!

Straight An to NPT Fitting

45° An to NPT Fitting

90° An to NPT Fitting

An to NPT Fittings Video

This video is about the details of Topa An to NPT fitting.

Topa can supply all kinds and colors of An to NPT adapters, we also apply custom services.

Please contact with us if you have any questions about hydraulic An adapter fittings or other products.

An Fitting Catalog

This catalog is about An fittings.

Topa can offer all kind of hydraulic An to NPT fittings, and our catalog also including all of them.

Please contact us If you need more information of An hydraulic hose fittings, or would like some free samples.

your name
E-mail
With Country Code
what can we do for you?

An Fitting Union

An Fitting Union

An fitting union has two male AN flare threads, and it can be used to connect oil and fuel lines. There exists straight/45-degree/90-degree elbows. Topa can offer all kinds of An union couplings, you can check the pictures below.

If you have any questions of An union fittings, please contact us!

0° An Union

45° An Union

90° An Union

An Fitting Union Video

This video is about the details of Topa An fitting union.

Topa An union fittings are CNC automated and coated for beauty and rust resistance. Our fittings have international quality certification.

Please contact with us if you have any questions about hydraulic An union fitting or other products.

An Fitting Catalog

This catalog is about An fittings.

Topa can offer all kind of hydraulic An flare union fittings, and our catalog also including all of them.

Please contact us If you need more information of An hydraulic hose fittings, or would like some free samples.

your name
E-mail
With Country Code
what can we do for you?

An Fitting Bulkhead

An Fitting Bulkhead

An fitting bulkhead connectors allow fuel lines to pass safely and securely through firewalls or body panels. They are mad of aluminum, light and corrosion resistance. Topa supply all types of AN bulkhed fitting, you can check the pictures below.

If you have any questions of An bulkhead fittings, please contact us!

0° An Bulkhead

45° An Bulkhead

90° An Bulkhead

An Fitting Bulkhead Video

This video is about the details of Topa bulkhead An fitting.

Bulkhead An fittings are good choice for fuel line systems, Topa can cuatom different colors and sizes.

Please contact with us if you have any questions about hydraulic An bulkhead fittings or other products.

An Fitting Catalog

This catalog is about An fittings.

Topa can offer all kind of hydraulic bulkhead An hose fittings, and our catalog also including all of them.

Please contact us If you need more information of An hydraulic hose fittings, or would like some free samples.

your name
E-mail
With Country Code
what can we do for you?

An Banjo Fitting

An Banjo Fitting

An banjo eye fittings are used to connect fuel lines and air brake systems. They are made of reliable aluminum, carbon steel and stainless steel materials. Those fittings are corrosion and strength. Topa can provide all kinds of banjo An fittings, you can check the pictures below.

If you have any questions of An banjo fitting, please contact us!

0° An Banjo Fitting

20° An Banjo Fitting

30° An Banjo Fitting

45° An Banjo Fitting

90° An Banjo Fitting

An Banjo Fittings Video

This video is about the details of Topa AN banjo fitting.

Topa factory can process all types of banjo fittings, we can custom sizes and colors according to your needs.

If you need hydraulic banjo An fittings, or other products, please contact us now!

An Fitting Catalog

This catalog is about An fittings.

Topa can offer all kind of hydraulic An banjo fittings, and our catalog also including all of them.

Please contact us If you need more information of An hydraulic hose fittings, or would like some free samples.

your name
E-mail
With Country Code
what can we do for you?
AN Push lock fitting

Push Lock An Fittings

Push Lock An Fittings

Push lock An fittings are made of high-quality aluminum. They are used to connect fuel lines safety. Topa can supply all size and color AN fuel line fittings , you can check the pictures below. 

If you have any questions of An push lock fittings, please contact us!

0° An Fitting

30° An Fitting

45° An Fitting

60° An Fitting

90° An Fitting

120° An Fitting

150° An Fitting

180° An Fitting

Push Lock An Fittings Video

This video is about the details of Topa push lock An fitting.

Push lock An fittings have all types of sizes, and we also offer customized services, if you need different colors, contact us!

Please contact with us if you have any questions about hydraulic An fittings or other products.

An Fitting Catalog

This catalog is about An fittings.

Topa can offer all kind of hydraulic An hose fittings, and our catalog also including all of them.

Please contact us If you need more information of An hydraulic hose fittings, or would like some free samples.

your name
E-mail
With Country Code
what can we do for you?
hose end an fitting factory in china

Swivel Hose End An Fitting

Swivel Hose End An Fitting

Swivel hose end fitting has swivel end on both ends, they are easy to operate and install. Topa can supply all size and color AN fuel line fitting , you can check the pictures below. 

If you have any questions of An hose fittings, please contact us!

0° An Hose End Fitting

30° An Hose End Fitting

45° An Hose End Fitting

60° An Hose End Fitting

90° An Hose End Fitting

120° An Hose End Fitting

150° An Hose End Fitting

180° An Hose End Fitting

Swivel Hose End An Fitting Video

This video is about the details of Topa swivel hose end fitting.

Swivel hose end An fittings are made of high-quality aluminum. They are used to connect braided fuel lines. Topa can offer all kinds of an hose connectors.

Please contact with us if you have any questions about hydraulic An hose fitting or other products.

An Fitting Catalog

This catalog is about An fittings.

Topa can offer all kind of hydraulic An hose fittings, and our catalog also including all of them.

Please contact us If you need more information of An hydraulic hose fittings, or would like some free samples.

your name
E-mail
With Country Code
what can we do for you?

Contact Topa

Looking for unbeatable prices, top-tier quality, or custom solutions that fit your exact needs? Contact Topa Now!

Contact Us

“Still hesitating which product is right for you?” Send an inquiry and our hydraulics team will provide you with the best solution!