What is a banjo fitting

What is a Banjo Fitting

What is a Banjo Fitting?

Table of Contents

Introduction

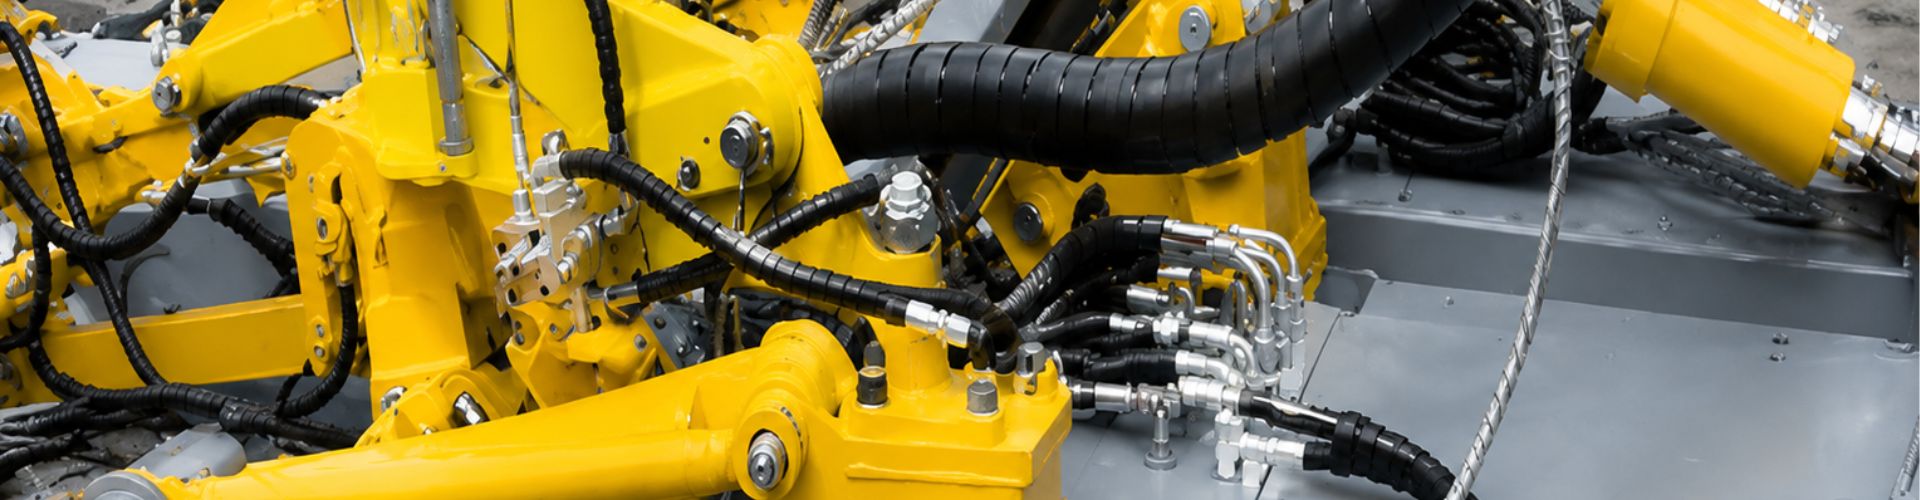
Hydraulic systems are integral to modern machinery, playing a crucial role in a wide array of applications from automotive engineering to heavy industrial equipment. Central to these systems are various types of fittings that ensure efficient and secure fluid transport. The banjo fitting stands out for its unique design and functionality. In this comprehensive exploration, we delve into what a banjo fitting is. We aim to provide a detailed and insightful guide that not only clarifies the concept of banjo fittings but also highlights their significance in diverse industrial applications.

Understanding Banjo Fittings

Basic Definition of a Banjo Fitting

A banjo fitting is a unique and highly functional component in hydraulic systems. Its primary purpose is to facilitate the transfer of fluid within systems that have rotating or oscillating parts. This type of fitting is distinctly recognizable by its hollow, circular shape, featuring a central hole. This design is not just for aesthetic resemblance to a musical banjo but serves a practical purpose in hydraulic applications. The structure of the banjo fitting is crucial for its functionality, allowing it to seamlessly integrate into various machinery setups.

Physical Description

In terms of its physical makeup, a banjo fitting is composed of two main parts: a perforated hollow bolt and a spherical union. The bolt is the central pathway for the fluid, allowing it to flow uninterrupted through its core. This bolt is typically threaded on the outside to allow secure attachment to a machine or a hydraulic line. Surrounding the bolt is the spherical union, which plays a pivotal role in connecting the fitting to the hose or pipe. This union is designed to swivel around the bolt, giving the banjo fitting its unique ability to connect at various angles without causing stress or bending in the hydraulic line. The fluid’s pathway is through the center of the bolt and exits through the hole in the side, which is strategically positioned to align with the hydraulic hose or pipe.

The banjo fitting’s design is ingeniously simple yet highly effective. Its compact size makes it ideal for use in confined spaces where traditional fittings might be cumbersome or impractical. Furthermore, the ease of connection and disconnection provided by the banjo fitting’s design makes maintenance and repair tasks more straightforward, reducing downtime in industrial settings.

Historical Background and Evolution

Origins of Banjo Fittings

The inception of banjo fittings dates back to the early 20th century, originally designed to facilitate fluid flow in automotive braking systems. Their design was a response to the need for a fitting that could easily connect fluid lines at variable angles without extensive modifications.

Evolution and Advancements Over Time

Over the years, the design and application of banjo fittings have evolved. They have been adapted for use in a broader range of hydraulic systems, including high-pressure environments, thanks to advancements in materials and manufacturing processes.

Components of a Banjo Fitting

Detailed Breakdown of Parts

Topa banjo fitting components

Banjo Bolt: The banjo bolt is a critical component of the fitting. It is a hollow bolt with an internal bore through which fluid flows. The external threading on the bolt allows it to be screwed into a receiving component, securing the fitting in place. The head of the bolt is typically hexagonal, allowing for easy tightening or loosening with standard tools.

Eye-Shaped Union (Banjo Body): This is the part of the fitting that resembles the body of a banjo, giving the component its name. The union is a ring or eye-shaped piece that encircles the bolt. It is designed with an opening that aligns with the hole in the bolt, ensuring a clear path for fluid flow. The union typically has a flat surface on one or both sides to accommodate the sealing washers.

Sealing Washers: These are usually two in number, placed on either side of the eye-shaped union. The washers are crucial for preventing leaks. They compress against the flat surfaces of the union when the bolt is tightened, creating a tight seal that prevents fluid from escaping. The effectiveness of the seal is paramount to the functioning of the banjo fitting.

Material Composition and Manufacturing Process

Materials Used: The choice of material for banjo fittings is crucial for their performance and longevity. Steel is often used for its strength and durability, making it suitable for high-pressure applications. Brass is selected for its resistance to corrosion, making it ideal for use in environments where corrosion is a concern. Aluminum is another common choice, known for being lightweight yet strong, and is often used in automotive applications.

Manufacturing Process: The manufacturing of banjo fittings involves precision machining. The process starts with the selection of high-grade metal, which is then machined into the specific shapes required for the parts of the fitting. Precision is key in this process to ensure that all components fit together perfectly. The internal bore of the bolt is carefully drilled to allow unrestricted fluid flow. The threading on the bolt and the dimensions of the union and washers are meticulously crafted to ensure a leak-proof connection. After machining, the components are often treated or coated to enhance their durability and resistance to environmental factors like moisture and chemicals.

The Importance of Banjo Fittings in Hydraulic Systems

Role in Hydraulic Systems

Function in a System

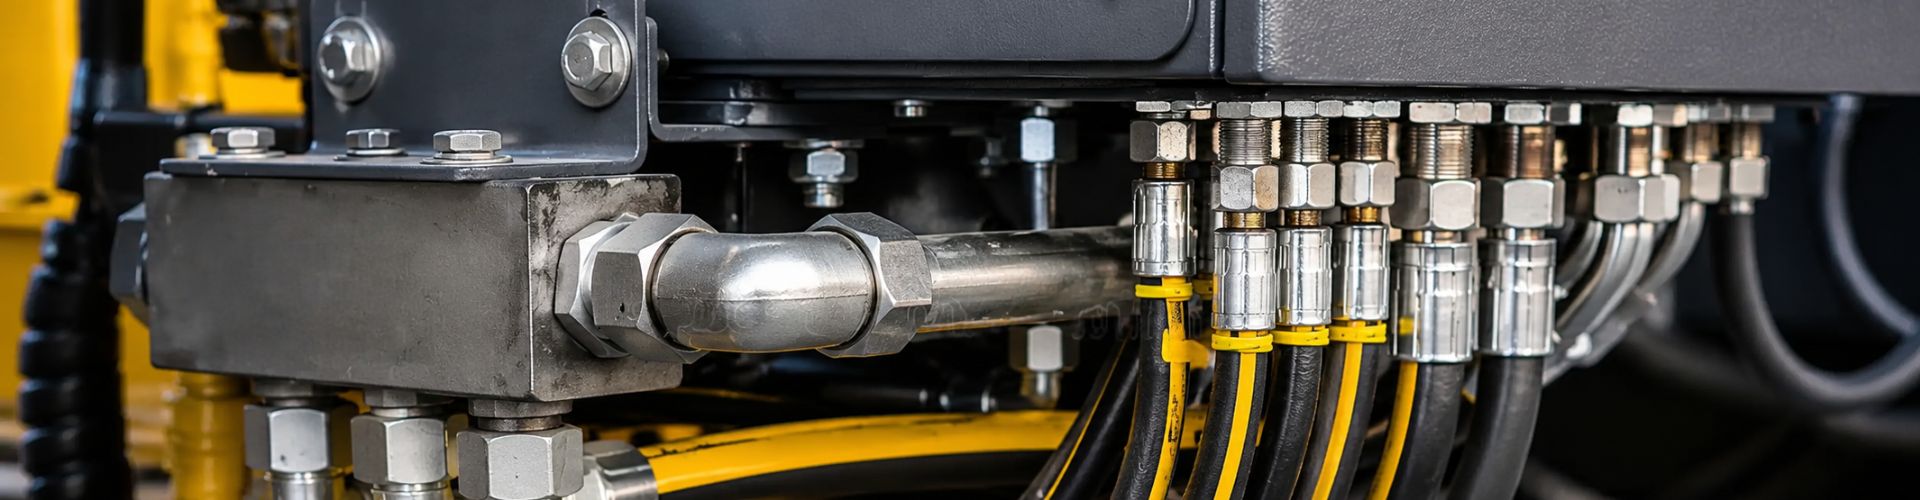
Banjo fittings serve a pivotal role in hydraulic systems by facilitating the secure and efficient transfer of fluids under pressure. Their unique design allows them to connect hoses or pipes at various angles while maintaining a secure seal. This capability is especially crucial in systems where components are in motion or where space constraints require flexible routing of hydraulic lines.

Importance in System Integrity and Efficiency

The integrity of a hydraulic system largely depends on the reliability of its connections. Banjo fittings contribute significantly to this reliability. Their design ensures minimal leakage and maintains the pressure necessary for the system’s operation. By providing a reliable connection that can withstand high pressures and dynamic stresses, banjo fittings enhance the overall efficiency and longevity of hydraulic systems.

Advantages of Using Banjo Fittings

Benefits and Superiority

One of the primary benefits of banjo fittings is their ability to facilitate quick and easy installation and maintenance. Their compact design allows them to fit into tight spaces where traditional fittings might not be suitable. Moreover, the swivel feature of the banjo union makes alignment with hoses and pipes more straightforward, reducing installation time and the risk of improper fitting.

Situations Where Particularly Advantageous

Banjo fittings are particularly advantageous in applications where space is limited and where the direction of hoses and pipes needs to change frequently. They are also ideal in systems that require frequent disassembly for maintenance, as their design allows for easy removal and reattachment without the need for extensive re-routing of lines.

Common Applications and Industries

Specific Examples of Usage in Different Industries

Banjo fittings are widely used in various industries due to their versatility. In the automotive industry, they are commonly found in brake and fuel systems. In manufacturing and industrial applications, they are used in machinery that requires hydraulic power for operation.

Types of Banjo Fittings

Overview of Varieties

Cataloging the Different Types Available

Banjo fittings come in a range of types, each designed to meet specific requirements and applications. Common varieties include standard banjo fittings, double banjo fittings, adjustable banjo fittings, and banjo bolt fittings. Each type has its unique design characteristics, making them suitable for different applications in hydraulic systems.

Detailed Descriptions

Standard Banjo Fittings

These are the most common type, consisting of a single hose connection. They are typically used where a single hose needs to be connected to a component like a master cylinder or a hydraulic pump.

Double Banjo Fittings

These fittings have two hose connections, allowing two separate hoses to be connected at the same point. This design is useful in systems where space is limited and where multiple lines need to converge.

Adjustable Banjo Fittings

These fittings come with an additional feature that allows for the rotation of the hose end, making them ideal for applications where precise alignment is necessary.

Topa banjo fitting types

Use-Cases for Each Type

Standard Banjo Fittings

Ideal for most hydraulic systems in automotive and industrial applications, where a single line connection is required.

Double Banjo Fittings

Best suited for complex hydraulic systems in machinery or automotive applications, where space-saving and multiple line connections are critical.

Adjustable Banjo Fittings

These are particularly useful in custom hydraulic setups or in applications where hoses need to be routed in specific directions to avoid obstructions.

Banjo Bolt Fittings

Commonly used in high-pressure systems such as automotive braking systems, where a robust and leak-proof connection is paramount.

Choosing the Right Type for Specific Needs

The selection of the appropriate banjo fitting type depends on several factors:

Application Requirements: Understanding the specific needs of the hydraulic system, such as pressure ratings, fluid compatibility, and connection type.

Space Constraints: Considering the available space and the need for flexibility in hose routing.

Maintenance and Accessibility: Factoring in ease of maintenance and the frequency of system modifications or inspections.

Pressure and Flow Requirements: Ensuring the fitting can handle the system’s pressure and flow without compromising efficiency or safety.

Installation and Maintenance of Banjo Fittings

Step-by-Step Instructions for Fitting Installation

Preparation

Start by determining the exact size and type of banjo fitting required for your specific hydraulic application. This is crucial as using the incorrect size can lead to leaks or system failure.

Gather all the necessary tools for the installation process. This typically includes wrenches that fit the banjo bolt and any sealants or thread tape if recommended by the manufacturer.

Ensure you have the correct number of sealing washers, usually two, for each banjo fitting.

Cleaning

Before installation, it is imperative to clean all parts of the banjo fitting. Any dirt or debris on the bolt, union, or washers can compromise the seal, leading to potential leaks.

Inspect each component for any signs of damage or wear. If any parts are damaged, replace them before proceeding with the installation.

Assembly

Begin by placing one sealing washer onto the banjo bolt. This washer will sit between the bolt head and the union.

Carefully insert the bolt through the hole in the union. The union is the part that will connect directly to the hose or pipe in your hydraulic system.

After the bolt is through the union, place the second sealing washer onto the bolt on the opposite side of the union. This arrangement ensures a tight seal on both sides of the union.

Connection

Thread the banjo bolt into the receiving component, such as a hydraulic pump or cylinder. It is important to do this gently by hand at first to prevent cross-threading.

While threading the bolt, ensure that the union is correctly aligned with the hydraulic hose or pipe. Misalignment can cause undue stress on the hose and potentially lead to failure.

Tightening

Once the bolt is hand-tightened, use an appropriate wrench to tighten it to the specified torque. It is vital to adhere to the manufacturer’s torque specifications to ensure a secure fit without over-tightening.

Over-tightening the banjo bolt can deform or damage the sealing washers, which can compromise the seal and lead to leaks. On the other hand, under-tightening might result in a loose fit, posing the risk of the fitting coming apart under pressure.

install banjo fitting Topa

Tips for a Successful Installation

Always double-check the alignment of the banjo fitting before the final tightening.

In applications where vibrations are prevalent, consider using locking mechanisms or thread-locking compounds to prevent the fittings from loosening over time.

After installation, it is a good practice to test the system under pressure before full operation to check for any leaks or issues.

Maintenance and Care

Routine Checks and Upkeep Advice

Regular Inspections for Leaks or Corrosion

Implement a schedule for regular inspections of the banjo fittings in your hydraulic system. This should include checking for any signs of leaks, which can be indicated by wetness or fluid deposits around the fittings.

Inspect for signs of corrosion, particularly if the fittings are used in harsh environments or are exposed to corrosive substances. Corrosion can compromise the structural integrity of the fittings and lead to leaks or failures.

Immediate Replacement of Worn or Damaged Components

If during inspections any component of the banjo fitting, such as the bolt, washers, or the union itself, shows signs of wear, damage, or corrosion, it should be replaced immediately. Using worn or damaged fittings can lead to system failures and pose safety risks.

Ensure that the replacements are of the same type and specifications as the original components. Using incorrect or substandard parts can adversely affect the performance and safety of the hydraulic system.

Maintaining System Cleanliness

Keeping the hydraulic system, including the banjo fittings, clean is crucial for its longevity and efficient operation. Contamination in the system can cause blockages and damage the components.

When replacing any part of the fitting or conducting maintenance, ensure that the system is clean and free from contaminants. Use clean tools and handle components with care to prevent introducing dirt into the system.

Conclusion

In summary, banjo fittings play an indispensable role in the realm of hydraulic systems, providing a unique combination of flexibility, efficiency, and reliability. Their distinct design, characterized by a hollow bolt and an eye-shaped union, allows for a compact and versatile connection solution, particularly valuable in confined spaces and in systems requiring directional fluid flow. Understanding and respecting the intricacies of banjo fittings is not just about maintaining a component; it’s about ensuring the seamless operation, safety, and longevity of hydraulic systems.

FAQ

A banjo fitting is a type of hydraulic fitting that features a hollow bolt with a side-entry port for fluid flow, typically used in tight spaces.

Banjo fittings are commonly used in automotive, hydraulic, and fuel systems where space limitations require a compact connection.

The advantage is that it allows for a 90-degree connection in confined spaces, providing a secure and efficient way to route fluid lines.

A banjo fitting works by creating a leak-proof seal between the fitting and the hose, allowing fluid to pass through the hollow bolt and into the system.

Banjo fittings are typically made from materials like steel, stainless steel, or aluminum for durability and resistance to corrosion.


Yes, banjo fittings can be reused as long as they are in good condition, and the sealing washers are replaced if needed to prevent leaks.

Topa Blog

Find out more about Topa Blog and learn more about specialized hydraulic fittings.

how to measure hydraulic quick connect fittings Topa

How to Measure Hydraulic Quick Connect Fittings

How to Measure Hydraulic Quick Connect Fitting?

Table of Contents

Introduction

Imagine this: you’re in the middle of an important project, and suddenly, your hydraulics break down. The culprit? A seemingly minor mismatch in the measurement of a hydraulic quick coupling. This situation underscores the critical importance of accurate measurements to keep your hydraulic system efficient and safe. In this comprehensive guide, we embark on a journey through the world of hydraulic quick couplings – unraveling the intricacies of their measurements, understanding the nuances of the different types, and offering expert tips for avoiding common pitfalls.

Understanding Hydraulic Quick Connect Fittings

Definition and Function

Hydraulic quick connect fittings are the unsung heroes of hydraulic systems. They are specialized connectors that allow for the rapid connection and disconnection of hydraulic hoses to different components within a system. Think of them as the critical links that keep the lifeblood of hydraulic machinery – the hydraulic fluid – flowing seamlessly. These fittings are ingeniously designed to prevent fluid leakage during connection and disconnection, ensuring the integrity of the hydraulic system. Their role extends beyond just connecting parts; they contribute significantly to the overall efficiency, safety, and maintenance convenience of hydraulic systems.

Types of Hydraulic Quick Couplings

The world of hydraulic quick connect fittings is diverse, each type crafted to meet specific requirements. Here are some common ones:

ISO A: Known for its poppet valve design, ISO A fittings are widely used and are recognized for their ability to prevent fluid loss and air inclusion.

ISO B: These fittings, with their ball-locking mechanism, are another popular choice, known for their robustness in high-pressure applications.

Flat Face: True to their name, these fittings have a flat mating surface and are prized in environments where minimal spillage is critical.

Threaded Flat Face: A variation of the flat face, these fittings are used where additional security in connection is needed.

Each type has its unique characteristics, applications, and benefits, making the selection process a crucial one.

Importance of Selecting the Right Fitting

Choosing the right hydraulic quick connect fitting is not just a matter of convenience; it’s a necessity for the optimal performance of a hydraulic system. The wrong fitting can lead to leaks, pressure drops, and even system failures. It’s essential to consider factors like the type of hydraulic fluid, operating pressure, temperature range, and environmental conditions when selecting a fitting. The right fitting ensures a seamless flow of hydraulic fluid, maintains system integrity, and enhances the lifespan of the hydraulic machinery. In essence, the right fitting choice is pivotal in harnessing the full potential of a hydraulic system.

Understanding Quick Connect Fitting Thread Standards and Sizes

Quick connect fittings in hydraulic systems rely heavily on the thread standards and sizes for a secure and leak-free connection. Understanding these standards is essential for selecting the right fittings for your hydraulic systems.

Different Thread Standards

National Pipe Thread (NPT): Common in North America, NPT threads are tapered and create a seal through thread interference, requiring thread sealant or tape.

British Standard Pipe (BSP): Popular in Europe and other parts of the world, BSP threads come in two types – parallel (BSPP) and tapered (BSPT). BSPP threads usually require a bonded seal, while BSPT threads are similar to NPT in forming a seal.

Metric Threads: Used globally, these threads follow the metric measurement system and are commonly found in ISO standard fittings.

SAE Threads: Predominantly used in mobile hydraulic applications, SAE threads are based on dimensions defined by the Society of Automotive Engineers.

Identifying Thread Sizes

Thread size for NPT and BSP is often denoted by the nominal pipe size, which doesn’t match the actual dimensions. For example, a 1/2″ NPT thread does not measure 1/2″ anywhere on the thread.

Metric threads are measured in millimeters and are typically easier to identify since their designation corresponds to the actual dimension in millimeters.

SAE thread sizes are usually denoted in inches and are often accompanied by a dash number (e.g., -4, -6, -8, etc.), indicating the size.

Tools Required for Measurement

Introduction to Necessary Tools

The precision measurement of hydraulic quick connect fittings demands specialized tools, each serving a unique purpose. Essential in this toolkit are calipers and thread gauges, instruments that bring accuracy and reliability to your measurements.

Calipers: A cornerstone tool in measuring hydraulic fittings, calipers come in various forms – digital, dial, or vernier. They are used to measure the outer and inner diameters of fittings, crucial for ensuring the correct fit.

Thread Gauges: These are used to determine the thread pitch and size of the fittings. Accurate identification of thread type is critical as mismatched threads can lead to leaks or fitting failures.

Ruler or Tape Measure: For quick, general measurements, a standard ruler or tape measure is useful, especially for measuring the length of hoses or the overall dimensions of fittings.

Effective Usage of These Tools

Using Calipers:
  • For External Diameter: Place the fitting between the jaws of the caliper, close the jaws gently until they make contact with the fitting, and read the measurement.
  • For Internal Diameter: Use the upper smaller jaws of the caliper for this measurement. Insert them into the fitting and expand until they fit snugly against the internal walls, then read the size.
Using Thread Gauges:
  • Start by visually inspecting the thread profile against a thread gauge.
  • Place the gauge on the threads and try different sizes until you find a perfect match. The correct gauge should fit snugly with no wiggle room.
Using a Ruler or Tape Measure:
  • For straightforward measurements like the length of a hose, lay it flat and measure from end to end.

Step-by-Step Guide to Measuring Quick Coupler

Measuring the Diameter

measure hydraulic quick connect fittings Topa
Measuring the External Diameter:
  • Select the Right Caliper: Choose a caliper that’s appropriate for the size of the fitting. Digital calipers are recommended for their ease of reading and precision.
  • Positioning the Fitting: Carefully place the fitting between the jaws of the caliper. It’s crucial to ensure that the fitting is perpendicular to the jaws. This positioning is essential for an accurate measurement.
  • Taking the Measurement: Gently close the caliper until it makes firm contact with the external surface of the fitting. Avoid applying excessive force to prevent any damage to the fitting or the caliper.
  • Recording the Measurement: Once the caliper is snug against the fitting, lock the caliper jaws (if applicable) and record the measurement. Note the measurement down to the appropriate decimal place for precision.
Measuring the Internal Diameter:
  • Caliper Selection: Use a caliper that has a range suitable for the expected internal diameter of the fitting.
  • Using the Upper Jaws: The upper jaws of the caliper are designed for measuring internal diameters. Carefully insert these jaws into the opening of the fitting.
  • Expanding the Jaws: Gently expand the caliper jaws until they reach the internal walls of the fitting. Be cautious not to over-expand as it may distort the measurement or damage the fitting.
  • Snug Fit and Measurement: Expand the jaws until they fit snugly against the internal walls. The fit should be firm but not forced. Once a snug fit is achieved, lock the caliper and record the measurement.

Identifying Thread Types and Sizes

Visual Inspection:
  • Initial Observation: Start by closely examining the thread pattern on the fitting. Observe whether the threads appear tapered (conical shape) or parallel (cylindrical shape). This visual distinction is vital as it helps in identifying the thread type.
  • Thread Appearance: Note any unique characteristics of the threads, such as the number of threads per inch, thread pitch, and the angle of the threads. These observations can provide initial clues about the thread type.
Using Thread Gauges:
  • Selection of Thread Gauge: Choose a thread gauge that matches your initial visual estimate. It’s beneficial to have a set of thread gauges that includes various standards like NPT (National Pipe Thread), BSP (British Standard Pipe), Metric, etc.
  • Aligning Gauge with Thread: Carefully place the thread gauge against the fitting’s threads. Begin with the gauge size you estimated visually to be closest.
  • Finding the Perfect Match: Slide the gauge along the threads. The correct size gauge will align seamlessly with the threads without any gap or play. It should sit flush against both the peaks (crests) and valleys (roots) of the threads.
  • Recording Thread Type and Size: Once you find the matching gauge, record the thread type and size. For example, you might identify a fitting as 1/2″ NPT or 3/4″ BSP.

Determining the Body Size of the Fitting

Measuring Body Diameter:
  • Using a Caliper for Measurement: Position the caliper around the largest part of the fitting body. This is typically the section with the maximum diameter.
  • Recording the Measurement: Measure and record the diameter, ensuring the caliper is perpendicular to the fitting for an accurate reading. This diameter is essential in understanding the fitting’s flow capacity.
Referencing Manufacturer Specifications:
  • Comparing with Standards: Once you have the measurements, compare them with the manufacturer’s specifications or standard size charts. This comparison ensures that the fitting aligns with industry standards and can correctly match with complementary components.
Special Considerations for Different Fitting Styles
  • ISO A vs ISO B Fittings: Recognize that ISO A and ISO B fittings have different locking mechanisms. For ISO B, it is crucial to measure across the locking balls as this dimension impacts the interlocking capability of the fittings.
  • Flat Face Fittings: The sealing surface diameter is critical in flat face fittings. Ensure accurate measurement of this surface as it directly affects the fitting’s ability to seal and prevent leaks.
  • Threaded Fittings: When dealing with threaded fittings, both the thread size and the body size are important. Accurate measurement of these dimensions ensures proper fitting functionality and compatibility within the hydraulic system.

Common Mistakes and How to Avoid Them

Overview of Typical Errors Made During Measurement

  • Incorrect Tool Use: A frequent error is the improper use of measurement tools, like using a caliper incorrectly. This leads to inaccurate readings.
  • Ignoring Calibration: Failing to calibrate tools, especially digital ones, can result in measurements that are off.
  • Misreading Thread Types: Mixing up thread types, such as confusing NPT with BSP, is a common mistake due to their subtle differences.
  • Overlooking Wear and Tear: Measuring worn-out fittings without considering their degraded state can lead to inaccurate size determination.
  • Assuming Standard Sizes: Assuming that all fittings adhere to standard sizes and not measuring each fitting individually can lead to mismatches.
  • Neglecting Environmental Factors: Not accounting for temperature or pressure conditions that could affect the fitting dimensions.

Tips for Ensuring Accuracy in Measurements

  • Proper Tool Handling: Always use measurement tools as intended. For calipers, ensure they are perpendicular to the object being measured and that the jaws are gently closed on the item.
  • Regular Calibration: Regularly calibrate your tools, especially if they are digital, to ensure ongoing accuracy.
  • Educate on Thread Types: Familiarize yourself with different thread types and their characteristics. Use a thread identification chart if necessary.
  • Consider Condition of Fittings: When measuring used fittings, consider their wear and tear. Compare with new fittings if possible to understand how wear has affected the size.
  • Measure Each Fitting Individually: Don’t assume all fittings of the same type are identical. Variations can occur, so measure each fitting individually.
  • Mind the Environment: Consider the environmental factors where the fittings will be used. Temperature and pressure can affect both the fitting material and the measurements.
  • Double-Check Measurements: Always double-check measurements, especially when they seem off or do not align with standard sizes.
  • Use Quality Tools: Invest in high-quality, reliable measuring tools. Good tools reduce the chance of error.
  • Keep Tools Clean and Protected: Ensure your tools are clean and stored properly. Dirt and damage can affect accuracy.
  • Continuous Learning: Stay informed about new fittings, tools, and measurement techniques. The field of hydraulics is constantly evolving, and keeping up-to-date can help avoid mistakes.

Advanced Considerations

When selecting hydraulic quick connect fittings, it’s not just about size and compatibility; advanced considerations like pressure ratings, flow rates, and material selection play a critical role in the performance and durability of the hydraulic system.

Pressure Ratings

Understanding Pressure Ratings: Each hydraulic fitting is rated for a maximum operating pressure. It’s essential to choose fittings that can withstand the system’s maximum pressure, including pressure surges.

Consequences of Incorrect Ratings: Using a fitting with a lower pressure rating than the system can lead to catastrophic failures, posing safety risks and potential system damage.

Matching with System Requirements: Ensure that the fittings’ pressure ratings either match or exceed the requirements of the hydraulic system to maintain integrity under all operating conditions.

Flow Rates

Importance of Flow Rate: The flow rate, typically measured in gallons per minute (GPM), determines the speed at which fluid travels through the system. Fitting size and internal design impact this rate.

Selection Based on Flow Requirements: Select fittings that can accommodate the system’s required flow rate without causing excessive turbulence or pressure drop.

Impact on System Efficiency: Inadequate flow rates can lead to inefficiencies, such as slow operation of hydraulic actuators or overheating of the fluid.

Material Selection

Types of Materials: Common materials for hydraulic fittings include steel, stainless steel, brass, and thermoplastics. Each material has its advantages and limitations.

Steel and Stainless Steel: These materials are known for their strength and durability. Stainless steel offers additional corrosion resistance, making it suitable for harsh environments.

Brass: Brass fittings are typically used in lower pressure applications and are known for their corrosion resistance and ductility.

Thermoplastics: These are used in less demanding applications and offer good resistance to chemicals and corrosion. They are lightweight and economical.

Considerations for Material Choice: The selection should be based on factors like the type of hydraulic fluid used, environmental conditions (corrosive or extreme temperatures), and application-specific requirements.

Tips for Purchasing the Correct Fittings

Selecting the right hydraulic quick connect fittings is crucial for the efficiency and safety of your hydraulic system. Here are some essential tips to consider when purchasing fittings:

Guidance on Selecting the Right Fittings After Measurement

Verify Measurements: Cross-check the measurements taken with the specifications needed for your application. Ensure that the diameters, thread types, and sizes align with your system requirements.

Application-Specific Requirements: Consider the specific demands of your application. For instance, if the fitting is for a high-vibration environment, choose a fitting designed to withstand such conditions.

Standard vs. Custom Fittings: Determine if standard fittings meet your needs or if you require custom-made fittings for specialized applications.

Conclusion

In choosing the perfect hydraulic quick connect coupling, it is important to fully understand its type, take proper measurements, recognize common mistakes, and be able to grasp high-level considerations such as pressure ratings and material suitability. Every step of the way, from initial measurements to final selection, requires attention to detail and an understanding of the system’s operating environment and requirements.

FAQ

To measure hydraulic quick connect fittings, you’ll need a caliper or micrometer to measure the diameter, and a thread gauge for checking the thread size.

Measure the outside diameter of the fitting’s male or female threads to determine its size, and check the thread pitch using a thread gauge.

Accurate thread measurement ensures compatibility between the fitting and the mating part, preventing leaks or connection issues.

Measure the overall length of the fitting from end to end, excluding any external features like sleeves or collars.

The coupling mechanism, such as the locking sleeve, should be measured for proper alignment and functionality, ensuring it securely locks the fitting in place.

Ensure that both the size (diameter, thread) and pressure rating of the hydraulic quick connect fitting match the requirements of your hydraulic system.

Topa Blog

Find out more about Topa Blog and learn more about specialized hydraulic fittings.

Contact Topa

Save 30% on maintenance costs with our easy-install hydraulic fittings. Contact Now!