How to Loosen Hydraulic Hose Fittings

How to Loosen Hydraulic Hose Fittings

How to Loosen Hydraulic Hose Fittings

Table of Contents

Introduction

Hydraulic hose fittings are crucial components in various industrial applications, ensuring the proper flow of hydraulic fluid within the system. Proper maintenance and handling of these fittings are essential to avoid operational issues and extend the lifespan of the equipment. This guide aims to provide a comprehensive method for safely loosening hydraulic hose fittings, targeted towards maintenance providers, technicians, and industry professionals.

Understanding Hydraulic Hose Fittings

Types of Hydraulic Hose Fittings

Hydraulic hose fittings are essential components in hydraulic systems, ensuring secure connections and the efficient transfer of fluids. Each type of fitting is designed for specific applications and operating conditions, and understanding these types can help you choose the right fitting for your needs.

JIC Fittings:

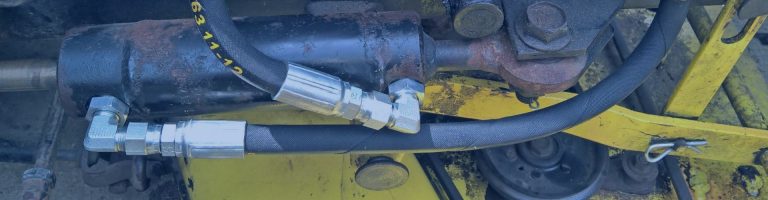
JIC fittings are characterized by their 37-degree flare seating surface, which provides a strong and reliable connection. These fittings are widely used in fuel delivery systems, fluid power applications, and other high-pressure environments where durability and reliability are crucial. Their flared design ensures a tight seal, reducing the risk of leaks and enhancing system safety.

ORFS Fittings:

ORFS fittings feature an O-ring within a groove on the face of the fitting, creating a seal when connected. This design ensures a leak-proof connection, even under high-pressure conditions. Ideal for high-pressure hydraulic systems, ORFS fittings are commonly used in construction equipment, agricultural machinery, and other industrial applications requiring reliable sealing. The primary benefit of ORFS fittings is their ability to provide a leak-proof seal, significantly reducing the risk of fluid leaks. This makes them suitable for applications where maintaining hydraulic fluid integrity is critical.

NPT Fittings:

NPT fittings use a tapered thread design that tightens as it is threaded together, creating a seal. NPT fittings are commonly used in lower-pressure applications such as pneumatic systems, plumbing, and general hydraulic systems where high pressure is not a primary concern.

BSP Fittings:

BSP fittings are similar to NPT fittings but have a different thread angle and pitch. BSP fittings are commonly used in Europe and Asia and come in two types: BSPP (parallel) and BSPT (tapered). These fittings are widely used in hydraulic systems, plumbing, and other fluid transfer applications in regions where BSP standards are prevalent.

Preparatory Steps Before Loosening Fittings

Safety Precautions

When working with hydraulic systems, safety is paramount. Improper handling can lead to severe injuries or system damage. Always follow these guidelines to ensure a safe and efficient work environment:

Wear Personal Protective Equipment (PPE):

  • Gloves: Protect your hands from sharp edges and hot surfaces.
  • Safety Goggles: Shield your eyes from hydraulic fluid splashes and debris.
  • Protective Clothing: Wear long sleeves and pants to minimize skin exposure to hydraulic fluid and other hazards.
  • Ensure a Safe Working Environment:
  • Clear the Area: Remove any unnecessary personnel and equipment from the work area to prevent accidents.
  • Adequate Lighting: Ensure the work area is well-lit to avoid mistakes and to see potential hazards.
  • Ventilation: Work in a well-ventilated area to avoid inhaling fumes from hydraulic fluids and lubricants.

Tools and Equipment Needed

Having the right tools and equipment is essential for safely and effectively loosening hydraulic hose fittings. The proper tools not only make the job easier but also help prevent damage to the fittings and the hydraulic system. Here’s a list of essential tools and equipment:

Wrenches:

  • Adjustable Wrenches: Versatile and can be adjusted to fit different sizes of fittings.
  • Pipe Wrenches: Useful for gripping round fittings and applying significant torque.
  • Specific Hydraulic Wrenches: Designed specifically for hydraulic fittings, ensuring a better grip and preventing damage.

Pliers:

  • Slip-Joint Pliers: Adjustable pliers that can be used for gripping various sizes of fittings.
  • Needle-nose Pliers: Ideal for gripping small fittings and working in tight spaces.
  • Locking Pliers (Vise-Grips): Provide a firm grip on the fitting, making it easier to turn.

Lubricants:

  • Penetrating Oils: Products like WD-40 or PB Blaster can help loosen rusted or seized fittings by penetrating the threads and breaking down corrosion.
  • Application: Apply the penetrating oil around the fitting and allow it to sit for several minutes to maximize effectiveness.

Step-by-Step Guide to Loosening Hydraulic Hose Fittings

Initial Assessment

Before attempting to loosen a hydraulic hose fitting, a thorough initial assessment is crucial. This step helps you understand the condition of the fitting and select the appropriate tools for the job.

Inspect for Damage or Corrosion:

  • Visual Inspection: Look for signs of wear, rust, or corrosion. These can make the fitting harder to loosen and might indicate that additional care is needed.
  • Physical Examination: Feel for any roughness or deformities that might suggest damage beyond visual inspection.

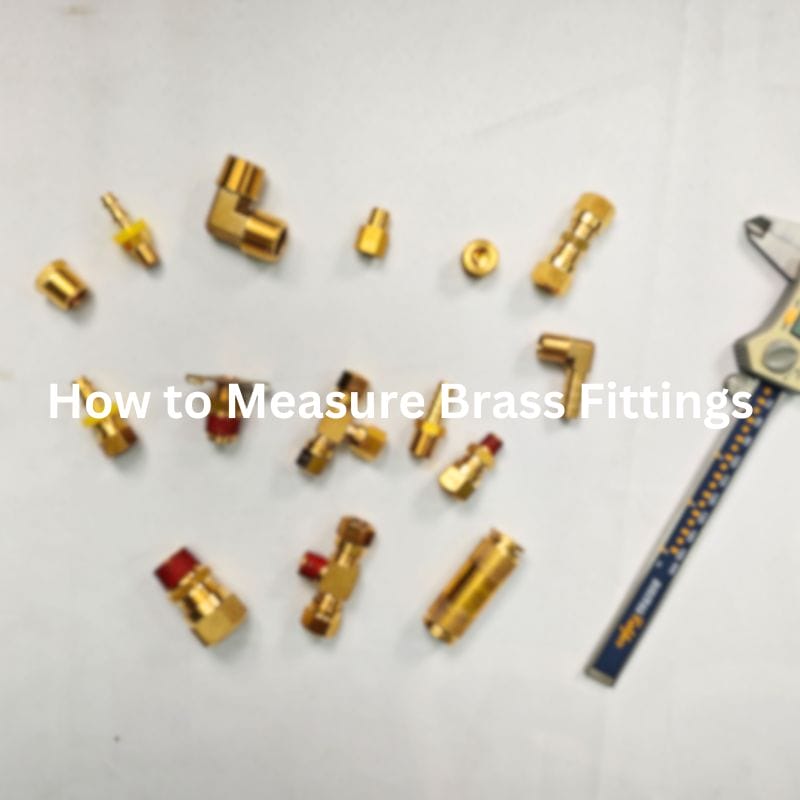
Determine Type and Size:

  • Identify the Fitting Type: Understand whether it is a JIC, ORFS, NPT, BSP, or another type of fitting. This will guide the choice of tools and techniques.
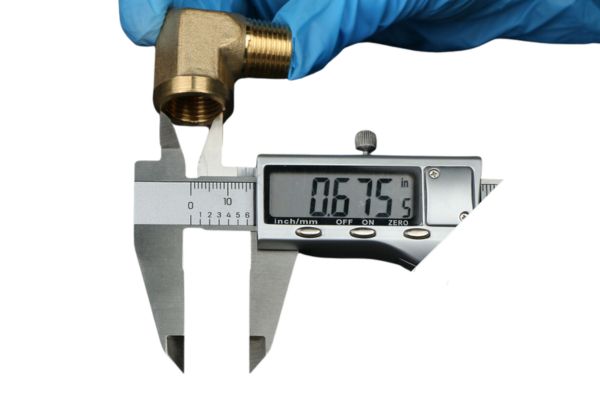
  • Measure the Fitting: Use a caliper or a fitting gauge to determine the exact size of the fitting, ensuring you select tools that fit properly.

Applying Lubricants and Penetrating Oils

Lubricants and penetrating oils can significantly ease the process of loosening hydraulic hose fittings by breaking down rust and corrosion.

Types of Lubricants:

  • Penetrating Oils: Products like WD-40, PB Blaster, and Liquid Wrench are designed to penetrate rust and corrosion, making it easier to loosen fittings.
  • Specialty Lubricants: Consider using high-performance penetrating lubricants for severely corroded or seized fittings.

Application:

  • Apply Generously: Spray or apply the lubricant around the fitting, ensuring it reaches the threads.
  • Wait Time: Allow the lubricant to penetrate for several minutes. For severely seized fittings, let it sit for up to an hour, reapplying as needed.

Loosening Techniques

Using the right techniques is essential to avoid damaging the fitting or the hydraulic system.

Gentle Tapping and Vibration:

  • Light Tapping: Use a small hammer to gently tap the fitting. This can help break the bond of rust or corrosion.
  • Vibration: Apply vibration using a vibrating tool or by tapping consistently to loosen the grip of corrosion on the threads.

Using Heat:

  • Heat Application: Use a heat gun or propane torch to apply heat around the fitting. Heat causes the metal to expand, which can break the bond of rust and make the fitting easier to loosen.
  • Caution: Avoid overheating, which can damage the fitting or surrounding components. Heat should be applied evenly and for short periods.
stuck Hydraulic fitting

Step-by-Step Process

Apply Moderate Force:

  • Initial Attempt: Begin by applying moderate force using the appropriate wrench or pliers. Ensure you have a firm grip on the fitting to avoid slippage.
  • Caution: Do not apply excessive force immediately, as this can damage the fitting or strip the threads, making it even more difficult to remove. Gentle but firm pressure is key.

Increase Gradually:

  • Incremental Pressure: If the fitting does not budge with moderate force, gradually increase the pressure. This approach minimizes the risk of sudden breakage or thread damage.
  • Lubricant Application: If the fitting remains resistant, apply additional penetrating oil or lubricant. Allow the lubricant to penetrate for several minutes before attempting to loosen the fitting again.
  • Tapping Technique: Use a small hammer to gently tap around the fitting. The vibration can help break up rust and corrosion, making the fitting easier to turn. Alternate between applying lubricant and tapping to maximize the effect.

Dealing with Stubborn Fittings

Sometimes, despite careful application of force and lubrication, hydraulic hose fittings remain stubborn due to severe corrosion or being over-tightened. In these cases, more advanced techniques are necessary.

Advanced Techniques

Hydraulic Pullers:

  • Usage: Hydraulic pullers or extractors are designed to remove seized fittings by applying uniform, controlled force. Attach the puller to the fitting and operate it according to the manufacturer’s instructions.
  • Effectiveness: These tools can be very effective, especially for fittings that are deeply corroded or tightly bonded to the hose.

Impact Tools:

  • Pneumatic Impact Tools: These tools use compressed air to deliver high torque and vibration, which can help break the bond of rust and corrosion. Attach the impact tool to the fitting and use short, controlled bursts.
  • Electric Impact Tools: Similar to pneumatic tools, electric impact tools provide high torque and vibration. They are useful in situations where compressed air is not available. Always follow safety guidelines when using impact tools to avoid damage or injury.
stubborn Hydraulic fitting Topa

Cutting and Replacing

When Necessary:

  • Last Resort: If all other methods fail, cutting the fitting may be the only viable option. This should be considered a last resort due to the irreversible nature of cutting.
  • Tool Selection: Use a pipe cutter, hacksaw, or reciprocating saw. Choose the tool based on the material of the fitting and the surrounding components to avoid collateral damage.

Cutting Process:

  • Careful Execution: Position the cutter or saw carefully to ensure a clean cut through the fitting without damaging the hose or other adjacent components. It is crucial to maintain steady hands and a slow, controlled cutting motion.
  • Removing the Fitting: Once the fitting is cut through, gently remove it. Be mindful of any remaining sharp edges that could pose a safety hazard.

Replacement:

  • Selecting a New Fitting: Ensure the replacement fitting matches the specifications of the original, including thread type, size, and material. This is essential for maintaining system integrity and preventing leaks.
  • Installation: Install the new fitting according to the manufacturer’s guidelines. Use proper torque specifications to avoid over-tightening and ensure a secure, leak-free connection.
  • Testing: After installation, repressurize the hydraulic system and test for leaks. Conduct a thorough inspection to confirm that the new fitting is securely in place and functioning correctly.

Post-Loosening Procedures

After successfully loosening and removing a hydraulic hose fitting, several critical steps must be taken to ensure the system’s integrity and prevent future issues. This section covers inspecting the fitting and hose, cleaning and maintenance, reconnecting the system, and system testing.

Inspecting the Fitting and Hose

Checking for Signs of Damage or Wear:

  • Visual Inspection: Carefully examine the removed fitting for any signs of damage, such as cracks, deformation, or excessive corrosion. These issues can indicate that the fitting needs to be replaced rather than reused.
  • Thread Integrity: Inspect the threads for any signs of stripping or cross-threading. Damaged threads can compromise the sealing capability and should be addressed.
  • Hose Condition: Check the hose for any signs of wear, such as abrasions, cuts, or bulges. These can indicate potential failure points that need attention.

Assessing the Condition of the Hose and Adjacent Fittings:

  • Hose Integrity: Ensure the hose is still flexible and free of cracks. Stiffness or brittleness in the hose material can indicate age-related degradation and may necessitate replacement.
  • Adjacent Fittings: Inspect any nearby fittings for similar issues. Corrosion or damage to adjacent fittings can impact the overall system’s performance and safety.

Cleaning and Maintenance

Cleaning the Fitting and Surrounding Area:

  • Debris Removal: Use a suitable solvent to clean the fitting and the surrounding area thoroughly. Remove any dirt, rust, or debris that could interfere with the connection.
  • Drying: Ensure the cleaned areas are completely dry before proceeding to prevent any contaminants from entering the hydraulic system.

Applying Anti-Seize Compounds:

  • Purpose: Applying an anti-seize compound to the threads of the fitting can prevent future seizing and make future maintenance easier.
  • Application: Apply a thin, even layer of anti-seize compound to the threads of the fitting. Avoid over-application, as excess compounds can contaminate the hydraulic fluid.

Reconnecting the System

Proper Reinstallation Techniques:

  • Alignment: Ensure the fitting and hose are correctly aligned before threading the fitting. Misalignment can lead to cross-threading and damage.
  • Thread Engagement: Start threading the fitting by hand to ensure proper engagement and avoid cross-threading. Once hand-tight, use the appropriate wrench to secure the fitting.

Ensuring Secure and Leak-Free Connections:

  • Torque Specifications: Follow the manufacturer’s recommended torque specifications to ensure the fitting is tightened correctly. Over-tightening can damage the threads, while under-tightening can lead to leaks.
  • Sealing Elements: Ensure any O-rings, gaskets, or sealing elements are correctly positioned and in good condition. Replace any worn or damaged seals.

System Testing

Repressurizing the Hydraulic System:

  • Gradual Pressurization: Slowly bring the hydraulic system back up to its operating pressure. This gradual approach allows for monitoring and immediate response to any issues.
  • Monitoring: Keep a close eye on the system during depressurization, looking for any signs of leaks or pressure drops.

Testing for Leaks and Proper Functionality:

  • Leak Detection: Use a leak detection fluid or soapy water to check for leaks around the reconnected fitting. Bubbles or fluid movement indicates a leak that needs to be addressed.
  • System Functionality: Test the hydraulic system under normal operating conditions to ensure it is functioning correctly. Pay attention to any unusual noises, vibrations, or performance issues.
  • Final Inspection: After the system has been tested and deemed functional, perform a final inspection of all fittings and connections to ensure everything is secure and leak-free.

Conclusion

To safely and effectively loosen hydraulic hose fittings, it’s crucial to follow proper procedures, including initial assessment, selecting the right tools, applying lubricants, and employing appropriate loosening techniques. Always adhere to safety measures and use the correct tools to avoid damage. Regular maintenance and inspections are vital to ensure the longevity and reliability of your hydraulic system.

For more information, refer to industry books, articles, and online resources. Contact Topa hydraulic system experts for professional advice and assistance.

FAQ

How do I identify the type of hydraulic hose fitting?

Check the shape, size, and thread type of the fitting. Common types include JIC, ORFS, NPT, and BSP. Refer to manufacturer specifications or use a fitting gauge for accurate identification.

What should I do if a hydraulic hose fitting is stuck?

Apply penetrating oil, allow it to sit, then use appropriate tools with moderate force. If still stuck, use heat carefully or advanced tools like hydraulic pullers.

How can I prevent hydraulic hose fittings from seizing in the future?

Regularly apply anti-seize compounds to the threads, maintain a clean environment, and perform routine inspections and maintenance.

What safety precautions should I take when working with hydraulic systems?

Always wear PPE, such as gloves, safety goggles, and protective clothing. Ensure the work area is clear and well-lit, and depressurize the system before starting any work.

How do I check for leaks after reconnecting a hydraulic hose fitting?

Gradually repressurize the system and use a leak detection fluid or soapy water around the fitting. Look for bubbles or fluid movement indicating a leak.

When should I replace a hydraulic hose fitting instead of reusing it?

Replace the fitting if it shows signs of severe damage, corrosion, or stripped threads, or if it fails to seal properly after reinstallation.

How to Measure Brass Fittings

How to Measure Brass Fittings

How to Measure Brass Fittings

Introduction

Accurately measuring brass fittings is crucial for ensuring the proper fit and function in various applications, such as plumbing, automotive, and industrial systems. This guide provides a comprehensive approach to measuring brass fittings, helping you achieve precision and avoid common pitfalls.

Understanding Brass Fittings

Brass fittings are essential components in various systems, known for their versatility and reliability. Here’s a closer look at the different types and their characteristics:

Types of Brass Fittings

Elbows: These fittings allow for a change in direction, typically at 45° or 90° angles. They are crucial in navigating piping systems around corners or obstacles.

Tees: Used to combine or split flow, tees have three openings, making them ideal for branching off a main line.

Couplings: Couplings connect two pipes. They come in different forms, such as straight couplings for same-size pipes or reducing couplings for connecting different sizes.

Adapters: These fittings connect pipes of different types or sizes. They are particularly useful in retrofitting and repair applications.

Properties of Brass

Durability: Brass is known for its longevity and ability to withstand wear and tear, making it a reliable choice for long-term installations.

Corrosion Resistance: One of brass’s most significant advantages is its corrosion resistance, which ensures a longer lifespan in various environments, including those with moisture or corrosive substances.

Conductivity: Brass is an excellent conductor of heat and electricity, which is beneficial in applications requiring efficient thermal or electrical transfer.

Applications of Brass Fittings

Brass fittings are used in numerous industries due to their robustness and reliability:

Plumbing: In household and commercial plumbing systems, brass fittings ensure secure and leak-free connections.

Automotive: Brass fittings are used in fuel lines, brake systems, and other critical automotive components.

Industrial: These fittings are essential in machinery, manufacturing processes, and industrial equipment, where durability and precision are paramount.

Step-by-Step Guide to Measuring Brass Fittings

Step 1: Identifying the Fitting Type

Start by visually identifying the fitting type. Recognize whether it is an elbow, tee, coupling, adapter, or another type of fitting. It’s also essential to determine if the fitting has male (external threads) or female (internal threads) ends. This step is crucial because different fittings serve different functions and require specific measurement approaches.

Elbows: Used to change the direction of the flow.

Tees: Used to combine or split fluid flow.

Couplings: Used to connect two pipes.

Adapters: Used to connect different types or sizes of pipes and fittings.

Understanding the fitting’s role will help you determine which measurements are necessary and how to approach them accurately.

Step 2: Measuring the Diameter

Accurate diameter measurement is essential for ensuring a proper fit. Both the inner diameter (ID) and outer diameter (OD) need to be measured with precision.

Inner Diameter (ID):

Use calipers to measure the internal width of the fitting. Ensure the calipers are fully inserted and perpendicular to the walls of the fitting for an accurate measurement.

Measure at multiple points to check for roundness and consistency.

Outer Diameter (OD):

Measure the external width of the fitting using calipers. Position the calipers perpendicular to the fitting’s surface.

For fittings with threads, measure the OD across the threads, ensuring the calipers are properly aligned.

Step 3: Measuring the Thread Size

Thread size is critical for compatibility in threaded connections. Identifying the thread type and size ensures that the fittings will mate correctly with other components.

Identify the Thread Type:

Common thread types include NPT (National Pipe Thread), BSP (British Standard Pipe), and metric threads.

Look for markings on the fitting that indicate the thread type or use a thread identification chart.

Use a Thread Gauge:

Match the fitting threads with the correct thread gauge. Ensure the gauge fits snugly without force.

Check both the thread pitch (distance between threads) and the thread angle for an accurate match.

measure brass Fitting length

Step 4: Measuring the Length

Length measurements are necessary to ensure that the fitting will fit properly within the system.

Overall Length:

Measure the total length from one end to the other using a ruler or tape measure.

For threaded fittings, measure from the end of the threads. Include the length of the threads in your measurement to ensure an accurate overall length.

Additional Measurements:

For fittings like elbows or tees, measure the length of each segment.

Measure the center-to-end length for elbows to determine the distance from the centerline to the end of the fitting.

Step 5: Cross-Referencing Standards

Ensuring your measurements comply with industry standards is essential for compatibility and functionality.

Reference Charts:

Use industry-standard reference charts to compare your measurements. These charts provide standard dimensions for various types of fittings.

Ensure that your measured dimensions align with the standard dimensions listed in the charts.

Manufacturer Specifications:

Consult the specifications provided by the fitting manufacturer. These documents often include detailed dimensions and tolerances.

Verify that your measurements fall within the acceptable range specified by the manufacturer.

Consistency in Units:

Ensure consistency in measurement units (metric or imperial) throughout your measurements. Mixing units can lead to errors and compatibility issues.

Special Considerations for Different Fitting Types

Elbows and Tees

Elbows and tees are commonly used in piping systems to change the direction of the flow or to split/combine flow paths. Due to their unique shapes, these fittings require special considerations during measurement.

Measure Angles Using a Protractor:

Elbows typically come in standard angles such as 45°, 90°, and 180°. Use a protractor to measure the exact angle of the elbow.

Ensure the protractor is correctly aligned with the fitting’s centerline for an accurate reading.

Measure Branch Diameters Separately:

Tees have three branches, and each branch may have a different diameter. Use calipers to measure the inner and outer diameters of each branch individually.

For consistency, take multiple measurements along different points of the branch diameters to confirm uniformity.

Measure Center-to-End Distances:

For elbows, measure the center-to-end distance, which is the distance from the centerline of one end to the end of the fitting. This is crucial for ensuring proper alignment in piping systems.

For tees, measure the center-to-end distances for all three branches to ensure proper fitment and alignment within the system.

measure elbow brass fitting

Specialty Fittings

Specialty fittings are custom or unique fittings designed for specific applications. These fittings often require detailed and precise measurements.

Take Detailed Measurements:

Measure all dimensions meticulously, including inner and outer diameters, lengths, and angles. Use calipers, rulers, and protractors as needed.

Record any unique features or modifications present in the fitting.

Consult with Suppliers for Exact Specifications:

If the fitting has been custom-made or has unique features, consult with the supplier or manufacturer to obtain detailed specifications and tolerances.

Provide the supplier with all the measurements you’ve taken to ensure compatibility and correctness.

Consider Material and Coating:

Note the material and any coatings or treatments applied to the fitting. These factors can affect the fitting’s dimensions and performance in specific environments.

Troubleshooting Common Issues

Measurement Errors

Measurement errors can occur for various reasons, including improper tool use, incorrect alignment, or inconsistent measurement techniques. Ensuring accuracy is essential to avoid these pitfalls.

Re-check Measurements if They Seem Off:

Double-check your measurements if they do not match expected values or seem inconsistent.

Ensure that your measuring tools, such as calipers and rulers, are correctly calibrated and in good working condition.

Take multiple measurements at different points and average the results to improve accuracy.

Verify that you are using the appropriate units (metric or imperial) consistently throughout the measurement process.

Proper Tool Use:

Familiarize yourself with the correct use of each measuring tool. Refer to the manufacturer’s instructions or seek training if necessary.

Ensure that calipers and thread gauges are properly positioned and applied perpendicular to the surfaces being measured.

Worn or Damaged Fittings

Fittings that are worn or damaged can present challenges in obtaining accurate measurements. Identifying and addressing these issues is crucial for ensuring reliable measurements.

Use Calipers and Gauges to Measure Unaffected Areas:

Inspect the fitting for signs of wear, corrosion, or damage. Focus on areas that appear to be in good condition.

Use calipers to measure the inner and outer diameters at multiple points around the fitting to find areas that are less affected by wear.

Utilize thread gauges to verify the thread size in sections that are not damaged.

Assess the Extent of Wear or Damage:

If the fitting is significantly worn or damaged, consider replacing it with a new fitting to ensure accurate measurements and proper functionality.

Document the condition of the fitting and communicate with suppliers or manufacturers for guidance on tolerances and replacement options.

Hard-to-Reach Areas

Measuring fittings in hard-to-reach areas can be challenging. Employing the right tools and techniques can help you overcome these difficulties.

Use Flexible Measuring Tools:

Utilize flexible or extendable measuring tools, such as flexible rulers or measuring tapes, to reach confined spaces.

Employ specialized calipers with extended or flexible jaws designed for accessing hard-to-reach areas.

Disassemble Components if Necessary:

In some cases, disassembling components may be necessary to gain better access to the fitting. Ensure that you have the necessary tools and expertise to safely disassemble and reassemble the system.

Take extra care during disassembly to avoid damaging the fitting or associated components.

Utilize Mirror and Light:

Use mirrors and adequate lighting to improve visibility in tight or obscured spaces. This can help you align measuring tools more accurately and ensure precise measurements.

Brass Fitting Maintenance

Maintaining the brass fittings themselves is also crucial to ensure their durability and functionality.

Regular Inspection:

Periodically inspect brass fittings for signs of wear, corrosion, or damage. Look for any cracks, deformities, or discoloration that may indicate a problem.

Check threaded areas for any signs of wear or stripping that could affect the fitting’s ability to seal properly.

Cleaning:

Clean brass fittings with a mild solution of soap and water. Avoid using harsh chemicals that can damage the brass.

Use a soft brush to remove any debris or build-up from the threads and internal surfaces.

Corrosion Prevention:

Apply a thin layer of anti-corrosion lubricant to the threads and external surfaces of brass fittings to protect against moisture and corrosive elements.

Store fittings in a dry environment to minimize exposure to humidity and other corrosive factors.

Repair and Replacement

Knowing when to repair or replace brass fittings is vital for maintaining system integrity and safety.

Repair:

Minor surface corrosion can often be cleaned and treated to restore the fitting’s appearance and function.

For fittings with damaged threads, use thread repair kits or inserts to restore the threading.

Replacement:

Replace fittings that show significant signs of wear, severe corrosion, or damage that compromises their structural integrity.

Keep an inventory of commonly used fittings to ensure quick replacement and minimize system downtime.

Professional Consultation

In some cases, consulting with professionals can provide additional insights and recommendations for maintaining and calibrating brass fittings.

Manufacturer Support:

Reach out to the fitting manufacturer for guidance on maintenance, calibration, and replacement procedures specific to their products.

Utilize manufacturer-provided resources, such as manuals and support lines, to ensure proper care of fittings.

Industry Experts:

Consult with industry experts or technicians who specialize in brass fittings and measurement tools. Their expertise can help identify best practices and solutions for specific challenges.

By adhering to these maintenance and calibration practices, you can ensure that both your measuring tools and brass fittings remain in optimal condition, providing reliable performance and longevity in their applications.

Conclusion

In conclusion, mastering the accurate measurement of brass fittings is essential for ensuring the success and reliability of your projects. By following this detailed guide, you equip yourself with the knowledge and skills needed to achieve precision, avoid common errors, and maintain the performance of your fittings. Accurate measurements lead to optimal performance, increased longevity, and smooth operation across all your applications, making your work more efficient and effective.

If you have any questions about measuring brass fittings, please feel free to contact Topa and we will provide you with a solution as soon as possible!

FAQ

What tools do I need to measure brass fittings accurately?

To measure brass fittings accurately, you will need calipers for diameter measurements, thread gauges to identify thread size and type, rulers or tape measures for overall length and height measurements, and protractors for measuring angles in elbow fittings.

How do I identify the type of brass fitting I have?

Start by visually inspecting the fitting. Determine whether it is an elbow, tee, coupling, adapter, or another type. Note if it has male (external threads) or female (internal threads) ends. This helps in applying the correct measurement technique.

What should I do if my measurements seem inconsistent?

Re-check your measurements, ensuring your tools are correctly calibrated and in good working condition. Take multiple measurements at different points and average the results for better accuracy. Ensure consistent use of measurement units (metric or imperial).

How can I measure fittings in hard-to-reach areas?

Use flexible or extendable measuring tools, such as flexible rulers or measuring tapes, to access confined spaces. Employ specialized calipers with extended or flexible jaws. If necessary, disassemble components to gain better access to the fitting.

Why is regular calibration of measuring tools important?

Regular calibration ensures that your measuring tools provide accurate and reliable measurements. It helps maintain precision, prevents measurement errors, and ensures that your fittings fit correctly and function as intended.

How do I maintain brass fittings to ensure their longevity?

Periodically inspect brass fittings for wear, corrosion, or damage. Clean them with mild soap and water, and avoid harsh chemicals. Apply a thin layer of anti-corrosion lubricant to protect against moisture and corrosive elements. Store fittings in a dry environment.

Do You Use Teflon Tape on Brass Fittings

Do You Use Teflon Tape on Brass Fittings?

Do You Use Teflon Tape on Brass Fittings

Table of Contents

Introduction

In the intricacies of plumbing and industrial applications, the proper use of materials and techniques is critical to achieving optimum performance and reliability. One of the most prominent of the many questions that arise in this area is whether Teflon tape should be used on brass fittings. The purpose of this article is to understand the properties of brass fittings and Teflon tape, discuss the pros and cons of using Teflon tape, and provide a detailed step-by-step guide to the proper application of Teflon tape.

Understanding Brass Fittings

Brass fittings are crucial components used extensively across various sectors, including plumbing systems, industrial machinery, and automotive applications. These fittings are crafted from an alloy of copper and zinc, which offers an ideal balance of strength, durability, and corrosion resistance. The versatility of brass fittings makes them indispensable in environments where reliability and longevity are paramount. Brass fittings come in numerous shapes and sizes, each designed to meet specific functional requirements.

Properties of Brass

Brass is highly valued for its excellent machinability, allowing it to be easily molded into a wide array of shapes and sizes to suit diverse applications. Its good heat conductivity ensures efficient thermal management in systems that encounter significant temperature variations. Moreover, brass is inherently resistant to corrosion, which is crucial for components exposed to water, chemicals, and other harsh substances. This resistance extends the lifespan of brass fittings, making them a cost-effective choice for long-term use. Additionally, brass fittings can withstand high pressures, making them suitable for high-stress environments where other materials might fail. This combination of properties underscores why brass remains a preferred material in many critical applications.

What is Teflon Tape?

Teflon tape, officially known as PTFE (polytetrafluoroethylene) tape, is a thin, white tape widely used to seal pipe threads. Its primary function is to prevent leaks in threaded connections by filling the gaps between threads. The tape’s non-stick properties help to lubricate the threads during assembly, making it easier to tighten the connections and subsequently disassemble them if needed. This characteristic reduces the likelihood of threads seizing or becoming damaged during use, contributing to the longevity and reliability of the fittings.

Types of Teflon Tape

There are several types of Teflon tape, each designed for specific applications:

Standard Density Tape: Typically white, this tape is used for general plumbing applications, particularly with water pipes. It is suitable for most household and light commercial uses where moderate pressure and temperature are expected.

High-Density Tape: This tape is thicker and more durable than standard-density tape, providing a more robust seal. It is often used in applications where higher pressures and temperatures are encountered, offering enhanced reliability.

Gas-Rated Tape: Usually yellow, this type of tape is specifically designed for gas lines. It is thicker and denser, providing a secure seal that can withstand the pressures and potential corrosive nature of gas. This tape is essential for ensuring safety in gas installations.

Common Uses

Teflon tape is most commonly used in plumbing to seal pipe threads and prevent leaks. Its application extends to both residential and commercial plumbing systems, ensuring watertight connections in water supply and drainage systems. In industrial settings, Teflon tape is used to seal threaded connections in machinery and equipment, preventing fluid and gas leaks that could disrupt operations or pose safety hazards.

To Use or Not to Use Teflon Tape on Brass Fittings

Arguments for Using Teflon Tape

Proponents of using Teflon tape on brass fittings argue that it provides a highly effective seal that prevents leaks in threaded connections. This is particularly important in systems where even a small leak can lead to significant issues, such as in gas lines or high-pressure water systems. Teflon tape is valued for its ability to fill the small gaps and imperfections in the threads, creating a watertight and airtight seal that enhances the overall reliability of the connection.

Additionally, Teflon tape lubricates the threads during assembly, which reduces friction and makes it easier to tighten the fittings without damaging them. This lubrication is particularly beneficial during maintenance or repairs, as it allows the fittings to be disassembled and reassembled with minimal effort. This ease of disassembly is crucial in applications where frequent maintenance is required, as it can save time and reduce the risk of damaging the fittings or the surrounding components.

Moreover, Teflon tape is resistant to a wide range of chemicals, making it suitable for use in various environments where chemical exposure is a concern. Its versatility and ease of use make it a preferred choice for many professionals and DIY enthusiasts who seek a reliable and straightforward sealing solution for their brass fittings.

Teflon Tape on Brass Fittings Topa

Arguments Against Using Teflon Tape

On the other hand, critics of using Teflon tape on brass fittings raise several concerns. One of the primary arguments against its use is the risk of over-tightening. When Teflon tape is applied to the threads, it can reduce the friction so much that users may inadvertently over-tighten the fittings. Over-tightening can lead to several issues, including stripping the threads, deforming the fitting, or even causing the fitting to crack, all of which can compromise the integrity of the connection.

Another point raised by critics is that Teflon tape may not always be necessary for brass fittings. Brass-to-brass connections are typically designed to create a reliable seal without the need for additional sealing materials. The precision machining of brass threads allows them to fit together snugly, forming a seal through metal-to-metal contact. In such cases, adding Teflon tape might be redundant and could potentially interfere with the natural sealing properties of the brass.

Furthermore, there is a concern that improperly applied Teflon tape can unravel or become dislodged during assembly, leading to debris in the system that can cause blockages or interfere with the operation of valves and other components. This risk underscores the importance of proper application techniques, which are not always followed, especially by less experienced individuals.

In conclusion, the decision to use Teflon tape on brass fittings depends on the specific application and the user’s expertise. While Teflon tape offers several benefits, including improved sealing and ease of maintenance, it also carries risks that must be carefully managed to avoid damaging the fittings or compromising the system’s integrity.

Proper Application Techniques

Preparing the Fitting

Before applying Teflon tape, it is essential to prepare the fitting properly to ensure an effective seal. Start by cleaning the fitting thoroughly to remove any dirt, debris, or old sealing material from the threads. Use a brush or a rag to clean the threads meticulously. Ensuring that the threads are clean and free of any contaminants will help the Teflon tape adhere better and form a more reliable seal.

Applying Teflon Tape

Applying Teflon tape correctly is crucial for achieving a leak-free connection. Follow these steps for optimal results:

Hold the End of the Tape Against the Male Threads:

Begin by securing the end of the Teflon tape against the male threads of the fitting. Ensure that the tape is positioned at the start of the threads, nearest to the end of the fitting.

Wrap the Tape Around the Threads in a Clockwise Direction:

Wrap the tape in a clockwise direction, following the direction in which the fitting will be screwed in. This prevents the tape from unraveling during the assembly process.

Overlap the Tape Slightly as You Wrap:

As you wrap the tape around the threads, make sure to overlap it slightly. This ensures that the tape covers the threads evenly, creating a uniform seal. Be careful not to overlap too much, as this can make the tape too thick.

Apply 2-3 Wraps for a Secure Seal:

Typically, 2-3 wraps of Teflon tape are sufficient to create a secure seal. More wraps might be necessary for larger fittings, but avoid overdoing it, as too much tape can cause issues.

Press the Tape Into the Threads:

After wrapping, use your fingers to press the tape into the threads. This helps to ensure that the tape adheres properly and is snugly fitted into the threads, enhancing the seal’s effectiveness.

Common Mistakes to Avoid

Even a slight mistake during the application process can compromise the seal. Here are some common mistakes to watch out for:

Wrapping the Tape in the Wrong Direction:

Wrapping the tape in the wrong direction (counterclockwise) can cause it to unravel when the fitting is screwed in. Always wrap the tape in a clockwise direction.

Using Too Much Tape:

Applying too much tape can lead to over-tightening, which might damage the threads or cause the fitting to crack. Stick to 2-3 wraps to avoid this issue.

Not Applying Enough Tape:

Insufficient tape can result in a poor seal, leading to leaks. Ensure that the threads are adequately covered by applying at least 2-3 wraps.

By following these proper application techniques, you can ensure a reliable and durable seal for your brass fittings, reducing the risk of leaks and enhancing the overall performance of your system.

Alternatives to Teflon Tape

Thread Sealants

Thread sealants, commonly referred to as pipe dope, are paste-like substances designed to seal threaded connections. These sealants are versatile, suitable for a broad range of temperatures and pressures, and compatible with various materials, including brass. They are particularly effective in applications where a strong, durable seal is required, making them a popular choice in both residential and industrial settings.

Types of Thread Sealants

Anaerobic Sealants: These sealants cure in the absence of air and provide a robust seal that can withstand high pressures and temperatures. They are ideal for use in hydraulic and pneumatic systems.

Non-Hardening Sealants: These remain pliable and are easy to disassemble, making them suitable for applications that require regular maintenance or adjustment.

Pipe Dope

Pipe dope is a specific type of thread sealant that remains pliable after application, ensuring a long-lasting and flexible seal. It is particularly advantageous in high-pressure applications where the sealing performance of Teflon tape might fall short. The pliability of pipe dope helps maintain a seal even under thermal expansion and contraction, making it ideal for systems that experience significant temperature fluctuations.

Troubleshooting and Maintenance

Identifying Issues

leak brass Fitting

When using Teflon tape on brass fittings, several common problems can arise, often due to improper application or selecting the wrong type of tape for the job. The most frequent issues include:

Leaks: Leaks can occur if the Teflon tape is not applied correctly or if insufficient tape is used. This results in gaps between the threads, allowing fluid or gas to escape.

Difficulty in Disassembly: If the Teflon tape is applied too thickly or incorrectly, it can cause the fittings to bind together, making disassembly difficult. This is particularly problematic during maintenance or repairs.

Damaged Threads: Over-tightening the fittings when Teflon tape is used can strip or damage the threads. This damage compromises the integrity of the connection and can lead to leaks or failure of the fitting.

Solutions and Fixes

Addressing these issues promptly is essential to maintain the integrity and reliability of your plumbing or industrial system. Here are detailed solutions and fixes for the common problems associated with Teflon tape:

Leaks:

Reapplication: If you identify a leak, remove the fitting and inspect the Teflon tape. Strip off the old tape and clean the threads thoroughly to remove any residue. Reapply the Teflon tape, ensuring you wrap it correctly and evenly. Start at the end of the fitting and wrap in a clockwise direction, overlapping the tape slightly. Typically, 2-3 wraps are sufficient. Press the tape into the threads with your fingers to ensure a secure fit.

Disassembly Issues:

Using Lubricants or Heat: If the fitting is difficult to disassemble, apply a lubricant such as penetrating oil to the threads and let it sit for a few minutes to reduce friction. If this does not work, you can apply heat to the fitting using a heat gun or a torch to expand the metal slightly, which can help loosen the threads. Be cautious when using heat, especially in environments with flammable materials.

Damaged Threads:

Inspection and Replacement: If the threads appear damaged, inspect them closely. If the damage is minor, you may be able to clean the threads with a thread file or a wire brush. For significant damage, it is best to replace the fitting entirely to ensure a reliable seal. Always check both the male and female threads for damage to prevent future issues.

Conclusion

Understanding the proper use of Teflon tape on brass fittings is critical to achieving a reliable, leak-free connection. Adhering to proper application techniques and choosing the right type of tape will ensure a secure seal in a variety of applications. While Teflon tape works well for most brass fittings, other sealing methods such as thread sealants or pipe coatings must be considered for high-pressure applications or to avoid the risk of over-tightening. Do you have any other tips or tricks? Please let us know!

FAQ

Can Teflon tape be used on brass fittings?

Yes, Teflon tape can be used on brass fittings to create a leak-free seal and lubricate the threads during assembly.

How many wraps of Teflon tape should I use?

Typically, 2-3 wraps of Teflon tape are sufficient for most applications. Over-wrapping can lead to over-tightening and potential damage.

In which direction should I wrap Teflon tape?

Wrap Teflon tape in a clockwise direction, following the direction in which the fitting will be screwed in, to prevent the tape from unraveling.

Is Teflon tape suitable for high-pressure applications?

While Teflon tape can be used for many applications, thread sealants or pipe dope are recommended for high-pressure environments for a more robust seal.

Can I use Teflon tape on gas lines?

Yes, but it is essential to use gas-rated Teflon tape, usually yellow, which is designed specifically for gas line applications.

What should I do if my fitting leaks even after using Teflon tape?

If fitting leaks, remove the fitting, clean the threads, and reapply the Teflon tape correctly, ensuring it is wrapped evenly and securely.

Can You Mix Brass and Copper Fittings

Can You Mix Brass and Copper Fittings?

Can You Mix Brass and Copper Fittings?

Introduction

When working on plumbing or piping systems, selecting the right fittings is crucial for ensuring durability and performance. Brass and copper are two common materials used in these applications due to their excellent properties. However, mixing these fittings raises questions about their compatibility and potential issues. This comprehensive guide aims to address these concerns, providing detailed insights into the feasibility and best practices for mixing brass and copper fittings.

Understanding Brass and Copper Fittings

Brass Fittings

Brass is an alloy primarily composed of copper and zinc, which can also include small amounts of other elements like lead, tin, and aluminum to enhance its properties. The combination of these metals results in a material known for its exceptional durability and corrosion resistance, making brass an ideal choice for various applications.

Composition and Varieties

The ratio of copper to zinc in brass can vary, producing different types of brass with specific properties tailored to particular uses. For example, yellow brass, which contains about 60-70% copper and 30-40% zinc, is known for its excellent corrosion resistance and machinability. On the other hand, red brass, with a higher copper content (typically 85-90%), is even more resistant to corrosion and is often used in environments where high durability is required.

Copper Fittings

Copper fittings are crafted from pure copper, a metal renowned for its exceptional thermal and electrical conductivity. Copper’s natural properties make it a preferred choice for a variety of applications where efficient heat and electricity transfer are essential.

Properties and Benefits

Thermal Conductivity: Copper has one of the highest thermal conductivity ratings among metals, which makes it ideal for use in systems that require efficient heat dissipation, such as radiators and heat exchangers.

Electrical Conductivity: Due to its excellent electrical conductivity, copper is widely used in electrical wiring and electronic components.

Corrosion Resistance: Copper naturally resists corrosion from water and air, which prolongs the lifespan of copper fittings and reduces maintenance costs.

Types of Copper Fittings

There are several types of copper fittings, each designed for specific applications:

Soldered Fittings: These fittings are joined using solder to create a leak-proof seal, commonly used in plumbing and HVAC systems.

Compression Fittings: Compression fittings provide a mechanical seal and are often used where soldering is impractical.

Flared Fittings: These fittings are typically used in high-pressure applications, such as refrigeration and fuel lines.

Physical and Chemical Properties

Physical Properties

Both brass and copper exhibit unique physical properties that make them suitable for different applications in plumbing, heating, and industrial systems.

Brass

Density and Hardness: Brass is denser and harder than copper due to its zinc content. The density of brass typically ranges from 8.4 to 8.7 grams per cubic centimeter, depending on the exact composition. Its hardness and strength are significantly higher, making it more resistant to wear and mechanical damage. This property is particularly advantageous in applications where fittings are subjected to high pressures and mechanical stress.

Mechanical Strength: The mechanical strength of brass makes it ideal for use in heavy-duty applications. Its ability to withstand high temperatures and pressures without deforming or failing is crucial in industrial and high-pressure environments.

Thermal Conductivity: While brass has good thermal conductivity, it is not as high as that of pure copper. However, its conductivity is sufficient for many applications, including heating systems and heat exchangers, where efficient heat transfer is essential.

Workability: Despite being harder than copper, brass retains good workability. It can be easily machined, welded, and soldered, allowing for the production of precise and complex fittings. The machinability of brass is enhanced by its relatively low melting point, which ranges from 900 to 940 degrees Celsius (1,650 to 1,720 degrees Fahrenheit).

Copper

copper Fitting Types

Malleability and Ductility: Copper is highly malleable and ductile, which means it can be easily shaped, bent, and drawn into thin wires or intricate shapes without breaking. This property is beneficial in applications that require custom-shaped fittings or where pipes need to be bent around obstacles.

Density: Copper has a density of about 8.96 grams per cubic centimeter, making it slightly less dense than brass. This lower density contributes to its greater flexibility and ease of handling during installation.

Thermal and Electrical Conductivity: Copper’s thermal conductivity is among the highest of any metal, making it an excellent choice for heat transfer applications. It efficiently conducts heat, which is why it is used in HVAC systems, heat exchangers, and refrigeration units. Additionally, copper’s electrical conductivity is superior, making it the preferred material for electrical wiring and components.

Strength: While not as strong as brass, copper possesses sufficient strength for most plumbing and HVAC applications. Its ability to withstand internal water pressure and external mechanical forces makes it a reliable choice for residential and commercial systems.

Chemical Properties

Copper

Reactivity: Copper is more chemically reactive than brass, primarily due to its higher copper content. Copper can react with various substances, including oxygen, sulfur, and ammonia, leading to the formation of compounds such as copper oxide, copper sulfide, and copper ammonia complexes. These reactions can occur over time, especially in harsh environmental conditions.

Corrosion Resistance: Despite its reactivity, copper has excellent resistance to corrosion in most environments. When exposed to air, copper forms a protective layer of copper oxide, which prevents further oxidation and corrosion. This passive layer is self-repairing, ensuring long-term durability. Copper is also resistant to corrosion caused by water and many chemicals, making it suitable for plumbing and HVAC systems.

Brass

Composition and Stability: Brass, being an alloy of copper and zinc, exhibits enhanced stability compared to pure copper. The addition of zinc improves the alloy’s resistance to various forms of chemical attack, including corrosion.

Dezincification: One specific chemical property of brass that requires attention is its susceptibility to dezincification. Dezincification is a form of corrosion that selectively removes zinc from the brass alloy, leaving behind a porous and weakened copper-rich structure. This process can occur in environments with high levels of chlorides or other aggressive substances. However, brass alloys designed for plumbing and industrial applications often include small amounts of arsenic or other elements to inhibit dezincification.

Corrosion Resistance: Overall, brass exhibits excellent corrosion resistance, particularly in non-aggressive environments. Its ability to resist corrosion from water, atmospheric conditions, and mild chemicals makes it a popular choice for plumbing and industrial fittings. The zinc content in brass contributes to the formation of a stable oxide layer that protects the underlying metal from further corrosion.

Can Brass And Copper Fittings Be Used Together?

Yes, brass fittings and copper fittings can be used together, but there are several important factors to consider to ensure compatibility and longevity of the system. Here are the key points to keep in mind:

Compatibility and Benefits

Material Compatibility:

Mechanical Strength and Flexibility: Combining brass and copper fittings can leverage the mechanical strength of brass and the flexibility of copper, resulting in a robust and adaptable system.

Corrosion Resistance: Both brass and copper have excellent corrosion resistance. Copper is naturally resistant to most forms of corrosion, while brass, particularly when alloyed with other elements, resists dezincification and other corrosion types.

install brass Fittings

Potential Issues

Galvanic Corrosion:

Electrochemical Process: When two dissimilar metals, such as brass and copper, are in contact with each other and an electrolyte (like water), galvanic corrosion can occur. This electrochemical process causes the less noble metal (the anode) to corrode faster than it would alone, while the more noble metal (the cathode) corrodes more slowly.

Impact: In the brass-copper combination, brass (depending on its zinc content) can act as the anode and corrode, especially in the presence of an electrolyte.

Best Practices for Mixing Brass and Copper Fittings

Installation Guidelines

Proper installation is crucial to ensure the longevity and functionality of a system that mixes brass and copper fittings. Here are some detailed guidelines to follow:

Avoid Direct Metal-to-Metal Contact:

Insulation: Always ensure that there is no direct contact between brass and copper fittings to prevent galvanic corrosion. Use insulating materials like rubber or plastic gaskets and sleeves to physically separate the metals.

Thread Sealants: Apply appropriate thread sealants or pipe joint compounds on threaded connections. These sealants not only prevent leaks but also act as a barrier between the metals.

Use Appropriate Sealing Compounds and Gaskets:

Compatibility: Choose sealing compounds and gaskets that are compatible with both brass and copper. Ensure that they can withstand the operating temperatures and pressures of the system.

Non-conductive Materials: Opt for non-conductive sealing materials to further minimize the risk of electrical continuity between the metals, reducing the potential for galvanic corrosion.

Use of Dielectric Unions

Dielectric unions are essential components when mixing brass and copper fittings. They are designed to prevent galvanic corrosion by electrically isolating the two different metals. Here’s how to effectively use dielectric unions:

Functionality:

Electrical Isolation: Dielectric unions contain a non-conductive barrier that breaks the electrical path between brass and copper, preventing the electrochemical reaction that causes galvanic corrosion.

Sealing: They also provide a reliable seal to prevent leaks, ensuring the integrity of the plumbing or piping system.

Installation:

Correct Placement: Install dielectric unions at all transition points between brass and copper fittings. Ensure that the union is securely fastened to both metal types.

Inspection: After installation, inspect the unions to ensure there are no gaps or loose connections that could compromise their effectiveness.

Selection:

Quality: Choose high-quality dielectric unions that are rated for the specific pressures and temperatures of your system. Inferior products may fail prematurely, leading to leaks or corrosion.

Size Compatibility: Ensure the unions are the correct size for your fittings to provide a proper fit and seal.

Recommended Environments

While brass and copper fittings can be used together, it’s important to consider the environment in which they will be installed. Here are some recommendations:

Controlled Environments:

Indoor Use: Mixing brass and copper fittings is generally safer in indoor environments where exposure to corrosive substances and extreme weather conditions is minimal.

Temperature and Humidity Control: Ensure that the environment is relatively stable in terms of temperature and humidity to minimize the risk of condensation and subsequent corrosion.

Assessment of Specific Conditions:

Water Quality: In plumbing applications, assess the quality of the water. High levels of chlorides or other corrosive agents can accelerate galvanic corrosion. In such cases, additional protective measures or material choices may be necessary.

Chemical Exposure: In industrial settings, evaluate the presence of chemicals that could react with brass or copper. Use protective coatings or select materials with higher resistance to the specific chemicals present.

Outdoor and Harsh Environments:

Protective Coatings: If the fittings must be used in outdoor or harsh environments, consider applying protective coatings to the fittings to shield them from corrosive elements.

Enclosures: Use protective enclosures to shield the fittings from direct exposure to the elements. This can significantly extend the lifespan of the fittings and reduce maintenance needs.

System-Specific Considerations:

HVAC Systems: In HVAC systems, where temperature fluctuations are common, ensure that the fittings can handle thermal expansion and contraction without compromising the seal.

Refrigeration Systems: In refrigeration applications, ensure that the fittings can withstand low temperatures and the presence of refrigerants without corroding or leaking.

Conclusion

The right mix of brass and copper fittings can be beneficial. Understanding the properties of each material and following best practices is critical to preventing issues such as galvanic corrosion. While mixing these fittings can improve system performance, it is important to follow industry standards and guidelines. Consulting a professional and taking the proper precautions will ensure the longevity and reliability of your plumbing or piping system. For specific needs and applications, it is recommended that you consult a professional to ensure the best results.

FAQ

Can brass and copper fittings be directly connected?

No, it’s best to avoid direct metal-to-metal contact between brass and copper fittings to prevent galvanic corrosion. Use dielectric unions to electrically isolate the two metals.

What is a dielectric union, and why is it important?

A dielectric union is a fitting that prevents electrical continuity between brass and copper, reducing the risk of galvanic corrosion. It’s essential when mixing these metals to ensure longevity and reliability.

Can I use brass and copper fittings together in potable water systems?

Yes, brass and copper fittings can be used together in potable water systems, provided dielectric unions are used to prevent galvanic corrosion and the installation follows best practices.

What types of environments are suitable for mixing brass and copper fittings?

Controlled environments with minimal exposure to corrosive substances are ideal. Indoor settings or areas with stable temperature and humidity levels are recommended.

How can I prevent leaks when mixing brass and copper fittings?

Use appropriate sealing compounds and gaskets to create a reliable seal and prevent leaks. Regularly inspect the fittings to ensure they remain secure and free from corrosion.

What should I do if I notice corrosion on mixed brass and copper fittings?

Inspect and replace affected fittings promptly. Use dielectric unions and review the installation to ensure best practices are followed. Consider adding corrosion inhibitors if water quality is a concern.

Hydraulic Hose Fitting Repair Expert Tips for Quick Fixes

Hydraulic Hose Fitting Repair: Expert Tips for Quick Fixes

Hydraulic Hose Fitting Repair: Expert Tips for Quick Fixes

Table of Contents

Introduction

Hydraulic hose fittings are crucial components in various industrial applications, ensuring the efficient transfer of fluids under high pressure. When these fittings fail, the consequences can be severe, leading to costly downtime and potential safety hazards. Understanding how to quickly and effectively repair hydraulic hose fittings is essential for maintaining productivity and safety. This post aims to provide expert tips for both immediate on-site fixes and long-term repair solutions, helping you minimize downtime and maintain optimal performance in your hydraulic systems.

Understanding Hydraulic Hose Fittings

Hydraulic hose fittings are integral components in hydraulic systems, designed to connect hoses to various system parts such as pumps, valves, and cylinders. These fittings ensure the seamless flow of hydraulic fluid under high pressure, enabling the system to function effectively and efficiently. Given their critical role, understanding the different types of fittings and the common causes of their failures is essential for maintaining the reliability of hydraulic systems.

Common Causes of Hose Fitting Failures

Understanding the common causes of hose fitting failures can help in preventing issues and ensuring the longevity of hydraulic systems:

Wear and Tear:

Over time, hydraulic hose fittings are subjected to repeated use and exposure to harsh conditions, leading to gradual degradation. Factors such as friction, pressure cycles, and environmental exposure contribute to wear and tear, eventually causing fittings to weaken and fail.

Improper Installation:

Incorrect installation practices are a significant cause of premature fitting failure. This includes using the wrong type of fitting, not following manufacturer guidelines, or not ensuring a secure and tight connection. Improper installation can lead to leaks, reduced system efficiency, and increased risk of fitting blowouts.

Environmental Factors:

Hydraulic hose fittings are often exposed to extreme environmental conditions, including temperature fluctuations, chemicals, and physical abrasion. High temperatures can cause fittings to expand and contract, leading to material fatigue. Exposure to chemicals can cause corrosion, while physical abrasion can wear down the surface of the fittings, compromising their integrity.

leaking hydraulic Fittings Topa

Signs of Failing Hose Fittings

Recognizing the signs of failing hose fittings is essential for timely maintenance and repair, preventing more severe system failures:

Leaks:

Visible fluid leakage around the fitting area is a clear indicator of fitting failure. Leaks can occur due to cracks, loose connections, or damaged sealing surfaces. Regular inspection for leaks can help identify problems early and prevent fluid loss and contamination.

Pressure Drops:

A sudden drop in system pressure suggests a problem with the hydraulic hose fittings. Pressure drops can occur when there is a partial blockage, a significant leak, or a fitting that is not securely connected. Monitoring system pressure can help detect issues before they lead to complete system failure.

Visible Damage:

Cracks, corrosion, or other visible damage to the fittings indicate the need for repair or replacement. Regular visual inspections of the fittings and hoses can help identify signs of damage early. Look for any signs of wear, rust, or deformation that could compromise the fitting’s performance.

Quick Fixes for On-Site Hydraulic Hose Fitting Repair

In many situations, the ability to perform quick fixes on hydraulic hose fittings can be the difference between significant downtime and continued operation. These temporary repairs are essential to keep operations running smoothly until a more permanent solution can be implemented.

Temporary Repairs

Temporary repairs are critical for immediate issues that arise unexpectedly. Here are two effective methods for quick on-site repairs:

Using Hose Clamps:

Hose clamps are a reliable and straightforward solution for temporarily stopping leaks in hydraulic hoses. When a leak is detected, placing a hose clamp over the affected area can help contain the fluid and prevent further leakage. Here’s how to use hose clamps effectively:

Selection: Choose a clamp that fits the diameter of the hose snugly.

Placement: Position the clamp directly over the leak.

Tightening: Use a screwdriver or wrench to tighten the clamp until the leak is stopped. Be careful not to over-tighten, as this can damage the hose further.

Applying Sealants and Tapes:

Hydraulic sealants and self-fusing silicone tapes are excellent for quickly patching minor leaks. These materials are designed to withstand high pressure and create a temporary seal that prevents fluid from escaping.

Sealants: Apply hydraulic sealant around the leaking area, ensuring it covers the entire circumference of the hose. Allow the sealant to set as per the manufacturer’s instructions before testing the repair.

Silicone Tapes: Wrap self-fusing silicone tape tightly around the leak, overlapping each layer to ensure a secure seal. The tape bonds to itself, forming a durable, waterproof barrier.

repair Hydraulic hose Topa

Step-by-Step Guide for On-Site Quick Fixes

Implementing a quick fix requires careful attention to detail and adherence to safety protocols. Here’s a step-by-step guide to ensure effective and safe repairs:

Identifying the Problem:

  • Inspection: Begin by thoroughly inspecting the hose and fittings to locate the source of the issue. Look for visible signs of wear, damage, or fluid leakage.
  • Pressure Testing: If the leak is not immediately apparent, use a pressure testing kit to identify pressure drops that indicate a leak.

Preparing the Site and Equipment:

  • Depressurizing the System: Before starting any repair, ensure the hydraulic system is fully depressurized to prevent accidents. Turn off the hydraulic pump and bleed the pressure from the system using the appropriate valves.
  • Gathering Tools: Collect all necessary tools and materials for the repair, including hose clamps, sealants, silicone tape, wrenches, screwdrivers, and safety gear.

Implementing the Temporary Fix:

  • Safety First: Wear safety goggles, gloves, and protective clothing to safeguard against fluid exposure and potential injuries.
  • Applying the Fix: Depending on the chosen method, use hose clamps, sealant, or silicone tape to the damaged area. Ensure the application is thorough and secure.
  • Hose Clamps: Position the clamp over the leak and tighten it until the leak stops.
  • Sealants: Apply the sealant evenly around the leak and allow it to cure.
  • Silicone Tapes: Wrap the tape tightly around the hose, covering the leak completely.

Testing the Repair:

  • Repressurizing the System: Slowly repressurize the hydraulic system, monitoring the repaired area for any signs of leakage. Gradually increase the pressure to the operating level.
  • Checking for Leaks: Observe the repaired area closely to ensure the temporary fix is holding. If leaks persist, reapply the temporary fix or consider a different method.

Practical Tips for On-Site Repairs

  • Keep a Repair Kit Ready: Always have a well-stocked repair kit on hand that includes various sizes of hose clamps, sealants, tapes, and basic tools. This preparedness ensures you can address issues promptly.
  • Routine Inspections: Regularly inspect your hydraulic systems for early signs of wear and damage. Early detection can prevent minor issues from escalating into major failures.

Detailed Repair Procedures for Long-Term Solutions

For a more permanent solution to hydraulic hose fitting issues, it’s essential to follow detailed and precise repair procedures. These steps ensure the longevity and reliability of the repaired fittings, preventing future failures and maintaining system efficiency.

Removing and Replacing Damaged Hose Fittings

Proper Disconnection Techniques:

  • Depressurize the System: Before starting any repair, ensure the hydraulic system is completely depressurized to prevent accidents. Turn off the hydraulic pump and open the appropriate valves to release any residual pressure.
  • Clean the Area: Clean the area around the damaged fitting to remove dirt and debris. This ensures that no contaminants enter the hydraulic system during the repair process.
  • Use the Correct Tools: Gather the necessary tools, such as wrenches, pliers, and hose cutters. Use these tools to carefully disconnect the damaged fitting from the hose and the hydraulic system. Ensure you follow the manufacturer’s guidelines to avoid damaging the hose or other components.

Selecting the Right Replacement Fittings:

  • Match Specifications: Choose replacement fittings that match the exact specifications of your system, including size, thread type, and material. Using the correct fittings is crucial for ensuring a secure and leak-proof connection.
  • Quality Components: Invest in high-quality fittings from reputable manufacturers to ensure durability and reliability. Avoid cheap or substandard fittings that may fail prematurely.
fix hydraulic fitting Topa

Techniques for Permanent Hose Fitting Repairs

Crimping and Swaging:

  • Hydraulic Crimping Machine: Use a hydraulic crimping machine to securely attach new fittings to the hose. Follow these steps:
  • Cut the Hose: Use a hose cutter to make a clean, straight cut at the end of the hose where the new fitting will be attached.
  • Insert the Fitting: Insert the hose end into the fitting until it reaches the fitting’s stop.
  • Crimping Process: Place the hose and fitting assembly into the crimping machine and select the appropriate die set. Activate the crimping machine to compress the fitting onto the hose, ensuring a tight and secure connection.
  • Inspect the Crimp: After crimping, inspect the fitting to ensure it is properly seated and there are no visible gaps or misalignments.

Welding and Soldering:

  • When Necessary: In some cases, especially with metal fittings, welding or soldering may be required to repair or reinforce fittings. This is typically done when fittings are part of a larger metal assembly or when high-pressure applications demand additional strength.
  • Welding Process: Use appropriate welding techniques (such as TIG or MIG welding) to fuse the fitting to the hose or assembly. Ensure the weld is strong and free from defects.
  • Soldering Process: For smaller repairs, soldering may be used to join fittings. Heat the fitting and apply solder to create a secure bond. Allow the solder to cool and solidify before testing.

Reassembly and Testing

Ensuring a Secure Fit:

  • Reassemble Components: Carefully reassemble the new fittings onto the hose and reconnect them to the hydraulic system. Ensure all connections are tight and secure, following the manufacturer’s specifications.
  • Check Alignment: Verify that all components are properly aligned and that there is no strain on the hose or fittings. Misalignment can lead to premature wear and potential failures.

Pressure Testing for Leaks:

  • Conduct a Thorough Test: After reassembly, conduct a pressure test to confirm the integrity of the repair. Gradually increase the system pressure to the operating level while closely monitoring the repaired area for any signs of leaks.
  • Use a Pressure Gauge: Attach a pressure gauge to monitor the system pressure accurately. Ensure the pressure remains stable and within the specified range.
  • Inspect for Leaks: Visually inspect all connections and fittings for any signs of fluid leakage. If leaks are detected, depressurize the system and re-tighten the fittings or apply additional repairs as needed.
  • Final Verification: Once the system has been pressurized and no leaks are found, verify the overall performance of the hydraulic system. Ensure that it operates smoothly and efficiently, with no unusual noises or pressure fluctuations.

Conclusion

Hydraulic hose fitting repairs are an essential skill for maintaining the efficiency and safety of hydraulic systems. By understanding the causes of failures, having the right tools, and following expert tips for quick and permanent repairs, you can minimize downtime and ensure the longevity of your equipment. Implement these strategies to keep your operations running smoothly and effectively.

FAQ

How often should I inspect my hydraulic hose fittings?

It’s recommended to perform brief daily inspections, more thorough weekly inspections, and comprehensive monthly inspections to ensure early detection of wear, leaks, or other potential issues.

What are the signs of a failing hydraulic hose fitting?

Common signs include visible fluid leaks, sudden drops in system pressure, and visible damage such as cracks or corrosion on the fittings.

Can I perform hydraulic hose fitting repairs myself?

Yes, with the right tools and knowledge, you can perform temporary and even permanent repairs. However, for complex issues or if you’re unsure, it’s best to consult a professional.

What tools do I need for on-site hydraulic hose fitting repairs?

Basic tools include wrenches, screwdrivers, pliers, and a utility knife. Specialized equipment like a hydraulic crimping machine, hose cutters, and a pressure testing kit are also essential for more complex repairs.

How can I prevent hydraulic hose fitting failures?

Regular inspections, proper installation practices, using high-quality materials, and ensuring your team is well-trained in handling and maintenance procedures are key steps in preventing failures.

What should I do if I detect a leak in a hydraulic hose fitting?

Immediately depressurize the system, inspect the area to locate the leak, and apply a temporary fix such as a hose clamp or hydraulic sealant. Follow up with a permanent repair as soon as possible to ensure the system’s reliability.

Contact Topa

Save 30% on maintenance costs with our easy-install hydraulic fittings. Contact Now!