How to Remove Hydraulic Hose Fittings banner

How to Remove Hydraulic Hose Fittings: A Step-by-Step Guide

Hydraulic hose fittings are integral to ensuring a reliable connection in hydraulic systems, which are typically subject to high-pressure, high-temperature, and harsh working conditions. Over time, however, fittings can become difficult to remove, which can cause operational delays and increased maintenance costs. Whether it’s due to pressure, corrosion, dirt, or improper installation, stuck hydraulic hose fittings are a common issue that can cause headaches for maintenance teams.

Common Reasons Hydraulic Fittings Become Stuck

The Impact of Corrosion and Wear on Hose Fittings

Corrosion is one of the leading culprits behind stuck hydraulic fittings, and it’s no mystery why. Hydraulic systems often operate in challenging environments where exposure to moisture, chemicals, and fluctuating temperatures is the norm. Over time, these elements can degrade the material of the fitting, leading to rust formation. Rust and scale buildup can essentially “weld” the fitting to the hose or its coupling.

Corrosion is especially prevalent when there is material incompatibility between the fitting and the hydraulic fluid or when the system isn’t adequately sealed. For instance, a carbon steel fitting exposed to high-moisture environments without a protective coating is highly susceptible to rust. This corrosion can creep into the threads, making unscrewing a nightmare.

Proper maintenance and the use of corrosion-resistant materials, such as stainless steel or coated fittings, can significantly reduce this risk.

The Role of Pressure and Temperature in Sticking Fittings

Hydraulic systems are synonymous with high-pressure operations. This pressure can lead to fittings binding together, particularly if they were over-tightened during installation. Think of it as the components being pressed into an unyielding embrace due to the immense force they experience daily.

Temperature fluctuations add another layer of complexity. In systems exposed to high-heat environments, metals tend to expand. As the system cools down, the fittings contract but may not return to their original state, causing them to seize. Repeated cycles of this thermal expansion and contraction can create a “lock-in” effect, making disconnection nearly impossible.

To prevent this, use fittings with appropriate temperature and pressure ratings for the application. Proper torque settings during installation also play a crucial role in avoiding this type of sticking.

Signs That Your Hydraulic Hose Fittings Are Stuck

Difficulty in Loosening or Removing the Fitting

One of the most obvious signs that your hydraulic hose fittings are stuck is when they simply refuse to budge. If you’re applying standard loosening force—using wrenches, pipe tools, or even hydraulic tools—but the fitting doesn’t respond, this is a clear indication that something is preventing the threads from moving. Over time, factors like excessive hydraulic pressure, rust, or improper installation can cause the threads to lock into place, making it nearly impossible to disconnect the fitting using typical methods.

Hydraulic fittings subjected to high pressure and extreme temperatures can experience a “locking” effect, where the threads become bound due to thermal expansion or corrosion. This resistance can escalate over time, meaning even the most experienced technicians may find themselves struggling with these fittings. If the fitting has become particularly stuck, you might need to apply specialized tools or methods like penetrating oil or heat to break the seal.

stuck Hydraulic fitting

Unusual Leaks Around the Fitting Connection

If you notice fluid leaking from the fitting, it could signal that the fitting is stuck, improperly installed, or has experienced some level of damage. Leaks are often a direct result of either a damaged thread or seal, which might be caused by over-tightening or corrosion.

When a fitting is seized or not properly loosened, the threads can get stripped or the seals can be compromised. This results in hydraulic fluid leaking out, which is not only a safety hazard but also a sign that the fitting may need to be replaced or carefully freed from the system. If the leaks persist despite tightening or trying to reseat the fitting, it’s likely that the underlying issue is a stuck connection, requiring more intensive intervention.

Unresponsive Threads and Seals

Another common sign of stuck hydraulic fittings is unresponsive threads and seals. When you’re working with a hydraulic fitting, you should be able to apply the proper amount of torque to either tighten or loosen the fitting. However, if the threads fail to respond to your wrench or tools, the fitting is likely stuck due to corrosion, pressure buildup, or other environmental factors.

In cases of extreme pressure or corrosion, the threads can become so damaged or locked that no amount of standard tightening or loosening will help. This can prevent the hose from being disconnected properly, and continuing to apply force can risk further damage to the system. In these situations, additional steps like using a penetrating oil or applying heat may be necessary to free the stuck fitting.

Why Do Hydraulic Hose Fittings Get Stuck?

The Effect of Dirt and Debris in the Hydraulic System

One of the lesser-known causes of stuck hydraulic hose fittings is the presence of dirt, dust, and debris within the system. These small particles can infiltrate the hydraulic circuit, entering through vents, leaks, or inadequate filtration systems. Once inside, they can accumulate at the fitting connections, causing additional friction and wear. This accumulation of debris prevents the fitting from sliding or rotating freely, leading to jamming.

As dirt particles settle around the threads or seals, they can bind with the metal surfaces, creating a gritty layer that can make it nearly impossible to disconnect or remove the fitting without additional force. Over time, this debris can cause permanent damage to the threads or seals, resulting in a stuck fitting that might need to be replaced entirely.

Regular cleaning and proper filtration are critical in preventing this buildup. Ensuring the hydraulic system is properly sealed and maintaining a clean environment can significantly reduce the chances of dirt and debris causing stuck fittings.

Corrosion from Fluid Leaks and External Exposure

Fluid leaks and external exposure are among the leading causes of corrosion in hydraulic systems, and they often play a significant role in making hydraulic hose fittings get stuck. If the hydraulic system is exposed to moisture—either through weather conditions or fluid leaks—rust can begin to form on the fittings. This rust essentially binds the fitting and hose together, making it incredibly difficult to remove or disconnect.

Additionally, hydraulic fluid itself can sometimes contain corrosive elements, especially if it has been in use for extended periods or hasn’t been properly filtered. Some hydraulic fluids may contain acids, salts, or other compounds that can eat away at metal parts, accelerating the corrosion process. This corrosion can lock the fitting in place, preventing proper disconnection and even damaging the fitting to the point where it must be replaced.

To prevent corrosion, regular inspection of fittings and timely maintenance, such as replacing worn seals or treating fluid leaks, are essential. Using corrosion-resistant materials and applying anti-corrosive coatings can also help protect fittings from rust and wear over time.

The Consequences of Over-Tightening Hydraulic Fittings

Over-tightening hydraulic fittings during installation is one of the most common causes of fittings becoming stuck. It may seem counterintuitive, but applying too much torque to a fitting can lead to it binding with the hose or coupling, creating an immovable connection.

When a fitting is over-tightened, the metal components may deform, causing the threads to become misaligned or the seals to compress too much. This unnecessary pressure puts additional stress on the connection and makes it harder to loosen or remove the fitting in the future. The excessive tightening also increases the likelihood of corrosion due to the increased friction, especially in high-pressure environments.

To prevent this, always use the correct torque settings as specified by the manufacturer. Using a torque wrench during installation can ensure the right amount of force is applied, which helps avoid over-tightening and keeps fittings functioning smoothly over time.

The Role of Pressure Build-Up in Stuck Fittings

Hydraulic systems operate under very high pressure, and this pressure can often cause fittings to become stuck over time. When a fitting is constantly subjected to pressure, the internal components of the fitting can expand and contract. If the system pressure is too high or fluctuates too much, this repeated expansion and contraction can cause the fitting to “lock” into place.

Additionally, excessive pressure can cause the threads or seals to distort, further increasing the difficulty in loosening or removing the fitting. In extreme cases, the pressure can cause the fitting to become permanently fused with the hose or coupling, making any disconnection attempts almost impossible without special tools or techniques.

Regular maintenance and pressure regulation are key to preventing pressure build-up issues. Monitoring the pressure levels within the hydraulic system and addressing any abnormalities can help prevent fittings from becoming stuck due to internal stress. Additionally, pressure relief valves should be used to safely manage system pressure and ensure fittings remain in optimal condition.

Step-by-Step Guide to Removing Stuck Hydraulic Hose Fittings

Step 1: Assess the Situation and Prepare Your Work Area

Before attempting to remove a stuck hydraulic hose fitting, it’s important to first assess the situation. Check the surrounding area for any potential hazards, such as external damage to the fittings or system. Ensure that the work area is clean and free of flammable materials, especially when working with hydraulic fluids, which can be flammable.

Disconnect any power sources to the hydraulic system to prevent any accidental operation of the system while you’re working on it. Always wear appropriate personal protective equipment (PPE) such as gloves, goggles, and protective clothing to safeguard yourself from flying debris, hot surfaces, or accidental fluid sprays.

Step 2: Relieve System Pressure and Drain Fluid if Necessary

Before you begin working on any hydraulic system, it is crucial to relieve all pressure to ensure safety. The first action should be to open the system’s pressure release valve. This will allow the hydraulic pressure to dissipate and prevent any accidental pressure bursts that could lead to injury or further damage to the system.

Once the pressure has been relieved, drain any residual hydraulic fluid from the hoses. This step is especially important as hydraulic fluids can remain under pressure even after the system is turned off. Draining the fluid helps to prevent leaks or sudden bursts of fluid when you attempt to remove the fitting.

install ferrule fitting

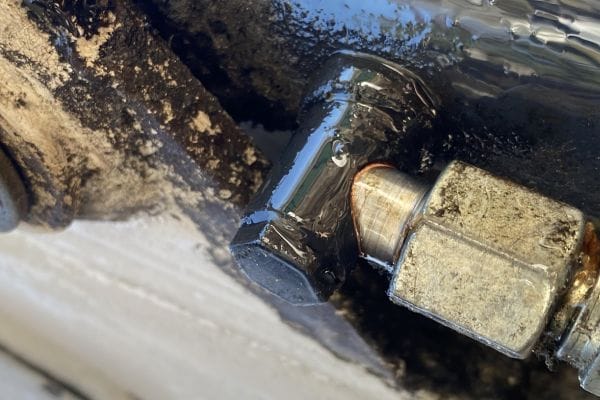
Step 3: Inspect for Visible Corrosion or Debris

Once you’ve prepared the area and relieved pressure, visually inspect the fitting and surrounding parts for any signs of corrosion, rust, or accumulated debris. This step will give you an idea of the extent of the issue and whether additional cleaning or lubrication is needed.

If you spot significant corrosion or debris, it may be necessary to clean the area before attempting further removal. Corrosion can cause the fitting to become fused with the hose, and debris can obstruct the fitting’s movement, making it harder to loosen. A wire brush, cleaning solvent, or mild abrasive can help clear the area before proceeding.

Step 4: Loosen the Fitting with Correct Torque Application

Once the fitting is free of visible corrosion and debris, the next step is to try loosening it using the proper torque. Select a proper-sized wrench or spanner that fits the fitting securely. It’s critical to apply the correct amount of torque as specified by the manufacturer to avoid damaging the fitting or hose.

Apply steady, controlled force to the fitting. Avoid jerking or sudden movements, as this can cause stripping of threads, damaging seals, or even breaking the fitting. If the fitting resists, stop and reconsider your approach before applying more force, as over-tightening may make it even harder to loosen.

Step 5: Use Penetrating Oil to Break the Bond

If the fitting still won’t loosen, applying penetrating oil is a key step in the process. This type of oil is designed to break down rust, corrosion, and other debris that may be causing the fitting to stick. Apply a generous amount of penetrating oil to the threads of the stuck fitting, ensuring the oil fully coats the area around the connection.

Allow the oil to sit for several minutes, or longer if necessary, to give it time to penetrate the rust or debris. For particularly stubborn fittings, you may need to apply the oil multiple times. The oil works by reducing friction and breaking down the corrosion, making it easier to loosen the fitting.

Step 6: Carefully Use Leverage for Stubborn Fittings

If the fitting still remains stuck after using penetrating oil, you can try using additional leverage to break the bond. A pipe wrench or breaker bar can provide extra force to loosen a fitting that won’t budge. Attach the tool securely and apply gradual, consistent pressure.

However, when using leverage, caution is essential. Avoid applying excessive force, as it can cause damage to the fitting, the hose, or even the entire hydraulic system. Be mindful of the force you’re applying to ensure that the fitting is not over-tightened in the process, which could cause further issues down the line.

If the fitting still won’t come off, it may be time to consult a professional or use more advanced methods, such as heat or impact tools, to free the stuck connection.

Troubleshooting Stuck Hydraulic Hose Fittings

What to Do When the Fitting Won’t Budge

If you’ve tried all standard methods—such as applying the correct torque, using penetrating oil, or leveraging tools like a pipe wrench—and the fitting still refuses to budge, it’s time to take more advanced steps. One effective method is to apply heat to the fitting. Heat can help expand the metal, breaking the bond between the fitting and the hose or coupling, particularly if rust or corrosion is the issue. However, be cautious when applying heat; overheating could damage seals, O-rings, or other parts of the hydraulic system.

Another tool you can use is vibration. Impact wrenches or vibration tools can help break loose stuck fittings by loosening the rust or debris around the connection. The vibration disrupts the bond, making it easier to loosen the fitting without using excessive force.

In extreme cases, if the fitting is severely corroded or damaged beyond repair, you may need to cut off the fitting. Using a pipe cutter or saw, carefully cut through the fitting, but make sure to protect the surrounding components to avoid unnecessary damage. This should be a last resort, as cutting the fitting could require replacing parts of the hydraulic system.

How to Avoid Damaging Hydraulic Hoses and Fittings During Removal

When dealing with stuck hydraulic fittings, it’s crucial to prevent further damage to the hose or fitting. The first step in avoiding damage is to use the correct tools. Never try to force a fitting off with improper tools, as this can damage the threads, seals, or the hose itself. Always choose the right-sized wrenches, pipe tools, or torque wrenches to ensure you’re applying force in the most efficient and controlled way possible.

Additionally, it’s important to apply gradual, consistent force when attempting to loosen a fitting. Jerking or using excessive force can lead to damaged threads or cracked fittings, and in some cases, it may even cause the fitting to break entirely. Instead, work slowly and carefully, ensuring you’re not applying too much torque all at once.

If the fitting still doesn’t budge, don’t rush the process—give the penetrating oil time to work, or use a heat gun to gradually warm up the fitting. Patience is key to avoid costly repairs and prevent damaging the system during removal.

Dealing with Fittings That Seem Permanently Stuck

In certain cases, particularly when the fitting seems permanently stuck, professional assistance may be necessary. If the fitting is severely corroded, rusted, or has been overtightened beyond the point of reasonable removal, attempting to remove it yourself can lead to even more serious damage. For example, forcing a stuck fitting can damage the hose, the fitting itself, or even other parts of the hydraulic system like the couplings or valves.

When this happens, it’s time to consult a hydraulic technician or a professional mechanic who has experience dealing with stuck hydraulic fittings. Professionals may have access to specialized tools, such as cutting torches, high-powered impact tools, or hydraulic pullers that can remove even the most stubborn fittings without damaging the system. They can also evaluate the rest of the hydraulic system to ensure that removing the stuck fitting doesn’t lead to further complications.

Conclusion

To prevent hydraulic hose fittings from becoming stuck in the first place, regular inspection and maintenance are key. Monitoring the system for signs of corrosion, pressure fluctuations, or improper tightening can help catch issues before they become significant problems. Additionally, using proper installation techniques, anti-seize lubricants, and ensuring a clean environment can greatly extend the life of your hydraulic fittings.


FAQ

What should I do if a hydraulic hose fitting is stuck?

Start by assessing the situation. Ensure the system is powered off and the pressure is relieved. Inspect for corrosion or debris, apply penetrating oil, and then attempt to loosen the fitting with the proper tools.

How can I prevent hydraulic hose fittings from getting stuck?

Inspect fittings for corrosion, dirt, or debris, and clean them periodically. Use the correct torque when tightening fittings, and apply anti-seize lubricants during installation to prevent them from seizing in the future.

Can I use any oil to loosen a stuck hydraulic fitting?

No, use penetrating oil specifically designed for breaking rust and corrosion. Regular oils or lubricants may not have the same properties needed to dissolve rust or reduce friction, making the process less effective.

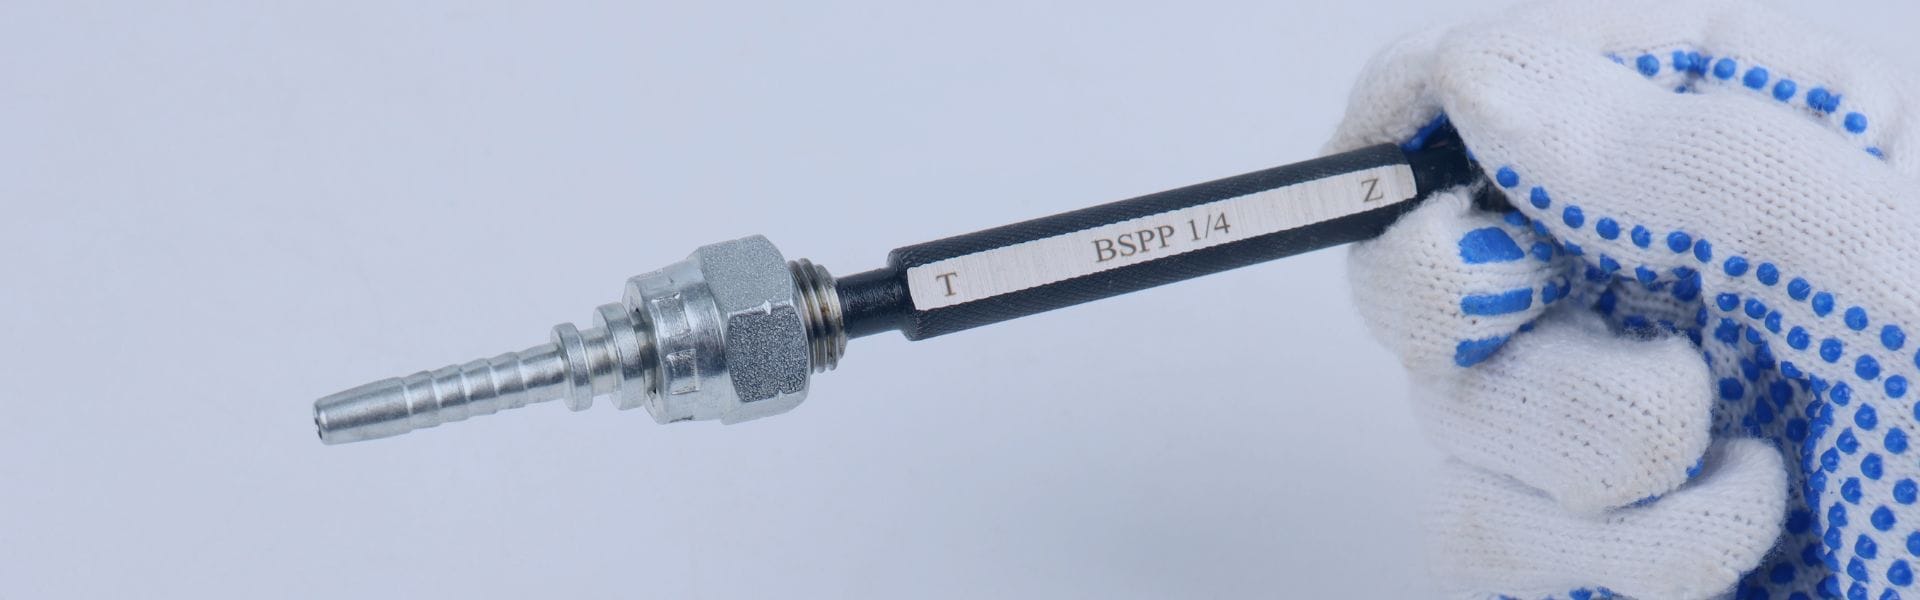
What tools do I need to remove a stuck hydraulic fitting?

Essential tools include a proper-sized wrench or spanner, penetrating oil, and if needed, a pipe wrench or breaker bar for additional leverage. Always ensure that the tools are compatible with the size and type of fitting you’re working on.

Is it safe to use heat on a stuck hydraulic fitting?

Yes, heat can help loosen a stuck fitting by expanding the metal and breaking the bond formed by corrosion. However, be cautious not to overheat, as it can damage the seals, O-rings, or other parts of the hydraulic system.

When should I call a professional for stuck hydraulic fittings?

If you’ve tried all removal methods, including the use of penetrating oil, heat, and proper leverage, and the fitting remains stuck, it’s time to consult a professional. Forcing the fitting can cause expensive damage to the system.

Hydraulic Cylinder Fitting Repair banner

Hydraulic Cylinder Fitting Repair: A Step-by-Step Guide

Common issues with hydraulic cylinder fittings include leaks, corrosion, wear and tear, and improper sealing. These problems can lead to decreased system pressure, fluid loss, and inefficient operation, often requiring immediate repair or replacement to avoid further damage to the hydraulic system.

Signs You Need a Hydraulic Cylinder Fitting Repair

Recognizing Hydraulic Fitting Leaks

One of the most common signs that your hydraulic cylinder fitting needs repair is the presence of leaks. Leaking hydraulic fluid can often be seen around the fitting area or noticed as wet spots on the ground beneath the equipment. A decrease in fluid levels can also indicate a leak, which, if left untreated, can severely affect the system’s pressure and performance.

Performance Loss in Hydraulic Systems

If your hydraulic equipment is experiencing slower operation, inconsistent movements, or reduced force output, this could signal an issue with the cylinder fittings. Performance loss often occurs when fittings fail to maintain proper fluid pressure, leading to inefficient system operation. This may result in your machinery working harder, consuming more energy, and producing less effective results.

Visual Indicators of Wear and Tear on Hydraulic Fittings

Over time, hydraulic fittings are exposed to high pressure, temperature fluctuations, and harsh environmental conditions. Inspecting the fittings for visible signs of damage such as cracks, corrosion, or wear on the seals can indicate the need for repair. Discoloration, rust, or swelling around the fitting area are clear indicators that the fitting is no longer functioning properly and requires attention.

Step 1 – Identifying the Issue with Your Hydraulic Cylinder Fitting

How to Detect Hydraulic Fitting Leaks

The first step in identifying an issue with your hydraulic cylinder fitting is detecting any leaks. Start by visually inspecting the fittings for wet spots or visible signs of hydraulic fluid around the connection points. You can also use a piece of clean paper or cloth to wipe around the fittings; if it comes away damp, a leak is likely present. Another effective method is to use a leak detection dye or UV light to spot even the smallest leaks, especially in hard-to-see areas. Listening for a hissing sound, which indicates escaping air or fluid, can also help pinpoint the source of the leak.

Troubleshooting Hydraulic Cylinder Problems

Once a leak or fitting issue is suspected, the next step is troubleshooting the hydraulic cylinder. Check for any irregularities in system pressure, temperature fluctuations, or sluggish movements of the hydraulic cylinder. These signs often point to problems with the hydraulic fluid flow, which is directly affected by the condition of the fittings. Performing a pressure test using a gauge can help assess whether the hydraulic system is maintaining the required pressure. Additionally, listen for abnormal sounds, such as whining or grinding, which may indicate a faulty fitting or damaged cylinder components.

Hydraulic Cylinder Fitting leak

Assessing the Severity of the Fitting Issue

Once you’ve identified the potential problem, it’s important to assess how severe the issue is. Minor leaks might be fixed with a simple tightening or sealing, while more significant leaks or visible cracks in the fitting may require replacement. Check the condition of the seals and O-rings to determine if they have worn out or cracked, as this is often the root cause of leaks. If the hydraulic cylinder is experiencing a major loss of performance or if the fittings show signs of severe wear, it’s crucial to address the issue immediately to prevent further damage to the entire system. Keep in mind that early detection and repair can help avoid costly downtime and extensive repairs down the line.

Step 2 – Disassembling the Hydraulic Cylinder Fitting

How to Properly Disassemble Hydraulic Cylinder Fittings

Disassembling hydraulic cylinder fittings requires careful attention to avoid causing additional damage to the parts. Start by relieving the pressure in the hydraulic system to ensure safety. Disconnect the hydraulic hose from the cylinder, making sure the fluid is drained or contained properly to prevent spills. Use the appropriate wrenches or sockets to loosen the fittings, starting with the outer components and working your way inward. Always take note of the order in which parts are removed, as this will help during reassembly. If the fitting is stubborn, use penetrating fluid to ease the disassembly process without damaging the threads or seals.

The Right Tools for Safe Disassembly

Having the right tools is essential for a safe and efficient disassembly process. Common tools needed for hydraulic cylinder fitting disassembly include:

Hydraulic wrenches or spanners: For loosening large or tightly secured fittings.

Torque wrenches: To ensure that fittings are removed with the correct force, preventing thread damage.

Pliers or pipe wrenches: For gripping and loosening smaller components.

Seal pick or scraper: For carefully removing old seals without scratching the fitting or cylinder surfaces.

Penetrating oil or lubricant: To loosen stuck fittings and prevent corrosion.

Hydraulic fluid container: To safely drain and store hydraulic fluid during the disassembly process.

Ensure that all tools are in good condition and suitable for the specific size and type of fittings you’re working with. Using the correct tools will make the process safer and more efficient, while reducing the risk of damaging critical components.

What to Look for While Disassembling Hydraulic Cylinders

As you disassemble the hydraulic cylinder fittings, inspect the components for signs of wear or damage. Look for:

Worn or damaged seals: Cracked, hardened, or deteriorated seals are a common cause of leaks.

Corrosion or rust: Any signs of rust or corrosion on the fittings or cylinder should be noted, as they can compromise the hydraulic system’s performance.

Cracks or fractures in the fitting: Check for visible cracks or deformation in the fitting parts, which can lead to failure during reassembly or operation.

Thread damage: Examine the threads on both the fittings and the cylinder to ensure they are not stripped or damaged. Thread issues can cause improper sealing or difficulty in reassembly.

Debris or contaminants: Make sure that no dirt, debris, or old sealant remains inside the fitting area, as this can affect the functionality of the hydraulic system and lead to further damage.

Step 3 – Inspecting Hydraulic Cylinder Parts

Common Problems Found in Hydraulic Cylinder Fittings

When inspecting hydraulic cylinder fittings, several common issues can arise, leading to inefficiencies or system failure:

Leaking Fittings: The most frequent issue is leakage, which can occur due to improper sealing or worn-out O-rings. Leaking fittings reduce the system’s pressure and performance, leading to fluid loss and potential system failure.

Corrosion and Rust: Exposure to moisture, chemicals, or harsh environments can cause corrosion on the fitting surfaces. This can weaken the fittings, lead to leaks, and cause them to fail prematurely.

Cracks and Fractures: Over time, hydraulic fittings can develop small cracks due to stress, excessive pressure, or fatigue. Cracks are particularly dangerous, as they can cause catastrophic failure of the system.

Clogging and Debris: Dirt, debris, or old sealant left behind can block fluid flow or cause increased wear on the fitting surfaces. These obstructions can affect system performance and result in overheating or excessive wear.

Excessive Wear on Threads: Frequent disassembly and assembly can cause thread damage, making it difficult to properly seal the fitting. Worn threads can also compromise the connection between the fitting and the hydraulic cylinder.

Identifying Worn or Damaged Hydraulic Seals

Seals play a crucial role in maintaining a leak-proof connection and ensuring proper fluid flow within hydraulic systems. Here’s how to identify worn or damaged seals:

Cracked or Brittle Seals: Over time, seals made from rubber or elastomers can dry out, crack, or become brittle, particularly if exposed to high heat, extreme pressure, or chemicals. A cracked seal will no longer provide an effective barrier against fluid leakage.

Deformation or Swelling: Seals that appear swollen, misshapen, or out of place could indicate that they have been over-extended, exposed to high temperatures, or exposed to incompatible fluids. Such seals should be replaced immediately to prevent leaks.

Visible Gaps or Tears: Examine the seals for any visible tears, gaps, or breakage. Even minor cuts or deformities can cause significant leaks and loss of hydraulic pressure. These damaged seals will need to be replaced to maintain system integrity.

Compression Set: If the seals appear compressed and no longer bounce back to their original shape, it may indicate they have become “set” from prolonged exposure to pressure or heat. This reduces their sealing capability and necessitates a replacement.

Step 4 – Repairing or Replacing Damaged Fittings

How to Repair Hydraulic Cylinder Fittings

Repairing hydraulic cylinder fittings involves addressing any damage, wear, or leaks in the components to restore the system’s integrity. Here’s how to approach the repair process:

Clean the Fitting Area: Before starting the repair, ensure the fitting and surrounding area are thoroughly cleaned of dirt, debris, or old sealant. This prevents contaminants from interfering with the repair and ensures a proper seal when reassembling.

Tighten Loose Fittings: If the issue is a loose connection causing a leak, use the correct torque settings to tighten the fitting. Over-tightening can damage the threads or cause other components to crack, so always follow manufacturer specifications for torque.

Replace Worn Seals: One of the most common causes of hydraulic fitting failure is damaged or worn seals. Use a seal pick to carefully remove the old seals and replace them with new, compatible ones. Ensure that the new seals are installed correctly and seated evenly to avoid leaks.

Patch Minor Cracks or Surface Damage: If the fitting shows signs of minor surface wear or small cracks, you may be able to use a special hydraulic repair adhesive or patch to seal the cracks temporarily. However, this is not a permanent solution and should only be done for short-term fixes until the fitting can be replaced.

Use Hydraulic Thread Sealant: For leaking threaded connections, apply a quality hydraulic thread sealant to ensure a tight seal. Be sure to follow the manufacturer’s instructions on the sealant, and avoid over-applying, as excess sealant can block fluid flow or create obstructions.

Hydraulic cylinder fitting repair

When to Replace a Hydraulic Cylinder Fitting

While repairing hydraulic cylinder fittings is possible, there are cases where replacement is necessary. Here’s when to consider replacing a fitting rather than repairing it:

Severe Cracks or Fractures: If the fitting has visible cracks or fractures, it’s likely beyond repair. Cracks can compromise the fitting’s structural integrity, causing future leaks or even catastrophic failure, making replacement the best option.

Significant Corrosion or Rust: Corroded fittings that are beyond cleaning or buffing should be replaced immediately. Corrosion weakens the metal and compromises the fitting’s ability to withstand high pressure, making it unsafe to use.

Excessive Thread Damage: If the threads on the fitting are stripped, damaged, or have worn down significantly, they may no longer create a secure seal. In such cases, the fitting should be replaced to maintain the system’s reliability.

Repeated Leaks or Persistent Performance Issues: If you’ve already attempted a repair, such as replacing seals or tightening fittings, but the leak persists or performance issues remain, replacement is often the most cost-effective solution. Continuing to repair a repeatedly failing fitting may lead to bigger issues down the road.

Outdated or Obsolete Fittings: Older fittings may no longer meet current safety standards or could be incompatible with modern hydraulic components. In this case, replacing outdated fittings with newer, more efficient models is necessary to keep the system running smoothly.

Step 5 – Sealing Hydraulic Fittings Properly

Best Practices for Sealing Hydraulic Fittings to Avoid Leaks

Properly sealing hydraulic fittings is critical to maintaining the integrity of the hydraulic system and preventing leaks that can cause performance issues or equipment damage. Here are the best practices for sealing hydraulic fittings effectively:

Use the Correct Seal Type: Always ensure that you use the appropriate seals for the type of hydraulic fitting you are working with. O-rings, flat seals, and backup rings are common choices, each designed for specific applications and pressures. Verify the material of the seals to ensure compatibility with the hydraulic fluid and operating conditions (e.g., temperature, pressure, and chemical exposure).

Clean Surfaces Before Sealing: Ensure that the sealing surfaces of both the fitting and the cylinder are free of debris, dirt, and old sealant. Contaminants can compromise the seal, causing leaks. Use a solvent and a clean cloth to wipe the surfaces clean before applying new seals or sealant.

Lubricate the Seals: Apply a light coating of hydraulic fluid or a compatible lubricant to the new seals before installation. Lubrication prevents damage during installation and helps the seals form a tight, leak-proof barrier. Avoid over-lubricating, as excess lubricant can create a mess and potentially cause contaminants to enter the system.

Install Seals Correctly: Ensure that the seals are installed in the correct orientation. For O-rings, this means ensuring the ring sits evenly in the groove without being pinched or twisted. Flat seals should be placed squarely in the sealing area, and backup rings should be oriented in the direction that prevents extrusion.

How to Apply Hydraulic Sealants Effectively

In some cases, using hydraulic sealant in addition to seals can provide an extra layer of protection against leaks. Here’s how to apply hydraulic sealants effectively:

Choose the Right Sealant: Select a sealant designed for hydraulic systems. There are different types of hydraulic sealants, including thread sealants, anaerobic sealants, and gasket sealants, each suitable for specific applications. Ensure the sealant is compatible with the hydraulic fluid and operating conditions.

Clean the Fitting and Thread: Before applying sealant, clean the threads and surfaces of the fitting thoroughly to remove any dirt, grease, or old sealant. This ensures the sealant bonds properly and does not trap contaminants that could damage the system.

Apply Sealant Sparingly: When applying sealant to threaded connections, apply a thin, even layer to the male threads of the fitting. Be careful not to over-apply, as excess sealant can block fluid flow and potentially damage the system. For flat seals or gasketed areas, apply sealant to both surfaces evenly.

Allow Sealant to Cure: Some hydraulic sealants require curing time to achieve full bonding strength. Follow the manufacturer’s instructions regarding curing time before pressurizing the system. Rushing this step can lead to premature failure of the seal.

Conclusion

In conclusion, repairing hydraulic cylinder fittings is a critical task that ensures the efficiency and longevity of your hydraulic system. By following the step-by-step process—identifying issues, disassembling the fittings, inspecting parts, and properly sealing the system—you can address leaks and performance issues effectively.


FAQ

What are the common signs that my hydraulic cylinder fitting needs repair?

Look out for hydraulic fluid leaks, a decrease in system performance, unusual noises, or visible wear and tear around the fittings.

Can I repair hydraulic cylinder fittings myself?

Yes, with the right tools and knowledge, you can perform DIY hydraulic fitting repairs. However, ensure you follow safety protocols and use quality parts.

How often should hydraulic cylinder fittings be inspected?

It’s recommended to inspect hydraulic cylinder fittings regularly—ideally every 6 to 12 months—depending on usage, to identify early signs of wear or leaks.

What tools are needed for hydraulic cylinder fitting repair?

Common tools include wrenches, seal pickers, torque wrenches, thread sealants, cleaning solvents, and new seals or O-rings.

How can I prevent leaks in hydraulic cylinder fittings?

Regularly check for wear, replace seals as needed, use proper sealant, and ensure all fittings are tightly secured with correct torque.

When should I replace a hydraulic cylinder fitting instead of repairing it?

Replace the fitting if it has visible cracks, significant corrosion, severe thread damage, or repeated leaks that can’t be fixed through regular repairs.

How to Install Hydraulic Quick Coupler banner

How to Install Hydraulic Quick Coupler: Common Mistakes to Avoid

The most significant benefit of correctly installing a hydraulic quick coupler is the prevention of leaks. Leaking hydraulic fluid can lead to environmental hazards, loss of system pressure, and a decrease in overall efficiency. Additionally, leaks often result in expensive repairs and costly downtime. When the coupler is installed properly, it ensures a secure seal, maintaining pressure integrity and ensuring that the hydraulic fluid stays where it needs to be.

Step-by-Step Guide: How to Install Hydraulic Quick Coupler

Installing a hydraulic quick coupler might seem like a straightforward task, but the process requires precision and attention to detail to ensure everything works as it should. Following the right steps helps guarantee a secure, leak-free connection that maximizes the efficiency and safety of your hydraulic system. Below, we’ve broken down the installation process into easy-to-follow steps.

Step 1: Preparing the Hydraulic System for Installation

Before diving into the actual installation, it’s essential to prepare the hydraulic system. First, turn off the power or pressure to the system to avoid accidents. Next, depressurize the hydraulic lines by releasing any built-up pressure, either through valves or a separate release mechanism. This step is crucial to prevent hydraulic fluid from spraying or leaking when you disconnect old couplings or install new ones. Finally, inspect the system for any existing damage or issues that could interfere with the installation process. Make sure all components are in good condition, and if necessary, clean or replace any parts before moving forward.

Step 2: Ensuring Cleanliness – The Importance of Clean Surfaces

One of the most important yet often overlooked aspects of hydraulic system installation is cleanliness. Dirt, debris, or even oil residues on the surfaces of the coupler and connectors can prevent a proper seal, leading to leaks or system malfunctions. Before installation, thoroughly clean the surfaces where the quick coupler will be connected. Use a clean, lint-free cloth or an appropriate cleaning solution to wipe down the components. Additionally, ensure that the hydraulic lines are free from contaminants, as particles can damage seals and O-rings, reducing the lifespan of the coupler.

Step 3: Correctly Aligning the Coupler and Connector

Proper alignment is essential to ensure that the hydraulic quick coupler connects seamlessly. If the coupler and connector are misaligned, it can cause leaks, difficulty in coupling, and excessive wear. When positioning the quick coupler, make sure that the male and female components align perfectly, with no angular distortions. The coupling should slide in smoothly without resistance. Take your time to check alignment before securing it in place to avoid problems that could arise later in the installation process.

Step 4: Tightening the Quick Coupler – Torque Specifications to Follow

Once the coupler is aligned, it’s time to tighten it. However, it’s important to follow the recommended torque specifications for the coupler. Over-tightening can damage the threads or cause excessive pressure on the seals, while under-tightening can lead to leaks. Always refer to the manufacturer’s guidelines for the correct torque value for your specific quick coupler model. You can use a torque wrench to ensure that you apply the correct amount of force. Tighten the coupler in gradual increments rather than all at once to ensure even pressure distribution across the connection.

Install Hydraulic Quick Coupler

Step 5: Final Checks and Pressure Testing the Installation

After the coupler is securely tightened, perform a final visual inspection to ensure that everything looks correct. Double-check for any visible gaps, misalignments, or signs of wear on the seals. Once you’re satisfied with the installation, it’s time for pressure testing. Apply pressure to the hydraulic system and observe the coupler and surrounding area for leaks. If you notice any fluid escaping, depressurize the system, correct the issue, and re-test until the installation is leak-free. Pressure testing is a crucial step to ensure the system functions correctly under operating conditions and that no issues remain before use.

Common Mistakes to Avoid During Installation

Even with the best intentions, mistakes during hydraulic quick coupler installation can lead to inefficiencies, costly repairs, and even safety hazards. Being aware of common errors and how to avoid them can help ensure that your installation process goes smoothly, and that your hydraulic system functions optimally. Below are some of the most frequent mistakes made during installation and tips on how to avoid them.

Mistake 1: Using Incorrect Coupler Size or Type

One of the most common and critical mistakes is choosing the wrong size or type of hydraulic quick coupler. Using a coupler that’s too small or too large for the system can lead to poor connections, excessive pressure loss, or even failure. Additionally, different types of couplers (e.g., ISO, BSP, NPT) are designed for specific systems and applications. Always verify the required coupler specifications—such as size, thread type, and pressure rating—before purchasing. Refer to system manuals or consult with experts to ensure compatibility with the hydraulic connectors and hoses in your system.

Mistake 2: Not Ensuring Proper Alignment of Components

Misalignment during installation can lead to significant issues like leaking, excessive wear, and difficulty in coupling. If the coupler and connector aren’t aligned correctly, the connection might not form properly, causing stress on the parts and reducing their effectiveness. This mistake often occurs when trying to rush the installation. Be patient and double-check that both the male and female parts of the coupler are perfectly aligned. Proper alignment ensures a smooth connection and prevents damage to the seals, threads, and coupler components.

Mistake 3: Over-Tightening or Under-Tightening Connections

Finding the right amount of torque when tightening a hydraulic quick coupler is crucial. Over-tightening can strip threads, damage seals, or even cause cracks in the coupler, while under-tightening can lead to leaks and connection failures. Both issues can compromise the integrity of your hydraulic system. Always refer to the manufacturer’s torque specifications to tighten the coupler to the correct level. Using a torque wrench to ensure accuracy is highly recommended, as it helps you apply even and consistent pressure during installation.

Mistake 4: Ignoring Proper Sealing and O-Ring Installation

The sealing components, such as O-rings and gaskets, play a vital role in ensuring leak-free hydraulic connections. Ignoring proper installation of these parts can result in fluid leakage, pressure loss, or even total system failure. Before installation, inspect the O-rings for signs of damage or wear. Make sure they are properly seated and lubricated according to the manufacturer’s guidelines. Failing to do so can lead to poor sealing and operational inefficiency, as even a small leak can cause significant issues in high-pressure systems.

Mistake 5: Failing to Check for Hydraulic Fluid Compatibility

Another mistake to avoid is failing to check the compatibility of the hydraulic fluid with the coupler material. Hydraulic fluids come in various types, and some can be corrosive to certain metals or seal materials, potentially causing leaks or damage over time. Always ensure that the hydraulic fluid you’re using is compatible with both the coupler and any seals, O-rings, or gaskets in the system. This will not only extend the life of your hydraulic components but will also ensure that the system operates at peak efficiency.

Install Hydraulic Quick Coupler fail

Mistake 6: Not Performing Pressure Testing After Installation

After installing the hydraulic quick coupler, many people skip the crucial step of pressure testing. This oversight can result in undetected leaks or weak connections that could compromise the entire system. Pressure testing is the best way to ensure that the coupler is functioning properly under operational conditions. Always conduct a pressure test after installation to check for leaks or other issues. If any leakage or malfunction is detected, take immediate action to correct the problem before returning the system to full service. This step guarantees the installation is sound and that the system will operate as expected without any surprises.

Troubleshooting Hydraulic Quick Coupler Issues

Even with proper installation, hydraulic quick couplers can sometimes experience issues. Identifying and addressing problems quickly is key to maintaining the performance and safety of your hydraulic system. This section will guide you through troubleshooting common issues like connection failures and poor hydraulic flow, helping you resolve them efficiently.

How to Fix Hydraulic Connection Failures

Hydraulic connection failures can manifest in various ways, including leaks, inability to fully connect, or failure to disconnect properly. Here’s how to troubleshoot and fix these issues:

Check for Misalignment: Often, connection failures are caused by misalignment between the coupler and connector. If the male and female components are not properly aligned, the coupler may not engage or seal properly. Inspect the connection to ensure everything is aligned and that the parts fit snugly together.

Examine for Debris or Contamination: Dirt, rust, or other contaminants can prevent a proper seal or cause damage to the internal parts of the coupler. Clean the connection points thoroughly before reassembling, making sure all components are free from debris. Use lint-free cloths or cleaning tools designed for hydraulic systems to prevent damage.

Inspect Seals and O-Rings: If you notice leaks or difficulty in securing the coupler, check the seals and O-rings. Over time, seals can wear out or become damaged. If you find any visible damage, replace the seals or O-rings with new, compatible parts. Always lubricate O-rings according to the manufacturer’s instructions before installation to ensure proper sealing.

Ensure Correct Coupler Size: If the coupler doesn’t fit properly or fails to engage, it might not be the correct size for your hydraulic system. Verify that the coupler is compatible with the hose or connector in terms of size, thread type, and pressure rating. A mismatched coupler is a common cause of connection failure.

Check for Worn or Damaged Threads: Over-tightening or improper handling during installation can damage the threads on the coupler or connector. Damaged threads can result in leaks or difficulty connecting. If the threads are worn, you may need to replace the affected components.

Troubleshooting Poor Hydraulic Flow After Installation

If you’re experiencing poor hydraulic flow after installing a quick coupler, it’s essential to identify the root cause quickly to prevent system inefficiency or failure. Here are some steps to troubleshoot poor flow:

Verify Proper Coupler Size and Compatibility: If the coupler is too small or incorrectly matched to the system, it can restrict fluid flow. Ensure that the coupler’s flow capacity matches the needs of your hydraulic system. Also, confirm that all couplers, hoses, and fittings are compatible with the fluid flow requirements.

Check for Internal Blockages: A blockage inside the coupler or hoses can restrict the flow of hydraulic fluid. Inspect the hoses, couplers, and connectors for any internal obstructions or buildup, such as dirt, corrosion, or debris. If blockages are found, clean the components thoroughly or replace them if necessary.

Examine for Valve Malfunctions: Some hydraulic quick couplers have built-in valves that help control the flow of hydraulic fluid. If these valves become stuck, damaged, or malfunctioning, they can cause poor flow. Check the valve components for signs of wear or damage, and replace any faulty valves.

Inspect for Leaks in the System: Leaks can reduce the overall pressure and flow in a hydraulic system. Even small leaks in the coupler or hose can result in a noticeable decrease in hydraulic flow. Check all connections, seals, and hoses for leaks, and replace any damaged parts as needed.

Test for Proper Pressure Settings: Low pressure can also lead to poor flow. After installation, check the system’s pressure settings to ensure they are within the recommended range. If the pressure is too low, you may need to adjust the pressure relief valve or check for any issues that could be preventing the system from building adequate pressure.

Ensure Proper Coupler Operation: Finally, ensure that the coupler is functioning properly. Some quick couplers, especially those with automatic shutoff or check valves, may not operate correctly if the internal mechanism is damaged. If the coupler is defective, consider replacing it with a new one to restore proper flow.

Advanced Tips for Installing Hydraulic Quick Disconnects

Installing hydraulic quick disconnects in certain environments or conditions can present unique challenges. From tight spaces to high-pressure systems, mastering these advanced techniques will help ensure your installation is efficient, safe, and durable. Below are some tips for handling these more complex scenarios.

Tips for Working in Tight Spaces

Installing hydraulic quick disconnects in tight or confined spaces requires extra care and the right tools. Here’s how to tackle the challenge:

Use Compact, Low-Profile Couplers: For installations in narrow or cramped areas, select compact quick disconnect couplers designed for such environments. These are often shorter and have a lower profile, allowing for easier access and installation.

Invest in Flexible Hoses: In tight spaces, rigid pipes and hoses can be difficult to maneuver. Flexible hydraulic hoses can make the job easier by allowing for more freedom in positioning. Choose hoses that are durable yet flexible enough to fit into confined spaces without straining.

Utilize Specialized Tools: When working in tight spots, traditional tools may not fit. Consider using specialized tools, such as small wrenches, torque adapters, or hydraulic quick disconnect tools designed for tight spaces. These tools help ensure you can tighten or loosen couplings without damaging surrounding components.

Plan the Layout in Advance: Before starting installation, take time to plan the layout of the system. Think about the orientation of the quick disconnect couplers and how to position hoses and components in a way that allows for efficient connection and disconnection, even in tight spaces.

Use a Mirror or Camera for Visibility: In some cases, the workspace may be too tight to view directly. Consider using a mirror or a small inspection camera to get a clear view of the coupler and connector during installation. This can help you ensure correct alignment and avoid misconnections.

How to Install Quick Disconnect Couplers Safely and Efficiently

Quick disconnect couplers are designed for easy connection and disconnection, but installing them correctly and safely is still crucial. Here’s how to do it efficiently:

Wear Proper PPE (Personal Protective Equipment): Always wear safety gloves, goggles, and any other required protective gear. Hydraulic systems are under high pressure, and an accident could cause serious injury. Proper PPE helps reduce risks during installation.

Depressurize the System Before Installation: Before starting the installation or disconnection process, make sure the hydraulic system is fully depressurized. This step is critical to prevent the accidental release of pressurized fluid, which could result in injury or system damage.

Check for Leaks Before Full Operation: After installing the quick disconnect coupler, perform a visual inspection and pressure test to check for leaks. Even a small leak can cause long-term damage to the hydraulic system. If leaks are found, address them immediately before resuming normal operation.

Ensure Easy Access for Future Maintenance: When installing quick disconnect couplers, ensure they are positioned in a way that allows for easy access during future maintenance or repairs. This may require slightly adjusting the placement of components to make the couplers more accessible.

Using Quick Disconnects in High-Pressure Systems

Quick disconnect couplers are commonly used in high-pressure hydraulic systems, but there are specific considerations to keep in mind:

Choose High-Pressure Rated Couplers: Always ensure that the quick disconnect coupler you select is rated for the pressure of your hydraulic system. Using a coupler with an inadequate pressure rating can result in dangerous failures, including bursts or leaks.

Consider the Flow Rating: In addition to pressure, the flow capacity of the coupler is essential in high-pressure systems. Ensure that the coupler is capable of handling the flow requirements of the system without causing excessive pressure drop, which could affect system performance.

Check for Burst Pressure Ratings: In high-pressure systems, it’s crucial to select quick disconnects that have burst pressure ratings well above the operating pressure of your system. This ensures that even in the event of a system pressure surge, the coupler will not fail.

Use Couplers with Secure Locking Mechanisms: For high-pressure applications, it’s essential to use quick disconnect couplers with reliable locking mechanisms that prevent accidental disconnections under pressure. A good locking mechanism ensures that the coupler remains securely attached even during high-pressure operations.

Inspect Regularly for Wear: In high-pressure systems, components experience more stress and wear. Regularly inspect quick disconnect couplers for signs of fatigue, wear on the seals, or other damage that could lead to leaks or connection failure. Replace any worn or damaged parts immediately to avoid system failure.

Perform Leak Testing After Installation: After installing quick disconnects in high-pressure systems, always conduct a thorough leak test. Under high pressure, even small leaks can become catastrophic, so testing for leaks before full system operation is vital to ensuring system integrity.

Conclusion

Mastering installation and maintenance will help you avoid costly mistakes, keep your hydraulic system running smoothly, and ensure its continued performance and safety.


FAQ

What is a hydraulic quick coupling?

Hydraulic quick couplings are quick connecting and disconnecting devices used in hydraulic systems to quickly connect and disconnect hydraulic lines without leaking hydraulic fluid.

How to install hydraulic quick couplings?

When installing hydraulic quick couplings, you first need to clean the system and make sure the connectors are aligned. Then, tighten the fitting according to the manufacturer’s torque specifications and perform a final inspection and pressure test to ensure there are no oil leaks.

What do I need to be aware of when installing hydraulic quick couplings?

When installing, avoid using the wrong fitting size, make sure it is correctly mated, avoid over-tightening or over-loosening the connection, and check that the O-rings and seals are in place.

What should I do if hydraulic quick coupling leaks oil?

If the hydraulic quick coupling leaks oil, first check whether the connection is correctly docked and whether the O-ring is damaged or aging. If there is damage, replace the seals or joints in time.

How long is the service life of hydraulic quick coupling?

The service life of hydraulic quick couplings depends on the working environment, pressure and maintenance. Regular inspection and maintenance can greatly extend its service life.

How to avoid common mistakes during the installation of hydraulic quick couplings?

To avoid common mistakes, be sure to use the correct type and size of fitting, ensure proper alignment, tighten the fitting to the specified torque standard, and perform a thorough inspection after installation.

7 Simple Steps for Identifying Hydraulic Fittings Correctly banner

7 Simple Steps for Identifying Hydraulic Fittings Correctly

Hydraulic fittings are vital components in fluid systems, designed to connect, secure, and direct the flow of hydraulic fluids between machinery parts. They come in various shapes, sizes, and materials, depending on the application, and play a critical role in ensuring system efficiency and safety. Properly selected fittings maintain pressure, prevent leaks, and enable smooth connections between components like hoses, pipes, and valves.

Step 1: Familiarize Yourself with Different Hydraulic Fitting Types

Understanding the various types of hydraulic fittings is the first step in identifying the right ones for your system. Hydraulic fittings come in different shapes, sizes, materials, and connection methods, and each type is designed for specific applications. In this section, we’ll break down the most common types of hydraulic fittings you’ll encounter and their key features.

Overview of Common Hydraulic Fitting Types

There are several categories of hydraulic fittings, and each serves a unique purpose in fluid systems. The most common types include:

Threaded Fittings – These fittings have threaded ends that screw into corresponding components, creating a tight seal. They are commonly used in stationary applications and where high pressure is involved.

Flared Fittings – These are designed with a flared end that fits into a corresponding connector, usually involving a metal-to-metal seal. They are ideal for high-pressure systems.

Compression Fittings – Often used for smaller systems, compression fittings use a ferrule to compress the tube against the fitting, creating a secure, leak-proof connection.

Push-to-Connect Fittings – These fittings are designed for quick and easy connection without the need for tools. They are ideal for applications where flexibility and speed are required.

Quick Connect Fittings – Similar to push-to-connect, these allow for the fast connection and disconnection of hydraulic hoses or equipment without needing extra tools or hardware.

Knowing how to identify these different types is essential for correctly selecting the right fitting for your hydraulic system.

Hydraulic Adapters materials

Threaded Fittings: NPT, BSPT, BSPP

Threaded fittings are among the most common hydraulic fitting types, and they feature threads that allow them to screw into compatible components. Here are the three most common types of threaded fittings:

NPT (National Pipe Thread): This is a tapered thread type commonly used in North America. It creates a seal by the threads themselves, which tighten as they are screwed into place. NPT fittings are often used in high-pressure applications but require careful installation to avoid leaks.

BSPT (British StandardPipe Tapered): Similar to NPT, BSPT fittings have a tapered thread and are primarily used in Europe and parts of Asia. The tapered threads create a tight seal, but these fittings should not be confused with BSPP (explained below), as they are designed for different types of systems.

BSPP (British StandardPipe Parallel): Unlike BSPT, BSPP fittings have parallel threads and require a seal, such as an O-ring or gasket, to prevent leaks. These are commonly used in low-pressure systems and where a flexible seal is needed.

Key Differences to Remember:

NPT has tapered threads, while BSPT has similar but slightly different thread angles and shapes.

BSPP uses parallel threads and relies on seals for a leak-proof connection.

NPT and BSPT are used in high-pressure systems, while BSPP is used for low-pressure systems.

Flared Fittings vs. Compression Fittings

When working with hydraulic systems, it’s crucial to understand the differences between flared and compression fittings, as they are designed for different types of connections.

Flared Fittings: These fittings are used with tubing that has been flared at the end, creating a wide, cone-like shape that fits tightly against the fitting’s tapered surface. Flared fittings create a strong metal-to-metal seal, which makes them ideal for high-pressure applications where tight sealing is critical. They are commonly used in gas and fluid systems where leak prevention is a top priority.

Compression Fittings: Compression fittings use a ferrule to compress the tubing against the fitting, creating a secure, leak-free connection. These fittings are generally used in low to medium-pressure applications and are popular in smaller hydraulic systems. They are easier to install than flared fittings but may not handle high-pressure conditions as well.

Key Differences to Remember:

Flared fittings require tubing to be flared at the end and are best for high-pressure systems.

Compression fittings use a ferrule to secure the tube and are best for low-pressure and smaller applications.

Push-to-Connect and Quick Connect Fittings

These two fitting types are designed for ease of use and fast connection and disconnection, making them particularly useful in dynamic or mobile hydraulic systems.

Push-to-Connect Fittings: These fittings allow quick installation by simply pushing the tube or hose into the fitting. The fitting automatically locks into place, creating a tight, secure connection without requiring any tools. Push-to-connect fittings are ideal for systems where fast, frequent connections are needed, and they are often used in automation and pneumatic systems.

Quick Connect Fittings: Quick connect fittings are designed for rapid connection and disconnection of hydraulic hoses and equipment. Unlike push-to-connect, quick connect fittings often feature a lever or collar that, when activated, locks or unlocks the connection. These fittings are commonly used in systems where components are regularly swapped in and out, such as construction or agricultural machinery.

Key Differences to Remember:

Push-to-connect fittings are easy to install without tools and are used in low-pressure applications.

Quick connect fittings allow for rapid connection and disconnection, making them ideal for equipment that needs to be frequently connected and disconnected.

Step 2: Learn How to Identify Hydraulic Fitting Sizes

When it comes to hydraulic fittings, selecting the right size is crucial for ensuring that fluid flows efficiently and without leakage. Hydraulic fittings come in various sizes, and understanding the difference between nominal size and actual size, as well as how to measure and determine the correct size, is key to proper system functionality.

Understanding Nominal Size vs. Actual Size

Nominal Size refers to the approximate internal diameter of the fitting or hose, which is often used as a standard measurement. It is a rough indication of the size and is often rounded for convenience. Nominal sizes are typically denoted in inches or millimeters, but they do not always correspond exactly to the actual dimensions of the fitting.

Actual Size refers to the true measurements of the fitting, including its outer diameter (OD) and inner diameter (ID), and can vary slightly from the nominal size. Understanding this distinction is important, as hydraulic systems require precise measurements to ensure that fittings and hoses fit securely and provide a leak-free connection.

For example:

A “1/2-inch” hydraulic fitting might have a nominal size of 1/2 inch, but its actual inner diameter could be slightly different due to manufacturing tolerances.

When choosing hydraulic fittings, it is essential to check both the nominal and actual sizes to ensure compatibility with your system’s hoses and pipes.

Measuring Hydraulic Fitting Diameter and Length

Correctly measuring the diameter and length of hydraulic fittings is key to making sure you select the right components for your system. Here’s how to do it:

Measuring the Diameter: To measure the diameter of a hydraulic fitting, use a caliper to determine the outside diameter (OD) or inner diameter (ID) of the fitting. For threaded fittings, measuring the diameter at the base of the threads is important. If you’re working with hoses, the inside diameter is especially critical, as it affects the fluid flow.

Measuring the Length: The length of the fitting typically refers to the overall length, from one end of the fitting to the other. For threaded fittings, this includes the length of the threads. It’s important to measure the entire length of the fitting, including any parts that will be inserted into the connecting components (such as the threaded or flared section).

How to Determine the Correct Size for Your System

Selecting the correct hydraulic fitting size requires a careful approach. Here are the steps to ensure you choose the right fitting size for your system:

Check Hose or Tube Size: The size of the hose or tube that you are using is the primary determinant for selecting the fitting size. Measure the inner diameter (ID) of the hose or tube and ensure it matches the fitting size.

Match the Fitting Type to the Application: Different types of fittings are designed to accommodate specific applications, so ensure that the fitting size matches the required flow rate and pressure. For instance, high-pressure systems may require fittings with thicker walls or larger sizes.

Consult Manufacturer Specifications: Manufacturers often provide charts or guidelines for selecting the correct fitting size based on the hydraulic system’s pressure requirements and fluid types. These charts help you match the fitting size to your system’s needs.

Consider the Thread Type and Size: If you are using threaded fittings, be sure to match the thread type (NPT, BSPT, BSPP, etc.) with the correct size. Threads should match both the diameter and pitch to ensure a secure connection.

Account for System Pressure and Flow Requirements: The size of the fitting also depends on the pressure and flow rate of your hydraulic system. Larger fittings are required for systems with higher flow rates, while smaller fittings may suffice for low-pressure systems.

Step 3: Understand Hydraulic Fitting Materials

Selecting the right material for hydraulic fittings is critical for ensuring that your system operates reliably under varying pressures, temperatures, and environmental conditions. Different materials offer distinct advantages in terms of strength, corrosion resistance, durability, and cost. Understanding these materials will help you make informed decisions to optimize your hydraulic system’s performance.

Material Properties and Their Impact on Performance

The choice of material significantly influences the overall performance of hydraulic fittings in your system. Key properties of each material type impact how the fittings will function under different conditions:

Strength and Durability

Steel fittings provide the highest strength and are often used in heavy-duty applications, such as in mining, construction, or manufacturing, where high-pressure conditions are common.

Brass fittings, being softer, are not as strong and are more suited to light-duty applications, such as in fluid handling or low-pressure systems.

Stainless steel fittings strike a balance between strength and corrosion resistance, and are ideal for systems exposed to aggressive chemicals, high temperatures, or harsh environments.

Corrosion Resistance

Steel fittings are vulnerable to corrosion if not properly coated or treated, particularly in environments with moisture or exposure to chemicals.

Brass fittings are more resistant to corrosion than carbon steel, but they can still degrade under certain conditions, particularly in high-temperature or high-pressure environments.

Stainless steel fittings offer the best corrosion resistance, making them the ideal choice for offshore applications, marine environments, and systems exposed to harsh chemicals.

Temperature Tolerance

Steel fittings can tolerate a wide range of temperatures, but they may rust or weaken in extreme moisture or corrosive conditions unless treated.

Brass is less tolerant of high temperatures compared to steel or stainless steel and is typically used for lower-temperature systems.

Stainless steel excels in both high and low temperatures and maintains its integrity in extreme conditions, making it the preferred choice for applications with temperature variations.

Choosing the Right Material for Your Hydraulic System

When selecting the material for your hydraulic fittings, consider the following factors to ensure optimal performance:

System Pressure and Flow Rate: If your system operates at very high pressures, steel fittings may be the best option due to their superior strength. For moderate pressure systems, brass or stainless steel may be more appropriate.

Environmental Conditions: If your hydraulic system will be exposed to harsh chemicals, moisture, or extreme temperatures, stainless steel fittings are ideal due to their corrosion resistance and durability. For systems in less aggressive environments, brass may be a suitable choice.

Corrosion Resistance Needs: For applications exposed to water, salty environments, or chemicals, stainless steel fittings provide superior corrosion resistance. Brass also offers some resistance but may not be as durable as stainless steel in these conditions.

Step 4: Get to Grips with Hydraulic Fitting Threads

Hydraulic fittings rely heavily on precise thread types to ensure secure connections and prevent leaks. Understanding the different thread types used in hydraulic systems and knowing how to identify and match them correctly is essential for system efficiency and safety.

How to Identify Thread Types in Hydraulic Fittings

Identifying the correct thread type in hydraulic fittings is crucial, as each thread type has a specific design and function. Here’s how you can identify them:

Inspect the Threads: The first step in identifying thread types is to visually inspect the threads on the fitting. Check for characteristics like whether the threads are tapered or parallel, as this can immediately narrow down your options.

Measure the Thread Pitch: Thread pitch refers to the distance between adjacent threads. To measure it, use a thread pitch gauge or calipers. The pitch can be measured in inches (for imperial threads) or millimeters (for metric threads).

Identify the Thread Form: The thread form (the shape of the thread profile) is another key indicator. Some common forms include triangular (for NPT threads), square (for BSPP threads), or rounded forms (for JIC threads).

Use a Thread Identification Chart: Once you’ve identified basic features like pitch and form, use a thread identification chart to confirm the thread type. Charts will show the exact measurements and form for popular hydraulic thread types.

Tips for Matching Threads Correctly

Incorrectly matched threads can lead to leaks, system inefficiency, or even catastrophic failure. Here are some practical tips for ensuring you choose the right threads:

Match the Thread Type and Size

Make sure the fitting and the connecting component (pipe or hose) have the same thread type and size. This is critical to achieving a proper, leak-proof seal. Always double-check whether the fitting requires tapered threads (like NPT or BSPT) or parallel threads (like BSPP or metric threads).

Use a Thread Pitch Gauge

A thread pitch gauge is a useful tool for identifying the thread pitch and determining whether the pitch of the fitting matches the corresponding hose or pipe. A slight mismatch in pitch can cause an incomplete seal, leading to leaks.

Check for Sealing Mechanisms

For tapered threads (NPT, BSPT), the threads themselves create the seal as the fitting is tightened. For parallel threads (BSPP, JIC), sealing relies on an additional element like an O-ring or copper washer. Ensure that the sealing component is also the correct size and material for the application.

Pay Attention to Thread Angle

Thread angle plays a vital role in ensuring a secure connection. For example, NPT has a 60-degree angle, while BSPT has a 55-degree angle. If the wrong type of thread is matched (e.g., BSPT with NPT), the threads may not engage correctly, causing leaks or failure.

Verify System Pressure Requirements

Consider the pressure rating of the system when choosing fittings. Some threads, like NPT, are designed to handle high-pressure environments, while others, like BSPP, may be more suited for low-pressure systems with O-ring seals. Ensure that the fitting thread type can handle the pressure your system requires.

Consider Thread Coatings

Thread coatings (such as PTFE or nickel plating) can help improve the performance of the thread, especially in systems exposed to chemicals or high temperatures. If the system is highly corrosive, choosing fittings with appropriate coatings can help extend the life of the threads and prevent wear or corrosion.

Step 5: Examine Hydraulic Fitting Connections and Seals

Hydraulic fitting connections and seals are crucial elements in maintaining the integrity of your hydraulic system. A proper connection ensures that pressure is maintained, fluid flows seamlessly, and leaks are prevented. Understanding the different types of connections and seals, as well as how to identify the right ones for your system, is essential for ensuring reliability and safety in hydraulic operations.

Types of Hydraulic Fitting Connections: Male, Female, Couplings

Hydraulic fittings come with different types of connections that allow them to securely attach to hoses, pipes, and other components in the hydraulic system. Here’s an overview of the most common types:

Male and Female Connections

Male Fittings: Male hydraulic fittings have external threads that fit into female counterparts. These fittings are typically used to connect to a female fitting or port. Male fittings are commonly used in straight-thread and tapered-thread applications.

Applications: Connecting hoses to a valve, pump, or cylinder port. Common in systems using NPT or BSPT threads.

Female Fittings: Female hydraulic fittings have internal threads that allow them to connect with male fittings. They are commonly used in threaded port connections where a male fitting is inserted into the female connector.

Applications: Used in hydraulic systems to connect tubes or pipes to components like pumps, cylinders, and valves.

Couplings

Quick-Connect Couplings: These are designed to provide quick and easy connections between hydraulic lines without the need for tools. They allow users to disconnect or connect hydraulic lines with minimal effort, which is especially useful in mobile or field applications.

Applications: Agricultural machinery, construction equipment, or systems requiring frequent changes between hoses or tools.

Threaded Couplings: Threaded couplings are used to connect two components with matching threads. They provide a more permanent and secure connection and are common in industrial hydraulic systems.

Applications: Used where a secure, leak-proof connection is necessary, typically in industrial or high-pressure applications.

Flanged and Clamp Couplings: Flanged couplings use a flange and bolts to connect pipes or hoses, providing a strong, secure connection. Clamp couplings use a clamping mechanism for easy assembly and disassembly. Both are typically used in larger hydraulic systems.

Applications: High-flow systems, heavy equipment, and large-scale industrial machinery.

Identifying Proper Seals for Hydraulic Fittings

Identifying the correct seal for your hydraulic fittings is just as important as selecting the right fitting itself. Here are some key factors to consider when choosing seals:

Material of the Seal

The material of the seal directly affects its performance in the hydraulic system. The most common seal materials include:

Nitrile (Buna-N): This is a common seal material, used in general-purpose hydraulic systems. It is resistant to petroleum-based fluids but has limitations at higher temperatures.

Viton (FKM): Known for excellent resistance to high temperatures and a broad range of chemicals, Viton seals are ideal for systems with high-temperature or aggressive fluid environments.

EPDM (Ethylene Propylene Diene Monomer): EPDM seals are highly resistant to water and steam and are commonly used in applications where water or glycol-based fluids are present.

PTFE (Polytetrafluoroethylene): PTFE seals are known for their low friction and excellent chemical resistance, making them suitable for systems that deal with aggressive chemicals or high-pressure environments.

Seal Shape and Type

There are several different types of seals used in hydraulic fittings, each designed for specific applications:

O-rings: One of the most commonly used seals in hydraulic fittings, O-rings are circular seals that fit into grooves and provide a reliable, pressure-tight connection. They are used in various fitting types, including flared fittings and threaded connections.

Backup Rings: These rings are used in conjunction with O-rings to prevent extrusion in high-pressure environments. They support O-rings in situations where extreme pressure could cause the O-ring to deform.

Face Seals: Face seals provide a sealing surface between two parts and are commonly used in high-pressure hydraulic systems. They provide a leak-tight connection without the need for an additional sealing element like an O-ring.

Gaskets: Gaskets are often used in flanged hydraulic connections to provide a seal between two flat surfaces. They are designed to compress when tightened to ensure a leak-free connection.

Pressure and Temperature Rating

The seal’s material and design must be able to withstand the operating pressure and temperature of the hydraulic system. Check the manufacturer’s specifications for pressure and temperature limits to ensure the seal is appropriate for your system’s demands.

Fluid Compatibility

Ensure that the seal material is compatible with the hydraulic fluid used in your system. Hydraulic fluids vary widely in terms of chemical composition, and some materials (e.g., nitrile) may degrade if exposed to certain fluids. Always verify compatibility before choosing a seal material.

Seal Sizing

Ensure the seal is the correct size for the fitting and the application. A seal that is too large or too small may not provide a proper seal, leading to leaks. Always refer to manufacturer specifications for seal dimensions and sizing.

Step 6: Check Hydraulic Fitting Pressure Ratings

The pressure rating of hydraulic fittings is a critical factor in ensuring the safety and reliability of your hydraulic system. Hydraulic systems operate under varying levels of pressure, and using fittings with incorrect pressure ratings can lead to catastrophic failures, leaks, or damage to the system.

Common Pressure Rating Standards for Hydraulic Fittings

Hydraulic fittings come with specific pressure ratings that are determined by factors like the material of the fitting, the design, and the intended use of the system. Here are some common standards for pressure ratings:

PSI (Pounds per Square Inch)

PSI is the most commonly used unit to express pressure in hydraulic systems, especially in the United States. Hydraulic fittings are rated to withstand pressures measured in PSI. The pressure ratings of fittings are often marked directly on the fitting itself or provided in the manufacturer’s specifications.

Low-Pressure Fittings: These typically have pressure ratings up to 1,500 PSI and are used in systems where low pressures are involved, such as in lubrication systems or cooling applications.

Medium-Pressure Fittings: Rated around 3,000 to 5,000 PSI, these fittings are commonly found in industrial hydraulic systems for machinery and equipment.

High-Pressure Fittings: These fittings are designed to withstand pressures above 5,000 PSI and are often used in heavy-duty applications such as construction machinery, aerospace, and hydraulic presses.

MPa (Megapascal)

In countries that use the metric system (like Europe), pressure ratings may be expressed in megapascals (MPa). One MPa is equal to 145 PSI, and hydraulic fittings in these regions may be rated for 10 MPa, 25 MPa, or higher, depending on the application.

Bar

A bar is another metric unit of pressure used widely in Europe. One bar is approximately equal to the pressure exerted by a 1 kg weight per square centimeter at sea level. Hydraulic fittings may be rated in bars, with common ratings being 100 bar (low-pressure systems), 400 bar (medium-pressure systems), and 700 bar or more (high-pressure systems).

SAE Standards (Society of Automotive Engineers)

SAE J514 and SAE J516 standards are commonly used for hydraulic fittings in North America. These standards provide pressure ratings based on the material and fitting design. For example, SAE J514 specifies the pressure ratings for flareless fittings made from steel, which can typically handle pressures up to 5,000 PSI.

ISO Standards (International Organization for Standardization)

ISO 8434 is a set of standards used for hydraulic fittings, particularly in Europe and international markets. These standards define pressure ratings based on the design, material, and intended application. Common ISO pressure ratings include those for fittings used in automotive, industrial, and mobile machinery.

Identifying the Right Pressure Rating for Your System

Choosing the right pressure rating for hydraulic fittings depends on various factors, including the operating conditions, fluid type, and system design. Here are key steps for identifying the correct pressure rating for your system:

Know Your System’s Maximum Operating Pressure

The first step in selecting a hydraulic fitting with the correct pressure rating is to know the maximum operating pressure (MOP) of your system. This is the highest pressure your system will experience under normal operating conditions. Always choose a fitting with a pressure rating higher than your system’s MOP to ensure safety.

Factor in Pressure Surges

Hydraulic systems can experience pressure surges or spikes that exceed the normal operating pressure. To account for these surges, select fittings with pressure ratings that can handle transient pressures. Typically, you should choose a fitting rated at least 1.5 times the system’s normal operating pressure to accommodate these spikes.

Temperature Considerations

Pressure ratings can also be influenced by temperature. High temperatures can weaken materials, while extremely low temperatures can make certain materials brittle. If your system operates in extreme temperatures, consider how temperature affects the fitting’s pressure rating and select fittings designed for those conditions.

Factor in Fluid Type

Certain fluids (such as water-based fluids, oil, or synthetic fluids) may have different effects on hydraulic fittings. Fluids with higher viscosity or corrosive properties may require fittings with higher pressure ratings. Ensure the hydraulic fluid in your system is compatible with the fitting material and its pressure rating.

Step 7: Ensure Compatibility with Your Hydraulic System

Ensuring compatibility between hydraulic fittings and your system’s components is essential to achieving peak performance, avoiding system failures, and maintaining safety. When hydraulic fittings are mismatched with the system’s requirements, it can lead to poor fluid flow, leaks, and even complete breakdowns.

Matching Fittings to the Hydraulic System’s Requirements

Choosing the right fittings for your hydraulic system starts with understanding the specific needs of your system. Each hydraulic system is unique, with varying pressure, flow, and temperature demands, so selecting the appropriate fittings requires careful consideration.

Consider the System’s Application and Design

Each hydraulic system has a specific purpose, whether it’s for heavy machinery, industrial manufacturing, or mobile equipment. Understanding the intended application of your system helps determine which fittings are necessary to ensure smooth operation. For example:

Heavy-duty machinery: Will require high-pressure-rated fittings and robust materials like steel or stainless steel.

Mobile equipment or machinery: Might benefit from quick-connect fittings for ease of maintenance and flexibility.

Choose Fittings Based on System Pressure

Different sections of a hydraulic system will have different pressure requirements. It’s essential to choose fittings that can handle both the maximum operating pressure (MOP) and any potential pressure surges or spikes. Ensure that all components, including hoses, fittings, and valves, are rated for the pressures they will experience in service.

Select Fittings for Fluid Compatibility

Hydraulic systems use different types of fluids such as water-based fluids, petroleum-based oils, or synthetic fluids. The material of the fittings must be compatible with the fluid used in your system to prevent corrosion, leakage, or damage to components. Always verify the fluid compatibility of both the fitting material and seals, as some materials may degrade when exposed to certain fluids.

Account for Environmental Conditions

The operating environment of your hydraulic system plays a significant role in the type of fittings you select. Exposure to harsh elements such as extreme temperatures, chemicals, UV radiation, or corrosive conditions may require fittings made from specialized materials (e.g., stainless steel, brass, or corrosion-resistant coatings) that can withstand such environments.

Understanding Flow Rate and Compatibility

Flow rate refers to the volume of hydraulic fluid that moves through the system per unit of time, typically measured in gallons per minute (GPM) or liters per minute (LPM). Ensuring compatibility between the flow rate and the hydraulic fittings is essential to maintaining efficient system operation.

Matching Flow Rate with Fitting Size

Fittings must be sized to allow for proper flow through the system. Choosing fittings that are too small can restrict fluid flow, increase pressure drop, and cause system inefficiency. On the other hand, oversized fittings can lead to turbulence and fluid instability, which can cause wear and tear on system components. To match the flow rate with the fitting size:

Ensure the internal diameter (ID) of the fitting matches the diameter of the hose or pipe to avoid flow restriction.

Use fittings with the appropriate flow characteristics to maintain system pressure and prevent unnecessary fluid resistance.

Pressure Loss Considerations

Pressure loss due to friction is a key factor when selecting fittings, especially when considering the flow rate. If the fittings are too small for the flow rate, the system will experience a pressure drop, which could affect the operation of downstream components like pumps and valves. To minimize pressure loss:

Use fittings designed to reduce friction, such as those with smooth internal surfaces.

Select fittings that are designed for low-flow or high-flow applications, depending on the system’s needs.

Flow Control Components Compatibility

In some systems, flow control components such as valves, pumps, and regulators are used to manage the flow of fluid. Ensure that the fittings selected are compatible with these components to maintain the required flow rates and pressure settings. For example, if your system uses a flow control valve, make sure the fittings match the specifications of the valve and the hoses connected to it.

Conclusion

In conclusion, mastering the art of recognizing hydraulic fittings is a vital skill for anyone working with hydraulic systems. If you still have questions about how to properly identify hydraulic fittings, feel free to contact us!


FAQ

What are hydraulic fittings, and why are they important?

Hydraulic fittings are components used to connect hoses, pipes, or tubes in hydraulic systems. They ensure the safe and efficient transfer of hydraulic fluid between system components. Properly chosen hydraulic fittings prevent leaks, maintain pressure, and ensure the system operates smoothly.

How do I determine the correct size of a hydraulic fitting?

To determine the correct size, you need to measure both the internal diameter (ID) and the external diameter (OD) of the hose or pipe that the fitting will connect to. Make sure to consider both the nominal and actual size of the fitting to ensure a proper fit and prevent leaks.

What materials are used in hydraulic fittings?

Common materials for hydraulic fittings include steel, brass, stainless steel, and carbon steel. The material selection depends on the type of fluid used, environmental conditions, pressure ratings, and compatibility with other system components.

How can I identify the thread type of a hydraulic fitting?

Hydraulic fittings often have different thread types, such as NPT (National Pipe Thread), BSPT (British Standard Pipe Tapered), and BSPP (British Standard Parallel). To identify the thread type, check the fitting’s thread pitch, size, and whether it is tapered or parallel. Use a thread gauge or comparison to confirm the correct match.

What’s the importance of hydraulic fitting pressure ratings?

Pressure ratings indicate the maximum pressure that a hydraulic fitting can safely handle. It is crucial to choose fittings with a pressure rating that matches or exceeds the maximum pressure your hydraulic system will experience. Using a fitting with an inadequate pressure rating can result in system failure, leaks, or damage.

How do I ensure compatibility between hydraulic fittings and my system?

To ensure compatibility, consider the system’s pressure, fluid type, flow rate, and environmental conditions. Match the fitting material, size, thread type, and pressure rating to the system’s requirements.

Contact Topa

Save 30% on maintenance costs with our easy-install hydraulic fittings. Contact Now!