Crafting a reliable hydraulic hose assembly is a science of precision. This comprehensive guide details the essential steps, from material selection to the final quality check, ensuring every assembly you build is safe, durable, and leak-free.
The Foundation: Safety and System Understanding
Before you make the first cut, remember this: every good hose assembly starts with safety and a solid grasp of how the hydraulic system works. Skipping these basics is the fastest way to end up with leaks, downtime, or even serious injuries.

Safety First: Gear Up Before You Start
Hydraulic systems pack a lot of stored energy — and when things go wrong, they go wrong fast.
Before touching a hose, make sure you’re properly protected:
| Safety Gear | Why It Matters |
| Safety glasses | Shields your eyes from hydraulic fluid spray or metal shavings. |
| Cut-resistant gloves | Prevents injuries from sharp fittings or steel wire strands. |
| Hearing protection | Helpful if you’re cutting or crimping in a noisy shop. |
| Protective clothing | Keeps you safe from hot fluids and abrasive surfaces. |
⚠️ Always depressurize the system before disconnecting or removing any hose assembly. Never assume the line is safe until the pressure gauge reads zero.
Know What Your System Needs (S.T.A.M.P. Method)
To build the right hose, you need to know exactly what it’s expected to handle. The S.T.A.M.P. method is a simple checklist used across the hydraulic industry:
| Letter | Meaning | What to Check |
| S | Size | Inside diameter and overall length of the hose |
| T | Temperature | Fluid and ambient operating temperature |
| A | Application | Equipment type, routing path, and movement |
| M | Media | Type of hydraulic fluid or chemical |
| P | Pressure | Working and maximum peak pressure |
Getting even one of these wrong can lead to leaks, bursts, or premature hose failure.
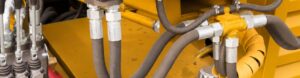
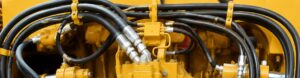
Understanding the Hose Assembly
Think of a hose assembly as a team of three parts working together:
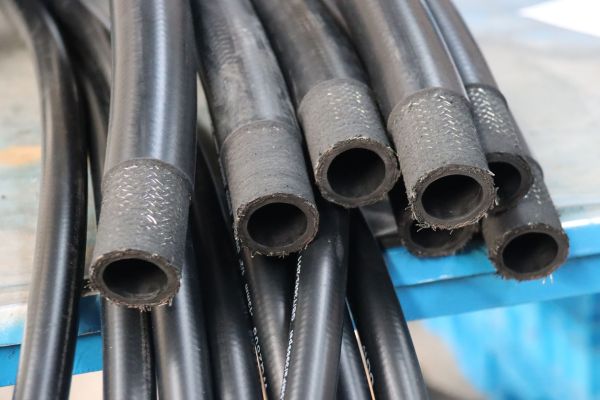
- The hose – made of an inner tube, reinforcement (braid or spiral wire), and an outer protective cover.
- The fittings – connect the hose to the system ports.
- The crimp – the process that permanently joins the fitting and hose into one leak-proof unit.
When all three are correctly matched and crimped, the assembly becomes a single, high-pressure-ready component that can safely power your equipment day after day.
Step 1: Precision in Preparation
The quality of your finished assembly is determined long before you approach the crimper. Meticulous preparation—selecting the right components, measuring accurately, and preparing the hose end—sets the stage for a perfect, reliable crimp.
Selecting the Right Hydraulic Hose
Your hose choice must match the S.T.A.M.P. requirements. Check the hose layline for its ID, pressure rating, and construction type (e.g., SAE 100R1, 100R2). Using an underrated hose for a high-pressure application is exceptionally dangerous and guarantees failure.
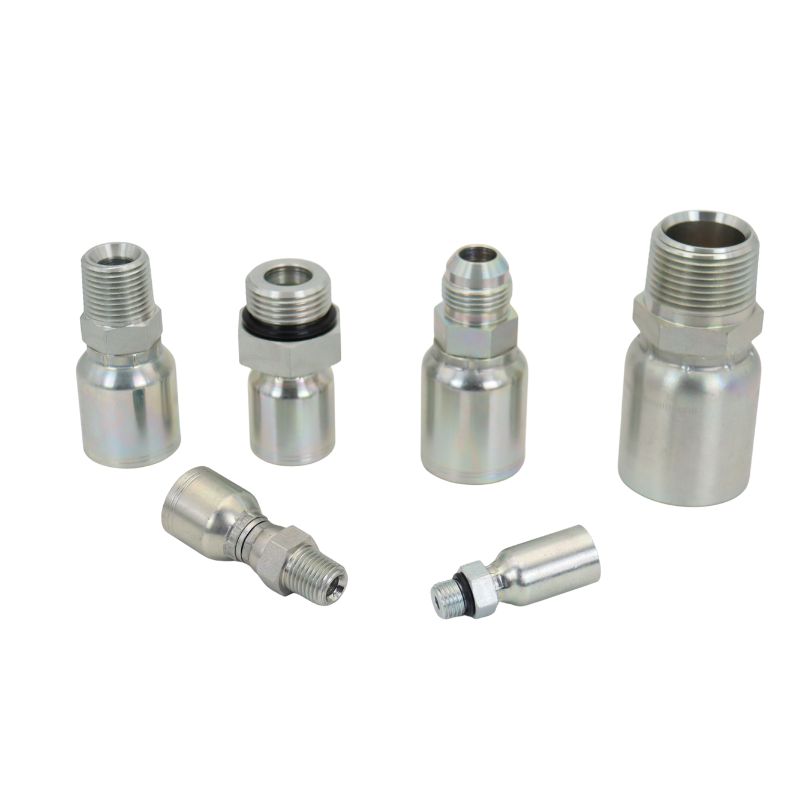
Choosing the Correct Fittings
Fittings must be compatible with both the hose and the port you are connecting to. Match the fitting series to the hose manufacturer’s specifications (e.g., a 43 series fitting for a 43 series hose). Ensure the thread type (NPT, JIC, ORFS) is correct for the application.
Measuring and Cutting to Length
Measure the required length carefully. Remember to account for the “cut-off factor”—the length the fittings will add. Use a dedicated hydraulic hose cut-off saw with a sharp, abrasive blade for a clean, square cut that minimizes rubber dust and frayed wires.
The Critical Skiving Step
Skiving is the process of removing a portion of the outer cover (and sometimes inner tube) to expose the steel wire reinforcement. This allows the fitting’s ferrule to get a direct, powerful bite on the wire, essential for high-pressure and super high-pressure hoses.
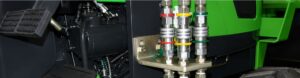
Step 2: The Heart of the Process – Crimping
Crimping is where art meets precision engineering. It’s the stage where you physically compress a metal ferrule around the hose and fitting to form a tight, permanent, leak-proof seal. Getting this right means combining the correct tools, accurate data, and steady attention to detail.
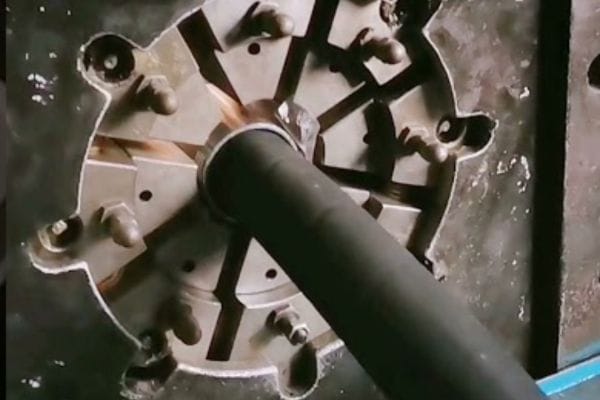
Choosing the Right Die Set
Your crimping machine works with matched die sets — each one designed for a specific hose and fitting size. Even a die that looks close can ruin the assembly. The result? A crimp that’s too tight (damaging the hose) or too loose (causing leaks or blow-offs).
| Step | What to Do | Why It Matters |
| 1 | Check the crimp chart from the hose/fitting manufacturer. | Guarantees you’re using the right die size. |
| 2 | Verify the die is clean and free of damage. | Dirt or wear can distort the crimp. |
| 3 | Match the die number to the ferrule marking. | Confirms compatibility and accuracy. |
✅ Pro tip: Always double-check the part numbers on both the ferrule and the die before starting the crimp.
Setting Up the Crimper
Every crimper needs proper calibration. Think of this as “zeroing out” your tool before every job.
- Follow the manufacturer’s maintenance schedule for calibration.
- Set the target crimp diameter using the crimp chart.
- Older machines may use a micrometer adjustment.
- Newer digital units let you input the diameter directly.
- Run a quick test crimp on a scrap piece to confirm accuracy.
The goal is consistency — each crimp should match the chart’s diameter within ±0.1 mm.
Inserting the Fitting Correctly
This step is simple but critical. Poor insertion leads to leaks or blow-offs under pressure.
- Slide the ferrule onto the hose first.
- For skived hoses, push it until it stops at the skived edge.
- Lubricate the fitting stem lightly with hydraulic oil.
- Insert the fitting fully until it bottoms out against the ferrule.
- Use a marker line on the hose to confirm the fitting doesn’t back out during crimping.
Performing the Crimp
Now for the fun part — turning everything into a single, high-pressure-ready unit.
| Action | Key Point | Result |
| Center the ferrule in the dies | Make sure it’s fully contained within the jaws. | Even pressure and symmetrical crimp. |
| Start the crimp cycle | Let the machine complete its full stroke. | Uniform compression around the hose. |
| Wait for auto-retraction | Don’t interrupt the process mid-cycle. | Prevents incomplete or unsafe crimps. |
| Inspect the crimp diameter | Measure with calipers to confirm. | Ensures it meets specification. |
⚠️ Never stop mid-cycle. Incomplete crimps are unsafe and can cause catastrophic failures once pressurized.
Quick Recap
- Use the exact die set recommended in the crimp chart.
- Calibrate and verify your crimper regularly.
- Make sure the fitting is fully seated before crimping.
- Let the crimp cycle finish — and always check your final diameter.
A clean, even crimp isn’t just a mark of good workmanship — it’s the foundation of a safe, reliable hydraulic connection.
Step 3: Verification and Quality Control
A crimped assembly is not a finished assembly until it passes a rigorous quality control check. This final inspection is your last chance to catch any errors that could lead to leaks, blowouts, or catastrophic failure in the field. Trust, but always verify.
The Critical Visual Inspection
Visually inspect the entire ferrule. Look for a uniform, concentric crimp. There should be no cracks in the metal. The fitting should be straight and axially aligned with the hose. The end of the ferrule should be neat and not excessively flared or distorted.
Measure the Final Crimp Diameter
Using a set of calipers, measure the final diameter of the crimped ferrule at several points around its circumference and along its length. The average measurement must fall within the tolerance specified in the manufacturer’s crimp chart (e.g., +/- 0.005″).
Internal Bore and Contamination Check
Inspect the inside of the fitting to ensure the hose’s inner tube has not been crushed or obstructed. Use a go/no-go gauge if available. Any rubber debris from the cutting process must be cleaned out to prevent system contamination. A blocked bore is a sign of over-crimping.
Marking for Traceability
As a best practice, mark the assembly with a tag or layline marking indicating the date of assembly, its specifications, and the technician responsible. This provides invaluable data for maintenance schedules, diagnostics, and quality improvement programs.
Common Mistakes and How to Avoid Them
Even experienced technicians can make mistakes. Understanding the most common failure modes—and their causes—is key to developing a consistent, error-free assembly process. Learning from these potential pitfalls is a hallmark of a true professional.
The Dangers of Over-Crimping
Applying too much pressure crushes the hose’s inner tube, restricting flow and potentially damaging the wire reinforcement. This leads to heat buildup, premature fatigue, and blowouts. It is often caused by using the wrong (too small) die set or incorrect crimper settings.
The Looseness of Under-Crimping
An under-crimped assembly doesn’t provide enough force to securely grip the hose. Under pressure, the fitting can literally blow off the hose end, releasing high-pressure fluid. This is caused by using the wrong (too large) die set or setting the crimper incorrectly.
Bad Insertion, Bad Assembly
If the fitting is not fully inserted into the hose before crimping, the ferrule’s grip will be on an empty section of hose. This creates a weak point that will fail under pressure. Always use a depth-marking tool to ensure proper insertion.
Contamination: The Silent Killer
Rubber dust, metal shavings, or dirt left inside the assembly will be flushed directly into your hydraulic system. This contamination can score cylinders, clog valves, and destroy pumps. Always clean an assembly with a foam projectile or clean, dry, filtered air after crimping.
| Problem | Likely Cause(s) | Solution |
| Fitting Blows Off Under Pressure | Under-crimping. Incorrectly large die set used, or crimper setting was too high (yielding a large diameter). Incorrect fitting/hose pairing. | Verify Crimp Specs. Discard the assembly. Re-verify the correct die set and crimper setting from the manufacturer’s chart. Ensure the hose and fitting series are compatible. Crimp a new assembly and measure the diameter. |
| Leak at the Ferrule/Hose Interface | Under-crimping. Insufficient compression to create a seal. Also possible if the wrong hose/fitting combination was used (e.g., no-skive fitting on a skive-required hose). | Check Compatibility and Crimp Diameter. Review the hose and fitting specs to ensure they are designed to work together. Re-measure the crimp diameter against the spec. Build a new assembly using the correct data. |
| Hose Fails Just Behind the Ferrule | Over-crimping. Excessive pressure has fractured the wire reinforcement, creating a stress point. The hose then flexes and fatigues at this weakened spot. | Reduce Crimp Diameter. The crimper setting is too low, or the die set is too small. Discard the assembly. Calibrate the crimper and use the correct die set and setting from the chart for a new assembly. |
| Restricted Flow or System Overheating | Over-crimping. The inner tube of the hose has been crushed, creating a blockage (stenosis). | Inspect the Bore. Discard the failed assembly. After crimping a new one, use a go/no-go gauge or visually inspect the bore to ensure it is clear and unobstructed before cleaning and installation. |
The Final Touches: From Bench to Service
A perfectly crimped hose assembly is not ready for service until it is cleaned, protected, and installed correctly. These final steps are crucial for ensuring the assembly’s longevity and the hydraulic system’s overall health and reliability.
Projectile Cleaning for a Pristine Bore
The professional standard for cleaning an assembly is to shoot a foam projectile through the bore using a specialized pneumatic gun. This effectively scours the inner tube, removing all cutting debris and contaminants without introducing any cleaning fluids.

Capping to Maintain Cleanliness
Once cleaned, immediately cap both ends of the hose assembly with clean, plastic caps. This prevents environmental contaminants like dust, dirt, and moisture from entering the assembly during storage or transport to the installation site.
Installation Best Practices
When installing the assembly, route the hose to avoid sharp bends, twisting, kinking, or abrasion against machine components. Use clamps to secure the hose properly. Never allow the hose to meet a bend radius tighter than its specified minimum. Do not overtighten the threaded connections.
FAQ
Can I reuse a hydraulic fitting after removing it from an old hose?
No, absolutely not. Hydraulic fittings are designed for single-use only. The crimping process permanently deforms the ferrule and fitting stem. Attempting to reuse a fitting will result in an unreliable and extremely dangerous assembly that is guaranteed to fail.
What is the difference between a “skive” and “no-skive” hose assembly?
A “skive” assembly requires removing the outer cover of the hose before crimping, allowing the ferrule to grip the wire reinforcement directly. A “no-skive” system uses specialized fittings that are designed to crimp over the cover and bite through it to grip the wire. No-skive is more common today for its speed and simplicity.
My crimp diameter is correct, but the assembly still leaked. Why?
This can happen for a few reasons: A) You used an incompatible hose and fitting series, even if the size was right. B) The fitting was not fully inserted before crimping. C) The hose was damaged before assembly. D) The crimp itself might be angled or uneven.
How often should my hydraulic crimper be calibrated?
Most manufacturers recommend a formal calibration check at least once a year. However, you should perform daily or weekly checks by crimping a test piece and measuring the diameter against the machine’s setting to ensure it is tracking accurately.
Is it safe to build my own hose assemblies?
Yes, but only if you are properly trained and have access to the correct equipment and manufacturer-specific crimp data. The energy in a hydraulic hose is immense. An improperly made assembly is a serious safety hazard. If in doubt, always have your assemblies made by a certified professional.
Why did my hydraulic hose burst even though it was newly installed?
A hose can fail soon after installation if it was twisted, bent beyond its minimum bend radius, or routed too close to a heat source. Twisting changes the hose’s internal structure, causing stress and weakening the reinforcement layers.