Clear photographs can narrow down a one-piece hydraulic hose fitting, but photographs alone rarely establish an exact replacement. Send an organized photo set together with thread, sealing-face, hose, and application information so the recipient can verify the connection instead of matching by appearance. This reduces repeated questions, incorrect quotations, assembly rework, leakage risk, and avoidable equipment downtime.
What Can a Photo Actually Confirm?
Use images for screening, not final interchange approval
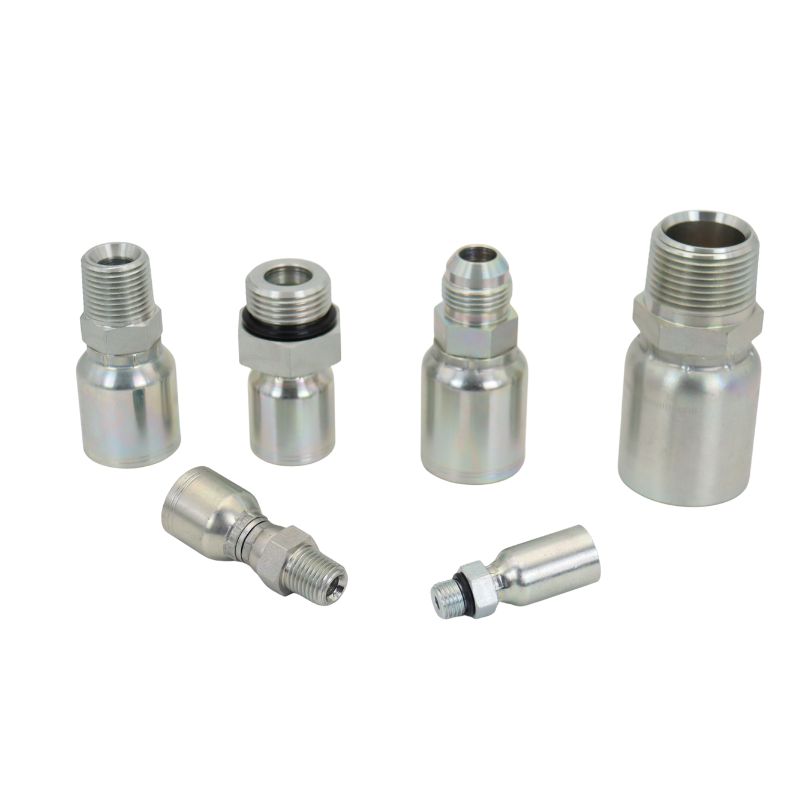
A useful photo set can show whether the item appears to be a straight, 45-degree, or 90-degree one-piece fitting; whether the port end is male or female; and whether the visible construction resembles a common JIC, ORFS, pipe-thread, BSP, metric, DIN, or other connection family. It can also reveal an elbow orientation, swivel nut, flange shape, O-ring location, ferrule profile, corrosion, impact damage, and any readable markings. These observations quickly remove many unsuitable candidates and tell the reviewer which dimensions to request next.
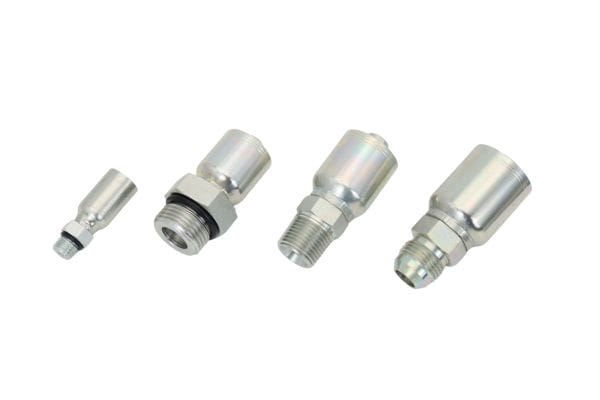
A photograph does not reliably establish thread pitch, a small difference in seat angle, the distinction between parallel and tapered threads, or compatibility with a particular hose and crimp specification. Two connections may look nearly identical on a phone screen while using different thread forms or sealing methods. Treat photo identification as a controlled shortlist: the image proposes possibilities, and measurements plus product data confirm or reject them.
The Essential One-Piece Fitting Photo Set
Photograph the complete part before taking close-ups
Start with a clean, well-lit overview showing the complete fitting from the side. Place it on a plain background, keep the camera square to the part, and include a ruler for scale without using the ruler as a substitute for caliper measurements. For an elbow, take another view looking along the hose or stem axis so the reviewer can understand its orientation rather than guessing from a flattened side image.
Then photograph every marking on the fitting and hose. Rotate the part because a stamped code, logo, dash size, or series mark may appear on a different wrench flat or ferrule face. Include one image of the entire hose assembly when available; the relationship between the two ends, overall routing, guards, sleeves, and adapters may explain details that an isolated close-up hides.
Capture the connection and sealing surfaces directly
Take close-ups straight toward the thread and straight toward the sealing face. A side view should show the full threaded length and whether the diameter changes along it; an end view should show a cone seat, flat face, O-ring groove, flare, nose, or other sealing feature. Clean away loose dirt carefully, but do not grind, polish, or reshape a damaged surface merely to make the photograph clearer.
Send the following image set as the practical minimum:
- Complete fitting from the side, plus a second overall angle
- Port end from the side with all threads visible
- Direct end view of the seat, sealing face, O-ring, or flare
- Ferrule and stem area, including any inspection hole or insertion mark
- Every stamped, etched, molded, or printed identification mark
- Hose layline and a wider view of the complete assembly, when available
- Damage, leakage path, corrosion, or deformation in separate close-ups
Sharp focus matters more than a large file. Use indirect light to avoid glare from plated steel, tap the thread or seat on the phone screen to focus, and review each image at full size before sending it. If the connection is still installed, shut down the equipment, release hydraulic pressure and stored energy, and follow the equipment and component manufacturers’ safety procedures before removal or close inspection.
Measurements That Must Accompany the Photos
Measure the thread instead of estimating it from a ruler
Provide the male thread outside diameter or female thread inside diameter, measured with calipers across the thread crests where the connection standard calls for that reference. Record the value in millimeters or inches and state which unit you used. Add the pitch in millimeters for metric-style descriptions or threads per inch (TPI) as appropriate, preferably checked with a thread-pitch gauge rather than inferred from a blurry image.
Also report whether the thread appears straight or tapered and whether it is male or female. Do not force a known nut, adapter, or gauge onto an uncertain connection as a trial fit: partial engagement does not demonstrate compatible thread form or sealing. Nominal names often do not equal the measured diameter, so send the actual reading rather than converting it into a guessed size.
Describe the seat and seal separately from the thread
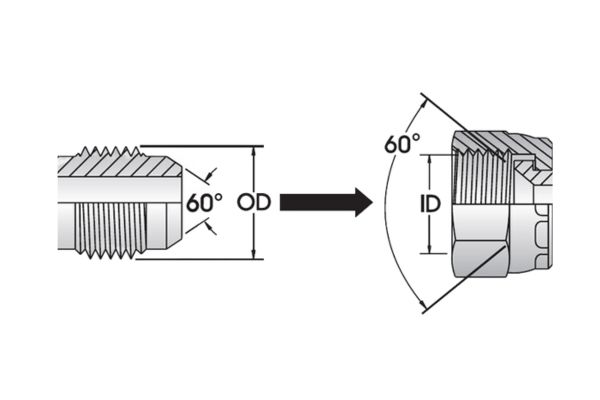
The thread retains the connection, but it may not create the fluid seal. State whether sealing occurs on a metal cone or flare, a flat face with an O-ring, a bonded seal, a tapered thread, an O-ring boss, or another feature. If a seat angle must be confirmed, use the correct gauge or compare the geometry through authoritative product data; perspective distortion makes angle measurements from photographs unreliable.
Record the tube or flange dimensions when those features form part of the connection. For a used item, note flattened O-rings, scoring, fretting, cracks, corrosion, or an uneven witness mark, because damage can disguise the original geometry. Thread sealant must not be used to compensate for an incompatible thread or a damaged sealing face.
| Identification item | What to send | Why it matters |
|---|---|---|
| Thread | Male OD or female ID, pitch/TPI, straight or tapered | Separates visually similar thread families and sizes |
| Seal | Seat style, angle if verified, O-ring location, sealing-face photo | Confirms where and how the connection seals |
| Hose end | Hose ID/dash size, hose series, stem/ferrule details | Links the fitting to the intended hose construction |
| Geometry | Straight/45°/90°, drop length, orientation, key dimensions | Prevents routing, clearance, and installation errors |
| Markings | Exact transcription plus clear photos | Supports catalog and part-number cross-checking |
Hose and Crimp Information the Image Cannot Supply
Identify the hose from its layline and construction
Send the hose manufacturer, exact series, hose inside diameter or dash size, and a clear photograph of the complete layline. If the layline is unreadable, do not assume size from the hose outside diameter; cover thickness and reinforcement construction vary. Note whether the original assembly was skived, but use the applicable hose-and-fitting manufacturer instructions to decide whether a replacement requires skiving.
The fitting tail and ferrule may look like another product series while having different stem dimensions, tooth profiles, shell lengths, or intended hose constructions. Equal dash sizes do not make two products compatible. When the hose cannot be identified, the responsible next step may be to identify and replace the complete hose assembly under an approved system rather than copy an uncertain fitting-hose combination.
Obtain valid crimp data for the exact combination
Supply the crimping machine model, available die information, and any verified crimp specification associated with the hose and fitting series. The correct crimp diameter, measurement location, insertion depth, die choice, skive requirement, and assembly procedure must come from current data applicable to that exact combination. A value copied from a similar-looking fitting or another manufacturer’s series is not a safe substitute.
One-piece construction can reduce the chance of picking the wrong loose ferrule, but it cannot make an unsupported hose-and-fitting combination valid. The finished assembly is limited by its components, connection, assembly quality, pressure impulses, temperature, fluid, routing, and service conditions. For safety-critical or high-consequence equipment, escalate uncertain identification to the equipment, hose, fitting, or crimp-equipment manufacturer as appropriate.
How to Send a Request That Can Be Checked
Label the images and state the required outcome
Use simple filenames such as 01-overall, 02-male-thread-side, 03-sealing-face, and 04-hose-layline, then match each measurement to the relevant image. Transcribe markings in the message because characters that look like 0/O, 1/I, or 5/S may remain ambiguous in a photograph. State whether you need preliminary identification, a quotation, a replacement assembly, or verification of an existing candidate; each outcome needs a different level of evidence.
Include the quantity and whether the parts are for a repair, stock replenishment, resale, or equipment production. Add the equipment make and model when it can help locate an approved parts record, but do not assume the original equipment identifies every replacement hose installed later. If an existing part number is available, give its source—fitting, hose tag, drawing, invoice, or equipment manual—so the reviewer can judge how directly it relates to the physical part.
Copy this compact identification checklist
- Overall, thread-side, sealing-face, ferrule, markings, and hose-layline photos
- Straight, 45-degree, or 90-degree fitting; male or female connection
- Thread outside or inside diameter, pitch/TPI, and straight or tapered form
- Verified seat angle or seal type, including O-ring location and condition
- Hose manufacturer, series, ID/dash size, and visible construction details
- Existing part number and the document or marking from which it came
- Crimper model and valid crimp data, if an assembly is being produced
- Working pressure, temperature, fluid, equipment, routing, and service conditions
- Material or finish requirement, quantity, and purpose of the request
If any field is unknown, write “unknown” rather than filling it with a visual guess. That distinction lets the reviewer isolate what still requires inspection, a gauge, a drawing, or manufacturer confirmation. It also preserves a traceable record for later receipt inspection and future replacement.
Common Photo-Identification Failures
Similar appearance is not evidence of interchangeability
The most frequent error is selecting a connection because its diameter and general shape resemble the old one. JIC and SAE 45-degree flare connections, various BSP and pipe-thread forms, metric and DIN geometries, and different O-ring arrangements can be confused when scale and seat details are missing. A wrong choice may begin threading, yet damage the mating port, fail to seat, loosen under vibration, or leak under pressure.
Another failure is photographing only the damaged end. Crushed threads, a missing O-ring, an eroded cone, or a cut-off ferrule can conceal the feature needed for identification. Photograph the mating port or adapter separately when accessible, record where the failed part was installed, and retain the old assembly until the replacement has been fully verified.
Do not let urgency remove the safety checks
Downtime creates pressure to accept the first plausible match, but an uncertain fitting should not be installed merely because it screws in or can be crimped. An incorrect thread or sealing face can leak; an unsupported hose-and-fitting combination can damage the hose, pull off, or fail unpredictably. Fluid injection injuries and uncontrolled equipment movement are serious hazards, so never search for a pinhole leak with a bare hand and never dismantle a pressurized system.
After assembly, follow the applicable inspection, cleaning, installation, and test procedures for the equipment and approved hose system. Check routing, bend radius, twist, abrasion exposure, clearance, and connection engagement, not just the fitting’s visual similarity. Record the confirmed part number, hose series, end styles, orientation, length, crimp reference, and installation location so the next replacement begins with evidence rather than another photo-only search.
Frequently Asked Questions
Can a supplier identify a one-piece fitting from one photo?
Usually not with enough certainty for final selection. One image may indicate a connection family or elbow style, but it rarely proves thread pitch, seat geometry, hose series, or crimp compatibility. Send the complete photo set and measured data even when the item looks common.
Should I place a ruler next to the fitting?
A ruler provides useful scale, but it does not replace calipers or a thread-pitch gauge. Camera angle, lens distortion, and coarse ruler marks can shift the apparent dimension. Include the ruler in an overview, then write down the measured thread diameter and pitch separately.
What if the hose layline has worn off?
Treat the hose series and construction as unconfirmed. Check tags, maintenance records, equipment documentation, purchase records, and any readable section of the layline. If compatibility cannot be established, use an approved identification and replacement process for the complete assembly rather than assuming that matching dash size is sufficient.
Is an existing part number enough without measurements?
It may be enough to locate a candidate, but physical verification is still prudent when the number’s source is uncertain or the assembly may have been modified. Compare the candidate’s connection, dimensions, hose compatibility, material, and applicable crimp data against the actual requirement. A branded number can support cross-checking but does not by itself prove another product is fully interchangeable.
What should I do if the thread and seat still cannot be identified?
Stop treating the request as a photo match and escalate it for direct inspection or authoritative data review. Preserve the old part and mating component, use suitable gauges, and consult the relevant equipment or component manufacturer information. Do not repair uncertainty with thread sealant, forced engagement, or an improvised adapter stack.