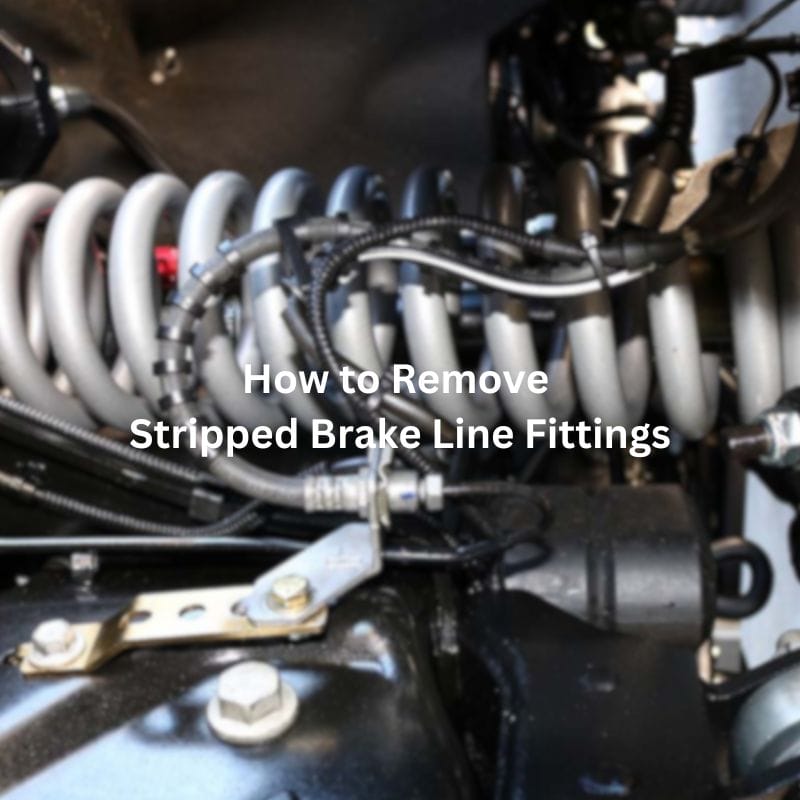
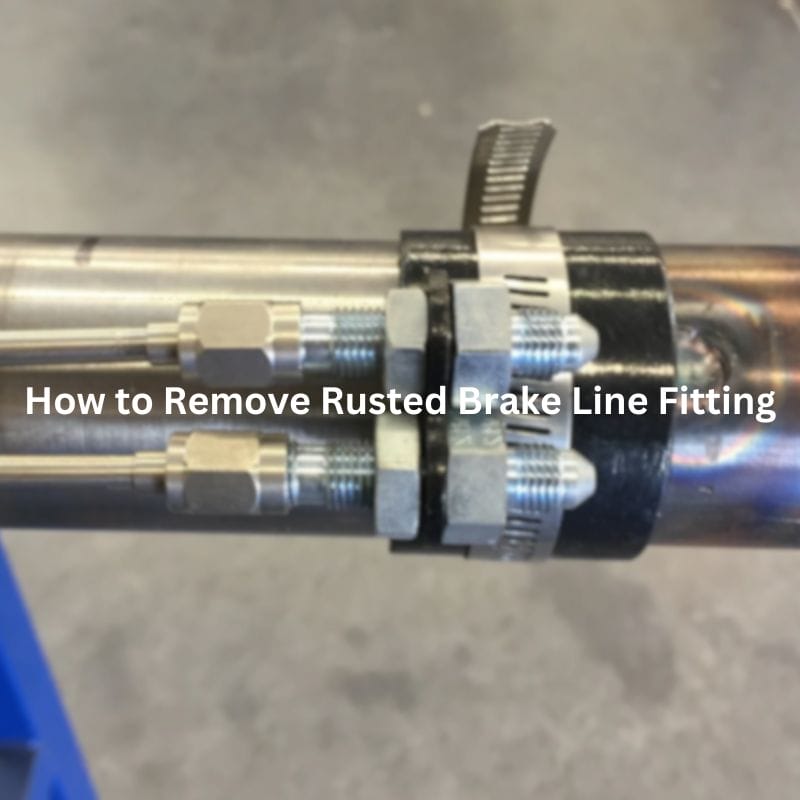
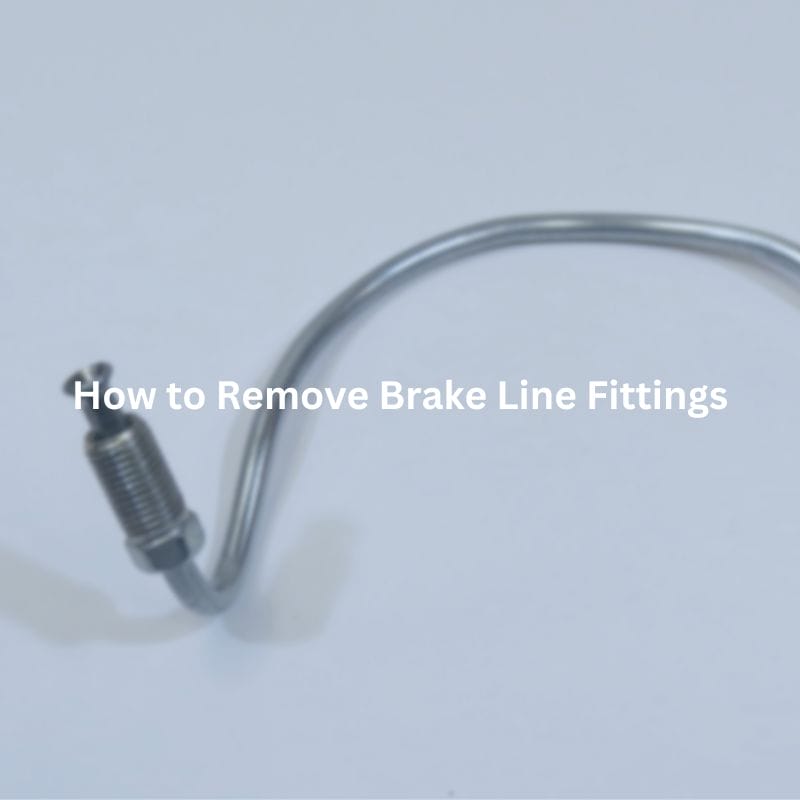
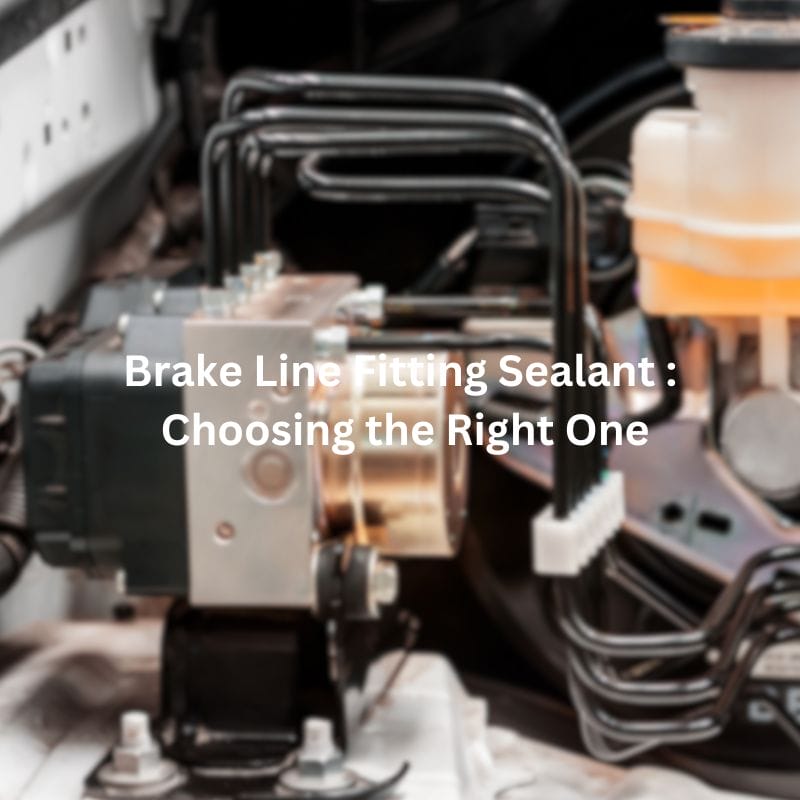
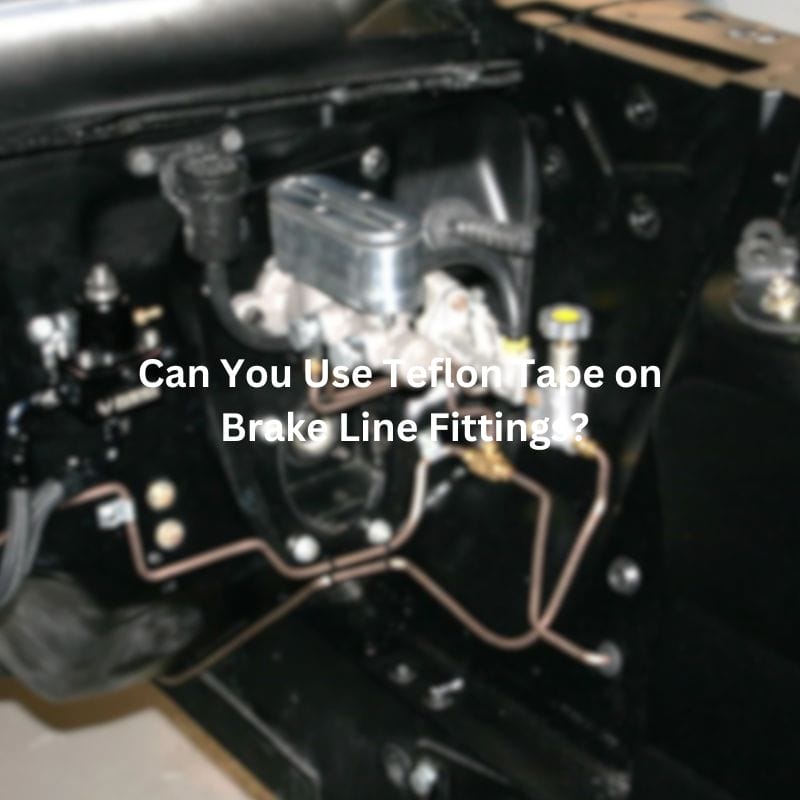
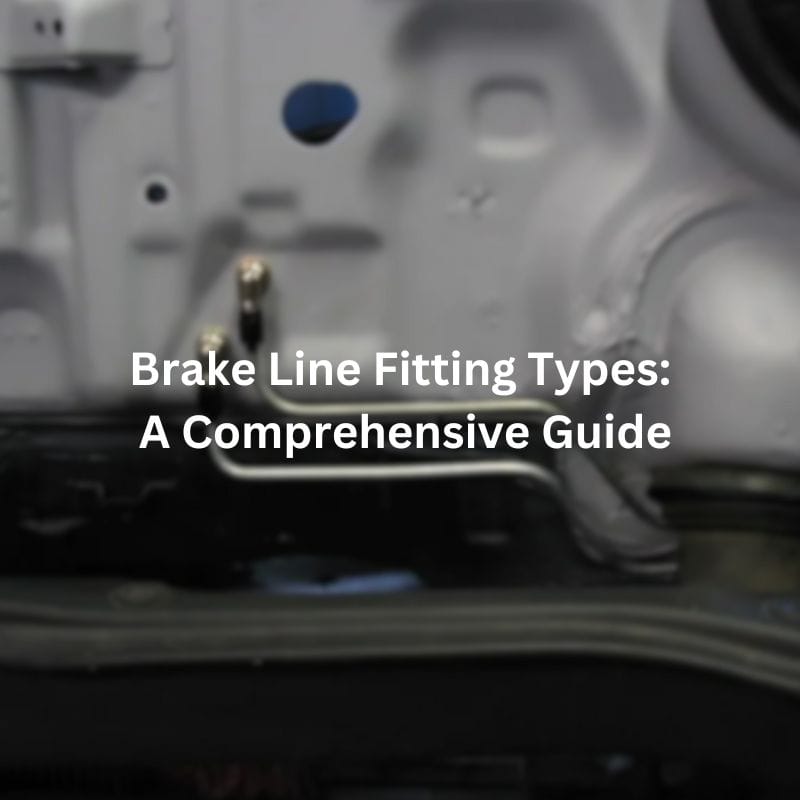
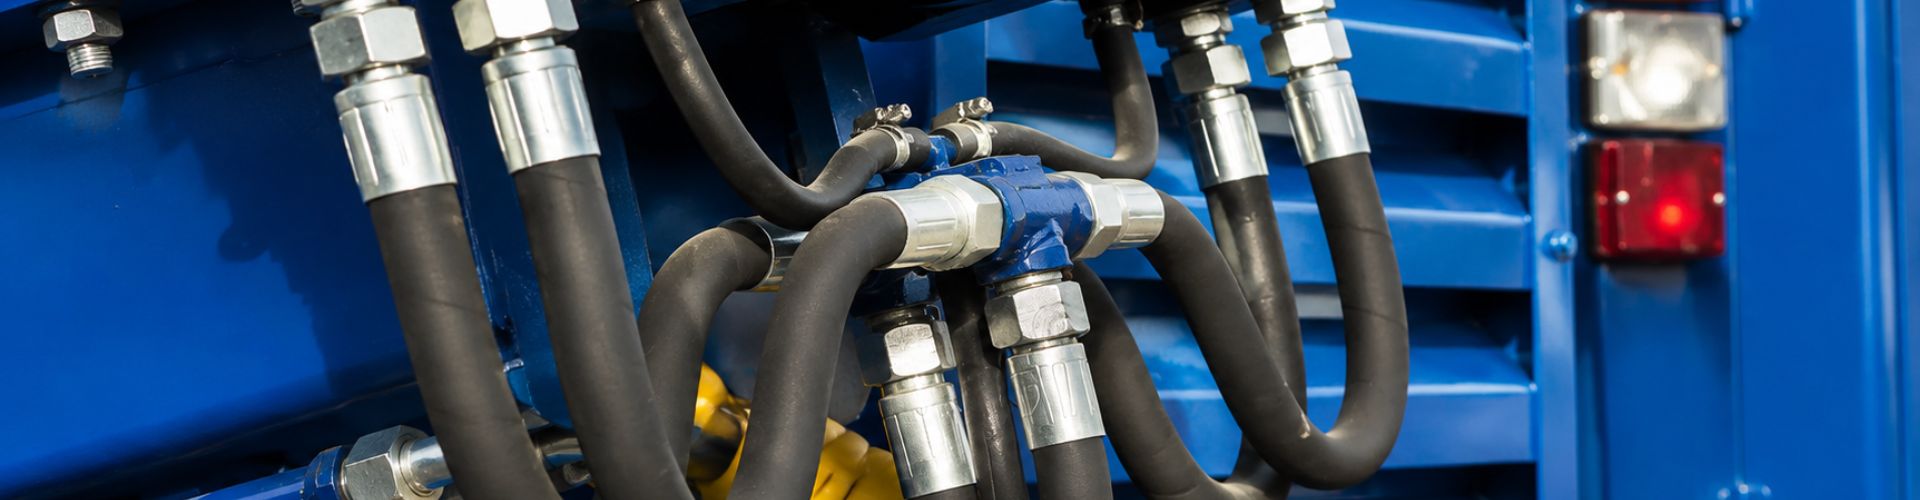
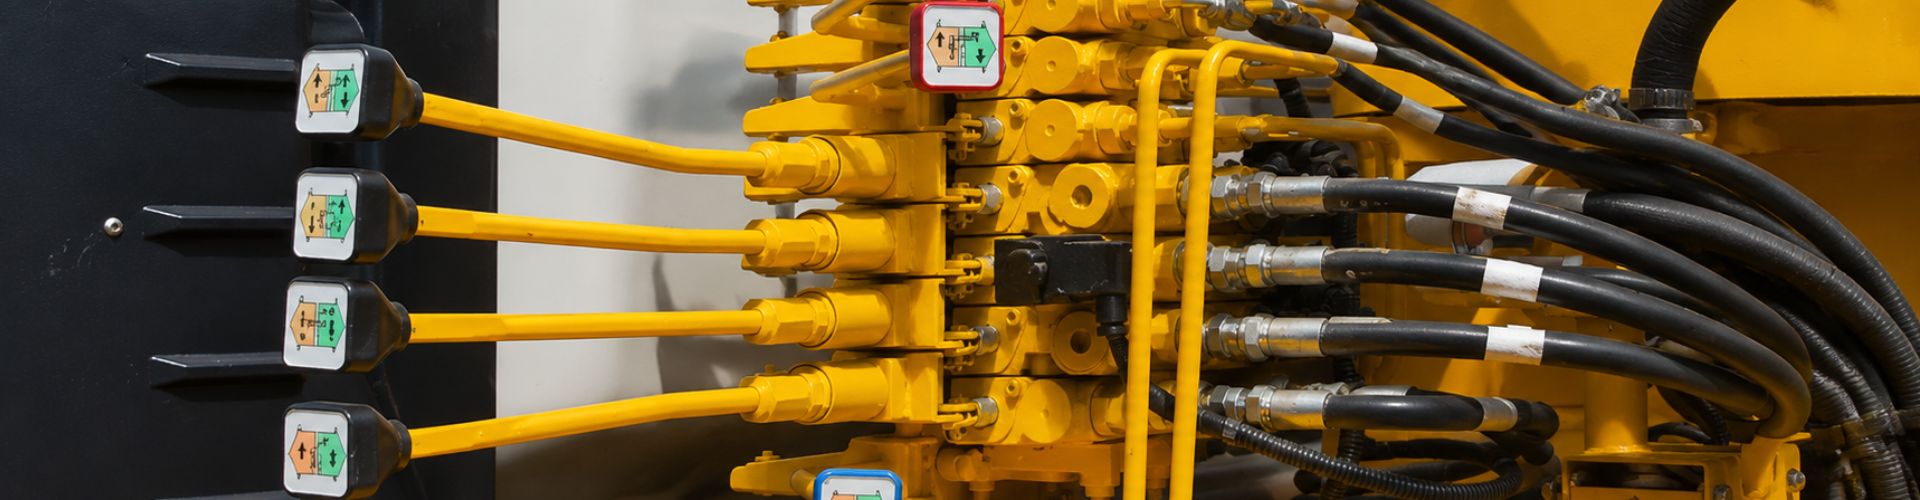
Understanding Compression Brake Line Fittings banner

Understanding Brake Line Compression Fittings: Pros and Cons

Compression brake line fittings play a significant role in the repair and maintenance of brake systems. These fittings are designed to connect brake lines securely, forming a seal that prevents brake fluid leakage under high pressure. However, despite their advantages, compression fittings come with certain drawbacks and risks, especially when used in high-pressure environments like public road vehicles. This article explores the advantages and disadvantages of compression brake line fittings in detail.  

What Are Brake Line Compression Fittings?

Compression brake line fittings are components designed to connect and seal brake lines in hydraulic brake systems. These fittings create a secure connection by compressing a ferrule (a small metal ring) around the brake line, which helps form a tight seal to prevent brake fluid from leaking. They are commonly used for quick and temporary fixes or in low-pressure systems where other more permanent solutions might be less practical or too costly.

Definition and Overview

A compression brake line fitting is a mechanical device that connects two sections of brake tubing or joins a brake tube to a fitting, such as a union or adapter. It works by creating a seal through the compression of a ferrule when the nut is tightened, compressing it against the fitting body and the brake line itself. This action forms a leak-proof seal capable of withstanding a certain amount of hydraulic pressure. The effectiveness and longevity of this seal depend largely on the correct installation and the pressure levels within the system.

These fittings are often used in hydraulic systems because they are relatively easy to install and do not require specialized equipment like flaring tools or welding kits. They are particularly useful when a quick repair is needed, making them popular in situations such as off-road or temporary vehicle setups.

Components of a Compression Brake Line Fitting

A compression fitting typically consists of three main parts:

Fitting Body: This is the main component that connects to the brake line. The fitting body has a threaded opening on one end where the nut and ferrule are attached. It is designed to hold the brake line in place and to support the compression process when the nut is tightened.

Ferrule (Compression Ring): The ferrule is a small metal ring that sits between the fitting body and the nut. It is the key element that forms the seal. As the nut is tightened, it compresses the ferrule against the brake line and fitting body, creating a tight seal. Ferrules are usually made from soft metals like brass or copper, which allow them to deform slightly to fit snugly around the brake line.

Compression Nut: This part threads onto the fitting body and compresses the ferrule as it is tightened. The nut’s role is crucial as it drives the ferrule into place, ensuring that the brake line is securely sealed. Proper tightening of the compression nut is vital for preventing leaks; over-tightening or under-tightening can compromise the seal and lead to brake fluid leakage.

Together, these components work to form a leak-proof connection. The simplicity of this design is what makes compression fittings a popular choice for quick and efficient repairs.

Metric Brake Line Fittings Topa

Common Uses

Compression brake line fittings are widely used in several scenarios:

Off-Road and Non-Public Vehicles: These fittings are commonly used in vehicles that do not operate on public roads, such as off-road vehicles, farm equipment, and lawn mowers. In these settings, brake systems typically experience lower pressure, making compression fittings an acceptable choice. Additionally, the ease of installation and replacement makes these fittings ideal for vehicles that frequently undergo modifications or repairs.

Temporary Repairs: In automotive repair and restoration, compression fittings are often used as a temporary solution to test the brake system’s functionality before permanent repairs are made. For instance, during vehicle restoration, mechanics might use compression fittings to check for leaks or pressure issues before replacing the brake lines with flared or welded connections. This allows for efficient troubleshooting and reduces the time needed to identify potential problems.

Hydraulic Systems: While not typically recommended for high-pressure automotive brake systems, compression fittings are used in other types of hydraulic systems where pressure levels are manageable. This includes applications in hydraulic machinery, HVAC systems, and low-pressure fluid systems where the simplicity and quick installation of compression fittings provide practical benefits.

DIY and Quick Fixes: For vehicle owners or hobbyists who need to perform quick fixes without access to specialized tools, compression fittings offer a practical solution. They are especially useful for individuals who might not have the skills or tools required for creating flared connections or welding lines. However, these fittings are only advisable in situations where safety is not compromised, as high-pressure applications in public road vehicles pose significant risks if the fittings fail.

How Compression Fittings Work

Basic Mechanism

The primary working principle of a compression fitting revolves around the interaction between three key components: the fitting body, the ferrule, and the compression nut. When the compression nut is tightened, it exerts force on the ferrule, which compresses it around the brake line. Here’s how this mechanism operates in detail:

Tightening the Nut: When the compression nut is turned clockwise onto the fitting body, it pulls the ferrule inward. This action creates pressure on the ferrule against the surface of the brake line.

Ferrule Compression: The ferrule, typically made of a softer metal like brass or copper, deforms slightly under this pressure. As it compresses, it conforms tightly around the brake line, filling any gaps and creating a seal that prevents brake fluid from leaking out. The integrity of this seal is crucial for maintaining the system’s hydraulic pressure.

Sealing Effect: The mechanical compression of the ferrule around the brake line creates a strong bond that withstands the pressures typically encountered in hydraulic brake systems. This seal remains effective as long as the fitting is properly tightened and the materials do not degrade over time.

Understanding this mechanism highlights the importance of proper installation, as a poorly tightened or installed fitting can lead to leaks and potentially dangerous brake system failures.

install Compression Brake Line Fittings

Installation Process

Installing compression fittings in brake lines involves several straightforward steps. Here’s a step-by-step overview of the installation process, including the common tools needed:

Gather Tools and Materials: Before starting, collect the necessary tools:

Compression fittings

Brake line (appropriate material and size)

Wrench (preferably a torque wrench for precise tightening)

Tubing cutter (to ensure clean cuts)

Deburring tool (to smooth out any rough edges)

Cut the Brake Line: Using a tubing cutter cut the brake line to the desired length. Ensure the cut is straight and clean to facilitate a better seal.

Deburr the Edges: After cutting, use a deburring tool to remove any sharp edges or burrs from the cut end of the brake line. This step is crucial for preventing damage to the ferrule and ensuring a proper seal.

Prepare the Compression Fitting: Slide the compression nut and then the ferrule onto the brake line. Ensure that the ferrule is positioned correctly on the line before connecting it to the fitting body.

Connect to the Fitting Body: Insert the brake line into the fitting body, ensuring it reaches the bottom of the fitting. This is important for a complete seal.

Tighten the Nut: Using a wrench, tighten the compression nut onto the fitting body. It’s essential to apply even pressure and avoid over-tightening, as this can damage the ferrule or the brake line itself.

Check for Leaks: After installation, it’s vital to test the system for leaks. Pressurize the brake system and visually inspect the connection for any signs of fluid escaping.

Final Adjustments: If any leaks are detected, slightly tighten the nut again to ensure a proper seal. Always refer to manufacturer specifications for recommended torque settings.

Advantages of Installation

Compression fittings have gained popularity for several reasons:

Ease of Installation: One of the most significant advantages of compression fittings is their straightforward installation process. Unlike flared fittings, which require specialized tools and techniques, compression fittings can be installed with basic hand tools. This accessibility makes them ideal for DIY enthusiasts and mechanics alike.

Time Efficiency: The installation process for compression fittings is generally quicker, allowing for faster repairs and less downtime for vehicles. This is especially valuable in situations where timely repairs are critical, such as in off-road vehicles or emergency services.

Cost-Effectiveness: Compression fittings are typically more affordable than other connection methods, such as flared or welded fittings. This cost advantage makes them an attractive option for temporary repairs and budget-conscious repairs.

Versatility: Compression fittings can be used with various materials, including copper, steel, and copper-nickel brake lines. This versatility allows them to be applied in different situations and environments, accommodating various vehicle types and brake systems.

Disadvantages and Risks Associated with Compression Brake Line Fittings

Prone to Leaks Under High Pressure

One of the primary concerns with compression fittings is their reliability in high-pressure brake systems. Unlike flare fittings, which are designed to handle high hydraulic pressures more effectively, compression fittings can be less robust. The nature of their design—where the seal relies on the compression of a softer material (the ferrule)—means that they may not withstand extreme pressures over time.

When brake fluid is subjected to high pressure, such as during emergency braking scenarios, compression fittings can become susceptible to leaks. This is especially true if the fitting is not tightened properly or if it has been subjected to thermal expansion and contraction, which can loosen the connection. The risk of brake fluid leaks is particularly dangerous, as even a small loss of fluid can compromise the entire braking system, leading to reduced braking efficiency or complete brake failure.

In scenarios where vehicles operate under high stress—such as racing or heavy-duty applications—using compression fittings can pose significant safety risks. They are generally more suited for low-pressure systems or temporary fixes rather than permanent solutions in critical brake applications.

Legality Issues

Another critical factor to consider is the legal implications surrounding the use of compression fittings in certain vehicles, particularly those that operate on public roads. Many jurisdictions have strict regulations governing the types of fittings that can be used in brake systems, primarily to ensure the highest safety standards.

In numerous regions, the use of compression fittings in passenger vehicles is either discouraged or outright prohibited. This is due to concerns about their reliability and potential failure under high-stress conditions. Vehicle manufacturers often specify the types of connections to be used in their braking systems, and compression fittings may not meet the required safety standards.

Compression Brake Line Fittings

Tendency to Fail Over Time

Compression fittings are not immune to wear and tear. Over time, several factors can lead to their failure, posing significant safety risks:

Vibration: Vehicles experience constant vibrations during operation, which can gradually loosen compression fittings. This is particularly concerning in high-performance or off-road vehicles, where vibrations can be more pronounced. As the fittings loosen, the seal can become compromised, leading to potential leaks.

Improper Installation: If compression fittings are not installed correctly, they are at a higher risk of failure. Over-tightening can damage the ferrule, while under-tightening may not create a secure seal. Additionally, if the brake line is not cut properly or deburred adequately, it can lead to leaks at the connection point.

Material Fatigue: The materials used in compression fittings can degrade over time. Factors like corrosion, exposure to harsh chemicals, or prolonged high temperatures can weaken the ferrule or the brake line itself. Once the integrity of these components is compromised, the likelihood of failure increases significantly.

Regular inspections and maintenance are essential to identify early signs of wear and prevent catastrophic failures. However, as discussed in the following section, maintaining and inspecting these fittings presents its challenges.

Inspection and Maintenance Challenges

Maintaining and inspecting compression brake line fittings can be challenging, which can lead to safety hazards if not addressed properly. Here are some key issues:

Accessibility: In many vehicles, brake line fittings are located in hard-to-reach areas. This makes it difficult for mechanics or vehicle owners to perform thorough inspections regularly. If fittings are not easily accessible, they may be overlooked during routine maintenance checks, increasing the risk of undetected leaks or failures.

Difficulty in Identifying Issues: Unlike some other fittings, where leaks are visually apparent, compression fittings can sometimes leak internally. This means that brake fluid may not escape outside the fitting, making it hard to detect a problem until significant damage has occurred. Without visible signs of failure, proactive maintenance may be neglected.

Alternative Solutions to Compression Brake Line Fittings

Flare Fittings

Flare fittings are a widely used alternative to compression fittings, particularly in high-pressure brake systems. They are designed to create a secure, leak-proof seal by flaring the end of the brake line tubing. The flared end of the tube is inserted into a fitting, and a nut is tightened to compress the flare against the fitting body, forming a strong and durable connection.

Benefits of Flare Fittings:

Higher Pressure Tolerance: Flare fittings are specifically designed to handle the high pressures commonly encountered in hydraulic brake systems. The flaring process creates a robust mechanical bond that minimizes the risk of leaks under high pressure, making it ideal for vehicles operating on public roads or in heavy-duty applications.

Durability: The flared connection is mechanically strong and resistant to vibrations, a common cause of failure in compression fittings. This makes flare fittings particularly suitable for long-term applications where reliability is crucial.

Compatibility: Flare fittings are compatible with various brake line materials, including steel, copper, and copper-nickel. This versatility allows for a wide range of applications in different vehicle types and environments.

When to Use Flare Fittings: Flare fittings are the preferred choice for permanent installations in vehicles that operate at high pressures, such as passenger cars, trucks, and commercial vehicles. They are also recommended when complying with safety regulations for road vehicles. However, installing flare fittings requires specific tools like a flaring tool kit and some technical expertise, which may not be as convenient for quick or temporary fixes.

Welding Brake Lines

Welding brake lines is a highly durable solution, often used in professional repair settings where a permanent fix is required. In this method, sections of the brake line are welded together, forming a continuous and seamless connection that eliminates the risk of leaks.

Benefits of Welding Brake Lines:

Seamless Connection: Welding provides a leak-proof, seamless connection that is not susceptible to loosening due to vibration or pressure changes, unlike fittings that rely on mechanical seals.

Longevity: Welded brake lines have an extended lifespan, making them ideal for high-performance vehicles and those exposed to extreme conditions, such as race cars and heavy-duty trucks.

Custom Fabrication: Professional welding allows for custom brake line fabrication, ensuring that the brake system is tailored to the vehicle’s specific requirements and conditions.

When to Use Welding: Welding is suitable for situations where the brake system needs to be highly reliable and maintenance-free for extended periods. It is commonly used in professional settings, such as automotive workshops, where trained technicians have access to the necessary equipment and expertise. However, welding brake lines is not practical for DIY enthusiasts or temporary repairs, as it requires specialized tools and skills.

Quick-Connect Fittings

Quick-connect fittings represent a newer technology designed to simplify brake line connections while providing reliability. These fittings are engineered to “snap” into place, creating a secure seal without the need for extensive tools or tightening processes. They are increasingly used in modern brake systems, especially in situations where rapid assembly or disassembly is advantageous.

Benefits of Quick-Connect Fittings:

Ease of Use: Quick-connect fittings are designed for fast and straightforward installation, reducing the time and effort required for brake line repairs. They are ideal for both professional mechanics and experienced DIY enthusiasts.

No Need for Specialized Tools: Unlike flare fittings or welding, quick-connect fittings do not require specialized tools, making them more accessible for general use.

Reliable Seal: Modern quick-connect fittings are engineered to provide a secure seal, minimizing the risk of leaks and offering a reliable connection similar to that of traditional flaring methods.

When to Use Quick-Connect Fittings: These fittings are a suitable option when ease of use and speed are critical, such as in emergency repairs or routine maintenance that requires frequent disassembly. While quick-connect fittings are designed to handle a wide range of pressures, they may not be as robust as flared or welded connections in extreme conditions, making them best for standard applications.

Comparative Chart
FeatureCompression
Fittings
Flare FittingsWelding Brake
Lines
Quick-Connect
Fittings
Pressure
Tolerance
Moderate (Prone to
leaks)
High (Excellent
seal)
Very High
(Seamless
connection)
Moderate to
High (Depends
on design)
Installation
Complexity
Low (Simple tools
required)
Moderate
(Flaring tool
needed)
High (Welding
equipment
needed)
Low(No
specialized tools)
DurabilityMedium(Prone to
vibration issues)
High (Resistant
to vibration)
Very High
(Permanent
solution)
High (Designed
for quick
assembly)

Conclusion

For those considering the use of compression fittings, it’s essential to evaluate their application carefully. They may be appropriate for low-pressure systems or temporary repairs, but in high-stress scenarios or regulated environments, opting for flare fittings or welding is recommended to ensure safety and reliability. If you found this information useful, please share the post with others who might benefit from it. Always consult professionals for brake line repairs to ensure the highest safety standards are met.


FAQ

What are compression brake line fittings used for?

Compression brake line fittings are used to connect brake lines in hydraulic systems. They create a seal by compressing a ferrule around the brake line, allowing for fluid to flow without leaks. They are often used for temporary fixes or in low-pressure systems.

Are compression brake line fittings safe for high-pressure systems?

No, compression fittings are not recommended for high-pressure systems, such as those found in most vehicle brake lines. They are prone to leaks under extreme pressure and may not meet the safety standards required for vehicles on public roads.

Can I use compression fittings for brake lines in my car?

Compression fittings are generally not suitable for use in passenger vehicles that operate on public roads. Many jurisdictions prohibit their use due to the risk of leaks and potential brake failure. It’s important to check local regulations and safety standards.

What are the alternatives to compression brake line fittings?

Alternatives include flare fittings, which provide a more durable and high-pressure tolerant connection, welding for a permanent and seamless connection, and quick-connect fittings for easy installation without compromising safety.

Are compression fittings easy to install?

Yes, one of the benefits of compression fittings is their ease of installation. They require only basic tools and are suitable for quick or temporary fixes, making them a popular option for DIY repairs and off-road vehicles.

What are the risks of using compression brake line fittings?

The risks include potential leaks under high pressure, failure over time due to vibrations or improper installation, and legal restrictions in certain areas. Regular inspection and maintenance are required to minimize these risks.

Brake Line Fittings 101 banner

Brake Line Fittings 101: How to Identify and Choose

Brake fittings play a critical role in ensuring the safe and efficient operation of a vehicle’s braking system. These components connect the brake lines to the brake calipers, master cylinders, and other essential parts of the brake system. Properly functioning brake fittings are crucial for maintaining the integrity of the brake system, which directly impacts vehicle safety and performance. Choosing the right brake fittings can be challenging due to the variety of types, materials, and sizes available. Incorrect fittings can lead to leaks, reduced braking efficiency, or even complete brake failure.

Understanding Brake Fittings

Definition and Function

Brake fittings are essential components in a vehicle’s braking system. They serve as connectors between various parts of the brake system, such as the brake lines, calipers, and master cylinders. Their primary function is to create a secure and leak-proof connection that ensures the hydraulic brake fluid can flow efficiently from one component to another. This fluid flow is crucial for transmitting the force from the brake pedal to the braking mechanism, allowing the vehicle to slow down or stop safely.

Properly functioning brake fittings are vital for maintaining the braking system’s integrity and ensuring that the vehicle operates safely. Any leaks or failures in these fittings can lead to a loss of brake fluid pressure, resulting in diminished braking performance or even total brake failure.

Metric Brake Line Fittings Topa

Types of Brake Line Fitting

Brake fittings come in various types, each designed to meet specific requirements and standards. Understanding these types helps in selecting the right fitting for a given application. Here are the most common types:

Double Flare Fittings: These are widely used in automotive brake systems. Double flare fittings are characterized by their two-stage flare process, where the end of the brake line is flared twice to form a strong, leak-resistant connection. This type of fitting is often used in high-pressure brake lines due to its durability and reliability.

Bubble Flare Fittings: Bubble flare fittings, also known as single flare fittings, are commonly found in European vehicles. The flare is a single-stage process that forms a rounded, bubble-like end on the brake line. While bubble flare fittings are generally less robust than double flare fittings, they are still effective for many braking systems.

AN (Army-Navy) Fittings: AN fittings are used in racing and high-performance applications. These fittings have a unique design with a 37-degree flare that provides a secure and leak-proof connection. They are often made from aluminum or stainless steel to withstand high pressures and extreme conditions.

Compression Fittings: These fittings use a compression nut and ferrule to create a tight seal around the brake line. They are versatile and can be used in various applications, including brake lines, fuel lines, and hydraulic systems. Compression fittings are easy to install and remove, making them a popular choice for many automotive and industrial applications.

Common Materials

The materials used in brake fittings play a significant role in their performance and durability. The choice of material affects the fitting’s strength, resistance to corrosion, and overall lifespan. Here are the most common materials used:

Steel: Steel is one of the most commonly used materials for brake fittings. It offers a good balance of strength, durability, and cost. Steel fittings are typically used in standard brake systems where high performance is not a critical factor. However, they can be prone to rust and corrosion if not properly coated or maintained.

Stainless Steel: Stainless steel is favored for its superior resistance to corrosion and rust. It is often used in high-performance and racing applications where durability and reliability are crucial. Stainless steel fittings provide a longer lifespan and can withstand harsh environmental conditions better than steel fittings.

Aluminum: Aluminum fittings are lightweight and resistant to corrosion. They are commonly used in racing and performance vehicles due to their high strength-to-weight ratio. While aluminum fittings are less durable than stainless steel, they offer a good balance of performance and weight savings.

Identifying Brake Fittings

Visual Identification  

Characteristics of Different Brake Fittings

Visual identification of brake fittings is crucial for selecting the correct component for your vehicle’s braking system. Here are the key characteristics of common brake fittings:

Double Flare Fittings: These fittings have a distinct two-stage flare where the end of the brake line is flared twice. The first flare creates a cone shape, while the second flare forms a cup around the cone. This design ensures a tight, leak-proof seal. Double flare fittings are often found in North American vehicles and are usually made of steel or stainless steel.

Bubble Flare Fittings: Also known as single flare fittings, bubble flare fittings have a rounded, bubble-like end. The flare is a single-stage process, creating a softer seal compared to double flare fittings. These are commonly used in European vehicles and are typically seen in both steel and aluminum.

AN (Army-Navy) Fittings: AN fittings have a 37-degree flare angle and are used in high-performance and racing applications. They often feature a hexagonal nut for easy tightening. The fittings are generally made from aluminum or stainless steel and are designed for high-pressure environments.

Compression Fittings: These fittings use a compression nut and ferrule to secure the brake line. The ferrule, a small ring that compresses around the brake line, forms the seal. Compression fittings are versatile and can be used in various applications, including brake lines, fuel lines, and hydraulic systems.

Brake Line Fittings Applications

How to Visually Inspect and Differentiate Fittings

To visually inspect and differentiate brake fittings:

Check the Flare Type: Examine the end of the fitting to determine the flare type. Double flare fittings will have a two-stage flare, while bubble flare fittings will have a rounded, single-stage flare.

Inspect the Nut and Thread Design: Look at the fitting’s nut and thread design. AN fittings will have a hexagonal nut with a 37-degree flare angle. Compression fittings will have a nut and ferrule system.

Material and Finish: Observe the material and finish of the fitting. Steel fittings will have a more matte finish, while stainless steel fittings will have a shiny, corrosion-resistant surface. Aluminum fittings are often lighter and may have a distinct appearance.

Size and Shape: Measure the fitting’s size and shape to ensure it matches the required specifications. AN fittings, for example, are typically characterized by their precise dimensions and high-pressure design.

Thread Identification

Explanation of Thread Types and Standards

Thread identification is crucial for ensuring compatibility between brake fittings and their corresponding components. Here’s a breakdown of common thread types and standards:

SAE Threads: SAE (Society of Automotive Engineers) threads are commonly used in automotive applications. They have a unified thread form and are specified by a thread pitch and diameter. SAE threads are often found in double flare and some compression fittings.

DIN Threads: DIN (Deutsches Institut für Normung) threads are used in European vehicles and adhere to standards set by the German Institute for Standardization. DIN threads typically have a different pitch and diameter compared to SAE threads. Bubble flare fittings often use DIN threads.

NPT Threads: NPT (National Pipe Thread) threads are used in pipe fittings and are characterized by their tapered design. NPT threads are not commonly used in brake fittings but may be encountered in related hydraulic systems.

AN Threads: AN (Army-Navy) threads are used in high-performance and racing applications. They have a 37-degree flare angle and are often associated with high-pressure applications.

Tools and Methods for Measuring and Identifying Threads

To accurately measure and identify threads, you’ll need the following tools:

Thread Gauge: A thread gauge is a tool used to measure the thread pitch and determine the thread type. It comes with various blades or inserts that match different thread profiles. Using a thread gauge, you can match the fitting’s threads to the corresponding standard.

Caliper: A caliper is used to measure the diameter of the fitting’s threads. You’ll need a precise measurement to determine the thread size and ensure compatibility.

Thread Pitch Gauge: A thread pitch gauge helps measure the distance between threads. This is essential for identifying the thread pitch and matching it to the correct standard.

Common Thread Sizes and Their Applications

SAE 3/16″ and 1/4″ Threads: These are common sizes for automotive brake fittings. They are often used in standard brake systems and are compatible with double flare fittings.

DIN 10mm and 12mm Threads: These sizes are commonly found in European vehicles using bubble flare fittings. They are used for various braking and hydraulic applications.

AN -4, -6, and -8 Threads: AN fittings come in various sizes, such as -4 (7/16″), -6 (9/16″), and -8 (5/8″). These sizes are used in high-performance and racing applications, where precise dimensions and high-pressure ratings are required.

Choosing the Right brake fittings

Factors to Consider  

1. Compatibility with Existing Brake Lines and Systems

Ensuring compatibility between brake fittings and existing systems is crucial for maintaining a safe and efficient braking system. When selecting fittings, consider the following:

Fitting Type and Design: Confirm that the fitting type (e.g., double flare, bubble flare, AN) matches the requirements of your brake lines and the braking system. Using incorrect fitting types can lead to leaks and decreased braking performance.

Thread Size and Pitch: Ensure that the thread size and pitch of the fittings match those of the brake lines and components they are connecting. Mismatched threads can prevent proper sealing and may result in dangerous leaks or system failures.

Connection Points: Verify that the fittings are designed to connect securely to the various components of the brake system, such as the master cylinder, brake calipers, and other connections. Proper fitment is essential for maintaining hydraulic pressure and overall system integrity.

2. Material Selection Based on Durability and Corrosion Resistance

The material of the brake fittings affects their performance and longevity. Here are considerations for material selection:

Steel: Steel fittings are robust and cost-effective but are prone to rust and corrosion if not properly coated or maintained. They are suitable for standard applications where extreme durability is not critical.

Stainless Steel: Stainless steel fittings offer excellent corrosion resistance and are ideal for high-performance or racing applications where exposure to harsh conditions is common. They provide durability and longer service life compared to standard steel fittings.

Aluminum: Aluminum fittings are lightweight and resistant to corrosion, making them a good choice for performance vehicles where weight savings are important. However, they may not be as durable as stainless steel in extreme conditions.

Brake Line Fittings installation

3. Pressure Ratings and Performance Requirements

Brake fittings must be able to withstand the pressure and performance demands of the braking system:

Pressure Ratings: Ensure that the fittings have pressure ratings that meet or exceed the requirements of the brake system. High-performance and racing applications often require fittings with higher pressure ratings to handle increased hydraulic pressures.

Performance Requirements: Consider the performance requirements of your braking system, including the type of driving and environmental conditions. For instance, off-road or racing applications may require fittings designed to endure higher stress and temperature variations.

Types of Fittings and Their Applications  

1. Overview of Different Fitting Types

Brake fittings come in various configurations, each suited for specific applications. Here’s an overview of common types:

Straight Fittings: These are the simplest and most common types of brake fittings. They are used to connect two brake lines directly in a straight path. Straight fittings are typically used where the brake lines run parallel to each other without any changes in direction.

Elbow Fittings: Elbow fittings are designed to change the direction of the brake lines by 90 degrees. They are useful in applications where space is limited or where the brake lines need to navigate around other components. Elbow fittings help to route brake lines efficiently and avoid sharp bends that could restrict fluid flow.

Tee Fittings: Tee fittings allow for the branching of a single brake line into two separate lines. They are commonly used when a brake system needs to distribute fluid to multiple components, such as when a single line splits to serve both front and rear brakes. Tee fittings must be carefully selected to ensure proper fluid distribution and balance in the braking system.

2. Application Scenarios and Recommendations for Each Type

Straight Fittings: Ideal for straightforward connections where brake lines run in a single direction. They are commonly used in standard brake systems and are available in various sizes and materials to match different requirements. Choose straight fittings for simple, direct connections in systems with minimal changes in direction.

Elbow Fittings: Recommended for applications where brake lines need to navigate around obstacles or change direction. They are useful in custom installations or when routing lines through tight spaces. When selecting elbow fittings, ensure that the angle and dimensions match the requirements of your system to avoid kinks or restrictions in fluid flow.

Tee Fittings: Suitable for distributing brake fluid to multiple parts of the system. They are commonly used in setups where a single brake line must feed multiple components. Choose tee fittings based on the flow requirements and pressure ratings needed for your system to ensure balanced and efficient braking performance.

Brake Line Hose Options

Stainless Steel Braided Brake Hoses

Advantages

Durability: Stainless steel braided brake hoses are known for their superior durability. The stainless steel braid protects the internal rubber or synthetic hose from damage due to abrasion, chemicals, and extreme temperatures. This construction helps to prevent the hose from expanding under pressure, maintaining consistent braking performance over time.

Flexibility: Despite their robust construction, stainless steel braided hoses are flexible and can bend and twist to fit complex routing paths. This flexibility makes them ideal for custom brake systems where precise routing is required. They can handle the movement and vibrations of the vehicle without compromising their integrity.

Performance: Stainless steel braided hoses offer excellent performance due to their minimal expansion under high pressure. This ensures a more responsive brake pedal feel and improved braking performance. They also provide better resistance to heat and high temperatures, which can be crucial in high-performance or racing applications where brake temperatures can become extreme.

Comparison with Other Hose Types

Rubber Brake Hoses: Traditional rubber brake hoses are more prone to expansion under pressure, which can lead to a spongy brake pedal feel and reduced braking performance. They are generally less durable than stainless steel braided hoses and can degrade more quickly due to environmental factors such as heat, moisture, and exposure to road chemicals.

Synthetic Brake Hoses: Synthetic hoses, often made with a polymer construction, offer better resistance to abrasion and heat compared to rubber hoses but may not match the durability and performance of stainless steel braided hoses. They are a good middle ground for everyday driving conditions but may not be suitable for high-performance applications.

Composite Hoses: Composite brake hoses are designed with a combination of materials to balance flexibility, strength, and durability. While they can offer some advantages in specific applications, stainless steel braided hoses generally provide superior performance and longevity, particularly in demanding conditions.

Choosing the Right Hose for Your Vehicle

Factors to Consider

Vehicle Type: The type of vehicle plays a significant role in determining the appropriate brake hose. For everyday passenger vehicles, high-quality rubber or synthetic hoses may be sufficient. However, for high-performance cars, racing vehicles, or off-road applications, stainless steel braided hoses are recommended for their superior performance and durability.

Driving Conditions: Consider the typical driving conditions your vehicle will encounter. If you frequently drive in harsh environments, such as areas with extreme temperatures, heavy rain, or off-road conditions, stainless steel braided hoses offer better protection and resistance to environmental factors. For more moderate conditions, synthetic or high-quality rubber hoses may be adequate.

Performance Needs: Assess the performance requirements of your braking system. For high-performance applications, such as racing or heavy-duty use, stainless steel braided hoses provide enhanced braking performance and reliability. They offer minimal expansion under pressure and excellent resistance to high temperatures, ensuring a more responsive and consistent brake pedal feel.

Conclusion

Choosing the right brake fittings and hoses is not just about maintaining vehicle performance; it’s also about ensuring safety. Properly selected and installed fittings and hoses contribute to reliable braking performance, reducing the risk of brake failure and improving overall vehicle safety.


FAQ

What are the main types of brake fittings?

The main types include double flare, bubble flare, and AN fittings. Each type is designed for different applications and connections within the brake system.

How can I visually identify brake fittings?

Look for key characteristics such as the shape of the fitting, the type of flare (e.g., double or bubble), and thread type. Comparing these features to reference guides can help with identification.

What materials are commonly used for brake fittings?

Common materials include steel, stainless steel, and aluminum. Steel is cost-effective but less durable, while stainless steel offers superior durability and corrosion resistance. Aluminum is lightweight and resistant to corrosion.

How do I choose the right brake line hose for my vehicle?

Consider factors such as the type of vehicle, driving conditions, and performance needs.

What is the difference between stainless steel braided hoses and rubber hoses?

Stainless steel braided hoses offer greater durability, flexibility, and performance under high pressure and extreme conditions. Rubber hoses are more prone to expansion and wear but are generally less expensive.

Why is it important to consult with professionals when choosing brake fittings and hoses?

Professionals can provide expert advice tailored to your vehicle’s specific needs, ensuring you select the correct fittings and hoses for optimal safety and performance.

How to Remove Stripped Brake Line Fittings

How to Remove Stripped Brake Line Fittings

How to Remove Stripped Brake Line Fittings

Table of Contents

Introduction

Proper brake maintenance is crucial for ensuring the safety and performance of your vehicle. The brake system is one of the most vital components in any vehicle, directly impacting your ability to stop effectively and avoid accidents. Neglecting brake maintenance can lead to decreased performance, increased wear and tear on brake components, and, ultimately, dangerous driving conditions. By addressing issues like stripped brake line fittings promptly and correctly, you maintain the integrity of your brake system, ensuring it functions optimally and keeps you safe on the road.

Understanding Brake Line Fittings

Types of Brake Line Fittings

Brake line fittings come in various types, each designed for specific applications and ensuring a secure, leak-free connection within the brake system. The three most common types are flare fittings, compression fittings, and inverted flare fittings:

Flare Fittings: These fittings feature a conical seat that forms a tight seal when the flare nut is tightened. They are commonly used in high-pressure hydraulic systems, including brake lines, due to their ability to withstand significant pressure without leaking.

Compression Fittings: These consist of a compression nut and a compression ring (ferrule) that compresses against the brake line when tightened, creating a seal. They are typically used for lower-pressure applications but can be found in some brake systems.

Inverted Flare Fittings: Similar to flare fittings, inverted flare fittings have a concave seat and are often used in automotive brake systems for their reliability and ease of installation.

brake line fitting adapter supplier

Common Causes of Stripping

Understanding why brake line fittings become stripped can help prevent this issue in the future. The most common causes include:

Over-Tightening: Applying too much torque when tightening a brake line fitting can damage the threads, leading to stripping. It’s essential to follow the manufacturer’s torque specifications to avoid this problem.

Corrosion: Exposure to moisture and road salt can cause brake line fittings to corrode, weakening the threads and making them more susceptible to stripping when force is applied. Regular inspections and maintenance can help mitigate corrosion-related issues.

Improper Tools: Using the wrong tools, such as adjustable wrenches or pliers, instead of proper line wrenches or flare nut wrenches, can damage the fitting’s threads. Always use the correct tools designed for brake line work to ensure a secure and undamaged fitting.

Signs of a Stripped Fitting

Identifying a stripped brake line fitting early can prevent further damage and potential brake failure. Key signs to look for include:

Visual Inspection: Check the threads on the brake line fitting for any signs of damage, such as flattened or missing threads. A fitting that appears rounded or damaged likely indicates stripping.

Performance Symptoms: If you notice a decrease in braking performance, such as a spongy brake pedal or a loss of brake fluid, it could be due to a stripped fitting causing a leak. Any noticeable reduction in braking efficiency warrants an immediate inspection of the brake system, including the fittings.

Step-by-Step Guide to Removing Stripped Brake Line Fittings

Assessing the Situation

Visual Inspection and Determining the Extent of the Damage

Before attempting to remove a stripped brake line fitting, perform a thorough visual inspection to assess the extent of the damage. Look for signs such as flattened or missing threads, rounded edges, and any visible corrosion. Evaluate whether the fitting can be saved or if it requires replacement. If the damage is minor, simpler techniques may suffice. For severe stripping, more advanced methods or complete replacement may be necessary.

Choosing the Right Method Based on the Level of Stripping

The level of damage will dictate the removal method. Minor stripping might be resolved with penetrating oil and grip enhancement, while severe cases may require cutting and re-flaring the line. Deciding on the appropriate technique ensures efficiency and minimizes further damage to the brake line.

Stripped Brake Line Fittings

Using Penetrating Oil

Application Techniques for Maximum Effectiveness

Penetrating oil can be a lifesaver for loosening corroded or stuck brake line fittings. To use it effectively, generously apply the oil to the fitting and allow it to seep into the threads. Use a small brush to help the oil penetrate deeper. Repeat the application several times over at least 15-30 minutes to ensure thorough penetration.

Allowing Time for the Oil to Work

Patience is key when using penetrating oil. After applying the oil, allow sufficient time for it to work its way into the threads. For heavily corroded fittings, you might need to wait an hour or more. During this time, avoid applying any force to the fitting, as premature attempts can cause further stripping.

Grip Enhancement Techniques

Using Vice Grips and Brake Line Pliers to Gain Better Grip

When dealing with stripped fittings, getting a firm grip is crucial. Use vice grips or specialized brake line pliers designed to provide a secure hold without further damaging the fitting. Adjust the vice grips to the correct size, ensuring they grip tightly around the fitting.

Applying Steady, Controlled Force to Avoid Further Stripping

Once you have a good grip, apply steady and controlled force to turn the fitting. Avoid sudden or jerky movements, as these can exacerbate the stripping. If the fitting doesn’t budge initially, reapply the penetrating oil and try again after a short period.

Cutting and Re-Flaring the Line

When and How to Cut the Brake Line

In cases where the fitting is severely stripped and cannot be removed using conventional methods, cutting the brake line may be necessary. Use a pipe cutter to make a clean, straight cut on the brake line, removing the damaged section.

Tools for Flaring the Brake Line Correctly

After cutting the brake line, you’ll need to re-flare the end to attach a new fitting. Use a high-quality flaring tool to create a precise flare. Follow the tool’s instructions carefully to ensure a proper and secure flare, which is crucial for preventing leaks.

Reattaching the New Fitting

Once the brake line is flared, attach the new fitting by sliding it onto the flared end and tightening it to the appropriate torque specification. Ensure a snug fit without over-tightening, which can lead to future stripping.

Using Heat and Cold

Applying Heat to Expand the Metal

Heat can help loosen stubborn fittings by expanding the metal. Use a propane torch to apply heat evenly around the fitting for a few minutes. Be cautious not to overheat, as excessive heat can damage nearby components. After heating, attempt to remove the fitting with pliers or vice grips.

Using Cold Treatments to Contract the Metal

Alternatively, applying cold can contract the metal and make removal easier. Use an aerosol freeze spray or dry ice to cool the fitting rapidly. Once it contracts, try loosening the fitting with the appropriate tools.

Safety Precautions When Using Heat and Cold

When using heat or cold, always follow safety protocols. Wear protective gloves and safety glasses to prevent burns or frostbite. Ensure proper ventilation when using a torch, and keep flammable materials away from the work area.

install Brake Line Fittings

Alternative Removal Methods

Specialty Tools Like Extraction Sockets

For particularly stubborn or severely stripped fittings, specialty tools like extraction sockets can be effective. These sockets are designed to grip stripped or damaged fasteners tightly. Select the correct size and fit it onto the fitting, then use a ratchet to remove it.

Using a Dremel or Rotary Tool for Precise Cuts

A Dremel or rotary tool can be used to carefully cut away damaged portions of the fitting. This method requires precision and patience. Make small, controlled cuts to avoid damaging the brake line itself. Once enough material is removed, you may be able to grip and remove the fitting.

Last-Resort Methods and Professional Help

If all else fails, seeking professional help may be necessary. A skilled mechanic has access to advanced tools and techniques for removing stripped fittings. Don’t hesitate to reach out to a professional to avoid causing further damage or compromising your vehicle’s brake system.

Replacing the Brake Line Fittings

Choosing the Correct Replacement Fitting

When replacing brake line fittings, selecting the correct replacement is crucial for maintaining the integrity and safety of your brake system. Here are key factors to consider:

Size: Ensure the replacement fitting matches the diameter of the brake line and the thread size of the original fitting. Using a fitting that is too large or too small can result in leaks and brake failure.

Type: Choose the appropriate type of fitting based on your brake system’s design. Common types include flare fittings, compression fittings, and inverted flare fittings. Refer to your vehicle’s manual or consult with an automotive expert if unsure.

Material: Select a fitting made from durable materials such as stainless steel or brass, which are resistant to corrosion and high pressure. Avoid using inferior materials that may not withstand the demands of the brake system.

Installing the New Fitting

Proper installation of the new fitting is essential to ensure a secure and leak-free connection. Follow these steps for optimal results:

Preparation: Clean the brake line and fit thoroughly to remove any debris or old thread sealant. Use a wire brush or brake cleaner if necessary.

Thread Sealant: Apply a small amount of thread sealant or anti-seize compound to the threads of the new fitting. This helps create a better seal and makes future removal easier.

Attachment: Slide the new fitting onto the brake line and thread it onto the corresponding port. Use a line wrench to tighten the fitting. Be cautious not to over-tighten, as this can strip the threads and cause damage. Tighten until snug and then give it a final quarter turn.

Testing the Installation

After installing the new fitting, it’s crucial to test the brake system to ensure there are no leaks and that it functions correctly:

Visual Inspection: Check the fitting and surrounding areas for any signs of brake fluid leaks. A dry fitting indicates a successful installation.

Brake Pedal Test: Press the brake pedal several times to build pressure in the brake lines. The pedal should feel firm and responsive. If it feels spongy or sinks to the floor, there may be air in the lines or a leak.

Brake Fluid Level: Check the brake fluid reservoir and top it off if necessary. Low brake fluid can affect braking performance and indicate a leak.

Road Test: Take the vehicle for a short test drive in a safe area to ensure the brakes are functioning properly. Pay attention to the brake response and listen for any unusual noises.

Post-Removal Maintenance

Inspecting the Brake System

After replacing the brake line fitting, it’s a good practice to inspect the entire brake system for any additional wear and tear:

Brake Lines: Check for any signs of wear, cracks, or corrosion on the brake lines. Replace any damaged sections to prevent future issues.

Brake Pads and Rotors: Inspect the brake pads and rotors for wear. Worn pads should be replaced, and rotors should be resurfaced or replaced if they show signs of excessive wear or damage.

Calipers and Wheel Cylinders: Ensure that the calipers and wheel cylinders are in good condition and functioning correctly. Look for leaks or sticking components.

Routine Maintenance Tips

Regular maintenance can help prevent future issues with brake fittings and extend the life of your brake system:

Regular Inspections: Periodically inspect the brake lines and fittings for any signs of wear or damage. Early detection can prevent more severe problems.

Proper Tools: Always use the correct tools, such as line wrenches and flare nut wrenches, to avoid damaging fittings during maintenance.

Torque Specifications: Follow the manufacturer’s torque specifications when tightening fittings to avoid over-tightening and stripping threads.

Regular Brake Fluid Checks and Changes

Brake fluid plays a vital role in the performance of your brake system. Regular checks and changes are essential:

Fluid Level: Check the brake fluid level regularly and top it off as needed. Low fluid levels can indicate a leak or worn brake pads.

Fluid Quality: Over time, brake fluid can become contaminated with moisture and debris, reducing its effectiveness. Replace the brake fluid according to the manufacturer’s recommended schedule, typically every 2-3 years.

Bleeding the Brakes: Bleed the brake lines to remove any air bubbles that can cause a spongy brake pedal and reduce braking efficiency. This is especially important after replacing fittings or brake lines.

Conclusion

Dealing with stripped brake line fittings can be challenging, but with patience and the right approach, it’s a task that can be successfully managed. Remember, taking your time and carefully following each step is crucial. Always prioritize safety by wearing protective gear and working in a stable, well-ventilated environment. If at any point you feel unsure or overwhelmed, don’t hesitate to seek professional assistance.

FAQ

If penetrating oil doesn’t loosen the fitting, reapply and wait longer, ensuring thorough coverage. For heavily corroded fittings, you might need to use heat, cold, or specialized tools like extraction sockets. Patience is key, and sometimes multiple applications are necessary.

Using regular pliers is not recommended, as they can further strip the fitting and damage the brake line. Vice grips or brake line pliers provide a more secure grip, reducing the risk of additional damage.

Inspect the brake line for any signs of wear, cracks, or severe corrosion. If the brake line itself is in good condition, you may only need to replace the fitting. However, if the line shows significant damage, replacing the entire brake line is advisable for safety.

A spongy or soft brake pedal, extended stopping distances, or a pedal that sinks to the floor are common signs of air in the brake lines. Bleeding the brakes to remove air bubbles will typically resolve this issue.


Driving with a stripped brake line fitting is unsafe, as it can lead to brake fluid leaks and brake failure. Address the issue immediately by either repairing the fitting or consulting a professional mechanic to ensure your brake system is functioning correctly.

Check your brake fluid level regularly, at least once a month, and top it off as needed. Brake fluid should be replaced according to the manufacturer’s recommended schedule, typically every 2-3 years, to maintain optimal braking performance and safety.

How to Remove Rusted Brake Line Fitting

How to Remove Rusted Brake Line Fitting

How to Remove Rusted Brake Line Fitting

Table of Contents

Introduction

Dealing with rusted brake line fittings is a common challenge faced by many vehicle owners and mechanics. These fittings, often exposed to harsh conditions, can become severely rusted over time, making them difficult to remove. Ignoring this issue can lead to compromised brake performance and potential safety hazards. The purpose of this post is to provide a comprehensive guide on safely and effectively removing rusted brake line fittings.

Understanding Brake Line Fittings

What are Brake Line Fittings?

Brake line fittings are crucial components in a vehicle’s braking system, serving as the connectors between various brake lines and other hydraulic components. These fittings ensure that brake fluid flows efficiently from the master cylinder to the brake calipers or wheel cylinders, allowing the braking system to function correctly. Typically made from durable metals such as steel or brass, brake line fittings are designed to withstand high pressure and harsh conditions. They come in various types and sizes, including flare fittings, compression fittings, and banjo fittings, each serving a specific purpose in different parts of the braking system. The integrity of these fittings is vital for maintaining the braking system’s effectiveness and ensuring the safety of the vehicle.

Rusted Brake Line Fitting Topa

Common Causes of Rust

Rust on brake line fittings is a frequent issue that can compromise the safety and performance of the braking system. Several factors contribute to the rusting of these fittings:

Environmental Factors: Vehicles exposed to harsh weather conditions, such as heavy rain, snow, or humidity, are more susceptible to rust. The moisture in these environments can lead to oxidation, causing the metal fittings to corrode over time.

Exposure to Road Salt: In regions where road salt is used during winter to melt ice and snow, brake line fittings are at a higher risk of rusting. The salt accelerates the corrosion process by creating a more conducive environment for the metal to oxidize.

Lack of Maintenance: Infrequent inspection and maintenance of the braking system can lead to the accumulation of dirt, grime, and moisture on brake line fittings. Over time, this buildup can promote rust formation.

Age and Wear: As vehicles age, their components naturally wear down. Older brake line fittings, having been exposed to the elements for extended periods, are more likely to develop rust compared to newer ones.

Mechanical Damage: Physical damage to brake line fittings, such as dents or scratches, can expose the bare metal underneath the protective coating, making it more susceptible to rust.

Preparation Steps

Preparing the Work Area

Before beginning any work on removing rusted brake line fittings, it’s essential to prepare your work area properly. Ensure the area is clean and free of clutter to provide ample space for maneuvering and to prevent accidents. A well-ventilated workspace is crucial, especially when using penetrating oils and other chemicals, to avoid inhaling harmful fumes. Proper lighting is also important, as it allows you to see the components clearly and reduces the risk of mistakes. Gathering all the necessary tools and materials beforehand will save time and make the process smoother.

Lifting and Securing the Vehicle

To safely access the brake line fittings, you need to lift and secure your vehicle properly. Follow these detailed steps:

Choose a Flat Surface: Park your vehicle on a flat, level surface to ensure stability.

Engage the Parking Brake: Apply the parking brake to prevent the vehicle from rolling.

Use Wheel Chocks: Place wheel chocks on the opposite side of the vehicle to further prevent any movement.

Locate the Jack Points: Refer to your vehicle’s manual to find the recommended jack points, which are designed to safely lift the vehicle without causing damage.

Lift the Vehicle: Position the jack under the designated jack point and slowly lift the vehicle until the wheel you’re working on is off the ground.

Secure with Jack Stands: Place jack stands under the vehicle at the recommended points and lower the vehicle onto the stands for added stability. Never rely solely on the jack to hold the vehicle up.

Double-Check Stability: Gently shake the vehicle to ensure it is securely supported by the jack stands before beginning any work.

Identifying the Rusted Fitting

Locating the rusted brake line fitting is a crucial step in the removal process. Here’s how to do it:

Visual Inspection: Begin by visually inspecting the brake lines under the vehicle. Follow the lines from the master cylinder to the brake calipers or wheel cylinders, looking for any signs of rust or corrosion.

Feel for Rough Spots: Use your hands to feel along the brake lines for any rough or flaky areas, which can indicate rust.

Check Connection Points: Pay special attention to the connection points where the brake lines meet other components, as these areas are more prone to rust due to exposure to moisture and road debris.

Use a Flashlight: If visibility is an issue, use a flashlight to thoroughly inspect the brake lines and fittings.

Mark the Area: Once you’ve identified the rusted fitting, mark the area with a piece of chalk or tape to easily locate it during the removal process.

Step-by-Step Guide to Removing Rusted Brake Line Fitting

Applying Penetrating Oil

Penetrating oil is essential for loosening rusted brake line fittings. It helps to dissolve rust and lubricate the fitting, making it easier to remove. Follow these instructions:

Select the Right Penetrating Oil: Choose a high-quality penetrating oil specifically designed for rusted bolts and fittings. Popular brands like WD-40, PB Blaster, or Liquid Wrench are effective options. These products are formulated to penetrate rust and corrosion deeply.

Apply Generously: Spray the penetrating oil generously on the rusted fitting. Ensure the oil covers the entire fitting and surrounding area. The goal is to get the oil to seep into the threads and break the rust bond.

Allow to Soak: Let the oil soak into the rust for at least 15-30 minutes. For heavily rusted fittings, you may need to reapply the oil and allow it to soak overnight. This gives the oil time to penetrate deep into the rust and make the fitting easier to loosen.

Repeat if Necessary: If the fitting is still stuck after the initial application, apply more penetrating oil and give it additional time to work. Patience is key; multiple applications might be necessary for heavily corroded fittings.

Using the Right Tools

Choosing the appropriate wrench and using it correctly is crucial to avoid further damage to the brake line fitting.

Select the Correct Wrench: Use a flare nut wrench or a brake line wrench specifically designed for brake fittings. These wrenches have a unique design that provides better grip and reduces the risk of rounding off the fitting. Unlike regular wrenches, flare nut wrenches grip more sides of the nut, making them ideal for soft metal fittings.

Properly Position the Wrench: Place the wrench snugly on the fitting. Ensure it’s positioned correctly to maximize leverage and grip. The wrench should fit tightly around the fitting without slipping.

Apply Controlled Force: Turn the wrench slowly and steadily. Avoid using excessive force, which can strip or damage the fitting. If the fitting doesn’t budge, try a gentle back-and-forth motion to help break the rust seal.

Applying Heat

Heat can help break the rust seal by expanding the metal fitting, making it easier to loosen.

Use a Heat Gun: A heat gun is preferable to an open flame, as it provides controlled heat without the risk of igniting nearby flammable materials. Using a heat gun allows you to apply heat directly to the fitting without damaging surrounding components.

Heat the Fitting: Apply heat evenly around the fitting for a few minutes. Focus on the area directly around the fitting to avoid damaging nearby components. The heat will cause the metal to expand, which can help break the rust bond.

Caution: Be careful not to overheat the fitting or surrounding areas, as excessive heat can weaken the metal and cause other damage. Always monitor the temperature closely and avoid applying heat for too long.

Using a Rotary Tool

A rotary tool can help remove excess rust and make it easier to access the fitting.

Attach the Right Bit: Use a wire brush or cutting bit suitable for metal. The wire brush attachment can effectively remove surface rust, while a cutting bit can help in more severe cases.

Carefully Remove Rust: Gently grind away rust from the fitting and surrounding areas. Be cautious not to cut into the brake line or fitting itself. Focus on removing just enough rust to improve access and grip.

Clean the Area: After using the rotary tool, wipe the area clean with a rag to remove debris and ensure better visibility. This will also help the penetrating oil and wrench work more effectively.

install Brake Line Fittings

Gently Tapping the Fitting

Tapping can help break the rust seal and make it easier to loosen the fitting.

Use a Small Hammer: Select a small ball-peen hammer or a similar tool. The hammer should be light enough to tap gently without causing damage.

Tap Gently: Lightly tap around the fitting to help break the rust bond. Focus on the fitting itself rather than the surrounding brake line to avoid damage. The vibrations from tapping can help loosen the rust.

Avoid Excessive Force: Use gentle taps to avoid damaging the fitting or brake line. The goal is to create small vibrations, not to forcefully break the rust.

Slow and Steady Force

Applying consistent, steady force is crucial to avoid breaking the fitting.

Gradual Pressure: Apply gradual, steady pressure when turning the wrench. Quick, jerky movements can cause the fitting to snap or strip. Patience is key to preventing damage.

Reverse Technique: If the fitting begins to move, try turning it back and forth (tightening and then loosening) to help break the rust seal further. This technique can gradually work the rust loose without applying excessive force.

Using a Brake Line Wrench

Using a brake line wrench provides better grip and control, reducing the risk of damage.

Position the Wrench: Ensure the brake line wrench is properly positioned on the fitting, covering as much surface area as possible for a secure grip. The wrench should fit snugly and not slip off.

Apply Steady Pressure: Turn the wrench with steady, controlled pressure. Avoid using extensions or cheater bars, as they can increase the risk of damaging the fitting. The goal is to apply even force to avoid stripping the fitting.

Leverage Techniques: If the fitting is particularly stubborn, use leverage techniques such as bracing the wrench against a solid surface to increase your control and reduce the risk of slipping. This can help apply more force without damaging the fitting or brake line.

Post-Removal Steps

Inspecting the Brake Line

Once the rusted brake line fitting has been successfully removed, it’s crucial to thoroughly inspect the brake line itself for any additional damage or rust. Follow these steps:

Visual Inspection: Look along the entire length of the brake line for any visible signs of rust, corrosion, or damage. Pay special attention to areas near connection points and bends.

Feel for Weak Spots: Gently run your fingers along the brake line to feel for any weak spots, rough patches, or thinning areas that may indicate corrosion or damage.

Use a Flashlight: Utilize a flashlight to illuminate hard-to-see areas and ensure you don’t miss any small cracks or rust spots.

Assess the Integrity: If you find any significant rust or damage, consider replacing the entire brake line rather than just the fitting to ensure the safety and reliability of your braking system.

Cleaning the Area

Cleaning the fitting area is essential to ensure a secure and proper connection when installing the new fitting. Here’s how to do it:

Remove Debris: Use a clean rag or brush to wipe away any dirt, debris, or rust particles from the fitting area.

Use a Cleaner: Apply a brake cleaner or a degreaser to the fitting area to remove any remaining oil, grease, or contaminants. Follow the product instructions for proper use.

Scrub if Necessary: If there is stubborn rust or dirt, use a small wire brush to gently scrub the area until it is clean and smooth.

Dry the Area: Ensure the fitting area is completely dry before proceeding to install the new fitting. Use a clean cloth to wipe away any moisture.

Bleeding the Brake Lines

After replacing the brake line fitting, it’s essential to bleed the brake lines to remove any air bubbles that may have entered the system. Here are the detailed steps:

Gather Materials: You’ll need a brake bleeder kit, fresh brake fluid, a container for old fluid, and a wrench that fits the bleeder valve.

Locate the Bleeder Valve: Identify the bleeder valve on the brake caliper or wheel cylinder closest to the brake line you worked on.

Prepare the System: Attach the brake bleeder kit to the bleeder valve. Ensure the container is positioned to catch old brake fluid.

Open the Bleeder Valve: Use the wrench to open the bleeder valve slightly. Be prepared for brake fluid to flow out.

Pump the Brake Pedal: Have an assistant pump the brake pedal slowly and steadily. As the pedal is pressed, old fluid and air bubbles will be pushed out through the bleeder valve.

Close the Valve: Once the pedal is fully depressed, close the bleeder valve before your assistant releases the pedal to prevent air from re-entering the system.

Repeat the Process: Continue this process until you see clear, bubble-free brake fluid coming out of the bleeder valve. Make sure to check and top off the brake fluid reservoir to maintain proper fluid levels.

Move to Other Wheels: If you worked on multiple brake lines, repeat the bleeding process for each wheel, starting from the furthest wheel from the master cylinder and moving closer.

Final Check: Once all brake lines are bled, ensure the brake pedal feels firm and responsive. Check for any leaks around the new fitting and bleeder valves.

Conclusion

In conclusion, dealing with rusty brake lines can be done safely and effectively with the right tools, techniques, and patience. We covered some of the basic steps, including applying penetrating oil, using the proper tools, applying heat, using a rotary tool, gently tapping the fitting, and applying slow and steady pressure. Additionally, we detail the post-disassembly steps, including inspecting the brake lines, cleaning the area, replacing fittings and bleeding the brake lines to ensure a successful repair. If you have any experience or additional tips, feel free to contact us.

FAQ

It’s best to use a high-quality penetrating oil designed specifically for rusted bolts and fittings. Popular brands include WD-40, PB Blaster, and Liquid Wrench, which are effective at breaking down rust and lubricating the fitting.

While a regular wrench can be used, it’s recommended to use a flare nut wrench or a brake line wrench. These wrenches provide a better grip and reduce the risk of rounding off the fitting, ensuring a more secure and damage-free removal.

It’s safer to use a heat gun rather than an open flame like a torch. A heat gun provides controlled heat without the risk of igniting flammable materials nearby. Applying even heat around the fitting helps to expand the metal and break the rust seal.

After removing the rusted fitting, inspect the entire brake line for any signs of rust, corrosion, or damage. If you find significant rust or weak spots, it’s advisable to replace the entire brake line to ensure the safety and reliability of your braking system.

If the fitting remains stuck, try reapplying penetrating oil and allowing it to soak for a longer period, possibly overnight. You can also gently tap the fitting with a small hammer to help break the rust seal. If it still doesn’t budge, using a rotary tool to carefully remove excess rust may help.

Bleeding the brake lines is essential to remove any air bubbles that may have entered the system during the replacement process. Air in the brake lines can lead to a spongy brake pedal and reduced braking efficiency, compromising the safety of your vehicle.

Contact Topa

Have a question or suggestion? Fill out the form below to get in touch with one of our experts.

How to Remove Brake Line Fittings

How to Remove Brake Line Fittings

How to Remove Brake Line Fittings

Table of Contents

Introduction

Proper removal of brake line fittings is crucial not only for maintaining the efficiency and safety of your vehicle’s braking system but also for preventing potential damage that can arise from improper handling. This guide will walk you through the process, emphasizing safety considerations and addressing common challenges you might face. We’ll cover everything from the tools you need to step-by-step instructions and troubleshooting tips. 

Tools and Materials Needed

Essential Tools

Wrenches (flare nut wrenches, line wrenches)

Flare nut wrenches and line wrenches are specifically designed to grip the hexagonal nuts of brake line fittings without stripping them, ensuring a secure and efficient removal process.

Penetrating Oil

Penetrating oil is used to loosen rusted or seized brake line fittings, making it easier to remove them without causing damage.

Brake Line Cutter

A brake line cutter is essential for cutting brake lines cleanly and accurately when replacing sections of the line.

Brake Line Flaring Tool

This tool is used to create precise flares on the ends of brake lines, ensuring a tight and leak-free connection with the fittings.

Brake line install Tools

Additional Materials

Replacement Brake Lines or Fittings

Having replacement brake lines or fittings on hand is crucial in case the original components are damaged or too corroded to reuse.

Brake Fluid

Fresh brake fluid is necessary for refilling the brake system after replacing the brake lines or fittings.

Preparatory Steps

Safety First

Importance of Wearing Safety Gear

Wearing safety gear, including gloves and safety glasses, is crucial to protect yourself from brake fluid, which is corrosive, and other potential hazards such as debris and sharp edges.

Ensuring the Vehicle is on a Stable and Flat Surface

Ensuring the vehicle is parked on a stable and flat surface prevents accidental movement and provides a secure working environment. Engaging the parking brake and using wheel chocks can add extra security.

Using Jack Stands for Added Safety

Using jack stands to support the vehicle after lifting it with a jack adds an extra layer of safety. Jack stands are more stable and reliable than jacks alone, preventing the vehicle from falling during the repair.

Initial Inspection

Checking the Condition of Brake Lines and Fittings

Before beginning the removal process, inspect the brake lines and fittings for any signs of wear, such as cracks, leaks, or bends. This helps you determine the extent of the repairs needed.

Identifying Any Visible Rust, Corrosion, or Damage

Look for any rust, corrosion, or damage on the fittings and lines. These issues can make removal more challenging and may require additional steps, such as using penetrating oil to loosen rusted parts.

Preparing the Vehicle

Removing the Wheel for Better Access to the Brake Lines

Removing the wheel provides better access to the brake lines and fittings, making it easier to work on them. Ensure the vehicle is securely lifted and supported before removing the wheel.

Using Penetrating Oil on the Fittings to Ease Removal

Apply penetrating oil to the brake line fittings and allow it to soak for a few minutes. This helps to loosen any rust or corrosion, making the fittings easier to remove without causing damage.

Step-by-Step Guide to Removing Brake Line Fittings

Loosening the Fittings

Proper Technique for Using Flare Nut Wrenches

Flare nut wrenches are specifically designed to grip the nuts on brake line fittings securely, reducing the risk of rounding off the corners. Position the wrench snugly around the fitting and apply steady pressure. Avoid using adjustable wrenches as they can slip and damage the fittings.

Step-by-Step Instructions for Loosening Different Types of Fittings

  • Inverted Flare Fittings: Place the flare nut wrench on the fitting, ensuring it is seated properly. Turn the wrench counterclockwise to loosen the fitting. If the fitting is resistant, apply penetrating oil and allow it to soak before attempting again.
  • Bubble Flare Fittings: Use the appropriate size flare nut wrench, grip the fitting securely, and turn counterclockwise. Be patient and apply penetrating oil if necessary.
  • Banjo Fittings: Use a line wrench or a socket wrench for better leverage. Loosen the bolt holding the banjo fitting, taking care not to strip the threads.

Tips for Dealing with Stubborn or Seized Fittings

  • Penetrating Oil: Apply penetrating oil to the fitting and let it soak for at least 15 minutes. This can help break down rust and corrosion.
  • Heat Application: Carefully use a propane torch to heat the fitting. Heat can expand the metal slightly, making it easier to loosen the fitting. Be cautious not to overheat and damage nearby components.
  • Tapping Method: Gently tap the fitting with a hammer to help break up rust and corrosion. This can sometimes loosen stubborn fittings.
  • Patience and Persistence: Don’t rush the process. Allow the penetrating oil and other methods time to work effectively.
cut An Fitting hose

Cutting the Brake Line (if necessary)

When and Why Cutting the Brake Line Might Be Necessary

Cutting the brake line may be necessary if the fittings are too corroded or damaged to be removed intact. It’s also an option when replacing a section of the brake line that is compromised.

How to Safely Cut the Brake Line Without Damaging Other Components

  • Select the Right Tool: Use a brake line cutter specifically designed for this task. These tools provide a clean and precise cut.
  • Positioning: Ensure the area around the brake line is clear of other components. Position the cutter around the brake line and tighten the tool gradually.
  • Cutting: Rotate the cutter around the brake line, tightening slightly with each rotation until the line is cut through. Avoid applying excessive force, which can deform the line and create an uneven cut.

Removing the Old Fittings

Detailed Steps for Removing Different Types of Brake Line Fittings

  • Inverted Flare Fittings: Once the fitting is loosened, continue turning the flare nut wrench until the fitting is completely unscrewed. Carefully pull the brake line away from the fitting.
  • Bubble Flare Fittings: After loosening the fitting with the flare nut wrench, remove it by continuing to unscrew it manually if necessary. Pull the brake line out of the fitting gently.
  • Banjo Fittings: After removing the bolt, carefully pull the banjo fitting away from the brake line. Be cautious of any residual brake fluid that may leak out.

Handling Rust and Corrosion Effectively

  • Rust Penetration: Apply a generous amount of penetrating oil to heavily rusted fittings and allow time for it to work. Repeat as necessary.
  • Wire Brush: Use a wire brush to remove surface rust and corrosion from the fittings and surrounding areas. This can help improve the grip of the wrench and make removal easier.
  • Replacement of Severely Corroded Parts: If a fitting or section of the brake line is severely corroded, it’s best to replace it entirely. This ensures the integrity and safety of the brake system.

Troubleshooting Common Issues

Stubborn Fittings

Techniques for Dealing with Fittings That Won’t Budge

  • Patience and Persistence: Apply penetrating oil to the fitting and allow it to soak for at least 15-30 minutes. In some cases, multiple applications may be necessary to break through the rust and corrosion.
  • Proper Tools: Ensure you are using the correct size and type of wrench. Flare nut wrenches provide a better grip than standard wrenches and are less likely to round off the fitting.
  • Leverage: Use a longer wrench or a breaker bar to gain more leverage. Be careful not to apply too much force to avoid damaging the fitting or the surrounding components.

Use of Heat and Other Methods to Loosen Stubborn Fittings

  • Heat Application: Carefully use a propane torch to heat the fitting. Heat can expand the metal, making it easier to loosen. Heat the fitting evenly and avoid overheating, which can damage other parts. Always take precautions to prevent fire hazards, especially around flammable brake fluid.
  • Impact Tools: An impact wrench can provide short bursts of torque that might free a stubborn fitting. Use it cautiously to avoid damaging the fitting or the line.
  • Vibration: Tapping the fitting lightly with a hammer can help break the bond of rust and corrosion. Combine this with penetrating oil for better results.
Topa Rusted Brake Line Fitting

Stripped or Damaged Fittings

Identifying and Dealing with Stripped or Damaged Fittings

  • Visual Inspection: Check for rounded edges or signs of wear on the fitting. Stripped fittings will not grip the wrench properly and can make removal difficult.
  • Alternative Tools: Use a bolt extractor or a specialized socket designed to grip stripped fittings. These tools can provide the necessary grip to remove damaged fittings.
  • Cutting: If the fitting is too damaged to remove with tools, you may need to cut the brake line and replace the fitting entirely.

Options for Replacing Damaged Fittings

  • Replacement Kits: Purchase a brake line repair kit that includes new fittings and the necessary tools to install them. These kits are designed to be user-friendly and ensure a proper fit.
  • Professional Help: If the fitting is severely damaged or if you are unsure about replacing it yourself, consider seeking professional assistance. A mechanic can ensure the fitting is replaced correctly and safely.
  • Upgrading Fittings: Consider upgrading to higher-quality or corrosion-resistant fittings to prevent future issues. Stainless steel fittings, for example, are more resistant to rust and corrosion.

Brake Fluid Leaks

How to Manage and Clean Up Brake Fluid Leaks During the Process

  • Containment: Use a drip pan or absorbent materials like rags or paper towels to catch any leaking brake fluid. Place them under the area you are working on to minimize mess.
  • Immediate Cleanup: Clean up any brake fluid spills immediately. Brake fluid is highly corrosive and can damage paint and other vehicle components. Use a brake cleaner to remove fluid from surfaces.
  • Disposal: Dispose of used rags and paper towels following local regulations. Brake fluid should not be poured down drains or disposed of in regular trash.

Preventing Brake Fluid Contamination

  • Sealing the System: Cap or plug any open brake lines or fittings to prevent dirt and debris from entering the brake system. Use clean, dry caps or plugs specifically designed for this purpose.
  • Clean Work Area: Ensure that the work area is clean and free of contaminants. Avoid using tools or parts that have been in contact with dirt or other substances.
  • Fresh Brake Fluid: Use only fresh, uncontaminated brake fluid when refilling the system. Old or contaminated fluid can cause damage to the brake system and reduce braking efficiency.
  • Proper Storage: Store brake fluid in a sealed container to prevent moisture and dirt from contaminating it. Brake fluid is hygroscopic, meaning it absorbs moisture from the air, which can lead to corrosion and reduced performance.

Post-Removal Steps

Inspecting and Cleaning the Area

Checking for Any Damage to Surrounding Components

  • Visual Inspection: Carefully examine the area around the brake line fittings for any signs of damage or wear. Look for cracks, dents, or other deformities on the brake lines, calipers, and nearby components.
  • Functional Check: Ensure that the brake lines are not bent or kinked, as this can affect the flow of brake fluid and the overall performance of the braking system.
  • Integrity of Connections: Verify that all connections, such as clamps and brackets, are intact and securely holding the brake lines in place.

Cleaning the Area Thoroughly Before Installing New Fittings

  • Removing Debris: Use a clean rag or paper towel to wipe away any dirt, debris, or old brake fluid from the area around the brake line fittings.
  • Brake Cleaner: Apply brake cleaner to the fittings and surrounding components to remove any residual brake fluid and contaminants. This ensures a clean surface for the new fittings.
  • Drying: Allow the cleaned areas to dry completely before proceeding with the installation of new fittings. This helps to prevent any contamination of the new fittings and brake fluid.
Brake Line Fitting Guide

Installing New Brake Line Fittings

Choosing the Right Replacement Fittings

  • Matching Specifications: Ensure that the replacement fittings match the specifications of the original fittings. This includes the type (e.g., inverted flare, bubble flare), size, and material.
  • Quality Materials: Opt for high-quality fittings made from durable materials, such as stainless steel or brass, to ensure longevity and resistance to corrosion.
  • Compatibility: Verify that the new fittings are compatible with the existing brake lines and the overall braking system.

Proper Installation Techniques to Ensure a Secure Fit

  • Positioning the Fitting: Align the new fitting with the brake line and ensure it is seated properly before tightening.
  • Using the Right Tools: Use a flare nut wrench or line wrench to tighten the fitting securely. Avoid using adjustable wrenches, as they can slip and damage the fitting.
  • Torque Specifications: Tighten the fitting to the manufacturer’s recommended torque specification to ensure a secure and leak-free connection. Over-tightening can damage the fitting and brake line.
  • Double-Checking: Once installed, double-check the fitting for proper alignment and tightness. Make sure there are no visible gaps or misalignments.

Bleeding the Brakes

Importance of Bleeding the Brakes After Replacing Fittings

  • Air Removal: Bleeding the brakes is essential to remove any air that may have entered the brake lines during the fitting replacement process. Air in the brake lines can lead to a spongy brake pedal and reduced braking efficiency.
  • Restoring Brake Pressure: Proper bleeding ensures that the brake system is fully pressurized and functioning correctly, providing optimal braking performance and safety.

Step-by-Step Guide to Bleeding the Brake System

  • Preparation: Gather the necessary tools, including a brake bleeder kit, a container for old brake fluid, and fresh brake fluid. Ensure the vehicle is securely lifted and supported.
  • Locate Bleed Valves: Identify the bleed valves on each brake caliper or wheel cylinder. Start with the wheel furthest from the master cylinder (usually the rear passenger side).
  • Attach Bleeder Hose: Attach a clear hose to the bleed valve and place the other end in a container to catch the old brake fluid.
  • Open Bleed Valve: Have an assistant press the brake pedal several times and hold it down. Open the bleed valve to allow brake fluid and air to escape. Close the valve before the assistant releases the brake pedal.
  • Repeat Process: Repeat this process until no air bubbles are visible in the brake fluid coming out of the hose. Ensure that the brake fluid reservoir is topped up with fresh fluid throughout the process to prevent air from entering the system.
  • Proceed to Next Wheel: Move to the next wheel (rear driver side, front passenger side, front driver side) and repeat the bleeding process for each wheel.
  • Final Check: After bleeding all wheels, check the brake pedal for firmness. If it feels spongy, repeat the bleeding process. Ensure the brake fluid reservoir is at the proper level and all bleed valves are securely closed.

Conclusion

In this guide, we covered the essential steps to remove brake line fittings. Performing regular maintenance on your vehicle’s brake system not only ensures your safety but also extends the lifespan of your vehicle. By knowing how to remove and replace brake line fittings, you can save on repair costs and gain a deeper understanding of your vehicle’s mechanics, empowering you to handle future repairs with confidence.

FAQ

You will need flare nut wrenches, penetrating oil, a brake line cutter, a brake line flaring tool, and safety gear such as gloves and safety glasses.

Apply penetrating oil and allow it to soak in, use a flare nut wrench for better grip, apply heat cautiously to expand the metal, and use a longer wrench or breaker bar for added leverage.

Use a bolt extractor or a specialized socket for stripped fittings. If the fitting is too damaged, consider cutting the brake line and replacing the fitting entirely.

Seal any open brake lines or fittings with clean, dry caps, ensure the work area is clean, use fresh brake fluid, and store brake fluid in a sealed container to prevent moisture and dirt contamination.

If you encounter severely damaged fittings, if the brake system feels spongy after bleeding, or if you are unsure about any step in the process, it is best to seek assistance from a professional mechanic to ensure safety and proper function.

Bleeding the brakes removes any air that may have entered the system, ensuring the brake system is fully pressurized and functioning correctly, which is crucial for safe braking performance.

Brake Line Fitting Sealant Choosing the Right One

Brake Line Fitting Sealant : Choosing the Right One

Brake Line Fitting Sealant: Choosing the Right One

Table of Contents

Introduction

When it comes to vehicle maintenance, one often overlooked yet crucial component is the brake line fitting sealant. This sealant plays a vital role in ensuring the integrity and reliability of a vehicle’s braking system by preventing leaks at the brake line fittings. A reliable brake line fitting sealant not only helps maintain optimal brake performance but also significantly enhances vehicle safety, reducing the risk of brake failure due to fluid leaks. The purpose of this post is to guide readers in selecting the most suitable brake line fitting sealant for their specific needs, ensuring their vehicles remain safe and efficient on the road.

Understanding Brake Line Fitting Sealant

Brake line fitting sealant is a specialized adhesive substance used to create a secure and leak-proof connection between brake line fittings. Its primary function is to prevent brake fluid leaks that can compromise the braking system’s efficiency and safety. By sealing the tiny gaps and threads between fittings, the sealant ensures that the hydraulic pressure within the brake lines is maintained, allowing for consistent and reliable brake performance.

Different Types of Brake Line Fitting Sealants

Thread Sealant

Description: Thread sealant is a liquid or paste applied to the threads of brake line fittings to create a strong bond and seal.

Common Use: It is typically used for threaded connections where a tight seal is crucial to prevent fluid leaks.

Features: Thread sealants are often anaerobic, meaning they cure in the absence of air, ensuring a hard and durable seal.

Anaerobic Sealant

Description: Anaerobic sealant is a type of adhesive that hardens when in contact with metal and deprived of air.

Common Use: Ideal for applications where metal-to-metal contact is involved, such as brake line fittings.

Features: It provides excellent resistance to vibration and thermal expansion, making it suitable for high-pressure brake systems.

PTFE Tape

Description: Polytetrafluoroethylene (PTFE) tape, also known as Teflon tape, is a non-adhesive tape used to wrap around threads before assembly.

Common Use: It is used to seal threaded joints in brake lines and other fluid systems.

Features: PTFE tape is known for its excellent chemical resistance and ability to withstand high temperatures, making it a versatile choice for various sealing applications.

brake line fitting adapter supplier

Benefits of Using Brake Line Fitting Sealant

Prevents Leaks: The primary benefit of using brake line fitting sealant is its ability to prevent fluid leaks, ensuring the braking system maintains proper hydraulic pressure.

Enhances Safety: By preventing leaks, the sealant contributes to the overall safety of the vehicle, reducing the risk of brake failure.

Improves Performance: A well-sealed brake line ensures consistent brake performance, providing drivers with reliable stopping power.

Extends Lifespan: Using the appropriate sealant can extend the lifespan of brake line fittings by protecting them from corrosion and wear caused by brake fluid exposure.

Ease of Maintenance: Sealants make it easier to maintain and service brake systems, as they can be applied and removed without causing damage to the fittings.

Key Considerations When Choosing Sealant

Materials

One of the foremost considerations when selecting a brake line fitting sealant is its compatibility with both the brake fluid used in the vehicle and the materials of the brake lines themselves. Brake fluids can vary (DOT 3, DOT 4, DOT 5, etc.), each having different chemical properties. The sealant must be chemically stable and resistant to these fluids to prevent degradation over time. Additionally, brake lines are typically made from materials like steel, copper, or aluminum, and the sealant must adhere effectively to these materials without causing corrosion or damage.

Temperature and Pressure Ratings

Brake systems operate under extreme conditions, with high temperatures and pressures. The chosen sealant must be able to withstand these conditions without losing its sealing properties. Look for sealants that specify their temperature and pressure ratings, ensuring they can handle the maximum operating conditions of your brake system. This ensures the sealant will not break down under intense heat or pressure, maintaining a secure and leak-proof seal.

Ease of Application and Removal

The ease with which a sealant can be applied and later removed is another critical factor. A good sealant should be straightforward to apply, whether it comes in a paste, liquid, or tape form. It should spread evenly and fill gaps without requiring excessive force or precision. Equally important is the ability to remove the sealant cleanly if necessary, for maintenance or repairs. Sealants that are too difficult to remove can lead to additional labor and potential damage to the brake lines during disassembly.

Curing Time and Conditions

Curing time refers to the period required for the sealant to fully harden and become effective. Depending on the type of sealant, curing times can vary significantly. For example, anaerobic sealants require metal-to-metal contact and the absence of air to cure properly. Understanding the curing conditions and timeframes is essential for planning repairs and ensuring that the vehicle is not put back into service before the sealant has been fully set. Fast-curing sealants may be preferred for quicker turnarounds, while longer-curing options might offer stronger bonds.

Chemical Resistance and Durability

Brake line fitting sealants are exposed to a variety of chemicals, including brake fluids, oils, and road contaminants. Therefore, the chosen sealant must exhibit strong chemical resistance to prevent breakdown and maintain its sealing capabilities over time. Additionally, the durability of the sealant is crucial for long-term performance. A durable sealant will resist vibrations, thermal cycling, and physical wear, ensuring that the brake lines remain sealed throughout the vehicle’s operation.

Application Techniques for Brake Line Fitting Sealant

Preparing the Brake Line Fittings

Cleaning: Before applying any sealant, it is crucial to thoroughly clean the brake line fittings. Use a wire brush or abrasive pad to remove any rust, dirt, or old sealant residues. Follow up with a brake cleaner or solvent to ensure all contaminants are removed. This helps the sealant adhere properly and prevents leaks.

Inspection: Inspect the fittings for any signs of damage or excessive wear. Look for cracks, deep scratches, or deformations that could compromise the seal. Replace any damaged fittings before proceeding with the sealant application.

Applying Thread Sealant

Step-by-Step Application:

Select the Sealant: Choose a high-quality thread sealant compatible with your brake fluid and fitting material.

Apply the Sealant: Squeeze a small amount of sealant onto the threads of the fitting. Spread it evenly around the threads using a brush or your fingers.

Assemble the Fitting: Screw the fitting into place, ensuring it is properly aligned. Tighten it to the manufacturer’s recommended torque specification.

Curing: Allow the sealant to cure according to the manufacturer’s instructions before testing the brake system.

Brake Line Fitting Sealant

Applying Anaerobic Sealant

Step-by-Step Application:

Select the Sealant: Use an anaerobic sealant designed for brake line fittings.

Apply the Sealant: Apply a thin, even layer of the sealant to the male threads of the fitting.

Assemble the Fitting: Insert the fitting into the mating component and tighten it to the specified torque. Anaerobic sealants cure in the absence of air and the presence of metal ions.

Curing: Ensure that the parts remain undisturbed while the sealant cures. Follow the manufacturer’s recommended curing time before using the brake system.

Applying PTFE Tape

Step-by-Step Application:

Select the Tape: Use PTFE tape (commonly known as Teflon tape) suitable for high-pressure brake applications.

Wrap the Tape: Starting at the first thread, wrap the PTFE tape around the male threads in the direction of the thread rotation. Apply 2-3 layers of tape, ensuring it is tight and even.

Assemble the Fitting: Screw the fitting into place, being careful not to over-tighten, which could damage the tape and cause leaks.

Check for Leaks: After assembly, check the connection for leaks. If a leak is detected, disassemble and reapply the tape as necessary.

Common Mistakes to Avoid During Application

Insufficient Cleaning: Failing to clean the fittings thoroughly can prevent the sealant from adhering properly, leading to leaks.

Over-Application: Using too much sealant can cause it to squeeze out of the threads and contaminate the brake fluid, potentially causing brake system failure.

Under-Application: Applying too little sealant may not provide an adequate seal, leading to leaks under pressure.

Improper Curing: Not allowing sufficient curing time before testing the brake system can result in a weak bond and potential leaks.

Wrong Sealant Type: Using a sealant not compatible with brake fluid or fitting material can cause degradation of the sealant and leaks over time.

Over-Tightening: Excessive tightening can damage the threads and the sealant, compromising the seal and leading to leaks.

Troubleshooting Common Issues

Identifying and Fixing Leaks

Identifying Leaks:

Visual Inspection: Regularly inspect the brake line fittings for any signs of fluid leakage. Look for wet spots, drips, or puddles around the fittings.

Pressure Test: Use a pressure tester to check for leaks in the brake system. Apply pressure to the system and observe any pressure drop, indicating a potential leak.

Brake Fluid Levels: Monitor the brake fluid reservoir for any unexplained drops in fluid levels, which could suggest a leak in the brake lines.

Fixing Leaks:

Tightening Fittings: If a leak is detected, first try tightening the fitting to the recommended torque specification. Be cautious not to over-tighten, which can damage the fitting or the sealant.

Reapplying Sealant: If tightening does not resolve the leak, disassemble the fitting, clean off the old sealant, and reapply a fresh coat of the appropriate sealant. Ensure the surfaces are clean and dry before reassembly.

Replacing Components: If the fitting or the brake line is damaged, replace the faulty component. Using a damaged fitting can result in persistent leaks despite proper sealing techniques.

Brake Line Fitting leak

Dealing with Difficult or Stubborn Fittings

Stuck Fittings:

Penetrating Oil: Apply a penetrating oil to the threads and allow it to sit for several minutes to loosen any rust or corrosion.

Heat Application: Gently apply heat to the fitting using a heat gun or torch. Be cautious to avoid damaging surrounding components or causing a fire hazard. The heat can expand the metal and help break the bond.

Proper Tools: Use the appropriate tools such as a flare nut wrench or line wrench, which provide better grip and prevent rounding off the fittings.

Cross-Threaded Fittings:

Inspection: Carefully inspect the threads for damage. If the threads are cross-threaded, use a thread chaser or tap and die set to repair the threads.

Replacement: In severe cases where the threads cannot be repaired, replace the fitting to ensure a proper seal and avoid future issues.

Removing Old or Hardened Sealant

Mechanical Removal:

Wire Brush: Use a wire brush or abrasive pad to scrub away old or hardened sealant from the threads. Be thorough in removing all remnants, as leftover sealant can prevent the new sealant from adhering properly.

Thread Chaser: A thread chaser tool can help clean and restore the threads by removing any residual sealant or corrosion.

Chemical Removal:

Solvents: Apply a suitable solvent, such as brake cleaner or acetone, to dissolve the old sealant. Allow the solvent to sit for a few minutes to soften the sealant before scrubbing it away.

Sealant Removers: Specialized sealant removers are available for breaking down and removing old sealant. Follow the manufacturer’s instructions for safe and effective use.

Avoiding Damage:

Gentle Scrubbing: When removing old sealant, be careful not to damage the threads or the fitting surface. Use gentle scrubbing motions and avoid using excessive force.

Protective Measures: If using chemical removers, ensure they are compatible with the brake line material to avoid corrosion or weakening of the fittings.

Conclusion

In conclusion, selecting the right brake line fitting sealant is essential for ensuring the safety and efficiency of your vehicle’s braking system. By carefully preparing the fittings, applying the sealant correctly, and avoiding common mistakes, you can achieve a secure and leak-free brake line connection. Remember, prioritizing safety and quality when selecting and applying brake line fitting sealants is paramount. Always opt for high-quality products and follow best practices to ensure your vehicle’s braking system remains reliable and effective.

FAQ

Brake line fitting sealant is a specialized adhesive used to create a secure, leak-proof connection between brake line fittings. It is crucial for maintaining hydraulic pressure and preventing brake fluid leaks, which ensures reliable brake performance and vehicle safety.

The main types of brake line fitting sealants include thread sealants, anaerobic sealants, and PTFE tape. Each type has specific applications and benefits, such as varying curing times, chemical resistance, and ease of application.

When choosing a brake line fitting sealant, consider factors like compatibility with brake fluid and fitting materials, temperature and pressure ratings, ease of application and removal, curing time, and chemical resistance. Selecting a sealant that meets these criteria ensures a secure and durable connection.

To prepare brake line fittings, clean them thoroughly with a wire brush and brake cleaner to remove dirt, rust, and old sealant. Inspect the fittings for damage and replace any that are worn or cracked. Proper preparation ensures the new sealant adheres correctly.

Common mistakes include insufficient cleaning of the fittings, over-application or under-application of the sealant, not allowing enough curing time, using the wrong type of sealant, and over-tightening the fittings. Avoiding these mistakes helps ensure a secure and leak-free connection.

To remove old or hardened sealant, use a wire brush or thread chaser to mechanically remove the residue. Apply a solvent like brake cleaner or a specialized sealant remover to dissolve and soften the old sealant. Be gentle to avoid damaging the threads or fittings during removal.

Can You Use Teflon Tape on Brake Line Fittings

Can You Use Teflon Tape on Brake Line Fittings?

Can You Use Teflon Tape on Brake Line Fittings?

Table of Contents

Introduction

Ensuring the integrity and security of brake line fittings is crucial for vehicle safety, as even minor leaks or failures can lead to catastrophic consequences. This article addresses the common question: can you use Teflon tape on brake line fittings? We will explore the design and purpose of brake line fittings, the properties and uses of Teflon tape, and why it may not be suitable for such critical applications. Additionally, we will provide alternative solutions and best practices to ensure the reliability and safety of your brake system.

Understanding Brake Line Fittings

Brake line fittings are essential components in a hydraulic brake system, responsible for connecting various parts of the braking system and ensuring the secure transfer of brake fluid. These fittings create leak-proof seals that maintain the necessary pressure within the brake lines, allowing the hydraulic fluid to efficiently transfer force from the brake pedal to the brake calipers or wheel cylinders. This process ultimately brings the vehicle to a stop. The critical nature of brake line fittings cannot be overstated, as any failure or leak can lead to brake system malfunctions, putting the vehicle and its occupants at serious risk.

Types of Brake Line Fittings

There are several types of brake line fittings, each designed for specific applications within the brake system:

Inverted Flare Fittings: Commonly used in automotive brake systems, these fittings provide a strong, leak-proof connection by creating a flare at the end of the brake line that fits snugly into the fitting.

Banjo Fittings: Typically used in high-pressure hydraulic systems, banjo fittings feature a hollow bolt and spherical union, allowing fluid to flow through the fitting while providing a secure connection.

AN (Army-Navy) Fittings: Originally designed for military applications, AN fittings are known for their high durability and precision. They use a 37-degree flare to create a tight seal and are often found in performance and racing vehicles.

brake line fitting adapter supplier

Materials Commonly Used

Brake line fittings are typically made from materials that offer durability and resistance to corrosion, ensuring long-term reliability and performance. The most commonly used materials include:

Steel: Known for its strength and resistance to high pressure, steel fittings are widely used in automotive brake systems.

Brass: Valued for its corrosion resistance and ease of installation, brass fittings are often used in both automotive and industrial applications.

Understanding the different types and materials of brake line fittings is crucial for selecting the right components for your specific needs, ensuring the safety and efficiency of your hydraulic brake system.

What is Teflon Tape?

Composition and Characteristics

Teflon tape, also known as PTFE (Polytetrafluoroethylene) tape, is a thin, white film used to seal pipe threads. It comprises PTFE, a synthetic fluoropolymer of tetrafluoroethylene, known for its non-reactivity, high melting point, and low friction properties. These characteristics make Teflon tape an excellent sealing material, as it can withstand various temperatures and chemical exposures without degrading.

Common Uses

Teflon tape is widely used in various industries, primarily for its sealing capabilities. In plumbing, it is commonly applied to the threads of pipes and fittings to prevent leaks by creating a watertight seal. Additionally, it is used in other applications such as:

Gas Lines: To seal joints in gas piping systems, ensuring no leaks.

Aerospace and Automotive Industries: For sealing hydraulic and pneumatic systems.

Food and Beverage Industry: For applications requiring non-reactive and food-safe sealing materials.

teflon tape Topa

Advantages and Disadvantages

Advantages:

Sealing Threads: Teflon tape effectively fills gaps in threaded connections, preventing leaks.

Ease of Use: It is easy to apply, requiring only a few wraps around the thread to create a seal.

Chemical Resistance: Teflon tape is resistant to most chemicals, making it versatile for various applications.

Temperature Tolerance: It can withstand a broad range of temperatures, from very low to extremely high, without losing its sealing properties.

Disadvantages:

Compatibility Issues: Teflon tape is not suitable for all types of threads and connections. For instance, it is not recommended for use with certain plastics that may react with PTFE.

Over-application Risks: Over-wrapping or using excessive Teflon tape can lead to debris entering the system, potentially causing blockages or contamination.

Not Ideal for High-Pressure Systems: In some high-pressure applications, Teflon tape might not provide a reliable seal, leading to potential leaks or system failures.

The Compatibility of Teflon Tape with Brake Line Fittings

Brake Line Fitting Design

Brake line fittings are meticulously designed to create secure, leak-proof seals without the need for additional sealing materials like Teflon tape. These fittings achieve a tight seal through precision engineering, utilizing the shape and pressure of the fitting itself. Common designs include:

Inverted Flare Fittings: These fittings create a seal by forming a flare at the end of the brake line that fits perfectly into the mating surface of the fitting. The flare compresses to form a tight seal when the fitting is tightened.

AN (Army-Navy) Fittings: These fittings use a 37-degree flare to create a precise seal. The flare angle ensures that the surfaces of the fitting and the brake line form a leak-proof connection when properly torqued.

Banjo Fittings: These fittings use a banjo bolt and a spherical union to create a seal. The design allows fluid to pass through the hollow bolt while maintaining a tight connection.

Brake systems operate under extremely high pressure and require precise engineering to ensure that no leaks occur. The fittings must withstand these pressures without fail, as any breach could result in a loss of braking power and, consequently, vehicle safety.

Potential Issues with Teflon Tape

While Teflon tape is effective in many applications, it is generally not suitable for use with brake line fittings due to several reasons:

Risk of Contamination: Teflon tape can shed small particles during application, which can contaminate the brake fluid. These particles can clog small passages within the brake system, leading to malfunctions.

Improper Sealing: Brake line fittings are designed to create seals through precise metal-to-metal contact. Adding Teflon tape can interfere with this contact, preventing the fitting from sealing correctly. This can result in leaks, as the tape may not hold up under the high pressure of the brake system.

Compatibility Issues: Teflon tape is not designed to handle the high pressures and dynamic forces present in brake systems. Over time, the tape can degrade, leading to a loss of seal integrity.

Examples of Problems:

Leaks: The most immediate issue with using Teflon tape on brake line fittings is the potential for leaks. Even a small leak can lead to a significant loss of brake fluid, reducing braking efficiency or causing total brake failure.

Brake Failure: Contamination from Teflon tape particles can lead to blockages in the brake lines or within the brake calipers and cylinders. This can prevent the proper functioning of the braking system, leading to a dangerous situation where the brakes may fail to engage properly.

Maintenance Issues: Over time, Teflon tape can deteriorate under the high pressures and temperatures within the brake system. This deterioration can lead to the need for frequent maintenance and replacement of brake lines and fittings.

Alternative Solutions for Sealing Brake Line Fittings

Thread Sealants:

When it comes to sealing brake line fittings, suitable alternatives to Teflon tape are specifically designed to withstand the high pressures and conditions of hydraulic systems. One of the most effective alternatives is anaerobic thread sealants.

Anaerobic Thread Sealants: These sealants are designed to cure in the absence of air and in the presence of metal ions, making them ideal for metal-to-metal connections like brake line fittings. They provide a strong, durable seal that can handle the high pressures and temperatures of hydraulic systems without the risk of contamination or improper sealing.

Properties: These sealants remain in a liquid state when exposed to air, but once confined within the threads of the fitting, they harden to form a solid, leak-proof seal.

Advantages: Anaerobic sealants are resistant to most chemicals and fluids found in hydraulic systems, including brake fluid. They also do not degrade over time and maintain their sealing properties under dynamic conditions.

Proper Installation Techniques

Ensuring a secure and leak-free brake line fitting installation involves meticulous attention to detail and adherence to proper techniques. By following a structured approach, you can maintain the integrity and safety of your hydraulic brake system. Here’s a comprehensive step-by-step guide for installing brake line fittings without using Teflon tape:

Preparation

Clean the Threads:

Thorough Cleaning: Begin by ensuring that both the male and female threads of the brake line fittings are meticulously cleaned. Any debris, oil, or remnants of old sealant can compromise the seal. Use a wire brush, brake cleaner, or an appropriate cleaning tool to remove all contaminants. A clean surface is essential for the thread sealant to bond effectively.

Inspect the Fittings:

Detailed Inspection: Carefully inspect the fittings for any signs of damage, wear, or deformation. Even minor imperfections can lead to leaks or a failed connection. Replace any fittings that show signs of damage to ensure a secure and reliable seal. This step is crucial for maintaining the overall safety and functionality of the brake system.

Teflon Tape on Brake Line Fittings

Application of Thread Sealant

Choose the Right Sealant:

Selection Criteria: Select an anaerobic thread sealant specifically designed for hydraulic systems. Anaerobic sealants are ideal as they cure in the absence of air and in the presence of metal, forming a strong, leak-proof bond. Ensure the sealant is compatible with brake fluid and can withstand the high pressures of the brake system.

Apply the Sealant:

Proper Application: Apply a small, even amount of the anaerobic sealant to the male threads of the fitting. Spread it evenly around the threads, taking care to avoid excessive application. Excess sealant can cause contamination inside the brake line, which can lead to blockages or malfunction. Ensure that the sealant does not enter the brake line, as contamination can compromise the system’s effectiveness.

Assembly

Align the Fittings:

Accurate Alignment: Carefully align the male and female threads of the fittings to ensure they thread together smoothly. Proper alignment is critical to prevent cross-threading, which can damage the threads and compromise the seal. Misalignment can lead to a weak connection that may fail under pressure.

Hand Tighten:

Initial Tightening: Begin threading the fittings together by hand. This step helps ensure proper alignment and prevents cross-threading. Hand tightening allows you to feel if the threads are engaging correctly and to adjust as needed before applying full torque.

Torque Specifications

Use a Torque Wrench:

Precision Tightening: Once the fittings are hand-tight, use a torque wrench to tighten them to the manufacturer’s recommended torque specifications. Over-tightening can strip the threads or crack the fitting, while under-tightening can lead to leaks. A torque wrench ensures that the fittings are tightened to the precise torque required for a secure seal.

Check Specifications:

Refer to Guidelines: Always refer to the vehicle’s service manual or the fitting manufacturer’s guidelines for the correct torque values. These specifications are designed to ensure a safe and effective seal under operating conditions.

Final Inspection

Check for Leaks:

Visual Inspection: After tightening the fittings, inspect the connections for any signs of leaks. Wipe the area clean and look for any fluid seepage. Leaks can indicate improper installation or damage to the fittings, requiring immediate attention.

Pressure Test:

Confirm Seal Integrity: If possible, perform a pressure test on the brake system to ensure that the fittings are properly sealed and there are no leaks. A pressure test can reveal hidden issues that may not be visible during a visual inspection.

Regular Maintenance

Periodic Checks:

Routine Inspections: Regularly inspect the brake line fittings as part of routine vehicle maintenance. Look for any signs of wear, corrosion, or leaks, and address any issues promptly. Regular maintenance helps to identify and resolve potential problems before they lead to brake system failure.

By following these proper installation techniques and using suitable thread sealants, you can ensure the reliability and safety of brake line fittings. This meticulous approach helps maintain the integrity of the hydraulic brake system, ensuring optimal performance without the need for Teflon tape. Regular maintenance and adherence to manufacturer guidelines further enhance the longevity and effectiveness of the brake system, providing peace of mind and safety for vehicle operators.

Conclusion

To ensure the safety and reliability of your brake system, always use anaerobic thread sealants specifically designed for hydraulic applications. Follow proper installation techniques, including thorough cleaning of threads, careful alignment, and adherence to torque specifications. Regularly inspect your brake line fittings as part of routine maintenance and address any issues promptly.

FAQ

t is generally not recommended to use Teflon tape on brake line fittings due to the high-pressure requirements and the potential for contamination. Anaerobic thread sealants are a better alternative.

The best sealant for brake line fittings is an anaerobic thread sealant specifically designed for hydraulic systems. These sealants cure in the absence of air and form a strong, durable seal.

Apply a small amount of anaerobic thread sealant evenly around the male threads of the fitting. Ensure that the sealant does not enter the brake line itself to avoid contamination.

Always refer to the vehicle’s service manual or the fitting manufacturer’s guidelines for the correct torque specifications. Using a torque wrench ensures the fittings are tightened to the precise torque required for a secure seal.

After tightening the fittings, inspect the connections for any signs of leaks by wiping the area clean and looking for fluid seepage. If possible, perform a pressure test on the brake system to ensure that the fittings are properly sealed.

Regular maintenance helps to identify and resolve potential problems before they lead to brake system failure. Periodically checking for signs of wear, corrosion, or leaks ensures the longevity and effectiveness of your brake system.

Brake Line Fitting Types A Comprehensive Guide

Brake Line Fitting Types: A Comprehensive Guide

Brake Line Fitting Types: A Comprehensive Guide

Table of Contents

Introduction

Understanding brake line fitting types is crucial for vehicle safety and performance. These small but vital components ensure that brake fluid flows efficiently and effectively throughout the braking system, allowing for precise and reliable braking action. Brake line fittings connect various parts of the brake system, ensuring a secure and leak-free environment that is essential for maintaining optimal brake performance. This comprehensive guide will delve into the different types of brake line fittings, their applications, and how to choose the right one for your vehicle.

Basics of Brake Line Fittings

Definition and Function

Brake line fittings are essential components in a vehicle’s braking system that connect various parts of the brake lines, ensuring a secure and leak-free conduit for brake fluid. Their primary function is to facilitate the seamless transfer of brake fluid from the master cylinder to the brake calipers or wheel cylinders. This ensures that when the brake pedal is pressed, the hydraulic pressure generated is efficiently transmitted to the brakes, allowing for effective stopping power. Brake line fittings come in various shapes and sizes to accommodate different brake line types and configurations, playing a crucial role in maintaining the integrity and reliability of the braking system.

Materials Used

Brake line fittings are manufactured from a variety of materials, each chosen for its specific properties that contribute to the durability and performance of the braking system:

Steel: Steel fittings are highly durable and resistant to wear and tear, making them a popular choice for many vehicles. They are capable of withstanding high pressures and are relatively inexpensive, which makes them a standard material in many brake systems.

Brass: Brass fittings offer excellent resistance to corrosion and are easy to work with due to their malleability. They provide a good seal and are often used in areas where exposure to moisture and road salts is a concern. However, they may not be as strong as steel fittings and are typically used in lower-pressure applications.

Stainless Steel: Stainless steel fittings combine the strength of steel with superior corrosion resistance. They are particularly suitable for high-performance and off-road vehicles where brake lines are exposed to harsh conditions. Although they are more expensive, their durability and longevity often justify the cost in demanding applications.

Types of Brake Lines

Brake lines are the conduits through which brake fluid travels from the master cylinder to the brake calipers or wheel cylinders. Different types of brake lines are used based on the specific requirements of the vehicle and its braking system:

Steel Brake Lines: These are the most common type of brake lines used in vehicles. Steel brake lines are strong and capable of withstanding high pressure, making them ideal for most standard applications. However, they can be prone to rust and corrosion if not properly maintained or if exposed to harsh environmental conditions.

Rubber Brake Lines: Rubber brake lines are flexible and easy to install, making them a common choice for connecting the brake caliper to the hard brake lines on the vehicle’s chassis. They provide a good balance of flexibility and durability but can degrade over time due to exposure to brake fluid and environmental factors. Regular inspection and replacement are necessary to maintain optimal performance.

Braided Stainless Steel Brake Lines: These brake lines consist of a Teflon or rubber inner tube wrapped in a braided stainless steel mesh. The stainless steel braid provides added strength and protection, reducing the risk of expansion under pressure and improving brake pedal feel. They are particularly favored in high-performance and racing applications where precise braking is critical. While they offer superior performance, they also come at a higher cost compared to standard rubber brake lines.

Common Types of Brake Line Fittings

Inverted Flare Fittings

Inverted flare fittings, also known as double flare fittings, are one of the most common types of brake line fittings used in automotive applications. They feature a 45-degree flare at the end of the brake line, which is folded back onto itself to create a double-layered flare. This design provides a secure and leak-proof connection, capable of withstanding high pressures. Inverted flare fittings are widely used in both domestic and imported vehicles, especially in systems where reliability and durability are paramount. They are commonly found in brake, fuel, and transmission systems.

Bubble Flare Fittings

Bubble flare fittings, also known as ISO or DIN flare fittings, are commonly used in European and some Japanese vehicles. These fittings have a single flare that creates a bubble shape at the end of the brake line. The bubble flare provides a reliable seal when connected to the corresponding female fitting. While they are less common in North American vehicles, bubble flare fittings are essential for ensuring compatibility and proper function in vehicles designed with this standard. They are typically used in hydraulic brake and clutch systems.

AN (Army-Navy) Fittings

AN fittings, which stand for Army-Navy fittings, are high-performance fittings originally developed for military and aerospace applications. These fittings have a 37-degree flare and are known for their robustness and precision. AN fittings are often used in high-performance, racing, and custom automotive applications due to their ability to provide a secure, high-pressure connection. They are available in various sizes and materials, including aluminum and stainless steel, making them versatile for different uses. AN fittings are not typically found in standard automotive brake systems but are favored in performance and custom builds.

Banjo Fittings

Banjo fittings are distinctive in their design, featuring a hollow bolt and spherical union, which allows for fluid transfer through the bolt and around the spherical fitting. This design enables a 360-degree rotation, providing flexibility in routing brake lines and making them ideal for tight or awkward spaces. Banjo fittings are commonly used in hydraulic brake systems, particularly in motorcycles and bicycles, as well as in automotive applications where space constraints exist. They provide a reliable and compact solution for connecting brake lines to calipers, master cylinders, and other components.

Banjo Bolt Usage

Quick-Connect Fittings

Quick-connect fittings are designed for ease of installation and removal without the need for specialized tools. These fittings typically feature a push-to-connect mechanism that locks the fitting in place, ensuring a secure and leak-free connection. Quick-connect fittings are commonly used in modern automotive applications, including brake and fuel systems, where serviceability and efficiency are essential. They are particularly useful in assembly lines and repair environments, where reducing installation time is a priority. These fittings are often made from durable plastics and metals, providing a reliable connection while simplifying maintenance.

Push Connect Fittings

Push connect fittings, similar to quick-connect fittings, are designed for fast and easy installation. These fittings allow the brake line to be pushed into the fitting, where an internal mechanism locks the line in place. This design eliminates the need for flaring tools and reduces the risk of leaks due to improper installation. Push connect fittings are commonly used in pneumatic and hydraulic systems, including brake systems, where they provide a secure connection with minimal effort. They are often used in conjunction with flexible brake lines and are favored in applications where quick assembly and disassembly are required.

Choosing the Right Brake Line Fitting

Vehicle Type and Application

Choosing the right brake line fitting begins with understanding the specific requirements of your vehicle and its intended application. Different vehicles have unique braking system designs and requirements, which influence the type of fittings that are most suitable:

Passenger Vehicles: For standard passenger cars, OEM (Original Equipment Manufacturer) fittings are usually the best choice as they are designed to meet the specific requirements of the vehicle. Inverted flare fittings are commonly used in these vehicles due to their reliability and compatibility with most brake systems.

Commercial Vehicles: Trucks and buses often require more robust fittings due to the higher pressures and heavier loads they handle. Stainless steel fittings or heavy-duty brass fittings are often recommended to ensure durability and longevity under demanding conditions.

Performance and Racing Vehicles: High-performance vehicles, including sports cars and race cars, often benefit from AN fittings. These fittings provide a secure, high-pressure connection that can withstand the increased demands of performance driving. Additionally, braided stainless steel brake lines paired with AN fittings can improve brake response and pedal feel.

Off-Road and Utility Vehicles: Off-road vehicles and utility vehicles, such as ATVs and UTVs, typically face harsh environments and require fittings that can withstand exposure to dirt, moisture, and extreme conditions. Banjo fittings and stainless steel fittings are ideal for these applications due to their strength and corrosion resistance.

Performance Needs

When upgrading a vehicle’s braking system for enhanced performance, selecting the right brake line fittings is crucial. Performance upgrades often involve higher pressures and more demanding conditions, making the choice of fittings particularly important:

High-Pressure Tolerance: AN fittings are a popular choice for performance applications due to their ability to handle higher pressures. These fittings are commonly used in racing and high-performance vehicles to ensure that the braking system remains reliable under extreme conditions.

Improved Brake Response: Upgrading to braided stainless steel brake lines can significantly improve brake response and pedal feel. These lines, when paired with high-quality fittings like AN or inverted flare fittings, reduce the expansion of the brake line under pressure, providing a more direct and responsive braking experience.

Custom and High-Performance Builds: Custom vehicles often require specialized fittings to accommodate unique designs and configurations. In these cases, consulting with a professional or referring to performance parts catalogs can help identify the best fittings for your specific build.

Compatibility and Standards

Ensuring compatibility and adherence to industry standards is essential when selecting brake line fittings. Using the wrong type of fitting can lead to leaks, brake failure, and potential safety hazards:

OEM Specifications: Always check the vehicle manufacturer’s specifications for brake line fittings. Using fittings that match the OEM specifications ensures compatibility and maintains the integrity of the braking system.

Industry Standards: Familiarize yourself with industry standards such as SAE and DOT regulations. For example, SAE J1401 is a standard that specifies performance requirements for hydraulic brake hose assemblies, including the fittings. Compliance with these standards ensures that the fittings are safe and reliable for use in automotive applications.

Material Compatibility: Ensure that the fittings you choose are compatible with the brake line material. For instance, stainless steel fittings are often used with braided stainless steel brake lines, while brass fittings may be more suitable for rubber brake lines. Using compatible materials helps prevent corrosion and ensures a secure connection.

Size and Thread Type: Brake line fittings come in various sizes and thread types. It is crucial to match the fitting size and thread type to the brake lines and components being used. Mismatched sizes or thread types can result in leaks and compromised braking performance.

Troubleshooting Brake Line Fitting Issues

Identifying Common Problems

Effective troubleshooting begins with identifying the common problems associated with brake line fittings. Here are some of the most frequent issues you might encounter:

Leaks: Leaks in brake line fittings can be caused by several factors, including improper installation, damaged flares, or worn-out seals. Leaks often result in a spongy brake pedal feel and reduced braking efficiency. They can be visually identified by wet spots or brake fluid dripping from the fittings.

Corrosion: Corrosion is a common issue, especially in areas with high humidity or where road salts are used during winter. Corroded fittings can weaken over time, leading to leaks and potential failure. Corrosion is typically identified by the presence of rust or a whitish powder on the surface of the fittings.

Fitting Failures: Fitting failures can occur due to manufacturing defects, excessive pressure, or physical damage. Common signs of fitting failure include cracks, deformities, and complete disconnection of the brake line from the fitting. This issue often results in immediate and significant brake fluid loss.

Brake Line Fittings install

Solutions and Repairs

Addressing issues with brake line fittings requires a systematic approach to ensure the problems are resolved effectively and safely. Here are some steps to tackle common issues:

Leak Repairs:

Inspection: Begin by thoroughly inspecting the brake line fittings and the surrounding areas to pinpoint the source of the leak. Check for loose connections, damaged flares, and worn-out seals.

Tightening: If the leak is due to a loose connection, carefully tighten the fitting using the appropriate tools. Avoid over-tightening, as this can damage the fitting and flare.

Flare Repair: If the flare is damaged, it may need to be re-flared. Cut off the damaged section of the brake line, re-flare the end using a quality flaring tool, and reconnect the fitting.

Seal Replacement: For leaks caused by worn-out seals, replace the seals with new ones. Ensure that the new seals are compatible with the fitting type and brake fluid used.

Corrosion Mitigation:

Cleaning: Light surface corrosion can be cleaned using a wire brush or a mild abrasive pad. Be gentle to avoid damaging the fitting.

Replacement: For severe corrosion, especially if it affects the integrity of the fitting, replacement is the best option. Use corrosion-resistant fittings, such as those made from stainless steel or brass, to prevent future issues.

Protective Coating: Apply a protective coating or use corrosion-resistant brake fluid to minimize the risk of future corrosion. Regularly inspect and maintain the brake lines and fittings to catch any early signs of corrosion.

Fitting Failure Solutions:

Immediate Action: If a fitting failure is identified, do not attempt to drive the vehicle. Brake fluid loss can lead to brake failure, posing a serious safety risk.

Replacement: Replace the failed fitting with a new, high-quality fitting that meets the manufacturer’s specifications. Ensure the replacement fitting is properly installed and secured.

System Bleeding: After replacing a fitting, bleed the brake system to remove any air bubbles that may have entered during the repair process. Proper bleeding is crucial to restore full braking power and responsiveness.

Preventive Measures

In addition to addressing existing issues, implementing preventive measures can help avoid future problems with brake line fittings:

Regular Inspections: Conduct regular inspections of the brake lines and fittings to catch any issues early. Look for signs of wear, corrosion, and leaks.

Quality Components: Use high-quality fittings and brake lines that meet or exceed OEM specifications. Investing in quality components can prevent many common issues.

Proper Installation: Ensure that all fittings are properly installed according to manufacturer guidelines. Use the correct tools and techniques to avoid damage during installation.

Environmental Protection: Protect brake lines and fittings from harsh environmental conditions. If driving in areas where road salts are used, wash the undercarriage of the vehicle regularly to remove salt residues.

Conclusion

In summary, understanding the various types of brake line fittings, their specific uses, and how to choose the right one for your vehicle is crucial for maintaining a safe and effective braking system. Take action now to inspect your vehicle’s brake lines and fittings, replace any worn or damaged components, and stay proactive with regular maintenance. Ensuring your brake system is in top condition not only improves vehicle performance but also ensures your safety and the safety of others on the road.

FAQ

Brake line fittings are components that connect various parts of the brake system, ensuring a secure and leak-free conduit for brake fluid.

Different types of brake line fittings, such as inverted flare, bubble flare, and AN fittings, are designed to meet specific performance requirements and compatibility needs for various vehicles and applications.

The right brake line fitting depends on your vehicle type, performance needs, and compatibility with existing systems. Refer to your vehicle’s manufacturer specifications or consult with a professional mechanic.

Common signs include leaks (visible brake fluid), corrosion (rust or whitish powder on fittings), and fitting failures (cracks or disconnections).

Yes, if you have the necessary tools and knowledge. However, for safety reasons, it’s often best to have a professional handle brake line fitting replacements and repairs.

Regular inspections are recommended at least once a year or during routine maintenance checks to ensure there are no leaks, corrosion, or other issues.

Brake Line Fitting Repair A Step-by-Step Guide

Brake Line Fitting Repair: A Step-by-Step Guide

Brake Line Fitting Repair: A Step-by-Step Guide

Table of Contents

Introduction

The brake system is one of the most critical safety components in any vehicle. Ensuring that every part of this system is functioning correctly is paramount to the safety of the driver and passengers. Among these components, brake line fittings play a crucial role in maintaining the integrity of the brake system. They ensure that the hydraulic pressure needed for braking is consistently delivered, allowing the vehicle to stop effectively. Over time, however, these fittings can wear out or become damaged due to various factors such as corrosion, physical impact, or regular wear and tear. This is why understanding how to repair brake line fittings is essential for any vehicle owner or mechanic.

Understanding Brake Line Fittings

Brake line fittings are essential components in a vehicle’s braking system, serving as connectors between brake lines and various parts of the brake system, such as calipers, wheel cylinders, and master cylinders. These fittings ensure a secure and leak-proof connection, enabling the hydraulic pressure generated by the brake pedal to be transmitted efficiently to the brake pads or shoes. This pressure is what ultimately allows the vehicle to slow down or stop. Given their critical role, brake line fittings must be in good condition and properly maintained.

Different Types of Brake Line Fittings

There are several types of brake line fittings, each designed for specific applications and connection types. The most common types include:

Inverted Flare Fittings: These are widely used in many vehicles and feature a flared end that fits into a corresponding female fitting. The inverted flare provides a strong and secure connection, minimizing the risk of leaks under high pressure.

Bubble Flare Fittings: Similar to inverted flare fittings, bubble flare fittings have a slightly different flare shape. They are commonly used in European and Japanese vehicles. The bubble flare fitting creates a reliable seal, ensuring efficient hydraulic pressure transfer.

Banjo Fittings: These fittings are used in applications where space is limited. Banjo fittings consist of a hollow bolt and spherical union, allowing brake fluid to pass through the fitting even when the connection is at a right angle. They are often used in motorcycle brake systems and some automotive applications.

Brake Line Fitting broken

Signs That Brake Line Fittings Need Repair or Replacement

Regular inspection of brake line fittings is crucial to maintaining a safe and reliable brake system. Here are some signs that indicate brake line fittings may need repair or replacement:

Leaks: Any sign of brake fluid leaking around the fittings is a clear indication that the fitting may be damaged or not properly secured. Leaks can lead to a loss of hydraulic pressure, reducing braking efficiency.

Corrosion: Visible rust or corrosion on the fittings can weaken the connection and lead to potential leaks or failure. Corroded fittings should be replaced to ensure the integrity of the brake system.

Cracks or Damage: Physical damage, such as cracks or dents in the fittings, can compromise their ability to maintain a secure seal. Damaged fittings should be replaced immediately.

Soft Brake Pedal: A soft or spongy brake pedal can indicate air in the brake lines or a loss of hydraulic pressure, possibly due to a faulty fitting. Inspecting and replacing faulty fittings can help restore the proper brake pedal feel.

Braking Performance: Any noticeable decline in braking performance, such as increased stopping distances or reduced braking power, warrants an inspection of the brake line fittings and other components of the brake system.

Preparing for the Repair

Before diving into the repair of brake line fittings, it is essential to take proper safety precautions and prepare the vehicle to ensure a smooth and secure process. Here’s how to get started:

Safety Precautions Before Starting the Repair

Wear Appropriate Safety Gear: Safety should always be a top priority. Wear safety glasses to protect your eyes from debris and brake fluid, which can be harmful if it comes into contact with your eyes. Gloves are also recommended to protect your hands from sharp edges and corrosive brake fluid.

Work in a Well-Ventilated Area: Brake fluid is toxic and has harmful fumes. Ensure you are working in a well-ventilated area or use a fan to circulate air and reduce exposure to fumes.

Keep a Fire Extinguisher Handy: Although it is rare, working with brake fluid carries a slight risk of fire. Having a fire extinguisher nearby can provide an added layer of safety.

Use Jack Stands and Chocks: Never rely solely on a jack to support the vehicle. Use jack stands to secure the vehicle and wheel chocks to prevent it from rolling.

Steps to Lift and Secure the Vehicle

Locate the Jack Points: Consult your vehicle’s manual to find the proper jack points. These are reinforced areas of the vehicle designed to support its weight.

Use a Hydraulic Jack: Place the hydraulic jack under the designated jack point and lift the vehicle slowly until the wheels are off the ground.

Place Jack Stands: Once the vehicle is lifted, place jack stands under the frame or other sturdy areas recommended by the vehicle manufacturer. Lower the vehicle onto the jack stands carefully, ensuring it is securely supported.

Secure the Wheels: Use wheel chocks to block the wheels that remain on the ground to prevent any movement.

How to Locate the Brake Line Fittings Needing Repair

Identify the Problem Area: If you have already identified a leak or specific issue, locate that area first. The brake line fittings in question are often near the leak.

Inspect Brake Lines: Follow the brake lines from the master cylinder to the calipers or wheel cylinders. Check for any signs of corrosion, damage, or leakage along the lines and fittings.

Check Fittings at Key Points: Inspect the fittings at key connection points, such as where the brake lines connect to the master cylinder, along the brake lines at junction points, and at the calipers or wheel cylinders.

Look for Wear and Tear: Pay close attention to areas where brake lines are subjected to movement or are close to suspension components. These areas are more prone to wear and damage.

Removing the Damaged Brake Line Fittings

Properly removing damaged brake line fittings is crucial for a successful repair. This process requires patience, the right tools, and careful attention to detail to avoid further damage to the brake system. Here’s a comprehensive guide to help you through this critical step:

Prepare the Work Area: Ensure the vehicle is securely lifted and supported on jack stands. Gather all necessary tools, including flare nut wrenches, a tubing cutter, and a penetrating oil.

Locate the Damaged Fittings: Identify the specific brake line fittings that need to be removed. These are usually found at connection points along the brake lines, such as where the lines connect to the master cylinder, brake calipers, or wheel cylinders.

Apply Penetrating Oil: Spray penetrating oil onto the fitting and the surrounding area. Allow it to sit for a few minutes to loosen any rust or debris that may be causing the fitting to stick.

Loosen the Fitting: Use a flare nut wrench to grip the fitting securely. A flare nut wrench is specifically designed to prevent rounding off the fitting. Turn the wrench counterclockwise to loosen the fitting. If the fitting is extremely tight or rusted, apply more penetrating oil and gently tap the fitting with a hammer to help break it free.

Hold the Brake Line Steady: While loosening the fitting, use another wrench to hold the brake line steady. This prevents the line from twisting or bending, which could cause additional damage.

Remove the Fitting: Once the fitting is loose, carefully unscrew it by hand. Be prepared for some brake fluid to leak out; have a container ready to catch any fluid and prevent it from spilling onto the floor.

Inspect the Brake Line: After removing the fitting, inspect the brake line for any signs of damage or corrosion. If the line itself is damaged, it may also need to be replaced.

Brake Line Fittings install

Tips for Loosening Stuck Fittings

Heat Application: If the fitting is severely stuck, use a heat gun to gently warm the fitting. This can help expand the metal and make it easier to loosen. Be cautious not to overheat and damage surrounding components.

Impact Wrench: In some cases, an impact wrench can be used to apply short, powerful bursts of torque to break free stubborn fittings. Use this tool carefully to avoid damaging the fitting or brake line.

Vise Grips: If the fitting is already rounded off or heavily corroded, vise grips may provide better grip than a wrench. However, this should be a last resort, as it can further damage the fitting.

How to Properly Dispose of Old Brake Line Fittings

Collect the Fittings: Place the removed fittings and any cut sections of brake line into a container. This keeps the work area clean and helps prevent brake fluid spills.

Dispose of Brake Fluid: Brake fluid is hazardous and should not be poured down the drain or onto the ground. Collect any drained fluid in a sealed container and take it to a local automotive shop or recycling center that accepts hazardous waste.

Recycle Metal Fittings: Most metal brake line fittings can be recycled. Separate the metal parts from any non-metal components and take them to a scrap metal recycling facility.

Cutting and Flaring New Brake Lines

Properly cutting and flaring new brake lines is essential for ensuring a secure and leak-proof connection in your vehicle’s brake system. This process requires precision and the right tools. Here’s a detailed guide to help you through these steps:

Instructions for Measuring and Cutting the Brake Line to the Correct Length

Measure the Old Brake Line: If you are replacing an existing brake line, measure the old line from end to end using a tape measure. This will give you the exact length needed for the new brake line.

Account for Fittings: When measuring, ensure you account for the length needed to accommodate the fittings. The fitting will add a small amount of length to the overall line, so it’s essential to include this in your measurement.

Mark the New Brake Line: Once you have the correct measurement, use a marker to mark the new brake line where it needs to be cut.

Use a Tubing Cutter: Secure the brake line in a tubing cutter, ensuring the cutting wheel is aligned with your mark. Tighten the cutter and rotate it around the line, gradually tightening the cutter with each turn until the line is cleanly cut. A tubing cutter ensures a straight, clean cut, which is crucial for creating a proper flare.

Deburr the Cut Edge: After cutting the brake line, use a deburring tool or a small file to remove any sharp edges or burrs from the cut end. This helps to ensure a smooth, even flare.

Step-by-Step Guide to Flaring the Brake Line Ends

Select the Correct Flare Tool: Ensure you are using a flaring tool that matches the type of flare required for your brake system, such as a double flare or bubble flare tool.

Prepare the Brake Line: Insert the brake line into the appropriate hole in the flaring tool’s clamp. The end of the line should extend slightly beyond the clamp, matching the depth required for the specific flare type.

Secure the Line: Tighten the clamp securely to hold the brake line in place. Ensure the line is straight and properly aligned within the tool.

Create the Initial Flare: For a double flare, place the flaring die (usually shaped like a small cone) over the brake line end. Position the flaring tool’s yoke over the die and screw the flaring cone down onto the brake line. Tighten until the line is compressed into the first stage of the flare.

Complete the Double Flare: Remove the die and tighten the flaring tool again to fold the initial flare back into itself, creating a double flare. This second stage reinforces the flare, making it stronger and more durable.

Inspect the Flare: Remove the brake line from the flaring tool and inspect the flare for evenness and smoothness. The flare should be symmetrical, with no cracks or uneven edges.

Installing New Brake Line Fittings

Installing new brake line fittings is a critical step in ensuring the reliability and safety of your vehicle’s brake system. Proper installation ensures a leak-proof connection, maintains hydraulic pressure, and ultimately contributes to effective braking performance. Here’s a detailed guide on how to install new brake line fittings, ensure proper alignment and tightness, and check for proper fitment.

Detailed Instructions for Installing New Fittings

Brake Line Fitting Guide

Prepare the Brake Line and Fittings:

Ensure the new brake line and fittings are clean and free of any debris.

Double-check that you have the correct type of fittings for your vehicle’s brake system (e.g., inverted flare, bubble flare, banjo fittings).

Slide the Nut Onto the Brake Line:

Before flaring the brake line, remember to slide the fitting nut onto the line. The threaded end should face the flared end of the brake line.

Position the Fitting:

Place the new fitting into the appropriate position on the brake component (e.g., master cylinder, brake caliper, wheel cylinder). Ensure the fitting is seated properly in its socket.

Insert the Flared Brake Line:

Carefully insert the flared end of the brake line into the fitting. Ensure the flare seats are properly against the fitting’s mating surface.

Thread the Nut Onto the Fitting:

Hand-tighten the nut onto the fitting to ensure it threads correctly. This helps prevent cross-threading, which can damage the fitting and the brake line.

Tighten the Fitting:

Using a flare nut wrench, tighten the nut securely. Flare nut wrenches are designed to grip the fitting firmly and prevent rounding off the edges.

Follow the manufacturer’s torque specifications to avoid over-tightening or under-tightening the fitting.

Bleeding the Brake System

Importance of Bleeding the Brake System After Repair

Bleeding the brake system is a crucial step after any brake line or fitting repair. This process removes air bubbles that can become trapped in the brake lines during the repair. Air in the brake lines can compress under pressure, leading to a spongy brake pedal and reduced braking efficiency. Properly bleeding the brakes ensures that the hydraulic pressure is consistently and effectively transmitted through the brake fluid, maintaining optimal braking performance and safety.

Step-by-Step Guide to Bleeding the Brakes

There are several methods to bleed the brakes, including gravity bleeding, manual bleeding, and using a vacuum pump. Here’s a step-by-step guide for each method:

Gravity Bleeding

Prepare the Vehicle:

Ensure the vehicle is on a level surface.

Check the brake fluid reservoir and top it up if necessary.

Open the Bleeder Valve:

Starting with the brake farthest from the master cylinder (usually the right rear wheel), locate the bleeder valve on the brake caliper or wheel cylinder.

Attach a clear plastic hose to the bleeder valve and place the other end in a container to catch the brake fluid.

Open the Valve and Wait:

Open the bleeder valve and allow gravity to pull the brake fluid through the system. This can take several minutes.

Keep an eye on the fluid level in the reservoir and ensure it doesn’t drop too low.

Close the Valve:

Once the fluid runs clear and free of air bubbles, close the bleeder valve securely.

Repeat the process for each wheel, moving closer to the master cylinder.

Gravity Bleeding

Prepare the Vehicle and Tools:

Have a helper sit in the driver’s seat to press the brake pedal.

Ensure the brake fluid reservoir is full.

Attach the Bleeder Hose:

Attach a clear hose to the bleeder valve and place the other end in a container.

Press and Hold the Brake Pedal:

Have the helper press and hold the brake pedal down.

Open the Bleeder Valve:

Open the bleeder valve to release fluid and air. The pedal will drop as fluid escapes.

Close the valve before the helper releases the pedal to prevent air from re-entering the system.

Repeat the Process:

Repeat the press, hold, open, close sequence until the fluid runs clear and bubble-free.

Move to the next wheel and repeat the process.

Using a Vacuum Pump

Prepare the Vacuum Pump:

Attach the vacuum pump to the bleeder valve using the appropriate adapter and a clear hose.

Create a Vacuum:

Pump the vacuum to create suction. This will draw fluid and air out of the system.

Open the Bleeder Valve:

Open the bleeder valve to allow the vacuum to pull the fluid through.

Monitor the Fluid:

Watch the fluid in the clear hose for air bubbles. Continue until the fluid is clear.

Close the Valve:

Close the bleeder valve while maintaining suction to prevent air from entering.

How to Check for Air in the Brake Lines

Pedal Feel:

After bleeding, the brake pedal should feel firm and responsive. A spongy pedal indicates that air remains in the system and further bleeding is required.

Brake Fluid Inspection:

Inspect the brake fluid in the reservoir. It should be clear and free of bubbles.

Test Drive:

Conduct a short, cautious test drive to ensure the brakes respond correctly and the pedal remains firm.

Conclusion

Proper brake line fitting repair is crucial for ensuring the safety and reliability of your vehicle’s braking system. This guide has provided a comprehensive step-by-step approach to identifying, repairing, and maintaining brake line fittings. By following these detailed instructions, you can perform safe and effective repairs, ensuring that your brakes function optimally and your vehicle remains secure on the road. By investing time and effort into learning and performing brake line fitting repairs, you are taking a significant step towards ensuring a safer driving experience.

FAQ

Damaged brake line fittings can lead to brake fluid leaks, reducing hydraulic pressure and compromising braking performance. Timely repair or replacement ensures your brakes remain effective and your vehicle stays safe.

Essential tools include flare nut wrenches, a tubing cutter, a flaring tool kit, and a brake bleeder kit. Safety gear like gloves and safety glasses are also recommended.

Signs include visible leaks, rust or corrosion on the fittings, cracks or physical damage, a spongy brake pedal, and decreased braking performance.

Common types include inverted flare fittings, bubble flare fittings, and banjo fittings. The type used depends on the vehicle make and model.

It’s advisable to inspect your brake line fittings during regular vehicle maintenance checks, especially if you notice any signs of brake issues or during seasonal changes when road conditions can affect brake components.

If you have the necessary tools and follow proper safety procedures, you can perform the repairs yourself.

Contact Topa

Save 30% on maintenance costs with our easy-install hydraulic fittings. Contact Now!