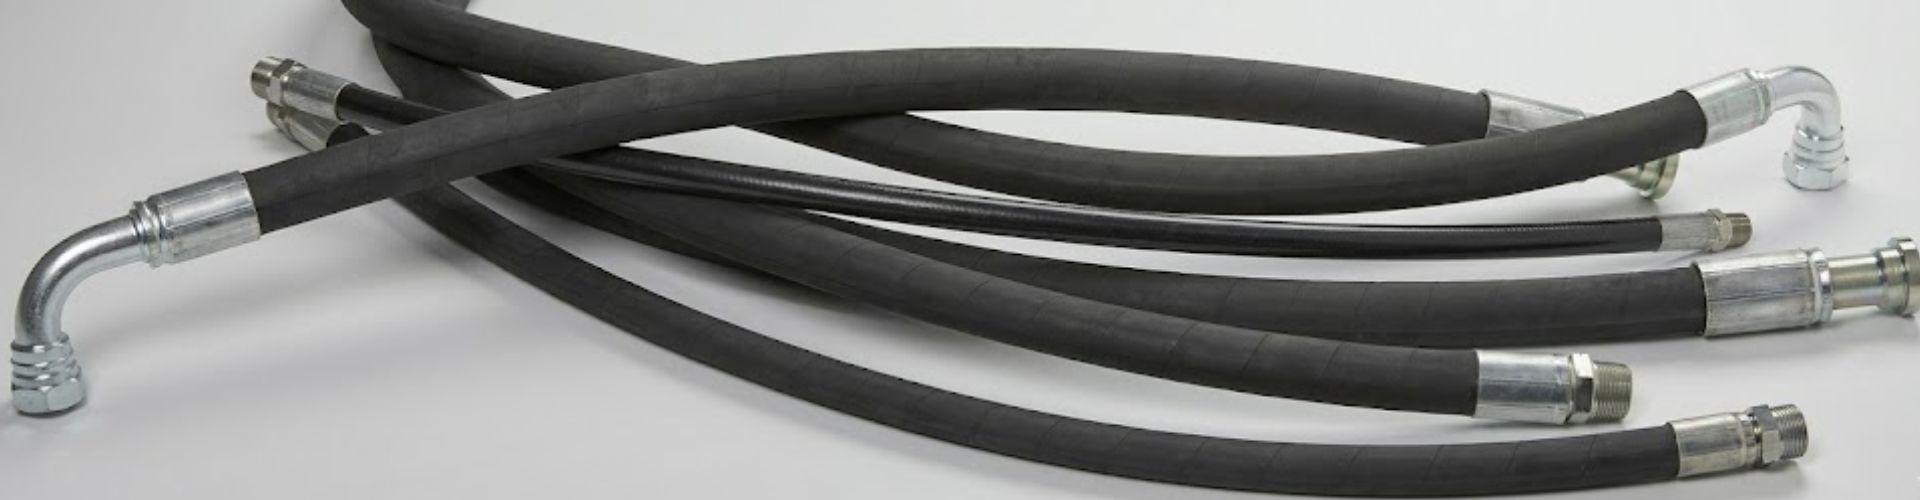
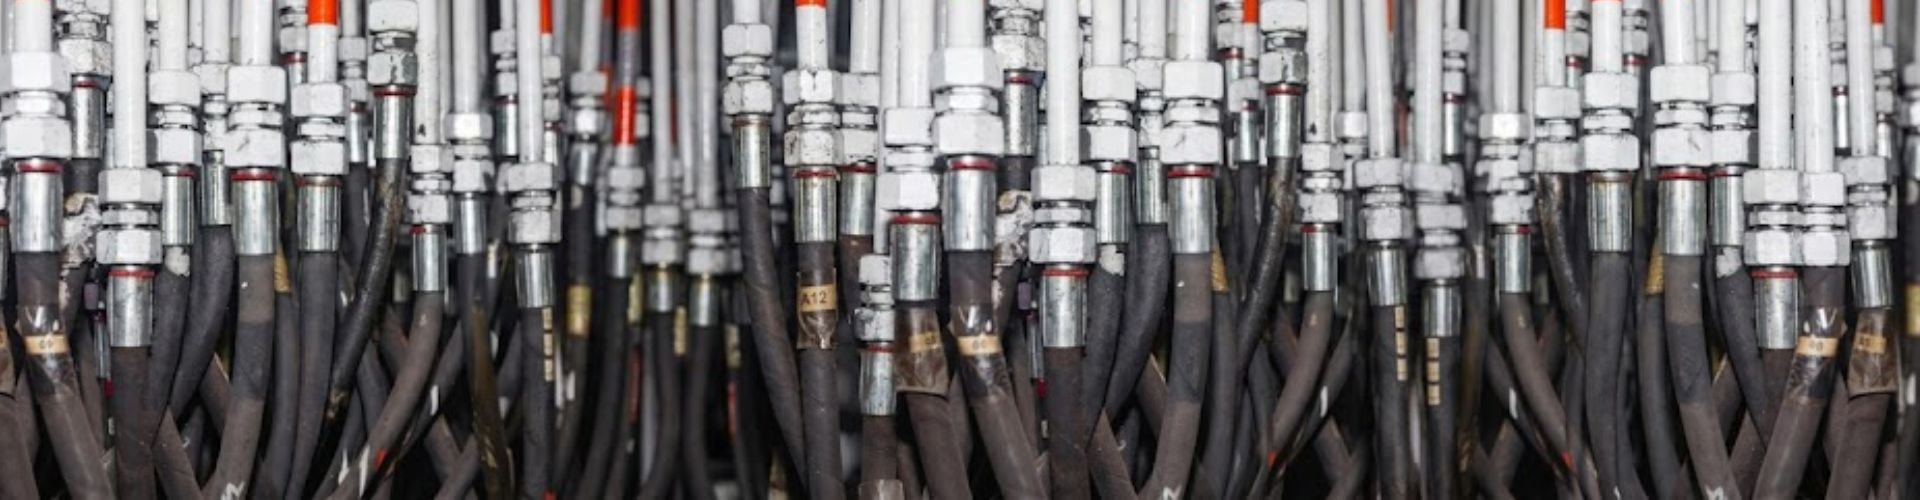
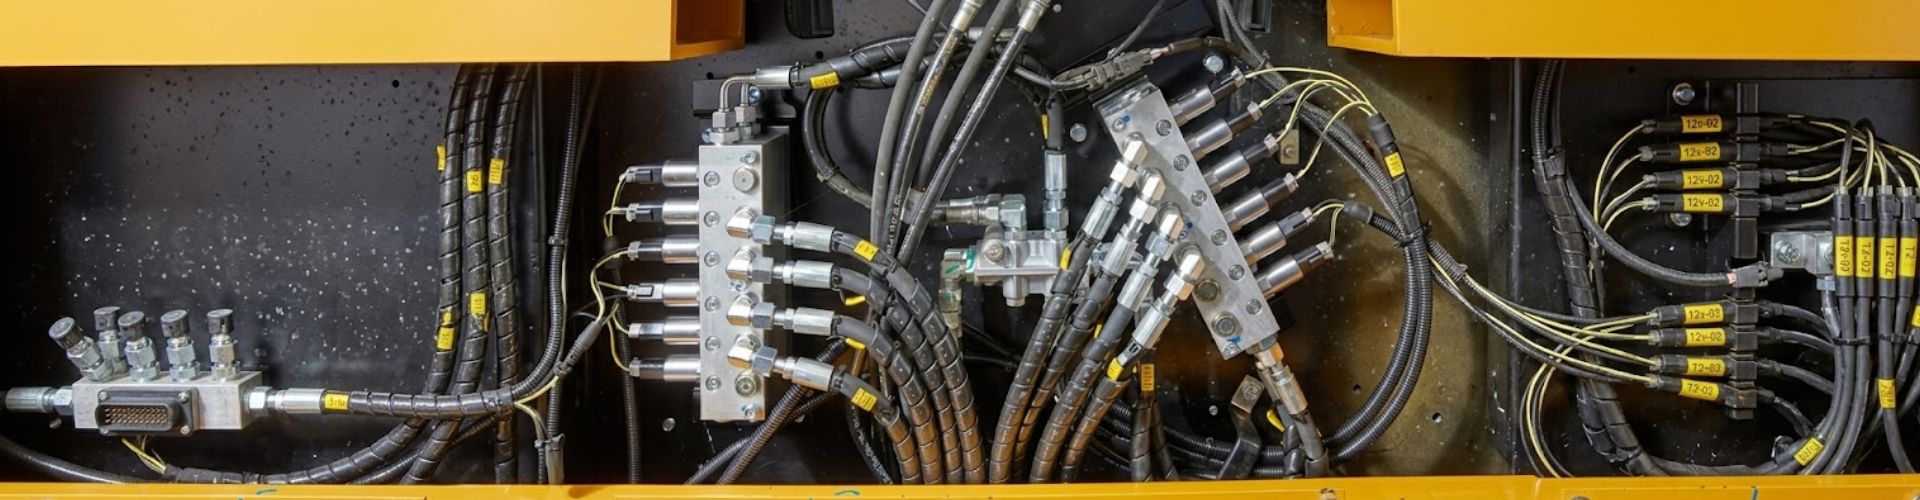
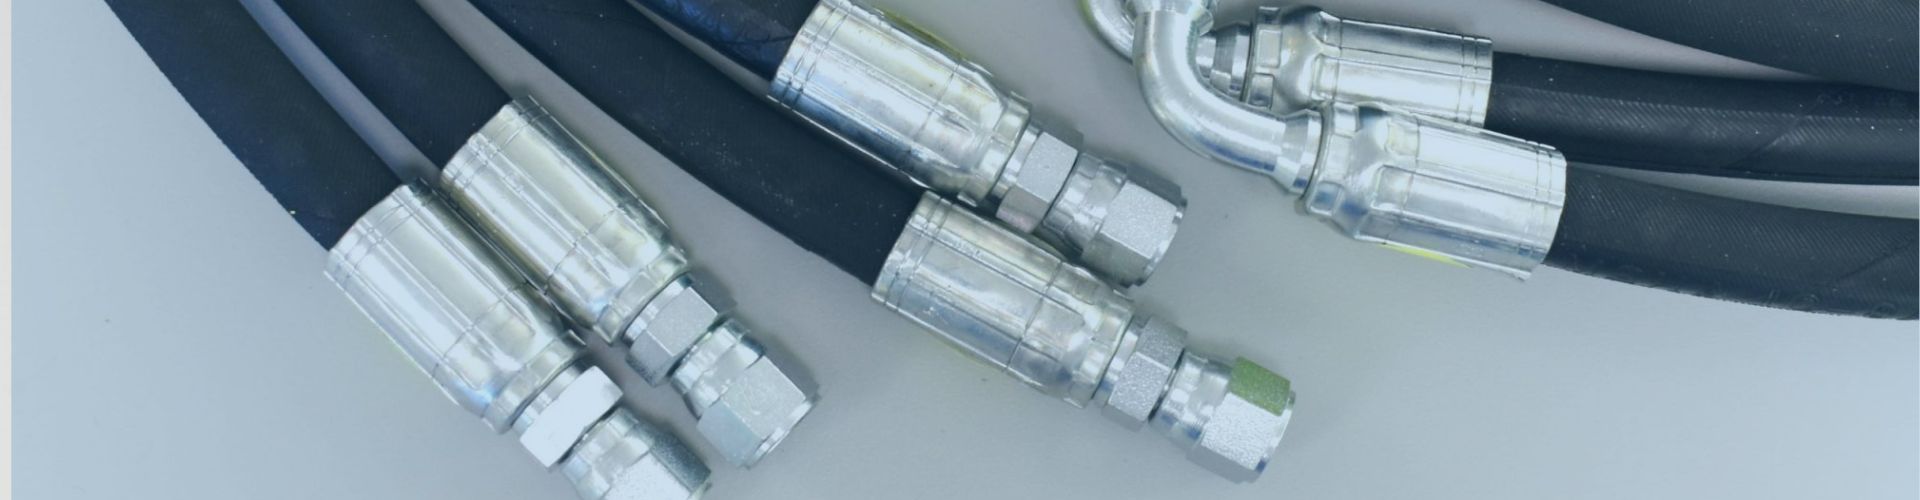
What Information Do Suppliers Need for Custom Hydraulic Hoses

What Information Do Suppliers Need for Custom Hydraulic Hoses?

Machinery downtime can halt your entire production line, leading to thousands of dollars in lost revenue and emergency repair costs. When a standard component fails, the frustration of searching for a replacement that doesn’t quite fit can agitate even the most experienced site manager. Our custom hydraulic hoses provide the precise solution you need, engineered to match your equipment’s exact specifications for long-term reliability.

What Are The Hose Dimensions And Length For Custom Hydraulic Hoses?

A technical diagram visualization of a hydraulic hose cross-section, clearly labeling the Inner Diameter (ID), Outer Diameter (OD), and total length with precise measurement lines. Photorealistic industrial style, clean white background.

Providing the correct dimensions is the first step in ordering your custom hydraulic hoses to ensure a perfect fit. You must follow the STAMPED acronym, focusing specifically on “Size” to avoid catastrophic system failures. Incorrect sizing often leads to significant pressure drops or excessive heat buildup that damages internal components.

How do you measure the inside diameter?

Think about it: even a minor deviation in the inside diameter (ID) can change the fluid velocity within your system. You should always use a high-precision caliper to measure the ID of your existing hose rather than guessing based on the outer cover. This measurement determines the flow capacity and prevents turbulence that wears down the hose liner prematurely.

Precise ID measurement is the most critical dimension for maintaining flow velocity and system efficiency.

Getting the dimensions right prevents installation delays and ensures your machine operates at its designed flow rate.

What Is The Maximum Working Pressure For Custom Hydraulic Hoses?

Determining the maximum operating force is vital when selecting custom hydraulic hoses for your heavy machinery. You need to consider both the steady-state working pressure and the sudden surges that occur during heavy lifting. Most industrial standards require a safety factor of 4:1 to protect operators and equipment from accidental bursts.

Why do pressure spikes matter?

Here is the kicker: surge pressures can be significantly higher than the nominal pressure shown on your machine’s gauge. If you don’t account for these spikes, the reinforcement layers in the hose will fatigue much faster than expected. We ensure every assembly can handle these moments of peak stress without compromising the hose structure.

Always specify the highest possible surge pressure to prevent catastrophic hose bursts during operation.

What Fluids Will The Hose Carry In Custom Hydraulic Hoses?

Photorealistic macro shot of different hydraulic fluids (mineral oil vs. synthetic) being poured, with a focus on the viscous texture and color clarity.

Chemical compatibility is a primary factor that determines the lifespan of your custom hydraulic hoses. Different fluids react differently with internal rubber compounds, potentially causing the hose to swell or become brittle. You can learn more about us and how we select high-grade Nitrile or EPDM materials to match your specific media.

Is the fluid petroleum or water-based?

But that’s not all. Using a hose designed for petroleum oil with a phosphate ester fluid will lead to total system contamination within days. The inner tube must be completely inert to the fluid passing through it to prevent erosion. Our team analyzes your fluid type to provide the most durable liner available for your application.

Chemical incompatibility can cause the inner tube to swell or erode, leading to total system contamination.

Matching the tube material to the fluid chemistry prevents internal leaks and protects your pumps from debris.

What Are The Temperature Requirements For Custom Hydraulic Hoses?

A hydraulic hose installed on heavy machinery in a snow-covered environment, showing frost on the outer cover to emphasize low-temp flexibility.

Extreme environments require specialized custom hydraulic hoses that can maintain flexibility and strength. You must evaluate both the internal fluid temperature and the external ambient conditions of your job site. Whether you are working in sub-zero mining conditions or near high-heat furnaces, the hose cover must withstand these thermal stresses.

How does heat affect hose life?

The truth is: operating even slightly above the maximum rated temperature can drastically shorten the life of your equipment. Excessive heat causes the rubber to lose its elasticity, leading to “heat cracking” when the hose is flexed. By specifying your thermal range, we can provide covers that stay pliable and protective regardless of the weather.

Operating just 10 degrees above the maximum temperature rating can cut the service life of your hose in half.

Thermal management is essential for preventing the premature hardening and cracking of the hose’s outer shell.

What End Fittings Are Needed For Custom Hydraulic Hoses?

An organized array of various steel hydraulic fittings (JIC, NPT, ORFS) lying on a workbench, reflecting bright workshop lights.

Finding the right connection is often the most challenging part of ordering custom hydraulic hoses. You need to identify the exact thread type and sealing surface to prevent leaks at the connection points. We have many success cases where our specialized fittings solved integration problems for complex international machinery.

Can you identify the thread type?

You might be wondering: how can I be sure about the thread size without a label? The only reliable way is to use a thread pitch gauge and a seat angle tool. Mistaking a JIC fitting for an SAE fitting is a common error that leads to damaged threads and messy leaks. We provide guidance on identifying everything from NPT to O-ring face seals.

Using a thread gauge and seat angle tool is the only way to ensure a leak-free connection between the hose and the machine.

What Is The Application’s Movement Type For Custom Hydraulic Hoses?

Understanding how your machine moves is critical for the longevity of custom hydraulic hoses. If your application involves constant bending, like an excavator arm, the hose must have a high flexibility rating. Static applications, where the hose remains stationary, allow for stiffer reinforcement layers that might be more cost-effective.

What is the minimum bend radius?

Look: exceeding the minimum bend radius is a leading cause of premature hose failure. When you force a hose into a tight curve, the wire reinforcement experiences uneven stress and begins to fray. We calculate the optimal length and flexibility to ensure your assembly can move freely throughout its entire range of motion.

Exceeding the minimum bend radius causes the wire reinforcement to fatigue and fail prematurely.

Are There Specific Abrasion Needs For Custom Hydraulic Hoses?

A heavy-duty hydraulic hose with a textured, high-abrasion resistant cover being dragged across a gravel surface.

Environmental hazards can wear down the outer cover of your custom hydraulic hoses long before the internal pressure does. If your hoses frequently rub against metal frames or gravel, you need a high-abrasion resistant cover. These hoses often work in tandem with a hydraulic cylinder, where movement and friction are constant parts of the job.

Do you need a protective sleeve?

It gets even better: you can add secondary protection like plastic wraps or fire sleeves to extend service life. High-density polyethylene (HDPE) guards are excellent for protecting against sharp edges and constant vibration. We offer various “ToughCover” options that provide up to 100 times more abrasion resistance than standard rubber covers.

High-density polyethylene (HDPE) wraps can extend hose life by 10x in environments with constant vibration or friction.

What Safety Standards Must Be Met For Custom Hydraulic Hoses?

Compliance with international regulations is mandatory for custom hydraulic hoses used in regulated industries. You must ensure your assemblies meet SAE, ISO, or MSHA standards depending on where and how they are used. These certifications guarantee that the hose has passed rigorous testing for impulse, burst, and flame resistance.

Why is SAE J517 important?

Simply put: this standard defines the performance levels for different hose constructions. Following these guidelines ensures that a hose from one manufacturer will perform consistently with a hose from another. We adhere to these strict manufacturing protocols to provide you with peace of mind and legal compliance on the job site.

Standards ensure that hoses from different manufacturers meet consistent performance and safety benchmarks.

Is There A Specific Delivery Timeline For Custom Hydraulic Hoses?

Timing is everything when your machinery is stuck and production has stopped. You should communicate your required lead times early so we can prioritize your order for custom hydraulic hoses. We offer various shipping options to help you balance the cost of freight with the urgency of your repair needs.

Do you offer emergency assembly?

Best of all: our factory-direct model allows for rapid turnaround on urgent orders. While custom projects typically take longer than standard ones, we can expedite the process for critical breakdowns. You should  contact us today  to discuss your specific deadline and get a realistic delivery estimate.

Early communication of deadlines allows suppliers to optimize production and shipping methods for your project.

Do You Have Technical Drawings For Custom Hydraulic Hoses?

A split screen showing a professional CAD drawing of a hose assembly on one side and the physical finished product on the other.

Providing a blueprint is the best way to ensure your custom hydraulic hoses are manufactured exactly to spec. Drawings eliminate the guesswork associated with fitting orientation and complex routing. If your machine uses high-performance custom hydraulic cylinders, a precise drawing ensures the hose assembly integrates perfectly with the cylinder ports.

What should a drawing include?

Here’s the bottom line: a good drawing should specify every detail from the hose type to the fitting angles. If you have elbow fittings on both ends, you must specify the orientation angle to ensure the hose doesn’t twist during installation. Our engineering team can review your CAD files to suggest optimizations for better performance.

A detailed drawing reduces the risk of error and speeds up the quoting process significantly.

Conclusion

At TOPA, we pride ourselves on being a factory-direct partner that understands the high stakes of industrial operations. By providing these ten critical pieces of information, you ensure that your custom components will perform reliably under the most demanding conditions. To get a precise quote and expert engineering review for your project, contact us today .

Frequently Asked Questions

Can I provide a sample hose instead of technical drawings?

Yes, sending a physical sample is an excellent way for us to match the dimensions and fittings exactly. Our technicians will reverse-engineer the sample to create an identical replacement for your machine.

What’s the best way to determine if my fluid is compatible with the hose material?

Directly consult a chemical compatibility chart or share your fluid’s technical data sheet with our engineers. We will cross-reference the chemical composition with our hose liner specifications to ensure a long-lasting match.

Can I use a high-pressure hose for a low-pressure application?

Yes, using a higher-rated hose is generally safe, although it may be less flexible and more expensive than necessary. However, never use a low-pressure hose in a high-pressure system, as this will lead to immediate failure.

Can I get a custom hose with different fitting types on each end?

Yes, we frequently build “adapter” hoses that transition between different thread standards, such as JIC to Metric. This is a common requirement for machines that use components from different global manufacturers.

How do I measure the orientation angle of two elbow fittings?

Directly look down the bore of the hose from one end and measure the clockwise angle from the near fitting to the far fitting. This “offset angle” is crucial for ensuring the hose installs without harmful twisting.

How to Tell a Excavator Hose Assembly is Near Failure Banner

How to Tell a Excavator Hose Assembly is Near Failure?

Excavator hydraulic hose failure triggers costly downtime, environmental liability, and critical safety hazards in heavy equipment. This guide details visual signs, performance metrics, and industry standards for inspection and replacement, empowering professionals to ensure site safety, compliance, and fleet efficiency.

Visual Indicators of Imminent Excavator Hose Failure

Visual inspection is the primary diagnostic tool in hydraulic maintenance, serving as the first line of defense against catastrophic failure. The external condition of a excavator hose assembly is rarely cosmetic; it is a direct reflection of the component’s structural integrity and its ability to withstand the extreme pressures of modern excavation equipment. Operators and fleet technicians must be trained not only to look but to interpret the physical degradation of hose materials.

Excavator hose assembly leak

Cracked or Abraded Outer Covers

The outer cover of a hydraulic hose is a sacrificial layer, typically made of synthetic rubber (neoprene or nitrile), designed to protect the critical reinforcement layers from environmental and mechanical hazards. However, it is susceptible to elastomeric degradation. This process is accelerated by exposure to UV radiation, ozone, and extreme temperature fluctuations, manifesting as a network of fine cracks known as “checking.”

While minor surface checking is common, it signals that the rubber is losing its plasticity. The danger escalates when these cracks deepen or when mechanical abrasion wears the cover down. If the steel wire reinforcement becomes visible—whether through a deep cut, abrasion, or cracking—the hose has lost its primary defense against moisture. Once water ingresses to the steel braid, oxidation (rust) begins immediately. Corroded wires lose their tensile strength rapidly, significantly reducing the hose’s burst pressure threshold. Under SAE J517 standards, any hose with exposed wire reinforcement is non-compliant and must be removed from service immediately to prevent a burst.

Bulges, Blisters, and Swelling

A bulge or blister on the surface of a hydraulic hose is a critical alarm signal that indicates the pressure-retaining integrity of the inner tube has failed. This phenomenon occurs when the inner liner develops micropores or pinholes, allowing high-pressure fluid to migrate through the tube and become trapped between the liner and the outer cover.

Because the outer cover is not designed to contain system pressure (which can exceed 5,000 PSI / 345 Bar in modern excavators), the trapped fluid creates a pressurized pocket. This blister is essentially a “ticking time bomb.” It indicates that the hose’s structural capacity is compromised and that the only thing preventing a massive rupture is a thin layer of unreinforced rubber. Technicians must never touch a pressurized blister to test its firmness, as it could burst upon contact. The presence of a blister requires immediate machine shutdown and lockout/tagout procedures.

Fluid Weeping at Fittings

Moisture, oil residue, or “weeping” around the metal crimp fittings is often dismissed as residual grease or sweating, but it is frequently a sign of cold flow or fitting detachment. Cold flow occurs when the rubber hose material, under the constant compression of the crimp shell, loses its elasticity over time and “flows” away from the pressure point. This relaxation breaks the seal between the hose and the fitting.

Alternatively, weeping can signal that the hose is pulling out of the fitting due to improper assembly (incorrect insertion depth) or because the hose was cut too short to accommodate the natural length changes (up to +2% or -4%) that occur during pressurization. Even minor weeping reduces system pressure and creates significant liabilities: it introduces slip hazards on the machine deck, contaminates the soil leading to environmental fines, and poses a fire risk if the leaking fluid contacts hot engine components like turbochargers.

Performance-Based Warning Signs

Hydraulic systems are closed loops where pressure and flow are inextricably linked to machine performance. Often, a hose will fail internally before it shows external signs of damage. The machine communicates this distress through subtle changes in operation, auditory anomalies, or thermal spikes.

Sluggish or Jerky Operation

When an excavator’s boom, arm, or bucket moves slowly (sluggishness) or exhibits a stuttering motion (jerkiness), the operator may initially blame the hydraulic pump. However, the root cause is frequently a collapsed inner tube within a hose. This is known as internal delamination.

Over time, the inner tube can separate from the reinforcement layer, creating a loose flap of rubber inside the hose. This flap acts like a check valve or a throttle, intermittently restricting fluid flow. When the operator demands power, the pump forces fluid against this blockage, resulting in reduced volumetric flow to the cylinder. This manifests as extended cycle times and unresponsive controls. If the machine feels “spongy” or inconsistent, and no external leaks are visible, maintenance teams should inspect hoses for soft spots or kinks that indicate internal collapse.

Excavator Hydraulic Fittings Rust

Abnormal Noise and Vibration

A healthy hydraulic system operates with a consistent, rhythmic hum. Deviations from this acoustic baseline are critical diagnostic clues.

System Overheating

Heat is the enemy of hydraulic longevity. Every hydraulic system has an optimal operating temperature range, typically between 110°F and 150°F (43°C – 65°C). If the fluid temperature spikes above 180°F (82°C) without a corresponding heavy load or high ambient temperature, it indicates a system inefficiency.

A restricted hose creates a pressure drop (ΔP) across the blockage. According to the laws of thermodynamics, this wasted energy is converted directly into heat. If a hose has internally collapsed or if an undersized replacement was installed, the pump has to work harder to push fluid through the narrow opening, generating excess heat. Chronic overheating accelerates the chemical breakdown of all rubber seals and hoses in the system (heat aging), causing them to become brittle and fail prematurely. Therefore, unexplained thermal spikes should trigger a comprehensive audit of the hose assemblies for restrictions.

Root Causes of Hydraulic Assembly Breakdown

Understanding why a hose failed is as important as replacing it. Simply installing a new hose without correcting the underlying environmental or mechanical issue guarantees a repeat failure. Root cause analysis distinguishes professional fleet management from reactive repair operations.

External Abrasion and Impact

Abrasion is the single leading cause of hydraulic hose failure in excavation environments. Excavators are dynamic machines; as the boom, stick, and bucket articulate, hoses flex and move. If a hose is routed improperly, it may rub against the sharp edges of the machine frame, rock guards, or even against other hoses.

This constant friction acts like sandpaper, wearing away the protective outer cover. Once the reinforcement is exposed, the hose is structurally compromised. Poor routing also leaves hoses vulnerable to impact damage. Falling rocks, rebar, or demolition debris can crush a hose, permanently deforming the wire reinforcement. This creates a stress concentration point where the hose will eventually burst under pressure. The use of spiral guard wraps, textile sleeves, and proper clamping techniques is essential to mitigate these risks.

Excavator hydraulic Fitting rust

Pressure Spikes and Fatigue

Hydraulic hoses are rated for a specific Maximum Working Pressure, usually with a 4:1 safety factor (burst pressure is four times the working pressure). However, excavators frequently endure shock loads. For example, when a bucket strikes an immovable rock or is dropped suddenly, the system experiences a transient pressure spike that occurs in milliseconds—far faster than the relief valve can open to dampen it.

These spikes can exceed the hose’s rated capacity significantly. This “water hammer” effect exerts massive tensile stress on the wire braiding. Over thousands of cycles, the steel wires suffer from metal fatigue and begin to snap internally. This damage is often invisible until the hose suddenly bursts during a standard lifting operation. Selecting hoses with high impulse cycle ratings (often exceeding SAE standards) is crucial for high-impact applications.

Table 1: Critical Hydraulic Hose Failure Indicators & Operational Impact

Professional Inspection and Maintenance Strategy

Transitioning from “breakdown maintenance” (fixing it when it breaks) to “predictive maintenance” is the hallmark of a profitable heavy equipment operation. A structured inspection regimen allows site managers to schedule repairs during planned downtime, avoiding the massive costs of idle crews and emergency service calls.

The Daily Walk-Around Protocol

The daily walk-around should be a non-negotiable ritual for every operator. Before the engine starts, the operator must inspect the ground for fresh oil puddles and trace them to their source. Special attention must be paid to the “bight” or loop of the hoses on the boom and stick, as these areas experience the most severe flexing.

Industry leaders like Caterpillar and John Deere recommend periodic cleaning of the hydraulic compartment. Accumulated grease and dirt can hide weeping fittings, abrasion marks, or hairline cracks. If a hose is covered in mud, its condition cannot be assessed. The inspection should also verify that all safety clamps are intact; a missing clamp allows a hose to whip or rub, accelerating failure.

Monitoring Service Life Intervals

Hydraulic hoses are wear items with a finite lifespan, typically ranging from 5 to 10 years, or 8,000 to 12,000 operating hours, depending on severity of use. However, the rubber degrades purely due to time (shelf life), even if the machine is not used. This is due to the leaching of plasticizers and oxidation.

Proactive fleet managers implement “hard time” replacement schedules. For example, replacing all high-pressure boom lines every 4,000 hours creates a baseline of reliability. While this incurs an upfront cost, it virtually eliminates the risk of an on-site hose failure during a critical project phase. This approach also allows for bulk purchasing and planned technician time, which is far cheaper than emergency rates.

Checking Routing and Clamps

Correct routing is an art form that dictates the longevity of the assembly. Inspectors must verify:

Safe Replacement and Installation Procedures

When a hose is identified for replacement, the installation process must follow strict technical standards. Improper selection or installation is the primary cause of repeat failures. A replaced hose should last as long as, or longer than, the original if specified correctly.

The STAMP Selection Method

Never guess specifications based on visual appearance. Professionals use the STAMPED acronym to ensure the new assembly is safe and compatible:

Excavator hose clean

Depressurization and Cleanliness

Safety begins with energy isolation. Hydraulic systems can store lethal energy even when the engine is off.

Cleanliness is critical. Modern hydraulic clearances are measured in microns (smaller than a red blood cell). Dirt is the enemy. Before removing a hose, clean the surrounding area thoroughly. Immediately cap the machine ports and the hose ends upon removal to prevent contamination. A single grain of sand introduced during a hose change can scour the swashplate of a piston pump or jam a spool valve, destroying the entire hydraulic system.

Table 2: Professional Hose Replacement Checklist

Critical Safety Risks and Compliance

Hydraulic systems on modern excavators operate at extreme pressures, often exceeding 5,000 PSI (345 Bar). At these levels, hydraulic fluid behaves less like a liquid and more like a solid projectile. The safety risks associated with hose failure are life-threatening and require rigorous adherence to safety protocols.

High-Pressure Injection Injuries

The most insidious danger in hydraulics is the fluid injection injury. To the naked eye, a high-pressure pinhole leak may look like a harmless mist or be nearly invisible. However, the fluid velocity can exceed 600 feet per second. If an operator runs their hand over the hose to find the leak, the fluid can penetrate the skin as easily as a hypodermic needle.

This is not a simple cut or burn. The hydraulic fluid is toxic and is injected deep into the tissue, traveling along nerve pathways and fascia. It causes immediate chemical necrosis (tissue death) and Compartment Syndrome. The entry wound often looks like a minor bee sting, leading victims to ignore it. However, without immediate surgical debridement (cutting away affected tissue) within hours, amputation is frequently the only outcome.

Safety Rule #1: Never use bare hands to search for leaks. Always use a piece of cardboard or wood to pass over the suspected area.

install excavator hydraulic hose

Environmental and Fire Hazards

Hydraulic fluid is both a fire accelerant and an environmental pollutant.

Industry Insights: OEM and Specialist Recommendations

Leading manufacturers and hydraulic specialists have moved away from reactive repairs toward a philosophy of total fluid power management. Understanding these industry trends helps operators maintain the resale value of their fleets and ensure compliance with modern safety standards.

Manufacturer Guidelines (Cat & Deere)

OEMs like Caterpillar, Komatsu, and John Deere integrate hydraulic health into their machine telematics. They advocate for Condition-Based Maintenance (CBM). Their maintenance manuals serve as the ultimate authority. For instance, Cat explicitly states that “if wire reinforcement is visible, the excavator hose assembly is failed.” There is no “watch and wait” period.

These manufacturers also stress Contamination Control. They recommend that whenever a hydraulic circuit is opened (like during a hose change), the system should be kidney-looped (filtered) if possible, or at minimum, extreme care taken to avoid ingress. They also standardize the use of abrasion sleeves on all hoses exposed to UV light or potential rubbing, viewing the sleeve as a cheap insurance policy for the expensive excavator hose assembly.

The “No-Patch” Standard

There is a prevalent but dangerous myth that hydraulic hoses can be repaired or spliced to save money. In the professional Western hydraulic industry, this is strictly prohibited for high-pressure applications.

A splice introduces two new potential leak points and a flow restriction. Furthermore, a used hose has already undergone fatigue; the rubber has hardened and taken a “compression set.” Attempting to crimp a new fitting onto an old, hardened hose will result in improper retention, leading to the fitting blowing off under pressure. The industry standard is binary: if a hose is damaged, the entire assembly must be replaced with a new, factory-spec unit.


FAQ

What visual signs indicate an excavator hose needs immediate replacement?

Immediate replacement is mandatory if you see exposed wire reinforcement (due to cuts or abrasion), blisters or bubbles on the cover, leaking crimped fittings, or deep cracks that penetrate the outer cover.

How frequently should I inspect hydraulic hoses on heavy equipment?

A visual walk-around looking for leaks and damage should be performed daily before every shift. A detailed inspection, involving opening panels and checking hidden routing and clamping, should be conducted every 500 operating hours or during scheduled services.

Why are hydraulic pinhole leaks dangerous to operators?

Pinhole leaks eject fluid at velocities capable of penetrating human skin (injection injury). This causes severe tissue death and requires immediate surgical intervention. Never use your hands to check for leaks; use cardboard to detect the spray.

Can I temporarily patch a damaged high-pressure hydraulic hose?

No. Patching or splicing high-pressure hydraulic hoses is unsafe and violates industry standards. Patches cannot withstand the system’s pressure spikes. The only safe repair is the replacement of the full assembly.

What is the STAMPED method for selecting replacement hoses?

STAMPED is the industry standard process to ensure the correct hose is selected: Size, Temperature, Application, Material, Pressure, Ends, and Delivery. Following this prevents installing a hose that is too weak or incompatible with the machine.

What is the leading cause of premature hose failure?

Abrasion (rubbing) is the #1 cause of failure. It occurs when hoses rub against machine frames, rocks, or other hoses. It can be prevented by using protective textile sleeves, spiral guards, and ensuring proper routing and clamping.

How to Protect Excavator Hydraulic Hoses in Mud & Dust

How to Protect Excavator Hydraulic Hoses in Mud & Dust?

Hydraulic hoses on excavators face constant exposure to mud, dust, and abrasive debris. These materials are not harmless surface contamination—they act as grinding agents that wear through hose covers, damage fittings, and push grit into sensitive hydraulic components. Once this process begins, the machine becomes vulnerable to leaks, pressure loss, and costly downtime.

The Abrasive Reality of Mud and Dust

On active jobsites, mud and dust behave like aggressive enemies of hydraulic hoses. They do not just sit on the surface. They work their way into every contact point, speeding up outer-cover wear, damaging support hardware, and creating serious risks for the hydraulic system itself.

dirt Hydraulic Rubber Hoses

More Than Just Dirt: The Sandpaper Effect

Most soil contains sharp minerals such as silica and quartz. When this material collects on a hose and gets trapped between the hose and nearby metal parts, it behaves like sandpaper. Every lift, swing, and boom movement drags these particles across the outer cover. Over time, this repetitive scraping removes the rubber layer, exposing the reinforcement beneath it. Once the reinforcement is visible, the hose is already close to failure.

The Grinding Paste Phenomenon

When water mixes with fine dust, a thick abrasive slurry forms. This mud sticks to clamps, brackets, guards, and the hose itself. As the machine vibrates, the slurry works like a polishing paste. It slowly eats through rubber, paint, and even steel. Many hose failures on excavators and loaders begin with this slow grinding process rather than sudden impact damage.

Contamination at the Connection Points

Loose contamination around fittings is another serious hazard. Dust collects inside wrench flats, threads, and swivel joints. If a hose is changed on the worksite without proper cleaning, grit can enter the hydraulic line. These particles then travel through pumps and valves, scoring surfaces and reducing component life.

Common Contaminants and Their Effects

Physical Shielding: The First Line of Defense

Keeping abrasive materials away from hydraulic hoses is one of the most effective ways to extend service life. Mud, dust, and sharp debris cannot destroy what they cannot reach. Physical shields act as outer armor, taking the abuse so the hose underneath can continue to work safely. This approach gives contractors a strong return because the cost of guards is far lower than the cost of hose failures, downtime, or oil leaks on the jobsite.

Heavy-Duty Spiral Guards

Hard plastic spiral guards are commonly used on excavators, loaders, and cranes. Their helical shape allows them to flex with the hose while still resisting heavy abrasion. When a hose rubs against a boom, frame, stone, or rebar, the guard absorbs the friction instead of the outer cover. Even if the guard becomes scratched or gouged, the hose inside stays protected. These guards also help organize multiple hoses, preventing them from twisting into each other during movement.

An excavator arm with spiral guard

Woven Textile Sleeves

For protection against lighter but persistent abrasion, a tight-weave nylon sleeve works well. It creates a soft barrier that prevents hose-to-hose rubbing. The material also helps block fine dust and grit, keeping particles from settling between bundled lines. This reduces the chance of slow surface wear that is easy to overlook during daily inspections.

Strategic Clamping and Routing

Good routing design strengthens the effect of any guard. Factory clamps must be in place and firmly tightened so the hoses stay in their intended path. When possible, hoses should be positioned away from low points where mud collects. Small routing changes often eliminate early wear problems.

Comparison of Common Hose Protection Options

Built to Resist: Selecting the Right Hose Cover

Hydraulic hoses face constant movement, vibration, and environmental stress. While guards and sleeves help, the hose cover itself is the first built-in defense against abrasion. Choosing the correct cover adds a layer of protection that works every hour the machine runs. This decision affects service life, downtime, and long-term operating cost.

The Baseline: Standard Rubber Covers

Standard synthetic rubber is suitable for general industrial work. It handles sunlight, oil mist, and light scraping. But in harsh environments, it wears down fast. Dust, gravel, concrete edges, and steel brackets can grind through this material in a short time. Once the cover breaks, moisture reaches the reinforcement layer. That leads to corrosion, reduced pressure capacity, and early failure.

The Upgrade: Abrasion-Resistant Covers

Many manufacturers offer improved cover formulas marketed as “Tough,” “Super Tough,” or “Abrasion-Resistant.” These use advanced rubber blends with higher density and better tear resistance. They survive much longer in high-movement areas like excavator booms and skid steer lift arms. When choosing a hose, check ratings that meet or exceed MSHA flame-resistant and abrasion-resistant requirements. These are proven benchmarks for demanding work areas.

The Ultimate: UHMW-PE Covers

For extreme conditions, Ultra-High Molecular Weight Polyethylene (UHMW-PE) is the top option. This material has a very low friction surface. Sand, dust, and grit slide across it instead of cutting in. It also resists sharp edges and constant rubbing. UHMW-PE covers are common on mining machines, drilling rigs, demolition equipment, and any site with nonstop abrasive contact.

Sealing Out the Grit: Protecting Fittings and Connections

Hydraulic fittings carry a higher level of risk than most hose components because they sit at the entry points of the system. When mud, dust, and debris collect around these areas, the danger is not only cosmetic. Packed contamination around fittings increases the chance of corrosion, weakens hardware, and creates a direct path for grit to enter the hydraulic circuit during maintenance.

The Dangers of Packed Debris

Mud holds moisture tightly against metal surfaces. When this slurry gathers around crimp shells, nuts, or valve ports, corrosion becomes unavoidable. Over time, the plating begins to break down. Thread strength weakens, sealing surfaces lose their integrity, and the technician must apply more torque to break the connection free. This extra force increases the chance of damaging soft-seal fittings or O-ring end types. Even worse, any attempt to loosen a fitting surrounded by packed dirt risks bringing contamination directly into the open port.

Excavator Hydraulic hose connection

The Importance of Dust Caps and Plugs

The simplest way to protect open hydraulic connections is to seal them immediately. Proper dust caps and plugs block fine dust, stop moisture, and prevent accidental debris entry. Caps should be used every time a hose or valve port is disconnected—whether in a workshop, on a jobsite, or during transport. Skipping this step leads to contamination that later moves through pumps, cylinders, and spools, reducing machine life.

Corrosion-Resistant Plating

Advanced coatings add an extra layer of security. Zinc-Nickel (Zn-Ni) plating, for example, delivers excellent resistance to moisture and mud exposure. Fittings with this coating typically withstand 700–1,000 hours of salt spray testing, offering strong protection in wet or abrasive environments.

The Power of Proactive Cleaning and Inspection

A hydraulic system can only be protected when technicians can actually see what is happening on the machine. Dirt hides problems. Mud conceals early warning signs. A structured cleaning routine is far more than surface care—it forms the foundation of every reliable preventative maintenance plan. Clean hoses and fittings give technicians the visibility they need to catch failures before they shut the machine down.

Cleaning as a Maintenance Tool

A layer of mud may look harmless, but it covers the small defects that indicate early hose wear. Cuts, soft spots, cracked covers, pinhole leaks, and damaged clamps become visible only after the bulk dirt is removed. Cleaning also helps expose hose routing issues, missing guards, loose fittings, or packed debris that signals corrosion. When cleaning is done consistently, technicians can detect changes from one inspection to the next and act before the machine suffers a hydraulic failure.

The Right Way to Wash

Cleaning needs a thoughtful approach. A pressure washer should never be used with a concentrated pinpoint jet, as this can slice through a rubber cover or force water into sensitive seals. A wider fan setting gives a controlled, gentle wash that removes mud while keeping components safe. Focus on clearing heavy buildup from boom arms, undercarriage areas, hose bundles, and fittings. The goal is functional visibility, not aggressive stripping of coatings or paint.

The “Clean, Inspect, Act” Cycle

A simple cycle keeps machines in safe working order:

  • Clean: Remove mud, dust, and debris from hoses, clamps, and fittings.
  • Inspect: Check for damage, leaks, corrosion, and routing problems.
  • Act: Document findings and schedule repairs before a failure occurs.

Conclusion

Mud, dust, and abrasive debris attack hydraulic systems from every angle, wearing down hose covers, damaging fittings, and hiding early warning signs. The strategies in this guide—stronger hose covers, proper shielding, clean routing, protected fittings, and a steady cleaning routine—work together to keep excavators running safely. When these measures are applied consistently, equipment stays in service longer, failures are reduced, and maintenance becomes far more predictable.

If you need hydraulic hoses, fittings, protective sleeves, or complete hose assemblies built for tough environments, Topa can support your projects with reliable products and fast delivery. Reach out to our team anytime for recommendations or a customized quote.

FAQ

What is the single best investment to protect my hoses in mud?

Plastic spiral guard. It is a relatively inexpensive, easy-to-install sacrificial part that provides excellent protection against the heavy grinding and impact damage caused by mud, rocks, and contact with the machine frame.

Is a “Tough Cover” hose really worth the extra cost?

Absolutely. An abrasion-resistant (MSHA-rated) hose cover can last orders of magnitude longer than a standard cover in abrasive conditions. The small upfront cost is easily justified by preventing just one premature failure and the associated downtime.

I see a hose with its wire braid exposed. Can I just wrap it with a guard?

No. Exposed wire is a critical failure condition. It means the cover’s protection is gone, and the structural wire is now corroding and fatiguing. The hose assembly must be replaced immediately. A guard is for prevention, not a repair.

My worksite is just dry and dusty, not muddy. Do I still need to worry?

Yes. Dry dust and sand are highly abrasive. The “sandpaper effect” can rapidly wear down hose covers, especially when combined with machine vibration. Physical shielding and routine cleaning are still essential.

How can I clean around a fitting without forcing dirt into the threads?

Use a combination of tools. Start with a brush to remove loose debris. Then use a targeted spray cleaner (like brake cleaner) and clean rags to wipe the fitting down. Finally, use a gentle puff of compressed air to blow contaminants away from, not into, the seal area.

What is the biggest mistake people make regarding hoses in dirty environments?

Ignoring the problem until there’s a leak. They view a mud-caked machine as normal and fail to clean and inspect it proactively. This allows abrasion to go unchecked until a hose bursts, shutting down the entire operation.

How to Inspect Excavator Hydraulic Hose Carefully

How to Inspect Excavator Hydraulic Hose Carefully?

A weeping hose is a failure that has already occurred. This expert guide teaches you the systematic inspection process to identify hidden damage—from abrasion and cracks to fitting corrosion and internal fatigue—before it leads to catastrophic failure and downtime.

The Foundation: Safety and a Systematic Approach

A proper inspection is a safe inspection. Before you ever touch a hose, you must neutralize the machine’s immense power. Rushing this step can have lethal consequences. A clean machine is also essential for an effective visual check.

Lockout/Tagout: Non-Negotiable

Before any inspection:

This tag alerts other operators that work is in progress and the machine must stay off.

Topa Excavator Hydraulic Hose Failure

Relieve All Stored Pressure

Even with the engine off, pressure can remain trapped in the hydraulic circuits.

Hidden pressure can cause a hose to whip, fittings to move suddenly, or oil to spray.

Steps to release residual pressure:

Once the controls feel “dead,” most of the trapped pressure has been released.

Clean First, Inspect Second

You cannot inspect damage that you cannot see.

A clean surface makes cuts, blistering, wire exposure, and wet spots much easier to spot.

Safety & Preparation Checklist (Quick View)

The Obvious Killers: Inspecting the Hose Cover

The outer cover of a hydraulic hose is its armor. Once that armor is compromised, moisture, abrasive particles, and chemicals can reach the reinforcement layer, accelerating failure. Regular inspection of this cover is one of the simplest ways to prevent downtime and unexpected hose bursts.

An excavator arm with spiral guard

The Telltale Signs of Abrasion

Areas that look polished, smooth, or shiny are early signs that the cover has been worn down by constant rubbing against a bracket, body panel, or another hose. If the wire reinforcement is visible, the hose is already in a critical state and must be replaced immediately. Even light abrasion is enough to weaken the cover’s protective function.

Spotting Cuts, Gouges, and Blisters

Run a gloved hand carefully along the hose length. Feel for sharp damage such as cuts, nicks, or gouges—these usually come from impact with debris or metal edges. Blisters, bubbles, or soft swollen spots often indicate fluid seeping beneath the cover through a pinhole leak or a chemical reaction with incompatible fluids. These conditions signal internal damage and typically require immediate removal from service.

Detecting Cover Cracks and Weathering

Fine surface cracks—often seen on bends or exposed sections—show that the rubber has lost elasticity. UV radiation, ozone, high temperatures, or simply age can make the cover stiff and brittle. If the hose feels hard, chalky, or faded, the material can no longer protect the reinforcement and is at the end of its usable life.

Look for a web of fine cracks, especially on the outside of bends. This indicates the hose’s rubber has become brittle from age, UV exposure, or heat. A hard, faded, or inflexible cover is a clear sign the hose has reached the end of its life.

The Connection is Key: Scrutinizing Hose Fittings

Leaks almost always originate at the hose ends. The fittings are subjected to immense stress, vibration, and environmental attack. A thorough inspection of the hose-to-fitting interface is just as critical as inspecting the hose body itself.

Actively Hunting for Leaks

Don’t just look for drips on the ground. Check for wetness, dirt accumulation, or shiny oil film around the crimp shell (ferrule) and the threaded connection. Pay close attention to the underside and backside of fittings where leaks often hide.

The Threat of Corrosion

Inspect the fitting hex nuts and the crimp shell for any signs of red rust. Corrosion can compromise the structural integrity of the fitting and can indicate that moisture has penetrated the connection, potentially rusting the internal wire reinforcement.

Excavator Hydraulic Fittings Rust

Checking for Fitting Damage

Examine the crimp shell for any signs of cracking or slipping (where the shell has moved on the hose). Look for deep wrench marks or rounded hex corners on the nut, which indicate improper installation and potential over-torquing.

Reading the Signs: Hose Shape and Stiffness

The shape and flexibility of a hydraulic hose provide clear clues about its internal condition. Subtle changes—such as stiffness, flattening, or unnatural bends—often reveal hidden issues long before an external leak appears. Identifying these conditions early helps prevent unplanned downtime and costly failures.

The Danger of Kinks and Tight Bends

A properly functioning hose should maintain its natural bend radius without collapsing. Sharp bends, flattened sections, or visible kinks are critical warning signs. These distortions restrict flow, increase heat, and overload the reinforcement, causing rapid structural fatigue. Even a single kink permanently weakens the hose and makes replacement mandatory.

hoses bend fatigue fail

The “Set” and Loss of Flexibility

During inspection, gently move the hose side to side. A healthy hose should return to its natural shape and remain flexible. If it feels rigid, stays in a fixed position, or has a noticeable “memory,” the rubber has likely been damaged by prolonged heat, ozone exposure, or internal pressure cycling. A hose that has taken a “set” can no longer absorb vibration or pressure spikes, increasing the likelihood of sudden failure.

Correct Routing and Clamping

Analyze the full hose path. Proper routing prevents excessive bending and constant flexing at the same point. Missing or loose clamps allow the hose to rub against neighboring components, leading to abrasion and premature wear. A twisted hose is especially dangerous—twisting shifts the reinforcement angle and reduces pressure capacity by as much as 30%. Restoring correct routing is essential for maintaining hose longevity and machine safety.

A Comprehensive Inspection Checklist

To ensure nothing is missed, an inspection must be repeatable and thorough. Using a checklist transforms a random look-over into a professional, data-driven process that enables proactive maintenance and prevents unexpected failures.

Building a Reliable Inspection Routine

To avoid surprises, hose inspection must follow a repeatable structure—not a quick glance, not guesswork. A clear checklist turns inspection into a consistent, measurable, and preventative maintenance practice. When every operator follows the same process, problems are identified earlier and long-term hose reliability improves dramatically.

The Daily Walk-Around

This quick inspection takes less than five minutes and should be completed before the machine starts work.

Focus on highly visible warning signs:

This is the operator’s first line of defense. Many catastrophic failures start as small, visible issues that could have been caught during this daily check.

The In-Depth Monthly Check

Once a month—preferably after cleaning the machine—perform a full, systematic examination.

Key tasks include:

This “hands-on” approach reveals the subtle deterioration that operators often miss during daily checks.

Documenting for Proactive Maintenance

A checklist only becomes powerful when paired with documentation.

Record the following:

This record allows maintenance teams to:

A simple logbook or digital app turns reactive repairs into proactive maintenance planning—extending machine life and reducing operating cost.

Conclusion

A well-structured inspection routine turns hose maintenance from guesswork into a predictable, preventive process. By controlling safety steps, cleaning before inspecting, checking the cover, fittings, routing, and flexibility, you catch failures long before they turn into bursts, downtime, or costly component damage.

Topa supplies durable, pressure-rated hoses and protective solutions designed for harsh job-site conditions—contact us when you’re ready to upgrade your machine with reliable, factory-level hydraulic hose assemblies.


FAQ

What is the single most important thing to look for during a hose inspection?

Abrasion. Look for any spot where the hose is rubbing against something. A worn cover that exposes the wire reinforcement is the most common cause of premature hose failure and is easy to spot if you look for it.

If a hose isn’t leaking, is it still safe to use?

Not necessarily. A hose can have severe external damage (like exposed wires) or internal damage (like fatigue from millions of flex cycles) and not yet be leaking. The leak is the final stage of failure; inspection aims to find the signs before the leak starts.

How often should excavator hoses be replaced?

There is no fixed time interval. Replacement is based on condition. Hoses should be replaced whenever an inspection reveals a failure condition, such as exposed wire braid, kinking, cracking, or active leaks.

Can I repair a damaged hydraulic hose?

No. Never attempt to repair a hydraulic hose by patching it or using clamps. The only safe and proper procedure is to replace the entire hose assembly with a new one that is rated for the machine’s pressure and temperature requirements.

Why is it important to clean the machine before an inspection?

A thick layer of greasy dirt can perfectly hide dangerous conditions like deep cuts, severe cracks in the hose cover, or the beginning of a fitting leak. You cannot reliably inspect a dirty hose.

I found a hose with a small blister on it. What does that mean?

A blister or soft bubble on the hose cover typically indicates a tiny, pinhole-sized leak in the inner tube of the hose. High-pressure fluid is escaping the inner tube and is being trapped by the outer cover. This hose has failed internally and must be replaced immediately.

How Do Installation Mistakes Damage Excavator Hoses

How Do Installation Mistakes Damage Excavator Hoses?

Hydraulic hoses are the lifelines of an excavator’s power system, carrying pressurized fluid to every moving part. But even the best-manufactured hose assembly can fail if installed incorrectly. Small errors—like a twist in the line, an overtightened fitting, or a few grains of dirt—can lead to costly downtime, system failure, or even safety hazards.

How Installation Errors Destroy a Perfect Hose Assembly

A factory-perfect hose assembly can be ruined in minutes by simple installation mistakes. This guide highlights the most common errors—from twisting to incorrect torque—and provides professional methods to prevent them. Following these techniques ensures maximum safety and long service life on your excavator.

The Cardinal Sin: Twisting a Hose During Installation

Topa Excavator Hydraulic Hose Failure

Twisting a hydraulic hose during installation is the leading cause of premature failure. This error places structural stress on the reinforcement layers—something the hose was never designed to withstand. Even a small twist can reduce the pressure capacity by up to 30%.

How Torsion Destroys a Hose from the Inside Out

Hydraulic hoses are reinforced with multiple layers of high-tensile steel wire. These layers are braided or spiral-wound to bear internal pressure.

When a hose is twisted, these reinforcement wires are forced to unwind and misalign, weakening the structure. This distortion leads to:

The Layline is Your Visual Guide

Every hydraulic hose features a layline—a continuous printed line of text running along its length. This is not just for identification; it’s also your alignment indicator.

After installation:

Tip: Always check the layline before pressurizing the system.

The Two-Wrench Technique: Simple but Effective

To avoid twisting during tightening:

Poor Routing: Creating Stress and Abrasion

The routing of a hydraulic hose is not random. The path determines how the hose behaves under motion, vibration, and pressure. Poor routing introduces stress, promotes abrasion, and accelerates failure — often long before the hose reaches its rated service life.

Violating the Minimum Bend Radius

Each hose type has a minimum bend radius, specified by the manufacturer. Bending tighter than this radius — especially near the fitting — crushes the hose tube, restricts flow, and weakens the wire reinforcement. This leads to localized fatigue, internal cracks, and eventual bursting.

Tip: Always measure bends using the hose centerline, not the inner edge.

hammer on an excavator with screw-to-connect coupling

Tension vs. Slack: Finding the Sweet Spot

Correct hose length is a balance.

Allow for proper movement compensation by checking the full motion range of the excavator boom or arm before final tightening.

The Danger of Abrasion

Abrasion is one of the most common causes of external hose failure. When the outer cover rubs against the machine’s frame or another component, it wears through quickly — exposing the steel reinforcement beneath. Once exposed, rust begins, followed by rapid structural failure.

Prevention Techniques:

The Invisible Killer: Contamination

A hydraulic system operates like a circulatory system of precision—every component depends on clean fluid to function properly. During hose assembly and installation, even a few microscopic particles of dirt, metal shavings, or lint can start a chain reaction of wear and failure. Contamination doesn’t announce itself with noise or vibration—it destroys quietly from within.

How Dirt Destroys Precision Components

A hydraulic pump’s internal clearances are often just 2–5 microns—smaller than a human hair. When foreign particles enter this environment, they act like abrasive sandpaper circulating through the system.

Over time, this microscopic damage compounds, leading to pressure loss, sluggish performance, and full system failure.

Note: Even if a particle is invisible to the naked eye, it can still cause measurable damage.

Installation Mistakes Damage Excavator Hoses

The Importance of Caps and Plugs

Leaving hoses or ports open—even for a few minutes—invites contamination. Dust, water, and metal fragments from nearby work can easily enter.

Best Practices for Protection:

Pro Tip: Never use tape, rags, or makeshift covers—they can shed fibers or adhesive residues into the hydraulic system.

Cleanliness During Assembly

Hydraulic assembly areas should be treated like a surgical zone. Every hose, fitting, and tool that contacts the hydraulic circuit must be clean and dry.

Recommended Assembly Procedures:

A Mismatch Made in Hell: Incorrect Components

Not all hydraulic fittings are created equal. Using the wrong type of fitting, seal, or mixing components from different manufacturers is a recipe for persistent leaks and potential blow-offs.

The “Matched System” is Not a Suggestion

For crimp-on fittings, the hose and fittings must come from the same manufacturer. Each brand engineers their components to work together. Mixing brands results in an unreliable crimp that can fail under pressure.

Thread Identification is Non-Negotiable

Many threads look similar but are incompatible. Forcing a BSPP (British) fitting into a JIC (American) port will damage the threads and will never seal properly. Use calipers and thread ID gauges to be absolutely certain of what you are working with.

Seals Are Not One-Size-Fits-All

An O-ring designed for an ORFS (O-Ring Face Seal) fitting will not work in an ORB (O-Ring Boss) port. Furthermore, the material of the seal (Buna-N, Viton, etc.) must be compatible with the system’s hydraulic fluid and temperature.

The Feel vs. Real: Improper Torque

The final tightening step often determines whether your hose assembly performs reliably or fails under pressure. Many technicians rely on feel, but “tight enough” isn’t always correct. Both under-tightening and over-tightening can compromise the seal, leading to leaks, cracks, or even catastrophic fitting failure.

The Consequences of Under-Tightening

An under-tightened connection lacks sufficient clamping force to hold against system pressure. The seal may hold at low pressure but will weep or leak under high pressure or vibration. Over time, micro-movement between surfaces worsens the leak and damages sealing faces.

Typical symptoms:

Installation Excavator Hoses

The Damage of Over-Tightening

Over-tightening is more destructive and often permanent. Each fitting type fails in its own way:

Once metal surfaces or O-rings are damaged, the only fix is replacement, not re-torqueing.

Using Flats as a Torque Guide (FFWR Method)

When a torque wrench is unavailable, the “Flats From Wrench Resistance” (FFWR) method offers a practical field solution.

Procedure:

The Two-Wrench Principle

To ensure accurate torque and prevent twisting:

Pro Tip: Mark the fitting and nut with a paint line after tightening — an easy visual reference to spot loosening later.

A reliable hydraulic system depends on precise installation, not just quality parts. Twisting, poor routing, contamination, or over-torquing can all shorten hose life. Following correct assembly practices ensures every connection holds pressure, operates safely, and performs like a true factory-built system.

At Topa, we don’t just supply hydraulic hoses and fittings—we deliver reliability you can trust. Whether you need standard assemblies or custom solutions for excavators and heavy machinery, our team provides fast quotes, consistent quality, and on-time delivery. Contact us today to get a competitive offer and experience factory-grade performance for your hydraulic systems.


FAQ

What is the easiest way to know if I twisted a hose during install?

Look at the printed “layline” on the side of the hose. If this line runs straight from one fitting to the other, the hose is not twisted. If the line spirals like a candy cane stripe, it is twisted and must be loosened and straightened.

Can I use Teflon tape or pipe sealant to stop a leak on a JIC fitting?

No, never. JIC, ORFS, and most excavator fittings seal mechanically, not on the threads. Adding tape or sealant will not fix the leak and creates a high risk of contaminating your hydraulic system when it shreds.

Why must I use two wrenches to tighten a hose end?

You need one wrench to hold the hose and fitting from turning, and a second wrench to tighten the swivel nut. This ensures that you are only tightening the connection and not twisting the entire hose assembly.

The fitting is still leaking after I tightened it more. What’s wrong?

Stop tightening! More torque is not the answer. You likely have a damaged sealing surface (a scratch on a JIC flare or a cut O-ring) or you have mismatched the thread types. Disassemble and inspect all sealing components.

How tight should a JIC fitting be?

The best method is to use a torque wrench. If one isn’t available, tighten the fitting until it is snug by hand, then use a wrench to turn it a specific amount (usually 1-2 “flats” of the hex nut). This prevents over-tightening which can crack the flare.

Is it okay to reuse an O-ring from a fitting I just disconnected?

No. O-rings are single-use items. An old O-ring has been compressed and has lost its elasticity, a condition called “compression set.” It will not provide a reliable seal. Always replace it with a new, correct-sized O-ring.

Why Excavator Boom Hoses Fail and How to Prevent It

Why Excavator Boom Hoses Fail and How to Prevent It?

The boom and stick hoses of an excavator are not just conduits for hydraulic fluid—they are dynamic, high-stress lifelines that endure constant motion, shock, and exposure. Every dig, lift, and swing subjects these hoses to bending, vibration, pressure spikes, and harsh environmental conditions that silently wear them down from both inside and out.

The Dynamic World of Boom & Stick Lines

The hydraulic hoses running along an excavator’s boom and stick are its lifelines under motion—constantly flexing, bending, and vibrating as the machine works. Unlike hoses buried deep inside a frame, these exposed lines face the full violence of the jobsite environment: extreme pressure fluctuations, UV exposure, airborne debris, and mechanical wear. Their survival depends not just on material strength but on smart design, careful routing, and disciplined maintenance.

Excavator Hydraulic Hose Failure Topa

Constant Motion, Constant Stress

Every swing, lift, and dig drives a complete range of motion through the boom hoses. During a single shift, each hose may flex thousands of times, experiencing both tensile stretch and compressive bend. This repetitive stress gradually weakens the inner tube and reinforcement, especially near the fittings where bending is most concentrated.

Key Stress Factors:

Tip: Always check the hose’s bend radius specification (per SAE or ISO) and route it to move naturally within the machine’s geometry.

Extreme Reach and Complex Routing

The boom and stick lines are among the longest hoses on any hydraulic machine, often spanning several meters with multiple directional changes. Their routing must allow full extension and retraction of the boom without tensioning, rubbing, or entanglement. This is achieved through precision clamp spacing, guide brackets, and protective sleeves that manage slack and prevent uncontrolled movement.

Best Practices for Routing Long Boom Hoses:

The Hidden Danger of Pressure Spikes

Beyond mechanical stress, boom lines endure high-frequency pressure transients generated by sudden valve closures or rapid actuator reversals. These “hydraulic shock waves” can exceed the hose’s rated working pressure by two to three times for milliseconds—short enough to go unnoticed, but long enough to damage the inner tube and weaken the reinforcement.

Over time, these invisible spikes cause micro-cracking, delamination, and blistering, setting the stage for sudden failure even when the hose looks intact externally.

Prevention Methods:

High Visibility, High Consequence

A hose failure on the boom is not a slow leak—it’s an instant, high-pressure release that can cause machine shutdown, environmental contamination, and serious safety hazards. A ruptured boom line often results in oil spray at over 200 bar, creating risk of injection injury or fire if the fluid contacts hot surfaces.

Consequences of Boom Hose Failure:

Regular inspection, correct hose specification, and precision installation are the best defenses.

Flex Fatigue: Bending Until It Breaks

Flex fatigue is the silent killer of hydraulic hoses in motion-intensive systems. It doesn’t strike suddenly like a burst from overpressure—it creeps in gradually, the result of millions of bending cycles that wear down the hose from within. Each movement, no matter how small, contributes to internal stress, friction, and eventual wire fracture.

How a Hose Is Built to Flex

A hydraulic hose is a complex composite engineered for strength and flexibility. Its performance depends on the balance between elastic rubber layers and the steel reinforcement inside.

When the hose bends, these reinforcement wires slide slightly against each other, allowing controlled movement. However, this sliding action generates internal friction and micro-wear, slowly eroding the structure.

Hydraulic Hose usages excavator

The Mechanics of Fatigue Failure

Each time a hose flexes, every individual wire strand experiences tensile and compressive stress. Even if the hose is within its bend radius, the repetition of motion initiates micro-cracks in the wire surface.

Over time, these cracks propagate, causing wires to break sequentially, like a frayed rope. When enough reinforcement wires fail, internal pressure can no longer be contained, and the hose ruptures without warning.

Typical Signs of Fatigue in the Field:

Two-Plane Bending: A Critical Installation Error

A hydraulic hose is designed to bend in one plane only, like a door hinge. When installed correctly, the internal wires align perfectly with the bending direction.

But when routed incorrectly—forcing it into a corkscrew, twist, or S-shaped path—the hose bends in two planes at once.

This two-plane bending introduces complex torsional stress, which the reinforcement cannot handle. Instead of sliding smoothly, the wire layers scrape against each other, creating intense internal friction and accelerated fatigue.

Prevention Tips:

The Grinding Threat of Abrasion

If flex fatigue is the internal enemy, abrasion is the external one. The constant movement of the boom creates endless opportunities for hoses to rub against machine structures—or each other—grinding away their protective outer cover.

Hose-to-Metal Contact

This occurs when a hose rubs against a part of the boom frame, a bracket, or the edge of a cylinder. The metal acts like a file, quickly eroding the rubber cover. Once the wire reinforcement is exposed, it is vulnerable to moisture, rust, and eventual failure.

Hose-to-Hose Contact

When two or more hydraulic hoses are routed parallel to each other without proper separation, the machine’s vibration and movement cause them to saw against one another. This mutual destruction can compromise multiple lines simultaneously.

Topa Excavator Hydraulic Hose Failure

The Power of Clamps and Sleeves

The solution to abrasion is prevention. Proper clamping is essential to keep hoses in their designated path. In areas where contact is unavoidable, the use of protective sleeving—from polymer spirals to textile wraps—is a non-negotiable requirement.

Pressure Spikes: The Invisible Hammer

The pressure rating printed on a hydraulic hose tells only half the story. While it defines the continuous working pressure, the real threat to hose integrity comes from pressure spikes—split-second surges that can exceed the rated pressure several times over. These invisible hammers strike the hose from the inside, gradually fatiguing the reinforcement until one day it bursts without warning.

What Causes a Pressure Spike?

Pressure spikes are the result of rapid fluiddeceleration—the hydraulic equivalent of slamming on the brakes. Whenever oil flow is stopped suddenly, the moving fluid mass converts kinetic energy into a sharp pressure wave that ricochets through the system.

Common Triggers of Pressure Spikes:

Why Spikes Exceed the Hose’s Rating

Even though most hydraulic hoses are designed with a burst safety factor (commonly 4:1), that factor is not meant to handle constant impulse or repetitive shock. Pressure spikes act differently from static overloads—they deliver a microsecond pulse of extreme energy, which flexes the inner tube and reinforcement violently.

Each spike acts like a miniature explosion, creating alternating tensile and compressive forces in the steel wire reinforcement. Over thousands of cycles, these stresses cause wire fatigue, delamination, and microcracks, leading to sudden, catastrophic rupture.

Note: A hose can survive for years under normal pressure but fail abruptly after a series of high-frequency spikes within a single workday.

braided vs spiral hoses

The Spiral vs. Braid Advantage

Not all hoses respond to spikes the same way. Spiral-wound hoses are inherently stronger under pulsation and shock than braided hoses, due to how their reinforcement layers handle expansion and contraction forces.

Comparison of Hose Constructions for Pressure Spike Resistance:

Spiral hoses distribute load along continuous wire paths, allowing energy to dissipate more evenly. Braided hoses, in contrast, experience local wire crossover friction under spike loads, accelerating wear.

How to Prevent Pressure Spike Damage

Use high-impulse-rated hoses

Choose hoses that meet or exceed SAE 100R12, R13, or R15 impulse standards for boom, arm, and hammer circuits.

Add pressure dampening components

Install accumulators or pulsation dampeners in circuits with frequent shocks to absorb transient surges.

Avoid hard valve closures

Use proportional or soft-close valves to reduce sudden flow stoppage.

Control operational habits

Train operators to avoid slamming controls or overextending cylinders into end stops.

Monitor and diagnose

Use pressure transducers to record spikes and identify abnormal conditions before they cause failure.

Environmental Degradation: The Slow Burn

Excavator boom hoses live their entire lives exposed to the elements. Sunlight, ozone, and temperature extremes work tirelessly to break down the chemical structure of the hose’s outer cover, stripping it of its flexibility and protective qualities.

UV Radiation and Ozone Attack

The ultraviolet (UV) radiation in sunlight is particularly damaging to the compounds used in a hose’s synthetic rubber cover. It causes the material to harden, lose its elasticity, and eventually develop a web of fine cracks, exposing the reinforcement layers beneath.

Extreme Temperature Cycles

The constant cycling between the heat of operation (both internal from the oil and external from the sun) and the cold of night causes the hose materials to expand and contract. This process accelerates the aging of the rubber and can cause fittings to lose their torque.

Chemical Exposure

While less common, exposure to aggressive chemicals—from leaked diesel fuel and solvents to harsh de-icing agents—can rapidly soften, swell, or dissolve the hose cover, leading to a swift and complete failure. Proper and prompt cleaning is essential.

The durability of an excavator’s boom hoses depends on more than just their pressure rating—it’s the result of smart engineering and precise maintenance. Flex fatigue, abrasion, and pressure spikes are inevitable, but their effects can be minimized through proper routing, quality hose selection, vibration control, and regular inspection.


FAQ

A boom hose burst but it looks brand new. What happened?

This is a classic sign of failure from a pressure spike. The hose’s exterior can be perfect, but an extreme internal pressure shock can rupture the wire reinforcement instantly. It can also indicate a manufacturing defect, though this is less common.

Is it okay to replace just one hose in a bundle that are all the same age?

While possible, it’s often poor practice. If one hose has failed from flex fatigue, the others that run alongside it have experienced the exact same number of cycles and are likely near the end of their service life. Replacing them all at once is preventative maintenance.

What is the most important thing to check for during daily inspections?

Look for any signs of abrasion (rubbing). Check for areas where the black outer cover is worn, shiny, or has been scraped away. This is the most common and easily spotted issue that can be corrected before it causes a failure.

Why is hose routing so critical on the boom?

Proper routing ensures the hose bends only in one plane and is never pulled taut or kinked at any point in the boom’s range of motion. Incorrect routing is the direct cause of premature flex fatigue and abrasion failures.

How can I tell if a hose is getting old and needs replacement?

Look for a hardened, cracked, or faded outer cover. A healthy hose should feel firm but flexible. An old hose will feel stiff and brittle. Any visible wire reinforcement is an immediate red flag for replacement.

Do I need a special type of hose for the boom?

Yes. You should use a high-quality hose designed for high-pressure, high-flex impulse cycles. For many excavators, this means a spiral-wound reinforcement hose (like SAE 100R13 or 100R15) with a tough, abrasion-resistant MSHA-rated cover.

How Do Poor Crimps Cause Excavator Hose Blow-Offs

How Do Poor Crimps Cause Excavator Hose Blow-Offs?

A hose blow-off is a catastrophic event, not a simple leak. This guide dissects the critical, often-overlooked root causes—from flawed crimping and mismatched parts to installation errors—to give you the expert knowledge needed to prevent them.

Anatomy of a Catastrophe: What is a Blow-Off?

A hose blow-off is the complete and sudden separation of the hose from its crimped fitting. It is one of the most dangerous failures in a hydraulic system, releasing a large volume of high-pressure fluid in an instant.

Hydraulic fitting leaking Topa

Blow-Off vs. Leak: A Critical Distinction

Not all failures are created equal. A leak is a warning; a blow-off is a violent mechanical failure. Understanding the difference between the two is essential for both safety and diagnostics.

A leak happens when the sealing interface — such as an O-ring, flare, or tube connection — is compromised. Fluid seeps through small gaps under pressure, often starting as a slow drip or mist.

A blow-off, however, is catastrophic. It occurs when the fitting loses its mechanical grip on the hose entirely. The hose separates from the fitting with explosive force, releasing high-pressure fluid and converting the hose into a whipping projectile.

The Unseen Forces at Play

Inside every working hydraulic hose lies stored energy equal to tons of force. To illustrate:

A 1-inch diameter hose operating at 4,000 PSI is resisting over 3,100 pounds (1.4 metric tons) of pressure trying to eject the fitting. The crimped connection is the only barrier keeping that energy contained.

If the crimp is under-sized, over-sized, or uneven, or if the hose was not fully inserted, the fitting’s teeth fail to grip the wire reinforcement layer — and the entire system loses containment in an instant.

The Danger Is Immediate and Severe

A blow-off is not just a maintenance failure — it’s a safety emergency. The combination of high pressure, velocity, and mass creates lethal conditions.

Safety Reminder: Always depressurize the system before inspection. Never lean over pressurized hoses or fittings, even for a visual check.

Preventing Blow-Off Events

Blow-offs are 100% preventable when the correct assembly and inspection procedures are followed:

A hose assembly that passes visual and dimensional inspection is your best guarantee of safety. Never compromise on these steps — a single shortcut can have catastrophic consequences.

The Crimp Itself: An Analysis of Flawed Assembly

A hydraulic hose crimp is a precision-engineered joint—not just a compression of metal over rubber. It’s the mechanical bond that contains thousands of pounds of pressure inside the system. Yet, over 80% of blow-off incidents trace back to flaws made during the assembly stage.

The crimp must compress the fitting shell just enough to grip the hose’s reinforcement layer without crushing it. A deviation of even 0.1 mm can mean the difference between a perfect seal and a dangerous failure under pressure.

High Pressure Hose Assembly Failure

The #1 Cause: The Under-Crimp

The most frequent cause of hose separation is an under-crimp—when the crimp diameter is larger than specified.

In this case, the fitting shell fails to compress the reinforcement tightly enough, leaving microscopic gaps between the hose and shell. During operation, pressure pulsation and vibration cause micro-movements that gradually loosen the connection until it slips off entirely.

Symptoms and Risks:

Prevention: Always verify the final crimp diameter using a calibrated digital caliper. Compare readings with the crimp chart and discard any assembly outside the tolerance range (typically ±0.005 inches or ±0.13 mm).

The Deceptive Threat: The Over-Crimp

An over-crimp occurs when the fitting is compressed too much, producing a smaller-than-specified crimp diameter.

Although it might look tight and secure, the excessive pressure crushes the wire reinforcement and can cut into the inner tube. The result is an internal weak point where the hose will eventually burst or crack near the fitting.

Symptoms and Risks:

Prevention: Always check the crimper’s calibration and die selection before each job. A slight setting error or wrong die number can lead to irreversible over-crimping.

The Hidden Flaw: Incorrect Insertion Depth

Even when the crimp diameter is perfect, a hose that wasn’t fully inserted into the shell is already compromised.

The internal teeth of the fitting are designed to grip the reinforcement layer, not the outer cover or the inner tube. If the hose is under-inserted, the crimp bites into the weaker rubber instead of the steel wire, leading to slippage or a full blow-off under load.

Symptoms and Risks:

Prevention: Always mark the insertion depth before crimping and confirm visually that the mark aligns flush with the back edge of the fitting shell.

The Mismatched System: A Guarantee of Failure

You cannot create a safe hose assembly by mixing and matching components from different manufacturers. Each brand engineers their hose and fittings to work as a “matched system” with unique tolerances. Deviating from this is a direct path to failure.

The Myth of “Interchangeability”

While a JIC fitting from one brand may thread into another, the critical dimensions of the hose and the crimp shell are not standardized. A thousandth of an inch difference in hose outer diameter can be the difference between a secure grip and a blow-off.

Hose Tolerances and Fitting Design

Manufacturers design their fitting shells and crimp specifications around the exact construction and tolerance of their own hose. Using another brand’s hose, which may be slightly smaller or larger, makes achieving the correct compression impossible.

The Skive vs. No-Skive Error

A common and critical error is failing to identify the hose type. Using a “No-Skive” fitting on a hose that requires the outer cover to be “skived” (removed) will result in a severely under-crimped connection that will almost certainly blow off.

Installation Errors: Creating Stress on the Connection

A flawless crimped hose can still fail in the field if it’s installed under mechanical stress. Hydraulic hoses are flexible by design—but only within specific limits. When they are stretched, twisted, or bent beyond those limits, the forces transfer directly into the crimp, progressively loosening or damaging the fitting.

Correct routing and installation are just as critical as proper assembly. Every inch of hose must move naturally with the machine, not against it.

install Reusable hose fitting

Axial Tension: The Straight Pull

A hose should always have a slight, relaxed curve—never be pulled tight.When installed too short, the hose remains under constant axial tension, like a cable being pulled from both ends. This tension tries to pull the fitting out of the crimp, especially under pressure cycles or machine motion.

Consequences:

Prevention Tips:

Torsional Stress: The Deadly Twist

![Image: A side view of a hydraulic hose showing rotation arrows and internal braid distortion caused by twisting.]

Twisting is one of the most destructive installation errors. Hydraulic hoses are reinforced with steel wire braids wound in opposite directions. When twisted, these braids fight against each other, generating torsional stress that weakens the hose from the inside out.

Even a 5–10° twist can reduce service life by up to 90%.

Effects of Twisting:

Prevention Tips:

Violating the Minimum Bend Radius

Each hydraulic hose type has a minimum bend radius (MBR)—the tightest curve it can safely handle without damaging its structure.

When a hose is bent too sharply—especially near the fitting—the outer wire reinforcement is overstressed while the inner tube collapses, concentrating stress where the hose exits the crimp shell.

This leads to:

Prevention Tips:

System Dynamics and Hidden Causes

Sometimes, the hose assembly is made correctly and installed properly, yet it still fails. In these cases, the problem lies within the hydraulic system itself. The hose is the victim, not the cause.

Extreme Pressure Spikes

Hydraulic systems can experience momentary pressure spikes (or “shocks”) that are far higher than the normal operating pressure. A faulty relief valve, for instance, can cause spikes that exceed the hose assembly’s rating, causing it to fail.

Excessive Vibration and Mechanical Shock

On hard-working equipment like excavators, high-frequency vibration from the engine or shock loads from digging can fatigue the connection over time. This is especially true if the hose is not properly clamped and secured.

Fluid Incompatibility and High Temperatures

Using a hydraulic fluid that is chemically incompatible with the hose’s inner tube can cause it to swell, soften, and lose its integrity. Similarly, extreme temperatures can degrade the rubber, weakening the material that the fitting needs to grip.

Every hose that leaves the workbench carries the responsibility of safety, reliability, and performance. Blow-offs don’t occur by chance—they result from overlooked details in selection, assembly, or installation. By following precise crimp dimensions, using matched systems, maintaining proper routing, and monitoring system conditions, technicians can eliminate nearly every root cause of failure.


FAQ

I measured my crimp and it’s perfect, but it still blew off. What’s the most likely cause?

The most probable cause is incorrect insertion depth. If the hose was not fully seated in the fitting shell before crimping, the crimp has nothing to grip. Cut the fitting off the failed hose; you will likely see that it was only gripping the very end.

Can I just use a generic crimp chart for all my hoses?

No, this is extremely dangerous. Crimp specifications are not universal. You must use the specific crimp chart provided by the crimper manufacturer for the exact brand and series of hose and fitting you are using.

Is it possible for a hose to “wear out” and blow off?

Not typically. A hose that fails from age or wear will usually develop cracks and leak first. A sudden blow-off on an older hose is more likely due to an underlying issue, like a pressure spike, that finally overcame a pre-existing weakness in the original crimp.

The manufacturer says to use their fittings. Is this just so they can charge more?

No, it is a critical safety requirement. They have invested heavily in engineering and testing to guarantee that their components work together reliably. The small cost saving of mixing brands is not worth the immense risk of a catastrophic failure.

How can I prevent installation errors?

Always install hoses so they have a gentle, natural curve with no twisting. The identification layline printed on the hose should run straight, not spiral. Ensure there is enough slack for the full range of machine movement, and use proper clamps to secure the hose from vibration.

Why do hoses on only one side of my excavator keep failing?

Repeated failures on one side usually point to a routing or system imbalance issue rather than a manufacturing defect. The hose may be too short, twisted during movement, or exposed to higher vibration or heat from nearby components.

How to Crimp and Install Excavator Hydraulic Hoses

How to Crimp and Install Excavator Hydraulic Hoses?

Hydraulic hoses are the veins of an excavator’s power system—every movement of the boom, arm, and bucket depends on their strength and precision. Building a hose assembly that performs like an OEM part isn’t about shortcuts; it’s about discipline in every step—from selecting the right components and preparing the hose, to precise crimping and careful installation.

The Foundation: Selecting the Right Components

The integrity of a hose assembly is determined before the crimper is even switched on. The selection of correct, compatible components is the foundation of a safe and reliable crimp. Using mismatched parts is a direct path to failure.

China hydraulic hoses Topa

Matching Hose to Application

Start with the hose that was designed for the job. Verify that its pressure rating, temperature range, and fluid compatibility meet the excavator’s system requirements. Using an under-rated hose guarantees a premature and often catastrophic failure.

The “Matched System” Rule

This is the most critical rule in hose assembly: hose and fittings must come from the same manufacturer and be part of a “matched system.” Each manufacturer engineers their hose tolerances and fitting dimensions to work together perfectly. Mixing brands is a dangerous gamble.

Choosing the Correct Die Set

Every crimper uses interchangeable die sets to accommodate different hose and fitting sizes. Using the wrong die set is a common and critical error. Always consult the crimper manufacturer’s specific crimp chart to select the correct die set for your hose and fitting combination.

Precision in Preparation: The Measure and Cut

Precision is not optional — it’s the foundation of a reliable hose assembly. The accuracy of your measurement and cut determines how well the hose fits, seals, and performs under pressure. Even a few millimeters of error can lead to stress points, misalignment, or premature leaks.

Measuring for Success

When replacing an existing hose:

Cut Length = OAL – (Cut-Off Factor A + Cut-Off Factor B)

Each fitting has a specific cut-off factor—the distance from the fitting’s sealing face to the end of the hose. Always refer to the manufacturer’s catalog for these values.

Hydraulic Hose Assembly cut hose

The Importance of a Clean, Square Cut

A precise 90° cut ensures the hose seats evenly inside the fitting shell.

Skiving vs. No-Skive: Know Your Hose

Not all hoses are prepared the same way before crimping. Knowing whether your hose requires skiving prevents assembly failure.

Tip: Never skive a no-skive hose — doing so compromises the integrity of the reinforcement layer and leads to catastrophic failure.

Critical Alignment: Hose and Fitting Insertion

In hydraulic assembly, alignment is everything. Even the most accurate cut and the strongest crimp mean nothing if the hose isn’t fully and correctly inserted into the fitting shell. This step determines whether the crimping force is distributed exactly where the fitting was designed to hold — at the reinforcement layer of the hose. A misaligned or under-inserted hose creates weak points that lead to leaks, blow-offs, or fitting separation under pressure.

Marking the Insertion Depth

Every hose-fittings combination has a specified insertion depth — the distance the hose must enter the fitting to reach its designed grip zone. This information is listed in the manufacturer’s catalog or technical manual.

To prepare:

This simple mark becomes your visual assurance that the hose is seated correctly before crimping.

The Technique of Proper Insertion

With the hose cut and marked, it’s time to seat it into the fitting:

Tip: If you feel abnormal resistance halfway through, stop and inspect for frayed wires, debris, or an incorrect fitting type.

Pre-Crimp Visual Confirmation

Before operating the crimper, take a moment to verify alignment. This inspection step is quick but critical — it confirms that all your preparation work has achieved the correct positioning.

Perform these checks:

A proper pre-crimp visual check saves hours of rework and prevents dangerous failure in the field.

The Moment of Truth: The Crimping Process

This is where the components are permanently joined into a single, high-integrity unit. The crimper applies immense, controlled force to deform the fitting shell, creating a mechanical and hydraulic seal that will last the life of the hose.

Setting the Crimp Diameter

Using the manufacturer’s crimp chart, find the correct final crimp diameter for your hose and fitting combination. Adjust the micrometer or digital setting on your crimper to this exact specification. This is the single most important setting on the machine.

Crimping Mistakes

Positioning the Assembly in the Crimper

Place the assembly into the crimper, ensuring the fitting is resting on top of the dies. Position it so the crimp will occur on the main body of the fitting shell, not on the “bubble” or threaded area.

Executing the Crimp Cycle

Following your machine’s safety procedures, activate the crimper. The machine will push the dies together until the preset diameter is reached, then stop or retract. Keep hands and clothing clear of the machine during the entire cycle.

Verification and Finalization: The Quality Control Step

A crimp is not complete until it has been verified. This final quality control check provides objective proof that the assembly is safe and has been manufactured to the correct specification. Do not skip this step.

The Post-Crimp Diameter Check

Using a set of calipers, measure the diameter of the crimped shell at several points (middle and ends) and in several orientations. The measured average diameter must be within the manufacturer’s specified tolerance (e.g., +/- .005 inches) of your target crimp diameter.

Visual Inspection of the Crimp

Visually inspect the finished crimp. It should be uniform and straight. Look for excessive die marks, a crooked or angled appearance, or any signs that the fitting is not concentric with the hose. These are signs of a bad crimp that must be scrapped.

hydraulic hose measure Topa

Cleaning, Capping, and Labeling

After a successful inspection, thoroughly clean the assembly with a cleaning projectile or solvent to remove cutting debris. Immediately cap both ends to prevent contamination. Labeling the assembly with its build date is a best practice for tracking service life.

Installation on the Excavator: Achieving a Perfect Fit

A perfectly built hose means nothing until it’s installed correctly. Improper routing, twisting, or over-tightening can destroy even a factory-grade assembly within days. Correct installation is what transforms a well-made hose into a long-lasting, high-performance hydraulic line.

Step 1 – Identify the Correct Routing Path

Before connecting anything, review the excavator’s hydraulic schematic or service manual. Each hose is designed for a specific circuit, whether it’s boom lift, arm curl, bucket tilt, or swing function.

Step 2 – Prepare the Port Connections

Each hydraulic port has its own sealing style — JIC 37°, ORFS, BSPP, or Metric 24°. Inspect every port and adapter before connection.

Tip: Always install fittings by hand until finger-tight, then torque to specification with a calibrated wrench. Over-tightening distorts the sealing surface and causes leaks.

install excavator hydraulic hose

Step 3 – Mount the Hose Assembly

Step 4 – Secure, Protect, and Test

After the hoses are installed:

Safety Reminder: Never check for leaks with bare hands. Use cardboard or paper — escaping hydraulic oil under pressure can penetrate skin.

Step 5 – Final Inspection and Documentation

After successful installation and testing:

A flawless hydraulic hose assembly doesn’t happen by chance; it’s the result of precision, consistency, and adherence to proven standards. When each stage—selection, preparation, crimping, and installation—is executed correctly, the result is an excavator hose that performs reliably under the harshest conditions.


FAQ

Can I re-crimp a fitting that is under-crimped or leaking?

No, never. The metal of the fitting shell is work-hardened during the initial crimp. Attempting to crimp it a second time will result in an unpredictable and unsafe connection that is prone to cracking and failure. The assembly must be cut apart and discarded.

What happens if I use a fitting from Brand A and a hose from Brand B?

Even if they look similar, the manufacturing tolerances for the hose’s outer diameter and the fitting’s shell are designed to work as a matched pair. Mixing brands can lead to an under-crimp (blow-off risk) or an over-crimp (damaging the hose tube), both resulting in failure.

My crimp diameter is correct, but the fitting still blew off. Why?

The most likely cause is that the hose was not fully inserted into the fitting before crimping. If the hose isn’t pushed all the way to the bottom, the “teeth” inside the fitting shell cannot get a sufficient bite into the hose’s wire reinforcement. Always use an insertion depth mark.

How often should I calibrate my hydraulic crimper?

Calibration should be checked regularly, typically on an annual basis at a minimum, or any time you suspect your crimp diameters are not matching your settings. Use a certified gauge and follow the manufacturer’s calibration procedure.

Is it necessary to clean the inside of the hose after cutting?

Yes, it is absolutely essential. The abrasive cutting process generates fine particles of rubber and metal that are forced into the hose. If not cleaned out (typically by firing a foam projectile through the line), this debris will be flushed into your excavator’s sensitive pumps and valves, causing extreme damage.

Why does a new hose start leaking soon after installation?

Most early leaks are caused by routing issues, improper torque, or the hose being twisted during installation. Even a perfectly crimped hose will fail if it rubs on metal, is over-tightened, or is forced into an unnatural bend. Re-check routing, clamp spacing, and torque to prevent early failure.

How to Stop Excavator Hydraulic Hose Oil Leaks Fast

How to Stop Excavator Hydraulic Hose Oil Leaks Fast?

A hydraulic leak is more than just a maintenance issue—it’s a direct threat to safety, productivity, and the environment. In excavators, where pressure levels and operating demands are high, even a small leak can lead to costly downtime or serious injury.

The First Rule: Safety and System Depressurization

Before a single tool is touched, the machine must be made safe. Stored hydraulic energy is immensely powerful and dangerous. Rushing this step can lead to severe injury. This is the most critical phase of the entire process.

Excavator Hydraulic Hose Failure Topa

Achieve a Zero-Energy State

Park the excavator on level ground, away from hazards. Lower the boom, bucket, and any other attachments to the ground. This uses gravity to release the hydraulic energy that is holding them up, significantly reducing stored pressure in the system.

Relieve All Residual Pressure

Even with attachments grounded, pressure can remain trapped in the circuits. Shut off the engine, then cycle all hydraulic controls (joysticks and pedals) back and forth several times. This opens the valves and allows any trapped oil to return to the tank.

Lock-Out, Tag-Out (LOTO)

Physically prevent the machine from being started. Remove the key from the ignition and place a “Do Not Operate” tag on the controls. This ensures another worker won’t accidentally start the engine while you are in a hazardous position.

Wear the Correct Personal Protective Equipment (PPE)

At a minimum, you need safety glasses and nitrile or other oil-resistant gloves. A fluid injection injury from a pinhole leak can require amputation. Never use your hands, fingers, or any part of your body to check for leaks.

The Hunt: Pinpointing the Exact Leak Source

Locating a hydraulic leak isn’t always straightforward — oil can migrate along a hose or frame before it finally drips. To fix the real problem instead of its symptoms, follow a clean and methodical process.

Hydraulic Hose Oil Leaks

Clean the Area Completely

Oil residue and dust often conceal the true source of a leak. Begin by using a quality degreaser and clean rags to wipe down the suspected hose, fittings, and surrounding components. A spotless surface will quickly reveal new oil trails once the system is pressurized again.

Check the Obvious Leak Points

After cleaning, briefly run the machine and activate the function related to the leaking circuit. Watch closely for drips, weeps, or sprays. Most leaks originate from:

Use Tools, Not Hands

Never use your hand to check for leaks under pressure — hydraulic oil can penetrate the skin and cause serious injury. Instead, move a piece of cardboard or wood along the hose path. Even a small pinhole will leave a visible oil streak, allowing you to pinpoint the exact source safely.

Triage and Assessment: Repair Now or Replace?

Not all leaks are created equal. Understanding the type and severity of the leak dictates the urgency and method of repair. For high-pressure hydraulic hoses, however, the answer is almost always a complete replacement of the assembly.

Categorizing the Leak Severity

Leaks can be categorized as weeps (slow, greasy film), drips (forming and falling drops), or sprays (a jet of fluid). While a slow weep from a threaded fitting might be fixable, any leak from the hose body or crimp is a sign of impending failure.

The Extreme Danger of Pinhole Leaks

A pinhole leak is the most dangerous type. The fine, high-velocity jet of fluid may look harmless, but it can easily penetrate skin and clothing, causing a catastrophic fluid injection injury that requires immediate, specialized surgery.

There Are No Safe “Temporary” Hose Repairs

Never use tape, clamps, or any form of sealant to patch a leaking hydraulic hose. These “fixes” cannot contain the immense pressure and create a false sense of security, making a dangerous burst more likely. The only safe repair is a full assembly replacement.

Professional Hose Removal and Installation

Replacing a damaged hydraulic hose is more than a quick swap — it’s a precision task that demands care, the right tools, and strict cleanliness. A properly installed hose ensures a long-lasting, leak-free seal and prevents damage that could cause repeat failures.

hammer on an excavator with screw-to-connect coupling

Use Two Wrenches — Always

When loosening or tightening any threaded hydraulic connection, never rely on one wrench. Use one wrench as a hold-back on the stationary component (such as an adapter or bulkhead fitting) and the other to rotate the hose nut.

This technique prevents:

Cap and Plug Everything Immediately

Hydraulic systems are highly sensitive to contamination. The moment you remove a hose, seal both open ends:

Even a few grains of dust or a drop of water can cause:

Tip: Keep a small kit of clean caps and plugs in your service toolbox for every standard fitting type (JIC, ORFS, BSPP, NPT).

Get an Exact Match

Bring the old hose assembly to a qualified hydraulic shop or supplier. Matching every specification is critical for both performance and safety:

Even small deviations — such as a few degrees in fitting angle or a few millimeters in length — can lead to twisting, over-bending, or stress fractures.

Install the New Hose Without Twisting

During installation:

A twisted high-pressure hose experiences internal shear stress, which can lead to failure within hours of operation. Always check the alignment marks on the hose to confirm that it remains untwisted during final tightening.

The Long Game: Preventing Future Leaks

Replacing a failed hose fixes the immediate problem. Understanding why it failed and implementing preventative measures is how you increase reliability, reduce downtime, and lower operating costs over the long term.

Hydraulic hoses working

Respect the Routing

Most hose failures are caused by mechanical stress. Ensure hoses are routed to avoid sharp bends (respecting the minimum bend radius), twisting, and rubbing against other hoses or machine components. Use proper clamps to secure hoses and prevent movement.

Use Protective Sleeving

In areas where contact is unavoidable, use abrasion-resistant sleeving. Nylon sleeves, metal spring guards, or hard plastic wraps provide a sacrificial layer that protects the hose cover from wear, dramatically increasing its service life in harsh conditions.

Implement Daily Walk-Around Inspections

Train operators to perform a quick visual inspection of all hydraulic hoses as part of their daily pre-start check. Looking for visible damage, leaks, or rubbing takes only a few minutes but can catch a problem before it becomes a catastrophic failure.

Conclusion

By following proper inspection, assembly, and preventive maintenance practices, you extend hose life and maintain the excavator’s performance in demanding conditions. In hydraulic repair, safety and cleanliness aren’t just procedures—they are the foundation of long-term reliability.

Don’t wait for the next leak to halt your job. Equip your excavators with Topa’s high-quality hydraulic hoses and fittings, engineered for durability, precision, and safety in every environment.


FAQ

Can I just tighten a leaking fitting to stop the leak?

If a threaded fitting (like a JIC or ORFS) is weeping, you can attempt to tighten it to the correct torque value after the system is safely depressurized. However, if the leak is from the crimp, tightening will do nothing and the assembly must be replaced.

Is it safe to reuse fittings from an old hose?

No. It is extremely dangerous and against all industry safety standards. Reusable fittings have a specific assembly process, but modern crimp-style fittings are designed for single use only. Reusing them will result in an unreliable and unsafe assembly.

The parts store gave me a hose that’s a little longer. Is that okay?

A little longer is generally safer than a little shorter. Too short, and the hose will be under tension and fail quickly. Too long, and it may sag and get snagged or rub on something. Use clamps to properly secure any excess length away from hazards.

My hose burst. Can I blame the manufacturer?

While manufacturing defects are possible, they are rare. Over 90% of hose failures are caused by external factors like abrasion, improper routing, kinking, operating over pressure, or using the hose beyond its service life.

What is the average lifespan of an excavator hose?

There is no “average” life. It depends entirely on the application’s severity. A hose on a boom might flex millions of times and last two years, while a static return line might last ten. Service life is determined by working conditions, not the calendar.

What are the signs that a hose needs to be replaced before it leaks?

Look for a cracked, hardened, or brittle outer cover; any visible damage like cuts or gouges; signs of abrasion where the cover is worn thin; or any blistering or soft, mushy spots on the hose. Any of these signs warrant immediate replacement.

How to Build a 90% Accurate Hose Replacement Strategy

How to Build a 90% Accurate Hose Replacement Strategy?

Replacing hydraulic hoses too early wastes money; too late invites catastrophic failure and downtime. This expert guide provides a decision-making model to help you move beyond guesswork, balancing equipment safety with economic reality for optimal asset management.

The High Cost of Ambiguity in Hose Replacement

Deciding when to replace a hydraulic hose is one of the most consequential decisions in maintenance management. Replace it too late, and the results can be catastrophic. Replace it too early, and you waste time, money, and perfectly serviceable equipment. In both cases, the consequences reach far beyond the price of the hose itself.

Hydraulic Fitting System Noise

The Unacceptable Risk of Failure

A hydraulic hose under pressure is not a benign component — it’s a potential hazard containing hot, high-pressure fluid capable of penetrating skin or causing severe burns.

When a hose bursts unexpectedly, the risks multiply:

What begins as a single hose failure can quickly escalate into a safety incident, environmental violation, and operational crisis — all at once.

The True Financial Impact of Downtime

In industries such as mining, construction, or manufacturing, unplanned downtime is the real cost driver.

When a machine sits idle because of a failed hose, the financial impact can reach thousands to tens of thousands of dollars per hour, depending on production scale and contract penalties.

This downtime cost often exceeds the replacement cost of the hose by hundreds of times. The indirect effects — delayed deliveries, overtime labor, missed project deadlines, and reduced customer confidence — make reactive maintenance a far greater expense than proactive inspection and planned replacement.

Simply put, the cheapest hose is the one that never fails in service.

The Waste of Premature Replacement

On the other hand, replacing hoses too early — without evidence of degradation or data-driven scheduling — is equally inefficient.

Overly conservative maintenance policies can:

Without condition-based data or inspection benchmarks, maintenance teams fall into the costly trap of “replace to be safe”, which drains budgets and creates unnecessary waste.

The Core Conflict: Reactive vs. Proactive Maintenance

Your hose replacement philosophy falls into one of two categories. The “run-to-failure” model is a reactive gamble, while a proactive strategy is a data-informed, controlled process that aligns maintenance with operational goals.

The “Run-to-Failure” Gamble

This reactive approach means taking no action until a hose fails in service. While it extracts the maximum theoretical life from each component, it guarantees 100% unplanned downtime and exposes the operation to the highest possible level of safety risk and collateral damage.

complex systems swept adaptor Topa

The Proactive Paradigm Switch

A proactive strategy uses data—from visual inspections, sensor inputs, and service history—to replace hoses just before they are predicted to fail. This converts unpredictable, high-cost emergency repairs into scheduled, low-cost maintenance events.

Shifting from a Cost Center to a Value Center

By adopting a proactive approach, the maintenance department shifts from being a cost center that only fixes broken assets to a value center that actively increases equipment availability, enhances safety, and improves the company’s bottom line.

Key Technical Indicators for Replacement Decisions

The foundation of proactive hose maintenance is recognition.

Every hose gives clear warning signs before failure — if you know how to read them. These technical indicators form the language of deterioration, helping maintenance teams make informed, timely replacement decisions.

External Cover Damage

The outer cover is the hose’s first line of defense against abrasion, weather, and chemical exposure. Any damage here is an early signal of internal risk.

Technicians should look for:

When the cover begins to degrade, it exposes the reinforcement layer to moisture and corrosion, accelerating the path to failure.

Install Hydraulic Quick Coupler fail

Exposed or Damaged Reinforcement

Once the steel wire or textile braid is visible, the hose’s integrity is already compromised.

Corrosion on exposed wires quickly weakens the structure, reducing burst pressure and making failure imminent. Even if the hose appears to function normally under pressure, the degradation is irreversible.

At this stage, replacement is mandatory — not repairable, not serviceable. Continuing to use a hose in this condition risks a sudden rupture, which can cause injury, contamination, and costly downtime.

Leaks at the Fitting or Along the Hose

Any sign of fluid weeping, seeping, or dripping around the hose body or crimped fitting must be treated as a failure indicator.

A leaking hose has already lost its seal integrity — a condition that cannot be fixed by tightening the fitting or applying sealant. In fact, retightening a crimped connection may worsen the damage by deforming the fitting or further stressing the hose body.

Leaks often point to internal reinforcement fatigue, cracked fittings, or degraded tube material, all of which are invisible until a full failure occurs. Replacement is the only safe response.

The Value of Early Recognition

Training technicians to recognize these symptoms early — and document them consistently — transforms maintenance from reactive to predictive.

Each inspection note, photo, or failure record becomes data that helps refine replacement intervals and improve overall equipment reliability.

A hose rarely fails without warning. Learning to identify those warnings is the key to preventing downtime, reducing costs, and keeping operators safe.

Calculating the Economic Indicators of Replacement

A purely technical assessment is only half the picture. For decision-makers, the economic analysis is just as important. Understanding the total cost of an in-service failure provides powerful financial justification for a proactive replacement program.

Hydraulic hose fail cost

Beyond the Component Price Tag

The purchase price of a new hose assembly is a minor fraction of the total cost of a failure. A true economic analysis considers the much larger costs associated with the event, known as the Total Cost of Ownership (TCO).

Quantifying the Cost of Unplanned Downtime

Work with your operations team to assign a realistic dollar value to one hour of downtime for each critical asset. This figure ($X,XXX/hour) becomes the most powerful number in your replacement justification.

The Compelling Economics of Prevention

A planned replacement involves a known labor cost and zero downtime cost. An unplanned replacement involves emergency labor rates, potential overtime, plus the massive cost of lost production. The proactive approach is almost always cheaper.

The Replacement Decision Matrix: A Practical Tool

The optimal decision lies at the intersection of technical condition and economic consequence. This matrix provides a simple yet powerful framework for making consistent, justifiable replacement decisions across your entire fleet.

Defining the Matrix Axes

The vertical axis rates the “Consequence of Failure” as either High (critical machine, safety risk, high downtime cost) or Low (non-critical function, redundant system). The horizontal axis rates the “Hose Condition” based on the technical indicators from Section 3.

Operating Within the Four Quadrants

By plotting a hose on this matrix, the path forward becomes clear. A hose in poor condition on a high-consequence machine demands immediate action, while a hose in good condition on a low-consequence machine can be safely monitored.

Standardizing Your Team’s Response

Using this matrix as a standard operating procedure removes ambiguity and emotion from the decision. It empowers technicians and managers with a common language and a consistent logic for managing hydraulic assets, dramatically improving the accuracy of their judgments.

Request Your Consultation Today

Stop gambling with safety and profitability. Contact us today to schedule a complimentary consultation. Let us show you how a proactive, data-driven hose replacement strategy can transform your maintenance operation and deliver a measurable return on investment.


FAQ

What is a realistic service life for a hydraulic hose?

There is no single answer. It depends on the application, pressure cycles, temperature, and environmental factors. Many industrial standards suggest a 5-year maximum, but for severe applications, it could be as short as one or two years.

Can we reuse hydraulic fittings from an old hose?

Absolutely not. Reusing fittings is an extremely unsafe practice prohibited by all major standards bodies. Field-crimpable fittings are designed for one-time use; reusing them creates an unpredictable and unreliable assembly that is likely to fail.

If a hose looks perfect but is 7 years old, should I replace it?

Yes. While it may look good, the elastomer compounds inside have chemically aged and become brittle. The hose no longer has its original performance specifications and is far more likely to fail under pressure spikes or flexing than a new hose.

My supplier says their hose is “better.” How can I verify this?

Ask for data. A reputable manufacturer can provide technical specifications on ozone resistance, temperature ratings, and crucially, the results of standardized abrasion tests (like ISO 6945). Higher performance in these tests is a verifiable indicator of a longer-lasting cover.

How do I start implementing this decision matrix?

Begin with one or two of your most critical machines. Work with your operators and finance department to define the “Consequence of Failure.” Then, train your maintenance team on the visual indicators. Starting small makes the process manageable and proves its value quickly.

Does this strategy really save money if I’m replacing some hoses sooner?

Yes. The cost of one unplanned, catastrophic failure on a critical machine (including downtime, cleanup, and potential safety incidents) is often greater than the cost of proactively replacing hundreds of hoses. It’s about preventing the single massive expense.

Contact Topa

Save 30% on maintenance costs with our easy-install hydraulic fittings. Contact Now!