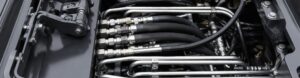
You just spent an hour in the field replacing a hydraulic hose. You tighten the new reusable fitting with all your strength, only to start the engine and see a steady drip.
To avoid overtightening, use the “flats from wrench resistance” (FFWR) method. Tighten the fitting by hand until it’s snug, then use a wrench to turn it a specific number of full flats—usually between two and four—as specified by the manufacturer.
Why Overtightening Happens
Common Causes
- Belief that “tighter is safer” Many technicians assume that applying extra force guarantees a stronger seal. In reality, overtightening damages threads and seals, reducing reliability instead of improving it.
- Lack of torque measurement tools Without a calibrated torque wrench, installers often rely on “feel.” This guesswork leads to inconsistent results and frequent overtightening.
- Using the wrong wrench type Pipe wrenches or adjustable wrenches apply uneven pressure and can crush fittings. Proper torque tools are essential for accurate tightening.
- Ignoring wear on threads and seals Worn threads create extra friction during tightening, giving a false sense of resistance. Installers may keep turning until the fitting is damaged.
Impact of Overtightening
- Stripped threads weaken fittings When threads are forced beyond their design, they lose shape and can no longer hold securely under pressure.
- Crushed O-rings lose sealing capacity Excessive force deforms or tears O-rings, leaving no elasticity to maintain a leak-free seal.
- Damaged hoses may fail under pressure Overtightened fittings can cut into hose reinforcement, leading to premature bursting or separation.
- Disassembly becomes more difficult Overtightened couplers often seize, making future repairs costly and time-consuming.
| Cause | Explanation |
| Belief that “tighter is safer” | Extra force is assumed to improve sealing, but it actually damages threads and seals, reducing reliability. |
| Lack of torque measurement tools | Without a torque wrench, installers rely on “feel,” leading to inconsistent tightening and overtightening. |
| Using the wrong wrench type | Pipe or adjustable wrenches apply uneven pressure and can crush fittings. Proper torque tools are needed. |
| Ignoring wear on threads and seals | Worn or dirty threads increase friction, giving false resistance and encouraging overtightening. |
What Are the Signs of an Overtightened Fitting?
You’ve installed the fitting, but you have a bad feeling about it. How can you tell if you’ve done permanent damage without even starting the machine?
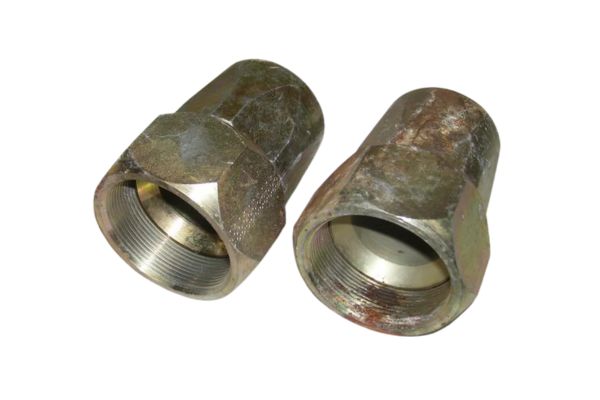
The most obvious signs of an overtightened fitting are visible cracks in the outer socket or stripped threads on the nipple. Leaks that appear under pressure, especially near the fitting, are also a clear giveaway that the internal seal has been compromised by excessive force.
Immediate and Visible Damage
Severe overtightening often leaves clear, physical signs that can be spotted without disassembly:
- Hairline fractures or cracks – Check the hexagonal body of the socket for fine cracks or complete splits. These appear when the nipple forces the socket to expand beyond its strength limit.
- Flattened or deformed threads – Inspect the nipple threads. If they look flattened, rolled over, or misshaped, the fitting has been over-stressed.
- Distorted socket body – In extreme cases, the socket may appear stretched or out of shape compared to a new fitting.
Leaks Under Pressure or Vibration
Not all damage from overtightening is visible during installation. Some problems only appear once the system is running:
- Crushed inner tube – Excessive force may compress or tear the hose’s inner lining, weakening its sealing capacity.
- Damaged reinforcement wires – The steel or textile braids inside the hose can be cut or distorted, reducing pressure resistance.
- No leak at zero pressure – The connection may seem fine during initial assembly.
- Leaks under load – Once the machine runs at operating pressure, fluid escapes near the fitting.
- Failure during vibration – System vibration can worsen hidden damage, leading to sudden leakage or hose separation.
Inspecting a Disassembled Fitting
If you suspect overtightening, disassemble the fitting and check both the hose and the fitting components carefully:
- Spiral groove condition –
- Proper installation: Leaves a clean, even spiral groove inside the hose tube.
- Overtightened installation: Shows torn, shredded, or excessively deep grooves.
- Hose end appearance –
- A healthy hose end remains round and smooth.
- An overtightened one may appear bulged or flared, showing abnormal stress.
- Nipple thread condition –
- Look closely at the nipple. If threads are packed with rubber debris, it means the fitting scraped material from the hose instead of cutting a clean path.
Inspection Checklist for Overtightening:
- Check Socket: Is the socket cracked or deformed?
- Check Nipple Threads: Are the threads flattened, stripped, or packed with rubber?
- Inspect Hose Exterior: Is there a bulge near the back of the socket?
- Check for Leaks: Does the fitting weep or spray fluid under system pressure?
- Examine Hose Interior: After disassembly, is the inner tube torn or excessively compressed?
How Do You Achieve the Perfect Tightness Every Time?
You want a reliable, leak-free connection on the first try. What is the professional method that guarantees you never under-tighten or over-tighten a reusable fitting again?
The perfect tightness is achieved by following the manufacturer’s assembly instructions exactly. This involves proper hose preparation, lubrication, and using the “flats from wrench resistance” (FFWR) method for the final, precise tightening sequence.
The Full Assembly Process, Step-by-Step
Step 1: Cut the Hose Cleanly
- Use a sharp hose cutter or a fine-tooth saw to achieve a straight, square cut.
- Avoid angled or frayed cuts, as they can prevent proper sealing and reduce hose strength.
- Remove any loose debris from the cut edge to keep the hose interior clean.
Step 2: Insert the Nipple
- Push the insert (nipple) fully into the hose bore until it bottoms out.
- Ensure the serrations on the nipple grip the hose’s inner tube securely.
- If resistance is high, apply a small amount of hydraulic oil to the insert—never use grease or sealant.
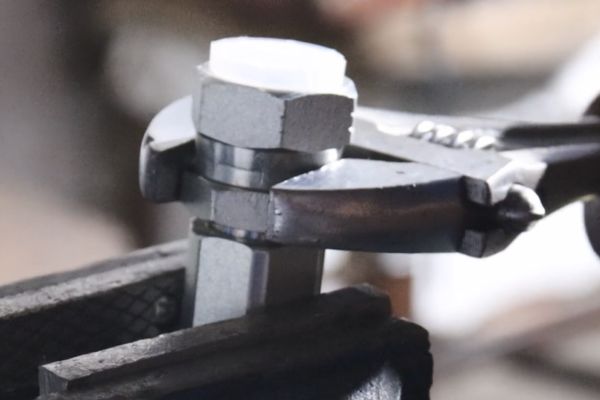
Step 3: Thread the Socket
- Slide the socket over the outer hose cover and align it with the nipple threads.
- Begin threading by hand to avoid cross-threading, which can permanently damage the fitting.
- Rotate slowly and confirm smooth engagement before applying tools.
Step 4: Tighten with a Torque Wrench
- Use two wrenches: one to hold the nipple steady, and one to turn the socket.
- Apply torque gradually in steady motions—do not jerk or over-pull.
- Stop once the manufacturer’s specified torque value is reached.
- Double-check that the connection is aligned and secure without twisting the hose.
The “Flats From Wrench Resistance” (FFWR) Method
The Flats From Wrench Resistance (FFWR) method is one of the most reliable techniques for correctly tightening reusable fittings in the field. Unlike guessing by “feel,” this method provides a repeatable, measurable way to achieve the right clamping force without overtightening.
How the Method Works
A standard hex fitting has six flat sides, often referred to as “flats.” The FFWR method uses these flats as a reference for how far the fitting should be rotated after reaching finger-tight contact. Each flat represents 1/6 of a turn, making it easy to measure tightening angle without special tools.
Step-by-Step Process
- Mark a starting point
- Place a mark on one flat of the nipple’s hex using a pen, paint marker, or scribe. This is your reference point.
- Turn with a wrench
- Using a proper wrench, continue tightening the nipple past the finger-tight starting point.
- Count how many flats pass by your reference mark as you turn.
- Stop at the chart value
- Refer to the manufacturer’s FFWR chart for the fitting size and hose type.
- Each size has a recommended number of flats to turn, typically between 1 to 2 flats depending on dimensions and materials.
- Stop tightening once you reach the specified flat count.
Why FFWR Is Accurate
- No torque wrench required – Makes it practical for field use where calibrated tools may not be available.
- Repeatable results – Flat counts are consistent across different installers.
- Protects fittings – Prevents overtightening, stripped threads, and crushed O-rings.
- Saves time – Fast and simple once you know the flat count for your fitting.
Common Mistakes to Avoid
1. Overconfidence in Hand Tightening
Many technicians trust their experience and believe they can “feel” the correct tightness. However, this method is unreliable:
- Why it’s a problem: Hand tightening is subjective and often leads to overtightening.
- Consequences: Stripped threads, crushed O-rings, leaks, and shortened hose life.
- Best practice: Use a calibrated torque wrench or the Flats From Wrench Resistance (FFWR) method for accurate and consistent results.
2. Ignoring Thread Condition
Threads are critical to forming a secure connection, yet they are often overlooked.
- Why it’s a problem: Dirt, rust, or minor deformation increases resistance, giving a false sense of tightness.
- Consequences: Cross-threading, poor sealing, and damage to both socket and nipple.
- Best practice: Always clean threads before assembly, inspect for wear or corrosion, and replace damaged fittings instead of forcing them.

3. Skipping the Pressure Test
Even the best installation can fail if the connection isn’t tested under real conditions.
- Why it’s a problem: Visual checks cannot detect hidden internal damage.
- Consequences: Unexpected leaks, hose blowouts, and costly downtime during operation.
- Best practice: Perform a pressure test at the system’s normal operating level. Observe for leaks or vibration-related loosening before returning the equipment to service.
| Mistake | Risk / Consequence | Correct Practice |
| Overconfidence in hand tightening | Overtightening, stripped threads, damaged seals | Always use a torque wrench or FFWR method to achieve consistent tightening. |
| Ignoring thread condition | False tightness, cross-threading, seal failure | Clean threads before use, inspect for wear or corrosion, replace damaged parts. |
| Skipping the pressure test | Hidden leaks, sudden failure during operation | Always pressure-test at system operating level before returning equipment to use. |
Maintenance Tips for Reusable Fittings
Perform Regular Inspections
- Check fittings during scheduled equipment maintenance.
- Look for oil seepage around the socket or nipple.
- Examine for cracks, dents, or thread wear.
- Ensure the hose end shows no bulging or fraying.
Keep Threads and Sealing Surfaces Clean
- Wipe threads and flat faces with a lint-free cloth before assembly.
- Use a soft brush to remove rust or fine debris.
- Install dust caps on unused fittings to prevent dirt buildup.
- Avoid abrasive cleaning methods that can scratch sealing surfaces.
Replace Worn or Damaged Components
- Swap O-rings that appear brittle, cracked, or flattened.
- Discard fittings with stripped threads or visible fractures.
- Do not reuse fittings that show bulging sockets or distorted nipples.
Apply Correct Torque Every Time
- Follow manufacturer torque charts for your fitting size and thread type.
- Use a calibrated torque wrench or FFWR (Flats From Wrench Resistance) method.
- Avoid relying on “hand feel,” which often causes overtightening.
Pressure-Test After Installation
- Run the hydraulic system at its normal operating pressure.
- Inspect the connection for leaks or vibration-related loosening.
- Record test results as part of a maintenance log for future reference.
Stock Spare Fittings and O-Rings
- Keep an inventory of replacement sockets, nipples, and O-rings.
- Store spares in sealed containers or with protective caps.
- This ensures immediate replacement in the field, reducing downtime.
| Aspect | Overtightening | Correct Torque |
| Threads | Stripped or damaged | Strong and reusable |
| O-rings | Crushed, leading to leaks | Properly compressed |
| Disassembly | Difficult or impossible | Smooth, repeatable |
| Safety | High risk of failure | Reliable and safe |
Conclusion
Only by adhering to proper operating procedures—using torque wrenches or FFWR methods, maintaining clean threads, replacing worn components, and always performing pressure tests—can you ensure joints are safe, reliable, and durable.
At Topa, we provide high-quality, reusable hydraulic fittngs to help you avoid over-tightening issues.
Get a free quote today. Choose Topa as your partner to ensure smooth operation of your hydraulic systems with durable joints and professional service.
FAQ
What happens if I overtighten a reusable fitting?
Overtightening can strip threads, crush O-rings, and damage hoses, leading to leaks and premature failure.
How can I prevent overtightening during installation?
Always use a calibrated torque wrench or the Flats From Wrench Resistance (FFWR) method instead of relying on hand feel.
Do all reusable fittings require the same torque value?
No. Torque varies by hose size, thread type, and fitting design. Always check the manufacturer’s torque chart.
What are the visible signs of overtightening?
Cracked sockets, flattened threads, bulged hose ends, or leaks under pressure are clear signs of damage.
Can I reuse a fitting after it has been overtightened?
No. Once threads or sealing surfaces are damaged, the fitting should be discarded to ensure safety.
Why is pressure testing important after installation?
A pressure test confirms that the fitting seals properly under real operating conditions and prevents unexpected leaks in service.