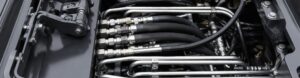
Hydraulic quick couplers allow fast, leak-free hose connections in demanding environments. Two common types dominate the market: flat face quick couplers and threaded quick couplers. Choosing the right one depends on application, pressure, and maintenance needs.
This guide explains the differences between flat face and threaded couplers, their advantages, disadvantages, and best uses. By the end, you will know how to select the right coupler for your hydraulic system.
What Are Flat Face Quick Couplers?
Flat face quick couplers are a type of hydraulic connector designed with smooth, flush mating surfaces. Unlike older designs with protruding valves, the flat faces press directly together, sealing the connection with an O-ring. This design minimizes fluid spillage and prevents air from entering the hydraulic system during connection or disconnection. They are widely used where system cleanliness and environmental safety are priorities.

Features
- Low-spill design The flat mating surfaces reduce trapped oil, which prevents fluid from leaking out when couplers are disconnected. This feature protects the environment and keeps work areas clean.
- Easy to clean Because the face is flat and smooth, dirt and debris can be wiped away quickly before reconnection. This helps prevent contamination inside hydraulic systems.
- Push-to-connect mechanism Flat face couplers connect without tools. The operator simply pushes the two halves together until they lock, making them faster and easier to use compared to threaded connections.
Common Uses
- Agriculture equipment Farm tractors and implements often use flat face couplers to keep hydraulic systems free from dirt and prevent oil spills on soil.
- Skid steers and loaders These machines frequently switch attachments, making fast, spill-free connections essential for efficiency and safety.
- Construction machinery Excavators, bulldozers, and other heavy equipment rely on flat face couplers where contamination control and reduced downtime are critical on job sites.
What Are Threaded Quick Couplers?
Threaded quick couplers are hydraulic connectors that join by screwing the male and female halves together. Instead of a push-to-connect design, they use a threaded sleeve to lock the connection securely. This creates a tight, high-pressure seal that resists accidental disconnection, even in the harshest conditions.
Features
- Threaded lock resists vibration and high pressure The threaded connection prevents loosening during heavy vibration, making these couplers suitable for demanding machinery.
- Handles residual pressure effectively Unlike push-to-connect couplers, threaded designs can connect and disconnect more reliably when there is trapped or residual pressure in the system.
- Rugged construction for heavy-duty use They are built with thicker walls and durable materials such as hardened steel, designed to withstand rough handling, dirt, and high-pressure cycles.
Common Uses
- Oilfield equipment Drilling rigs and well-service machinery depend on threaded couplers to endure extreme pressures and constant vibration.
- Mining and drilling machinery These couplers are often chosen for underground or surface mining equipment where reliability under shock loads is essential.
- High-pressure mobile hydraulics Heavy machinery such as cranes, rock crushers, and forestry equipment benefit from threaded couplers when operating at very high pressures.
Key Differences: Flat Face vs Threaded Couplers
Sealing Method
- Flat face couplers rely on flush mating surfaces and O-rings to create a secure seal. When connected, the flat faces press tightly together, compressing the O-ring to block fluid leakage. This design also reduces the risk of trapped air, which helps maintain consistent system performance. Because sealing depends on surface contact rather than thread compression, correct torque is important but less extreme than in threaded designs.
- Threaded couplers use a mechanical thread lock to secure the male and female halves. As the sleeve is screwed on, the threads generate strong clamping force, holding the connection firmly even during pressure spikes and heavy vibration. This design is especially valued in high-shock environments where push-to-connect styles may loosen.
Contamination Control
- Flat face couplers are widely chosen for their ability to keep systems clean. The smooth, flat sealing surfaces can be wiped easily with a cloth, reducing the risk of dirt or debris entering during reconnection. This makes them ideal for agriculture, construction, and other industries where equipment frequently changes attachments. Clean connections mean fewer maintenance problems and longer equipment life.
- Threaded couplers, on the other hand, have exposed threads that are more difficult to clean. Dust, sand, or mud can become lodged between the threads. If left unattended, contaminants may migrate into the hydraulic fluid once connected. Over time, this leads to increased wear of pumps, valves, and cylinders. In field conditions such as mining or oil drilling, operators must take extra care to clean threads before connecting.

Pressure Handling
- Flat face couplers are capable of handling medium to high pressures. They are suitable for most modern hydraulic equipment, including excavators, skid steers, and tractors. However, they are not typically rated for extreme impulse loads or continuous high-vibration service. In such situations, their seals may wear faster, requiring closer monitoring.
- Threaded couplers are specifically engineered for extreme high-pressure and high-impulse applications. The threaded sleeve ensures that the coupler remains locked even under severe vibration, sudden pressure surges, or shock loads. This makes them the preferred choice for oilfield rigs, heavy drilling equipment, and mining machinery, where failure is not an option. Their rugged design prioritizes strength and security over speed of operation.
| Aspect | Flat Face Couplers | Threaded Couplers |
| Sealing Method | Flush sealing surface + O-rings | Mechanical threaded sleeve lock |
| Contamination Control | Easy to clean, low contamination risk | Harder to clean, higher dirt exposure |
| Pressure Handling | Medium to high pressure | Extreme high-pressure environments |
| Ease of Use | Faster push-to-connect | Slower screw-to-connect |
Advantages and Disadvantages of Flat Face vs Threaded Quick Couplers
Flat Face Quick Couplers
Advantages
- Reduced spillage – Flat face couplers are designed to minimize oil loss, protecting the environment and keeping work areas clean.
- Easy maintenance – The smooth mating surfaces can be wiped clean quickly before reconnecting, reducing contamination risks.
- Faster operation – No tools are needed; the push-to-connect design saves time during frequent hose changes in the field.
Disadvantages
- Sensitive to pressure spikes – While strong, they may not handle extreme surges as reliably as threaded couplers.
- More expensive – Precision manufacturing makes them costlier compared to other designs.
- Requires proper torque – If installation torque is incorrect, sealing performance may be compromised.

Threaded Quick Couplers
Advantages
- High-pressure capability – The threaded sleeve lock provides strength for extreme operating pressures.
- Vibration resistance – Threads hold the connection firm, preventing accidental disconnection in high-vibration environments.
- Durable in harsh conditions – Ideal for oilfield rigs, drilling machines, and mining equipment where reliability is critical.
Disadvantages
- Slower connection – The screw-to-connect process takes longer compared to push-to-connect couplers.
- Higher spill risk – Disconnecting often leads to minor fluid loss.
- Dirt sensitivity – Exposed threads can trap debris, requiring more cleaning before reconnection.
How to Choose the Right Quick Coupler
Consider System Pressure
- Medium pressure Flat face quick couplers are well-suited for machines that run at moderate to high pressures without extreme spikes. They provide reliable sealing for tractors, loaders, and construction equipment.
- Very high pressure Threaded quick couplers are safer in extreme systems such as drilling rigs or mining machines. The threaded lock prevents disconnection and ensures secure performance under heavy loads.
Consider Operating Environment
- Cleanliness priority If reducing contamination is critical, flat face couplers are the best choice. Their smooth sealing surface wipes clean easily, helping protect sensitive hydraulic systems.
- Vibration and heavy-duty use In harsh conditions where equipment vibrates constantly, threaded couplers offer stronger resistance to loosening. Their threaded sleeve ensures the connection stays locked.
Consider Maintenance Needs
- Frequent connection/disconnection Flat face couplers save time because they connect quickly without tools. This makes them ideal for equipment that switches attachments often.
- Permanent or semi-permanent installs Threaded couplers are better when connections remain fixed for long periods. Their rugged design ensures durability and security even under continuous operation.
| Factor | Best Choice | Why It Works |
| System Pressure | Flat face (medium) | Reliable for common hydraulic equipment |
| Threaded (very high) | Withstands extreme loads and spikes | |
| Operating Environment | Flat face (cleanliness) | Easy to wipe clean, less contamination |
| Threaded (vibration) | Strong threaded lock for harsh conditions | |
| Maintenance Needs | Flat face (frequent) | Fast push-to-connect, no tools required |
| Threaded (permanent) | Long-term strength and secure sealing |
Best Practices for Installation
Flat Face Couplers
Step 1: Prepare the Work Area
Ensure the hydraulic system is depressurized before starting. Clean the workbench or installation area to avoid dust or debris contaminating the couplers.
Step 2: Inspect Coupler Components
Check both male and female halves for scratches, dents, or corrosion. Inspect the O-ring for cracks, flattening, or hardness. Replace worn parts before installation.
Step 3: Clean the Flat Mating Surfaces
Use a lint-free cloth to wipe the flat faces. Remove dust, oil, or moisture that could compromise sealing. In dirty environments, use protective caps until installation.
Step 4: Align the Coupler Halves
Carefully align the male and female faces before connection. Misalignment can damage the O-ring or sealing surface. Hold the couplers straight to prevent cross-threading.
Step 5: Engage Threads by Hand
Start threading by hand to ensure smooth engagement. This prevents cross-thread damage. Do not use tools at this stage.
Step 6: Apply the Correct Torque
Use a calibrated torque wrench to tighten the connection. Follow the manufacturer’s torque chart for the correct value based on thread size and material. Apply torque gradually, not with sudden force.
Step 7: Verify Coupler Locking
Check that the locking mechanism (if included) is fully engaged. Ensure the connection feels secure and cannot be disconnected accidentally.
Step 8: Perform a Pressure Test
Run the hydraulic system at normal operating pressure. Inspect for leaks, seepage, or vibration-related loosening. For safety-critical systems, document the results in a maintenance log.
Step 9: Final Inspection and Maintenance Prep
Check hose alignment to ensure there is no twisting or bending stress on the coupler. Confirm that dust caps are available for future protection when the coupler is not connected.
Threaded Couplers
Step 1: Prepare the Equipment
Depressurize the hydraulic system completely before installation. Confirm that the work area is clean and free of dust, oil, and other contaminants that could interfere with the threads.
Step 2: Inspect Threads and Seals
Check both male and female coupler threads for signs of wear, corrosion, or deformation. Inspect the O-rings or backup seals for cracks, flattening, or cuts. Replace damaged components before assembly.
Step 3: Clean the Threads Thoroughly
Exposed threads often trap grit, dust, or dried oil. Use a soft brush or lint-free cloth to clean them. For heavy contamination, a suitable cleaning solvent may be used. This prevents debris from grinding into the connection.
Step 4: Align the Coupler Halves
Hold the couplers in straight alignment before threading. Misalignment can cross-thread or damage the sealing surfaces. Always engage threads smoothly to avoid forced starts.
Step 5: Hand-Tighten First
Begin threading the male and female halves together by hand. This ensures correct thread engagement and prevents cross-threading, which is a common cause of damage in threaded couplers.
Step 6: Apply Torque with a Wrench
Switch to a calibrated torque wrench once hand-tightened. Tighten the sleeve gradually, applying steady, even force. Follow the manufacturer’s torque chart for the correct value based on size and material.
Step 7: Avoid Over-Torquing
Stop tightening once the specified torque is reached. Applying extra force can strip threads, distort the sleeve, or permanently deform the coupler body.
Step 8: Lock and Verify
Ensure the threaded sleeve is fully seated and locked. Check for any gaps between the coupler halves. A properly installed threaded coupler should feel secure without excessive force.
Step 9: Perform a Pressure Test
Pressurize the hydraulic system to operating conditions. Inspect the connection for leaks, vibration loosening, or abnormal noises. Document the results for quality assurance or maintenance records.
| Do’s ✅ | Don’ts ❌ |
| Depressurize the hydraulic system before installation. | Never connect or disconnect under system pressure. |
| Inspect O-rings, threads, and sealing faces for damage. | Don’t reuse damaged or worn couplers. |
| Clean flat faces or threads with a lint-free cloth/brush. | Don’t install with dirt, grit, or oil on sealing surfaces. |
| Hand-tighten first to ensure proper engagement. | Don’t force threads—avoid cross-threading. |
| Use a calibrated torque wrench to apply correct torque. | Don’t overtighten or guess torque values. |
| Align hose and coupler straight to prevent stress. | Don’t twist or bend hoses during installation. |
| Perform a pressure test at working conditions. | Don’t skip testing before equipment returns to service. |
| Use protective dust caps when couplers are not in use. | Don’t leave couplers exposed to dirt or weather. |
Maintenance Tips for Both Types
Inspect couplers regularly for wear and leaks
Frequent inspections are essential to prevent unexpected failures. Look for oil seepage, cracks on the body, worn threads, or damaged sealing surfaces. Early detection allows you to repair or replace couplers before they cause system downtime.
Replace O-rings showing cracks or deformation
O-rings provide the primary sealing function in both flat face and threaded couplers. Over time, they can harden, flatten, or crack due to heat, pressure cycles, or chemical exposure. A damaged O-ring cannot hold pressure effectively, leading to leaks.
Use only manufacturer-recommended torque values
Incorrect torque is a major cause of premature coupler failure. Under-torque results in leaks, while over-torque can strip threads and crush seals. Each manufacturer provides a torque chart for their specific coupler designs. Use a calibrated torque wrench to ensure accuracy and consistency.
Keep spare couplers available for quick replacement
Even with proper care, couplers eventually wear out. Having spares in stock ensures that damaged units can be replaced immediately, reducing downtime. This is especially important for industries like construction, agriculture, and mining, where delays are costly. Store spare couplers in clean, sealed containers or with protective caps to keep them free from dirt and moisture until needed.
Conclusion
Selecting the right coupler type depends on your system pressure, operating environment, and maintenance needs. By choosing correctly, you reduce downtime, extend equipment life, and ensure safe, efficient hydraulic performance.
Ready to Place Your Order? At Topa, we manufacture and supply both flat face and threaded hydraulic quick couplers, tested to meet international standards.
FAQ
What is the main difference between flat face and threaded quick couplers?
Flat face couplers focus on cleanliness and spill control, while threaded couplers provide higher strength and pressure resistance.
Which coupler type is better for high-pressure applications?
Threaded quick couplers are safer for extreme high-pressure and vibration-heavy environments like oilfield or mining.
Why are flat face couplers popular in agriculture and construction?
They reduce oil spillage, are easy to clean, and allow fast attachment changes without tools.
Do both coupler types require torque control during installation?
Yes. Incorrect torque may cause leaks or thread damage. Always follow the manufacturer’s torque chart.
What maintenance steps help extend coupler life?
Inspect regularly, replace worn O-rings, clean sealing surfaces, and keep spare couplers ready for replacement.
Can I use flat face and threaded couplers in the same hydraulic system?
It’s not recommended. Mixing types can create compatibility issues. Stick with one type for consistency and safety.