Are you tired of quick couplers that weep or leak after installation? A connection that’s too loose can vibrate apart, while one that’s too tight can crack the fitting, causing costly fluid loss and downtime.
The correct torque for a hydraulic quick coupler depends on its thread type, size, and material. Always consult the manufacturer’s torque chart for the specific value. This ensures a durable, leak-free seal without causing damage to the fitting’s threads or O-rings.
What Is Torque in Hydraulic Couplers?
Definition of Torque
Torque is the twisting force used to tighten a threaded connection. In hydraulic quick couplers, torque ensures the male and female threads engage securely without overstressing the parts. It is typically measured in Newton-meters (Nm) or foot-pounds (ft-lb) using a calibrated torque wrench. Applying the correct torque value provides the right clamping force to hold the coupler in place, while still protecting the threads, O-rings, and sealing surfaces from damage.
Why Torque Matters
- Leak prevention Proper torque compresses the sealing surface or O-ring just enough to form a leak-free connection. Under-tightening leaves gaps where fluid can escape, while over-tightening may distort the seal.
- Component protection Threads, O-rings, and flat sealing faces are precision-made parts. Excessive torque can strip threads, cut into rubber seals, or deform metal. Correct torque avoids these issues, keeping the coupler reusable.
- Safety Hydraulic systems operate under very high pressure. A poorly torqued coupler can blow apart, releasing oil at dangerous speeds. Correct torque reduces the risk of accidents, injuries, or equipment damage.
- Longevity When couplers are tightened correctly, they last longer. Threads stay intact, seals stay undamaged, and hoses remain secure. This lowers maintenance costs and reduces downtime across the system’s life cycle.
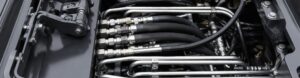
Types of Hydraulic Quick Couplers
Flat Face Couplers
Flat face couplers are designed to minimize fluid loss during connection and disconnection. Their flush, flat mating surfaces prevent dirt from entering the hydraulic system and make cleaning easy. Because the sealing surface is broad and smooth, they require precise torque to achieve a proper seal. Even slight under- or over-tightening can affect performance.

Poppet Couplers
Poppet-style couplers use a spring-loaded poppet valve that opens when the coupler halves connect. This design allows quick engagement and provides reliable sealing, though a small amount of fluid loss may occur during disconnection. They are durable, versatile, and simple to use, making them popular in general hydraulic applications, mobile equipment, and utility machinery.
Screw-to-Connect Couplers
Screw-to-connect couplers are built for high-pressure and high-vibration environments. Instead of a push-pull mechanism, they use a threaded sleeve that must be screwed together to connect. This design withstands heavy loads, impulse cycles, and extreme working conditions. Because of the threaded locking mechanism, they require higher torque values to ensure a secure and leak-free fit.
| Coupler Type | Key Feature | Torque Requirement | Common Applications |
| Flat Face | Low-spill, easy to clean | High precision needed | Agriculture, construction, skid steers |
| Poppet | Spring-loaded valve, durable | Moderate, less sensitive | General hydraulics, mobile equipment |
| Screw-to-Connect | Threaded lock for high pressure | Higher torque required | Oilfield, heavy-duty, mobile hydraulics |
How to Torque Hydraulic Quick Couplers Correctly
Tools Needed
- Torque wrench (calibrated) A properly calibrated torque wrench ensures accurate tightening. Without it, torque can easily be under- or over-applied, leading to leaks or damage.
- Proper fittings and adapters Always use the correct thread type and size. Mismatched fittings create poor sealing surfaces and require excess torque to hold, which can damage both the coupler and hose.
- Thread sealant or Teflon tape (if specified) Some thread types, like NPT or BSPT, require sealant to prevent leaks. Others, like ORFS or JIC, rely on mechanical seals and should never use tape.

Step-by-Step Guide
- Clean the threads Remove dirt, oil, rust, or old sealant from both male and female threads. A clean surface allows accurate torque transfer and prevents false tightening caused by debris.
- Apply sealant (if required) Use only manufacturer-approved thread sealant. Apply sparingly to avoid contaminating the hydraulic system. For tapered threads, wrap Teflon tape clockwise to prevent unraveling.
- Hand-tighten first Always start the connection by hand. This prevents cross-threading, which can permanently damage the fitting. Ensure threads engage smoothly before using tools.
- Use torque wrench Attach a torque wrench and apply torque gradually. Increase force in small steps until the recommended value is reached. Avoid sudden pulls that could overshoot the target torque.
- Verify alignment Check that the coupler, hose, and mating part are straight. Twisting or bending during tightening can weaken the seal and stress the hose. Proper alignment also improves service life.
- Pressure-test After tightening, run the hydraulic system to its working pressure. Check for leaks around the coupler. If leaks are present, do not overtighten further—instead, disassemble, clean, and reinstall correctly.
Best Practices for Correct Torque
Before Installation
- Check fitting condition Examine the threads, O-rings, and sealing surfaces before assembly. Even small scratches, dents, or corrosion can prevent proper sealing and lead to leaks. If any part looks worn or damaged, replace it instead of risking system failure.
- Confirm torque specifications Never rely on guesswork or generic tables. Each coupler type and size has its own recommended torque value. Refer to the manufacturer’s official torque chart to ensure accuracy. This protects both the coupler and the hydraulic system.
- Use clean, undamaged threads Contamination such as dirt, rust, or leftover sealant can alter torque readings and reduce sealing effectiveness. Always clean threads thoroughly with a brush or cloth before tightening. Smooth, undamaged threads ensure consistent torque transfer.
- Use clean, undamaged threads Clean both male and female threads with a brush or cloth. Dirt or debris can affect torque accuracy and sealing.
During Installation
- Use correct sequence: hand-tighten → torque wrench Always begin by hand to ensure the threads engage properly. This prevents cross-threading, which can permanently damage the fitting. Once hand-tight, switch to a torque wrench to apply the specified value.
- Avoid sudden force—apply torque gradually Do not jerk or snap the wrench. Instead, apply torque in smooth, steady movements. Gradual tightening gives better control and prevents overshooting the recommended torque. It also helps protect delicate seals.
- Keep hose alignment straight Check that the hose and coupler are in line with the connection. Twisted or bent hoses add extra stress to the joint. Misalignment can shorten service life by causing leaks or premature wear.
After Installation
- Perform leak test at operating pressure Once installed, run the system at its normal operating pressure. Check the coupler for leaks or seepage. This step ensures the connection is safe before the equipment goes back into service.
- Recheck torque if connection loosens Hydraulic systems experience vibration and load cycles that may loosen fittings. If a connection starts to leak, do not overtighten. Instead, loosen, inspect, and retighten using the correct torque value.
- Document torque values for maintenance records Keep a written log of torque values used during installation. Recording this information helps with troubleshooting, maintenance planning, and ensuring that future work follows consistent standards.
Common Mistakes When Tightening Quick Couplers
Over-Tightening
- Strips threads When too much torque is applied, the metal threads cut into each other and lose their shape. Stripped threads cannot hold pressure and may require the entire coupler to be replaced. This mistake is common when technicians rely only on “feel” instead of a torque wrench.
- Damages O-rings or seals Seals are designed to compress only to a certain point. Over-compression flattens or tears the O-ring, leaving no elasticity to maintain a seal. Once damaged, the seal cannot recover, and leaks will appear even under normal operating pressure.
- Causes difficulty during disassembly Couplers that have been overtightened often seize, making them almost impossible to remove without damaging the fitting. This increases downtime and repair costs because both the coupler and hose may need replacement.

Under-Tightening
- Leads to leaks If torque is too low, the seal is not compressed enough to block fluid flow. Hydraulic oil can leak around the threads or sealing face, causing efficiency loss and environmental hazards.
- Reduces pressure capacity Loose fittings cannot withstand full system pressure. During pressure spikes, the coupler may fail completely, resulting in sudden hose blowout or disconnection.
- Causes vibration-related loosening Hydraulic equipment often operates in high-vibration environments. A poorly tightened connection will gradually loosen further with use, making the leak worse over time.
Using the Wrong Tools
- Pipe wrenches can crush couplers – Their teeth bite into metal, deforming the body and sealing faces.
- Always use a calibrated torque wrench – This ensures accurate, repeatable tightening every time.
Ignoring Manufacturer Guidelines
- Each coupler design has unique torque requirements Flat face couplers require very precise torque, while poppet and screw-to-connect designs tolerate slightly different ranges. Treating all couplers the same leads to mistakes.
- Generic values may not apply Charts found online or for general fittings may not match the design, coating, or material of your specific coupler. Using the wrong numbers risks leaks, thread damage, and may even void warranties. Always check the product’s official torque chart.
| Mistake | Consequence | Solution |
| Over-tightening | Stripped threads, damaged seals | Use a calibrated torque wrench and stop at recommended torque |
| Under-tightening | Leaks, reduced pressure, loosening | Follow torque chart; recheck torque during maintenance |
| Using the wrong tools | Crushed or deformed couplers | Use correct-size wrenches or torque tools only |
| Ignoring manufacturer data | Incorrect torque, leaks, failures | Always follow the torque values in the manufacturer’s specification |
Where Can You Find the Right Torque Values?
Can’t locate the installation specs for your new hydraulic quick coupler? Tightening by guesswork is risky—it can cause leaks, damaged fittings, or even equipment failure at the worst possible time.
How to Read a Torque Chart
Torque charts are straightforward once you know the layout. Each table is organized by:
- Fitting size – shown as dash sizes (e.g., -08) or thread dimensions (e.g., 3/4-16).
- Torque values – listed in Newton-meters (N·m) and foot-pounds (ft-lb).
To use a chart, simply match your fitting size and thread type with the listed torque value. Then, apply it with a calibrated torque wrench in your preferred unit of measure.
The Impact of Lubrication on Torque
One critical detail often overlooked is friction. Torque charts are based on a defined condition—either dry or lubricated threads.
- Dry threads require higher torque to achieve proper clamping force.
- Lubricated threads reduce friction, meaning the same torque produces much more force.
If you apply a “dry” torque value to a lubricated fitting, you will almost certainly over-tighten and risk damaging the part. Always check the chart notes to confirm which condition applies.
When You Can’t Find the Chart
If the manufacturer’s torque chart isn’t available, the best solution is to contact your supplier directly. Never guess.
In urgent cases, you may use industry-standard torque charts from major hydraulic fitting standards (such as JIC or NPT). While these can serve as general guidelines, they don’t account for proprietary designs, coatings, or materials that may alter torque requirements.
Bottom line: The manufacturer’s specification is always the most reliable source. Using it ensures safe, leak-free, and long-lasting hydraulic connections.
Conclusion
Properly installing a hydraulic quick coupler is simple: use the manufacturer’s chart, understand your thread type, and follow the correct procedure with a calibrated torque wrench for a guaranteed result.
Looking for reliable hydraulic quick couplers with guaranteed performance? Topa offers both flat face and poppet designs, tested for durability and supported with complete torque charts. Whether you need small batches for repair work or bulk orders for production lines, we deliver high-quality products at competitive prices.
FAQ
Why is correct torque important for hydraulic quick couplers?
Correct torque prevents leaks, protects threads and seals, and ensures safe, long-lasting operation.
What tool should I use to tighten a quick coupler?
Always use a calibrated torque wrench. Avoid pipe wrenches, as they can damage the coupler.
Do all couplers require the same torque value?
No. Torque values depend on coupler type, thread size, and material. Always check the manufacturer’s chart.
Can over-tightening cause damage?
Yes. Too much torque can strip threads, crush seals, and make disassembly difficult.
What happens if a coupler is under-tightened?
Under-tightening leads to leaks, reduced pressure capacity, and loosening under vibration.
Should I use thread sealant on all quick couplers?
No. Use sealant only on tapered threads like NPT or BSPT. For ORFS, JIC, or flat face designs, sealing is achieved mechanically, and sealant is not needed.