An old hydraulic hose can provide useful clues for ordering a replacement, but it rarely tells the whole story. The hose marking may be worn, the fitting number may be partly hidden, and the original assembly may have been modified during an earlier repair.
For assemblies using 71 series one-piece fittings, the replacement needs to preserve the equipment connection while matching the hose and assembly process. Copying the visible thread or ferrule shape is not enough.
What Makes a 71 Series Fitting a One-Piece Fitting?
The stem and ferrule are supplied together
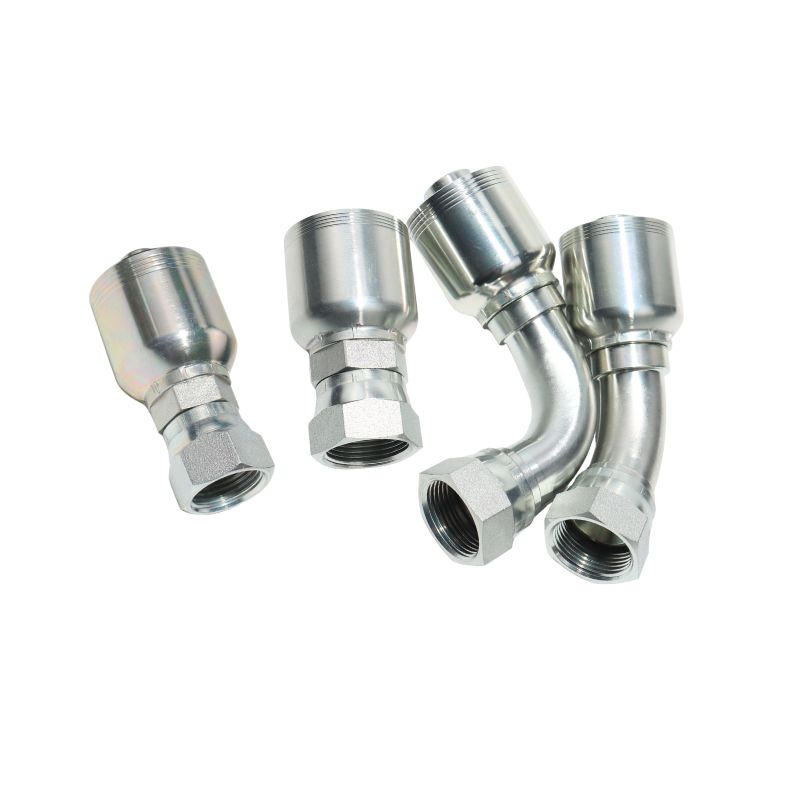
A 71 series one-piece fitting is a permanent crimp hose fitting with the stem and ferrule preassembled. The assembler does not need to choose a separate loose ferrule before making the hose assembly.
“One-piece” describes this supplied arrangement. It does not mean that the stem, nut, and ferrule are necessarily machined from one solid piece of metal.
The arrangement simplifies component handling, but it does not eliminate the need for correct hose selection. The hose-side geometry and the specified crimp process must suit the exact hose being assembled.
The crimped connection is permanent
During assembly, the ferrule is compressed around the hose using the prescribed equipment and tooling.
The fitting should therefore be treated as a permanent connection, rather than a reusable hose end. A fitting cut from an old assembly should not be assumed suitable for another crimp.
For replacement work, use the old fitting to help identify the required configuration, then specify new components for the new assembly. Visible condition alone cannot establish whether a previously crimped fitting remains suitable for reuse.
Read the Old Hose Before Ordering New Fittings
Capture the full hose marking
Before discarding the old hose, photograph any readable layline information. Record the manufacturer, complete hose model, nominal inside diameter, and other relevant markings.
Published references associate the 71 series with specified hoses, including 721, 721TC, and 721ST within applicable catalog scopes. These names are useful identification leads, but they do not replace a size-specific compatibility check.
Keep suffixes intact. A shortened description such as “721 hose” may omit information needed to locate the correct product and assembly instructions.
Where the reference comes from an older catalog, confirm the current replacement requirements rather than assuming the original combination remains unchanged.
Know what measurements cannot tell you
Measuring the inside or outside diameter can help narrow an investigation. It cannot reliably reconstruct an unknown hose model.
Hoses with the same nominal inside diameter may differ in cover thickness, reinforcement, and response to crimping. An old hose may also be swollen, flattened, abraded, or otherwise altered by service.
If the marking is unreadable, look for equipment records, previous purchase orders, assembly tags, or a documented parts list.
When the original hose cannot be established, specify a suitable new hose and confirm its approved fitting combination. Do not base the new assembly on an assumed identity.
Separate the Hose-Side Match from the Equipment Connection
Two interfaces must be correct
A hose fitting connects two different interfaces: the hose on one side and the equipment connection on the other.
Matching the equipment end does not prove that the fitting is suitable for the selected hose. Equally, a fitting approved for the hose may have the wrong thread, seat, or flange for the machine.
Keep these questions separate when reviewing a replacement:
| Interface | What needs to match |
| Hose side | Exact hose model, size, fitting design, and assembly requirements |
| Equipment side | Connection standard, size, sealing geometry, and installation dimensions |
This distinction helps avoid a common mistake: approving a fitting because it screws onto the equipment, then choosing a hose that happens to fit inside it.
Identify the sealing surface, not just the thread
Record the connection standard, male or female form, thread diameter, and pitch. Then identify where the seal is made.
Depending on the connection, sealing may occur at a cone, a flat face with an O-ring, a port seal, or a specified tapered-thread interface.
A nut that turns onto the mating thread may still have the wrong seat or sealing arrangement. Do not tighten a questionable connection to find out whether it seals.
For flange connections, confirm the complete flange form and mating dimensions. A photograph can help identify a candidate, but dimensional confirmation remains necessary.
Copy the Installation Requirements, Not the Old Hose’s Shape
Measure length using an agreed reference
An old hose often retains a curve after removal. That shape should not be used as the primary length specification.
Agree on the measurement reference for the new assembly. Depending on the end configurations, this may use defined sealing faces, fitting centerlines, or other drawing references.
Record the required finished length clearly. Avoid giving only an approximate cut-hose length when the supplier is expected to deliver a complete assembly.
Also consider whether the old hose was correctly sized. Evidence of stretching, excessive slack, tight bending, or rubbing may indicate that its length should be reviewed rather than copied.
Record elbow dimensions and relative orientation
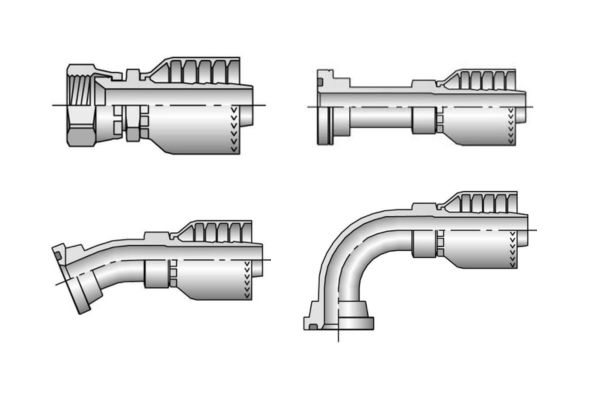
“90-degree elbow” does not fully describe an angled fitting.
Installation length and elbow drop affect clearance and hose exit direction. Two fittings with the same nominal angle can position the hose differently.
Where both ends are angled, specify their relative orientation using an agreed drawing or measurement convention. Descriptions such as “the elbows face roughly the same way” are difficult to reproduce accurately.
Check that the finished assembly can be installed without twisting the hose, pulling it tight, or forcing a bend immediately behind the ferrule.
Decide Whether to Retain or Change the Hose Specification
Retaining the hose still requires a current check
When the existing hose is identifiable and remains suitable for the application, keeping the same specification may simplify the replacement.
Even so, confirm the fitting combination and current assembly data. An old purchase record may identify what was previously supplied without proving that it was correct.
Review the reason for replacement as well. A hose damaged by abrasion may need improved routing or protection. A recurring leak may require inspection of the mating connection.
Replacing parts without addressing the cause can reproduce the same problem.
A new hose creates a new assembly combination
Changing the hose manufacturer or model is more than a purchasing substitution.
The new hose may have the same inside diameter and pressure marking while requiring a different fitting family or crimp process.
Confirm the proposed hose and fitting together. If the new hose requires another fitting family, preserve the equipment connection and installation dimensions through an appropriate configuration.
There is no benefit in retaining a 71 series designation when the selected hose requires a different approved assembly system. The objective is a suitable replacement assembly.
Check the Workshop Can Assemble the Combination
Obtain the applicable preparation instructions
Before cutting the new hose, confirm the preparation and insertion requirements.
Where no-skive assembly is approved, the outer cover does not need to be removed. That instruction applies to the specified combination, rather than every hose that can enter the ferrule.
Cut quality, cleanliness, and insertion still matter. An uneven end or incomplete insertion can affect the assembly even when the final crimp measurement appears acceptable.
Use the required insertion reference and external marking method so that positioning can be checked before crimping.
Use the correct tooling and measurement method
The assembly instructions should identify the hose, fitting, size, machine or process basis, tooling, target crimp dimensions, tolerance, and measuring location.
Do not borrow a die or crimp value from another series because its ferrule looks similar. Nominal hose size does not establish a common finished crimp diameter.
Before repeating production, inspect the first assembly. Confirm the components, insertion, crimp measurements, length, and orientation, together with any required testing.
A dimensional result is one part of the inspection. It cannot independently establish compatibility or suitability for the application.
Review the Conditions That Caused the Replacement
Pressure, temperature, and fluid remain part of the decision
The 71 series designation does not provide a universal assembly pressure or temperature rating.
Confirm normal working pressure, relevant pressure peaks, fluid, and operating temperature. The hose, fittings, seals, and approved combination must all suit those conditions.
Do not assign the hose’s pressure rating to the entire assembly without checking the other components. Likewise, a metal fitting does not establish fluid compatibility for the hose tube or seals.
Where the service conditions have changed since the original installation, review the replacement against the current requirements.
Look for mechanical causes of early failure
Inspect the route for rubbing, sharp edges, heat exposure, excessive movement, and connection loading.
Repeated damage near the fitting may indicate a routing or support problem rather than a need for a heavier-looking fitting.
Consider whether the hose has sufficient room to move through the equipment’s operating range. Check access for installation and future inspection.
Before removing or examining an installed assembly, isolate the equipment, release hydraulic pressure and stored energy, and follow the equipment’s safety procedure.
Give the Supplier a Replacement Specification They Can Use
Provide a concise identification package
A clear inquiry reduces the chance of receiving a visually similar but unsuitable fitting.
Include:
- Complete hose marking or proposed new hose specification.
- Readable fitting part numbers.
- Connection standard, size, and sealing details.
- Required finished assembly length.
- Fitting shape, critical dimensions, and elbow orientation.
- Working pressure, fluid, and temperature.
- Photographs showing the complete assembly and both connection ends.
- Required quantity, accessories, and inspection or testing requirements.
Measurements should support the photographs. A close-up image of a thread alone rarely provides enough information for accurate identification.
Keep the accepted details for the next repair
Once the replacement is confirmed, retain its hose model, fitting numbers, length, orientation, and assembly reference.
Give the assembly a clear internal identifier where practical. This makes the next order easier to reproduce and reduces dependence on a damaged sample.
If a supplier later proposes a change, compare it against the retained specification. Record accepted changes so that future orders follow the updated configuration.
A short, accurate record is more useful than repeatedly starting identification from scratch.
Conclusion
Replacing an assembly with 71 series one-piece fittings starts with identifying the hose and the equipment connections separately.
Preserve complete hose markings, confirm the sealing interface, and define the length and elbow geometry needed for installation. If the hose specification changes, reassess the fitting combination and assembly process.
Finally, address the reason the old assembly failed and retain the accepted replacement details. This helps turn a one-time repair into a repeatable specification for future maintenance.
Frequently Asked Questions
Can I identify a 71 series fitting from its ferrule shape?
Ferrule shape may provide a clue, but it cannot reliably establish the series or exact configuration. Use readable part numbers, drawings, and the hose information.
Can a 71 series fitting be used on any hose with the same inside diameter?
No. Compatibility depends on the exact hose model, size, fitting, and approved assembly process.
Should I copy the length of the old hose exactly?
First check whether the old length was suitable. Then specify the replacement using an agreed measurement reference, accounting for routing and movement.
Can a fitting from an old assembly be crimped onto a new hose?
Treat the connection as permanent and specify new approved components. Do not assume a previously crimped fitting is suitable for reuse.
What if the original hose model is no longer available?
Select a suitable current hose and confirm its fitting and assembly requirements. Preserve the equipment interface and installation dimensions without assuming the original fitting family must remain.