A hydraulic leak is more than just a maintenance issue—it’s a direct threat to safety, productivity, and the environment. In excavators, where pressure levels and operating demands are high, even a small leak can lead to costly downtime or serious injury.
The First Rule: Safety and System Depressurization
Before a single tool is touched, the machine must be made safe. Stored hydraulic energy is immensely powerful and dangerous. Rushing this step can lead to severe injury. This is the most critical phase of the entire process.

Achieve a Zero-Energy State
Park the excavator on level ground, away from hazards. Lower the boom, bucket, and any other attachments to the ground. This uses gravity to release the hydraulic energy that is holding them up, significantly reducing stored pressure in the system.
Relieve All Residual Pressure
Even with attachments grounded, pressure can remain trapped in the circuits. Shut off the engine, then cycle all hydraulic controls (joysticks and pedals) back and forth several times. This opens the valves and allows any trapped oil to return to the tank.
Lock-Out, Tag-Out (LOTO)
Physically prevent the machine from being started. Remove the key from the ignition and place a “Do Not Operate” tag on the controls. This ensures another worker won’t accidentally start the engine while you are in a hazardous position.
Wear the Correct Personal Protective Equipment (PPE)
At a minimum, you need safety glasses and nitrile or other oil-resistant gloves. A fluid injection injury from a pinhole leak can require amputation. Never use your hands, fingers, or any part of your body to check for leaks.
The Hunt: Pinpointing the Exact Leak Source
Locating a hydraulic leak isn’t always straightforward — oil can migrate along a hose or frame before it finally drips. To fix the real problem instead of its symptoms, follow a clean and methodical process.
Clean the Area Completely
Oil residue and dust often conceal the true source of a leak. Begin by using a quality degreaser and clean rags to wipe down the suspected hose, fittings, and surrounding components. A spotless surface will quickly reveal new oil trails once the system is pressurized again.
Check the Obvious Leak Points
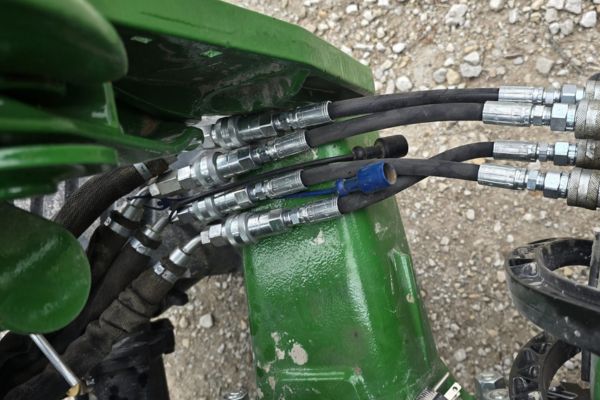
After cleaning, briefly run the machine and activate the function related to the leaking circuit. Watch closely for drips, weeps, or sprays. Most leaks originate from:
- Fitting crimps or ferrule ends
- Threaded joints that have loosened over time
- Sections where hoses rub against metal edges or moving parts
Use Tools, Not Hands
Never use your hand to check for leaks under pressure — hydraulic oil can penetrate the skin and cause serious injury. Instead, move a piece of cardboard or wood along the hose path. Even a small pinhole will leave a visible oil streak, allowing you to pinpoint the exact source safely.
Triage and Assessment: Repair Now or Replace?
Not all leaks are created equal. Understanding the type and severity of the leak dictates the urgency and method of repair. For high-pressure hydraulic hoses, however, the answer is almost always a complete replacement of the assembly.
Categorizing the Leak Severity
Leaks can be categorized as weeps (slow, greasy film), drips (forming and falling drops), or sprays (a jet of fluid). While a slow weep from a threaded fitting might be fixable, any leak from the hose body or crimp is a sign of impending failure.
The Extreme Danger of Pinhole Leaks
A pinhole leak is the most dangerous type. The fine, high-velocity jet of fluid may look harmless, but it can easily penetrate skin and clothing, causing a catastrophic fluid injection injury that requires immediate, specialized surgery.
There Are No Safe “Temporary” Hose Repairs
Never use tape, clamps, or any form of sealant to patch a leaking hydraulic hose. These “fixes” cannot contain the immense pressure and create a false sense of security, making a dangerous burst more likely. The only safe repair is a full assembly replacement.
| Leak Source / Type | Visual Cue | Corrective Action |
| Threaded Fitting Connection | Fluid weeping from the threads where two components join. Can be a slow drip. | Follow safety shutdown. Check fitting tightness with wrenches. If leak persists, disassemble, inspect seals (O-ring), and reassemble. |
| Fitting Crimp | Seeping or dripping from the junction of the metal fitting shell and the rubber hose. | The hose-to-fitting seal has failed internally. Immediate replacement of the entire hose assembly is required. Do not operate. |
| Pinhole Leak | A very fine, often invisible, high-pressure spray from the hose body. Evidence may be a thin line of oil on a nearby surface. | DO NOT APPROACH. Shut down the machine immediately from a distance if possible. Replace the assembly. This is an imminent burst hazard. |
| Abrasion / Wear | Fluid leaking from an area where the hose cover is visibly worn, frayed, or has exposed wire reinforcement. | The hose’s structural integrity is compromised. Replace the entire hose assembly immediately. |
| Catastrophic Burst | A sudden, large-volume failure of the hose, releasing significant amounts of oil. | Shut down the machine immediately and deal with the resulting spill and safety hazards. |
Professional Hose Removal and Installation
Replacing a damaged hydraulic hose is more than a quick swap — it’s a precision task that demands care, the right tools, and strict cleanliness. A properly installed hose ensures a long-lasting, leak-free seal and prevents damage that could cause repeat failures.
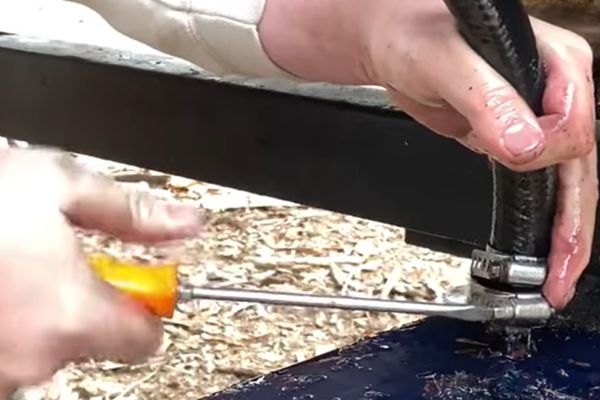
Use Two Wrenches — Always
When loosening or tightening any threaded hydraulic connection, never rely on one wrench. Use one wrench as a hold-back on the stationary component (such as an adapter or bulkhead fitting) and the other to rotate the hose nut.
This technique prevents:
- Damage to the adapter’s threads
- Cracking or warping of soft aluminum or brass fittings
- Unwanted stress on the hydraulic block or manifold
| Task | Correct Method | Common Mistake | Consequence |
| Loosening a JIC fitting | Use two wrenches — one to hold, one to turn | Using a single wrench | Twisted hose, damaged threads |
| Tightening connection | Torque to spec with hold-back | Over-torque by hand | Cracked seat or galling |
| Adjusting alignment | Loosen slightly, reposition, retighten | Force rotation under pressure | Seal damage, leaks later |
Cap and Plug Everything Immediately
Hydraulic systems are highly sensitive to contamination. The moment you remove a hose, seal both open ends:
- Cap the hose ends using plastic or metal dust caps.
- Plug the machine ports with matching thread protectors or plugs.
Even a few grains of dust or a drop of water can cause:
- Valve sticking or erratic motion
- Pump scoring or bearing wear
- System pressure loss and premature failure
Tip: Keep a small kit of clean caps and plugs in your service toolbox for every standard fitting type (JIC, ORFS, BSPP, NPT).
Get an Exact Match
Bring the old hose assembly to a qualified hydraulic shop or supplier. Matching every specification is critical for both performance and safety:
| Specification | Why It Matters |
| Hose type & pressure rating | Must meet or exceed the system’s maximum working pressure |
| Inside diameter | Affects flow rate and heat buildup |
| Fitting type & seat angle | Ensures proper sealing (JIC 37°, DIN 24°, ORFS flat face, etc.) |
| Orientation & clocking | Prevents torsion stress during movement |
| Overall length | Allows correct flexing and prevents pull tension |
Even small deviations — such as a few degrees in fitting angle or a few millimeters in length — can lead to twisting, over-bending, or stress fractures.
Install the New Hose Without Twisting
During installation:
- Route the hose naturally, following the original path without forcing bends.
- Avoid sharp turns or tight bends that violate the minimum bend radius.
- Tighten fittings using a torque wrench to the manufacturer’s specification.
- Do not overtighten — excessive torque can crush the sealing surface or distort the flare.
A twisted high-pressure hose experiences internal shear stress, which can lead to failure within hours of operation. Always check the alignment marks on the hose to confirm that it remains untwisted during final tightening.
The Long Game: Preventing Future Leaks
Replacing a failed hose fixes the immediate problem. Understanding why it failed and implementing preventative measures is how you increase reliability, reduce downtime, and lower operating costs over the long term.
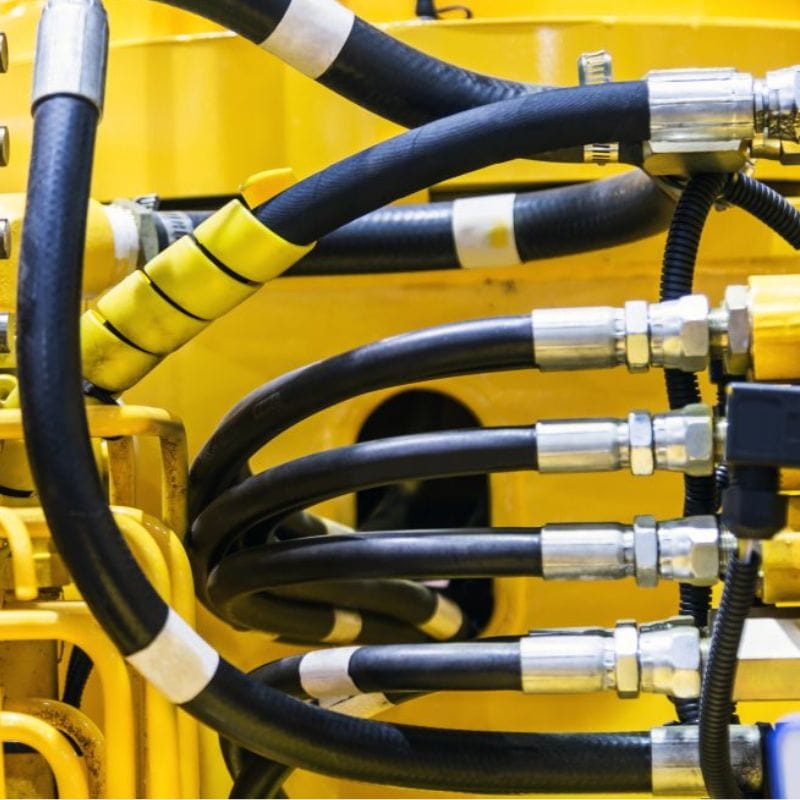
Respect the Routing
Most hose failures are caused by mechanical stress. Ensure hoses are routed to avoid sharp bends (respecting the minimum bend radius), twisting, and rubbing against other hoses or machine components. Use proper clamps to secure hoses and prevent movement.
Use Protective Sleeving
In areas where contact is unavoidable, use abrasion-resistant sleeving. Nylon sleeves, metal spring guards, or hard plastic wraps provide a sacrificial layer that protects the hose cover from wear, dramatically increasing its service life in harsh conditions.
Implement Daily Walk-Around Inspections
Train operators to perform a quick visual inspection of all hydraulic hoses as part of their daily pre-start check. Looking for visible damage, leaks, or rubbing takes only a few minutes but can catch a problem before it becomes a catastrophic failure.
| Common Mode of Failure | Primary Cause | Preventative Strategy | Key Inspection Point |
| Abrasion | Hose rubbing against another hose, a frame member, or an external object. | Re-route the hose to eliminate contact. Use clamps to secure the hose. Apply protective nylon or polymer sleeving in high-contact areas. | Look for worn, shiny, or frayed spots on the outer cover. |
| Fluid Contamination | The inner tube of the hose is degraded by incompatible or excessively hot fluid. | Verify fluid compatibility with the hose rating (e.g., synthetic oil vs. standard). Check and maintain the hydraulic system cooler. | The hose may feel mushy, soft, or may show blistering on the outer cover. |
| Minimum Bend Radius Violation | The hose is bent tighter than its specified limit, causing stress and damage to the reinforcement wires. | Re-route the hose to allow for a larger, gentler bend. Ensure there is enough slack, but not so much that it can snag. | Look for kinks or flat spots on the hose, especially near fittings. |
| Heat Aging | High ambient or fluid temperatures cause the rubber compounds to harden and crack. | Shield the hose from external heat sources like the engine or exhaust. Verify the hose’s temperature rating is appropriate for the system. | The outer cover will show a network of fine cracks (“weather checking”) and will feel hard and brittle. |
| Improper Assembly | The fitting was not crimped correctly, or the wrong fitting was used for the hose type. | Use only a qualified, professional hydraulic shop for hose assembly. Never mix and match hose and fitting manufacturers. | A leak specifically at the crimp shell is a primary indicator of a bad assembly. |
Conclusion
By following proper inspection, assembly, and preventive maintenance practices, you extend hose life and maintain the excavator’s performance in demanding conditions. In hydraulic repair, safety and cleanliness aren’t just procedures—they are the foundation of long-term reliability.
Don’t wait for the next leak to halt your job. Equip your excavators with Topa’s high-quality hydraulic hoses and fittings, engineered for durability, precision, and safety in every environment.
FAQ
Can I just tighten a leaking fitting to stop the leak?
If a threaded fitting (like a JIC or ORFS) is weeping, you can attempt to tighten it to the correct torque value after the system is safely depressurized. However, if the leak is from the crimp, tightening will do nothing and the assembly must be replaced.
Is it safe to reuse fittings from an old hose?
No. It is extremely dangerous and against all industry safety standards. Reusable fittings have a specific assembly process, but modern crimp-style fittings are designed for single use only. Reusing them will result in an unreliable and unsafe assembly.
The parts store gave me a hose that’s a little longer. Is that okay?
A little longer is generally safer than a little shorter. Too short, and the hose will be under tension and fail quickly. Too long, and it may sag and get snagged or rub on something. Use clamps to properly secure any excess length away from hazards.
My hose burst. Can I blame the manufacturer?
While manufacturing defects are possible, they are rare. Over 90% of hose failures are caused by external factors like abrasion, improper routing, kinking, operating over pressure, or using the hose beyond its service life.
What is the average lifespan of an excavator hose?
There is no “average” life. It depends entirely on the application’s severity. A hose on a boom might flex millions of times and last two years, while a static return line might last ten. Service life is determined by working conditions, not the calendar.
What are the signs that a hose needs to be replaced before it leaks?
Look for a cracked, hardened, or brittle outer cover; any visible damage like cuts or gouges; signs of abrasion where the cover is worn thin; or any blistering or soft, mushy spots on the hose. Any of these signs warrant immediate replacement.