Hydraulic hoses not only ensure the smooth transmission of hydraulic fluid but also provide flexibility and adaptability in complex systems where rigid piping might not suffice. They enable hydraulic components to move relative to each other, handle vibrations, and compensate for system misalignments. From cranes and forklifts to agricultural equipment and industrial robots, properly installed and maintained hydraulic hoses are essential for ensuring optimal system performance and safety.
Key Considerations for Hose Selection
Choosing the right hydraulic hose is crucial for ensuring the efficiency, safety, and longevity of your hydraulic system. The wrong selection can lead to system inefficiency, premature wear, or even catastrophic failures. Here are the most critical factors to consider when selecting a hydraulic hose for your application:
Pressure Rating
Why Pressure Ratings Matter
Hydraulic systems operate under a wide range of pressures, and each component, including the hose, must be capable of handling the maximum operating pressure. The pressure rating of a hose is the maximum pressure it can safely withstand. If a hose with an inadequate pressure rating is used, it can rupture under load, leading to leaks, equipment damage, and even injury.
How to Choose the Right Hose for Specific Applications
When selecting a hydraulic hose, it’s essential to know the system’s working pressure and ensure that the hose you choose has a pressure rating that exceeds the system’s maximum pressure, allowing for a safety margin. Most manufacturers provide hoses with different pressure ratings for various applications. It’s also important to consider pressure spikes, which can momentarily exceed normal operating pressure, especially in high-stress environments.
Hoses are typically categorized based on their pressure capacities (low, medium, high, and very high pressure). Consult the hose’s specification sheet and choose a hose that is designed to operate safely at or above your system’s maximum pressure.

Temperature Range
Importance of Temperature Compatibility
Hydraulic systems often operate in environments with extreme temperatures, which can affect the hose’s performance. If a hose is exposed to temperatures outside of its specified range, its material can degrade, resulting in reduced flexibility, cracking, or even failure.
Selecting the Right Hose for Temperature Extremes
Each hydraulic hose has a defined temperature range that indicates the maximum and minimum temperatures it can safely operate within. The operating temperature refers not only to the surrounding environment but also to the temperature of the fluid passing through the hose.
When selecting a hose, ensure that both the ambient temperature and fluid temperature fall within the hose’s specified limits. For systems operating in extremely hot conditions, opt for hoses that have high-temperature resistance, often made from materials like synthetic rubber. Similarly, for cold environments, choose hoses that maintain flexibility and durability at low temperatures. Keep in mind that temperature can also affect the pressure rating, as a hose may have a reduced pressure capacity at elevated temperatures.
Fluid Compatibility
Why Fluid Compatibility is Critical
Hydraulic systems use a variety of fluids, including petroleum-based oils, synthetic fluids, and water-based fluids. The material of the hose must be compatible with the fluid to prevent chemical reactions that could degrade the hose, leading to leaks, contamination, and system failures.
How to Match Hose Materials with Hydraulic Fluids
To ensure compatibility, review the specifications of the hydraulic fluid used in your system. Manufacturers provide guidelines on which hose materials are suitable for specific types of fluids. For instance:
Synthetic Rubber hoses are commonly used with petroleum-based fluids but may degrade if used with certain aggressive chemicals or synthetic fluids.
Thermoplastic hoses are often more resistant to a wider variety of fluids, including some synthetic fluids, and offer better chemical resistance than rubber hoses.
PTFE (Teflon) hoses are highly resistant to corrosive fluids and are ideal for systems using aggressive or high-temperature fluids.
Consulting the hose manufacturer’s chemical compatibility charts is essential to avoid premature hose degradation. Also, consider any additives in the hydraulic fluid, as some may react with the hose material over time.
Hydraulic Hose Orientation: Step-by-Step Guide
Proper hydraulic hose orientation is critical for ensuring system efficiency, safety, and longevity. Incorrect installation or improper hose selection can lead to failures, costly downtime, and potential safety hazards. Below is a step-by-step guide for orienting and installing hydraulic hoses correctly.
Step 1: Inspect the System and Identify Hose Needs
Before selecting or installing a hydraulic hose, it’s important to thoroughly inspect the system and determine the specific needs of the application. Consider the following checklist during your inspection:
Pressure Requirements: Identify the system’s maximum working pressure and check for any pressure spikes that could exceed normal operating conditions. Ensure the hose you choose is rated for these pressures.
Temperature Conditions: Evaluate both the ambient and fluid temperatures the hose will be exposed to, ensuring the hose material is suitable for these conditions.
Fluid Type: Confirm the hydraulic fluid being used (e.g., petroleum-based, synthetic, water-based) and verify hose material compatibility to avoid degradation.
Connection Points: Review the existing fittings, connectors, and ports to understand the connection type (threaded, quick-connect, etc.) and ensure the new hose and fittings will be compatible.
By thoroughly inspecting these factors, you can better determine the specific hose and fittings needed for the system.
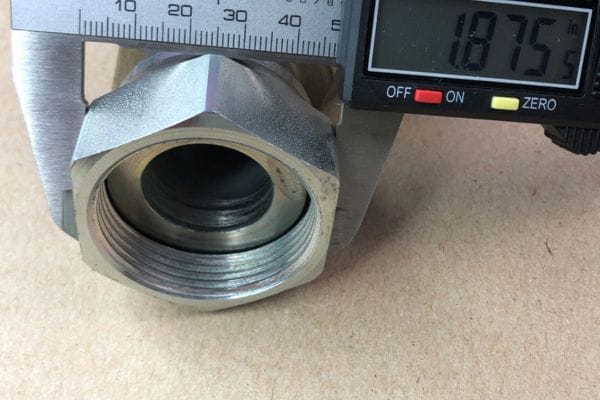
Step 2: Measure the Correct Hose Length and Diameter
Accurate measurement of hose length and diameter is essential for maintaining proper flow and preventing issues such as overextension, pressure loss, or premature hose failure.
Measuring Hose Length:
Measure the distance between the connection points where the hose will be installed.
Account for any bends or changes in direction, ensuring you leave enough slack to accommodate for system movement or vibrations.
Avoid routing the hose in a way that could cause tight bends, as this can lead to kinking or premature failure.
Selecting the Right Diameter:
Choose a hose diameter that allows for sufficient flow based on the system’s needs. A hose that is too small in diameter will cause pressure drops and reduce system efficiency.
The most common diameters are specified based on the system’s flow requirements (measured in gallons per minute) and the corresponding pressure.
Use flow rate charts provided by manufacturers to match the hose diameter to your system’s requirements.
Step 3: Choose the Correct Fittings
Choosing the appropriate fittings is critical to ensure leak-free connections and reliable operation. Hydraulic fittings come in a variety of types, each designed for specific applications and pressure ratings. Common fitting types include:
BSP (British Standard Pipe): Widely used in Europe and other international markets. Comes in both parallel and tapered designs.
NPT (National Pipe Tapered): Commonly used in North America, this fitting type has a tapered thread that provides a tight seal as it’s screwed in.
JIC (Joint Industry Council): Features a 37-degree flared seat and is widely used in high-pressure systems for secure, leak-resistant connections.
Considerations for Choosing Fittings:
Pressure Ratings: Ensure that the fittings can handle the system’s maximum pressure without failing.
Orientation: Choose fittings that accommodate the required hose routing to avoid awkward angles that can lead to kinks or excessive wear.
Seal Type: Depending on the application, you may need specific seal types, such as metal-to-metal seals or O-ring seals, for leak prevention.
Step 4: Install the Hose Properly
Once the correct hose and fittings are selected, it’s time to install the hose. Proper installation involves routing the hose in a way that maximizes its performance and longevity. Follow these guidelines:
Hose Routing:
Avoid tight bends and sharp angles that could kink the hose or restrict fluid flow.
Ensure there is enough slack in the hose to allow for system movement and vibration without putting strain on the hose or its connections.
Route hoses away from heat sources, such as exhausts or radiators, to prevent temperature-related degradation.
Securing the Hose:
Use clamps, guards, or sleeves to secure the hose in place and prevent it from rubbing against other surfaces, which can lead to abrasion and damage.
Ensure the hose remains flexible but protected from external wear and tear.
Proper routing and securing help prevent common issues such as hose failure, leaks, or loss of efficiency.
Step 5: Check for Leaks and Perform Initial Testing
Before putting the system under full pressure, it’s important to perform a series of tests to check for leaks and confirm that the installation was done correctly. Here’s how to perform initial testing:
Low-Pressure Testing:
Slowly pressurize the system to a low level, typically around 25% of the system’s maximum pressure.
Visually inspect all hose connections and fittings for leaks. If any leaks are detected, depressurize the system and tighten or replace the necessary components.
Checking for Leaks:
Pay attention to connections and the hose body itself for any signs of fluid leakage.
Use leak detection fluid or soapy water around connections to identify any slow-forming leaks.
If no leaks are detected, gradually increase the system pressure to normal operating levels.
By starting with low pressure, you can catch potential problems early, avoiding damage to the system.
Step 6: Final Inspection and Full System Testing
Once the hose is installed and has passed the initial low-pressure tests, it’s time for a full system test:
Final Inspection:
Check for proper hose routing one last time, ensuring there are no kinks, sharp bends, or unprotected areas that could lead to future issues.
Confirm that all fittings are securely fastened and hoses are correctly clamped or protected against abrasion.
Full System Testing:
Pressurize the system to its full working pressure and monitor for any changes in performance or signs of leaks.
Perform dynamic load testing if the hydraulic system involves moving parts (such as cylinders or motors). This will confirm that the hose is properly routed and secured to accommodate movement without excessive strain.
Monitoring During Operation:
Keep an eye on the hose during operation to ensure it performs as expected under full load.
Inspect the hose after several hours of operation to verify that the installation is holding up under the system’s normal pressures and temperatures.
Common Hose Installation Mistakes and How to Avoid Them
Proper hydraulic hose installation is key to ensuring the longevity and efficiency of your hydraulic system. However, several common mistakes can compromise performance, lead to premature failure, or create safety hazards. Below are some of the most frequent installation errors and how to avoid them.
Over-tightening or Under-tightening Connections
Consequences of Incorrect Torque Application
Applying incorrect torque when tightening hose connections can lead to significant issues:
Over-tightening:
Over-tightening can damage threads, deform fittings, and cause the connections to crack. This compromises the integrity of the seal, leading to leaks and potentially causing fitting failure under pressure. Over-tightening can also cause excessive stress on the hose itself, which might result in kinks or premature wear at the connection points.
Under-tightening:
Under-tightening, on the other hand, can leave the connection loose, resulting in leaks that not only waste hydraulic fluid but also lead to system inefficiency and potential environmental hazards. In high-pressure systems, loose connections can cause a dangerous blow-off of the hose, which may lead to equipment damage or injury.
How to Avoid It
To prevent over-tightening or under-tightening, always use a torque wrench and refer to the manufacturer’s recommended torque specifications. These specifications are designed to provide the optimal balance between a secure connection and preventing damage to the fittings or hose.

Inadequate Hose Routing
Examples of Poor Routing and Its Impact on Hose Longevity
Improper hose routing is a leading cause of hydraulic hose failure. Some common examples include:
Sharp Bends and Kinks:
Routing a hose with tight bends can cause kinking, which restricts fluid flow and increases pressure within the hose. Over time, this can lead to cracking and hose failure.
Abrasion:
Hoses that rub against surfaces, equipment, or other hoses experience abrasion. This gradually wears down the outer cover of the hose, exposing the reinforcement layer and leading to leaks or hose bursts.
Excessive Tension:
If a hose is installed without adequate slack to accommodate system movement or vibrations, it can be pulled too tightly. This puts stress on the connections and the hose itself, leading to premature wear, and in extreme cases, it may cause the hose to pull out of its fittings.
Best Practices for Avoiding Routing Issues
To ensure proper routing and avoid these common mistakes, follow these best practices:
Avoid Sharp Bends:
Hoses should be routed with generous bends to ensure that the hose is not under strain. Follow the manufacturer’s minimum bend radius recommendations to prevent kinking and maintain smooth fluid flow.
Use Hose Clamps and Guides:
Secure hoses with clamps or guides to prevent them from rubbing against other surfaces. Using abrasion-resistant sleeves or guards can also help protect hoses from damage in areas where they might come into contact with surfaces.
Allow for Flexibility:
Ensure that there is enough slack in the hose to allow for system movement, vibrations, or thermal expansion. This prevents undue stress on the hose and its fittings.
Improper Hose Storage
Why Proper Hose Storage is Important
Before installation, hydraulic hoses need to be stored correctly to prevent degradation and ensure they are in optimal condition when used. Improper storage practices can cause damage to the hose material, leading to performance issues or even failure after installation.
Consequences of Poor Storage:
Exposure to UV Light:
Hoses left exposed to direct sunlight or other UV light sources can experience degradation of the outer layer, which weakens the hose and reduces its service life.
Excessive Heat or Cold:
Storing hoses in environments with extreme temperatures can lead to hardening or cracking of the hose material, making it difficult to install and reducing its flexibility.
Improper Coiling:
If hoses are coiled too tightly or bent excessively during storage, they can develop permanent deformations, making installation challenging and potentially leading to flow restrictions or premature failure.
Contact with Contaminants:
Exposure to oil, grease, chemicals, or dirt during storage can damage the hose material or lead to contamination of the hydraulic fluid once the hose is installed.
How to Store Hydraulic Hoses Properly
To prevent damage during storage, follow these storage guidelines:
Store in a Cool, Dry Place:
Keep hoses in a location that is protected from direct sunlight, excessive moisture, and extreme temperatures. Aim to store hoses in a climate-controlled environment if possible.
Keep Hoses Clean:
Store hoses in a clean area away from oils, solvents, and other chemicals that could degrade the hose material. Using hose caps to seal the ends of the hoses can prevent dirt or other contaminants from entering.
Proper Coiling:
Store hoses in loose coils with large bends to prevent them from kinking or developing permanent bends. Use storage racks or hangers to keep the hoses elevated and organized, reducing the risk of crushing or improper handling.
Troubleshooting Common Hydraulic Hose Issues
Hydraulic hoses are critical components of hydraulic systems, and any issues that arise can severely impact the performance and safety of the equipment. Understanding common problems, their causes, and how to resolve them can help you maintain your system’s efficiency and avoid costly downtime.
Issue 1: Hose Leaks
Causes of Hose Leaks:
Loose or Improperly Tightened Fittings: The most common cause of hydraulic leaks is loose fittings or improperly torqued connections, which fail to create a proper seal.
Damaged Seals or O-rings: Over time, seals and O-rings can degrade due to wear, heat, or exposure to chemicals, leading to leaks at the connection points.
Abrasion or External Damage: Hoses that rub against surfaces, equipment, or other hoses can experience wear on the outer layer, leading to leaks along the hose body.
Cracked or Worn Hose Material: Exposure to extreme temperatures or fluid incompatibility can cause the hose material to crack or wear prematurely, resulting in fluid leakage.
Solutions for Hose Leaks:
Check and Tighten Fittings: Inspect all fittings and connections for proper torque, using a torque wrench to ensure they are tightened to the manufacturer’s specifications.
Replace Damaged Seals and O-rings: If seals or O-rings are worn or damaged, replace them with new ones that are compatible with your hydraulic fluid and operating conditions.
Repair or Replace Damaged Hoses: If the hose itself is damaged, you may need to replace the hose entirely or use an appropriate patch repair, though patching is often a temporary solution.
Use Protective Sleeving: Installing protective sleeving around hoses can help prevent abrasion and protect the outer layer from damage.
Issue 2: Hose Burst
Reasons for Hose Bursts:
Exceeding Pressure Limits: A hose that operates under pressure higher than its rated capacity is prone to bursting. Pressure spikes can also cause hose failure, especially if the hose is not designed to handle these fluctuations.
Incorrect Hose Selection: Choosing a hose with the wrong pressure rating, diameter, or material for the application can lead to bursting under load.
Kinking or Bending: Sharp bends or kinks in the hose can cause it to weaken and eventually burst, especially when subjected to high pressure.
External Damage or Aging: Hoses that have been exposed to extreme environmental conditions or have experienced significant wear are more likely to burst due to weakened material.
How to Prevent Hose Bursts:
Select the Correct Hose: Ensure the hose you use is rated for the system’s maximum operating pressure and can handle any pressure spikes that may occur.
Avoid Tight Bends: Follow the manufacturer’s guidelines on the minimum bend radius to avoid kinks and ensure proper flow.
Replace Aging Hoses: Regularly inspect hoses for signs of wear, aging, or damage, and replace them before they fail. Be proactive in maintenance to prevent burst events.
Steps to Take When a Burst Occurs:
Shut Down the System Immediately: If a hose bursts, stop the system to prevent further damage and ensure safety.
Depressurize the System: Before attempting any repairs, ensure the hydraulic system is completely depressurized to avoid injury.
Replace the Burst Hose: Identify the cause of the burst and replace the damaged hose with a new one rated for the correct pressure and application. Check the surrounding components to ensure no other parts were damaged.
Issue 3: Premature Wear
Identifying Early Signs of Wear:
Cracks in the Outer Layer: Visible cracking or discoloration on the hose’s exterior can be an early sign of material degradation due to environmental exposure or fluid incompatibility.
Flattened or Kinked Sections: If sections of the hose appear deformed or kinked, it indicates that the hose is under strain or has been improperly routed.
Excessive Abrasion: Hoses that show signs of rubbing or wear marks along their length are at risk of developing leaks or bursts.
Proactive Measures to Prevent Premature Wear:
Use Proper Routing and Clamps: Ensure hoses are routed properly, avoiding tight bends or areas where they could rub against equipment. Use clamps or guides to secure hoses and prevent excessive movement.
Apply Abrasion-Resistant Covers: Installing protective sleeves or guards over hoses can reduce wear from friction and external contact.
Monitor Pressure and Temperature: Excessive pressure or temperature can accelerate wear on hoses. Make sure the operating conditions stay within the hose’s specified limits and regularly monitor system conditions.
By addressing early signs of wear, you can replace hoses before they fail and prevent more serious issues from occurring.
Issue 4: Temperature-Related Failures
How Excessive Heat or Cold Affects Hose Performance:
Excessive Heat: High operating temperatures can cause the hose material to soften, crack, or blister. Hoses exposed to constant high heat are more prone to bursting or developing leaks due to weakened materials.
Cold Temperatures: In cold environments, hoses may become brittle and lose flexibility. This can lead to cracking, especially if the hose is subjected to movement or pressure changes in low temperatures.
Thermal Expansion and Contraction: Temperature fluctuations can cause the hose to expand and contract, leading to stress on the material and connections, which can cause leaks or loosening of fittings over time.
Adjustments to Make for Temperature Extremes:
Choose the Right Hose Material: Select hoses that are specifically designed for high- or low-temperature applications. For high-heat environments, synthetic rubber or thermoplastic hoses may be a better option. For cold environments, choose hoses that remain flexible in low temperatures.
Use Insulation or Heat Shields: In extreme heat environments, consider using insulating sleeves or heat shields to protect the hose from direct exposure to high temperatures.
Monitor System Temperatures: Regularly check the operating temperature of the system and the hydraulic fluid. If the fluid is running hotter than the hose’s rated limits, adjust the cooling system or consider changing to a fluid with a higher temperature tolerance.
Conclusion
By following these best practices, you can optimize hydraulic hose performance, minimize system failures, and ensure the longevity and safety of your hydraulic equipment. Proactive maintenance, proper installation, and careful system monitoring will help your system run smoothly and efficiently over the long term.
FAQ
How often should hydraulic hoses be inspected?
Hydraulic hoses should be inspected every three months or sooner if the system is exposed to extreme conditions. Regular checks help catch wear, leaks, or damage before they lead to failure.
What is the typical lifespan of a hydraulic hose?
The average lifespan of a hydraulic hose is 1 to 5 years, depending on operating conditions, pressure, temperature, and maintenance. Proactive replacement based on wear signs or service hours is recommended.
Can hydraulic hoses be repaired, or should they always be replaced?
While small leaks can sometimes be temporarily repaired, it’s generally safer to replace damaged hoses. Repairs are often temporary, and a new hose ensures reliable performance and safety.
What is the most common cause of hydraulic hose failure?
The most common cause of hydraulic hose failure is improper installation, such as incorrect routing, over-tightening fittings, or exceeding the hose’s pressure rating.
How do I choose the right hydraulic hose for my system?
Select a hose based on pressure rating, temperature range, fluid compatibility, and system requirements. Always consult the manufacturer’s specifications and guidelines to ensure the hose matches your application.
Can I reuse hydraulic fittings?
Reusing hydraulic fittings is generally not recommended, especially if they show signs of wear or damage. New fittings ensure a secure and leak-proof connection.