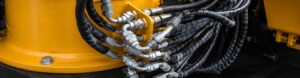
A recurring hydraulic leak is never just a minor inconvenience—it’s a warning sign of a deeper mechanical or assembly issue. Each connection in a hydraulic system is engineered to contain thousands of PSI, relying on precise sealing geometry and clean, controlled installation.
The Anatomy of a High-Pressure Seal
Every hydraulic fitting is engineered to create a perfect, leak-free barrier against immense pressure. Understanding how a specific fitting achieves this seal is the first step in diagnosing why it has failed. All designs rely on one of two fundamental principles.
The Role of the Primary Seal
The threads on a hydraulic fitting provide the mechanical strength to hold the connection together; they do not create the seal. The actual seal is formed by a small, precise interface designed to be impermeable to fluid under thousands of PSI of pressure.
Two Philosophies of Sealing
All common hydraulic fittings create their seal in one of two ways: they either compress a soft, elastomeric material (like an O-ring), or they force two precision-machined metal surfaces together with enough force to create a “hard” seal.
Why One Leak Is Never “Just a Leak”
A leak indicates that this critical sealing barrier has been compromised. Simply re-tightening the fitting is often a temporary fix that masks the root cause. A lasting repair requires identifying and correcting the original mode of failure.
Soft Seal vs. Hard Seal: Understanding the Difference
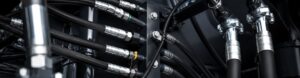
The fittings used on an excavator are not interchangeable. They are chosen based on pressure ratings, vibration resistance, and serviceability. Recognizing the sealing method is key to troubleshooting.
The Soft Seal Advantage: Resilient and Forgiving
Soft seals use a captured O-ring or elastomeric seal. Fittings like O-Ring Face Seal (ORFS) and O-Ring Boss (ORB) are prime examples. The soft material compresses to fill microscopic imperfections, providing an excellent seal that resists vibration.
The Hard Seal Method: Simple and Robust
Hard seals, like the JIC 37° flare or BSPP 60° cone, rely on the precise geometry of two mating metal cones forced together. This creates a line of intense contact that contains the fluid. They are simple but less tolerant of imperfection or contamination.
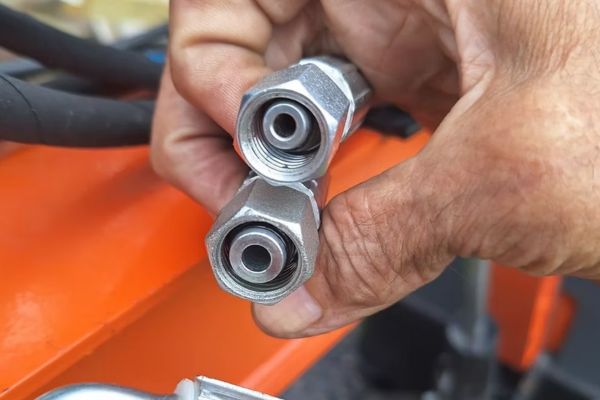
Identifying Your Fitting Type
ORFS fittings are recognizable by the visible O-ring in a groove on the flat face of the male fitting. JIC fittings have characteristic 37° flared ends. Knowing which type you are working on dictates the inspection and repair process.
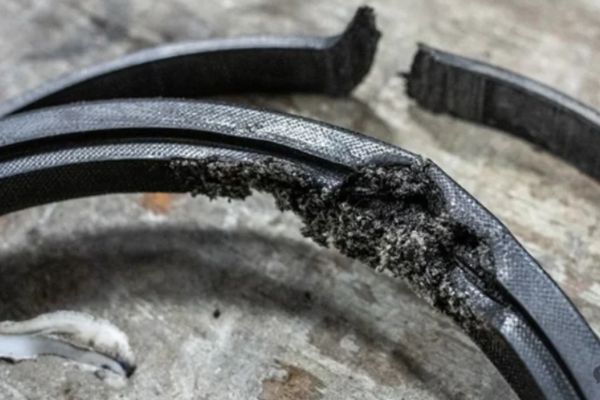
Common Failure Modes for Soft Seals (O-Rings)
O-rings are highly reliable but vulnerable to damage from improper installation or adverse system conditions. Learning to “read” a failed O-ring is a powerful diagnostic skill that tells you exactly what went wrong.
Failure by Pinching or Cutting
This appears as a clean cut or a flattened, “shaved” spot on the O-ring. It is almost always caused by the O-ring being forced over sharp threads or not being properly seated in its groove during the tightening process. It is an installation error.
Failure by Extrusion
The O-ring appears to have “nibbled” or frilled edges on the low-pressure side. This happens when the system pressure is too high or the gap between metal parts is too large, forcing the soft rubber into the clearance gap.
Failure by Heat Damage (Compression Set)
The O-ring becomes hard, brittle, and permanently flattened, losing its round cross-section. This is caused by prolonged exposure to excessive temperatures, which “cooks” the rubber, preventing it from springing back and maintaining a seal.
| Visual Evidence on Failed O-Ring | Probable Root Cause | Preventative Action |
| Clean Cut, Nick, or “Skived” Spot | Installation Damage. Pinched between metal components or cut on a sharp thread edge during assembly. | Lubricate the O-ring with system fluid before installation. Ensure it is perfectly seated in the groove. Take care when passing over threads. |
| “Nibbled” or Frayed Appearance | High-Pressure Extrusion. The pressure is forcing the O-ring into the clearance gap between the parts. | Verify system pressure is within spec. Check for excessive clearance due to worn or incorrect parts. Use a higher-durometer O-ring if applicable. |
| Hard, Brittle, Cracked Surface | Heat Hardening. Prolonged exposure to temperatures above the O-ring’s rating. | Verify the system’s operating temperature. Ensure hydraulic coolers are functioning. Use a high-temperature O-ring material (e.g., Viton™). |
| Swollen, Soft, or “Mushy” Ring | Chemical Attack. The O-ring material is incompatible with the hydraulic fluid being used. | Confirm O-ring material (e.g., Buna-N, Viton™) is compatible with the system fluid (e.g., standard mineral oil, synthetic ester). |
| Flattened on Both Sides (“Square”) | Compression Set. The O-ring has lost its elasticity due to age or heat and can no longer fill the gland. | Replace O-rings during any major hose replacement or system service. Do not reuse old O-rings. |
Common Failure Modes for Hard Seals (Metal-to-Metal)
Metal-to-metal (hard) seals—such as JIC, ORFS metal seats, or BSPP with bonded washers—depend on precise surface contact to achieve a leak-free connection.
Unlike soft-seal fittings that rely on O-rings, these joints leave zero tolerance for damage or debris. Even the smallest imperfection can become a direct leak path under high pressure.

Failure by Contamination
Cleanliness is the first rule of sealing integrity. A single grain of sand, metal shaving, or piece of lint trapped between the two sealing cones during assembly will create a microscopic escape channel for hydraulic fluid.
Once contamination is embedded in the surface, it can permanently scar the sealing faces—meaning even after reassembly, the leak will persist.
Best Practices:
- Always clean fittings and hoses before connection.
- Use lint-free cloths and protective caps during installation.
- Keep assembly areas isolated from dust and metalworking zones.
| Source of Contamination | Typical Cause | Resulting Issue | Preventive Action |
| Dust or grit | Poor worksite cleanliness | Creates micro-channels in seal | Clean and cap before assembly |
| Metal filings | Cutting, grinding, or re-threading near fittings | Embeds in surface | Work away from open connections |
| Dirty rags | Oil-soaked shop towels or cloth fibers | Deposits lint on sealing surface | Use lint-free or disposable wipes |
Failure by Surface Damage
The sealing cones on hard-seal fittings are precision-machined to micrometer tolerances. Any physical damage—such as scratches, gouges, or dents—will break the continuous contact line required for sealing.
This damage is typically caused by:
- Dropping fittings onto hard surfaces
- Using pliers or screwdrivers to separate tight joints
- Allowing fittings to rub together during storage or transport
Signs of Surface Damage:
- Shiny or dull flat spots on the sealing cone
- Circular scratches or visible lines across the seat
- Persistent weeping even after retightening
Prevention Tip:
Handle fittings as you would handle finished hydraulic components—keep them capped, separated, and stored in clean containers.
| Damage Type | Typical Cause | Result | Corrective Action |
| Scratch | Abrasive contact during assembly | Minor seepage | Replace or reface fitting |
| Nick or dent | Dropped or struck fitting | Distorted seal surface | Replace fitting immediately |
| Tool mark | Use of hard metal tools | Deep localized defect | Never use metal prying tools |
Failure by Over-Tightening (Coining)
A common misconception in hydraulic assembly is that “tighter means better” — but with hard-seal fittings, over-torquing is one of the fastest routes to failure.
When a fitting is grossly overtightened, the softer female cone becomes plastically deformed by the harder male cone, a process known as coining.
This deformation causes:
- Surface work-hardening of the flare
- Loss of elasticity in the joint
- A permanent leak path after pressure cycles
Best Practices:
- Always follow manufacturer torque charts for JIC and flare fittings.
- Use a torque wrench, not a guess.
- Re-torque only once after pressure testing—never repeatedly tighten.
| Symptom | Root Cause | Effect | Recommended Action |
| Flattened female flare | Excessive torque | Metal fatigue & leakage | Replace both male and female components |
| Uneven seating | Misalignment during tightening | Localized distortion | Loosen, realign, and torque correctly |
| “Creaking” sound during tightening | Overstress of cone surfaces | Galling or micro-cracking | Stop and inspect before reuse |
The Human Element: Installation and Assembly Errors
The vast majority of fitting leaks are not caused by faulty components but by errors made during the assembly process. Adopting a methodical, clean, and precise installation technique is the key to leak-free reliability.
The Sin of Under- or Over-Torquing
Under-tightening leaves insufficient force to maintain the seal against pressure spikes and vibration. Over-tightening damages threads, distorts seals, and can even crack the fitting. Using a torque wrench is ideal; experience-based methods can also be effective.
The Contamination Catastrophe
Cleanliness cannot be over-emphasized. A fitting end dragged on the ground or wiped with a dirty rag is a guaranteed future leak. Always use caps and plugs on disconnected hoses and ports, and wipe fittings only with clean, lint-free cloths.
The Danger of Reusing Components
Never reuse old O-rings; they are a single-use component. Carefully inspect the metal sealing surfaces of any fitting before reuse. If any scratches or signs of distortion are present, the fitting should be replaced, not reinstalled.
| Best Practice | Why It Matters | The Consequence of Failure |
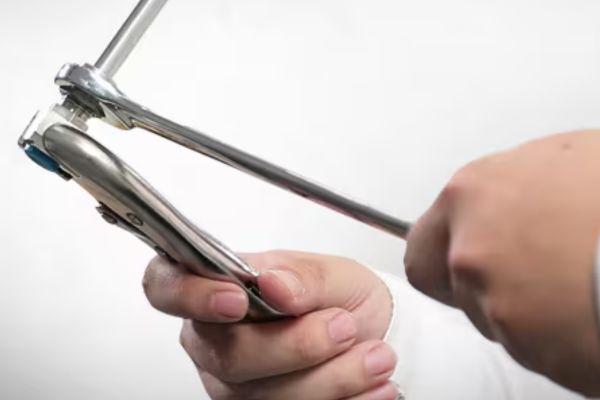
| 1. Always Use Two Wrenches | Prevents twisting the hose or applying damaging torque to adapters, bulkheads, and other components. One wrench holds, the other turns. | Twisting the hose assembly during installation will lead to premature failure. Damaging an adapter can create leaks and require costly component replacement. |
| 2. Keep Everything Scrupulously Clean | Contamination is the #1 enemy of a hard seal. A single particle can hold the sealing surfaces apart and create a leak path. | A persistent, weeping leak that cannot be fixed by proper tightening. Permanent damage (denting) to the precision-machined sealing surfaces. |
| 3. Lubricate O-Rings Before Installation | A dry O-ring can be easily pinched, cut, or abraded during assembly. Lubrication allows it to slide and seat correctly in its groove. | A leak that appears immediately upon system pressurization, caused by a cut O-ring. |
| 4. Tighten to the Correct Torque | Provides the precise clamping force needed to energize the seal without damaging components. | Under-tightening: a leak caused by vibration or pressure spikes. Over-tightening: damaged threads, a “coined” flare, or a cracked nut. |
| 5. Inspect All Sealing Surfaces | Old fittings may have scratches, nicks, or distortion from previous use. Reinstalling a damaged component guarantees a leak. | A frustrating, recurring leak that wastes time and money because the root cause (a damaged, reused part) was not identified. |
Conclusion
Hydraulic leaks rarely result from a single mistake—they’re the cumulative effect of contamination, damage, and improper assembly. True reliability comes from mastering the fundamentals: clean working practices, correct torque, new seals for every service, and using compatible, precision-made hydraulic fittings.
By applying these best practices—and choosing proven products from trusted suppliers like Topa—you ensure each fitting performs flawlessly under pressure, extending both machine life and operator confidence.
FAQ
Can I use Teflon tape or liquid sealant on a JIC or ORFS fitting?
No, absolutely not. These fittings are not designed to seal on the threads. Adding tape or sealant is ineffective, can mask the real problem, and introduces a major contamination risk as shreds of the material can break off and travel into your pumps and valves.
How tight is “tight enough” without a torque wrench?
For JIC fittings, a common field method is “Flats from Wrench Resistance” (FFWR). Tighten the nut by hand until it is snug. Then, using a wrench, turn it a specific number of “flats” (sides of the hex nut) based on its size, typically 1 to 2 flats.
Why do I have to replace the O-ring every time? It looks fine.
An O-ring that has been in service has taken a “compression set.” It has lost some of its elasticity and will not provide the same reliable sealing force as a new one. For the low cost of an O-ring, it is never worth the risk of having to redo the job.
Is it okay to mix fittings from different manufacturers?
While many fittings (like JIC) are made to a dimensional standard, tolerances and quality can vary. For the most reliable connection, it is best practice to use male and female ends from the same high-quality manufacturer. Never mix different fitting types (e.g., a JIC and a BSPP cone).
A hydraulic fitting is still weeping after I replaced the hose and O-ring. What now?
The leak is likely coming from the other half of the connection. The adapter or port it threads into may have a damaged sealing surface or cracked flare. Disassemble the connection again and meticulously inspect the “stationary” side of the fitting for any damage.
What’s the difference between a soft seal and a hard seal?
Soft seals use an O-ring to create a flexible, vibration-resistant seal. Hard seals rely on metal-to-metal contact between two cone surfaces.