Hydraulic Compression Fitting Pressure Ratings Explained

Hydraulic Compression Fitting Pressure Ratings Explained

Hydraulic Compression Fitting Pressure Ratings Explained

Table of Contents

Introduction

Hydraulic compression fittings are at the heart of hydraulic systems in construction, automotive, aerospace, and manufacturing to create secure connections and ensure efficient operation. Pressure ratings indicate the maximum pressure a fitting can withstand under normal operating conditions. Knowing these ratings accurately helps prevent system failure and ensures the reliable, safe operation of hydraulic systems, as proven by industry standards and rigorous testing protocols.

What Are Hydraulic Compression Fittings?

Hydraulic compression fittings are essential components in hydraulic systems, used to connect tubes and hoses securely to ensure efficient and leak-free fluid transfer. They work by compressing a ferrule—a small ring that fits over the tubing—against the tubing wall to create a tight seal. This section explores the various types, materials, and applications of hydraulic compression fittings.

Types of Hydraulic Compression Fittings

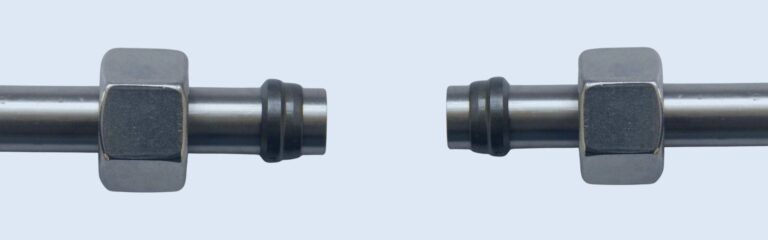
Single Ferrule Fittings

These fittings use a single ferrule to compress the tubing. The ferrule deforms slightly to create a tight seal around the tube when the nut is tightened.

Double Ferrule Fittings

These fittings use two ferrules—a front ferrule and a back ferrule. The front ferrule creates a seal against the fitting body, while the back ferrule grips the tubing securely.

Common Materials

Brass

Properties: Brass is a versatile metal with good corrosion resistance and moderate strength. It is also easy to machine and install.

Usage: Suitable for low to medium-pressure applications. Commonly used in plumbing, heating, and general hydraulic systems where corrosion resistance is necessary but high pressure is not a factor.

Stainless Steel

Properties: Stainless steel is highly resistant to corrosion and can withstand high pressures and temperatures. It also offers excellent strength and durability.

Usage: Ideal for high-pressure and corrosive environments. Frequently used in industries where hygiene and cleanliness are critical, such as food processing, pharmaceuticals, and chemical processing.

How They Work

The basic principle behind hydraulic compression fittings involves the compression of a ferrule to form a tight seal around the tubing. When the fitting nut is tightened, the ferrule deforms slightly, creating a seal that is both secure and resistant to leakage. This design allows for easy installation and maintenance, as well as reliable performance under varying pressures and environmental conditions.

Applications

Hydraulic compression fittings are found in numerous applications across different industries:

Automotive: Used in brake lines, fuel systems, and power steering systems.

Aerospace: Essential for hydraulic systems that control flight surfaces and landing gear.

Manufacturing: Used in hydraulic presses, injection molding machines, and assembly lines.

Construction: Critical in heavy equipment such as excavators, cranes, and bulldozers.

By selecting the appropriate type and material of hydraulic compression fittings, engineers can ensure the reliability and efficiency of hydraulic systems, maintaining performance under various operational conditions.

Understanding Pressure Ratings

Pressure ratings are a crucial aspect of hydraulic compression fittings, determining their suitability for specific applications. A pressure rating indicates the maximum pressure a fitting can safely withstand, considering its design and material strength. These ratings help ensure system integrity and safety, preventing failures and leaks under operational conditions.

Types of Pressure Ratings

Working Pressure

Definition: Working pressure, also known as operating pressure, is the maximum continuous pressure that a fitting can handle during normal operations without compromising its integrity.

Importance: Ensuring that the system operates within the working pressure limits helps maintain safety and reliability. This rating is critical for selecting fittings for daily use where consistent pressure is applied.

Example: A fitting with a working pressure rating of 3000 psi can handle continuous pressure up to 3000 psi during normal operations without failure.

Burst Pressure

Definition: Burst pressure is the pressure at which a fitting will fail or burst. It is typically much higher than the working pressure and represents the maximum pressure a fitting can endure before catastrophic failure.

Importance: Understanding the burst pressure helps in designing systems with safety margins. It indicates the absolute limit beyond which the fitting cannot function safely.

Example: A fitting with a burst pressure rating of 12000 psi will fail if the pressure exceeds this limit, providing a safety margin of four times the working pressure (if the working pressure is 3000 psi).

Determining Pressure Ratings

The pressure rating of a fitting is influenced by several factors, including:

Material Strength: Different materials have varying levels of strength and durability. For instance, stainless steel can typically handle higher pressures than brass due to its superior tensile strength and corrosion resistance.

Design Factors: The design of the fitting, including wall thickness and geometry, also plays a significant role. Fittings with thicker walls and robust designs can withstand higher pressures.

Temperature Effects: Elevated temperatures can reduce the material’s strength, lowering the fitting’s pressure rating. Manufacturers often provide derating factors to adjust pressure ratings based on operating temperatures.

Industry Standards and Testing

Pressure ratings are established based on industry standards and rigorous testing protocols. Common standards include:

SAE J514: Provides guidelines for hydraulic tube fittings, ensuring consistent performance and safety.

ISO 11926: Covers ports and stud ends for general use and fluid power applications, setting international benchmarks for pressure ratings.

Testing methods to verify pressure ratings include:

Proof Testing: Apply twice the maximum working pressure to check for leaks or deformations.

Burst Testing: Applying pressure until the fitting fails to determine the burst pressure.

Impulse Testing: Subjecting the fitting to cyclic pressure pulses to simulate real-world operating conditions.

Factors Affecting Pressure Ratings

Several factors influence the pressure ratings of hydraulic fittings, determining their suitability for various applications and environments. Understanding these factors helps in selecting the right fittings to ensure system safety and efficiency.

Material Strength

Stainless Steel: Known for its high tensile strength and excellent corrosion resistance, stainless steel fittings typically have higher pressure ratings compared to other materials. They are ideal for high-pressure and harsh environments such as offshore drilling and aerospace applications.

Brass: While brass fittings are more affordable and offer good corrosion resistance, their pressure ratings are generally lower than those of stainless steel. Brass is suitable for low to medium-pressure applications, including plumbing and automotive systems.

Temperature Variations

Effect on Material Properties: High temperatures can weaken the material, reducing its ability to withstand pressure. For example, the strength of stainless steel decreases at elevated temperatures, necessitating a lower pressure rating.

Derating Factors: Manufacturers provide derating factors to adjust the pressure ratings based on operating temperatures. These factors ensure that the fittings can handle the pressure safely at different temperatures.

raw carbon steel materials Topa

Connection Types

Threaded Connections: Threaded fittings are commonly used for their ease of installation and versatility. However, they may have lower pressure ratings compared to welded or flared fittings due to potential leak paths in the threads.

Flared Connections: Flared fittings offer a more secure and leak-resistant connection, suitable for high-pressure applications. The flaring process strengthens the connection point, enhancing its pressure rating.

Welded Connections: Welded fittings provide the highest pressure ratings due to the seamless connection they create. They are used in applications where leaks are unacceptable, such as in critical hydraulic systems in aerospace and industrial machinery.

Testing Methods for Pressure Ratings

To ensure that hydraulic fittings meet specified pressure ratings and perform reliably under various conditions, several testing methods are employed:

Proof Test

Description: This non-destructive test involves applying twice the maximum working pressure to the fitting. The purpose is to check for any leaks, deformations, or other signs of failure.

Significance: A successful proof test indicates that the fitting can safely handle its rated working pressure in regular use without any issues.

Burst Test

Description: A destructive test where the fitting is subjected to four times the working pressure until it bursts. This test determines the maximum pressure the fitting can endure before failing.

Significance: Burst tests provide crucial data on the safety margins of fittings, ensuring that they can withstand unexpected pressure surges.

Best Practices for Maintaining Clean Hydraulic Fluid

Description: This cyclic endurance test subjects the fitting to repeated pressure pulses to simulate real-world conditions. The fitting is pressurized to 133% of its working pressure at a high frequency for a specified number of cycles.

Significance: Impulse tests predict the lifespan of fittings under dynamic conditions, ensuring their durability and reliability in operational environments.

Salt Spray Test

Description: This corrosion resistance test involves exposing the fitting to a saline environment to evaluate the durability of its material and coatings.

Significance: Salt spray tests help determine the suitability of fittings for corrosive environments, ensuring long-term performance and resistance to rust and corrosion.

Calculating Pressure Ratings

Calculating the pressure ratings of hydraulic compression fittings is a crucial process that ensures the fittings will perform safely and efficiently under operational conditions. One common method used for this calculation is the Lame formula, which is applied to determine the design pressure based on the material properties and dimensions of the fitting.

The Lame Formula

The Lame formula is expressed as:

P=S(D²-d²/D²+d²)

where:

P is the design pressure,

S is the allowable stress of the material,

D is the outside diameter of the fitting,

d is the inside diameter of the fitting.

This formula helps engineers calculate the maximum pressure that a fitting can withstand by considering the inherent material properties and the geometric dimensions.

Steps in Calculating Pressure Ratings

Determine Material Allowable Stress (S)

The allowable stress is a material-specific value that indicates the maximum stress the material can handle without failure. This value is derived from material standards and is often provided by material manufacturers.

Measure the Outside Diameter (D)

The outside diameter of the fitting is measured to ensure accurate calculations. This dimension is critical as it impacts the overall strength and pressure rating of the fitting.

Measure the Inside Diameter (d)

Similarly, the inside diameter must be measured. The difference between the outside and inside diameters determines the wall thickness, which directly affects the pressure rating.

Apply the Lame Formula

Plug the values of S, D, and d into the Lame formula to calculate the design pressure (P). This gives the maximum pressure that the fitting can safely withstand.

Importance of Accurate Calculations

Accurate pressure rating calculations are vital for the following reasons:

Safety: Ensures that the fittings can handle the operational pressures without risk of failure, thereby preventing accidents and injuries.

System Performance: Guarantees that the hydraulic system operates efficiently without unexpected downtimes or maintenance issues.

Regulatory Compliance: Helps in adhering to industry standards and regulations, ensuring that the fittings meet the necessary safety and performance criteria.

By understanding and applying the correct pressure rating calculations, engineers can design more reliable and safe hydraulic systems that meet the demands of their specific applications.

Common Challenges and Solutions

Hydraulic systems, while highly efficient, can encounter several issues related to the fittings used. Addressing these challenges is essential for maintaining system integrity, safety, and performance. Here are some common problems and their solutions:

Leaks

Leaks are a prevalent issue in hydraulic systems, often resulting from improper installation or fittings that do not meet the required pressure ratings. Leaks can lead to reduced system efficiency, increased maintenance costs, and potential safety hazards.

Corrosion

Corrosion is a significant concern, especially in harsh environments such as marine, industrial, and outdoor applications. Corroded fittings can weaken and eventually fail, leading to system breakdowns and potential safety risks.

Pressure Surges

Pressure surges, or transient spikes in pressure, can exceed the rated pressure of the fittings, leading to failures. These surges can occur due to sudden changes in flow rates, system startup, and shutdown, or operational anomalies.

Conclusion

Understanding hydraulic compression fitting pressure ratings is essential for designing safe and efficient hydraulic systems. By selecting the right fittings and adhering to industry standards, professionals can ensure system reliability and performance. This knowledge helps prevent system failures, maintain safety, and optimize the overall functionality of hydraulic applications across various industries.

If you still have any questions about hydraulic compression fittings, please feel free to contact Topa!

FAQ

What is a hydraulic compression fitting?

A hydraulic compression fitting is a mechanical device used to connect tubes and hoses in hydraulic systems, ensuring secure and leak-proof connections. It works by compressing a ferrule against the tubing to create a tight seal.

What are the types of hydraulic compression fittings?

There are two main types: single ferrule fittings, which use one ferrule to compress the tubing, and double ferrule fittings, which use two ferrules (a front and back ferrule) for a more robust connection.

Why are pressure ratings important for hydraulic fittings?

Pressure ratings indicate the maximum pressure that a fitting can safely withstand. Understanding these ratings ensures system integrity, safety, and performance by preventing leaks and failures under operational conditions.

What materials are commonly used for hydraulic compression fittings?

Common materials include brass, suitable for low to medium-pressure applications, and stainless steel, ideal for high-pressure and corrosive environments.

How are pressure ratings determined?

Pressure ratings are determined by the design and material strength of the fitting, often calculated using formulas like the Lame formula. They also involve rigorous testing methods such as proof tests, burst tests, and impulse tests.

What are the common challenges with hydraulic fittings and their solutions?

Common challenges include leaks (solved by correct fitting selection and proper installation), corrosion (solved by using corrosion-resistant materials), and pressure surges (solved by designing systems with pressure relief mechanisms and selecting fittings with appropriate pressure margins).

Top Tips for Repairing Leaking Hydraulic Fittings Easily

Top Tips for Repairing Leaking Hydraulic Fittings Easily

Top Tips for Repairing Leaking Hydraulic Fittings Easily

Table of Contents

Introduction

Maintaining hydraulic systems is crucial for operational efficiency and safety. Hydraulic fitting leaks, a common issue, can lead to system failures and costly downtime. These leaks often result from poor installation, damaged components, wear and tear, contaminants, temperature fluctuations, and incorrect tightening. Identifying leaks involves visual inspections, pressure checks, and leak detection tools. Repair methods include tightening, replacing damaged parts, and using sealants. Preventive measures, such as regular maintenance, proper installation, and using quality components, are essential. Advanced techniques and tools also aid in effective leak management and repair.

Understanding Hydraulic Fitting Leaks

Definition and Types of Hydraulic Fittings

Hydraulic fittings are crucial for connecting various components within a hydraulic system, such as hoses, tubes, and pipes. These fittings ensure the proper transfer of hydraulic fluid, which is essential for the system’s operation. Here’s a closer look at the common types of hydraulic fittings:

Threaded Fittings

Threaded fittings use threads to connect components securely. They come in various thread types and sizes, ensuring a tight seal to prevent leaks. Common thread types include NPT (National Pipe Tapered), BSP (British Standard Pipe), and metric threads. Threaded fittings are versatile and widely used in different hydraulic applications, making them a popular choice for many systems.

Crimped Fittings

Crimped fittings involve the use of a crimping tool to secure the fitting to a hose. This method creates a permanent and leak-free connection, ideal for high-pressure applications. The crimping process ensures that the hose and fitting are tightly bonded, preventing fluid from escaping. Crimped fittings are preferred for their durability and reliability, especially in demanding environments.

Flange Fittings

Flange fittings consist of a flanged connection secured with bolts, providing a robust and high-pressure-capable connection. These fittings are typically used in industrial and heavy-duty hydraulic systems where strength and reliability are paramount. Flange fittings come in various sizes and pressure ratings, allowing for customization based on the specific requirements of the hydraulic system.

Other Types of Hydraulic Fittings

Quick-Disconnect Fittings: These allow for easy connection and disconnection without tools, facilitating quick maintenance and repairs.

Compression Fittings: Use a compression nut and ferrule to create a tight seal. They are commonly used for small-diameter tubing.

Push-to-Connect Fittings: Simplify the connection process by allowing hoses to be pushed into place without additional tools, often used in pneumatic and low-pressure hydraulic systems.

Common Causes of Hydraulic Leaks

Poor Installation

Incorrect procedures during installation can result in misaligned components and inadequate sealing. Ensuring proper alignment and following manufacturer guidelines are crucial to avoid leaks.

Damaged Components

Wear and tear or physical damage to fittings, hoses, and seals can create points of leakage. Regular inspections and timely replacement of worn parts are essential for maintaining system integrity.

leaking hydraulic Fittings Topa

Contaminants

Dirt and debris can compromise seals, causing abrasion and eventual failure. Keeping the system clean and using proper filtration can mitigate this issue.

Temperature Fluctuations

Hydraulic systems often operate in environments with varying temperatures. Expansion and contraction of materials can weaken seals, leading to leaks. Using materials suited for temperature variations can help prevent this problem.

Over-tightening or Under-tightening

Applying incorrect torque when securing fittings can damage threads or fail to seal properly. Over-tightening can strip threads, while under-tightening may not create a sufficient seal. Using torque specifications provided by manufacturers is critical to prevent leaks.

Diagnosing the Leak

Visual Inspection

Look for Visible Signs: Begin by looking for wet spots, fluid puddles, cracks, or loose fittings. These signs are the most immediate indicators of a hydraulic leak.

Focus on Connection Points: Pay close attention to areas where hoses and fittings connect, as these are common points for leaks to develop due to wear and stress.

Checking System Pressure

Monitor Pressure Levels: Continuously monitor the system for any drops in pressure, as a sudden decrease can indicate a leak.

Use Pressure Gauges: Install pressure gauges at different points within the system to compare readings. Significant differences between readings can help localize the leak.

Using Leak Detection Tools

Ultrasonic Detectors: Utilize ultrasonic detectors, which can pick up the high-frequency sound of fluid escaping from a leak, making it easier to locate small or hidden leaks.

Electronic Sniffers: Employ electronic sniffers that are designed to detect hydraulic fluid vapors. These tools are particularly useful for identifying leaks in enclosed or hard-to-reach areas.

Dye Testing

Inject Fluorescent Dye: Introduce a fluorescent dye into the hydraulic system. The dye mixes with the hydraulic fluid and flows through the system.

Use UV Light for Tracing: Shine a UV light over the system components to trace the dye’s path. The dye will glow under UV light, allowing you to pinpoint the exact location of the leak.

Safety Precautions

Depressurize the System: Always depressurize the hydraulic system before performing any inspections or repairs to prevent injury from high-pressure fluid.

Wear Appropriate PPE: Use personal protective equipment such as safety goggles, gloves, and protective clothing to guard against hydraulic fluid exposure and other potential hazards during the diagnostic process.

Repairing Leaking Hydraulic Fittings

Safety First

Depressurize the System: Always begin by depressurizing the hydraulic system to prevent injury from high-pressure fluid. Follow proper procedures to ensure all pressure is released safely.

Clean the Area

Remove Dirt and Debris: Clean the area around the leak thoroughly. Use a clean, dry cloth to wipe away any dirt, debris, or hydraulic fluid. This ensures a clean working surface and prevents contaminants from entering the system.

Inspect and Identify

Locate the Faulty Fitting: Carefully inspect the hydraulic system to locate the faulty fitting. Look for signs of wear, damage, or improper installation. Assess the condition of the fitting to determine the appropriate repair method.

Tightening Loose Fittings

Use a Torque Wrench: If the fitting is loose, use a torque wrench to apply the correct torque as specified by the manufacturer. Proper torque ensures a secure connection without over-tightening, which can cause damage.

Replacing Damaged Fittings

Remove and Replace: If the fitting is damaged or worn, remove it carefully. Replace it with a new fitting that matches the specifications of the original. Ensure proper alignment and secure it according to manufacturer guidelines.

Using Sealants and Tapes

Apply Hydraulic Sealant or PTFE Tape: For threaded fittings, apply hydraulic sealant or PTFE tape to the threads before reassembly. This helps create a secure seal and prevent leaks. Ensure the sealant or tape is applied evenly and not excessively.

Swaging and Flaring Techniques

Form Secure Connections: Use specialized tools to perform swaging or flaring on the hydraulic lines. Swaging involves deforming the fitting to create a tight seal while flaring expands the tube end to fit securely with the fitting. These techniques are used for creating strong, leak-free connections in high-pressure systems.

install Hydraulic Bulkhead Fittings

Proper Installation Techniques

Using the Correct Tools

  • Select the right tools specifically designed for hydraulic systems to avoid damaging fittings and hoses.
  • Use tools such as hydraulic wrenches, crimping tools, and alignment devices to achieve secure and precise connections.
  • Avoid makeshift solutions that can compromise the integrity of the fittings.

Use Tools Designed for Hydraulic Systems

  • Hydraulic systems require specific tools for installation and maintenance to ensure accurate and secure connections.
  • Tools such as hydraulic-specific wrenches and torque tools are designed to provide the necessary force without causing damage.

Ensuring Proper Torque

Follow Manufacturer Specifications

  • Adhere to the torque settings recommended by the manufacturer to avoid over-tightening or under-tightening fittings.
  • Incorrect torque can lead to damaged threads or insufficient sealing, causing leaks.

Use a Calibrated Torque Wrench

  • Utilize a calibrated torque wrench to apply the precise amount of torque required.
  • Regularly check the calibration of the torque wrench to ensure it provides accurate readings.

Aligning Components Correctly

Ensure Proper Alignment

  • Proper alignment of components is essential to prevent stress and potential leaks.
  • Misaligned fittings can lead to uneven pressure distribution and eventual failure.

Use Alignment Tools and Techniques

  • Employ alignment tools and techniques to achieve correct positioning during installation.
  • Techniques such as using alignment marks or fixtures can help ensure components are correctly positioned.

Selecting the Right Fittings and Materials

Match Fittings to System Requirements

Pressure Specifications

  • Select fittings that can withstand the hydraulic system’s maximum operating pressure. This ensures the fittings will not fail under normal or peak load conditions.
  • Consider both static and dynamic pressure ratings when selecting fittings to match the specific needs of your system.

Temperature Specifications

  • Choose fittings that are compatible with the operating temperature range of your hydraulic system. Materials should be able to expand and contract without compromising the integrity of the connection.
  • Use fittings made from materials designed to perform reliably at both high and low temperatures to prevent failures due to thermal stress.

Fluid Type Specifications

  • Ensure fittings are compatible with the type of hydraulic fluid used in your system. Different fluids can have varying chemical properties that may react differently with certain materials.
  • Consider the fluid’s viscosity, corrosiveness, and potential for contamination when selecting fittings.

Environmental Conditions

  • Take into account the environmental conditions where the hydraulic system operates. This includes exposure to elements such as moisture, chemicals, and varying temperatures.
  • Select materials that are resistant to corrosion, wear, and other environmental factors that could affect the longevity and performance of the fittings.

Use High-Quality Components

Invest in High-Quality Fittings and Hoses

  • Opt for fittings and hoses made from high-grade materials to ensure durability and reliability. High-quality components are less likely to fail and can significantly reduce the risk of leaks.
  • High-quality materials often come with better manufacturing processes, ensuring tighter tolerances and better performance under pressure.

Source from Reputable Manufacturers and Suppliers

  • Purchase components from reputable manufacturers and suppliers who provide certified and tested products. This guarantees that the fittings and hoses meet industry standards and specifications.
  • Reliable suppliers often offer better customer support and warranties, adding an extra layer of assurance for the quality and performance of the components.

Common Repair Mistakes and How to Avoid Them

Over-tightening

Issue: Applying excessive torque to hydraulic fittings can damage threads or deform the fittings, leading to leaks. This problem often arises from the mistaken belief that tighter connections are always better.

Solution: Use a torque wrench to apply the correct amount of force as specified by the manufacturer. This ensures that the fittings are secure without being overly tightened, preserving the integrity of the threads and connections.

Incorrect Fitting Selection

Issue: Using fittings that do not match the system’s pressure, temperature, or fluid type specifications can result in poor performance and leaks. Incompatible fittings may fail under operational stresses, leading to system downtime and potential damage.

Solution: Ensure that fittings are selected based on the hydraulic system’s specific requirements, including pressure ratings, temperature tolerance, and fluid compatibility. Consulting manufacturer guidelines and considering environmental conditions are crucial steps in this process.

Hydraulic Hose Fittings Leaking Topa

Poor Sealing Practices

Issue: Incorrect application of sealants and tapes can cause leaks. Improper sealing techniques, such as uneven application or using incompatible products, can lead to inadequate seals and fluid escape.

Solution: Apply hydraulic sealant or PTFE tape evenly and according to the manufacturer’s instructions. Ensure that the chosen sealant or tape is suitable for the hydraulic fluid and operating conditions of the system. Proper training on sealing techniques can help avoid these issues and ensure a leak-free connection.

Dealing with Persistent Leaks

Re-evaluate System Design

Issue: Persistent leaks may indicate a fundamental flaw in the system design, such as improper routing of hoses or incorrect component selection.

Solution: Review the system design thoroughly for potential weaknesses. Ensure that all components, including fittings and hoses, are appropriately matched to the system’s pressure, temperature, and fluid specifications. Consider re-routing hoses and redesigning certain aspects of the system to improve performance and reduce leak risks.

Consult with Hydraulic Experts

Issue: Complex hydraulic issues often require specialized knowledge and experience to diagnose and resolve effectively.

Solution: Seek advice from hydraulic experts who can provide in-depth analysis and recommendations. Experts can identify underlying problems that may not be apparent and suggest effective solutions tailored to your specific system requirements.

Consider upgrading to higher-quality fittings and hoses

Problem: Continuous leaks can result from the use of substandard or incompatible parts that cannot withstand the operating pressures.

Solution: Upgrade to higher quality fittings and hoses for improved durability and performance. Investing in quality components reduces the frequency of leaks and improves the overall reliability of your hydraulic system. You can choose components manufactured by Topa, which is known for its strict quality standards.

Vibration and Mechanical Stress

Hydraulic systems frequently operate in environments that subject them to significant vibration and mechanical stress. This is especially true for heavy machinery, industrial equipment, and mobile applications like construction vehicles and agricultural machinery. The continuous movement, high-speed operations, and mechanical impacts these systems endure can cause considerable strain on their components.

Vibration: Constant vibration can lead to the loosening of fittings, connections, and other critical components. Over time, this can create gaps and misalignments that compromise the integrity of the system.

Mechanical Stress: Repeated mechanical stress, such as shocks and impacts, can cause physical deformation of components. This stress can result in micro-cracks, material fatigue, and eventual failure of hydraulic fittings and seals.、

Methods to Reduce Vibration and Mechanical Stress

To mitigate the effects of vibration and mechanical stress on hydraulic systems, several strategies can be employed:

Install Vibration Dampers: Vibration dampers or isolators can be installed to absorb and reduce the impact of vibrations. These dampers can be placed at strategic points within the hydraulic system to protect vulnerable components from excessive movement.

Use Flexible Hoses: Incorporating flexible hoses in the hydraulic system can help absorb shocks and vibrations. Unlike rigid pipes, flexible hoses can bend and flex, reducing the strain on fittings and connections.

Shock Absorbers: For systems subject to frequent impacts, such as those in construction or mining equipment, installing shock absorbers can help cushion the blows and protect hydraulic components from sudden stress.

Conclusion

Proper maintenance and repair techniques are crucial for preventing hydraulic fitting leaks. Regular inspections and the use of high-quality components are essential for system reliability. Following best practices, ensuring thorough training for personnel, and using the right tools can significantly reduce the risk of leaks and enhance the efficiency of hydraulic systems. Prioritizing these elements will lead to long-term operational success and minimized downtime.

FAQ

What are the most common causes of hydraulic fitting leaks?

Common causes include poor installation, damaged components, contaminants, temperature fluctuations, and incorrect torque application (over-tightening or under-tightening).

How can I prevent hydraulic fitting leaks?

Regularly inspect fittings and hoses, replace worn components, use proper installation techniques, match fittings to system requirements, and apply correct torque.

What should I do if I find a leak in my hydraulic system?

Depressurize the system, clean the area around the leak, identify the faulty fitting, and either tighten, replace, or properly seal the fitting.

Why is it important to use high-quality fittings and hoses?

High-quality components are more durable and reliable, reducing the risk of leaks and ensuring the hydraulic system operates efficiently under various conditions.

What tools are essential for repairing hydraulic leaks?

Essential tools include torque wrenches, crimping tools, hydraulic sealants, PTFE tape, and leak detection tools like ultrasonic detectors and dye testing kits.

How do I know if my hydraulic fittings are properly aligned?

Ensure there are no visible gaps or misalignments between fittings and hoses. Use alignment tools and follow manufacturer guidelines to verify correct positioning.

Tightening Hydraulic Fittings Guide Avoid Over-Tightening

Tightening Hydraulic Fittings Guide: Avoid Over-Tightening

Tightening Hydraulic Fittings Guide: Avoid Over-Tightening

Table of Contents

Introduction

Proper hydraulic fitting tightening is essential for ensuring the efficiency and reliability of hydraulic systems. Incorrect tightening can lead to leaks, over-tightening, and potential system failures, which not only cause downtime but also increase maintenance costs and safety hazards. This guide aims to thoroughly understand the techniques and best practices for tightening hydraulic fittings effectively, helping maintain system integrity and avoid common issues.

Basics of Hydraulic Fitting Tightening

Explanation of Different Thread Types

NPT (National Pipe Thread): In North America, NPT threads are tapered, which helps create a seal as the threads are tightened. This type requires a thread sealant to prevent leaks.

BSP (British Standard Pipe): Widely used in Europe and Asia, BSP threads come in two varieties: BSPP (parallel) and BSPT (tapered). BSPT is similar to NPT but has a different thread angle and pitch.

JIC (Joint Industry Council): JIC threads are 37-degree flare fittings that provide a metal-to-metal seal, making them suitable for high-pressure applications.

ORFS (O-Ring Face Seal): ORFS fittings use an O-ring in the face of the fitting to create a leak-proof seal, ideal for high-pressure systems and those requiring frequent disassembly.

JIC vs NPT vs BSP

Compatibility and Standards

Compatibility: Matching the correct thread type to the corresponding fitting is crucial to ensure a proper seal and avoid cross-threading. Mixing different thread types can lead to system failures.

Standards: Adhering to industry standards like SAE (Society of Automotive Engineers), ISO (International Organization for Standardization), and DIN (Deutsches Institut für Normung) ensures compatibility and reliability of hydraulic systems. Each standard defines the thread dimensions, tolerances, and performance criteria for hydraulic fittings.

Tools Required

List of Essential Tools:

Wrenches: Standard wrenches, adjustable wrenches, and specialty hydraulic fitting wrenches are necessary for tightening and loosening fittings without damaging them.

Torque Wrenches: Essential for applying the correct amount of torque to ensure fittings are neither over-tightened nor under-tightened, which prevents leaks and damage.

Thread Sealants: These include Teflon tape, pipe dope, and anaerobic sealants, which help create a leak-proof seal for tapered threads like NPT and BSPT.

Proper Use and Maintenance of Tools:

Use: Always select the correct size and type of wrench for the fitting to prevent rounding off the edges. When using a torque wrench, follow the manufacturer’s guidelines to apply the correct torque. For thread sealants, ensure even application without overuse, which can obstruct the flow.

Maintenance: Regularly inspect tools for wear and tear, especially torque wrenches, which should be calibrated periodically to maintain accuracy. Clean tools after use to prevent contamination and store them in a dry, safe place to extend their lifespan.

Step-by-Step Tightening Process

Pre-Tightening Preparation

Inspection of Fittings and Threads:

  • Visual Inspection: Examine the fittings and threads for any signs of damage, such as cracks, nicks, or deformations. Damaged threads can lead to improper sealing and potential leaks.
  • Fit Check: Ensure that the threads match properly without forcing them. Mismatched threads can result in cross-threading and system failure.

Cleaning and Lubrication:

  • Cleaning: Remove any dirt, debris, or old sealant from the threads using a clean cloth or appropriate solvent. Clean threads ensure a better seal and prevent contamination.
  • Lubrication: Apply a small amount of lubricant to the threads to reduce friction during tightening. This helps achieve the correct torque and prevents galling (thread seizing).

Importance of Using the Correct Thread Sealant:

  • Selection: Choose the appropriate thread sealant based on the thread type and application. For instance, use Teflon tape or pipe dope for tapered threads like NPT and BSPT, and avoid sealants on metal-to-metal seal fittings like JIC.
  • Application: Apply the sealant evenly and sparingly to prevent over-application, which can obstruct the hydraulic flow and cause contamination.
tightening hydraulic Fittings Topa

Proper Tightening Techniques

Hand-Tightening:

  • Initial Alignment: Begin by carefully threading the fitting by hand. This initial step is crucial for ensuring the threads are properly aligned, which helps prevent cross-threading. Cross-threading can damage both the fitting and the component it is being attached to, leading to leaks and the potential need for costly repairs.
  • Ensuring Smooth Fit: Hand-tightening allows you to feel the fit and alignment of the threads. If any resistance or misalignment is felt, it’s easier to correct it at this stage before applying further torque. A smooth and proper hand-tight fit indicates that the threads are engaging correctly.
  • Avoiding Over-Tightening: By starting with hand-tightening, you reduce the risk of immediately over-tightening the fitting. Over-tightening can lead to thread stripping, deformation, and a compromised seal, all of which can cause leaks or fitting failures.

Torque-Tightening:

  • Use of Torque Wrench: Once the fitting is hand-tightened and properly aligned, switch to a torque wrench. A torque wrench is designed to apply a specific amount of torque to the fitting, ensuring consistency and accuracy.
  • Manufacturer Specifications: Refer to the manufacturer’s specifications for the recommended torque value. This value is typically provided in the product documentation and is crucial for ensuring the fitting is neither too loose nor too tight. Each type of fitting and material may have different torque requirements.
  • Applying Correct Torque: Using the torque wrench, apply the specified torque value. It’s important to do this gradually and evenly. Apply the torque in a smooth motion to avoid jerking or sudden movements that could affect the accuracy of the reading.
  • Avoiding Damage: Proper torque application ensures that the fitting achieves a secure seal without causing damage. Over-tightening can crush seals, distort threads, and lead to material fatigue while under-tightening can result in leaks and loosening of the fitting under pressure.

Step-by-Step Guide for Torque-Tightening

Prepare the Torque Wrench: Ensure the torque wrench is properly calibrated and set to the manufacturer’s specified torque value.

Engage the Fitting: Place the torque wrench on the fitting and apply steady pressure. Avoid using extensions or adapters that can alter the torque applied.

Apply Torque Evenly: Turn the wrench smoothly until the desired torque is reached. The wrench will typically click or indicate when the set torque is achieved.

Check Alignment: After torque-tightening, double-check the alignment and seating of the fitting. Ensure that there are no visible gaps or misalignments.

Inspect for Leaks: Once tightened, visually inspect the fitting for any signs of leaks. Perform a pressure test if necessary to confirm the integrity of the seal.

Checking for Leaks

Visual Inspection:

  • Initial Check: After tightening the fittings, perform a thorough visual inspection. Look closely at the fitting areas for any signs of leaks, such as oil or hydraulic fluid residue. Even small traces of fluid can indicate a leak.
  • Regular Monitoring: Incorporate visual inspections into regular maintenance routines. Regular monitoring helps in the early detection of leaks before they develop into larger issues.

Pressure Testing:

  • Test Procedure: Apply the system’s operating pressure to the hydraulic system. Observe the fittings closely for any signs of leaks during and after the pressure is applied. Pressure testing is a reliable method for verifying the integrity of the seals.
  • Monitoring: Keep the system under pressure for a specified period, as recommended by the manufacturer, to ensure that no leaks develop over time. This helps in confirming the durability of the seal under operating conditions.
Hydraulic Hose Fittings Leaking Topa

Immediate Actions if a Leak is Detected

Re-tightening:

  • Careful Adjustment: If a leak is detected, carefully re-tighten the fitting. Ensure that you do not over-torque it, as this can cause further damage or exacerbate the leak. Sometimes, minor adjustments can effectively stop a small leak.
  • Torque Check: Use a torque wrench to verify that the fitting is tightened to the correct specification. This ensures that the fitting is secure without being over-tightened.

Disassembly and Re-inspection:

  • Disassemble the Fitting: If re-tightening does not stop the leak, disassemble the fitting. Carefully inspect the threads and sealing surfaces for any damage, contamination, or debris that could be causing the leak.
  • Clean and Reapply Sealant: Clean the fitting and threads thoroughly. Reapply the appropriate thread sealant to ensure a proper seal. Reassemble the fitting, following the proper tightening procedures.
  • Inspect for Damage: Look for any signs of wear, deformation, or damage that might require the replacement of components to achieve a proper seal.

Replacement:

  • Replace Damaged Fittings: If the fitting or any component is found to be damaged or excessively worn, replace it with a new one. Ensuring the use of high-quality, compatible fittings helps maintain the integrity of the hydraulic system.
  • Quality Assurance: Always use fittings that meet or exceed industry standards to ensure durability and reliability. Replacement of faulty components helps prevent future leaks and system failures.

Common Mistakes and How to Avoid Them

Over-Tightening

Causes and Consequences:

  • Causes: Over-tightening typically occurs when excessive force is applied during the tightening process, often due to the misconception that tighter fittings create a better seal. Using incorrect tools or ignoring manufacturer torque specifications can also lead to over-tightening.
  • Consequences: Over-tightening can deform threads, crush seals, and cause fittings to crack or break. This can result in leaks, reduced system efficiency, and potential system failures. Additionally, over-tightened fittings are more difficult to disassemble and may require replacement.

Signs of Over-Tightening:

  • Deformed Threads: Visual inspection reveals damaged or deformed threads on the fittings.
  • Crushed Seals: Seals appear excessively compressed or damaged.
  • Cracked Fittings: Visible cracks or fractures in the fittings, especially around the threaded areas.
  • Difficulty in Disassembly: Over-tightened fittings are often extremely difficult to loosen and may require significant force to disassemble.

Under-Tightening

Causes and Consequences:

  • Causes: Under-tightening occurs when insufficient torque is applied, often due to fear of over-tightening or using inadequate tools. Inaccurate torque wrench settings or lack of proper calibration can also result in under-tightening.
  • Consequences: Under-tightened fittings may not achieve a proper seal, leading to leaks and reduced hydraulic system performance. Loose fittings can vibrate and loosen further over time, potentially causing system failure or damage to other components.

Signs of Under-Tightening:

  • Fluid Leaks: The presence of hydraulic fluid or oil around the fitting areas, indicates an improper seal.
  • Loose Fittings: Fittings that can be moved or adjusted by hand after tightening.
  • Audible Leaks: Hissing or other sounds indicating air or fluid escaping from the fittings.

Misalignment and Cross-Threading

How to Identify and Prevent These Issues:

Misalignment:

  • Identification: Misaligned fittings often show gaps between the mating surfaces or uneven contact. Misalignment can cause uneven wear and poor sealing.
  • Prevention: Always start by hand-tightening the fitting to ensure proper alignment before applying torque. Use visual guides or alignment tools to confirm that the fittings are correctly positioned. Avoid forcing the fitting if resistance is encountered during initial threading.

Cross-Threading:

  • Identification: Cross-threading is indicated by resistance, difficulty during hand-tightening, and visible thread damage. Cross-threaded fittings may not tighten properly and can lead to leaks.
  • Prevention: To prevent cross-threading, ensure that threads are clean and undamaged before assembly. Begin threading by hand, turning the fitting in reverse briefly to align the threads, then proceed with tightening. If resistance is felt early on, back off and realign the fitting. Use the correct thread type for each application to avoid mismatched threads.

Maintenance and Inspection

Regular Maintenance Practices

Scheduled Inspections and Maintenance Routines:

Routine Checks: Implement a schedule for regular inspections of hydraulic fittings. This includes visual inspections for signs of leaks, corrosion, wear, or damage. Regular checks help identify potential issues before they become severe.

Systematic Approach: Follow a systematic approach to inspect all fittings in the hydraulic system. Start from the main hydraulic pump and proceed through all hoses, connections, and cylinders. Ensure that all components are inspected according to the maintenance schedule.

Frequency: The frequency of inspections can vary based on the operational demands and environmental conditions. High-use systems may require more frequent inspections, while systems operating in harsh environments might need additional checks to prevent corrosion and wear.

Guidelines for Re-tightening Fittings

Scheduled Re-tightening: Include re-tightening as part of the regular maintenance routine. Over time, fittings may loosen due to vibration and pressure fluctuations, making re-tightening necessary to maintain a secure seal.

Proper Tools: Use the appropriate tools, such as torque wrenches, to ensure that fittings are tightened to the correct specifications. Avoid over-tightening, which can cause damage, and under-tightening, which can lead to leaks.

Conclusion

In this guide, we explored the types of hydraulic fittings, essential tools, and proper techniques for tightening, highlighting the importance of avoiding leaks and over-tightening. Emphasizing correct hand-tightening and torque-tightening methods ensures secure and reliable fittings. Regular maintenance, including scheduled inspections and careful re-tightening, coupled with prompt replacement of damaged components, is crucial for maintaining a leak-free hydraulic system.

FAQ

What is the most common cause of hydraulic fitting leaks?

The most common cause is improper tightening, either too loose or too tight, leading to poor sealing and leaks.

How do I know if a fitting is over-tightened?

Signs of over-tightening include deformed threads, crushed seals, cracked fittings, and difficulty in disassembly.

What tools are essential for tightening hydraulic fittings?

Essential tools include standard and adjustable wrenches, torque wrenches, and thread sealants like Teflon tape or pipe dope.

How often should I inspect my hydraulic fittings?

Regular inspections should be conducted based on operational demands, but generally, it’s advisable to perform checks during routine maintenance intervals.

Can I mix different thread types in my hydraulic system?

Mixing different thread types (e.g., NPT with BSP) can lead to improper sealing, cross-threading, and leaks.

What should I do if I detect a leak after tightening a fitting?

If a leak is detected, try re-tightening the fitting carefully. If the leak persists, disassemble, clean, inspect for damage, and reassemble or replace the fitting as needed.

Contact Topa

Have a question or suggestion? Fill out the form below to get in touch with one of our experts.

Contact Topa

Save 30% on maintenance costs with our easy-install hydraulic fittings. Contact Now!