Hydraulic Fluid Characteristics banner

Hydraulic Fluid Characteristics: What You Need to Know

Hydraulic fluids are crucial in hydraulic systems, enabling machinery and equipment to operate efficiently by transmitting force through pressure and flow. Understanding these fluids is essential because it affects system performance, component longevity, safety, and cost efficiency. Key characteristics to be explored include the types of fluids, their properties, performance factors, and best practices for selection and maintenance. This knowledge ensures effective management and optimal operation of hydraulic systems.

Types of Hydraulic Fluids

Mineral Oils

Mineral oils are the most prevalent type of hydraulic fluid, primarily due to their cost-effectiveness and established performance characteristics. These fitting fluids are derived from the refining of crude oil and have been used in hydraulic systems for decades. Their composition generally includes a base oil with various additives to enhance performance.

Advantages:

Good Lubrication Properties: Mineral oils provide effective lubrication, which reduces friction and wear on hydraulic components.

Broad Applicability: They are versatile and can be used in a wide range of hydraulic systems and applications.

Cost-Effectiveness: Mineral oils are generally less expensive than specialized hydraulic fluids, making them a popular choice for many applications.

Disadvantages:

Limited Fire Resistance: Mineral oils are flammable and can pose a fire hazard in high-temperature environments or in applications where sparks or open flames are present.

Potential Environmental Hazards: When spilled or improperly disposed of, mineral oils can cause environmental contamination. Their disposal often requires special handling procedures to minimize ecological impact.

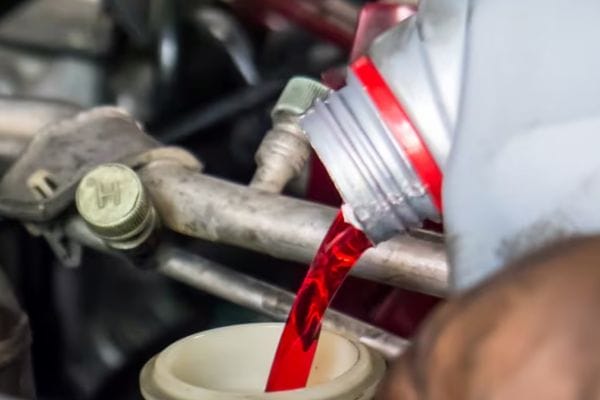
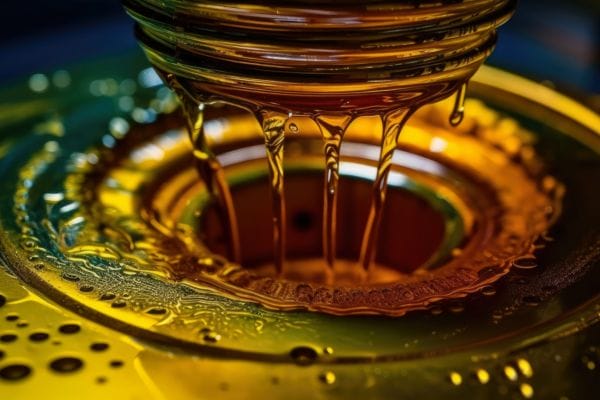
hydraulic fluid Topa

Water-Based Fluids

Water-based fluids are designed to offer improved fire resistance compared to mineral oils, making them suitable for applications where fire risk is a concern. These fluids come in several types, including water-glycol solutions and water-oil emulsions.

Water-Glycol Solutions: Water-glycol solutions consist of a mixture of water and glycol. They offer significant fire resistance due to the high water content. However, they have some limitations in performance.

Benefits:

Enhanced Fire Safety: The high water content provides excellent fire resistance, reducing the risk of fire in high-temperature environments.

Reduced Flammability: The presence of water makes these fluids less flammable compared to pure mineral oils.

Limitations:

Lower Lubrication Properties: Water-glycol solutions generally have poorer lubrication properties compared to mineral oils, which can affect the efficiency and lifespan of hydraulic components.

Corrosion Risk: The water content can lead to corrosion of metal components if not properly managed, necessitating the use of corrosion inhibitors.

Water-Oil Emulsions: Water-oil emulsions are mixtures of water and oil, with the water content varying depending on the required fire resistance level.

Benefits:

Fire Resistance: Like water-glycol solutions, these emulsions offer improved fire resistance compared to mineral oils.

Customizable: The ratio of water to oil can be adjusted to balance fire resistance with lubrication properties.

Limitations:

Corrosion Issues: Similar to water-glycol solutions, water-oil emulsions can lead to corrosion if proper maintenance and corrosion inhibitors are not used.

Reduced Lubrication: The lubrication properties of water-oil emulsions can be inferior to those of pure mineral oils.

Fire-Resistant Fluids

Fire-resistant fluids are essential in industries where there is a high risk of fire, such as steel mills, aerospace, and other high-temperature environments. These fluids are designed to resist ignition and burning, providing enhanced safety in critical applications.

Phosphate Esters: Phosphate esters are a type of fire-resistant fluid known for their excellent fire resistance properties.

Benefits:

Superior Fire Resistance: Phosphate esters are highly resistant to ignition and burning, making them suitable for extremely hazardous environments.

High Thermal Stability: They maintain performance at high temperatures, which is critical in industries like steel manufacturing.

Disadvantages:

Cost: Phosphate esters can be more expensive than mineral oils and other hydraulic fluids.

Handling Requirements: They require special handling and storage procedures to ensure safety and prevent degradation.

Organic Esters: Organic esters are another category of fire-resistant fluids, known for their lower flammability and environmental benefits.

Benefits:

Reduced Flammability: Organic esters have a lower risk of catching fire compared to mineral oils, making them suitable for various high-risk environments.

Environmental Benefits: They are often biodegradable and have a lower environmental impact compared to traditional mineral oils.

Disadvantages:

Higher Cost: Organic esters can be more costly than other types of hydraulic fluids.

Compatibility Issues: They may not be compatible with all materials used in hydraulic systems, necessitating careful selection of system components.

Key Properties of Hydraulic Fluids

Viscosity

Viscosity is a measure of a fluid’s resistance to flow, which plays a crucial role in hydraulic systems. It determines how easily the fluid can move through the system’s components.

Definition and Significance: Viscosity is defined as the internal friction within a fluid that resists flow. It is a key parameter in ensuring the hydraulic fluid performs optimally.

Impact on System Performance: Proper viscosity ensures that the fluid flows smoothly through the system, maintaining a consistent flow rate and pressure. Fluids with appropriate viscosity contribute to efficient energy use and system stability. If the viscosity is too high, it can lead to increased energy consumption and reduced efficiency. Conversely, too low viscosity may result in inadequate lubrication and potential system wear.

Compressibility

Compressibility refers to the extent to which a fluid’s volume decreases under pressure. It is essential for the proper operation of hydraulic systems, particularly in applications requiring precise control.

Importance in Hydraulic System Operation: Compressibility affects how the fluid responds to pressure changes. Fluids with low compressibility maintain more stable volume and pressure under varying conditions, which is critical for accurate control and system response.

Effects on System Response and Stability: A fluid with low compressibility ensures minimal changes in volume, providing stable and predictable performance. High compressibility can lead to system instability and delayed responses, impacting the overall effectiveness of hydraulic operations.
Hydraulic Fluid Characteristics

Lubricating Properties

Hydraulic fluids must possess adequate lubricating properties to ensure the longevity and efficient operation of system components.

Role in Reducing Wear and Tear: Proper lubrication minimizes friction between moving parts, reducing wear and extending the lifespan of components. Effective lubrication is essential for preventing premature component failure and maintaining system performance.

Impact on Component Lifespan: Well-lubricated components experience less friction and heat generation, which translates to longer service life and reduced maintenance requirements. This contributes to overall system reliability and cost-effectiveness.

Thermal Stability

Thermal stability is the ability of a hydraulic fluid to resist degradation and maintain performance at elevated temperatures.

Ability to Withstand Temperature Variations: Fluids with high thermal stability can endure high operating temperatures without breaking down or losing their effectiveness. This is crucial for systems exposed to fluctuating or extreme temperatures.

Effects on Fluid Degradation and System Reliability: High thermal stability prevents fluid breakdown and degradation, ensuring consistent performance and protecting the hydraulic system from potential failures caused by overheating or thermal stress.

Chemical Stability

Chemical stability involves a fluid’s resistance to chemical changes such as oxidation and contamination, which can impact its performance and longevity.

Resistance to Oxidation and Contamination: A chemically stable fluid resists oxidation and other chemical reactions that can lead to the formation of harmful by-products. This stability helps maintain fluid integrity and system health.

Impact on Fluid Life and System Health: Chemically stable fluids have a longer service life and reduce the risk of clogging, corrosion, and other issues that can compromise system performance. Proper chemical stability is essential for maintaining overall fluid quality and system reliability.

Performance Characteristics

Pumpability

Pumpability measures how effectively a hydraulic fluid can be moved through the system by the pump. This characteristic is crucial for ensuring smooth operation and optimal energy consumption.

Definition and Importance: Pumpability refers to the ease with which a fluid is transported through the hydraulic system. It affects the efficiency of the pump and overall system performance.

Impact on System Operation: Fluids with poor pumpability can lead to increased friction and strain on the pump, causing potential wear and operational issues. Ensuring high pumpability helps maintain consistent flow, reduce energy consumption, and prevent damage to system components.

Anti-Wear Properties

Anti-wear properties are essential for protecting hydraulic system components from damage caused by friction and mechanical wear.

Mechanisms to Protect System Components: Hydraulic fluids often contain additives specifically designed to enhance anti-wear properties. These additives form a protective film on metal surfaces, reducing friction and wear.

Ensuring Longevity and Reliability: Effective anti-wear properties extend the lifespan of hydraulic components by minimizing damage and reducing the frequency of maintenance. This contributes to the overall reliability and efficiency of the hydraulic system.

Corrosion Resistance

Corrosion resistance is the ability of hydraulic fluid to protect metal surfaces from corrosive damage caused by chemical reactions.

Role in Protecting Metal Surfaces: Hydraulic fluids with good corrosion resistance prevent the formation of rust and other corrosive compounds that can damage metal components. This protection is crucial for maintaining system integrity and preventing leaks or component failures.

Extending Component Life: By protecting against corrosion, a fluid helps extend the lifespan of metal parts and ensures consistent performance over time. This reduces the need for frequent replacements and repairs, enhancing the overall cost-effectiveness of the system.
Topa Hydraulic Fluid Characteristics

Foaming and Air Release

Foaming and air release characteristics impact the efficiency and safety of hydraulic systems.

Effects on System Efficiency: Foaming can lead to cavitation, where air bubbles collapse violently, causing damage to components and reducing performance. Effective hydraulic fluids should minimize foaming and facilitate rapid air release to maintain system efficiency.

Impact on Safety and Performance: Properly formulated fluids reduce the likelihood of cavitation and ensure that trapped air is quickly released, which helps maintain stable operation and prevents potential hazards associated with air bubbles in the system.

Selecting the Right Hydraulic Fluid

Application Considerations

Choosing the appropriate hydraulic fluid requires aligning its properties with the specific needs of the hydraulic system.

Operating Temperature: Select a fluid that remains stable and maintains performance across the expected temperature range of the system. Fluids with high thermal stability are essential for systems that operate under varying or extreme temperatures.

Pressure Requirements: Ensure the fluid can handle the maximum operating pressure of the system without degrading or causing issues. Fluids with suitable compressibility characteristics are crucial for maintaining system stability and performance under high pressure.

Fire or Environmental Hazards: For applications with high fire risks, such as in steel mills or aerospace, select fluids with high fire resistance. Consider environmental factors if the system operates in sensitive areas, opting for fluids that minimize ecological impact or contamination.

Environmental and Safety Factors

Selecting hydraulic fluids based on their environmental impact and safety features is crucial for responsible operation and compliance with regulations.

Biodegradability: Opt for biodegradable fluids if there is a risk of spillage or leakage into the environment. Biodegradable fluids break down more quickly and reduce long-term environmental damage.

Toxicity: Consider the toxicity of the hydraulic fluid, especially if the system is used in environments where human exposure is possible. Non-toxic fluids are safer and more environmentally friendly, reducing health risks.

Flammability: Choose fluids with appropriate flammability characteristics based on the system’s operating environment. For high-risk areas, select fluids with lower flammability to enhance safety and reduce fire hazards.

Manufacturer Recommendations

Following manufacturer recommendations is essential for ensuring the hydraulic system operates efficiently and reliably.

Adherence to Recommended Fluids: Manufacturers often provide specific fluid recommendations based on system design and component materials. Using the recommended fluid helps maintain optimal performance and avoid issues related to incompatibility or degradation.

Maintenance Practices: Along with selecting the right fluid, adhering to recommended maintenance practices is crucial. This includes regular monitoring of fluid condition, timely replacement, and proper handling procedures. Following these guidelines helps extend the system’s lifespan and ensures ongoing reliability and efficiency.

Maintenance and Management

Monitoring Fluid Quality

Regular monitoring of hydraulic fluid quality is essential for maintaining optimal system performance and preventing issues.

Methods for Assessing Fluid Condition: Regular assessments include visual inspections, where operators check for changes in color, clarity, or the presence of contaminants. Analytical tests, such as viscosity measurements, particle counts, and chemical analyses, provide detailed insights into fluid conditions.

Benefits of Monitoring: Early detection of issues like degradation, contamination, or reduced performance allows for timely interventions. Consistent monitoring helps maintain system efficiency, extend component lifespan, and prevent costly breakdowns.

Fluid Replacement and Disposal

Proper fluid replacement and disposal practices are critical for system maintenance and environmental protection.

Fluid Replacement Guidelines: Replace hydraulic fluids based on manufacturer recommendations or when analysis indicates significant degradation. Follow recommended intervals or triggers such as changes in fluid properties or system performance issues.

Best Practices for Disposal: Ensure proper disposal of used hydraulic fluids according to local regulations and environmental guidelines. Many regions have specific requirements for the handling and disposal of hazardous materials to minimize environmental impact. Employ recycling or waste management services that comply with these regulations.

Handling Contamination

Contamination can severely impact hydraulic system performance and longevity, so effective management strategies are crucial.

Prevention Through Filtration: Implement proper filtration systems to remove contaminants such as particles, water, and debris from the hydraulic fluid. Regularly replace filters and ensure they are appropriately sized for the system.

Handling Contamination Incidents: Develop and follow protocols for responding to contamination events. This includes immediate isolation of affected areas, system cleaning, and fluid replacement. Addressing contamination quickly helps prevent damage and ensures continued system reliability.

Regular System Checks: Conduct routine inspections and maintenance to identify potential sources of contamination. Regular checks help maintain fluid quality and system performance, reducing the risk of operational issues.

Conclusion

Performance characteristics such as pumpability, anti-wear properties, corrosion resistance, and foaming and air release further influence system effectiveness and longevity. Making informed decisions based on these factors, as well as adhering to best practices for fluid maintenance and management, ensures that your hydraulic systems operate reliably and efficiently. Regular monitoring, proper fluid replacement, and effective contamination handling are essential to maintain fluid quality and system performance.


FAQ

What are the main types of hydraulic fluids?

The main types of hydraulic fluids include mineral oils, water-based fluids (such as water-glycol solutions and water-oil emulsions), and fire-resistant fluids (like phosphate esters and organic esters). Each type has specific applications and properties suited to different operational needs.

How does viscosity affect hydraulic fluid performance?

Viscosity measures a fluid’s resistance to flow. It affects how easily the fluid moves through the system and maintains pressure. Proper viscosity ensures smooth operation, energy efficiency, and stable system performance.

Why is thermal stability important for hydraulic fluids?

Thermal stability indicates a fluid’s ability to withstand high temperatures without degrading. It is crucial for maintaining consistent performance and preventing fluid breakdown, which can lead to system failure and reduced reliability.

How can I monitor the quality of hydraulic fluid?

You can monitor hydraulic fluid quality through visual inspections for changes in color or clarity and analytical tests that measure properties like viscosity and contamination levels. Regular checks help detect issues early and maintain system performance.

What should I consider when selecting hydraulic fluid for my system?

Consider factors such as the operating temperature and pressure of your system, fire or environmental hazards, and the fluid’s compatibility with system components. It’s also important to follow manufacturer recommendations for optimal performance.

How should I handle the disposal of used hydraulic fluids?

Dispose of used hydraulic fluids according to local regulations and environmental guidelines. Many areas have specific rules for the disposal of hazardous materials.

Different Hose Clamps banner

Different Hose Clamps: How to Tighten or Remove

Hose clamps are essential components used to secure hoses onto fittings or pipes, ensuring a leak-proof connection in various systems, from automotive to industrial applications. Proper tightening and removal of hose clamps are crucial to maintain system integrity, prevent leaks, and avoid damage to the hoses. This post aims to provide a comprehensive guide on the different types of hose clamps, how to correctly tighten and remove them, and best practices to ensure reliable performance and longevity.

Types of Hose Clamps

A. Worm Gear Clamps

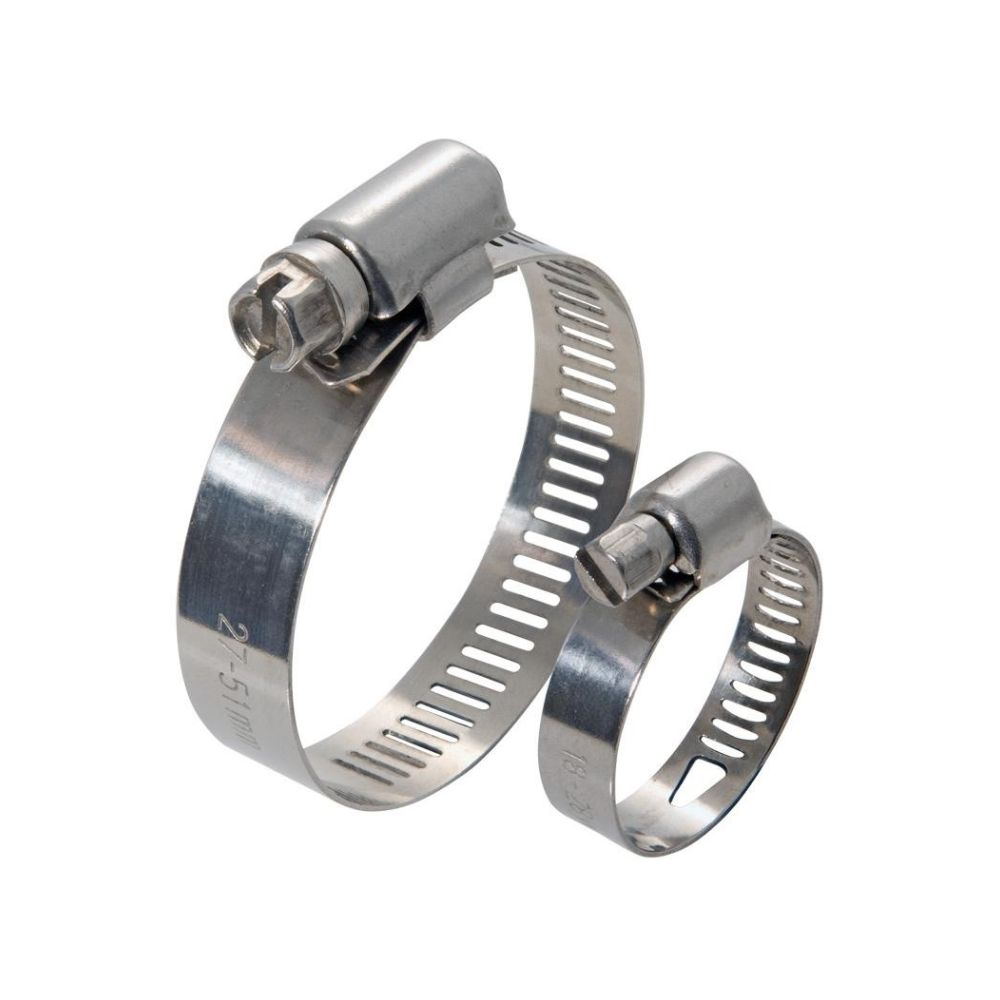
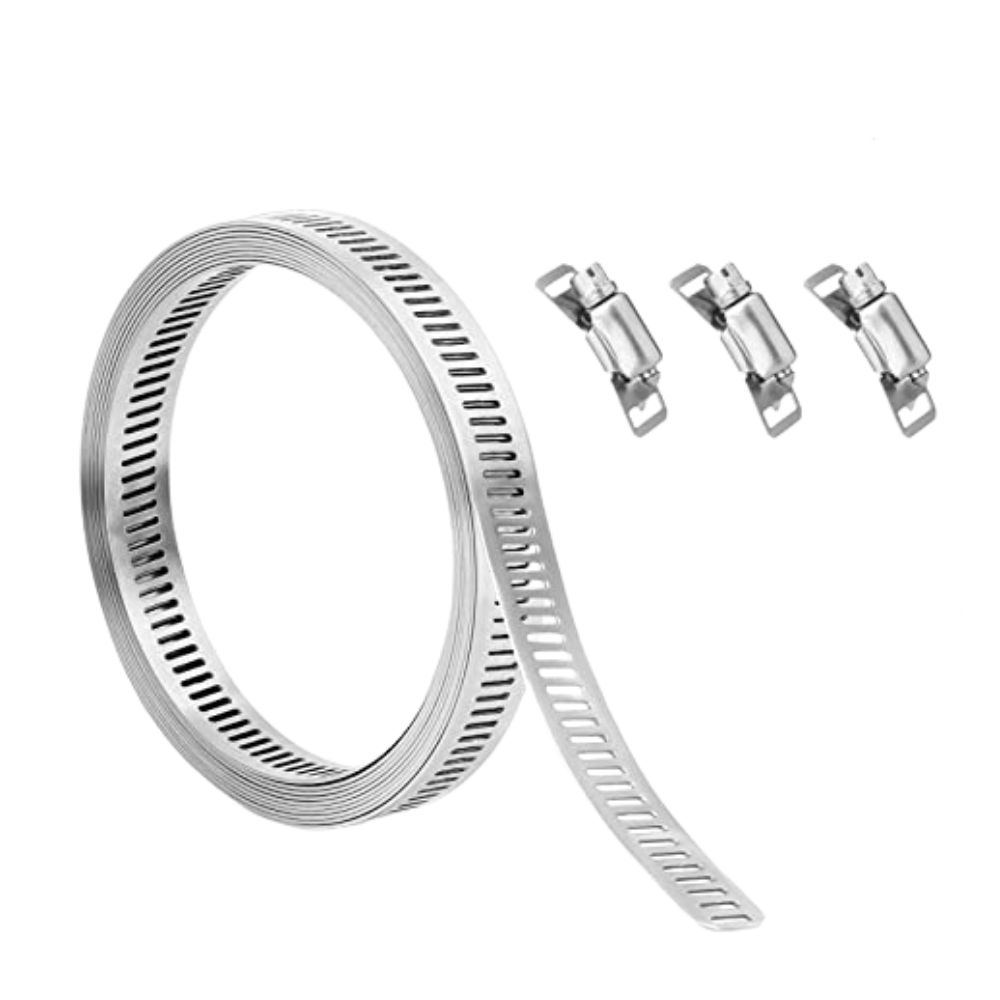
Description: Worm gear clamps consist of a metal band with a screw mechanism that tightens the band around the hose. They are often made of stainless steel for corrosion resistance.

Common Uses: Used in automotive, plumbing, and industrial applications where adjustable and secure fastening is needed.

Advantages:

Adjustable size for a range of hose diameters.

Provides a strong and secure hold.

Widely available and relatively inexpensive.

Disadvantages:

Can damage the hose if over-tightened.

May be susceptible to corrosion if not made from stainless steel.

Requires a screwdriver for adjustment.

worm gear hose clamp factory

B. Spring Clamps

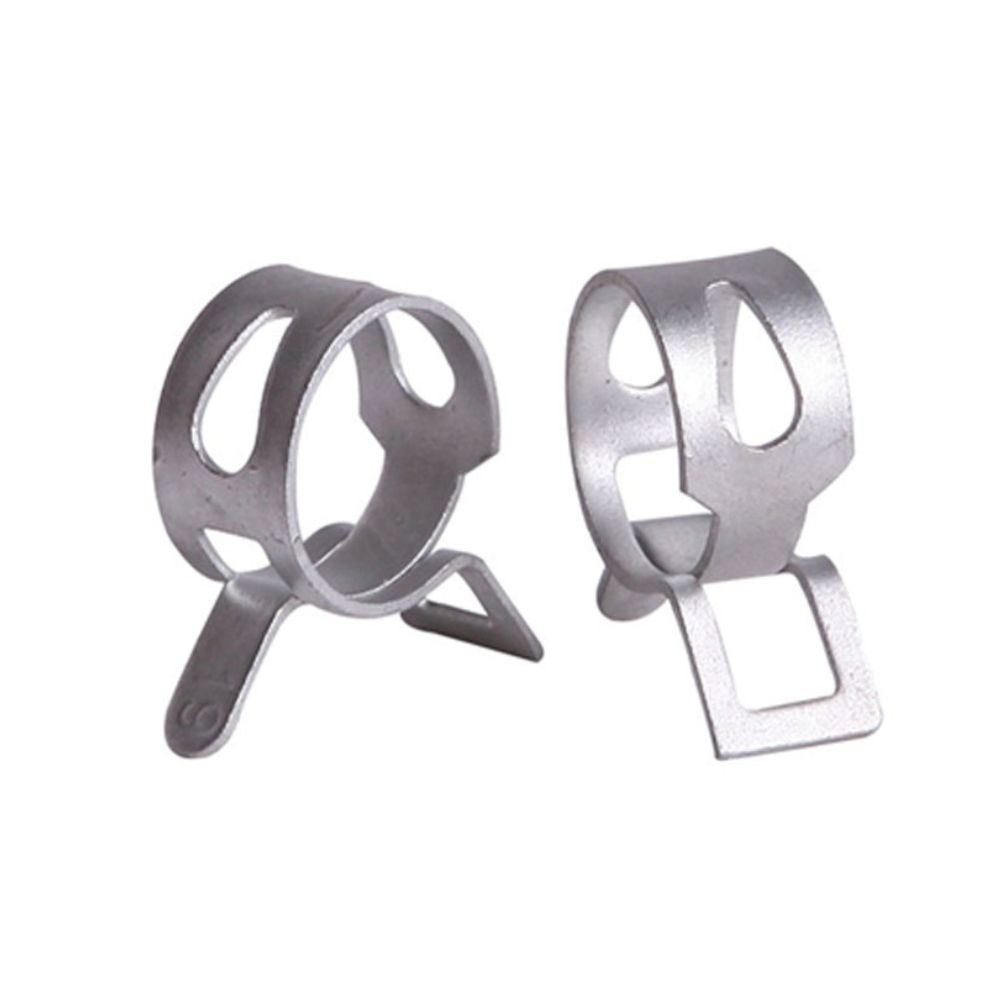
Description: Spring clamps use a spring mechanism to exert constant pressure on the hose. They are usually made from stainless steel or spring steel.

Common Uses: Common in automotive and household applications where consistent pressure is required without frequent adjustments.

Advantages:

No tools are needed for adjustment.

Maintains consistent pressure on the hose.

Durable and resistant to corrosion.

Disadvantages:

Limited to specific hose sizes.

Can be difficult to install or remove in tight spaces.

Less flexible in terms of size adjustments compared to worm gear clamps.

C. T-Bolt Clamps

Description: T-bolt clamps have a band with a T-bolt mechanism that provides high clamping force. They are usually made from stainless steel and are designed for heavy-duty applications.

Common Uses: Used in high-pressure applications, including in automotive and industrial systems where a strong, leak-proof seal is required.

Advantages:

Provides a strong and secure hold, suitable for high-pressure applications.

Adjustable and can accommodate a range of hose sizes.

Resistant to vibration and movement.

Disadvantages:

Generally more expensive than other types of clamps.

Requires a wrench or socket for adjustment.

Larger and heavier, which may not be suitable for all applications.

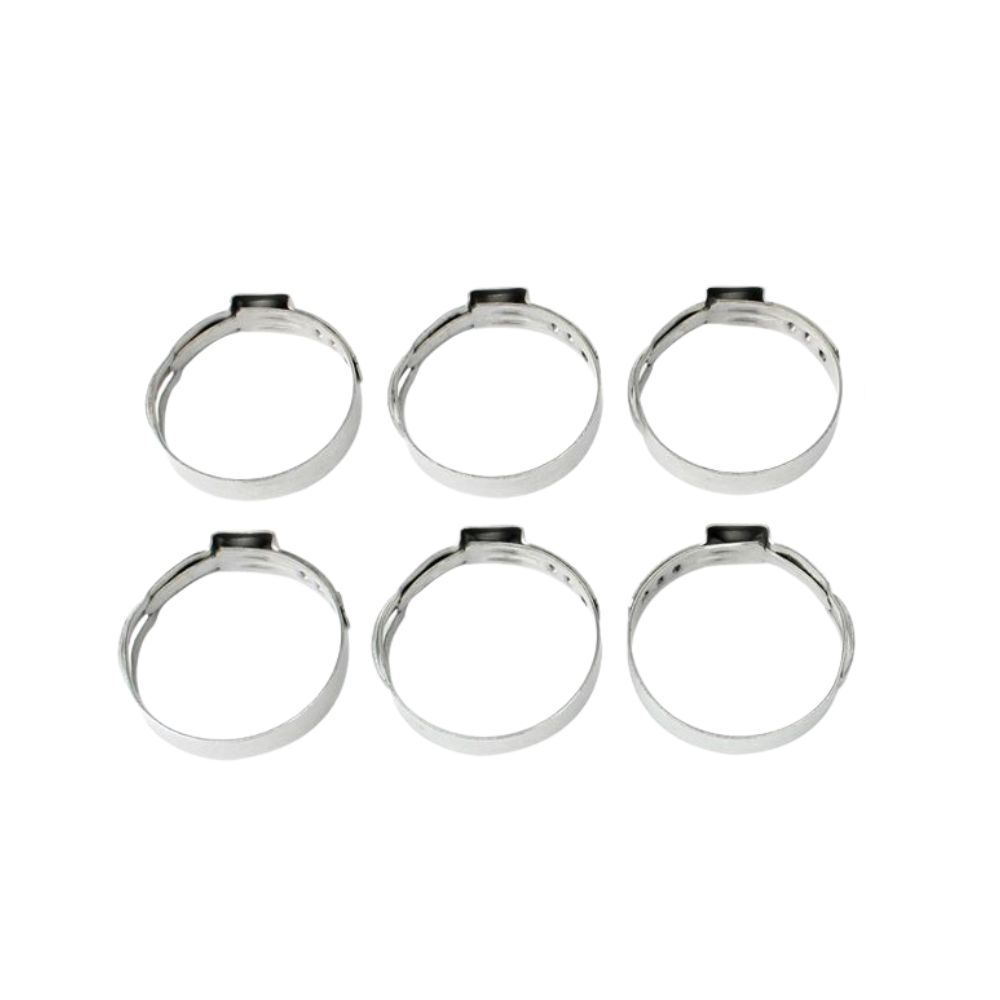
single ear hose clamp supplier

D. Ear Clamps

Description: Ear clamps are a type of clamp where the band is formed into an “ear” shape that is crimped onto the hose. They are typically used for their simplicity and effectiveness.

Common Uses: Often used in automotive and industrial applications where a tight, permanent seal is needed.

Advantages:

Provides a tight, permanent seal that is resistant to leakage.

Simple in design and easy to use with crimping tools.

Affordable and reliable for specific applications.

Disadvantages:

Not adjustable once installed, so exact sizing is critical.

Requires specialized tools for installation and removal.

Can be challenging to install or remove in confined spaces.

E. Band Clamps

Description: Band clamps are similar to worm gear clamps but often feature a wider band for distributing pressure more evenly. They are used in a variety of applications and can be made from different materials including stainless steel.

Common Uses: Used in both automotive and industrial settings, particularly where a more even distribution of pressure is required.

Advantages:

Provides an even clamping force, reducing the risk of hose damage.

Adjustable and suitable for various hose sizes.

Durable and resistant to high pressures.

Disadvantages:

Can be more expensive than standard worm gear clamps.

Requires a tool for adjustment.

Bulkier than some other types of clamps, which may limit use in tight spaces.

How to Tighten Hose Clamps

A. Worm Gear Clamps

Step-by-Step Instructions:

Position the Clamp: Slide the clamp over the hose and align it with the fitting.

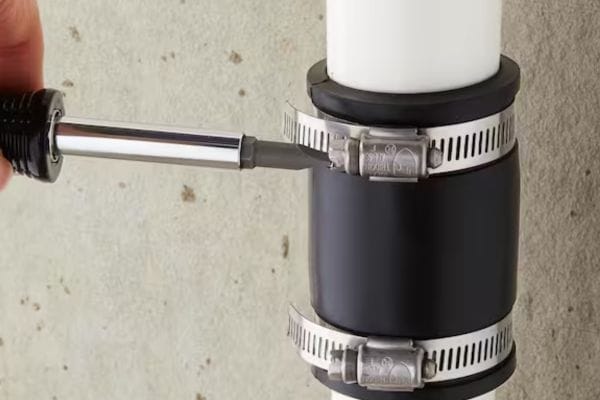
Adjust the Size: Use a screwdriver to turn the screw on the clamp, adjusting the size to fit the hose snugly.

Tighten the Clamp: Turn the screw clockwise to tighten the clamp around the hose and fitting.

Check for Tightness: Ensure the clamp is tight but not over-tightened, which can damage the hose.

Tips for Proper Tightening:

Use a screwdriver with a good grip to avoid slipping.

Check the clamp periodically to ensure it maintains the correct tightness.

Avoid over-tightening to prevent crushing or deforming the hose.

B. Spring Clamps

Step-by-Step Instructions:

Position the Clamp: Place the spring clamp around the hose and fitting.

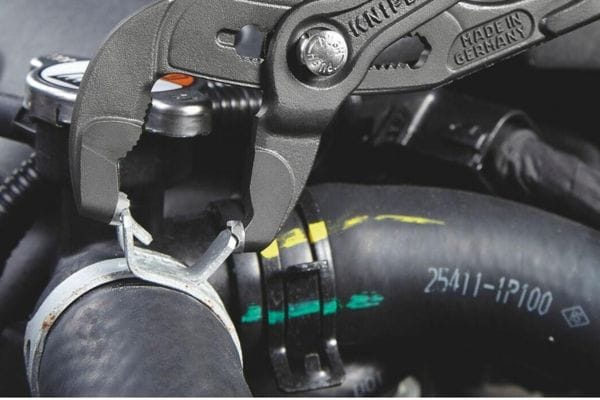
Compress the Spring: Use pliers to compress the spring and slide the clamp into position.

Release the Clamp: Let go of the pliers to allow the spring clamp to expand and secure the hose.

Verify the Fit: Check that the clamp is securely in place and providing even pressure.

Tips for Proper Tightening:

Use pliers with a firm grip to control the spring clamp.

Ensure the clamp is positioned evenly around the hose to prevent leaks.

Avoid using excessive force when compressing the spring to prevent damage.

Hose Clamp application

C. T-Bolt Clamps

Step-by-Step Instructions:

Position the Clamp: Place the T-bolt clamp around the hose and fitting.

Align the Bolt: Ensure the T-bolt is aligned with the clamp’s slots.

Tighten the Bolt: Use a wrench or socket to turn the T-bolt clockwise, tightening the clamp around the hose.

Check for Tightness: Confirm that the clamp is securely tightened without any movement.

Tips for Proper Tightening:

Use a torque wrench to ensure even tightening and prevent over-tightening.

Make sure the clamp is properly aligned to avoid uneven pressure.

Regularly inspect the clamp for any signs of wear or loosening.

D. Ear Clamps

Step-by-Step Instructions:

Position the Clamp: Slide the ear clamp over the hose and fitting.

Crimp the Clamp: Use a crimping tool to compress the “ear” of the clamp onto the hose.

Check the Fit: Ensure the clamp is tightly crimped and secure around the hose.

Tips for Proper Tightening:

Use a crimping tool specifically designed for ear clamps to ensure a secure fit.

Verify that the clamp is evenly crimped to prevent leaks.

Ensure the hose and fitting are properly aligned before crimping.

E. Band Clamps

Step-by-Step Instructions:

Position the Clamp: Place the band clamp around the hose and fitting.

Adjust the Clamp: Use a screwdriver or wrench to adjust the clamp’s size to fit the hose.

Tighten the Clamp: Turn the adjustment screw or bolt to tighten the band clamp around the hose.

Verify the Tightness: Check that the band is snug and secure without over-tightening.

Tips for Proper Tightening:

Use a tool that provides good leverage to ensure the band is tightened evenly.

Avoid over-tightening, which can damage the hose or the fitting.

Regularly inspect the clamp to ensure it remains secure and effective.

How to Remove Hose Clamps

A. Worm Gear Clamps

Step-by-Step Instructions:

Locate the Screw: Identify the screw on the worm gear clamp.

Loosen the Clamp: Use a screwdriver to turn the screw counterclockwise to loosen the clamp.

Slide the Clamp Off: Once loosened, slide the clamp off the hose.

Remove the Hose: Carefully pull the hose off the fitting if needed.

Common Issues and Solutions:

Clamp Stuck: If the clamp is stuck, try applying penetrating oil to the screw threads to loosen it.

Stripped Screw: If the screw is stripped, use a screw extractor tool to remove it, or replace the clamp if necessary.

Hose Damage: If the hose is damaged during removal, replace it with a new one to prevent leaks.

B. Spring Clamps

Step-by-Step Instructions:

Compress the Clamp: Use pliers to compress the spring mechanism.

Slide the Clamp Off: While holding the clamp compressed, slide it off the hose.

Release the Pliers: Once the clamp is removed, release the pliers.

Remove the Hose: Pull the hose off the fitting if needed.

Common Issues and Solutions:

Clamp Too Tight: If the clamp is too tight, carefully use a larger pair of pliers or a spring clamp removal tool.

Spring Mechanism Malfunction: If the spring mechanism is malfunctioning, consider using a replacement clamp.

Hose Damage: If the hose is damaged, replace it and ensure proper fitment of the new clamp.

C. T-Bolt Clamps

Step-by-Step Instructions:

Loosen the Bolt: Use a wrench or socket to turn the T-bolt counterclockwise to loosen it.

Slide the Clamp Off: Once the bolt is sufficiently loosened, slide the clamp off the hose.

Remove the Hose: Carefully pull the hose off the fitting if needed.

Common Issues and Solutions:

Bolt Stuck: If the bolt is stuck, apply penetrating oil to ease loosening, or use a breaker bar for additional leverage.

Rust or Corrosion: For rusted or corroded clamps, use a rust remover or replace the clamp with a new one.

Hose Damage: Inspect and replace the hose if it is damaged during removal.

D. Ear Clamps

Step-by-Step Instructions:

Locate the Crimped Ear: Identify the crimped “ear” of the clamp.

Use Crimping Tool: If possible, use a crimping tool to carefully cut or remove the crimped ear.

Slide the Clamp Off: Remove the clamp from the hose once it is no longer crimped.

Remove the Hose: Pull the hose off the fitting if needed.

Common Issues and Solutions:

Clamp Resistant: For stubborn ear clamps, use a cutting tool or specialized ear clamp removal tool.

Crimping Tool Issues: Ensure you use a high-quality crimping tool for efficient removal.

Hose Damage: If the hose is damaged, replace it with a new one and ensure proper installation of a new clamp.

E. Band Clamps

Step-by-Step Instructions:

Locate the Adjustment Mechanism: Find the screw or bolt used for tightening the band clamp.

Loosen the Clamp: Use a screwdriver or wrench to turn the screw or bolt counterclockwise to loosen the band clamp.

Slide the Clamp Off: Once loosened, slide the band clamp off the hose.

Remove the Hose: Carefully pull the hose off the fitting if needed.

Common Issues and Solutions:

Clamp Stuck: Apply penetrating oil to the screw or bolt threads if the clamp is stuck.

Damaged Band: If the band is damaged, consider replacing it with a new one.

Hose Damage: Inspect the hose for damage and replace it if necessary to ensure a proper seal.

Common Issues and Troubleshooting

A. Leaks

Causes:

Improper Tightening: The clamp may not be tightened enough, leading to leaks.

Hose Damage: The hose may be cracked or damaged, compromising the seal.

Misalignment: The hose or clamp might be improperly aligned with the fitting.

Solutions:

Re-tighten the Clamp: Adjust the clamp to ensure it is tightened properly. Follow the manufacturer’s recommended torque settings.

Inspect and Replace the Hose: Check for any visible damage or cracks in the hose. Replace it if necessary.

Realign Components: Ensure that the hose and fitting are properly aligned before securing the clamp.

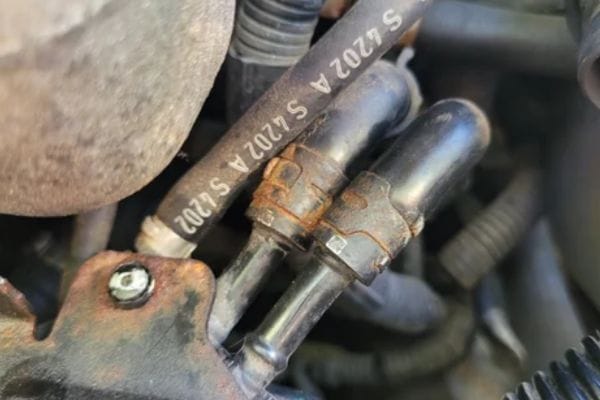
broken Hose Clamp Failures

B. Slippage

Causes:

Inadequate Clamp Pressure: The clamp may not provide sufficient pressure to hold the hose in place.

Incorrect Clamp Size: Using a clamp that is too large or too small can lead to slippage.

Vibration or Movement: Excessive vibration or movement can cause the clamp to loosen.

Solutions:

Adjust the Clamp Pressure: Increase the tightness of the clamp to ensure it exerts enough pressure on the hose.

Use the Correct Clamp Size: Ensure that the clamp is the appropriate size for the hose and fitting.

Secure the Assembly: Use additional supports or anti-vibration mounts if excessive movement is a problem.

C. Clamp Damage

Causes:

Over-tightening: Excessive tightening can deform or break the clamp.

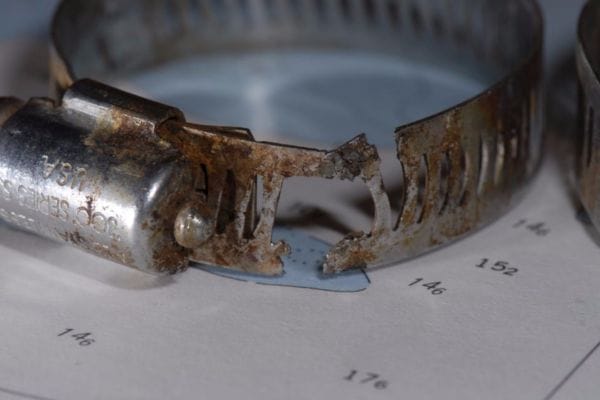
Corrosion: Exposure to harsh environments can lead to rust or corrosion of the clamp.

Improper Installation: Incorrect installation techniques can cause physical damage to the clamp.

Solutions:

Avoid over-tightening: Follow proper tightening procedures to avoid damaging the clamp. Use a torque wrench if necessary.

Replace Corroded Clamps: Inspect for signs of corrosion and replace damaged clamps with new ones made from corrosion-resistant materials.

Ensure Proper Installation: Use the correct tools and techniques for installation to prevent damage.

Conclusion

Each type of clamp has unique features and is suited to different needs, whether it’s the ease of adjustment with a worm gear clamp or the high-pressure capabilities of a T-bolt clamp. Knowing how to correctly remove clamps is vital to prevent harm to the hose or fitting, ensuring that replacements or repairs can be carried out smoothly.


FAQ

What is the purpose of a hose clamp?

Hose clamps secure hoses to fittings or pipes, preventing leaks and ensuring a tight seal.

How do I choose the right hose clamp?

Select a clamp based on the hose size, type of application, and environmental conditions. Common types include worm gear, spring, and T-bolt clamps.

How tight should I make a hose clamp?

Tighten the clamp enough to create a secure seal without over-tightening. Follow the manufacturer’s specifications or use a torque wrench for precise tightening.

Can I reuse hose clamps?

Hose clamps can often be reused if they are in good condition. Inspect them for damage or wear before reusing them.

How do I remove a hose clamp?

Use the appropriate tool for the clamp type (e.g., screwdriver for worm gear, pliers for spring clamps) and follow the removal steps to avoid damaging the hose or fitting.

What should I do if a hose clamp starts to leak?

Check if the clamp is properly tightened and if the hose is damaged. If necessary, replace the clamp or hose to stop the leak.

Choosing the Right Hose Clamp banner

Choosing the Right Hose Clamps: Essential Tips and Types

Given the variety of hose clamps available, selecting the appropriate type for your specific needs can be challenging. Different applications require different clamps based on factors like hose material, pressure conditions, and environmental exposure. This post aims to demystify the process of choosing the right hose clamp by providing essential tips and insights into the various types available.

Types of Hose Clamp

Worm Gear Clamps

worm gear hose clamp factory

Description: Worm gear clamps, also known as screw clamps, feature a metal band with a screw mechanism that tightens the band around the hose. The screw threads engage with a worm gear to adjust the diameter of the clamp, providing a secure fit.

Applications: These clamps are versatile and commonly used in automotive, plumbing, and industrial applications. They are ideal for securing hoses to fittings in environments where varying pressure levels and hose diameters are encountered.

Advantages:

Adjustability: This can be tightened to fit various hose sizes.

Ease of Use: Simple to install and adjust with basic tools.

Availability: Widely available and cost-effective.

Disadvantages:

Corrosion Risk: Metal bands and screws may corrode over time, especially in harsh environments.

Potential for Over-tightening: Excessive tightening can damage the hose or fitting.

Spring Clamps

Description: Spring clamps use a spring mechanism to provide constant clamping pressure. They are typically made from stainless steel and have a curved band that snaps into place around the hose.

Applications: Ideal for use in automotive and industrial settings where hoses experience fluctuations in pressure or temperature. Commonly used in applications where a constant clamping force is required.

Advantages:

Self-tightening: The spring mechanism adjusts to changes in hose diameter or pressure.

Durability: Resistant to corrosion and can withstand high temperatures.

Consistency: Provides a constant clamping force without manual adjustment.

Disadvantages:

Limited Adjustability: Fixed size may not be suitable for varying hose diameters.

Installation Difficulty: Can be challenging to install and remove without specialized tools.

hose clamp spring factory

Constant Torque Clamps

Description: Constant torque clamps are designed to maintain a consistent clamping force despite changes in temperature or pressure. They feature a band with a built-in spring mechanism or adjustment screw that ensures a uniform clamping force.

Applications: Used in high-pressure and high-temperature applications, such as in automotive engines and hydraulic systems. Ideal for situations where maintaining a constant clamping pressure is crucial.

Advantages:

Consistent Performance: Maintains a constant clamping force, reducing the risk of leaks.

Adaptability: Adjusts to changes in hose diameter and pressure.

Durability: Resists temperature fluctuations and corrosion.

Disadvantages:

Cost: Generally more expensive than other types of clamps.

Complexity: This may require more complex installation and adjustment.

T-Bolt Clamps

Description: T-bolt clamps are heavy-duty clamps that use a T-shaped bolt and nut to tighten the band around the hose. They are designed for high-pressure applications and provide a robust, secure fit.

Applications: Commonly used in automotive and industrial applications where high pressure and vibration are present. Suitable for securing hoses in high-performance engines and heavy machinery.

Advantages:

Strength: Provides a strong and secure clamping force, suitable for high-pressure applications.

Durability: Made from high-quality materials, often resistant to corrosion and extreme conditions.

Adjustability: Can be adjusted to fit various hose sizes and pressures.

Disadvantages:

Bulkiness: Larger and bulkier than other types of clamps, which may be unsuitable for tight spaces.

Cost: Typically more expensive than other clamp types due to their heavy-duty design.

band hose clamp supplier

Band Clamps

Description: Band clamps consist of a flat metal band that wraps around the hose and a mechanism to tighten the band. They can be either adjustable or fixed-size, depending on the design.

Applications: Used in a variety of applications, including plumbing, automotive, and industrial settings. Suitable for securing hoses that need a uniform clamping force over a larger surface area.

Advantages:

Even Distribution: Provides an even clamping force across the hose.

Flexibility: Available in both adjustable and fixed sizes to fit different needs.

Versatility: Can be used in a wide range of applications and environments.

Disadvantages:

Installation: May require more effort to install compared to other types of clamps.

Maintenance: Adjustable clamps may need periodic tightening to maintain a secure fit.

Material Considerations

Stainless Steel

Benefits and Drawbacks: Stainless steel is known for its excellent resistance to corrosion and high temperatures. It offers robust strength and durability, making it suitable for harsh environments. The main drawbacks include its higher cost compared to other materials and the potential for rust in extremely aggressive environments if not properly treated.

Best Applications: Stainless steel clamps are ideal for use in marine, chemical, and food processing industries due to their resistance to corrosion and ability to withstand high temperatures. They are also used in automotive and aerospace applications where high strength and reliability are required.

Zinc-Plated Steel

Benefits and Drawbacks: Zinc-plated steel clamps are coated with a layer of zinc to improve resistance to corrosion. They are generally more affordable than stainless steel and provide good strength for moderate applications. However, the zinc coating can wear off over time, especially in harsh environments, which may lead to rust and reduced lifespan.

Best Applications: These clamps are suitable for general-purpose applications where moderate corrosion resistance is sufficient. Commonly used in automotive and agricultural settings, they are also appropriate for standard plumbing and HVAC systems.

Plastic Clamps

Benefits and Drawbacks: Plastic clamps are lightweight and resistant to corrosion, making them ideal for use in environments where metal clamps may not be suitable. They are often cost-effective and easy to install. However, plastic clamps may not offer the same strength and durability as metal clamps and can be affected by extreme temperatures and UV exposure.

Best Applications: Plastic clamps are best suited for light-duty applications such as securing hoses in garden irrigation systems, low-pressure plumbing, and some automotive and HVAC applications where corrosion resistance is important but extreme strength is not required.

Specialty Materials

Benefits and Drawbacks: Specialty materials, such as titanium or high-performance alloys, offer exceptional strength, corrosion resistance, and durability. These materials are often used in specialized applications that require superior performance under extreme conditions. The main drawbacks include their high cost and limited availability.

Examples of Applications:

Titanium Clamps: Used in aerospace and high-performance motorsport applications due to their lightweight and strength.

High-Performance Alloys: Employed in chemical processing and high-temperature environments where standard materials would fail.

Rubber Coated Clamps: Used in automotive and machinery where vibration absorption and protection against abrasion are needed.

How to Choose the Right Size

Measuring Hose Diameter

Tools and Techniques: Accurate measurement of the hose diameter is crucial for selecting the right size clamp. Here are the tools and techniques to ensure a precise measurement:

Calipers: For a high level of accuracy, use a caliper to measure the inner diameter of the hose. Digital calipers provide the most precise readings.

Tape Measure: If calipers are not available, a flexible tape measure can be used to measure the circumference of the hose. Convert this measurement to diameter using the formula: Diameter = Circumference / π (3.14159).

Hose Measurement Tool: Specialized hose measurement tools are designed for quick and accurate readings, often including a gauge that provides both diameter and circumference measurements.

When measuring, ensure that the hose is at its normal operating pressure and temperature, as it may expand or contract under different conditions.

Clamp Size Chart

How to Use: Clamp size charts are useful for selecting the correct clamp based on the hose diameter. Here’s how to use them:

Identify Hose Diameter: Measure the inner diameter of the hose as described above.

Refer to the Chart: Locate the measured diameter on the clamp size chart. Charts typically list a range of diameters that each clamp size can accommodate.

Select the Appropriate Clamp: Choose a clamp that fits within the range specified for the diameter of your hose. Ensure that the clamp’s size range slightly exceeds the hose diameter to provide a secure fit.

Size charts are usually provided by clamp manufacturers and can be found in product catalogs or on their websites. Some charts also indicate the range of hose pressures and temperatures that the clamp can handle.

Hose Clamp application

Adjustable vs. Fixed Sizes

Adjustable Clamps

Pros:

Versatility: Can fit a range of hose diameters, making them suitable for applications where the exact size may vary.

Ease of Installation: Adjustability allows for easier installation on hoses of different sizes without requiring multiple clamps.

Cost-Effective: Often less expensive than having to purchase multiple fixed-size clamps.

Cons:

Potential for Over-tightening: Adjustability can lead to over-tightening if not properly set, which may damage the hose or fitting.

Less Secure Fit: This may not provide as tight a fit as a clamp that is specifically sized for the hose, potentially leading to leaks.

Fixed-Size Clamps

Pros:

Secure Fit: Provides a snug, precise fit for hoses of a specific diameter, reducing the risk of leaks.

Durability: Typically stronger and more durable for applications where the hose diameter is consistent.

Cons:

Limited Flexibility: Not suitable for hoses that vary in diameter. Multiple sizes may need to be stocked, increasing costs and inventory management.

Installation Complexity: Requires accurate measurement of the hose diameter before installation, which may be inconvenient if multiple hose sizes are used.

Installation Tips

Proper Tools for Installation

Recommended Tools:

Screwdriver: For worm gear and T-bolt clamps, a screwdriver is essential for adjusting the tightening mechanism.

Socket Wrench: Used for T-bolt clamps and some specialty clamps, providing a more secure and even tightening.

Pliers: Useful for spring clamps and plastic clamps to compress and secure them around the hose.

Caliper or Tape Measure: For verifying hose and clamp sizes before installation.

Lubricant: A light lubricant can help slide clamps into place, especially for larger sizes or when working with tight-fitting hoses.

Installation Techniques

Prepare the Hose and Fitting:

Ensure that the hose and fitting are clean and free of debris.

If needed, lightly lubricate the hose or fitting to facilitate easier installation of the clamp.

Measure and Select the Clamp:

Use a caliper or tape measure to verify the hose diameter.

Select the appropriate size clamp based on your measurement and the manufacturer’s size chart.

Position the Clamp:

Place the clamp over the hose end, ensuring it is centered and properly aligned with the fitting. For clamps with a screw or bolt mechanism, position it so that the tightening mechanism is easily accessible.

Tighten the Clamp:

For worm gear and T-bolt clamps, use a screwdriver or socket wrench to tighten the clamp evenly around the hose. Ensure that the band is snug but not excessively tight.

For spring clamps, use pliers to compress the spring and slide the clamp into place. Release the clamp to ensure it grips the hose securely.

For plastic clamps, ensure that the clamp’s locking mechanism is engaged properly, either by snapping it into place or by tightening the screw, depending on the design.

Check the Fit:

After installation, verify that the clamp is evenly tightened and that there are no gaps between the clamp and the hose.

For adjustable clamps, double-check the size and ensure the clamp is positioned correctly to prevent slipping.

Test the Installation:

If possible, pressurize the system to check for leaks around the clamp. Adjust the tightness if necessary to ensure a secure seal.

install Hose Clamps

Common Mistakes to Avoid

Incorrect Sizing:

Error: Using a clamp that is too large or too small for the hose.

Prevention: Always measure the hose diameter accurately and refer to the clamp size chart. Consider using adjustable clamps if precise sizing is challenging.

Over-tightening:

Error: Applying too much pressure when tightening the clamp, can damage the hose or fitting.

Prevention: Tighten the clamp until it is snug but not excessively tight. If using a torque wrench, follow the manufacturer’s recommended torque specifications.

Misalignment:

Error: Positioning the clamp incorrectly, leading to uneven pressure distribution and potential leaks.

Prevention: Ensure that the clamp is centered and aligned properly on the hose. Verify that the clamp covers the entire area where the hose meets the fitting.

Ignoring Manufacturer Guidelines:

Error: Not following specific installation instructions or recommendations provided by the clamp manufacturer.

Prevention: Review and adhere to the installation guidelines provided by the manufacturer. This ensures optimal performance and longevity of the clamp.

Inadequate Inspection:

Error: Failing to check the clamp installation after it is completed.

Prevention: Perform a final inspection to ensure that the clamp is properly tightened and the hose is securely attached. Test the system to check for leaks and make necessary adjustments.

Industry Standards and Regulations

Relevant Standards

ISO (International Organization for Standardization):

ISO 9001: This standard ensures quality management systems are in place, which affects the overall manufacturing and performance of clamps.

ISO 14540: Specifically related to clamps, detailing the design, materials, and performance requirements for various types of clamps used in hydraulic and industrial applications.

SAE (Society of Automotive Engineers):

SAE J20: Provides specifications for hose and hose assemblies, which includes guidelines for the clamps used to secure these hoses in automotive applications.

SAE J231: Defines performance standards for automotive clamps, including dimensions and testing methods.

DIN (Deutsches Institut für Normung):

DIN 3017: Covers clamps and their requirements, including dimensions and performance criteria, ensuring compatibility with various hoses and fittings.

ANSI (American National Standards Institute):

ANSI/ASME B18.6.1: Includes specifications for clamps, detailing dimensions, and performance standards for American-made products.

Conclusion

Selecting the right hose clamp is crucial for the reliability and efficiency of your system. By carefully evaluating the type, material, and size of the clamp, and adhering to proper installation techniques, you can prevent leaks, ensure safety, and extend the lifespan of your hoses and fittings. Make informed choices based on your specific needs to achieve the best performance and avoid costly repairs or replacements.


FAQ

What is the primary function of a hose clamp?

Clamps are used to secure hoses onto fittings or connections, preventing leaks and ensuring a tight seal. They are essential for maintaining the integrity of fluid or gas systems.

How do I measure the correct size for a hose clamp?

To measure the correct size, use a caliper or tape measure to determine the inner diameter of the hose. Refer to the clamp size chart provided by the manufacturer to select a clamp that fits within this measurement range.

What materials are commonly used for clamps?

Common materials include stainless steel, zinc-plated steel, and plastic. Stainless steel offers high corrosion resistance, while zinc-plated steel is cost-effective for moderate conditions. Plastic clamps are lightweight and resistant to corrosion.

What are the differences between adjustable and fixed-size clamps?

Adjustable clamps can accommodate a range of hose diameters and are versatile for various applications. Fixed-size clamps are designed for specific hose diameters and offer a more precise and secure fit.

How do I install a hose clamp correctly?

Position the clamp over the hose and fitting, then tighten it using the appropriate tool, such as a screwdriver or pliers. Ensure the clamp is evenly tightened and check for leaks once the system is pressurized.

How can I ensure my clamps meet industry standards?

Verify that your clamps come with certification and documentation from the manufacturer. Regularly test clamps for compliance with relevant standards.

Preventing Hose Clamp Failures banner

Preventing Hose Clamp Failures: Common Issues & Solutions

Hose clamps are crucial components in hydraulic systems, providing secure connections between hoses and fittings to ensure fluid containment and system integrity. Their role is fundamental in maintaining the efficiency and safety of hydraulic operations, as they prevent leaks, manage pressure fluctuations, and support system reliability. Without properly functioning hose clamps, even the most advanced hydraulic systems can suffer from performance issues and potential failures.

Understanding Hose Clamps

Definition and Types of Hose Clamps

Hose clamps are devices used to secure hoses over fittings or nozzles, preventing them from slipping off and ensuring a tight, leak-proof seal. They come in various designs, each suited for different applications and requirements. The primary types include:

worm gear hose clamp factory

Spring Clamps: These use a spring-loaded mechanism to apply constant pressure on the hose, accommodating variations in hose size due to temperature changes. They are self-adjusting and commonly used in automotive applications.

Screw Clamps: Featuring a band with a threaded screw, these clamps can be tightened or loosened to adjust the clamp’s diameter. They are versatile and widely used in both automotive and industrial settings.

Ear Clamps: Made from a band of stainless steel with one or two ‘ears’ that are crimped to tighten the clamp around the hose. They offer a secure fit and are often used in high-pressure applications.

Worm Gear Clamps: These have a band with a worm gear mechanism for precise adjustment. They are used in various applications due to their ability to provide a tight, adjustable fit.

Permanently Mounted Clamps: These clamps are fixed in place and are not adjustable. They are used in applications where a permanent, tamper-proof solution is needed.

Key Components and How They Function

Band: The primary component that wraps around the hose and applies pressure. It is usually made of stainless steel or other durable materials to resist corrosion and wear.

Screw or Bolt: Used to adjust the tension of the clamp. In screw clamps, turning the screw tightens or loosens the band. In spring clamps, the spring exerts constant pressure without the need for manual adjustment.

Housing: The part that contains the screw mechanism in screw clamps or the spring mechanism in spring clamps. It provides the structural support necessary for the clamp’s operation.

Lining (optional): Some clamps have a lining to protect the hose from abrasion and to enhance the seal. This lining can be made from rubber, plastic, or other materials.

When installed correctly, these components work together to create a strong, durable seal that prevents leaks and maintains the hydraulic system’s efficiency.

Selection Criteria for Different Applications

Pressure and Temperature Requirements: Choose clamps based on the operating pressure and temperature of the system. High-pressure systems may require more robust clamps, such as worm gear or ear clamps, while standard applications may use spring or screw clamps.

Material Compatibility: Ensure that the clamp material is compatible with the hose and the environment. Stainless steel clamps are resistant to corrosion and are suitable for harsh environments, while plastic clamps may be appropriate for less demanding conditions.

Hose and Fitting Sizes: Select clamps that match the diameter of the hose and the fitting. Proper sizing is crucial for achieving a secure fit and preventing leaks.

Ease of Installation: Consider how easy the clamp is to install and adjust. Some applications may benefit from adjustable clamps like screw or worm gear clamps, while others may require the permanence of ear clamps.

Environmental Factors: Take into account factors like exposure to chemicals, moisture, or extreme temperatures. Clamps should be chosen based on their ability to withstand these conditions without degrading.

Common Hose Clamp Failures

Over-Tightening

Causes and Effects

Over-tightening occurs when a hose clamp is applied with excessive force, often due to the use of improper tools or incorrect installation practices. This issue can be caused by the desire to ensure a leak-proof seal or a misunderstanding of the appropriate torque specifications for the clamp. Over-tightening compresses the hose more than necessary, potentially causing damage to both the hose and the clamp.

The primary effects of over-tightening include:

Hose Deformation: Excessive pressure can cause the hose to collapse or deform, affecting its ability to carry fluids properly. This deformation may lead to reduced flow capacity or internal damage.

Clamp Damage: The clamp itself may become distorted or weakened, which can compromise its ability to maintain a secure connection.

Signs of Over-Tightening

Visible Hose Deformation: Look for signs that the hose is squeezed or flattened, indicating excessive pressure from the clamp.

Leakage: Ironically, over-tightening can sometimes cause leaks if the hose material is damaged or if the clamp cannot hold the excessive pressure.

Clamp Distortion: Examine the clamp for any bending or warping, which suggests that too much force was applied.

Under-Tightening

Causes and Effects

Under-tightening happens when a hose clamp is not tightened sufficiently, often due to improper torque settings or oversight during installation. This can result from a lack of familiarity with the correct specifications or the use of inadequate tools.

The primary effects of under-tightening include:

Leakage: An insufficiently tightened clamp may not create a secure seal, leading to fluid leaks around the connection. This can result in loss of pressure and contamination of the hydraulic system.

Reduced Clamp Efficiency: The clamp may fail to hold the hose in place, which can cause the hose to slip or move, further exacerbating the leakage problem.

Consequences of System Integrity

Under-tightening can compromise the entire hydraulic system’s integrity by causing:

Pressure Drops: Leaks resulting from under-tightening can lead to pressure drops within the system, affecting its overall performance and efficiency.

System Contamination: Leaking fluids can introduce contaminants into the system, potentially damaging other components and leading to further failures.

Hose Clamp Failures

Corrosion and Material Degradation

Factors Leading to Corrosion

Corrosion occurs when the hose clamp material deteriorates due to exposure to moisture, chemicals, or extreme temperatures. Factors contributing to corrosion include:

Environmental Exposure: Clamps used in outdoor or industrial environments may be exposed to rain, chemicals, or high humidity, accelerating corrosion.

Material Composition: Clamps made from low-quality or non-corrosion-resistant materials, such as some types of steel or aluminum, are more prone to corrosion.

Impact on Performance and Longevity

Reduced Clamp Strength: Corrosion weakens the clamp material, reducing its ability to maintain a secure seal and increasing the risk of failure.

Hose Damage: Corroded clamps can become sharp or brittle, potentially causing damage to the hose and leading to leaks.

Increased Maintenance Costs: Regular replacement of corroded clamps and damaged hoses can increase maintenance costs and downtime.

Improper Installation

Common Mistakes During Installation

Improper installation of hose clamps can result from several common mistakes, including:

Incorrect Sizing: Using clamps that are too large or too small for the hose can prevent a secure fit and lead to leaks.

Misalignment: Failing to properly align the clamp with the hose and fitting can cause uneven pressure distribution and potential leaks.

Improper Torque: Not adhering to the manufacturer’s recommended torque settings for the clamp can result in over-tightening or under-tightening.

Effects on Clamp Efficiency and System Safety

Decreased Efficiency: Improper installation can lead to inefficient sealing, reducing the overall performance of the hydraulic system and increasing the likelihood of leaks.

Safety Risks: Leaks caused by improper clamp installation can create hazardous conditions, especially in systems carrying high-pressure fluids or volatile substances. This poses risks to both equipment and personnel.

System Failures: Consistent issues with clamp installation can lead to frequent system failures, increased maintenance needs, and potential damage to other components.

Solutions to Prevent Hose Clamp Failures

Correct Installation Techniques

Proper installation of hose clamps is crucial to ensuring a secure and leak-proof connection. Follow these step-by-step guidelines to avoid common installation issues:

Preparation:

Select the Correct Clamp: Ensure the clamp size matches the diameter of the hose and the fitting. Using a clamp that is too large or too small can lead to ineffective sealing.

Inspect Components: Check the hose and fitting for any signs of damage or debris that could affect the seal. Clean the surfaces thoroughly to remove any contaminants.

Positioning the Hose:

Align the Hose: Place the hose onto the fitting, ensuring it is fully seated. The hose should be pushed up to the base of the fitting to ensure maximum contact and seal integrity.

Applying the Clamp:

Position the Clamp: Slide the clamp over the hose and fitting, ensuring it is positioned evenly around the circumference. The clamp should cover the entire area where the hose meets the fitting.

Adjust the Clamp: If using a screw or worm gear clamp, align the screw or gear mechanism so it is easily accessible for tightening.

install Hose Clamps

Tightening the Clamp:

Use the Right Tools: Employ appropriate tools such as a torque wrench or screwdriver to tighten the clamp. For screw clamps, a torque wrench can help achieve the correct torque specification.

Tighten Gradually: Tighten the clamp gradually to avoid over-tightening. For screw clamps, turn the screw until it feels snug but not excessively tight. For spring clamps, ensure the spring is properly compressed.

Final Inspection:

Verify Seal Integrity: Ensure there are no visible leaks or signs of deformation. Test the system under normal operating conditions to confirm the clamp is functioning correctly.

Material Selection and Maintenance

Choosing the right materials and maintaining them is essential to ensuring long-term performance and preventing clamp failures.

Choosing the Right Materials for Different Environments

Corrosion Resistance:

Stainless Steel: Opt for stainless steel clamps for environments exposed to moisture, chemicals, or high temperatures. Stainless steel is highly resistant to corrosion and wear.

Plastic or Nylon: For less demanding environments, plastic or nylon clamps may be appropriate. They are less expensive but offer limited durability compared to metal clamps.

Temperature Tolerance:

High-Temperature Materials: Select clamps rated for high temperatures if the system operates under extreme heat. Materials such as high-grade stainless steel or specialized alloys can withstand these conditions.

Chemical Compatibility:

Chemical-Resistant Coatings: Use clamps with chemical-resistant coatings if the system involves aggressive chemicals or fluids. Ensure the coating is compatible with the specific chemicals used.

Regular Inspection and Maintenance Practices

Scheduled Inspections:

Routine Checks: Conduct regular inspections of hose clamps as part of routine maintenance. Look for signs of wear, corrosion, or damage.

Operational Testing: Periodically test the system under normal operating conditions to ensure that clamps maintain a secure seal and performance.

Maintenance Practices:

Cleaning: Regularly clean clamps and surrounding areas to remove debris, grime, or corrosive materials. This helps prevent build-up that can affect clamp performance.

Replacement: Replace clamps that show signs of significant wear, corrosion, or damage. Timely replacement helps prevent system failures and maintains system integrity.

Preventing Corrosion

Protective Coatings and Treatments

Coatings:

Electroplating: Apply electroplated coatings to clamps to enhance their corrosion resistance. Zinc or chromium plating can provide additional protection.

Powder Coating: Use powder coatings for clamps exposed to harsh environments. This coating provides a durable barrier against moisture and chemicals.

Treatments:

Anodizing: For aluminum clamps, anodizing can create a protective layer that enhances resistance to corrosion and wear.

Passivation: Apply passivation treatments to stainless steel clamps to remove surface contaminants and enhance corrosion resistance.

Regular Cleaning and Monitoring

Cleaning:

Routine Cleaning: Clean clamps and hoses regularly to prevent the accumulation of corrosive substances. Use non-abrasive cleaning agents suitable for the materials involved.

Inspection During Cleaning: While cleaning, inspect clamps for any signs of wear, corrosion, or damage. Address any issues immediately to prevent further problems.

Monitoring:

Environmental Conditions: Monitor the environment where the clamps are used. High humidity, exposure to chemicals, or extreme temperatures can accelerate corrosion and other issues.

System Performance: Regularly check the performance of the hydraulic system to ensure that clamps are functioning correctly and maintain a secure seal.

Conclusion

Implementing the recommended installation techniques, selecting the right materials, and adopting preventive measures against corrosion will significantly improve the reliability of your hose clamps. Regularly reviewing and adjusting your maintenance procedures based on system performance and environmental factors will help address emerging issues before they escalate. Investing time and resources into proper hose clamp management is essential for maintaining the integrity and performance of hydraulic systems. Embrace these solutions and commit to ongoing monitoring to ensure long-term success and system reliability.


FAQ

What is a hose clamp and why is it important?

A hose clamp is a device used to secure hoses onto fittings or connectors, preventing fluid leaks and maintaining system integrity. It’s crucial for ensuring a tight, leak-proof connection and for maintaining the efficiency and safety of hydraulic systems.

What are the common causes of hose clamp failure?

Common causes include over-tightening, under-tightening, corrosion, material degradation, and improper installation. Each issue can lead to leaks, decreased performance, and potential system failures.

How can I prevent over-tightening of hose clamps?

To prevent over-tightening, use a torque wrench to apply the correct amount of pressure as specified by the manufacturer. Tighten gradually and ensure that the clamp does not deform the hose or fitting.

What materials should I choose for hose clamps in corrosive environments?

For corrosive environments, choose clamps made from stainless steel or those with protective coatings such as zinc or chromium plating. These materials are resistant to rust and corrosion.

How often should I inspect and maintain hose clamps?

Inspect hose clamps regularly, ideally as part of routine maintenance schedules. Check for signs of wear, corrosion, or damage, and replace clamps as needed to ensure continuous system reliability.

What are the best practices for installing hose clamps?

Best practices include using the correct size clamp, positioning it evenly around the hose, and tightening it to the manufacturer’s specifications.

fitting Crimping Mistakes banner

Fittings Crimping Mistakes: 7 Common Errors and Fixes

Common hydraulic hose fittings crimping mistakes can lead to serious issues such as leaks, reduced efficiency, and even system failures. These errors not only compromise the functionality of the hydraulic system but also pose safety risks and increase maintenance costs. Understanding and addressing these mistakes is crucial for anyone involved in hydraulic system maintenance or assembly.

Incorrect Crimping Tool Use

Description of the Error

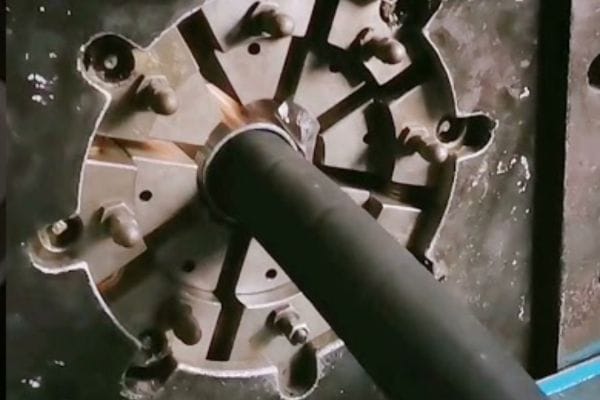
Using the wrong crimping tool or incorrect settings is a common mistake that can undermine the integrity of hydraulic connections. Each hydraulic application requires specific crimping tools and settings to ensure a proper fit between the hose and fitting. For instance, using a tool designed for smaller diameters on a larger hose can result in incomplete or improper crimps. Similarly, incorrect settings on a crimping machine, such as pressure or crimp diameter adjustments, can lead to over- or under-crimping, both of which compromise the connection.

Impact on Hydraulic Systems

The impact of using incorrect crimping tools or settings can be severe. If the crimping tool is not suited to the hose and fitting specifications, it can cause damage such as:

Leaks: An improper crimp creates gaps or weak spots where hydraulic fluid can escape, leading to leaks.

Reduced Performance: Insecure connections can lead to inefficient fluid transfer, reducing the overall performance of the hydraulic system.

System Failures: Over time, improperly crimped connections can fail under pressure, leading to system downtime and potential safety hazards.

How to Fix It

To correct issues caused by incorrect tool use or settings, follow these steps:

Identify the Correct Tool: Ensure that the crimping tool matches the specifications of the hose and fitting. Use manufacturer recommendations to select the right tool.

Adjust Settings Accurately: Set the crimping tool according to the specifications for crimp diameter and pressure. Refer to the hose and fitting manufacturer’s guidelines for the correct settings.

Verify Calibration: Regularly calibrate your crimping tool to ensure accuracy. This may involve checking and adjusting pressure gauges and settings to align with the manufacturer’s specifications.

Tips for Prevention

Regular Tool Maintenance: Perform routine maintenance on crimping tools to ensure they are in good working condition. This includes cleaning, inspecting for wear, and replacing parts as needed.

Proper Training: Train personnel on the proper use of crimping tools and the importance of using the correct settings. Ensure they understand how to read and apply manufacturer guidelines.

Keep Documentation Handy: Maintain up-to-date documentation of tool specifications, calibration procedures, and manufacturer guidelines for quick reference during crimping tasks.

Regular Calibration Checks: Schedule regular calibration checks for crimping tools to ensure they maintain accurate settings over time.

Inconsistent Crimping Pressure

Description of the Error

Inconsistent crimping pressure is a significant error that can adversely affect the quality of hydraulic connections. Crimping tools are designed to apply a specific amount of pressure to compress the fitting around the hose, ensuring a secure and leak-proof connection. Variations in pressure during the crimping process—whether due to equipment malfunction, incorrect settings, or human error—can lead to improperly crimped connections. This inconsistency can manifest as either over-crimping, where excessive pressure deforms the hose or fitting, or under-crimping, where insufficient pressure fails to achieve a secure fit.

Impact on Hydraulic Systems

The impact of inconsistent crimping pressure can be quite detrimental to hydraulic systems:

Leaks: Under-crimped connections may not form a tight seal, leading to leaks of hydraulic fluid. This not only reduces the efficiency of the system but also poses safety risks.

Reduced Effectiveness: Insecure or improperly crimped connections can result in reduced fluid transfer efficiency, impacting the overall performance and functionality of the hydraulic system.

Potential Failures: Over time, the stress on improperly crimped connections can lead to hose or fitting failure, which can cause system downtime, damage to other components, and potential safety hazards.

How to Fix It

To address issues arising from inconsistent crimping pressure, follow these steps:

Use Calibrated Pressure Gauges: Ensure that your crimping equipment is equipped with calibrated pressure gauges to monitor and adjust the pressure accurately during the crimping process. Regularly check and calibrate these gauges to maintain accuracy.

Follow Manufacturer’s Specifications: Adhere strictly to the manufacturer’s guidelines for crimping pressure settings. Each hose and fitting combination has specific pressure requirements, and deviations from these can result in improper crimps.

Monitor Pressure Consistency: During the crimping process, continuously monitor the pressure to ensure it remains within the recommended range. Make adjustments as necessary to maintain consistent pressure.

Tips for Prevention

Regular Calibration: Implement a regular calibration schedule for crimping tools and pressure gauges to ensure that they are operating accurately. Calibration should be performed by trained personnel and verified against known standards.

Routine Pressure Checks: Regularly inspect and test the crimping equipment to verify that pressure settings are correct and that the equipment is functioning properly. Replace or repair any components that show signs of wear or malfunction.

Training and Procedures: Train operators on the importance of consistent crimping pressure and proper use of crimping tools. Develop and follow standard operating procedures to ensure that pressure settings are applied correctly each time.

Equipment Maintenance: Perform routine maintenance on crimping tools to keep them in optimal condition. This includes cleaning, lubricating moving parts, and inspecting for wear and tear that could affect pressure consistency.

Poor Hose Preparation

Description of the Error

Poor hose preparation is a common error in hydraulic systems that can lead to compromised connections and system failures. This mistake typically involves inadequate cutting or cleaning of hoses before crimping. Hoses must be cut to the correct length and cleaned thoroughly to ensure a proper fit between the hose and fitting. Inadequate preparation can result in issues such as uneven cutting, contamination of the hose interior, or improper alignment during crimping.

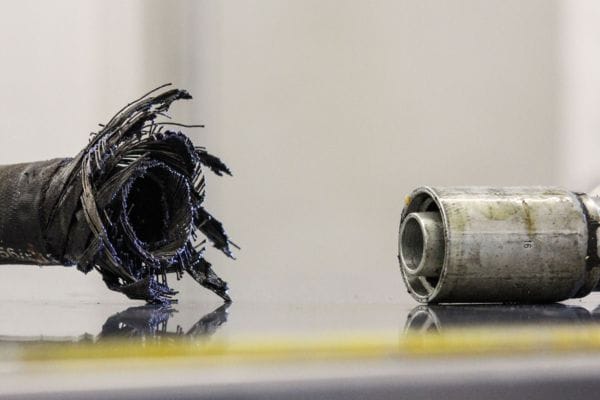
Inadequate Cutting: Using incorrect cutting techniques or tools can lead to uneven or frayed hose ends. This can prevent a proper seal and cause difficulties during the crimping process.

Insufficient Cleaning: Contaminants like dirt, oil, or debris left inside or on the hose can interfere with the crimping process and lead to poor connections.

Impact on Hydraulic Systems

The impact of poor hose preparation on hydraulic systems can be significant:

Compromised Seal: Inaccurate cutting or contamination can prevent the hose from seating properly in the fitting, leading to an incomplete seal. This can result in leaks and loss of hydraulic fluid.

Potential Failures: Contaminants or improperly cut hoses can cause weak or uneven crimping, leading to hose failures under pressure. This can cause system downtime and pose safety risks.

Reduced Performance: Poorly prepared hoses can result in inefficient fluid transfer and reduced overall system performance.

How to Fix It

To correct issues related to poor hose preparation, follow these steps:

Proper Hose Cutting Techniques: Use a hose cutter specifically designed for hydraulic hoses to ensure clean and precise cuts. Avoid using makeshift tools like utility knives, which can cause uneven or frayed ends.

Ensure Cleanliness: Thoroughly clean the interior and exterior of the hose before crimping to remove any contaminants. Use compressed air or a suitable cleaning solution as needed.

Check Hose Alignment: Ensure that the hose is correctly aligned with the fitting before crimping. Verify that the hose end is fully seated in the fitting to achieve a proper seal.

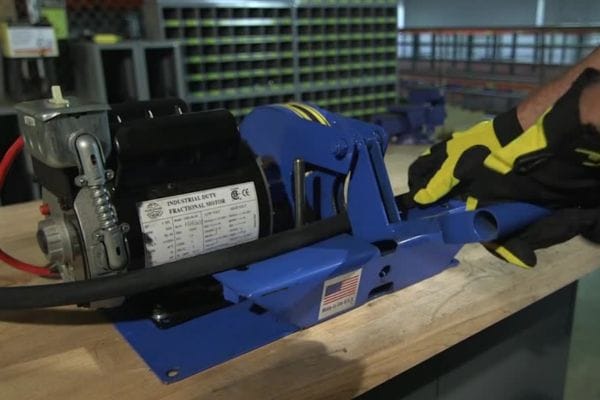
Hydraulic hose Cutting Topa

Tips for Prevention

Training on Hose Preparation: Provide training for personnel on the correct techniques for cutting and cleaning hoses. Emphasize the importance of proper preparation for ensuring reliable hydraulic connections.

Use of Appropriate Tools: Invest in high-quality hose cutting tools and cleaning equipment designed for hydraulic applications. Regularly inspect and maintain these tools to ensure their effectiveness.

Implement Standard Procedures: Develop and implement standard operating procedures (SOPs) for hose preparation. This should include guidelines for cutting, cleaning, and inspecting hoses before crimping.

Incorrect Ferrule Placement

Description of the Error

Incorrect ferrule placement is a common issue in hydraulic systems that can lead to weak connections and potential leaks. Ferrules are essential components used to reinforce the hose and fitting connection, ensuring a secure and reliable crimp. Misalignment or incorrect placement of ferrules can occur due to several reasons:

Misalignment: The ferrule may not be properly aligned with the hose and fitting, causing uneven crimping or insufficient compression.

Incorrect Placement: Ferrules may be placed too far from or too close to the hose end, affecting the integrity of the crimped connection.

Impact on Hydraulic Systems

The impact of incorrect ferrule placement on hydraulic systems can be significant:

Weak Connections: Misaligned or incorrectly placed ferrules can lead to weak connections that are prone to failure under pressure. This can result in leaks and reduced system performance.

Potential Leaks: An improperly placed ferrule may not provide a tight seal, leading to hydraulic fluid leaks. This can cause fluid loss, decreased system efficiency, and safety hazards.

System Failures: Over time, weak or compromised connections can lead to catastrophic failures, causing downtime, damage to other components, and potential safety risks.

How to Fix It

To address issues related to incorrect ferrule placement, follow these steps:

Ensure Correct Alignment: Before crimping, verify that the ferrule is correctly aligned with the hose and fitting. The ferrule should be centered and properly seated in the hose to ensure even compression.

Check Placement: Ensure that the ferrule is positioned according to manufacturer specifications. It should be placed at the correct distance from the hose end to achieve a proper seal and secure connection.

Verify Fit: After placement, double-check the fit of the ferrule against the hose and fitting. Make any necessary adjustments to ensure a proper alignment before proceeding with the crimping process.

Tips for Prevention

Double-Check Ferrule Positioning: Always verify ferrule positioning before crimping. Use visual inspections and measurements to ensure the ferrule is correctly placed and aligned.

Use Ferrule Guides: Utilize ferrule guides or alignment tools designed to assist with correct placement. These tools can help ensure that ferrules are positioned accurately and consistently.

Training and Procedures: Train personnel on the importance of correct ferrule placement and alignment. Develop standard operating procedures (SOPs) to ensure consistency and accuracy in the placement process.

Using the Wrong Crimping Die

Description of the Error

Using the wrong crimping die is a critical error in the crimping process that can lead to improper crimps and compromised hydraulic connections. Crimping dies are designed to compress the fitting around the hose to create a secure seal. Each die is specifically engineered to match certain hose and fitting sizes and types. When a die that does not match the hose or fitting specifications is used, it can cause various issues:

Incorrect Size: The die may not fit the hose or fitting properly, leading to uneven or incomplete crimps.

Wrong Type: Using a die designed for a different type of fitting or hose can result in poor compression and a weak connection.

inproper installation fitting

Impact on Hydraulic Systems

The impact of using the wrong crimping die can be significant:

Leaks: Improperly crimped connections can lead to leaks, as the seal may not be tight enough to contain the hydraulic fluid. This can cause fluid loss and reduced system efficiency.

Connection Failures: Incorrectly crimped hoses may fail under pressure, leading to potential system breakdowns, increased downtime, and safety hazards.

Reduced Performance: An inadequate crimp can lead to inefficient fluid transfer and overall reduced performance of the hydraulic system.

How to Fix It

To address issues related to using the wrong crimping die, follow these steps:

Select the Appropriate Die: Ensure that the crimping die you use is specifically designed for the hose and fitting you are working with. Check the manufacturer’s specifications for both the die and the hose/fitting to confirm compatibility.

Verify Die Size and Type: Before crimping, verify that the die size and type match the requirements of the hose and fitting. Consult the manufacturer’s guidelines and specifications for the correct die.

Inspect Dies Regularly: Regularly inspect crimping dies for wear and damage. Replace any dies that are worn out or damaged to ensure proper crimping performance.

Tips for Prevention

Reference Manufacturer Guidelines: Always refer to the manufacturer’s guidelines for selecting the correct crimping die. These guidelines will provide specific information on the required die sizes and types for different hoses and fittings.

Verify Die Compatibility: Before starting the crimping process, double-check that the die you are using is compatible with the hose and fitting specifications. This may involve cross-referencing product catalogs or using die compatibility charts.

Maintain a Die Inventory: Keep an organized inventory of crimping dies and their specifications. This will help you quickly identify and select the correct die for each crimping job.

Over-Crimping or Under-Crimping

Description of the Error

Over-crimping and under-crimping are common errors in the crimping process that can lead to compromised hydraulic connections. Both errors occur due to improper application of crimping pressure:

Over-Crimping: Applying excessive pressure during the crimping process can deform the hose or fitting, potentially causing damage to the hose structure or fitting threads. This can lead to a compromised connection that is prone to leaks and failures.

Under-Crimping: Applying insufficient pressure results in a weak connection where the hose and fitting do not bond securely. This can prevent the formation of a proper seal, leading to leaks and reduced performance.

Impact on Hydraulic Systems

The impact of over-crimping or under-crimping on hydraulic systems can be severe:

Compromised Hose Integrity: Over-crimping can damage the hose, reducing its ability to withstand pressure and affecting its overall integrity. Under-crimping can result in insufficient compression, leading to a loose connection.

Connection Strength: Both over-crimping and under-crimping can weaken the connection, making it more susceptible to leaks, failures, and reduced efficiency.

System Failures: Improperly crimped connections can lead to hydraulic fluid leaks, system malfunctions, and potential safety hazards.

Crimping Mistakes

How to Fix It:

To address issues of over-crimping or under-crimping, follow these steps:

Adjust Crimping Pressure: Set the crimping tool to the recommended pressure settings specified by the hose and fitting manufacturer. Ensure that the pressure applied is within the specified range to achieve a proper crimp.

Use Pressure Gauges: Equip your crimping tool with a calibrated pressure gauge to monitor and control the crimping force accurately. This helps ensure that the pressure applied is consistent with the manufacturer’s specifications.

Check Crimp Specifications: Verify that the crimping tool settings and pressure align with the specific requirements for the hose and fitting. Consult manufacturer guidelines and specifications for accurate pressure settings.

Tips for Prevention

Monitor Crimping Force: Use pressure gauges and monitoring devices to keep track of crimping force throughout the process. Regularly calibrate these devices to ensure accurate readings and prevent deviations from the required pressure.

Regular Tool Maintenance: Perform regular maintenance on crimping tools to ensure they are functioning correctly. Inspect tools for wear and tear and make necessary adjustments to maintain consistent crimping pressure.

Inspect Crimped Connections: After crimping, inspect connections to verify that they meet quality standards. Look for signs of over-crimping or under-crimping, such as deformations or loose fittings, and address any issues promptly.

Ignoring Manufacturer’s Specifications

Description of the Error

Ignoring the manufacturer’s specifications is a critical error that can lead to significant issues in hydraulic systems. Each hydraulic component, including hoses, fittings, and crimping tools, comes with specific guidelines and recommendations provided by the manufacturer. Deviating from these specifications can result in various problems:

Deviating Specifications: This may include using incorrect crimping pressures, inappropriate dies, or unsuitable hoses and fittings.

Non-Compliance: Failing to adhere to the recommended procedures and parameters can cause improper installation or operation.

Impact on Hydraulic Systems

The impact of ignoring the manufacturer’s specifications can be severe:

Increased Risk of Failure: Components that are not installed or used according to the manufacturer’s specifications are more likely to fail under pressure. This can result in leaks, breakdowns, and potential safety hazards.

Decreased Efficiency: Deviating from specifications can lead to suboptimal performance of the hydraulic system. Components may not function as intended, leading to reduced efficiency and increased operational costs.

Increased Maintenance Costs: Components that fail prematurely or require frequent adjustments can lead to higher maintenance costs and system downtime.

How to Fix It

To address the issue of ignoring the manufacturer’s specifications, follow these steps:

Follow Manufacturer’s Guidelines: Adhere strictly to the manufacturer’s specifications for installation, operation, and maintenance of hydraulic components. This includes following recommended crimping pressures, using the correct tools, and selecting appropriate components.

Refer to Technical Documentation: Regularly consult the technical documentation provided by the manufacturer for detailed instructions and specifications. Ensure that all personnel involved in the installation and maintenance process are familiar with these documents.

Verify Compliance: Before finalizing any installation or maintenance work, double-check that all procedures and component choices comply with the manufacturer’s guidelines.

Conclusion

Emphasizing proper crimping practices is essential for ensuring the reliability and safety of hydraulic systems. Implementing best practices, such as using the correct tools and dies, maintaining consistent pressure, and following manufacturer guidelines, will lead to better system performance and reduced risk of failures. For optimal results, seek professional training and regularly review technical documentation to stay updated on best practices and ensure high-quality installations.


FAQ

What is crimping in hydraulic systems?

Crimping involves compressing a fitting around a hose to create a secure and leak-proof connection. It’s crucial for ensuring the reliability and safety of hydraulic systems.

What tools are needed for crimping?

Essential tools include a crimping machine or hand tool, crimping dies, and pressure gauges. Using the correct tools and dies for your specific hose and fitting is vital for proper crimping.

How can I avoid over-crimping or under-crimping?

To avoid these issues, use a calibrated pressure gauge to ensure the crimping force matches manufacturer specifications. Regularly maintain and inspect crimping tools to ensure accurate pressure application.

Why is hose preparation important before crimping?

Proper hose preparation, including accurate cutting and cleaning, ensures a strong seal and prevents leaks.

What should I do if I notice a crimping mistake?

If a crimping mistake is detected, remove the improperly crimped connection and re-crimp using the correct settings and tools. Ensure all procedures adhere to manufacturer specifications to prevent recurring issues.

How can I ensure compliance with the manufacturer’s specifications?

Always refer to the manufacturer’s technical documentation for detailed guidelines on installation and crimping.

Contact Topa

Save 30% on maintenance costs with our easy-install hydraulic fittings. Contact Now!