Hydraulic vs Pneumatic Fitting banner

Hydraulic vs Pneumatic Fitting: Which is Right for You?

Hydraulic and pneumatic systems are integral to a wide array of industries, enabling efficient power transmission and automation. Hydraulic systems utilize incompressible liquids, typically oil, to transmit force and motion. They are renowned for their ability to handle heavy loads and generate high pressure, making them ideal for applications like construction equipment and industrial machinery. In contrast, pneumatic systems rely on compressed air to achieve similar tasks. While they are generally lighter and simpler, they excel in applications requiring rapid movement and flexibility, such as packaging and assembly lines.

Understanding Hydraulic Systems

Definition and Functionality

Hydraulic systems are mechanisms that use pressurized liquids to transmit power. At their core, they operate on Pascal’s principle, which states that pressure applied to a confined fluid is transmitted undiminished in all directions. This allows for the efficient transfer of force, enabling machinery to lift heavy loads, operate tools, and perform various mechanical functions. By using hydraulic fluid—commonly oil—these systems can generate significant force in a compact design, making them essential in applications requiring high power density.

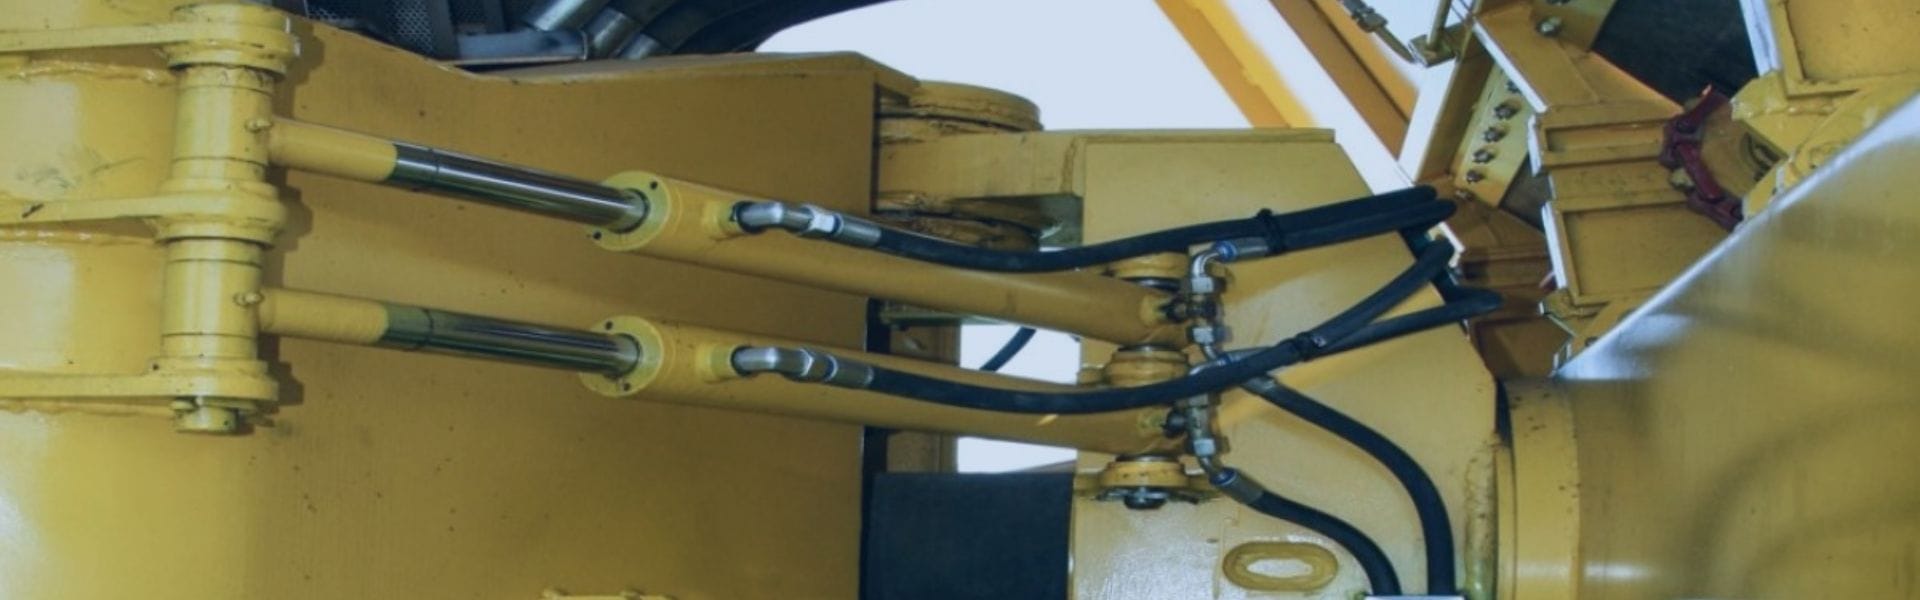
Common applications of hydraulic systems span various industries, with a notable presence in the construction, manufacturing, and automotive sectors. In construction, hydraulic excavators and lifts utilize these systems for digging, lifting, and material handling. Manufacturing plants employ hydraulic presses for shaping materials and assembling components, while automotive workshops utilize hydraulic jacks and lifts for vehicle maintenance. The versatility and effectiveness of hydraulic systems in managing heavy-duty tasks make them indispensable across many sectors.

Components of Hydraulic Systems

Hydraulic systems consist of several key components that work together to create a functional network. The primary elements include:

Pumps: These devices generate flow by converting mechanical energy into hydraulic energy, creating pressure within the system. They are crucial for maintaining fluid movement.

Actuators: Actuators convert hydraulic energy back into mechanical energy, often in the form of linear or rotary motion. Common types include hydraulic cylinders and motors.

Valves: Valves control the flow and direction of hydraulic fluid within the system. They regulate pressure and ensure that the actuators operate correctly, allowing for precise movement control.

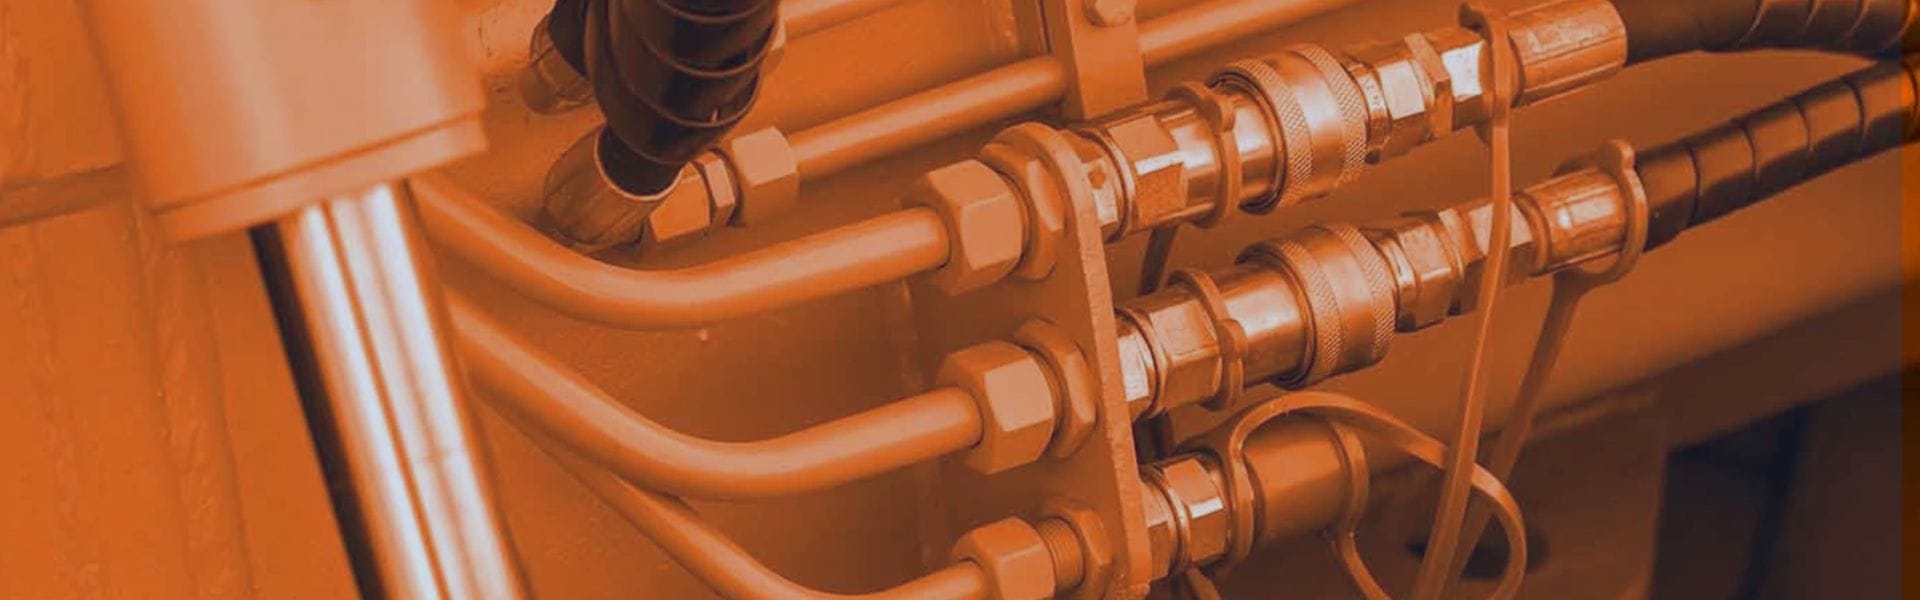
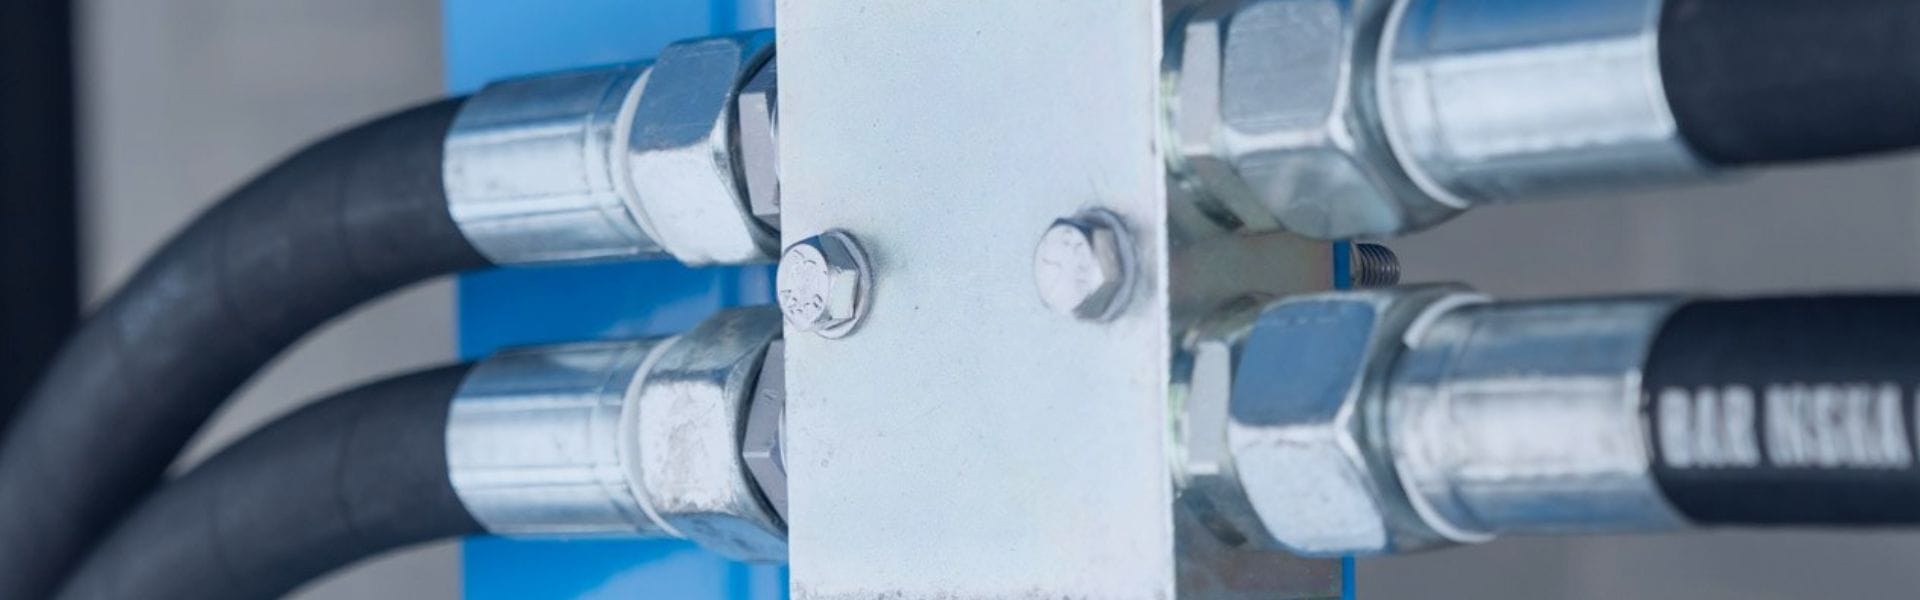
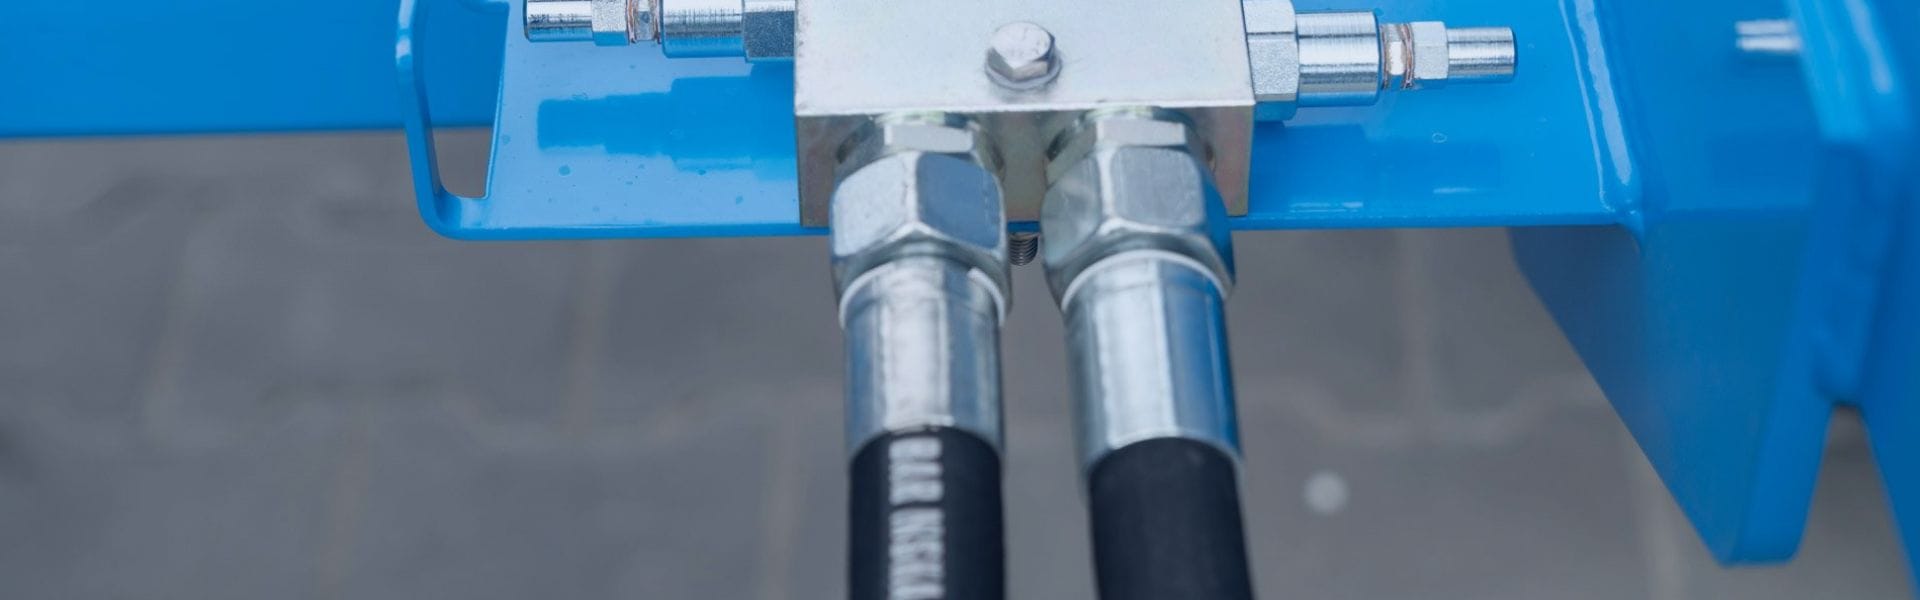
Fittings: These are connectors that link various components of the hydraulic system, ensuring a secure and leak-proof connection. Proper fittings are essential for maintaining system integrity and efficiency.

The importance of fittings cannot be overstated, as they directly impact system performance. A well-designed fitting prevents leaks and maintains pressure, contributing to overall system reliability. Inadequate fittings can result in fluid loss, reduced efficiency, and potential damage to other components.

hydraulic adapters manufacturer Topa in China

Types of Hydraulic Fittings

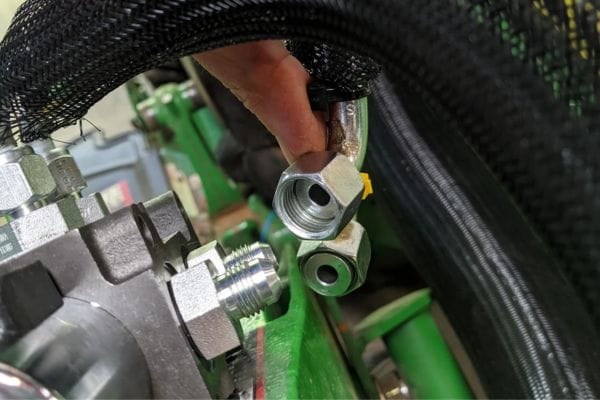
Hydraulic fittings come in various types, each suited for specific applications and environments. The most common types include:

O-ring Fittings: These fittings use a rubber O-ring to create a seal, preventing leaks at connection points. They are popular in high-pressure applications due to their reliability.

Flare Fittings: Flare fittings involve a conical-shaped end that creates a tight seal when tightened. They are commonly used in fuel and hydraulic lines, offering excellent resistance to vibration and thermal expansion.

Quick Couplings: These fittings allow for rapid connection and disconnection of hoses and components without the need for tools. They are essential in applications requiring frequent changes or maintenance.

Material choice for hydraulic fittings is also critical. Common materials include:

Steel: Known for its strength and durability, steel fittings are suitable for high-pressure applications but can be susceptible to corrosion.

Stainless Steel: This material offers excellent corrosion resistance, making it ideal for applications involving harsh environments or fluids.

Plastic: Lightweight and resistant to corrosion, plastic fittings are often used in low-pressure applications and environments where metal fittings may corrode.

Understanding Pneumatic Systems

Definition and Functionality

Pneumatic systems are mechanical systems that use compressed air to transmit power. They operate on the principles of fluid dynamics, where the movement of air or gas is harnessed to create motion. Compressed air serves as the medium to transfer energy, enabling the actuation of various tools and machinery. Pneumatic systems are characterized by their ability to provide rapid movement and flexibility, making them suitable for tasks requiring quick and precise actions.

Common applications of pneumatic systems are prevalent in various industries, particularly in automation, packaging, and material handling. In automated production lines, pneumatic systems control robotic arms and conveyors, facilitating efficient movement and assembly of products. In the packaging industry, pneumatic mechanisms are employed for filling, sealing, and labeling products. Their versatility allows them to excel in tasks such as clamping, gripping, and transporting items, all while minimizing energy consumption and wear on machinery.

Components of Pneumatic Systems

Pneumatic systems consist of several essential components that work in concert to create a functional network. The primary components include:

Compressors: These devices are responsible for compressing air and storing it in a tank, generating the pressure needed for the system. Compressors can be powered by electricity, gasoline, or diesel, depending on the application.

Actuators: Actuators in pneumatic systems convert compressed air into mechanical energy, producing linear or rotary motion. Common types include pneumatic cylinders and rotary actuators, which are used to drive tools or manipulate objects.

Valves: Valves control the flow of compressed air within the system, directing it to specific components based on operational needs. They play a crucial role in regulating pressure and ensuring the proper functioning of actuators.

Fittings: Similar to hydraulic systems, fittings connect various components in a pneumatic system, ensuring airtight connections that prevent leaks. They are vital for maintaining system pressure and efficiency.

The role of fittings in pneumatic systems is critical; they facilitate quick and secure connections while minimizing the risk of air leaks. Properly selected fittings can significantly enhance the performance and reliability of the entire system.

Pneumatic Fitting

Types of Pneumatic Fittings

Pneumatic fittings come in various forms, designed to cater to specific needs and installation requirements. The most common types include:

Push-to-Connect Fittings: These fittings allow for easy and quick connections by simply pushing the tubing into the fitting. They are popular in applications where frequent disconnections are necessary, offering convenience and speed.

Threaded Fittings: Threaded fittings create a secure connection by screwing together, providing a strong and reliable seal. They are typically used in applications that require high pressure or durability.

Barbed Fittings: Barbed fittings feature protrusions that grip the tubing when inserted, creating a friction fit. They are often used in low-pressure applications where flexibility and ease of installation are priorities.

Material selection for pneumatic fittings is essential for performance and durability. Common materials include:

Aluminum: Lightweight and corrosion-resistant, aluminum fittings are suitable for a variety of applications and offer excellent strength-to-weight ratios. They are often used in environments where weight savings are essential.

Plastic: Plastic fittings are typically used in low-pressure applications due to their lightweight nature and resistance to corrosion. They are easy to install and often used in applications where environmental factors may lead to metal degradation.

Key Differences Between Hydraulic vs Pneumatic Fittings

Pressure Levels

One of the most significant differences between hydraulic and pneumatic systems lies in their operating pressure levels. Hydraulic systems typically operate at much higher pressures, often ranging from 1,500 to over 5,000 psi, depending on the application and system design. This high-pressure capability allows hydraulic systems to lift heavy loads and perform demanding tasks, making them suitable for applications such as construction and heavy machinery.

In contrast, pneumatic systems operate at significantly lower pressures, usually between 80 to 120 psi. While this lower pressure range makes pneumatic systems less powerful compared to hydraulic systems, it also allows for lighter components and quicker response times. The implications for fitting selection are substantial: hydraulic fittings must be designed to withstand high pressures, often using robust materials and specialized designs to prevent leaks or failures. Pneumatic fittings, on the other hand, can be made from lighter materials and may incorporate simpler designs due to the lower operational stress.

Medium Used

The medium used in hydraulic and pneumatic systems also differentiates the two. Hydraulic systems utilize incompressible liquids—typically oil—as the transmission fluid, while pneumatic systems use compressed air or gas. This difference in medium has profound effects on fitting design and material selection.

Hydraulic fittings must create a tight, leak-proof seal because any fluid leakage can lead to loss of pressure and fluid. Consequently, hydraulic fittings are often constructed from durable materials such as steel or stainless steel, which can withstand the chemical properties of hydraulic fluids and the high pressures involved.

Pneumatic fittings, by contrast, are designed to handle air and do not require the same level of sealing strength as hydraulic fittings. While leaks can still result in inefficiencies, the consequences are generally less severe. Pneumatic fittings are frequently made from lighter materials such as plastic or aluminum, which provide sufficient durability while minimizing weight.

Applications and Suitability

The applications and suitability of hydraulic versus pneumatic fittings highlight their distinct strengths. Hydraulic fittings are best suited for applications requiring significant force and power, such as:

Construction: Hydraulic systems in excavators and cranes utilize hydraulic fittings to manage heavy lifting and precision tasks.

Manufacturing: Hydraulic presses are essential for shaping materials, where high pressure is crucial.

Pneumatic fittings shine in applications where speed and flexibility are paramount. Common use cases include:

Automation: In assembly lines, pneumatic systems control robotic arms, requiring quick responses and lightweight fittings.

Packaging: Pneumatic systems efficiently handle filling and sealing operations, benefiting from rapid cycle times.

Industry-specific examples further illustrate these differences. For instance, in the automotive sector, hydraulic fittings are used in brake systems due to their need for precise control under high pressure, while pneumatic fittings are employed in air tools for quick, repetitive tasks.

Performance and Efficiency

When comparing the performance and efficiency of hydraulic and pneumatic systems, several factors come into play. Hydraulic systems generally provide higher power output due to their ability to handle heavier loads. This high power makes them ideal for tasks that demand consistent force over time. However, the energy consumption of hydraulic systems can be significant, especially in applications with frequent cycling, which may lead to increased operational costs.

In contrast, pneumatic systems often consume less energy during operation, making them more efficient for tasks requiring rapid movement with lower force requirements. They are particularly advantageous in applications with intermittent use, where their quick startup and response times can enhance overall system efficiency.

Maintenance requirements also differ between the two systems. Hydraulic systems often necessitate regular checks for fluid leaks and contamination, as well as maintenance of pumps and valves to ensure optimal performance. This can lead to higher maintenance costs over time. Pneumatic systems, while generally simpler, still require periodic checks to ensure proper air compression and fitting integrity, but they typically involve less complexity and fewer components.

Factors to Consider When Choosing Fittings

Application Requirements

When selecting fittings for hydraulic or pneumatic systems, application requirements are paramount. Key factors include load capacity, operational speed, and environmental conditions.

Load Capacity: Understanding the maximum load that the fitting must support is crucial. Hydraulic fittings must be capable of handling high pressure and heavy loads, making material choice and design critical. Conversely, pneumatic fittings, which handle lighter loads, can be designed with less robust materials but still require careful consideration of pressure limits.

Speed: The operational speed of the system also influences fitting selection. Pneumatic systems are often chosen for their quick response times, so fittings must facilitate rapid airflow. Hydraulic systems, while slower in response, require fittings that can efficiently handle fluid flow without creating bottlenecks.

Environmental Factors: The environment in which the system operates plays a significant role in fitting selection. Factors such as temperature, humidity, and exposure to chemicals can affect material durability. For instance, stainless steel fittings may be preferred in corrosive environments, while plastic fittings might suffice in less demanding conditions. Understanding these requirements helps ensure the reliability and longevity of the fittings used.

Live Swivel fittings industry Topa

Cost Considerations

Cost is a significant factor when choosing fittings, encompassing both initial investment and long-term maintenance costs.

Initial Investment: While hydraulic fittings tend to be more expensive due to their robust design and materials, they may be necessary for high-performance applications. In contrast, pneumatic fittings are typically more affordable, making them attractive for lower-stress applications.

Long-term Maintenance Costs: It’s essential to consider the total cost of ownership, including maintenance and potential replacement costs. Hydraulic systems often require more frequent maintenance due to fluid leaks and contamination, leading to higher long-term costs. Pneumatic systems, being simpler and typically using air, may have lower maintenance costs but can still incur expenses if fittings fail or leak.

Conducting a cost-effectiveness analysis helps users make informed decisions by comparing initial costs with expected maintenance and operational costs over time. This analysis reveals that investing in higher-quality fittings may lead to lower overall costs through reduced downtime and maintenance.

Compatibility and Standards

Adhering to industry standards and ensuring compatibility among components is vital for the efficient operation of hydraulic and pneumatic systems.

Importance of Adhering to Industry Standards: Standards set by organizations such as ISO, SAE, and ANSI help ensure that fittings are manufactured to specific tolerances and performance criteria. Using fittings that meet these standards ensures compatibility and reliability within the system, reducing the risk of leaks and failures.

Cross-Compatibility of Fittings: It’s also important to consider the cross-compatibility of fittings from different manufacturers. While some fittings may appear similar, slight variations in design or specifications can lead to incompatibility issues. Therefore, selecting fittings from reputable manufacturers that adhere to the same standards can enhance compatibility and performance.

Conclusion

In summary, choosing between hydraulic and pneumatic fittings is not just a matter of preference, but requires careful analysis of specific application requirements and operating environments. We encourage you to further research and consult with Topa’s experts to deepen your understanding of these systems and their components.


FAQ

What is the main difference between hydraulic and pneumatic systems?

Hydraulic systems use incompressible fluids (usually oil) for power transmission, while pneumatic systems rely on compressed air or gas.

What applications are best suited for hydraulic fittings?

Hydraulic fittings are ideal for applications requiring high pressure and heavy loads, such as construction machinery and industrial equipment.

When should I choose pneumatic fittings instead of hydraulic fittings?

Pneumatic fittings are preferable for tasks needing quick response times and lighter loads, like automation in packaging and assembly lines.

What materials are commonly used for hydraulic and pneumatic fittings?

Hydraulic fittings are often made from steel or stainless steel, while pneumatic fittings can be made from lighter materials like aluminum or plastic.

How do I determine the right fitting for my application?

Consider factors such as load capacity, operational speed, environmental conditions, and compatibility with existing components.

Are there industry standards for fittings?

Yes, adhering to standards set by organizations like ISO and SAE ensures compatibility and reliability, reducing the risk of leaks and failures.

Hydraulic Fluid Change banner

Hydraulic Fluid Change: A Complete Step-by-Step Guide

Changing hydraulic fluid is essential for maintaining the health and performance of hydraulic systems. Over time, hydraulic fluid can become contaminated with particles, moisture, and debris, which can lead to increased wear and tear on system components. Additionally, as the fluid degrades, it loses its ability to effectively lubricate and cool the system, potentially resulting in operational failures and costly repairs. Regularly replacing hydraulic fluid helps to mitigate these risks, ensuring that the system runs optimally and prolongs its lifespan.

Understanding Hydraulic Fluid

Hydraulic fluid is a fundamental component of hydraulic systems, playing a vital role in their functionality and performance. Understanding the types of hydraulic fluids, their functions, and signs of degradation is crucial for effective maintenance.

Types of Hydraulic Fluids

Mineral Oil

Mineral oil is the most commonly used hydraulic fluid, derived from refining crude oil. It offers excellent lubrication properties and is cost-effective, making it a popular choice for various applications. Mineral oil can be further categorized into different grades based on viscosity and additives. However, it is important to monitor for potential contamination, as mineral oils can degrade over time and may require regular changes to maintain optimal performance.

Water-Based Fluids

Water-based fluids, which include water-glycol and water-oil emulsions, are used in applications where fire resistance is critical. These fluids can provide good lubrication while reducing the risk of combustion. However, their performance can be affected by temperature fluctuations and they may require more frequent monitoring for contamination and water content. Water-based fluids are commonly employed in industries like metalworking and certain manufacturing processes.

Biodegradable Fluids

As environmental concerns grow, biodegradable hydraulic fluids have gained popularity. These fluids are typically made from renewable resources such as vegetable oils and synthetic esters. Biodegradable fluids are designed to minimize environmental impact, especially in applications where leaks could contaminate soil or water. While they may be more expensive, their use is increasingly seen as a responsible choice in industries that prioritize sustainability.

Topa Hydraulic Fluid Characteristics

Functions of Hydraulic Fluid

Transmission of Power

The primary function of hydraulic fluid is to transmit power from one component to another within the system. When pressure is applied to the fluid, it moves through hoses and pipes, activating cylinders and motors to perform work. The efficiency of this power transmission is directly influenced by the quality and properties of the hydraulic fluid used.

Lubrication

Hydraulic fluid also serves as a lubricant for moving parts within the system. Effective lubrication reduces friction and wear, extending the lifespan of components such as pumps, valves, and cylinders. A high-quality hydraulic fluid will contain additives that enhance its lubricating properties, ensuring smooth operation even under high pressure and temperature conditions.

Cooling

Another critical function of hydraulic fluid is cooling. As hydraulic systems operate, they generate heat due to friction and the energy transferred through the fluid. Hydraulic fluid absorbs this heat and dissipates it, maintaining optimal operating temperatures. Proper cooling is essential for preventing overheating, which can lead to system failures and damage to components.

Signs of Fluid Degradation

Color Changes

One of the first indicators of hydraulic fluid degradation is a color change. Fresh hydraulic fluid typically has a clear or light hue, but as it ages or becomes contaminated, it may darken significantly. A darkened fluid often indicates the presence of contaminants or thermal breakdown, signaling the need for replacement.

Presence of Contaminants

Contaminants can significantly impact the performance of hydraulic fluid. These can include dirt, metal shavings, water, and other particulates that compromise the fluid’s integrity. Regular inspection for visible contaminants, such as sludge or particles suspended in the fluid, is crucial. Using filtration systems can help reduce contamination, but regular fluid changes are still necessary to maintain optimal conditions.

Unusual Odors

An unusual odor emanating from hydraulic fluid can be a warning sign of degradation or contamination. For example, a burnt smell may indicate overheating, while a sour odor might suggest microbial growth or the presence of moisture. Recognizing these odors and taking prompt action can prevent further damage to the hydraulic system.

Preparing for the Change

Tools and Equipment Needed

Fluid Reservoir

A clean fluid reservoir is essential for storing the new hydraulic fluid. It should be designed to prevent contamination and allow for easy pouring and transfer of the fluid into the hydraulic system. Depending on the system’s size, you may need a larger container to accommodate the volume of fluid being replaced.

Filters

Filters play a critical role in maintaining hydraulic system cleanliness. New hydraulic filters should be on hand for installation during the fluid change. It’s important to choose filters compatible with your hydraulic system to ensure effective filtration of contaminants. Regular replacement of filters during fluid changes helps prolong the life of the hydraulic fluid and system components.

Wrenches and Screwdrivers

A variety of wrenches and screwdrivers are necessary for removing drain plugs and securing components of the hydraulic system. Make sure to have the appropriate sizes and types on hand, as different systems may require specialized tools. A torque wrench may also be useful for ensuring that bolts and fittings are properly tightened according to manufacturer specifications.

Safety Precautions

Personal Protective Equipment (PPE)

Before starting the fluid change process, it is vital to wear appropriate personal protective equipment (PPE) to minimize exposure to hydraulic fluid and potential hazards. Recommended PPE includes gloves to protect the hands from chemical exposure, safety goggles to shield the eyes from splashes, and a long-sleeved shirt to reduce skin contact. Depending on the specific fluid being handled, additional protective gear, such as respirators, may be necessary.

Environmental Considerations

Hydraulic fluid can be hazardous to the environment if not disposed of properly. Ensure that you have designated containers for collecting used fluid and that you adhere to local regulations regarding disposal. If spills occur, have absorbent materials and cleanup kits readily available to address them immediately. Implementing environmentally responsible practices not only complies with regulations but also promotes a safer workspace.

Hydraulic Fluid Change

Identifying the Right Fluid

Manufacturer Specifications

Before purchasing new hydraulic fluid, consult the equipment’s manufacturer specifications. These specifications will outline the recommended type of fluid, viscosity, and any specific additives required for optimal performance. Using the correct fluid is crucial for maintaining system efficiency and preventing damage to components.

Fluid Compatibility

When selecting hydraulic fluid, it’s essential to ensure compatibility with the existing fluid and system materials. Mixing different types of hydraulic fluids can lead to chemical reactions, reduced performance, and increased wear. If changing to a different fluid type, thoroughly flush the system to remove residues of the old fluid. Compatibility with seals and hoses is also vital to prevent leaks and failures; always check for manufacturer guidelines regarding fluid compatibility with system materials.

Step-by-Step Fluid Change Process

Draining the Old Hydraulic Fluid

Locating the Drain Plug

The first step in the fluid change process is locating the drain plug. This is typically found at the lowest point of the hydraulic reservoir. Refer to the equipment’s manual for the exact location, as it can vary between different hydraulic systems. Ensure that the machine is turned off and, if possible, cool down to prevent any accidents during the draining process.

Best Practices for Draining

Prepare the Area: Lay down absorbent mats to catch any spills and protect the environment. Ensure you have a clean container large enough to hold the entire volume of old fluid.

Remove the Drain Plug: Using the appropriate wrench, carefully remove the drain plug. Allow the old fluid to drain completely into the container. If the fluid is particularly viscous or dirty, it may take some time.

Inspect the Fluid: While draining, take note of the fluid’s condition. Look for signs of contamination, such as metal particles or discoloration, which can provide insight into the system’s health.

Secure the Drain Plug: Once all the fluid has drained, clean the drain plug and its sealing surface before replacing it to prevent leaks.

Cleaning the Reservoir and Filters

Recommended Cleaning Solutions

Cleaning the reservoir is vital to remove any remaining old fluid and contaminants. Use a dedicated cleaning solution that is compatible with hydraulic systems. Avoid harsh chemicals that could damage seals or other components. Common options include water-based detergents or specialized hydraulic system cleaners.

Techniques for Thorough Cleaning

Manual Scrubbing: After draining, use a soft brush or cloth to scrub the interior of the reservoir. Focus on corners and crevices where residue may accumulate.

Flushing: For more thorough cleaning, flush the reservoir with the cleaning solution. Fill the reservoir partially, agitate it to dissolve contaminants, and then drain it completely. Repeat this process until the fluid runs clear.

Cleaning Filters: If your system uses reusable filters, clean them according to the manufacturer’s instructions. Use a soft brush or compressed air to remove dirt and debris. If the filters are disposable, replace them with new ones.

Installing New Filters

Importance of Filter Replacement

Filters play a crucial role in maintaining hydraulic fluid cleanliness and protecting system components from wear. Over time, filters can become clogged with contaminants, reducing their effectiveness and leading to potential system failure. Regular replacement during fluid changes ensures optimal filtration and prolongs system life.

Step-by-Step Installation Process

Select the Right Filter: Ensure the new filter matches the specifications provided by the manufacturer.

Prepare the Filter Housing: Clean the filter housing to remove any old fluid or debris. Inspect the O-rings for wear and replace them if necessary.

Install the New Filter: Screw the new filter into place by hand, ensuring a snug fit. Avoid over-tightening, as this can damage the filter or housing.

Check for Leaks: After installation, check the area for any signs of leaks before proceeding to the next step.

Filling with New Hydraulic Fluid

How to Fill the Reservoir Properly

Choose the Right Fluid: Refer to the manufacturer’s specifications for the correct type of hydraulic fluid. Use a clean funnel to prevent contamination during the filling process.

Fill Slowly: Pour the new fluid into the reservoir slowly to avoid creating air bubbles. Monitor the fluid level and fill until it reaches the recommended level indicated on the reservoir.

Checking Fluid Levels

After filling, allow the system to settle for a few minutes. Re-check the fluid level and add more if necessary. This step ensures that the system is filled to the correct level for optimal performance.

Bleeding the System

Importance of Air Removal

Air trapped within the hydraulic system can lead to reduced performance, erratic operation, and increased wear on components. Bleeding the system is essential to remove any air pockets that may have formed during the fluid change.

Step-by-Step Bleeding Process

Start the System: Turn on the hydraulic system and allow it to run at low pressure for a few minutes. This helps circulate the new fluid and push out any trapped air.

Cycle the Valves: Operate all hydraulic functions (e.g., raising and lowering cylinders) to help expel air. Move each function slowly through its entire range of motion several times.

Check for Bubbles: Monitor the reservoir for air bubbles during operation. If bubbles appear, continue cycling the system until they are no longer visible.

Recheck Fluid Levels: After bleeding, check the fluid level again and top up as necessary. This ensures that the system is properly filled and free from air.

Test the System: Finally, conduct a test run of the hydraulic system under normal operating conditions to ensure everything is functioning correctly. Look out for any abnormal noises or performance issues that might indicate remaining air or other problems.

Post-Change Maintenance

Monitoring Fluid Levels

How Often to Check

Regularly monitoring hydraulic fluid levels is crucial for maintaining system efficiency. It’s recommended to check fluid levels at least once a week, especially in high-use environments. For systems operating under heavy loads or extreme conditions, daily checks may be warranted. Additionally, inspect fluid levels before and after major operations or after any maintenance work to ensure optimal performance.

What to Look For

When checking fluid levels, look for several key indicators:

Fluid Level: Ensure the fluid is at the manufacturer-recommended level. Low fluid levels can lead to overheating and increased wear.

Fluid Condition: Assess the color, clarity, and consistency of the fluid. Discoloration, cloudiness, or the presence of particulates may indicate contamination or degradation.

Presence of Contaminants: Look for any visible debris, water, or foreign materials in the reservoir. These can compromise system performance and necessitate a fluid change sooner than expected.

Regular Maintenance Practices

Recommended Schedules for Fluid Changes

Establishing a fluid change schedule is essential for optimal hydraulic system performance. A general rule of thumb is to change the hydraulic fluid every 1,000 to 2,000 operating hours or annually, whichever comes first. However, specific schedules may vary based on equipment usage, operating conditions, and fluid type. Consult the manufacturer’s guidelines for tailored recommendations.

Additional System Checks

In addition to fluid changes, regular system checks should include:

Filter Inspection: Check filters during each fluid change and replace them as needed. Consider a more frequent inspection if the system operates in dirty or harsh environments.

Component Condition: Periodically inspect hoses, seals, and connections for wear, cracks, or leaks. Address any issues promptly to avoid further damage.

Performance Monitoring: Keep an eye on system performance metrics, such as pressure readings and operational response times. Any significant deviations may indicate underlying issues that need attention.

Hydraulic Fluid System

Troubleshooting Common Issues

Identifying Leaks

Leaks are a common issue in hydraulic systems that can lead to fluid loss and reduced performance. To identify leaks:

Visual Inspection: Regularly check all hoses, fittings, and connections for signs of fluid accumulation or wetness. Pay special attention to joints, where leaks are most likely to occur.

Pressure Tests: Conduct pressure tests to check for leaks in the system. If pressure drops unexpectedly, this may indicate a hidden leak.

Fluid Loss Monitoring: Keep track of fluid levels over time. A consistent drop in fluid levels may signal a leak that requires immediate investigation.

Understanding Performance Changes

Any noticeable change in hydraulic system performance should be thoroughly investigated. Common performance changes include:

Slow Response Times: If hydraulic functions operate slower than usual, this may indicate low fluid levels, contamination, or air in the system. Addressing these issues promptly is crucial to restoring performance.

Unusual Noises: Sounds such as grinding or whining can indicate problems such as low fluid levels, worn components, or air trapped in the system. Identifying the source of these noises can help prevent more significant issues.

Erratic Operations: If the hydraulic system behaves unpredictably or fails to maintain pressure, check for air in the system, fluid contamination, or malfunctioning components.

Environmental Considerations

Proper Disposal of Old Fluid

Local Regulations and Guidelines

Disposing of old hydraulic fluid must be done by local regulations and environmental guidelines. Used hydraulic fluid is considered hazardous waste due to its potential environmental impact, so it’s crucial to handle it responsibly. Many jurisdictions require that used fluids be collected and disposed of at designated hazardous waste facilities.

Before starting the disposal process, familiarize yourself with your local regulations to ensure compliance. Some key points to consider include:

Collection Methods: Use proper containers that are clearly labeled for hazardous waste. Avoid mixing hydraulic fluid with other waste materials to prevent contamination.

Transportation: When transporting used hydraulic fluid to disposal facilities, ensure that containers are securely sealed and meet transportation regulations to prevent leaks and spills.

Documentation: Maintain records of fluid disposal, including the date, volume, and disposal facility used. This documentation may be required for regulatory compliance and can help track fluid management practices.

Choosing Eco-friendly Hydraulic Fluids

Benefits of Biodegradable Options

Choosing eco-friendly hydraulic fluids, such as biodegradable options, offers numerous environmental benefits. These fluids are typically derived from renewable resources, such as vegetable oils, and are designed to minimize their ecological footprint. The key benefits include:

Reduced Environmental Impact: Biodegradable hydraulic fluids break down naturally in the environment, reducing the risk of soil and water contamination in case of leaks or spills. This is particularly important in sensitive environments, such as near water bodies or in agricultural applications.

Safer for Wildlife: The use of biodegradable fluids decreases the likelihood of harming wildlife and plant life in the event of a spill, as they are generally less toxic than traditional petroleum-based fluids.

Enhanced Public Image: Companies that adopt eco-friendly practices can improve their public image and demonstrate a commitment to sustainability. This can attract environmentally conscious customers and stakeholders, promoting brand loyalty.

Performance Considerations: Modern biodegradable fluids are engineered to provide comparable performance to traditional hydraulic fluids, ensuring that hydraulic systems operate efficiently while being environmentally responsible.

Conclusion

In conclusion, optimizing hydraulic system performance requires a commitment to regular maintenance and fluid management. By understanding the importance of changing hydraulic fluid and implementing best practices, operators can enhance reliability, efficiency, and overall operational effectiveness. Embracing these practices not only protects the investment in hydraulic machinery but also contributes to a safer and more sustainable working environment. With diligence and care, the long-term benefits of well-maintained hydraulic systems will be evident, resulting in smoother operations and increased productivity.


FAQ

How often should I change my hydraulic fluid?

It’s recommended to change hydraulic fluid every 1,000 to 2,000 operating hours or annually, depending on usage and conditions.

What are the signs that my hydraulic fluid needs changing?

Look for discoloration, cloudiness, unusual odors, or the presence of contaminants in the fluid.

Can I mix different types of hydraulic fluids?

It’s not advisable to mix different hydraulic fluids, as this can lead to chemical reactions and reduced performance. Always use compatible fluids.

What tools do I need for changing hydraulic fluid?

You will need a fluid reservoir, wrenches, screwdrivers, new filters, and a clean container for the old fluid.

How do I dispose of old hydraulic fluid?

Follow local regulations by disposing of old fluid at designated hazardous waste facilities. Ensure it is collected in labeled containers.

What are the benefits of using biodegradable hydraulic fluids?

Biodegradable fluids are less harmful to the environment, break down naturally, and reduce the risk of contamination in case of spills.

Air in Hydraulic System banner

Air in Hydraulic System? How to Exhaust Them Effectively

When air mixes with hydraulic fluid, it creates a condition known as aeration, which can result in a decrease in fluid pressure, reduced efficiency, and erratic behavior of hydraulic components. Common symptoms of air contamination include noisy operation, sluggish actuator movements, and increased wear on system parts. If left unaddressed, these issues can lead to significant downtime, costly repairs, and even catastrophic failures.

Understanding Air in Hydraulic Systems

What is Air Entrapment?

Air entrapment in hydraulic systems refers to the unwanted presence of air bubbles within the hydraulic fluid. This condition can occur when air infiltrates the system, disrupting the continuous flow of fluid and leading to various operational inefficiencies. Essentially, the air in the hydraulic lines creates a compressible medium that interferes with the system’s ability to generate consistent pressure. This can manifest as air pockets that impede fluid movement, leading to inconsistent operation and reduced system performance.

Common sources of air in hydraulic systems include leaks in hoses, fittings, or seals, where air can be drawn into the fluid. Additionally, improper filling procedures, such as introducing fluid too quickly or at an angle, can introduce air into the system. Rapid fluid movement, especially in high-speed applications, can also create turbulence, allowing air to mix with the fluid. Furthermore, temperature changes can affect fluid viscosity and pressure, potentially causing cavitation that contributes to air entrainment. Recognizing these sources is vital for maintenance personnel to prevent air contamination from occurring.

Effects of Air on Hydraulic Performance

The presence of air in hydraulic systems can significantly decrease efficiency. When air is trapped within the fluid, it results in less effective force transmission. This is particularly evident in systems that rely on precise movements, such as hydraulic lifts or robotic arms. Operators may notice sluggish response times or erratic behavior in actuators, leading to delays in operations and impacting overall productivity.

Moreover, air contamination can lead to potential damage to hydraulic components. The compressibility of air causes fluctuations in pressure that can strain pumps, valves, and cylinders. Over time, this can result in accelerated wear and tear on these components, leading to premature failures. Additionally, the presence of air increases the likelihood of cavitation—an effect where vapor bubbles collapse, creating shockwaves that can erode metal surfaces and damage seals. This not only compromises the integrity of the hydraulic system but also results in costly repairs and downtime.

Safety is another critical concern when air is present in hydraulic systems. Erratic system behavior due to air can pose serious risks to operators and surrounding personnel. For instance, unexpected movements of machinery can lead to accidents, injuries, or damage to equipment. Furthermore, if air leads to a complete loss of pressure in critical systems, it could result in catastrophic failures that endanger lives and assets. Therefore, maintaining air-free hydraulic fluid is essential not only for performance but also for ensuring a safe working environment.

Identifying Air in Your Hydraulic System

Signs of Air Presence

Detecting air in a hydraulic system is crucial for maintaining optimal performance and preventing damage. Several signs can indicate the presence of air, allowing operators to take timely action.

Unusual Noises: One of the most common indicators of air contamination is the presence of unusual noises within the hydraulic system. Operators may hear whining, gurgling, or bubbling sounds during operation. These noises result from air bubbles collapsing or moving through the hydraulic fluid, disrupting the flow and causing turbulence. A continuous or pronounced noise often suggests significant air entrainment that requires immediate attention.

Erratic Movements of Actuators: Air in the hydraulic lines can cause actuators—such as cylinders and motors—to operate unpredictably. This can manifest as jerky or inconsistent movements, where the actuator fails to respond smoothly to control inputs. For instance, a hydraulic lift may rise or lower unevenly, or a robotic arm may struggle to maintain precision. These erratic behaviors not only affect productivity but can also pose safety risks if equipment malfunctions during operation.

Increased Pressure Fluctuations: Pressure fluctuations are another telltale sign of air in hydraulic systems. When air is present, the hydraulic fluid’s ability to maintain steady pressure is compromised, leading to erratic pressure readings. Operators may notice spikes or drops in pressure on gauges, indicating that the system is struggling to perform as intended. This instability can further exacerbate wear on system components and lead to operational failures.

Air in Hydraulic System

Diagnosing Air Issues

Once signs of air presence are identified, it’s essential to diagnose the issue accurately to implement appropriate solutions.

Visual Inspections: A thorough visual inspection is the first step in diagnosing air issues within a hydraulic system. Operators should check for obvious leaks in hoses, fittings, and seals, as these can be entry points for air. Additionally, examining the fluid reservoir for proper fluid levels and clarity is crucial. If the fluid appears foamy or has a milky consistency, it may indicate the presence of air or contamination. Regular inspections can help detect potential problems before they escalate.

Using Pressure Gauges and Sensors: Pressure gauges and sensors play a vital role in diagnosing air issues. Monitoring pressure readings during operation can help identify irregularities associated with air entrainment. Operators should compare the current pressure readings with the system’s expected operating range. If fluctuations are detected, it may indicate air presence. Installing pressure sensors that provide real-time data can enhance monitoring capabilities and facilitate quicker responses to air-related issues.

Fluid Analysis: Conducting fluid analysis is an advanced method for diagnosing air issues in hydraulic systems. This process involves collecting fluid samples and analyzing them for signs of air entrainment, moisture, or contamination. Laboratory tests can provide insights into the fluid’s condition and reveal the extent of air contamination. By understanding the fluid’s properties, operators can make informed decisions about necessary maintenance and repairs.

Step-by-Step Process to Exhaust Air

System Shut Down and Isolation

Before attempting to exhaust air from a hydraulic system, it is crucial to follow proper shutdown procedures to ensure safety and prevent equipment damage. Begin by turning off the power to the hydraulic system and disconnecting any energy sources. This includes ensuring that all operators are aware of the shutdown and are positioned safely away from moving components. Once the system is powered down, the next step is to isolate it from any external pressure sources. This involves closing isolation valves and ensuring that the hydraulic fluid is contained within the system. Proper isolation helps prevent accidental activation and ensures that the bleeding process can be performed safely and effectively.

After isolating the system, visually inspect it for leaks or signs of damage. Address any issues before proceeding, as leaks can introduce air back into the system during the bleeding process. By taking these precautionary steps, operators can ensure a safer working environment and set the stage for successful air removal.

Opening Bleed Valves

Once the system is shut down and isolated, the next step is to open the bleed valves. Bleed valves are critical components designed specifically for releasing trapped air from hydraulic systems. The location of these valves can vary depending on the system design, but they are commonly found near pumps, actuators, and hydraulic reservoirs.

To identify bleed valves, refer to the system’s manual or schematics for specific locations. Generally, these valves are small, typically equipped with a screw or knob for adjustment. When opening the valves, use the appropriate tools to avoid damaging the components. Loosen the valve slowly to allow air to escape gradually. It’s important to monitor the fluid escaping from the valve; it should be free of air bubbles before closing it. If air bubbles are still present, continue to bleed until the fluid runs clear.

After releasing air, close the bleed valve securely to prevent fluid leaks. Repeat this process for all bleed valves throughout the hydraulic system to ensure thorough air removal. Following this technique not only helps maintain system integrity but also enhances operational efficiency.

Check Valve use

Using a Vacuum Pump

Using a vacuum pump is another effective method for exhausting air from hydraulic systems. This technique involves creating a vacuum environment that helps draw air out of the fluid. Begin by ensuring that the vacuum pump is compatible with your hydraulic system and fluid type. Set up the vacuum pump according to the manufacturer’s instructions, typically involving connecting it to the fluid reservoir or specific bleed points in the system.

Once set up, activate the vacuum pump. As the pump operates, it reduces pressure within the system, encouraging air to escape from the hydraulic fluid. Monitor the vacuum gauge to ensure that adequate vacuum pressure is maintained throughout the process. The duration of operation will depend on the amount of air present; continue until the gauge indicates that air has been sufficiently removed.

One of the advantages of using a vacuum pump is its efficiency in removing air without requiring extensive manual effort. This method can be particularly beneficial for larger or more complex hydraulic systems where manual bleeding may be cumbersome. Additionally, it minimizes the risk of introducing contaminants during the process, making it a preferred choice for many operators.

Manual Bleeding Techniques

Manual bleeding techniques remain a reliable approach for exhausting air, especially in smaller hydraulic systems or when vacuum pumps are not available. This method typically involves a pumping action to expel trapped air from the system. Begin by ensuring that the hydraulic fluid reservoir is filled to the recommended level to prevent running dry during the process.

To manually bleed the system, locate the bleed valves as described earlier. With the valves open, operators should actuate the hydraulic components—such as cylinders or pumps—by engaging the system controls. This action allows the hydraulic fluid to flow and pushes air toward the bleed valves. During this process, it is essential to monitor the fluid levels continuously, as air removal can cause the fluid level to drop rapidly.

As air is expelled, operators will notice a change in the consistency of the fluid exiting the bleed valves; it should become free of bubbles and flow smoothly. Once all visible air is expelled, close the bleed valves securely. After completing this process, test the system by cycling through its operational range to ensure that any remaining air has been adequately removed.

Post-Bleeding Checks

Monitoring System Performance

After completing the air bleeding process, it is crucial to monitor the hydraulic system’s performance to ensure that all air has been successfully removed and that the system is operating as intended.

Checking for Air Bubbles in Fluid: One of the first steps post-bleeding is to visually inspect the hydraulic fluid for any remaining air bubbles. This can be done by observing the fluid in the reservoir or through transparent hoses. If air bubbles are still present, it may indicate that the bleeding process was not entirely effective, and further bleeding may be necessary. Keeping an eye on fluid clarity not only helps detect residual air but also serves as an indicator of fluid quality, ensuring that the hydraulic fluid remains free from contaminants.

Observing System Responsiveness: Next, operators should assess the overall responsiveness of the hydraulic system. This includes monitoring the speed and accuracy of actuator movements and ensuring that the system reacts promptly to input commands. Any sluggishness or delay can signify remaining air in the system or other issues that require further investigation. Conducting operational tests under typical load conditions will provide valuable insights into whether the system is functioning optimally.

Regular Maintenance Tips

To maintain optimal performance and prevent future air issues, implementing a routine maintenance schedule is essential.

Scheduled Bleeding Intervals: Establishing scheduled bleeding intervals based on system usage and environmental conditions can help preemptively address air entrapment. For high-use systems or those operating in challenging environments, more frequent bleeding may be necessary. Conversely, systems with less frequent use might require less regular attention. Documenting these intervals in a maintenance log ensures that bleeding becomes a standard operating procedure, promoting consistent system performance.

Importance of Routine Inspections: Beyond bleeding, conducting routine inspections of the hydraulic system is vital for identifying potential issues before they escalate. Regularly check hoses, fittings, and seals for wear and tear, and monitor fluid levels and quality. Implementing a checklist for these inspections can help ensure that no aspect is overlooked. By being proactive in maintenance, operators can catch leaks or signs of air intrusion early, significantly reducing the risk of system failures.

Conclusion

In addition to the immediate benefits of air removal, maintaining the integrity of hydraulic systems requires ongoing attention. Regular maintenance schedules, fluid analysis, and system audits should be integral parts of any hydraulic management plan. This proactive approach ensures that potential issues are identified and addressed before they escalate into more significant problems, ultimately extending the lifespan of hydraulic equipment and optimizing performance.


FAQ

What causes air to enter a hydraulic system?

Air can enter through leaks in hoses, fittings, or seals, improper filling procedures, or turbulence caused by rapid fluid movement.

How can I tell if my hydraulic system has air in it?

Signs include unusual noises (like whining or gurgling), erratic actuator movements, and increased pressure fluctuations.

What tools do I need to bleed air from a hydraulic system?

Common tools include wrenches, vacuum pumps, and pressure gauges.

How often should I bleed air from my hydraulic system?

This depends on usage; high-use systems may require more frequent bleeding, while others can be checked periodically.

What safety precautions should I take during maintenance?

Always wear appropriate personal protective equipment (PPE) and follow lockout/tagout procedures to ensure safety.

What should I do if air persists after bleeding?

If air issues continue, consider conducting further inspections for leaks or consulting a professional for a thorough assessment.

Can You Safely Combine Different Hose and Fitting banner

Can You Safely Combine Different Hose and Fitting Brands?

A common question often arises: Can you safely combine different hose and fitting brands within the same system? This inquiry usually stems from practical considerations like availability, cost, or convenience. Yet, despite the potential benefits, mixing brands comes with notable risks. Mismatched components can result in leaks, reduced performance, increased wear, and even complete system failure.

Why Matching Components is Crucial

In hydraulic systems, the compatibility of hoses and fittings is not just a matter of convenience; it’s essential for maintaining system integrity, safety, and performance. Mismatching components can result in severe consequences, including leaks, equipment damage, and safety hazards.

Compatibility Concerns

1. Manufacturing Specifications and Design Parameters

Hoses and fittings are designed with specific parameters, such as diameter, pressure rating, and connection types, which are tailored to work with components from the same manufacturer. Each manufacturer follows its own set of specifications to ensure the components are optimized for performance, safety, and durability. When components from different brands are mixed, there is a risk of incompatibility in these parameters. For instance, a hose designed to operate at a specific pressure might not perform effectively with a fitting with a different pressure rating, potentially leading to underperformance or failure.

2. Differences in Manufacturing Tolerances

Hydraulic components are made with precise tolerances, which dictate how tightly they fit together and how well they perform under pressure. Even small variations in manufacturing tolerances can impact the effectiveness of the seal between the hose and fitting. Different manufacturers may have slight variations in their design, even for components labeled with the same specifications. These differences can result in poor sealing, increased wear, or the inability to maintain adequate pressure, thereby increasing the risk of leaks and malfunctions.

Impact on System Safety

1. Potential Safety Risks

Mismatched components can pose significant safety risks in hydraulic systems, where fluid is often under high pressure. A poor connection between the hose and fitting can lead to leaks, resulting in fluid spraying out at high velocities. This not only presents a physical hazard to workers but can also cause damage to nearby machinery or products. In the worst-case scenario, a complete disconnection under pressure can lead to catastrophic failures, risking serious injury or extensive equipment damage. Therefore, ensuring that components are designed to work seamlessly together is crucial for maintaining a safe working environment.

2. Loss of Pressure Integrity

Hydraulic systems rely on maintaining consistent pressure to function effectively. If components are not properly matched, there can be a significant loss of pressure due to inadequate sealing or mismatched flow rates. This pressure drop can affect the entire system’s performance, making it less efficient and unreliable. Even a minor drop in pressure can have costly consequences in industries where precision and consistency are critical.

Loss of Performance

1. Reduced Efficiency

Hydraulic systems are designed for optimal performance, but mismatched components can lead to inefficiencies. For example, a fitting with a lower flow capacity paired with a high-capacity hose can create a bottleneck, reducing the system’s overall performance. This inefficiency may increase energy consumption, operational costs, and the likelihood of overheating, which can further degrade system components.

2. Increased Wear and Tear

Mismatched hoses and fittings can accelerate wear and tear on system components. If components are not properly aligned or sealed, increased friction and pressure fluctuations can occur, leading to faster degradation. Over time, this can result in more frequent maintenance requirements, increased downtime, and ultimately higher costs for repairs or replacements.

3. Decreased Reliability and Durability

Reliability is a key factor in hydraulic systems, especially in critical applications like heavy machinery, construction, or industrial manufacturing. When hoses and fittings are mismatched, system reliability decreases as the potential for leaks, pressure loss, and component failures rises. This not only impacts productivity but can also affect the longevity of the equipment, leading to higher operational costs over time.

Common Challenges of Mixing Hoses and Fittings

Combining hoses and fittings from different manufacturers might seem like a cost-effective or convenient solution. However, this approach brings several challenges that can compromise the performance, safety, and reliability of hydraulic systems. Here, we’ll discuss some of the most common challenges encountered when mixing components: variations in pressure ratings, material differences, and thread and coupling mismatches.

Pressure Rating Variations

1. Mismatch in Pressure Capacity

One of the most critical aspects of hydraulic components is their pressure rating, which specifies the maximum pressure they can safely handle. Different manufacturers may use varying design parameters, leading to significant differences in pressure capacity. For example, a hose designed to withstand high pressure may not be compatible with a fitting that has a lower pressure rating. This discrepancy can create a weak point in the system, increasing the risk of leaks or even catastrophic failure.

2. Impact on System Performance

When components with mismatched pressure ratings are combined, the system may not perform as expected. The fitting could become the limiting factor, restricting the system’s overall pressure capacity and reducing efficiency. This bottleneck can also cause pressure fluctuations, leading to inconsistent system performance, reduced productivity, and potentially more frequent maintenance requirements.

3. Safety Hazards

Operating a hydraulic system with components that have different pressure ratings can be hazardous. If the system exceeds the lower pressure capacity of one component, it can result in sudden failure, creating a risk of fluid ejection under high pressure. This not only poses safety risks to personnel but can also damage other equipment, leading to costly downtime and repairs.

43 Series Hydraulic Crimp Fittings

Material Differences

1. Potential Chemical Reactions

The materials used in hoses and fittings are often chosen based on the fluids they will transport and the environmental conditions they will encounter. When mixing components from different brands, there is a risk of using incompatible materials, which can cause chemical reactions. For example, a hose made from one type of rubber may react adversely with a fitting made from a different metal alloy, leading to material degradation. This chemical incompatibility can compromise the seal between the hose and fitting, increasing the likelihood of leaks.

2. Corrosion Risks

Even if the materials are chemically compatible with the hydraulic fluid, mixing different metals can create galvanic corrosion. This type of corrosion occurs when dissimilar metals come into contact with each other in the presence of an electrolyte, such as water or hydraulic fluid. For instance, combining a steel fitting with an aluminum hose end can lead to accelerated corrosion, weakening the joint and potentially causing leaks or failures over time.

3. Decreased Component Longevity

Material differences can also affect the overall durability and lifespan of hydraulic components. Incompatible materials may wear at different rates, creating uneven stresses and accelerating component failure. This can result in higher maintenance costs and the need for more frequent replacements, negating any initial cost savings from using mixed brands.

Thread and Coupling Issues

1. Importance of Thread Matching

Threads play a crucial role in securing hydraulic connections, ensuring that hoses and fittings remain tightly coupled under pressure. Different manufacturers may use slightly different thread designs or dimensions, even within the same thread type category. This can lead to poor fits, which compromise the connection’s ability to maintain pressure and resist vibrations. In hydraulic systems, even minor differences in thread design can result in inadequate sealing, leading to leaks.

2. Secure Connections for Safety

A secure, leak-free connection is essential for hydraulic system safety. When threads do not match properly, there is an increased risk of the hose detaching from the fitting, especially under high pressure. This can be extremely dangerous, as hydraulic fluid can spray at high velocity, potentially injuring personnel and damaging surrounding equipment.

3. Cross-Threading Risks

Attempting to force mismatched threads together can result in cross-threading, which damages the threads and prevents a secure seal. Cross-threading not only weakens the connection but also makes future repairs more difficult, as damaged threads may require re-tapping or replacement. This further increases maintenance costs and downtime.

Industry Standards for Hose and Fitting Compatibility

In the hydraulic industry, standards play a vital role in ensuring the safety, performance, and reliability of hoses and fittings. Adhering to these standards helps maintain system integrity, provides consistency across different components, and minimizes the risks associated with mismatched parts.

Overview of Relevant Standards

1. ISO Standards

The International Organization for Standardization (ISO) sets globally recognized standards for hydraulic hoses and fittings. These standards specify performance criteria, such as pressure ratings, temperature resistance, dimensional tolerances, and compatibility with various fluids. Some key ISO standards include:

ISO 18752: Focuses on performance-based specifications for hydraulic hoses, categorizing them based on pressure ranges and temperature limits.

ISO 12151: Covers various types of hydraulic hose fittings, detailing their design, dimensions, and performance requirements.

2. SAE Standards

The Society of Automotive Engineers (SAE) provides another set of widely accepted standards for hydraulic components. These are commonly used in the North American market and ensure that hoses and fittings meet specific performance and compatibility criteria. Notable SAE standards include:

SAE J517: Provides guidelines for hydraulic hoses, detailing requirements for materials, pressure capacity, and dimensional tolerances.

SAE J516: Focuses on hydraulic hose fittings, specifying design, dimensions, and materials to ensure compatibility and durability.

3. Other Relevant Standards

DIN Standards (Deutsches Institut für Normung): Widely used in Europe, DIN standards cover both hydraulic hoses and fittings, providing detailed specifications for dimensions, pressure ratings, and materials.

BSI Standards (British Standards Institution): These standards also contribute to the global framework for ensuring the compatibility and safety of hydraulic components.

Role of Standards in Ensuring Safety

1. Consistency Across Components

Adhering to industry standards helps ensure that hydraulic components are consistent in terms of performance, dimensions, and pressure ratings. This consistency is vital for maintaining secure connections and preventing leaks. By following established standards, manufacturers can produce hoses and fittings that are more likely to work together seamlessly, even if sourced from different brands.

2. Minimizing Risks

Compliance with industry standards reduces the likelihood of mismatched components, which can lead to serious safety hazards. For example, using a fitting that does not meet the appropriate pressure standard can result in leaks, system failures, or catastrophic disconnections under high pressure. By ensuring that all components meet the same standards, operators can enhance the overall safety of hydraulic systems and reduce the risk of unexpected failures.

3. Improved Durability and Reliability

Standardized components tend to be more reliable and durable, as they are designed to withstand specific pressures, temperatures, and chemical exposures. This not only improves system performance but also extends the lifespan of hydraulic components, reducing the need for frequent replacements and minimizing downtime.

Certification Labels

1. Identifying Certified Components

Most certified hydraulic components come with visible labels or markings that indicate compliance with specific standards. For instance, a hose that meets ISO 18752 requirements will have a label displaying its pressure range, temperature capacity, and ISO classification. Similarly, fittings will be marked with their applicable standards (e.g., SAE J516), making it easier for users to identify compatible parts.

2. Verifying Compatibility

When selecting hydraulic hoses and fittings, look for these certification labels to ensure that the components meet the necessary standards for your application. Certified components are usually tested rigorously to ensure they can perform safely under specified conditions. This verification process adds an extra layer of confidence in the reliability and compatibility of the parts.

Risks of Mixing Different Brands in Hydraulic Systems

Mixing hoses and fittings from different manufacturers in hydraulic systems can introduce various risks that impact safety, legal standing, and operational efficiency. While combining different brands may seem convenient or cost-effective, the potential downsides often outweigh the benefits.  

Safety Risks

1. Potential for Disconnection

One of the most serious risks when using mismatched components in hydraulic systems is disconnection. Hoses and fittings from different brands may have slightly different thread designs, sealing surfaces, or coupling mechanisms. These differences can compromise the integrity of the connection, leading to unexpected disconnections under pressure. In high-pressure hydraulic systems, a sudden disconnection can be catastrophic, causing fluid to be expelled at high velocity, which poses a significant risk to personnel and equipment.

2. Leaks and Fluid Spills

Hydraulic systems operate under high pressure, and even minor mismatches between hoses and fittings can lead to inadequate sealing. This results in leaks, which not only reduce system efficiency but also create safety hazards. Hydraulic fluid leaks can cause slippery surfaces, increasing the risk of falls and injuries. Additionally, certain hydraulic fluids are flammable or toxic, posing environmental risks and health hazards to workers. Over time, persistent leaks can lead to costly fluid loss and potential damage to other components within the system.

3. Pressure Failures and Equipment Damage

Mismatched components often have varying pressure ratings, leading to weak points in the hydraulic system. If a fitting with a lower pressure capacity is combined with a hose designed for higher pressure, the fitting can fail, resulting in sudden depressurization and potential equipment damage. This pressure imbalance not only reduces the system’s efficiency but also increases the likelihood of damage to pumps, valves, and other critical components. In extreme cases, a complete system failure can occur, resulting in significant repair costs and potential safety incidents.

Legal and Warranty Concerns

1. Void Warranties

Most manufacturers provide warranties for their hydraulic components under the condition that they are used as specified, which typically includes using matching parts from the same brand. When components from different brands are combined, there is a strong possibility of voiding the warranties. Manufacturers are unlikely to honor warranties for components that fail due to mismatched parts, as this goes against their specified usage guidelines. This means that any damage, repairs, or replacements resulting from the use of mismatched components will likely be at the user’s expense.

2. Potential Legal Liabilities

In cases where hydraulic system failure causes injury or property damage, legal liability can be a serious concern. If it is found that mismatched components contributed to the failure, the operator or owner of the equipment could be held liable for negligence. Moreover, insurance claims might be denied if it is determined that non-compliance with manufacturer guidelines—such as using mismatched components—was the primary cause of the incident. Therefore, it’s crucial to understand the legal implications of mixing components, especially in industries where safety standards are strictly regulated.

Hydraulic Hose Fitting Diagnostics

Operational Downtime

1. Increased Maintenance and Repairs

Hydraulic systems rely on consistent pressure and secure connections to function efficiently. Mismatched components are more prone to failure, leading to increased maintenance and repair needs. This not only raises operational costs but also contributes to unplanned downtime, which can have a significant impact on productivity. Every hour of downtime can be costly, especially in industries like construction, manufacturing, and logistics, where hydraulic systems are critical to daily operations.

2. Unplanned Downtime and Production Loss

The use of mismatched components increases the likelihood of sudden equipment failure. When a hydraulic system goes down unexpectedly, it can halt production lines, delay projects, and disrupt overall workflow. The cost of unplanned downtime extends beyond just repair expenses; it includes labor costs, lost productivity, and potential penalties for missed deadlines. In industries where precision and consistency are crucial, even a brief disruption can lead to significant financial losses.

3. Reduced Equipment Lifespan

Frequent pressure imbalances, leaks, and disconnections caused by mismatched components can accelerate wear and tear on the system. Over time, this results in a reduced lifespan for pumps, valves, seals, and other critical parts. As these components wear out faster, the overall reliability of the system diminishes, leading to more frequent breakdowns and higher replacement costs. The cumulative impact of using incompatible components can undermine the long-term viability of hydraulic equipment, making it less cost-effective and less efficient.

Best Practices for Ensuring Compatibility

When mixing hoses and fittings from different manufacturers becomes necessary, it’s vital to follow best practices to ensure system safety, performance, and reliability. While using components from the same brand is generally the safest approach, there are ways to minimize risks when combining different brands. This section outlines the key steps for ensuring compatibility, from consulting experts to testing and using adaptors effectively.

Consulting Manufacturers and Experts

1. Seek Professional Guidance

The first step in ensuring compatibility between hoses and fittings from different brands is to consult with manufacturers or industry experts. Manufacturers have a deep understanding of their product specifications, pressure ratings, and material properties. By sharing details about the hydraulic system—such as fluid type, pressure levels, and operational conditions—manufacturers can offer specific recommendations for compatible components. This expert guidance can prevent potential mismatches and help identify suitable alternatives.

2. Consult Hydraulic System Specialists

Hydraulic system specialists, including engineers and technicians, can provide valuable insights on component compatibility. They can assess the system requirements and recommend the best combination of hoses and fittings based on factors like pressure ratings, material compatibility, and performance needs. Experts can also offer solutions to address any specific challenges, such as chemical resistance or extreme temperature conditions, ensuring that the components work well together under various circumstances.

3. Review Product Specifications and Certifications

Before mixing components, review the technical specifications provided by each manufacturer. Look for information on pressure ratings, temperature limits, material composition, and certification labels to ensure compatibility. Verifying that the components meet the same industry standards (e.g., ISO, SAE) can help confirm that they are likely to perform well together in the same system.

Testing and Verification

1. Conduct Initial Compatibility Testing

Once components have been selected, the next step is to conduct compatibility testing in a controlled environment. This helps identify any potential issues, such as pressure drops, leaks, or improper sealing before the components are installed in the main hydraulic system. Begin by testing the combined components at low pressure to ensure that the seals and connections are secure, then gradually increase the pressure to the system’s operating levels.

2. Perform Stress Testing

In addition to initial compatibility tests, stress testing is crucial to verify that the mixed components can withstand the system’s maximum pressure and flow rates. Stress tests should simulate real-world conditions, including pressure surges, temperature fluctuations, and vibration exposure. Monitor the system for signs of leaks, pressure imbalances, or unusual noises, as these can indicate compatibility issues. Conducting stress tests can ensure that the mixed components will perform reliably under normal operating conditions.

3. Implement a Regular Maintenance Routine

After installing mixed components, establish a regular maintenance routine to monitor system performance. This includes checking for leaks, pressure consistency, and any signs of wear at the connection points. Early detection of issues can prevent serious failures and extend the lifespan of the hydraulic components.

Use of Adaptors and Connectors

1. When to Use Adaptors

Adaptors can be a useful solution for bridging compatibility gaps when combining hoses and fittings from different manufacturers. For example, if the threads or coupling types do not match, adaptors can help create a secure connection. Adaptors are also helpful when connecting components with different pressure ratings, as long as the overall system pressure remains within safe limits. However, adaptors should only be used when necessary, as they can introduce additional connection points that may be prone to leaks.

2. Choosing the Right Adaptors

When selecting adaptors, ensure that they are made from compatible materials and are designed to handle the same pressure and temperature ranges as the main components. Adaptors should also meet relevant industry standards, such as ISO or SAE, to ensure that they can perform reliably within the hydraulic system. Avoid using generic or unverified adaptors, as they may not provide the necessary performance or safety required for hydraulic applications.

3. Proper Installation of Adaptors

The effectiveness of adaptors depends largely on proper installation. Make sure to follow the manufacturer’s guidelines for tightening, sealing, and connecting adaptors to the hoses and fittings. Use the recommended tools and techniques to ensure a secure fit. Over-tightening can damage the threads, while under-tightening can result in leaks. Additionally, apply appropriate thread sealants to prevent leaks at the adaptor connections, especially in high-pressure systems.

Conclusion

Matching components from the same manufacturer remains the safest and most effective approach for hydraulic systems, as it ensures seamless integration and minimizes risks. However, if mixing brands is unavoidable, it’s crucial to consult with manufacturers or hydraulic experts to verify compatibility. Conducting thorough testing in a controlled environment, using appropriate adaptors, and implementing regular maintenance can help mitigate the risks.


FAQ

Can I safely mix different brands of hydraulic hoses and fittings?

Mixing brands can be risky due to differences in design, pressure ratings, and materials. Always consult experts and conduct thorough testing.

What are the main risks of using mismatched hydraulic components?

Potential risks include leaks, disconnections, pressure failures, and reduced system performance.

Will mixing components void the warranty?

Yes, using mismatched parts often voids the manufacturer’s warranty, making you liable for any damage or failures.

How can I ensure compatibility when mixing brands?

Consult manufacturers, review specifications, and test components together in a controlled environment.

Are adaptors safe to use for bridging compatibility gaps?

Yes, if used correctly and with compatible materials. Follow installation guidelines to prevent leaks.

Why is it important to follow industry standards like ISO or SAE?

Adhering to these standards ensures the safety, reliability, and consistent performance of hydraulic systems.

Preventing Hydraulic Hose Leaks banner

Preventing Hydraulic Hose Leaks: Tips and Techniques

One of the most common issues faced by hydraulic systems is the occurrence of hose leaks. Hydraulic hoses are vital components that carry pressurized fluid, and leaks can arise from various factors such as wear and tear, improper installation, or exposure to harsh environmental conditions. These leaks not only compromise the efficiency of the hydraulic system but can also pose serious safety risks to personnel and equipment. Identifying and addressing these leaks promptly is essential to maintain system integrity and performance.

Understanding Hydraulic Hose Leaks

A. Definition of Hydraulic Hose Leaks

Hydraulic hose leaks occur when hydraulic fluid escapes from the hose, which is designed to transport pressurized fluid throughout a hydraulic system. These leaks can manifest as visible fluid seepage or may occur at a microscopic level, making them difficult to detect. In either case, the consequences can be significant, affecting system performance and posing potential safety risks. Understanding the nature of these leaks is crucial for implementing effective preventive measures.

B. Causes of Hydraulic Hose Leaks

Wear and Tear Over time, hydraulic hoses are subjected to constant pressure and movement, leading to wear and tear. Factors such as age, fatigue, and exposure to abrasive materials can weaken the hose material, resulting in cracks, splits, or other forms of degradation. Regular inspection and timely replacement of hoses are essential to mitigate this risk.

Incorrect Installation

Improper installation is a leading cause of hydraulic hose leaks. This can include issues such as incorrect torque on fittings, misalignment during installation, or using incompatible hose and fitting materials. When hoses are not installed according to manufacturer specifications, they can experience undue stress, leading to leaks. Ensuring that technicians are trained and knowledgeable about proper installation techniques is vital.

Environmental Factors

Hydraulic hoses are often exposed to various environmental conditions that can contribute to leaks. Temperature extremes, moisture, UV radiation, and chemical exposure can all degrade hose materials over time. For instance, excessive heat can cause hoses to become brittle, while moisture can lead to corrosion of metal fittings. Protecting hoses from harsh conditions through proper routing, shielding, and selection of appropriate materials is critical for longevity.

Preventing Hydraulic Hose Leaks

C. Impact of Leaks on Operations and Safety

The impact of hydraulic hose leaks extends beyond the immediate loss of hydraulic fluid. Operations can be significantly affected in several ways:

Reduced Efficiency: A leaking hose leads to a drop in hydraulic pressure, which can impair the performance of machinery and equipment. This reduction in efficiency can result in slower operations and increased energy consumption.

Increased Costs: Leaks can lead to increased maintenance costs due to the need for frequent repairs and replacements. Additionally, the lost fluid must be replenished, further driving up operational expenses.

Safety Hazards: Hydraulic fluid can be hazardous, posing risks such as slips and falls, fires, and environmental contamination. Leaks can also compromise the integrity of machinery, leading to malfunctions that could endanger operators and nearby personnel.

Downtime: Unplanned downtime caused by hose leaks can disrupt production schedules, leading to missed deadlines and lost revenue. Addressing leaks promptly and efficiently is essential to maintain operational continuity.

Identifying Potential Leak Points

A. Key Areas to Inspect Regularly

Connectors and Fittings

Connectors and fittings are critical junctions in hydraulic systems where hoses connect to pumps, valves, and other components. Regular inspection of these areas is vital, as they are common sites for leaks. Look for signs of fluid accumulation around fittings, which can indicate a compromised seal or connection. Check for any visible damage, such as cracks or wear, and ensure that all connections are tight and secure according to manufacturer specifications. Using the appropriate torque settings during installation can prevent future issues.

Hose Material and Condition

The hose itself is subject to wear and degradation over time. Inspect the hose material for any signs of aging, such as cracking, swelling, or bulging. Pay attention to any abrasions caused by friction or contact with sharp objects. Additionally, check for kinks or bends that could restrict flow and create stress points. If the hose appears discolored or has lost flexibility, it may be time for replacement. Regularly scheduled inspections can help catch these issues early, preventing leaks before they develop.

Mounting and Routing

Proper mounting and routing of hydraulic hoses are essential for preventing leaks. Hoses should be secured in a manner that minimizes movement and friction against other components. Check that hoses are routed away from sharp edges, moving parts, and heat sources. Ensure that they are not twisted or compressed, as this can lead to premature failure. Using protective sleeves or shields can help safeguard hoses from external damage. Regularly review hose routing during maintenance checks to ensure compliance with best practices.

B. Tools for Leak Detection

Visual Inspection

One of the simplest yet most effective methods for identifying leaks is through visual inspection. Regularly examine all hydraulic components, looking for signs of fluid leakage. This includes checking for wet spots, pooled fluid, or residue around connectors and fittings. Visual inspections should be part of routine maintenance and should be conducted by trained personnel who can recognize potential problem areas. Documenting findings can help track the condition of hoses and fittings over time.

Pressure Tests

Pressure testing is a more advanced method for detecting leaks. By subjecting the hydraulic system to a controlled pressure, technicians can identify weaknesses in hoses and connections. This method often involves using a pressure gauge to monitor any pressure drops, which can indicate a leak. Pressure tests should be conducted by safety protocols to prevent accidents. It’s important to use the appropriate test pressure as specified by the manufacturer to avoid damaging the system during the test.

Ultrasonic Leak Detectors

Ultrasonic leak detectors are specialized tools that can detect high-frequency sounds produced by escaping hydraulic fluid. These devices are particularly useful for identifying leaks that may not be visible to the naked eye. By scanning the hydraulic system with an ultrasonic detector, technicians can pinpoint the exact location of a leak, even in noisy environments. This technology is effective in detecting small leaks before they become significant problems, allowing for timely maintenance and repairs.

Best Practices for Hydraulic Hose Maintenance

A. Regular Inspection Schedules

Establishing a regular inspection schedule is crucial for maintaining hydraulic hose integrity. Inspections should be conducted at intervals based on operational demands, the environment, and manufacturer recommendations. A typical approach involves performing inspections daily, weekly, and monthly:

Daily Inspections: Before the start of operations, conduct a quick visual check for signs of leaks, wear, or damage. Look for fluid accumulation around hoses and fittings, ensuring connections are secure.

Weekly Inspections: Take a more thorough look at all hydraulic components, focusing on connectors, hose conditions, and mounting. Check for abrasions or exposure to harsh conditions and document any findings for future reference.

Monthly Inspections: Conduct detailed inspections, including pressure tests and checking the overall routing of hoses. This is an opportunity to assess the system’s performance and identify areas that may require attention or upgrades.

Implementing these schedules not only enhances reliability but also helps in early detection of issues, preventing costly downtimes and ensuring safety.

B. Proper Cleaning Techniques

Keeping hydraulic hoses clean is essential for preventing contamination and extending their lifespan. Dirt, debris, and fluid residues can compromise hose integrity and lead to failures. Here are some best practices for cleaning:

Use Appropriate Cleaning Solutions: Select cleaning agents that are compatible with hydraulic fluids and hose materials. Avoid harsh chemicals that can degrade the hose.

Gentle Cleaning Methods: Use soft cloths or brushes to clean hoses and fittings. Avoid abrasive materials that can scratch or damage the surface. For stubborn residues, consider using a non-abrasive scrub pad.

Prevent Contamination: Ensure that when cleaning hoses, no debris enters the system. Cover open fittings and hose ends with clean caps or plugs during maintenance to prevent contamination from dust and dirt.

Regular cleaning not only maintains the appearance of hydraulic hoses but also helps ensure that the system operates smoothly without unnecessary wear.

Preventing Hydraulic Hose Leaks Topa

C. Correct Storage Methods

Proper storage of hydraulic hoses is essential for preventing damage when they are not in use. Following these guidelines will help maintain their integrity:

Store in a Controlled Environment: Hoses should be stored in a clean, dry area away from extreme temperatures, humidity, and UV exposure. Excessive heat can cause hoses to become brittle, while moisture can promote corrosion.

Avoid Overlapping or Kinking: When coiling hoses, ensure that they are not kinked or overlapped in a manner that creates stress points. Store hoses in a manner that allows them to lay flat or be coiled without tension.

Label and Organize: If multiple hoses are stored together, label them for easy identification and organization. This practice reduces the risk of selecting the wrong hose during installation and ensures efficient retrieval.

By following these storage methods, organizations can significantly extend the life of their hydraulic hoses, reducing the need for replacements.

D. Replacement vs. Repair: When to Act

Knowing when to repair or replace a hydraulic hose is essential for effective maintenance. Here are guidelines to help make this decision:

Assessing Damage: Minor abrasions or surface damage may be repairable if the hose is otherwise in good condition. However, if there are signs of significant wear, cracking, or structural compromise, replacement is often the safer option.

Severity of Leaks: If a leak is detected, assess its size and location. Small, easily accessible leaks may be repairable, but larger leaks, especially those at critical junctions, typically necessitate a full hose replacement.

Age of the Hose: Hydraulic hoses have a finite lifespan, often dictated by usage, pressure cycles, and environmental conditions. Even if a hose appears to be in good condition, it may be prudent to replace it if it approaches the end of its recommended lifespan.

Manufacturer Recommendations: Always refer to manufacturer guidelines regarding hose replacement intervals and repair protocols. Adhering to these recommendations can prevent failures and ensure system reliability.

Installation Techniques to Prevent Leaks

A. Selecting the Right Hose and Fittings

The foundation of a reliable hydraulic system starts with selecting the appropriate hose and fittings. Different applications require specific hose types based on factors such as pressure rating, fluid compatibility, temperature range, and environmental conditions. Here are key considerations:

Hose Type: Select hoses designed for the specific type of hydraulic fluid being used. Common materials include rubber, thermoplastic, and metal-reinforced options. Ensure the hose can withstand the pressures and temperatures it will encounter in operation.

Fitting Compatibility: Choose fittings that match the hose size and type, ensuring compatibility with the hydraulic system. Incompatible fittings can lead to leaks due to improper sealing or stress on the hose.

Pressure Ratings: Always select hoses and fittings that exceed the maximum pressure requirements of the system. This ensures they can handle unexpected pressure spikes without failure.

By carefully considering these factors during the selection process, organizations can significantly reduce the likelihood of leaks stemming from improper components.

B. Proper Installation Procedures

Proper installation techniques are crucial to ensuring that hydraulic hoses and fittings perform effectively. Key aspects include:

Torque Specifications

Proper torque is essential for ensuring a tight seal between hoses and fittings. Each fitting comes with manufacturer-specified torque values, which should be strictly adhered to during installation. Over-tightening can damage the hose or fitting while under-tightening can lead to leaks. Using a torque wrench to achieve the correct specifications ensures optimal sealing and helps prevent future failures.

Alignment and Support

Correct alignment of hoses and fittings during installation is critical. Misalignment can create undue stress on the hose, leading to premature wear or failure. Ensure that hoses are routed smoothly without sharp bends or kinks, which can restrict fluid flow and increase pressure on the fittings. Additionally, providing adequate support for hoses through brackets or clamps can help maintain alignment and reduce movement, further preventing leaks.

C. Importance of Using Quality Materials

The quality of materials used in hydraulic systems plays a vital role in preventing leaks and ensuring overall system integrity. Here’s why:

Durability: High-quality hoses and fittings are designed to withstand harsh operating conditions, including temperature extremes, high pressures, and exposure to chemicals. Investing in durable materials reduces the likelihood of wear and subsequent leaks.

Reliability: Quality components undergo rigorous testing to ensure they meet industry standards. Using reputable brands or certified products can help guarantee reliability, giving operators confidence in the system’s performance.

Long-Term Cost Efficiency: While high-quality materials may involve a higher initial investment, they can lead to significant savings over time. Reduced maintenance costs, fewer replacements, and decreased downtime due to leaks contribute to the overall efficiency of operations.

Environmental Considerations

A. Effects of Temperature and Humidity on Hoses

Temperature and humidity play significant roles in the performance and longevity of hydraulic hoses. High temperatures can cause hoses to become brittle, leading to cracks and leaks, especially if they are not rated for such conditions. Conversely, extreme cold can make hoses rigid and less flexible, increasing the risk of fractures during operation. Humidity can introduce moisture into the system, promoting corrosion in metal fittings and degrading the hose material over time. It is essential to select hoses that can withstand the expected temperature and humidity ranges of the operating environment to ensure reliability.

B. Protecting Hoses from External Damage

Protecting hydraulic hoses from external damage is crucial for preventing leaks and maintaining system integrity. This involves several strategies:

Routing and Installation: Hoses should be routed away from sharp edges, moving parts, and potential sources of abrasion. Proper installation techniques, such as using protective sleeves or conduits, can shield hoses from mechanical damage.

Environmental Shields: For hoses exposed to harsh environmental conditions, consider using covers or shields to protect them from UV radiation, extreme temperatures, and chemical spills. These protective measures can significantly extend the lifespan of hoses.

Regular Inspections: Conduct routine inspections to identify any signs of wear or damage early. This proactive approach allows for timely maintenance or replacement, reducing the risk of leaks caused by external factors.

C. Adapting to Seasonal Changes

Seasonal changes can impact hydraulic hose performance and should be considered in maintenance practices. In winter, cold temperatures can stiffen hoses, while summer heat can accelerate wear. Organizations should adapt their maintenance schedules to account for these fluctuations:

Winter Preparation: Inspect hoses for flexibility and signs of brittleness before colder months. Consider using anti-freeze hydraulic fluids if applicable and ensure that hoses are adequately protected from freezing temperatures.

Summer Adjustments: In hot weather, increased temperatures can lead to hose expansion and a higher likelihood of leaks. Regularly check for signs of wear and ensure proper ventilation in areas where hydraulic systems operate.

Conclusion

Preventing hydraulic hose leaks is crucial for maintaining the efficiency and safety of hydraulic systems across various industries. Leaks can lead to significant operational disruptions, increased maintenance costs, and safety hazards, making it essential to address this issue proactively. By understanding the common causes of leaks, regularly inspecting components, and employing best practices in installation and maintenance, organizations can safeguard their operations. The cumulative impact of these efforts not only extends the lifespan of hydraulic hoses but also enhances overall system reliability.


FAQ

What are the common causes of hydraulic hose leaks?

Common causes include wear and tear, incorrect installation, environmental factors, and damage from external sources.

How often should hydraulic hoses be inspected?

Hoses should be inspected regularly, with daily visual checks, weekly thorough inspections, and monthly detailed assessments recommended.

What materials should I choose for hydraulic hoses and fittings?

Select hoses and fittings made from durable materials compatible with your specific hydraulic fluid, considering pressure and temperature ratings.

How can I protect hydraulic hoses from damage?

Use protective sleeves, ensure proper routing away from sharp edges, and conduct regular inspections to identify any signs of wear early.

When should I repair or replace a hydraulic hose?

Replace hoses that show significant wear, cracking, or leaks. Minor abrasions may be repairable, but assess the overall condition before deciding.

What installation practices help prevent leaks?

Follow manufacturer torque specifications, ensure proper alignment and support, and prevent contamination during installation for optimal sealing.

Hydraulic Hose Pulse Testing banner

Hydraulic Hose Pulse Testing: Reasons and Importance

The primary purpose of hydraulic hose pulse testing is to verify the structural integrity and longevity of hoses. By identifying potential weaknesses before they fail, pulse testing plays a proactive role in enhancing safety, reducing operational downtime, and preventing costly repairs. It also helps manufacturers meet compliance requirements and maintain consistent quality, boosting customer confidence and satisfaction.

What is Hydraulic Hose Pulse Testing?

Hydraulic hose pulse testing is a specialized evaluation process designed to simulate the pressure fluctuations that hydraulic hoses encounter during their normal operation. Unlike static pressure tests, pulse testing subjects hoses to repeated pressure cycles to ensure they can endure the demands of real-world applications. By doing so, pulse testing helps determine whether a hose can maintain its integrity over time, particularly under conditions of high-frequency pressure changes. The goal is to identify any potential weaknesses, fatigue points, or performance issues before they result in unexpected failures in the field.

Technical Process Overview

The pulse testing procedure involves connecting a hose assembly to a test rig that generates rapid pressure cycles. Here’s how the process generally works:

Setup: The hose is connected to a pulse tester, a specialized machine equipped with pressure controllers, pumps, and sensors. The hose is secured to the test rig using fittings that can handle the specified pressure levels.

Pressure Cycling: The pulse tester repeatedly applies and releases pressure at high frequencies, simulating the cyclic loads the hose would face during operation. This typically involves rapid pressure spikes followed by depressurization. The cycling can range from several thousand to over a million cycles, depending on the hose’s intended application.

Pressure Levels: The applied pressure can vary based on the hose type and specification but generally ranges from 1,000 psi to as high as 10,000 psi. This ensures that hoses can withstand the stresses of dynamic pressures in their target environments.

Duration: Pulse tests can last from a few hours to several days, depending on the number of cycles and the desired test outcomes. Monitoring sensors continuously check the hose’s performance, looking for any signs of leaks, ruptures, or deformation.

brust Test Topa Factory

Comparison with Other Tests

While pulse testing evaluates a hose’s performance under dynamic pressure variations, other tests focus on different aspects:

Burst Testing: This test determines the maximum pressure a hose can handle before rupturing. It involves applying a constant, steadily increasing pressure until the hose fails, providing a measure of its ultimate pressure capacity.

Pressure Decay Testing: This test is used to detect leaks by pressurizing the hose and monitoring for a drop in pressure over time. Unlike pulse testing, it assesses the hose’s ability to hold pressure rather than its ability to endure repeated cycles.

Static Pressure Testing: Here, a hose is exposed to a constant pressure level for an extended period to verify its ability to maintain integrity without leaks.

Why is Pulse Testing Crucial?

Hydraulic hose pulse testing is essential for maintaining safety, performance, and compliance in hydraulic systems. It plays a critical role in ensuring that hoses can endure the cyclic pressures characteristic of their working environment, thereby preventing failures that could lead to hazardous situations, operational inefficiencies, or legal liabilities. Here’s why pulse testing is indispensable:

Safety Assurance

Pulse testing is primarily conducted to confirm the reliability and safety of hydraulic hoses. By exposing hoses to rapid, repeated pressure variations, the test ensures they can withstand the fluctuating pressures typical in hydraulic systems. This preemptive approach helps to identify any weaknesses, fatigue points, or potential failure risks before they can compromise safety.

Without pulse testing, there is a greater risk of unexpected hose failures, which can result in high-pressure fluid leaks, equipment damage, and even injuries to operators. For instance, a hose that ruptures under pressure could release hot hydraulic fluid at high velocity, posing a significant danger to nearby personnel and damaging sensitive equipment. Thus, pulse testing acts as a safety net, preventing such critical failures by verifying hose integrity under simulated real-world conditions.

Performance Validation

In addition to safety, pulse testing validates the performance of hydraulic hoses, ensuring they are suitable for their intended applications. It demonstrates the hose’s ability to handle rapid pressure changes without degradation, deformation, or leakage, which are common challenges in hydraulic systems. This test assures that the hose can function efficiently and maintain consistent performance across its lifecycle.

Operational efficiency depends heavily on the reliability of each hydraulic component. Hoses that fail to perform under dynamic pressures can cause unexpected downtime, reduced productivity, and costly repairs. Pulse testing helps prevent these issues by ensuring that hoses can meet the demands of real-world operations, thereby improving system reliability and minimizing maintenance requirements.

Compliance with Standards

Pulse testing is not only a best practice but also a requirement in many industries to comply with established safety and performance standards. Key standards include:

ISO 6803: Specifies the methods for impulse testing hydraulic hoses under defined conditions.

SAE J343: Sets the guidelines for pressure testing, including pulse testing, to ensure hose performance meets the requirements of various applications.

DIN EN 853 and 854: European standards for hydraulic hoses that mandate pulse testing for specific hose classes.

Adherence to these standards is crucial for manufacturers, as it verifies the quality and reliability of their products. Non-compliance can lead to serious repercussions, including product recalls, legal liabilities, and damage to the company’s reputation. Moreover, non-compliant hoses may pose safety risks, as they might not endure operational stresses as intended, increasing the likelihood of failure.

How Pulse Testing is Performed

Preparation Phase

Preparation is a critical phase of pulse testing, as it ensures that the hoses are properly set up for accurate evaluation:

Initial Inspection of Hoses:

Before the testing begins, a thorough visual inspection is conducted to identify any obvious defects, such as cracks, abrasion, or signs of material degradation.

Hoses are also checked for cleanliness, as debris or contaminants can affect test results and potentially damage testing equipment.

Selecting Test Parameters:

Based on the hose’s specifications and intended application, test parameters are established. These include the maximum pressure level, number of cycles, and frequency of pressure changes.

Other factors, such as the type of hydraulic fluid used during the test, ambient temperature, and test duration, are also determined at this stage.

Setting Up Equipment:

The hose is connected to a pulse tester, a specialized machine designed to generate cyclic pressure waves.

Proper fittings and connectors are used to ensure a secure attachment, as loose fittings can result in leaks or inaccurate readings.

Safety measures, including pressure relief valves and protective barriers, are put in place to safeguard against hose bursts during testing.

ORFS hydraulic fittings China manufacturer Pulse test

Testing Process

The testing phase involves a series of steps that simulate real-world pressure conditions in a controlled environment:

Clamping the Hose:

The hose is securely clamped into the pulse tester to prevent any movement during testing. Clamping is essential for accurate pressure transmission and measurement.

Pressure Cycling:

The pulse tester begins to apply pressure to the hose, rapidly increasing and decreasing the pressure according to the pre-set parameters.

Pressure cycling typically ranges from 0 psi to the specified maximum pressure, mimicking the dynamic loading conditions encountered in the field.

The test cycles at a frequency that can range from 0.5 to 1 cycle per second, depending on the hose’s specifications and the test requirements.

Monitoring and Logging:

Sensors monitor the hose’s performance throughout the test, measuring parameters like pressure, temperature, and potential deformation.

Data logging systems record the results for each cycle, providing a comprehensive dataset that can be analyzed later for performance evaluation.

Duration of Testing and Parameters:

The duration of pulse testing depends on the number of cycles required. For example, some standards may call for 50,000 cycles, while others may require up to 1 million cycles, depending on the hose’s application.

The pressure applied during testing generally ranges between 1,000 psi and 10,000 psi, although this varies based on the hose type and industry requirements.

Interpreting Results

After testing is complete, the results are analyzed to determine whether the hose meets the required performance criteria:

Pass/Fail Criteria:

A hose is considered to have passed the test if it successfully endures the specified number of pressure cycles without rupturing, leaking, or exhibiting significant deformation.

Any signs of leakage, loss of pressure, or structural compromise are considered failures, and the hose is deemed unfit for use in its intended application.

Troubleshooting Unfavorable Results:

If the hose fails the test, a detailed inspection is conducted to determine the cause of failure. This may involve examining the hose material, reinforcement layers, or fittings.

Common issues include material fatigue, inadequate reinforcement, or improper crimping of fittings.

Based on the findings, manufacturers may adjust the design, materials, or production processes to improve the hose’s performance in future tests.

Common Challenges

Several challenges can arise during pulse testing, but understanding them can help ensure accurate results:

Temperature Fluctuations:

Variations in ambient temperature can affect hose performance during testing. To mitigate this, testing is often conducted in a controlled environment with consistent temperature settings.

Hose Slippage or Poor Clamping:

If the hose is not properly clamped, it can move during testing, leading to inaccurate pressure readings or premature failure. Using secure clamps and double-checking attachments can prevent this issue.

Sensor Malfunctions:

Sensors may fail or give inaccurate readings during testing, which can compromise data accuracy. Regular calibration and maintenance of the testing equipment can help mitigate this risk.

Pressure Leaks:

Leaks can occur due to poor fittings or hose defects. Inspecting fittings and connections thoroughly before testing can help identify potential leak points and prevent data loss.

Common Failures Detected by Pulse Testing

Pulse testing is a valuable diagnostic tool that simulates real-world pressure cycles to identify potential failures in hydraulic hoses. By subjecting hoses to repeated pressure variations, pulse testing can reveal a range of defects and weaknesses that may compromise hose safety and performance in the field. Below are the most common types of failures detected through pulse testing:

Hose Fatigue

Repeated pressure cycling during pulse testing helps detect hose fatigue, which occurs when a hose is unable to maintain its structural integrity under prolonged cyclic pressures. As pressure fluctuates rapidly, hose materials can weaken due to stress concentration, leading to material degradation over time. Hose fatigue is particularly common in hydraulic systems that operate at high frequencies, such as those in industrial or automotive applications.

During testing, signs of fatigue may manifest as:

Surface Cracks: The outer layer may develop visible cracks or crazing due to continuous flexing and compression.

Reinforcement Fractures: Internal reinforcement layers (e.g., steel wire braids or textile layers) may begin to break down, reducing the hose’s overall strength.

Stiffening or Hardening: Prolonged cyclic loading can cause the hose material to lose flexibility, becoming stiff or brittle.

Detecting fatigue early through pulse testing helps prevent unexpected hose failures in the field, enhancing both safety and operational reliability.

Leakages

Pulse testing is highly effective in detecting leakages, which can result from weak spots or microcracks in the hose material. When a hose undergoes cyclic pressure changes, any defects in its construction or material can lead to fluid seepage or full-blown leaks.

Common causes of leakages identified during pulse testing include:

Pinholes: Tiny holes in the hose material that allow hydraulic fluid to seep out, typically caused by manufacturing defects or material flaws.

Joint Leaks: If the fittings are not properly crimped or sealed, pressure cycling can cause leaks at the connection points.

Microcracks: Internal cracks in the hose material can allow fluid to escape under high pressure, leading to gradual loss of system pressure.

Leak detection during pulse testing is crucial for ensuring that hoses are safe for deployment. If undetected, leaks can lead to significant fluid loss, reduced system efficiency, contamination, and potential safety hazards.

Connection Failures

Connection failures are another critical issue detected through pulse testing. Hydraulic hoses rely heavily on secure fittings and couplings to maintain pressure integrity, and pulse testing helps identify weaknesses in these connections.

Key connection issues revealed by pulse testing include:

Loose or Slipping Fittings: Repeated pressure cycles can cause poorly crimped or improperly fitted couplings to slip or loosen, resulting in loss of pressure and potential disconnection.

Seal Failures: Seals within the fittings may fail under cyclic pressure, leading to fluid leaks or pressure loss.

Inadequate Coupling Strength: If the coupling is not strong enough to withstand the cyclic loads, it may deform or fail, causing sudden disconnections or hose damage.

Identifying connection failures during testing helps ensure that the hose assemblies are robust and reliable in demanding applications, preventing catastrophic disconnections or system failures in the field.

Structural Defects

Pulse testing can also uncover structural defects within the hose, which might not be visible during a basic visual inspection. These defects can significantly compromise hose performance and safety.

Common structural defects detected through pulse testing include:

Internal Delamination: This occurs when the hose’s internal layers separate due to pressure cycling, weakening the hose’s structure and increasing the risk of rupture.

Cracks in the Reinforcement Layer: Internal cracks in the reinforcement layer can lead to pressure loss, reduced flexibility, and increased likelihood of failure under stress.

Blisters or Bulges: If pressure cycles cause the hose’s internal layers to separate or swell, blisters or bulges may appear, indicating a significant internal defect.

By detecting structural defects early, pulse testing ensures that hoses meet the necessary performance standards and are safe for use in high-pressure environments.

Conclusion

For operators and maintenance teams, implementing regular pulse testing should be a priority. By integrating this testing into your maintenance routines, you can improve system reliability, reduce downtime, and ensure the safety of your personnel. Investing in pulse testing today will not only protect your equipment but also enhance overall operational efficiency in the long run.


FAQ

What is hydraulic hose pulse testing?

It is a process that subjects hydraulic hoses to rapid, repeated pressure cycles to simulate real-world conditions and assess their durability and performance.

Why is pulse testing important?

Pulse testing ensures that hoses can handle dynamic pressures safely, preventing unexpected failures, enhancing safety, and maintaining compliance with industry standards.

How often should hoses undergo pulse testing?

Hoses should be tested during initial production and regularly during maintenance routines to ensure continued reliability.

What standards govern pulse testing?

Major standards include ISO 6803, SAE J343, and DIN EN 853/854, which provide guidelines for pressure levels, test cycles, and pass/fail criteria.

What are common failures detected by pulse testing?

Pulse testing can detect hose fatigue, leaks, connection failures, and structural defects like delamination or internal cracks.

How long does pulse testing typically take?

The duration depends on the number of cycles required, ranging from a few hours to several days, based on industry specifications and test parameters.

Connecting and Disconnecting Hydraulic Hoses banner

Connecting and Disconnecting Hydraulic Hoses: Safe Practices

Hydraulic hoses play a crucial role in industrial operations, transferring high-pressure fluids to power various equipment and machinery. Given their importance, ensuring safe and effective connection and disconnection is vital to maintaining operational efficiency and preventing potential hazards. Whether in construction, manufacturing, or agriculture, proper handling of hydraulic hoses not only protects equipment but also safeguards personnel working with these powerful systems.

Understanding Hydraulic Hoses and Their Connections

Overview of Hydraulic Hoses

Definition and Role of Hydraulic Hoses in Various Industries Hydraulic hoses are flexible, high-strength tubes engineered to transport hydraulic fluids under pressure, facilitating mechanical processes across diverse industries. These hoses are integral to the hydraulic systems of heavy machinery, construction equipment, industrial machines, and agricultural tools. Designed for flexibility, durability, and efficiency, they allow smooth fluid transfer even in dynamic and challenging environments, which is crucial for maintaining productivity and safety.

In construction, hydraulic hoses power excavators, bulldozers, and cranes enabling precise control over movements and lifting. In manufacturing, they facilitate assembly lines, pressing machines, and material handling equipment, ensuring seamless automation. The mining sector relies on hydraulic hoses to manage drilling rigs, loaders, and transport machinery, where robust and safe fluid transmission is essential due to the high pressures and rough conditions. In agriculture, they support the operation of tractors, harvesters, and irrigation systems, enhancing productivity and reducing manual labor.

4SP-rubber hose factory in china

Common Types of Hydraulic Hoses Used

Hydraulic hoses are constructed using different materials, designs, and reinforcements to meet the specific needs of various applications. The most common types include:

Reinforced Rubber Hoses

Made from synthetic rubber, reinforced with either wire braiding or spiral layers, these hoses offer exceptional flexibility and high-pressure resistance.

Applications: These hoses are widely used in construction, agricultural machinery, and material handling equipment. They can handle heavy-duty operations and tolerate frequent bending.

Advantages: Good flexibility, high abrasion resistance, and reliable performance under varying temperatures.

Limitations: They may degrade over time when exposed to harsh chemicals or extreme temperatures, requiring regular inspection and maintenance.

Thermoplastic Hoses

These hoses feature a nylon or polyester core and are typically reinforced with a synthetic fiber or steel wire layer.

Applications: Ideal for medium- and high-pressure applications such as forklifts, aerial lifts, and mobile hydraulic equipment.

Advantages: Lightweight, durable, and highly resistant to chemicals, making them suitable for both indoor and outdoor use.

Limitations: They are not as flexible as rubber hoses, and sudden temperature changes may impact their performance.

PTFE (Polytetrafluoroethylene) Hoses

Also known as Teflon hoses, these are made from chemically inert PTFE and are often reinforced with stainless steel wire braiding.

Applications: These hoses are commonly used in high-temperature applications, chemical processing, and food industries.

Advantages: High resistance to chemicals, heat, and pressure, along with a longer lifespan compared to rubber hoses.

Limitations: Limited flexibility compared to rubber and thermoplastic hoses; they are generally more expensive and require careful handling to avoid damage to the inner core.

Steel-Reinforced Teflon Hoses

These hoses are a specialized type of PTFE hose, reinforced with multiple layers of stainless steel wire braiding, designed to withstand extremely high pressures.

Applications: Used in heavy-duty hydraulic systems, industrial processes, and equipment where consistent performance under extreme conditions is required.

Advantages: Excellent pressure and temperature resistance, reduced risk of hose bursting, and enhanced durability.

Limitations: Stiffer than other hoses, making installation and routing more complex; they may also have a higher initial cost.

Types of Hydraulic Connections

Efficient hydraulic systems depend not only on the hoses themselves but also on the types of connections used to secure and manage fluid flow.

Quick-Connect Couplings

Quick-connect couplings are designed to allow rapid and easy connection or disconnection of hydraulic lines without the need for tools.

Pros:

Ease of Use: Quick-connect couplings enable fast and efficient attachment or detachment, which reduces downtime and improves workflow efficiency.

Reduced Fluid Loss: Many designs incorporate automatic shut-off valves that minimize fluid spillage during disconnection, protecting both the operator and the environment.

Versatility: Available in various configurations and materials, quick-connects can accommodate different types of hoses and equipment, making them suitable for diverse hydraulic systems.

Time-Saving: In emergencies, quick-connects allow for fast isolation of equipment, reducing the risk of damage and injury.

Cons:

Potential for Contamination: If the connectors are not properly cleaned and maintained, contaminants such as dust, dirt, or moisture can enter the hydraulic system, leading to equipment malfunctions.

Pressure Sensitivity: Quick-connects may not be ideal for extremely high-pressure applications, as improper engagement can result in leaks or damage to the coupling, posing safety risks.

Wear and Tear: Due to frequent connections and disconnections, quick-connects may experience wear over time, requiring regular inspection and possible replacement to ensure safe operation.

Threaded Connections

Threaded connections involve screwing the fittings onto the hose ends, creating a secure and robust seal. They are commonly used in applications where high-pressure resistance is required.

Safety Considerations:

Proper Tightening: Ensuring the connections are properly tightened is crucial to prevent fluid leaks and potential hose failure. Over-tightening can damage the threads, while under-tightening can result in leaks.

Use of Sealants: Threaded connections often require PTFE tape or thread sealants to maintain a leak-proof seal. It’s essential to apply these correctly to avoid contamination or residue inside the hydraulic system.

High-Pressure Compatibility: Threaded connections are typically designed to withstand higher pressures than quick-connects, making them suitable for heavy-duty machinery and equipment.

Inspection and Maintenance: Regular checks are necessary to ensure the integrity of threaded connections, as the threads can become worn or damaged, compromising the seal and increasing the risk of leakage.

Safety Preparations Before Handling Hydraulic Hoses

Pre-Operational Safety Check

Before starting any operation with hydraulic hoses, it’s essential to conduct a thorough pre-operational safety check. This helps prevent potential hazards and ensures the safe and efficient functioning of hydraulic systems.

Inspecting Hoses for Wear, Leaks, or Damages

Visual Inspection: Begin by conducting a detailed visual inspection of all hydraulic hoses, checking for any visible signs of wear, such as cracks, abrasions, blisters, or bulges.

Look for Leaks: Carefully examine the hose connections and fittings for fluid leaks. Leaks can be indicated by fluid residue around connection points or unusual dampness on the hose surface.

Assessing Damage: Check for kinks, twists, or deformation that may have occurred during previous operations. Damaged hoses are more prone to bursting or leaking when under pressure, posing safety risks.

Action: Replace any hose showing significant wear, damage, or leaks. Remember that using a damaged hose in high-pressure operations can lead to catastrophic failures.

Checking Pressure Ratings and Ensuring Compatibility with Equipment

Verify Pressure Ratings: Confirm that the hose being used is rated for the system’s working pressure. Using hoses below the required pressure rating can result in leaks or bursts, which could cause injuries or damage to the equipment.

Equipment Compatibility: Ensure that the hose material, length, and diameter are compatible with the specific hydraulic equipment in use. This helps maintain optimal fluid flow and system efficiency.

Check Hose Fittings: Ensure the fittings and connections match the hose specifications and are securely attached. Mismatched fittings can lead to leaks, reduced pressure, or hose ejection during operation.

Importance of Safety Gear

Personal Protective Equipment (PPE): Operators must wear the appropriate safety gear when handling hydraulic hoses to protect against potential hazards.

Gloves: Wear cut-resistant, oil-resistant gloves to safeguard against leaks, spills, and sharp edges on fittings or damaged hoses.

Goggles or Face Shields: Protect eyes and face from unexpected fluid sprays, which can be dangerous due to the high pressure of hydraulic systems.

Protective Clothing: Wear long-sleeved garments made of durable materials to shield skin from high-pressure fluid leaks, which can penetrate the skin and cause serious injuries (hydraulic injection injuries).

Install Field attachable Hydraulic hose fittings Topa

Proper Work Environment Setup

A safe working environment is a crucial factor in ensuring hydraulic hose handling operations are conducted without incident.

Ensure a Clean, Dry, and Well-Ventilated Work Area

Clean Work Area: Keep the workspace free of debris, dirt, and unnecessary tools to reduce the risk of contamination during hose connection or disconnection. Contaminants can enter the hydraulic system and cause blockages, wear, or equipment failure.

Dry Surface: Avoid working in wet areas where spills can cause slips or falls. Fluid spills should be cleaned up immediately, and absorbent materials should be readily available for quick response.

Ventilation: Ensure that the workspace is well-ventilated to prevent the buildup of any hazardous fumes, especially when working indoors or in confined spaces. Proper ventilation is essential when dealing with hydraulic systems that involve fluid maintenance or refilling.

Warning Signage and Barriers Around High-Risk Zones

Display Warning Signs: Use clear, visible warning signs to indicate high-pressure zones, potential fluid leakage areas, or areas where hoses are actively being connected or disconnected.

Barriers: Set up physical barriers or cones around the work area to restrict access to unauthorized personnel, reducing the risk of accidental injury.

Emergency Preparedness: Ensure that safety showers, eyewash stations, and first-aid kits are easily accessible in case of hydraulic fluid exposure or accidental injuries.

Steps for Safely Connecting Hydraulic Hoses

Properly connecting hydraulic hoses is critical to maintaining system safety and operational efficiency. Follow these detailed steps to ensure a secure and effective connection:

Depressurizing the System Before Starting

Importance: Hydraulic systems operate under high pressure, and attempting to connect hoses without first relieving pressure can be extremely dangerous. It can cause sudden fluid release, leading to injuries or hose ejection.

How to Depressurize:

Turn off the power source and ensure the system is completely shut down.

Gradually release the pressure by opening the designated relief valve. In some cases, a bleed-off valve or hose will also need to be opened to drain residual pressure.

Confirm that there is no residual pressure before proceeding. Use a pressure gauge if necessary to verify that the system is at zero pressure.

Cleaning the Hose Ends and Connectors

Why It’s Important: Dirt, dust, or debris on hose ends and connectors can enter the hydraulic system during connection, potentially causing blockages, component damage, or reduced performance.

Cleaning Process:

Use a clean, lint-free cloth to wipe off any contaminants from both the hose end and the connector.

For stubborn debris or greasy residue, use a suitable solvent cleaner. Ensure the cleaning agent is compatible with the hose material to prevent degradation.

Cover the cleaned hose ends with protective caps until they are ready to be connected, minimizing contamination risks.

Aligning the Hose Correctly to Avoid Twisting or Bending

Importance: Proper hose alignment prevents unnecessary twisting, bending, or kinking, which can weaken the hose structure and lead to leaks or bursts during operation.

Alignment Tips:

Position the hose in the intended path, ensuring that it is free of sharp bends and excessive stretching.

The hose should be naturally aligned with the connection point, following the equipment’s routing layout.

Use hose clamps, brackets, or guides to secure the hose in place, maintaining alignment and minimizing movement during operation.

Engaging the Connector with a Firm, Secure Fit

Steps for Connection:

Begin by carefully aligning the hose fitting with the equipment’s receiving port, making sure that the threads or connectors match perfectly.

Firmly screw or push the connector until it is fully engaged, ensuring a tight seal. For threaded connections, hand-tighten first and then use a wrench to secure the fitting.

For quick-connect couplings, push or pull the connection until you hear a distinct ‘click,’ indicating that the coupling is securely locked.

Final Check:

Verify the connection’s tightness by gently pulling on the hose to ensure it’s securely attached.

Perform a pressure test after connection to confirm that there are no leaks and that the connection can withstand the system’s working pressure.

Common Mistakes During Connection

Proper awareness of potential mistakes during connection is essential to prevent accidents and system failures. Here are some common errors and how to avoid them:

Skipping Inspection and Cleaning

Risk: Failure to inspect and clean hose ends and connectors before connection can introduce contaminants into the hydraulic system, causing blockages, reduced performance, and increased wear.

Prevention: Make inspection and cleaning mandatory steps before every connection. Always keep clean clothes and suitable solvents on hand for quick cleaning.

Misalignment or Using Incompatible Connectors

Misalignment:

Twisting or bending the hose during connection can weaken its structure, leading to premature wear or bursting.

Avoid forcing the hose into position. If misalignment occurs, readjust the hose routing rather than attempting to bend it into place.

Using Incompatible Connectors:

Incompatible connectors can create gaps, resulting in leaks or hose detachment under pressure.

Always verify that the connectors match in size, thread type, and material compatibility before connection.

Steps for Safely Disconnecting Hydraulic Hoses

Safely disconnecting hydraulic hoses is as critical as the connection process, requiring proper techniques to avoid sudden fluid release, contamination, or equipment damage. Follow these steps for secure and effective disconnection:

Turn Off the Power and Release Pressure from the System

Importance: Hydraulic systems operate under high pressure, making it essential to eliminate residual pressure before disconnection. Failing to do so can result in sudden fluid release, causing severe injuries or damage.

How to Release Pressure:

Start by shutting down the hydraulic system and ensuring that the power source is completely turned off.

Locate the pressure relief valve and slowly open it to allow the pressure to dissipate gradually. For systems equipped with bleed-off valves or hoses, use them to safely drain any remaining fluid pressure.

Confirm that the system pressure has dropped to zero by checking the pressure gauge or by carefully attempting a small release at a nearby connection point.

ORFS, 37° Flare, and 24° Flareless Fittings

Loosen the Connectors Gradually to Prevent Sudden Bursts

Importance: Rapid disconnection can cause sudden bursts of fluid, posing risks of high-pressure injection injuries, fluid spills, and contamination.

Disconnection Process:

Use two wrenches: one to hold the hose in place and the other to slowly loosen the connector. This method ensures stability and reduces the risk of sudden hose movement.

For quick-connect couplings, firmly press the release mechanism and allow any trapped pressure to vent before fully detaching the connection.

If any fluid begins to leak during the process, pause the disconnection to allow the pressure to stabilize further.

Cover the Disconnected Hose Ends to Prevent Contamination

Why It’s Important: Open hose ends are vulnerable to contamination by dust, dirt, and moisture, which can enter the hydraulic system when reconnected, leading to blockages or equipment damage.

Covering Process:

Immediately after disconnection, cap both the hose ends and equipment ports using clean, protective caps or plugs. This practice keeps contaminants out and maintains system integrity.

If contamination is suspected during the disconnection, flush and clean the hose before the next connection to ensure proper operation.

Precautionary Measures

While following the disconnection steps, implement additional safety measures to protect both the operator and the hydraulic system:

Use of a Secondary Safety Measure (e.g., a Safety Block)

Safety Blocks: Install a safety block or isolation valve to ensure the system is completely depressurized before starting the disconnection. This adds an extra layer of safety by physically separating the hydraulic fluid flow from the hose being disconnected.

Emergency Shut-off Valves: Some systems are equipped with emergency shut-off valves that can be used as an extra precaution to isolate the system from residual pressure, reducing the risk of sudden fluid release.

Avoiding Direct Contact with Leaking Fluids or Hot Surfaces

Fluid Leaks: Hydraulic fluids are often under high pressure and can be hot. Direct contact with leaking fluids can result in burns, skin irritation, or hydraulic injection injuries.

Always wear appropriate personal protective equipment (PPE), including gloves, goggles, and long-sleeved clothing, when working with hydraulic hoses.

Position yourself at a safe distance from the hose and use tools or absorbent materials to manage leaks instead of direct contact.

Hot Surfaces: Hydraulic components can become very hot during operation. Allow the system to cool down before starting disconnection to avoid burns.

Use thermal gloves when handling hoses or connections that may still be warm.

If the hose surface remains hot after shutdown, wait for the equipment to cool, or apply cooling methods if necessary.

Managing High-Pressure Situations

Dealing with High-Pressure Hoses

Handling high-pressure hoses requires a heightened level of safety awareness, as these hoses operate at extremely high pressures and pose greater risks of injury or damage if not managed properly.

Special Safety Tips for High-Pressure Hydraulic Systems

Understand the Pressure Rating: Always check and confirm that the hose’s pressure rating is suitable for the intended application. The working pressure of the hose should match or exceed the system’s maximum operating pressure to prevent sudden failure.

Regular Inspection: Inspect high-pressure hoses more frequently for any signs of wear, bulging, leaks, or weak spots, as they are more susceptible to stress and pressure fluctuations.

Proper Hose Routing: Ensure high-pressure hoses are routed correctly, avoiding sharp bends, tight curves, or kinks, as these can weaken the hose structure and lead to potential bursting.

Avoid Abrasion: High-pressure hoses are often subject to abrasion due to their placement in heavy-duty operations. Use protective sleeves or guards to minimize wear and extend hose life.

Safe Handling: Never attempt to kink, twist, or forcefully bend a high-pressure hose during operation. This can create weak points that may lead to sudden failure when under high pressure.

Use of Pressure-Relief Valves and Pressure Indicators

Pressure-Relief Valves:

Install pressure relief valves as part of the hydraulic system design to prevent over-pressurization. These valves automatically release excess pressure, protecting hoses, fittings, and other components from damage.

Test pressure-relief valves regularly to ensure they function properly, as malfunctioning valves can create significant risks in high-pressure systems.

Pressure Indicators:

Use pressure gauges or digital pressure indicators to monitor system pressure continuously. This allows operators to detect pressure fluctuations early, enabling preventive measures before pressure builds up to dangerous levels.

Mount pressure gauges at easily visible locations along the system, especially near connection points and high-pressure zones. This enhances monitoring and quick response capabilities during operation.

Handling Hose Failures or Unexpected Pressure Release

High-pressure hydraulic systems can fail suddenly, making it crucial to have emergency protocols in place to manage potential accidents effectively.

Emergency Response Protocols for Sudden Leaks or Hose Failures

Immediate Shutdown: In case of a sudden leak or hose failure, immediately shut down the hydraulic system using the nearest emergency stop button or shut-off valve. This helps reduce pressure buildup and prevents further fluid loss.

Evacuate the Area: If the leak is substantial, evacuate the immediate area to protect personnel from potential fluid injection injuries, burns, or exposure to hazardous fluids.

Contain the Leak:

Use absorbent materials or spill kits to contain leaking fluid and prevent it from spreading. Quick containment also minimizes environmental damage and makes the area safer for emergency responders.

In case of a major failure, create a temporary barrier using safety cones or caution tape to mark off the affected area and prevent unauthorized access.

Assess the Damage:

Once the area is secure, carefully assess the extent of the hose failure. Look for possible reasons such as pressure overload, material fatigue, or improper installation.

Ensure that the pressure has been completely released before conducting any inspections. Use pressure indicators to verify the absence of residual pressure in the system.

Preventing Further Damage or Injuries

Protective Gear: Ensure all personnel involved in handling the failure are equipped with personal protective equipment (PPE), such as gloves, goggles, and face shields, to prevent contact with high-pressure fluids.

Notify Maintenance Personnel: Alert the maintenance team to initiate repairs or replacement of the failed hose. Use hoses with pressure ratings that match or exceed the system’s requirements to prevent similar incidents.

Conclusion

Safety must always be the top priority when handling hydraulic hoses. Even minor oversights can result in serious injuries, costly equipment damage, or unexpected downtime. A proactive approach to safety not only protects personnel but also ensures operational efficiency and system longevity. Share this information with colleagues, team members, and other operators to promote safety awareness and prevent accidents in hydraulic systems. Together, we can enhance safety standards and contribute to a safer, more efficient workplace.


FAQ

What should I do first before connecting hydraulic hoses?

Always depressurize the system completely before attempting any connection. This prevents sudden fluid release and potential injuries.

How often should I inspect hydraulic hoses for wear or damage?

Inspect hoses regularly—ideally before each use. For high-pressure systems, more frequent checks are recommended.

What personal protective equipment (PPE) should I use when handling hydraulic hoses?

Wear gloves, goggles, and protective clothing to safeguard against high-pressure fluid leaks, hot surfaces, and potential hydraulic injection injuries.

What are the main risks of improperly aligned hoses?

Misaligned hoses can twist or kink, leading to leaks, reduced flow, or even hose bursts during operation.

What should I do if a hydraulic hose suddenly bursts?

Shut down the system immediately, contain the leak with absorbent materials, and evacuate the area to prevent injuries.

Can I use any connector type for hydraulic hoses?

No, connectors must match the hose’s size, thread type, and pressure rating to ensure a secure, leak-proof seal.

Contact Topa

Save 30% on maintenance costs with our easy-install hydraulic fittings. Contact Now!