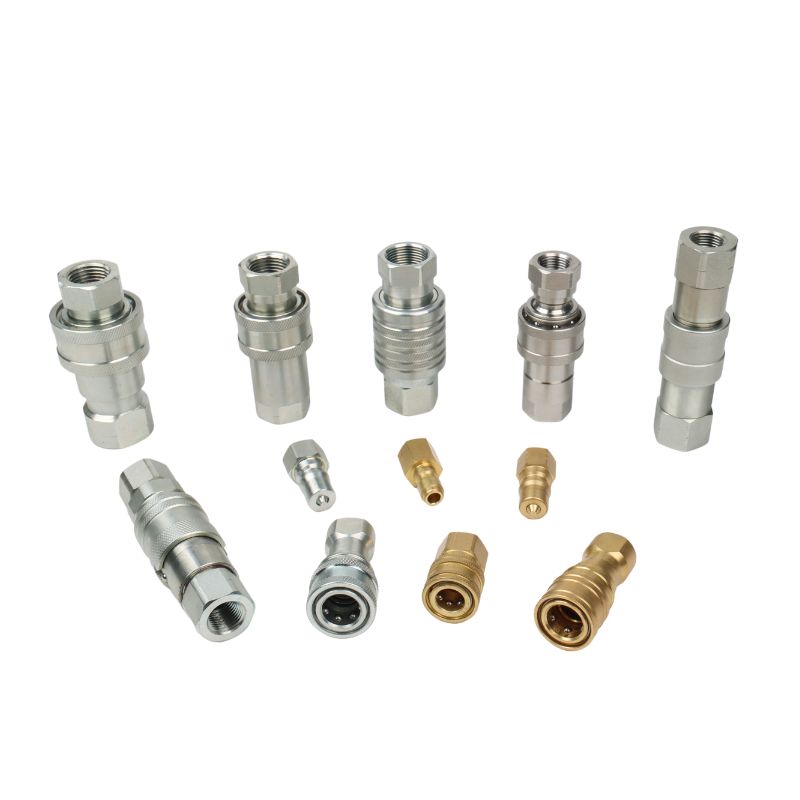
Are you experiencing frustrating leaks or unexpected rust on your “stainless steel” hydraulic fittings, despite believing they received proper surface treatment? This common confusion between “passivation” and “pickling and passivation” can lead to significant quality issues and costly failures.
Many in the metal treatment field use “passivation” and “pickling and passivation” interchangeably. However, these are fundamentally different processes. A clear understanding of each method’s purpose and application, especially for critical components like stainless steel hydraulic fittings, is essential to prevent premature corrosion, maintain system integrity, and avoid unexpected leaks.
Why Process Names Matter for Your Stainless Steel Fittings
Have you ever mistakenly assumed two similar-sounding surface treatment processes were the same? This common error with “passivation” can have serious consequences for your stainless steel fittings.
Misusing terms like “passivation” and “pickling and passivation” can lead to critical process deviations, resulting in stainless steel fittings that perform below expectations. This often manifests as compromised quality, direct non-compliance with industry standards, and unpredictable early onset of rust, directly affecting the long-term reliability and leak-free performance of your hydraulic systems.
The Hidden Costs of Process Misidentification
The consequences of misinterpreting or misapplying surface treatment processes for stainless steel fittings can be significant, extending far beyond superficial rust. When the correct process is not deployed due to a naming confusion, the inherent corrosion resistance of the fitting is compromised. This can lead to rapid material degradation, unexpected fluid leaks through weakened areas, and ultimately, premature failure of critical hydraulic connections. Such failures not only necessitate expensive component replacement but also cause significant operational downtime and potential safety hazards. The promise of “stainless” steel is broken, undermining trust in even robust industrial systems, and necessitating costly rework or recalls.
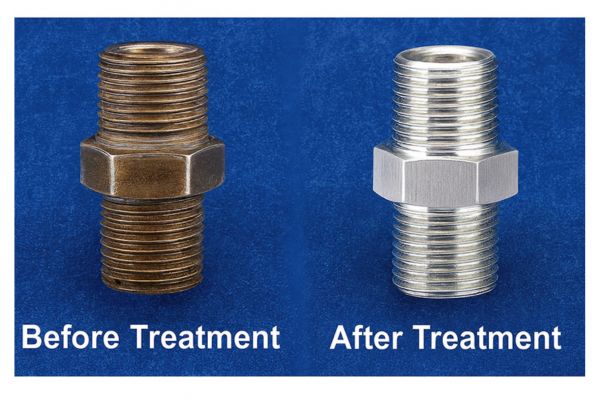
The Fundamental Rule: Assess Surface Condition Before Treatment
Before applying any surface treatment to a stainless steel hydraulic fitting, a crucial step must be taken: accurately determine its initial surface condition. This fundamental assessment dictates which specific process, either passivation or pickling and passivation, is appropriate. Implementing the wrong treatment without considering the existing surface contaminants or defects will invariably fail to achieve the desired corrosion resistance, making the entire effort counterproductive for your fittings’ longevity.
Passivation vs. Pickling & Passivation for Fittings
Do you know the precise difference between passivation and pickling & passivation? One is a single step for protection, while the other is a two-step process that includes essential surface preparation.
For stainless steel hydraulic fittings, “passivation” creates a protective film on an already clean surface. In contrast, “pickling and passivation” is a combined process that first cleans contaminated surfaces by removing oxides and residues, and then forms the protective film. This distinction is critical for choosing the right treatment.
Passivation: The Single-Step Protective Shield
Passivation is a surface treatment process that chemically or electrochemically enhances the passive film on stainless steel hydraulic fittings. Its primary objective is to form or thicken a dense, stable chromium oxide (Cr₂O₃) layer, typically just 2-10 nanometers thick. This protective layer acts as a barrier, preventing corrosive agents from reacting with the underlying metal. This process is inherently a single, targeted step aimed at film formation and stabilization on surfaces that are already clean and free from contaminants.
Pickling & Passivation: The Two-Step Cleaning and Protecting Process
Pickling and passivation, as the name suggests, is a two-phase surface treatment. The first phase, pickling, involves using strong acid solutions to remove surface contaminants such as weld slag, scale (oxides formed during welding or high-temperature processes), rust, and embedded iron. This crucial cleaning step prepares the surface. The second phase is then passivation, where the now-cleaned and reactive stainless steel surface forms the protective chromium oxide film. This combined approach, effectively “cleaning + protection,” is designed for stainless steel hydraulic fittings that have undergone welding, fabrication processes, or prolonged exposure that has led to surface contamination or oxidation.
| Process Name | Number of Steps | Primary Goal | Ideal Surface State Before Process |
| Passivation | Single | Form/Stabilize Protective Film | Clean, Free from Contaminants/Oxides |
| Pickling & Passivation | Two | Clean & Protect Simultaneously | Welded, Contaminated, Rusted, Scaled |
How Each Process Forms a Leak-Resistant Surface on Your Fittings
How do passivation and pickling & passivation actually prevent corrosion and safeguard your hydraulic fittings? It’s all about how they interact with the metal’s surface chemistry.
Passivation mechanism builds a robust chromium oxide film that physically isolates the fitting’s surface. Conversely, pickling & passivation first purifies the surface by removing harmful contaminants, then creates that same stable and protective film, ensuring maximum corrosion resistance and minimizing potential leak paths.

The Mechanism of Passivation: Building the Film
The fundamental mechanism of passivation for stainless steel fittings involves the active formation or enhancement of the chromium oxide layer. This can occur through two primary routes:
- Chemical Oxidation: When a clean stainless steel surface is exposed to an oxidizing chemical solution (such as nitric acid or citric acid, often with an oxidizing agent), the chromium within the steel selectively reacts with oxygen. This reaction forms a very thin (typically 5 to 10 nm) but highly stable and dense chromium oxide (Cr₂O₃) film. This film is rich in chromium, which is more corrosion-resistant than iron.
- Electrochemical Oxidation: In this method, an external electrical current is applied to the stainless steel fitting while it is immersed in an appropriate electrolyte. This anodic polarization forces the chromium on the surface to oxidize. This process can produce a thicker, more robust, and highly uniform passive film, potentially reaching up to 50 nm in thickness, offering enhanced corrosion resistance.
The Mechanism of Pickling & Passivation: Purifying and Protecting
The mechanism of pickling and passivation for stainless steel fittings is a two-stage process specifically designed to address surface contamination before forming the protective film.
Pickling Stage: This initial stage employs acidic solutions (often mixtures of nitric acid and hydrofluoric acid) to chemically dissolve and remove various contaminants from the fitting’s surface. These contaminants include:
- Scale and Oxides: Formed during welding or hot forming, these are complex iron oxides (e.g., FeO, Fe₂O₃) that are less protective than the passive film and can trap corrosive elements.
- Weld Slag: Residues from welding processes, often containing manganese oxides (MnO) and silicon oxides (SiO₂).
- Embedded Iron Particles: Minute iron particles that can be transferred to the stainless steel surface from cutting tools or wire brushes not specifically designed for stainless steel. These “free iron” particles are a major cause of rust staining and localized corrosion.
- The acid reacts with these contaminants, converting them into soluble salts that can be rinsed away. This leaves a clean, chemically active stainless steel surface.
Neutralization Stage: After pickling, it is critical to neutralize any residual acid on the fitting’s surface. This involves thorough rinsing, often followed by a mild alkaline wash. Incomplete neutralization can leave acid residues that will hinder proper passivation and lead to flash rusting or localized corrosion, directly compromising the fitting’s long-term integrity and potentially causing leaks.
Passivation Stage: Once the surface is thoroughly cleaned and free of pickling residues, the fitting proceeds to the passivation bath. In this stage, the newly exposed, chemically active chromium on the stainless steel surface reacts with the oxidizing solution to regenerate a uniform and stable chromium oxide (Cr₂O₃) passive film. This film, typically 5-10 nm thick, is similar to the one formed during stand-alone passivation, but it is now built upon a truly purified surface, ensuring its effectiveness. A crucial point is to initiate passivation immediately after pickling and neutralization to minimize the risk of re-contamination or flash rusting on the highly reactive clean surface.
Application Scenarios for Your Stainless Steel Fittings
Not every stainless steel fitting needs the same surface treatment. Knowing your fitting’s history and its intended environment helps you pick the right process.
Selecting between “passivation” and “pickling and passivation” for stainless steel fittings depends on the surface condition and operational environment. Passivation is ideal for pristine, clean surfaces needing enhanced corrosion resistance, while pickling and passivation is essential for fittings with weld discoloration, scale, or other contaminants, ensuring both cleanliness and protection.

Suitable for “Passivation” Only
This process is ideal for stainless steel hydraulic fittings that already possess a clean, uniform, and oxide-free metallic surface. It’s essentially about enhancing and stabilizing the pre-existing passive film or forming one on freshly machined surfaces.
- Polished or Machined Fittings: New fittings that have undergone precision machining, polishing, or grinding, and are free from heat tint, weld discoloration, or fabrication-induced contamination. Examples include highly aesthetic components or precision parts like medical instruments that are pre-polished to a clean finish.
- General Industrial Fittings (Internal Use): Fittings designed for use in relatively mild, indoor environments where they will not be subjected to welding or other processes that cause surface scale or contamination. These fittings benefit from enhanced corrosion resistance without the need for aggressive cleaning.
- Post-Cleaning Enhancement: After thorough mechanical cleaning (e.g., abrasive blasting with non-contaminating media like glass beads, followed by meticulous degreasing) that removes surface impurities without causing embedded iron, a passivation step can finalize the surface for optimal corrosion resistance.
Suitable for “Pickling & Passivation”
This combined process is a necessity when the stainless steel surface has been compromised or contaminated during manufacturing or prior service. The goal is to restore the surface integrity before establishing the protective film.
- Welded Fittings and Fabrications: Any stainless steel hydraulic fitting or assembly that has undergone welding. Welding introduces heat tint (discoloration), weld scale, and can embed iron particles or slag from welding electrodes. These contaminants are severe threats to corrosion resistance. A pickling step is absolutely essential to remove these before passivation is effective.
- Fittings with Heat Tint or Scale: Components that have been exposed to high temperatures, causing a non-protective oxide layer to form on the surface. This happens commonly during bending, forming, or localized heat applications in fabrication.
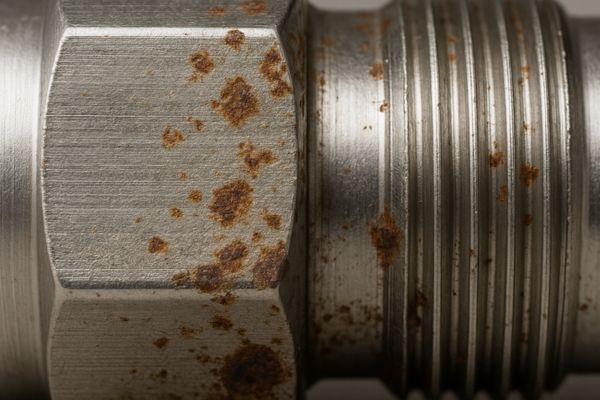
- Rusted or Heavily Contaminated Fittings: Stainless steel fittings that have already developed rust (e.g., from exposure to free iron particles and moisture) or severe surface contamination (such as grease, oils, and other fabrication residues that simple degreasing cannot remove).
- Outdoor or Harsh Environment Exposure: Fittings designed for long-term outdoor exposure or particularly aggressive environments (like marine, chemical processing, or constant moisture) where even minor surface defects could rapidly escalate into corrosion. Ensuring a perfectly clean and highly passivated surface through pickling and passivation provides maximum long-term resilience against corrosion and leaks.
| Process | Suitable For |
| Passivation Only | – Polished/machined fittings (clean, oxide-free )- Indoor/general industrial use – Post-cleaning enhancement after blasting & degreasing |
| Pickling & Passivation | – Welded fittings with heat tint/scale – Fittings exposed to high temperatures – Rusted or heavily contaminated fittings – Outdoor/marine/chemical environments |
Conclusion
The “non-rusting” reputation of stainless steel hydraulic fittings hinges entirely on the integrity of their passive film. My experience demonstrates that misunderstanding the nuanced difference between “passivation” and “pickling and passivation” can lead to critical failures and costly leaks. The key lies in assessing the initial surface condition: choose passivation for pristine surfaces and pickling and passivation for any fitting that has undergone welding or suffered contamination.
At Topa, we understand the critical role and integrity of hydraulic fittings. Our commitment to supplying high-quality, corrosion-resistant components means guiding you to select the correct surface treatment. We offer a comprehensive range of stainless steel hydraulic fittings and services, ensuring your components are prepared to withstand the most demanding environments.
FAQ
What is the difference between passivation and pickling & passivation?
Passivation forms a protective chromium oxide film on a clean surface, while pickling & passivation first removes oxides, scale, and contaminants before forming the film.
When should I use passivation only?
Use passivation for clean, polished, or machined stainless steel fittings with no weld scale, heat tint, or rust.
When is pickling & passivation necessary?
It is required for welded, heat-tinted, rusted, or contaminated fittings, as well as those exposed to harsh environments.
Why does using the wrong process cause rust?
If contaminants like weld scale or embedded iron are not removed, the passive film will not form properly, leading to rust and leaks.
How many steps are in each process?
Passivation is a single step (film formation), while pickling & passivation is two steps (cleaning + protection).
How do I decide which process to choose?
Always check the surface condition first: clean surfaces → passivation; contaminated or welded surfaces → pickling & passivation.