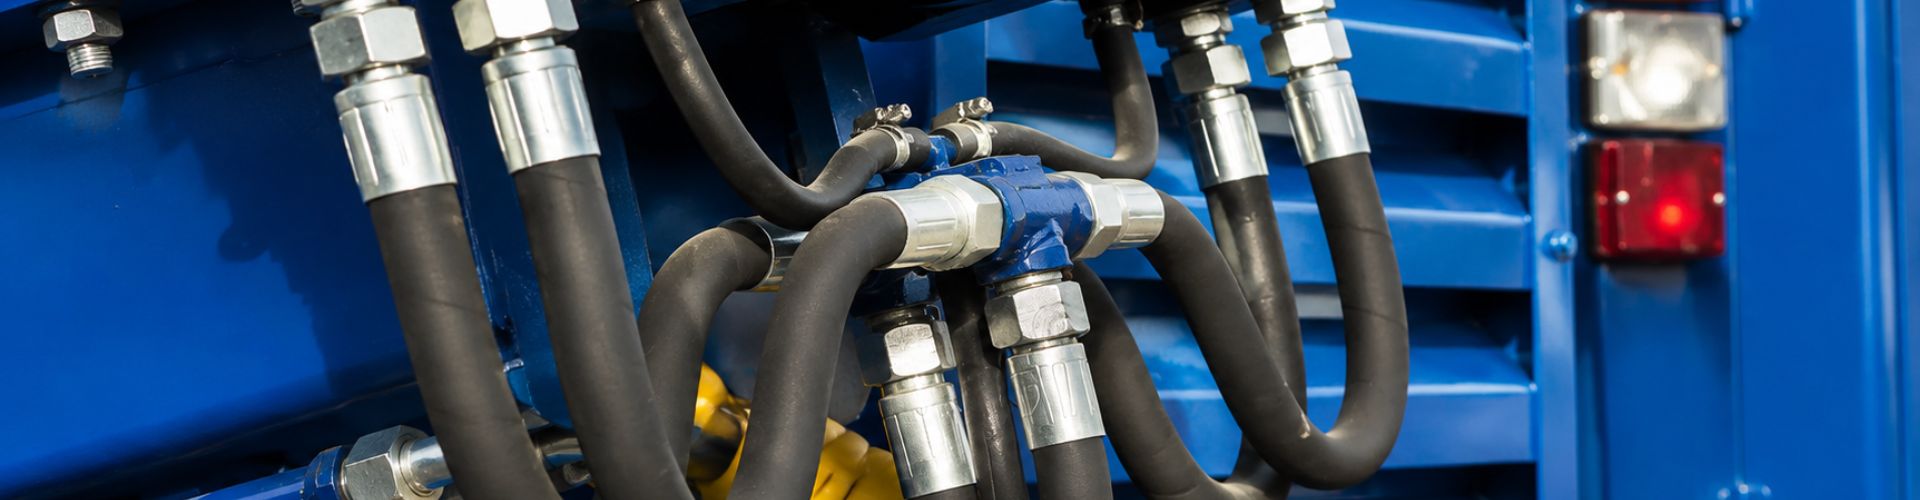
How to Solder Copper Pipe to Brass fitting

How to Solder Copper Pipe to Brass Fitting

How to Solder Copper Pipe to Brass Fitting

Introduction

Soldering copper pipe to brass fittings is a critical skill in the fields of plumbing and HVAC (heating, ventilation, and air conditioning). The goal of this post is to provide a comprehensive, step-by-step guide on how to effectively solder copper pipe to brass fittings.

Understanding the Basics

Before diving into the soldering process, it’s crucial to gather all the necessary materials and tools. Having everything at hand will ensure a smooth and efficient workflow, minimizing interruptions and enhancing safety. Here’s a comprehensive list of what you’ll need:

Materials

Copper Pipe: The primary material for the pipe sections of your project. Choose the correct diameter and length for your specific needs.

Brass Fitting: Used to connect different sections of copper pipe or to join copper pipe to other types of pipe. Brass fittings are available in various configurations such as elbows, tees, and couplings.

Lead-Free Solder: Essential for creating a strong and safe bond. Lead-free solder is particularly important for potable water systems to prevent lead contamination.

Flux: A chemical cleaning agent that helps the solder flow and bond properly by cleaning the metal surfaces and preventing oxidation.

Emery Cloth or Sandpaper: Used to clean and prepare the surfaces of the copper pipe and brass fitting, ensuring a good bond.

Pipe Cleaning Brush: A cylindrical brush designed to clean the inside of copper pipes and fittings.

Tools

flux

Pipe Cutter: A specialized tool for cutting copper pipes cleanly and accurately. Ensure it’s sharp and in good condition for the best results.

Torch: A propane or MAPP gas torch is used to heat the joint to the correct temperature for soldering. The torch should have a precise flame control feature.

Safety Gear: Includes heat-resistant gloves, safety goggles, and a long-sleeve shirt to protect against burns and splashes.

Heat Shield: A protective barrier to shield surrounding areas from the torch’s flame, preventing accidental fire hazards.

Adjustable Wrenches: For holding and adjusting the fittings securely during the soldering process.

Tape Measure: To measure the length of the copper pipe accurately before cutting.

Marker or Pencil: For marking cutting lines on the copper pipe.

Deburring Tool: Used to remove burrs from the cut end of the pipe, ensuring a smooth, clean edge.

Why Solder Copper to Brass?

Copper and brass are highly valued in plumbing and HVAC systems due to their distinct and complementary properties.

Corrosion Resistance

Copper and brass are both highly resistant to corrosion, which is essential for long-lasting plumbing and HVAC systems. This resistance ensures that the pipes and fittings maintain their integrity and functionality over time, reducing the likelihood of leaks and system failures.

Thermal Conductivity

Copper has excellent thermal conductivity, making it an ideal material for heating and cooling applications. This property allows for efficient heat transfer.

Strength and Durability

Brass fittings offer superior strength and durability, capable of withstanding high pressure and temperature variations. This makes brass an excellent choice for connections that require a robust and reliable seal.

Step-by-Step Guide to Soldering Copper Pipe to Brass Fitting

Preparation

Safety First

Safety is paramount when working with tools and materials that involve high heat and potentially hazardous substances. Here are essential safety tips to follow:

  • Wear Safety Gear: Always wear heat-resistant gloves to protect your hands from burns. Safety goggles are crucial to shield your eyes from sparks, debris, and harmful fumes. Long-sleeved shirts and long pants made of non-flammable materials will protect your skin.
  • Work in a Well-Ventilated Area: Ensure that your workspace is well-ventilated to avoid inhaling harmful fumes produced during the soldering process. If working indoors, use a fan or an exhaust hood to improve ventilation.
  • Fire Safety: Keep a fire extinguisher nearby and be aware of its location and how to use it. Clear the area of any flammable materials and use a heat shield to protect walls and other surfaces from the torch’s flame.
  • Proper Lighting: Make sure your work area is well-lit so you can clearly see the joint and ensure precise application of heat and solder.

Cutting the Copper Pipe

Accurate measurement and clean cuts are essential for a successful soldering job. Follow these steps to measure and cut the copper pipe:

  • Measure the Pipe: Use a tape measure to determine the required length of the copper pipe. Mark the measurement with a pencil or marker.
  • Cut the Pipe: Use a pipe cutter for a clean, straight cut. Position the cutter on the mark, tighten the blade, and rotate the cutter around the pipe. Gradually tighten the blade after each full rotation until the pipe is cut through.
  • Deburr the Pipe: After cutting, use a deburring tool to remove any burrs from the cut end of the pipe. Burrs can impede the fitting process and affect the integrity of the joint.

Cleaning the Pipe and Fitting

Proper cleaning ensures that the solder bonds effectively to the copper pipe and brass fitting:

  • Clean the Pipe: Use an emery cloth or sandpaper to clean the outside of the copper pipe’s end. Rub the cloth or sandpaper around the pipe until it is shiny and free of oxidation and debris.
  • Clean the Fitting: Similarly, clean the inside of the brass fitting using an emery cloth or a pipe cleaning brush. Make sure all surfaces to be joined are clean and shiny.

Applying Flux

  • Choosing the Right Flux
  • Flux is essential in the soldering process as it helps the solder flow and bond by cleaning the metal surfaces and preventing oxidation:
  • Types of Flux: There are several types of flux available, including water-soluble, petroleum-based, and rosin-based flux. For plumbing applications, a water-soluble flux is often recommended as it is easy to clean after soldering.
  • Best Flux for the Job: Choose a flux specifically designed for plumbing or HVAC work, which is typically safe for potable water systems and compatible with both copper and brass.

Applying the Flux

Proper application of flux is critical to ensure a strong bond:

  • Apply Flux to the Pipe: Use a small brush to apply a thin, even layer of flux to the cleaned end of the copper pipe. Ensure the entire surface that will be inserted into the fitting is covered.
  • Apply Flux to the Fitting: Similarly, apply a thin layer of flux to the inside of the brass fitting where it will contact the pipe. This will ensure both surfaces are properly prepared for soldering.

Fitting the Pieces Together

Inserting the Copper Pipe into the Brass Fitting

Ensuring a snug fit without forcing the pieces is key to a successful joint:

  • Align the Pipe and Fitting: Carefully insert the flux-coated end of the copper pipe into the brass fitting. Rotate the pipe slightly as you push it in to ensure the flux is evenly distributed and the fit is secure.
  • Check the Fit: Make sure the pipe and fitting are aligned correctly and that the pipe is fully seated in the fitting. There should be no gaps between the surfaces to be soldered.
welding brass to copper

Soldering the Joint

Heating the Joint

Proper heating is crucial for a strong, leak-free joint:

  • Prepare the Torch: Light your propane or MAPP gas torch and adjust it to a medium flame with a sharp, blue cone for precise heating.
  • Heat the Joint Evenly: Begin heating the joint by moving the torch flame around the pipe and fitting it to distribute heat evenly. Avoid overheating any one spot to prevent burning the flux.
  • Heat Until Flux Sizzles: Heat the joint until the flux begins to sizzle and bubble, indicating that the metal is hot enough for soldering.

Applying the Solder

Applying solder at the right moment ensures a secure bond:

  • Apply the Solder: Once the joint is sufficiently heated, touch the tip of the solder wire to the joint. The heat will draw the solder into the gap between the pipe and the fitting through capillary action.
  • Continue Heating: Move the torch as needed to keep the joint hot enough for the solder to flow smoothly and evenly around the joint. Ensure the entire circumference of the joint is covered with solder.
  • Remove Excess Solder: Once the joint is filled, remove the solder and the torch. Allow any excess solder to drip off or wipe it away carefully with a rag.

Allowing the Joint to Cool

Letting the joint cool properly ensures the solder solidifies correctly:

  • Natural Cooling: Allow the joint to cool naturally without disturbing it. Do not touch or move the pipe and fitting until the solder has fully solidified.
  • Inspect the Joint: Once cool, inspect the joint for any gaps or inconsistencies in the solder. A smooth, shiny appearance indicates a good bond.

Troubleshooting Common Issues

Cold Joints

Identifying Cold Joints:

Cold joints occur when the solder does not melt properly or does not adhere correctly to the pipe and fitting, resulting in a weak, unreliable connection. Identifying cold joints is crucial to ensure the integrity of your plumbing or HVAC system.

  • Visual Inspection: A cold joint often appears dull, rough, and uneven compared to a properly soldered joint, which should be smooth and shiny.
  • Physical Test: Cold joints may feel loose or show signs of movement when slight pressure is applied. A properly soldered joint should be solid and immovable.
  • Performance Issues: Cold joints can lead to leaks or reduced system efficiency due to the incomplete bonding of the materials.

Fixing Cold Joints:

  • Reheat the Joint: Carefully reheat the joint with your torch, ensuring that the entire area reaches the appropriate temperature for the solder to melt and flow properly.
  • Apply More Flux: If necessary, add a small amount of flux to the joint to improve the flow of the solder and ensure proper bonding.
  • Add Solder: Apply additional solder to fill any gaps and create a smooth, even joint. Ensure the solder is drawn into the joint by capillary action.
  • Allow to Cool: Let the joint cool naturally without disturbing it. Inspect the joint again to ensure it has a shiny, smooth appearance and is securely bonded.
hot welding

Improper Thread Sealant Application

Too Much Thread Sealant

Applying too much thread sealant, whether Teflon tape or pipe dope, can interfere with the threading process. Excessive sealant can prevent the threads from fully engaging, leading to leaks or weakened connections.

  • Solution: Apply Teflon tape by wrapping it around the male threads two to three times, ensuring even coverage without overwrapping. For pipe dope, use a small brush or applicator to spread an even layer on the threads, avoiding clumps or excess.

Too Little Thread Sealant

Applying too little thread sealant can leave gaps in the threads, allowing fluids or gases to escape. Inadequate coverage fails to create a proper seal, making leaks more likely.

  • Solution: Ensure that the sealant covers all the threads evenly. For Teflon tape, wrap it tightly and ensure it adheres smoothly to the threads. For pipe dope, spread it uniformly with no gaps or missed spots.

Incorrect Pipe Alignment

Misaligned pipes can place undue stress on the fittings, leading to leaks and potential damage. Pipes that are not properly aligned can cause fittings to warp or fail, compromising the entire system.

  • Solution: Before tightening, ensure the pipes are correctly aligned. Hand-tighten the fittings to check for alignment, making any necessary adjustments before using a wrench. Proper alignment reduces stress on the fittings and ensures a secure connection.

Excessive Solder

Excessive solder can create problems such as blockages inside pipes, unsightly joints, and potential weak points. Here’s how to manage and prevent it:

  • Apply Solder Sparingly: When soldering, use just enough solder to fill the joint. Too much solder can lead to drips and uneven distribution.
  • Control the Heat: Overheating can cause the solder to flow excessively. Ensure the torch is set to the appropriate temperature and move it evenly around the joint.
  • Positioning: Position the pipe and fitting horizontally or at a slight angle to control the flow of the solder and prevent it from pooling in one area.

Fixing Excessive Solder:

  • Reheat the Joint: Gently reheat the joint with your torch to soften the excess solder.
  • Remove Excess Solder: Use a clean, heat-resistant cloth to wipe away the softened excess solder. Be careful to avoid disturbing the joint itself.
  • Inspect the Joint: Ensure the joint is smooth and free of excessive solder. If necessary, reapply a small amount of solder to fill any gaps created during the removal process.

Leaky Joints

Diagnosing Leaky Joints:

Leaky joints can compromise the efficiency and safety of your plumbing or HVAC system. Identifying and diagnosing the cause of leaks is essential:

  • Visual Inspection: Look for signs of moisture or water droplets around the joint. Leaky joints may show visible signs of water seepage.
  • Pressure Test: Perform a pressure test by running water or the appropriate fluid through the system and checking for leaks at the joints.
  • Check for Cracks or Gaps: Inspect the joint for any visible cracks, gaps, or areas where the solder did not flow properly.

Repairing Leaky Joints:

  • Drain the System: Ensure the system is drained and dry before attempting repairs.
  • Reheat the Joint: Use your torch to reheat the joint, ensuring the entire area reaches the appropriate temperature for soldering.
  • Apply Flux and Solder: Add a small amount of flux to the joint to improve the flow of the solder. Apply additional solder to fill any gaps or cracks, ensuring a smooth, even joint.
  • Allow to Cool and Test: Let the joint cool naturally without disturbing it. Once cool, perform another pressure test to ensure the leak has been fixed.

Conclusion

In conclusion, soldering copper pipe to brass fittings involves several critical steps: ensuring safety, cutting and cleaning the copper pipe and fittings, using the correct flux, assembling the copper pipe and fittings together, properly heating the joints, and applying the solder correctly. Remember to troubleshoot common faults such as joints that are too cold, too much solder, and leaky joints to ensure a long-lasting, leak-free connection. Practice your soldering skills on scrap to gain confidence before making actual repairs. We invite you to share your experiences, ask questions and provide feedback. Your insights and questions are invaluable and help us improve our work.

FAQ

Use a water-soluble flux specifically designed for plumbing applications. This type of flux is safe for potable water systems and helps ensure a strong, clean bond.

The joint is ready for soldering when the flux begins to sizzle and bubble. This indicates that the metal surfaces are hot enough for the solder to flow and bond properly.

Ensure the joint is evenly heated. If the solder still doesn’t flow, reapply a small amount of flux and heat the joint again to ensure proper adhesion.

Yes, lead-free solder designed for plumbing applications is suitable for both copper and brass. It ensures a safe, durable connection, especially in potable water systems.

Use an emery cloth or sandpaper to clean the surfaces until they are shiny and free of oxidation. This ensures a strong bond between the solder and the metal surfaces.

Ensure that the joint is properly cleaned, fluxed, and heated. Apply the solder evenly around the joint and allow it to cool naturally without disturbance. Performing a pressure test after cooling can help verify that the joint is leak-free.

Do You Need Pipe Dope on Brass Fittings

Do You Need Pipe Dope on Brass Fittings

Do You Need Pipe Dope on Brass Fittings?

Introduction

Imagine you’re working on a plumbing project, and you come across brass fittings. A common question arises: do you need to use pipe dope on these fittings? This post will explore whether pipe dope is necessary for brass fittings, providing detailed insights and practical advice.

What is Pipe Dope?

Types of Brass Pipe Fittings

Pipe dope, also known as pipe joint compound, is a type of sealant used to ensure a leak-free connection between threaded pipes and fittings. It is typically applied to the threads of pipes and fittings before assembly to create a durable, watertight, or airtight seal.

Types of Pipe Dope

pipe dope on brass fitting

Pipe dope comes in various formulations to suit different applications and materials. The most common types include:

Oil-based Pipe Dope:

  • Traditional Type: This is one of the most common types of pipe dope, suitable for use with metal pipes. It is composed of an oil base, which helps it adhere to the threads and provide a reliable seal.
  • Advantages: Durable and effective in sealing metal pipes in high-pressure and high-temperature environments.
  • Disadvantages: It can be messy and difficult to clean up.

PTFE-based Pipe Dope:

  • Contains Polytetrafluoroethylene (PTFE): This type of pipe dope includes PTFE, a material known for its excellent sealing properties.
  • Advantages: Provides a highly effective seal, easy to apply, and is suitable for both metal and plastic pipes.
  • Disadvantages: Can be more expensive than other types of pipe dope.

Water-based Pipe Dope:

  • Easy to Clean: This type of pipe dope is water-based, making it easy to clean up after application.
  • Advantages: Environmentally friendly, suitable for a variety of applications, and compatible with both metal and plastic pipes.
  • Disadvantages: May not be as durable as oil-based or PTFE-based pipe dope in high-pressure or high-temperature environments.

Comparison with Other Sealants

When considering pipe dope, it is useful to compare it with other commonly used sealants to understand its unique advantages and limitations:

Thread Seal Tape (Teflon Tape):

  • Description: Teflon tape is a thin, white tape used to lubricate and seal threads. It is typically made from PTFE.
  • Advantages: Easy to apply, and clean, and provide a good seal for low to medium-pressure applications. It is especially useful for small-diameter pipes.
  • Disadvantages: May not be as durable as pipe dope in high-pressure applications and can be prone to tearing during application.

Anaerobic Sealants:

  • Description: Anaerobic sealants are liquid or gel compounds that cure in the absence of air, forming a strong bond between threaded parts.
  • Advantages: Provide a very strong and durable seal, suitable for high-pressure and high-temperature applications. They are also resistant to vibration and shock.
  • Disadvantages: Can be difficult to disassemble once cured, and may require special handling and storage conditions.

The Science Behind Sealing Threads

How Threads Seal

Threaded connections work by joining the male and female threads of two fittings. When properly tightened, these threads interlock, creating a seal that prevents the escape of fluids or gases. The sealing mechanism relies on several factors:

Mating Surfaces: The surfaces of the threads come into close contact, creating friction and forming a seal.

Thread Design: The angle and depth of the threads are designed to create a tight fit. Common thread designs include tapered and straight threads. Tapered threads, often used in plumbing, create a wedging action that enhances the seal as the fittings are tightened.

However, even precisely manufactured threads have microscopic imperfections. These small gaps and irregularities can compromise the seal, allowing leaks to occur.

Role of Sealants

Sealants such as pipe dope play a critical role in addressing these imperfections. Here’s how they work:

Filling Imperfections: Sealants fill in the tiny gaps and irregularities between the threads, creating a continuous barrier that prevents leaks.

Lubrication: Many sealants also act as lubricants, making it easier to tighten the fittings and ensuring a snug fit without damaging the threads.

Chemical Bonding: Some sealants chemically bond to the thread surfaces, enhancing the strength and durability of the seal.

By filling in the gaps and providing a more uniform surface, sealants like pipe dope improve the reliability of threaded connections, ensuring they remain leak-proof over time.

Leak Prevention

Proper sealing is essential for several reasons:

Preventing Water Damage: In plumbing systems, leaks can lead to significant water damage, affecting building structures and personal property.

Avoiding Gas Leaks: In gas lines, leaks pose serious safety hazards, including the risk of explosions and health risks from inhalation.

System Integrity: In hydraulic and HVAC systems, leaks can reduce efficiency, increase maintenance costs, and lead to system failures.

To ensure proper sealing and leak prevention, it is crucial to:

Choose the Right Sealant: Select a sealant suitable for the material and application, whether it’s pipe dope, Teflon tape, or anaerobic sealant.

Follow Best Practices: Clean the threads thoroughly, apply the sealant evenly, and tighten the fittings appropriately.

Inspect and Test: After assembly, inspect the connections for leaks and test the system under operating conditions to confirm the integrity of the seal.

By understanding the science behind threaded connections and the role of sealants, you can make informed decisions to ensure reliable, leak-proof joints in your plumbing, gas, and other systems.

When to Use Pipe Dope on Brass Fittings

Factors to Consider

When deciding whether to use pipe dope on brass fittings, several factors need to be considered to ensure optimal performance and reliability:

Type of Application:

  • Plumbing: For water supply lines and drainage systems, pipe dope can provide an additional layer of security against leaks. It’s particularly useful in high-pressure water systems.
  • Gas Lines: In gas installations, a reliable seal is critical to prevent hazardous leaks. Pipe dope, especially one rated for gas applications, can enhance the integrity of the connection.
  • Hydraulic Systems: These systems operate under high pressure and require robust sealing solutions. Pipe dope can help ensure leak-proof joints in hydraulic applications.

Pressure Levels:

High-Pressure Systems: Systems operating at high-pressure benefit significantly from the use of pipe dope, as it fills in imperfections and ensures a tight seal.

  • Low-Pressure Systems: While not always necessary, pipe dope can still be used to provide additional assurance against leaks.
  • Type of Fluid/Gas:
  • Water: Standard pipe dope formulations are generally suitable for water applications, ensuring a reliable seal.
  • Gas: Specialized pipe dopes are available for gas lines, designed to withstand the specific conditions and pressures involved.
  • Chemicals: When dealing with aggressive chemicals, it’s important to choose a pipe dope compatible with the specific chemical to avoid degradation of the sealant.

Pros:

  • Enhanced Sealing: Pipe dope fills in thread imperfections, providing a more complete and reliable seal than threads alone.
  • Reduced Risk of Leaks: By ensuring a tight seal, pipe dope minimizes the chances of leaks, which is crucial in applications where leaks can cause significant damage or pose safety risks.
  • Improved Reliability: Connections sealed with pipe dope are less likely to loosen over time, contributing to the long-term reliability of the system.

Cons:

  • Messiness: Pipe dope can be messy to apply and clean up, especially if too much is used.
  • Compatibility Issues: Some pipe dopes may not be suitable for certain materials or applications. It’s important to choose the right type of pipe dope for the specific use case.
seal on Brass Fittings

Step-by-Step Guide to Applying Pipe Dope on Brass Fittings

Preparation

Clean the Threads:

Ensure the threads on both the male and female fittings are clean and free of any debris, dirt, or old sealant. Use a wire brush or a clean cloth to wipe away any contaminants.

Choose the Right Pipe Dope:

Select a pipe dope that is appropriate for your specific application. Consider factors such as the type of fluid or gas being transported, the operating pressure, and the material of the pipes and fittings.

Application Process

Apply Evenly:

Spread the pipe dope evenly onto the male threads of the fitting. Be careful to avoid applying it on the first two threads, as this can prevent contamination inside the pipe and ensure that the dope does not get into the system.

Assemble the Fitting:

Thread the male fitting into the female fitting by hand. Once it is hand-tight, use a wrench to further tighten the connection if necessary. Be careful not to over-tighten, as this can damage the threads or the fitting itself.

Best Practices

Moderation:

Use the right amount of pipe dope. Applying too much can be as problematic as applying too little. The goal is to fill the gaps and imperfections in the threads without creating excess mess or hindering the assembly.

Follow Instructions:

Always adhere to the manufacturer’s instructions for the best results. Each type of pipe dope may have specific guidelines regarding its application and curing time.

Alternatives to Pipe Dope

Brass Compression Fittings wrap

Teflon Tape

When to Use:

Teflon tape is ideal for small-diameter pipes and low-pressure systems. It is especially useful in plumbing applications involving water lines.

How to Use:

Wrap the tape clockwise around the male threads. Ensure that the tape overlaps slightly with each turn, covering the threads completely but not excessively. Typically, 3-to 4 wraps are sufficient.

Other Sealants

Anaerobic Sealants:

  • Description: These sealants cure in the absence of air, forming a strong, permanent bond.
  • Application: Apply a small amount to the male threads and assemble the fitting. Anaerobic sealants are especially useful in high-pressure applications and for creating a secure, long-lasting seal.

Silicone-based Sealants:

  • Description: These sealants are flexible and suitable for various materials, including both metal and plastic.
  • Application: Apply a bead of silicone-based sealant to the male threads and assemble the fitting. Silicone-based sealants are versatile and provide a reliable seal in many different applications.

Comparison Chart

Sealant Type

Application

Pros

Cons

Pipe Dope

Metal fittings

Strong seal,versatile

Can be messy

Teflon Tape

Small pipes

Easy to use,clean

Less durable for high-pressure

Anaerobic Sealants

Permanent joints

Strong bond,reliable

Difficult to disassemble

Silicone-based

Flexible materials

Versatile,flexible

May require longer curing time

Common Mistakes and Troubleshooting

When using pipe dope on brass fittings, there are a few common mistakes to avoid to ensure a secure and leak-free connection:

Over-application

Issue: Using too much pipe dope can lead to clogging within the pipe system. Excess pipe dope can also be forced into the pipe, potentially contaminating the fluid or gas being transported.

Solution: Apply a thin, even layer of pipe dope to the male threads. Avoid coating the first two threads to prevent excess sealant from entering the pipe.

Incorrect Type

Issue: Using the wrong type of pipe dope for the material or application can compromise the seal. For example, some pipe dopes are not suitable for certain chemicals or high-pressure applications.

Solution: Ensure you choose a pipe dope that is compatible with both the material of the fittings and the type of fluid or gas being transported. Always check the manufacturer’s recommendations.

Problem-Solving

If a leak occurs despite following the proper procedures, here are the steps to address the issue:

Disassemble the Fitting:

Carefully remove the fitting from the connection. Use appropriate tools to avoid damaging the threads or the fitting itself.

Clean and Reapply:

  • Clean the Threads: Thoroughly clean the threads on both the male and female fittings to remove any old pipe dope, debris, or contaminants. A wire brush or a clean cloth can be useful for this step.
  • Reapply Pipe Dope: Apply the correct amount of pipe dope to the male threads, following the best practices outlined earlier. Ensure an even application and avoid the first two threads to prevent contamination.
  • Reassemble the Fitting: Thread the fittings together by hand and then tighten with a wrench as needed. Be careful not to over-tighten to avoid damaging the threads.

Conclusion

Using pipe dope on brass fittings can enhance the reliability and leak-proof nature of your connections. While it is not always necessary, it is often recommended, especially for high-pressure or critical applications. Based on the information provided, using pipe dope on brass fittings is generally a good practice to ensure a secure and leak-free connection. Share your experiences with brass fittings and pipe dope in the comments below. Have questions or need further advice? Feel free to ask!

FAQ

While not always necessary, pipe dope is often recommended for brass fittings to ensure a reliable and leak-proof seal, especially in high-pressure or critical applications.

Generally, using one type of sealant is sufficient. However, some professionals use both for added security. If you choose to use both, apply Teflon tape first, then apply a thin layer of pipe dope over it.

Choose a pipe dope based on the application, material of the pipes and fittings, and the type of fluid or gas being transported. Always refer to the manufacturer’s recommendations for guidance.

Some types of pipe dope are compatible with plastic fittings, but it’s important to check the product specifications. PTFE-based or water-based pipe dopes are typically safe for plastic fittings.

Most pipe dopes do not require a curing time and can seal immediately upon application. However, it’s best to refer to the product instructions for specific details, especially if the application involves high pressure or critical systems.

If pipe dope gets inside the pipe, it can potentially clog the system or contaminate the fluid or gas. Disassemble the fitting, clean the threads and the inside of the pipe thoroughly, and reapply the pipe dope more carefully, avoiding the first two threads.

How to Install Brass Compression Fittings

How to Install Brass Compression Fittings

How to Install Brass Compression Fittings

Table of Contents

Introduction

In plumbing and a variety of other applications, brass compression fittings ensure leak-free connections that maintain system integrity and efficiency. In this article, we’ll provide a comprehensive, step-by-step guide on how to install brass compression fittings, ensuring you get a tight, leak-free connection every time.

Understanding Brass Compression Fittings

What Are Brass Compression Fittings?

Brass compression fittings are a type of connector used to join two pipes or a pipe to a fixture. These fittings rely on the compression of a brass ring (or ferrule) around the pipe to create a tight seal, ensuring a secure and leak-proof connection. They are commonly used in situations where soldering or welding is not feasible or practical.

Nut: The nut is a threaded component that screws onto the fitting body. When tightened, it compresses the ring around the pipe, creating the seal.

Ring (Ferrule): The ring, also known as a ferrule, is a small brass ring that fits over the pipe. As the nut is tightened, the ring is compressed, forming a tight seal between the pipe and the fitting body.

Fitting Body: The fitting body is the main part of the compression fitting. It contains the internal threads that the nut screws onto and provides the housing for the pipe connection.

Common Applications

Plumbing: Brass compression fittings are widely used in residential and commercial plumbing systems to connect pipes for water supply and distribution.

Gas Lines: Due to their secure sealing capability, these fittings are often used in gas line installations for both natural gas and propane systems.

HVAC Systems: In heating, ventilation, and air conditioning systems, brass compression fittings are used to connect various components and ensure leak-free operation.

Industrial Uses: These fittings are also prevalent in industrial applications, including hydraulic systems, fuel lines, and chemical processing, where reliable and durable connections are essential.

Advantages of Brass Compression Fittings

Durability: Brass is a strong and long-lasting material, making these fittings reliable for long-term use.

Ease of Installation: Unlike other types of fittings that may require soldering or specialized tools, brass compression fittings can be installed with basic hand tools.

Resistance to Corrosion: Brass is naturally resistant to corrosion, ensuring the fittings maintain their integrity and performance even in harsh environments.

Preparing for Installation

Selecting the Right Fitting

Choosing the correct size and type of brass compression fitting is crucial for ensuring a secure and leak-free connection. Here are some key considerations:

Size Compatibility: Ensure the fitting size matches the outer diameter of the pipe. Brass compression fittings come in various sizes, so measure the pipe accurately before purchasing.

Type of Fitting: Depending on the application, select the appropriate type of fitting, such as straight connectors, elbows, tees, or couplings. Each type serves different connection needs.

Material Compatibility: Verify that the fitting material is suitable for the pipe material. Brass fittings work well with copper, plastic, and other metal pipes, but it’s essential to ensure compatibility to prevent corrosion or damage.

Inspecting Components

Before installation, inspect all components of the brass compression fitting to ensure they are free from defects or damage. This step helps avoid issues during and after installation.

Visual Inspection: Check the nut, ring, and fitting body for any visible cracks, deformities, or manufacturing defects.

Thread Inspection: Ensure the threads on the nut and fitting body are intact and free from debris or damage. Damaged threads can lead to poor sealing and leaks.

Ring (Ferrule) Condition: Inspect the compression ring for any signs of wear or distortion. A damaged ring can compromise the integrity of the seal.

Cutting the Pipe

Properly cutting the pipe to the required length is essential for a successful installation. Follow these steps for a precise cut:

Measure Accurately: Use a measuring tape to mark the desired length of the pipe. Double-check the measurement to ensure accuracy.

Use the Right Tool: Select a pipe cutter appropriate for the pipe material. For metal pipes, a rotary pipe cutter is ideal, while a plastic pipe cutter works well for plastic pipes.

Straight Cut: Ensure the cut is straight and clean. An angled or jagged cut can cause fitting issues and leaks.

Deburring and Cleaning

Deburring and cleaning the pipe ends are crucial steps to ensure a secure and leak-free fit.

Deburring Tool: Use a deburring tool to remove any burrs or sharp edges from the cut end of the pipe. Burrs can damage the compression ring and compromise the seal.

Cleaning: Clean the pipe ends with a clean cloth to remove any dirt, debris, or grease. Contaminants can interfere with the sealing process and cause leaks.

Smooth Surface: Ensure the pipe ends are smooth and free from any irregularities. A smooth surface allows the compression ring to form a tight seal around the pipe.

By meticulously preparing for the installation, you can ensure that the brass compression fittings will provide a secure, durable, and leak-free connection. Proper selection, inspection, cutting, and cleaning are fundamental steps in achieving a successful installation.

Step-by-Step Guide

Properly connecting brass pipe fittings involves several crucial steps to ensure a secure, leak-free joint. This step-by-step guide will help you navigate the process with precision and confidence.

Insert the Pipe

Detailed Instructions:

Prepare the Pipe: Ensure the pipe end is clean, deburred, and cut to the correct length.

Align the Pipe: Hold the pipe in line with the fitting body to ensure a straight and secure connection.

Insert the Pipe: Push the pipe into the fitting body until it reaches the internal stop. Ensure the pipe is fully seated in the fitting to create a proper seal.

Brass Compression Fittings install

Slide the Compression Ring and Nut

Detailed Instructions:

Position the Compression Ring: Slide the compression ring (ferrule) onto the pipe. The ring should be positioned approximately 1/8 inch (3 mm) from the end of the pipe.

Slide the Nut: Place the compression nut over the pipe, ensuring it slides over the compression ring and aligns with the fitting body threads.

Tighten the Nut

Detailed Instructions:

Hand-Tighten First: Begin by hand-tightening the compression nut onto the fitting body. This helps align the components properly and ensures an even compression.

Use Wrenches: Once hand-tightened, use two wrenches to secure the connection. Hold the fitting body with one wrench to prevent it from turning.

Tighten Securely: Use the second wrench to turn the compression nut clockwise. Tighten the nut until you feel resistance, then turn it an additional 1/4 to 1/2 turn to compress the ring and create a seal.

Check for Over-Tightening: Be cautious not to over-tighten, as this can damage the fitting or pipe. The goal is to achieve a snug fit without excessive force.

Common Mistakes:

Over-Tightening: Applying too much force can deform the compression ring and fitting, leading to leaks or damage. Stop tightening as soon as the connection feels snug and secure.

Under-Tightening: Insufficient tightening can result in a weak seal, causing leaks. Ensure the nut is tightened appropriately to compress the ring adequately.

Misalignment: Ensure the pipe, ring, and nut are properly aligned before tightening to avoid uneven compression and potential leaks.

Troubleshooting Leaks

Steps to Take if a Leak is Detected:

Identify the Source: Carefully inspect the area around the fitting to pinpoint the exact location of the leak.

Re-tighten the Nut: Use a wrench to slightly tighten the compression nut further. Be cautious not to over-tighten, as this can damage the fitting or pipe.

Check for Debris: Disassemble the fitting and inspect the components for any debris or dirt that may have caused an improper seal. Clean the components thoroughly before reassembling.

Inspect the Compression Ring: Check the compression ring (ferrule) for any signs of damage or deformation. Replace the ring if necessary.

Replace Components: If the leak persists, consider replacing the compression nut, ring, or fitting body to ensure all parts are in optimal condition.

Brass Compression Fittings wrap

Adjustments

How to Make Necessary Adjustments if the Fitting is Not Sealed Properly:

Disassemble the Fitting: If re-tightening does not resolve the leak, disassemble the fitting completely.

Inspect the Pipe End: Ensure the pipe end is clean, smooth, and free from burrs or damage. Re-cut and deburr the pipe if necessary.

Reposition the Compression Ring: Place the compression ring slightly further back on the pipe before reassembling it to ensure a better seal.

Reassemble and Tighten: Reassemble the fitting, ensuring all components are properly aligned. Hand-tighten the nut initially, then use a wrench to secure it further.

Re-test for Leaks: After making adjustments, conduct another pressure test to verify that the connection is now leak-free.

Maintenance and Tips

Regular Inspections

Importance of Checking Fittings Periodically:

Regular inspections of your brass compression fittings are crucial to ensure their longevity and reliability. Over time, even the best-installed fittings can develop issues due to wear and tear, environmental factors, or system vibrations. Conducting periodic checks helps identify potential problems before they become significant issues, ensuring the system’s overall integrity and preventing costly repairs or downtime.

Inspection Checklist:

Visual Check: Look for any signs of corrosion, discoloration, or physical damage on the fittings and surrounding areas.

Leak Detection: Inspect for any visible leaks or moisture around the fittings, which can indicate a compromised seal.

Pressure Test: Conduct periodic pressure tests to ensure the fittings maintain their integrity under operational conditions.

System Performance: Monitor the system’s performance for any unusual changes, such as drops in pressure or flow rates, which could indicate fitting issues.

Re-tightening

When and How to Re-tighten Fittings if Necessary:

Re-tightening brass compression fittings can be necessary if you notice signs of minor leaks or if fittings have loosened over time due to system vibrations or thermal expansion and contraction.

Steps to Re-tighten:

Preparation: Turn off the system and relieve any pressure before attempting to re-tighten the fittings.

Check Alignment: Ensure the pipe and fitting are still properly aligned. Misalignment can cause leaks and improper sealing.

Hand-Tighten: Start by hand-tightening the compression nut to ensure it’s snug.

Use Wrenches: Use two wrenches – one to hold the fitting body steady and the other to tighten the compression nut. Turn the nut clockwise, tightening it an additional 1/8 to 1/4 turn.

Test for Leaks: After re-tightening, turn the system back on and conduct a leak test to ensure the fitting is now secure.

Replacement

Signs That a Fitting Needs to Be Replaced and How to Do It:

While re-tightening can often resolve minor issues, there are times when a fitting must be replaced to maintain the system’s integrity.

Signs a Fitting Needs Replacement:

Persistent Leaks: If a fitting continues to leak despite re-tightening, it may be damaged or worn out.

Corrosion: Significant corrosion or rust on the fitting can weaken its structure and lead to failures.

Cracks or Damage: Visible cracks or physical damage to the fitting indicate that it can no longer provide a secure seal.

Worn Compression Ring: If the compression ring is deformed or excessively worn, it won’t create a proper seal.

Conclusion

We hope this guide has provided you with the knowledge and confidence to successfully install brass compression fittings. If you have any questions or would like to share your installation experience, please contact us. Your insights and feedback are valuable to us and other customers. Let’s work together for leak-free connections and reliable installations!

FAQ

Brass compression fittings are commonly used to join two pipes or a pipe to a fixture in plumbing, gas lines, HVAC systems, and various industrial applications. They provide a secure and leak-free connection without the need for soldering or welding.

Yes, brass compression fittings can be used with plastic pipes. However, it’s important to ensure that the fitting is compatible with the specific type of plastic pipe you are using. Some plastic pipes may require a support sleeve inside the pipe to prevent collapse.

The compression nut should be tightened until you feel resistance, and then give it an additional 1/4 to 1/2 turn. Avoid over-tightening, as this can deform the compression ring and fitting, leading to leaks. If you experience leaks, you may need to tighten the nut slightly more.

While it is possible to reuse brass compression fittings, it is generally not recommended. The compression ring (ferrule) may have deformed during the initial installation, and reusing it could result in an improper seal. For the best results, use a new fitting.

If you detect a leak in your brass compression fitting, first try tightening the nut slightly more. If the leak persists, disassemble the fitting and inspect the components for damage or debris. Replace any damaged parts and reassemble, ensuring the pipe end is clean and properly aligned.

No, Teflon tape or pipe dope is not required with brass compression fittings. These fittings rely on the compression of the ring to create a seal. Using Teflon tape or pipe dope can interfere with the compression process and lead to leaks.

Brass vs Nickel Plated Brass Fittings Key Differences

Brass vs Nickel Plated Brass Fittings: Key Differences

Brass vs Nickel Plated Brass Fittings: Key Differences

When it comes to selecting the right fittings for your projects, do you ever wonder about the impact of choosing brass versus nickel-plated brass? This decision can significantly influence the performance and longevity of your system. In this article, we will explore the distinct characteristics of brass and nickel-plated brass fittings, helping you understand their differences and guiding you to make an informed choice. We’ll delve into their properties, applications, costs, and much more, providing a comprehensive comparison to aid you in selecting the most suitable fitting for your specific needs.

Understanding Brass Fittings

Definition and Composition

Brass is a metal alloy primarily composed of copper and zinc. The proportions of these two elements can vary to create a range of brass types with different properties. Typically, brass used in fittings consists of about 60-70% copper and 30-40% zinc, though other elements like lead, tin, and iron may be added in small quantities to enhance specific characteristics. Common types of brass used in fittings include C36000 (free machining brass) and C37700 (forged brass), each offering unique benefits for various applications.

Properties

Brass is known for its excellent physical and chemical properties, making it a popular choice for fittings. It has a distinctive yellow-gold appearance and is relatively easy to work with due to its malleability and ductility. The alloy exhibits good conductivity, both thermally and electrically, which is beneficial in various industrial applications.

In terms of durability, brass is a strong material that can withstand significant pressure and wear, making it suitable for high-stress environments. Its corrosion resistance is another notable property; brass fittings are less likely to rust compared to steel, especially in moist or chemically aggressive environments. This resistance to corrosion makes brass an ideal material for plumbing and hydraulic applications where long-term reliability is crucial.

Applications

Brass fittings are used in a wide range of industries due to their versatility and beneficial properties. Some common applications include:

Plumbing: Brass fittings are widely used in residential and commercial plumbing systems. They are ideal for water supply lines, valves, and pipe connectors due to their corrosion resistance and durability.

HVAC Systems: Brass fittings are used in heating, ventilation, and air conditioning systems due to their ability to withstand high temperatures and pressures.

Automotive Industry: Brass fittings are utilized in various automotive applications, including fuel lines, brake systems, and cooling systems, where their strength and corrosion resistance are crucial.

Electrical and Electronics: Brass is used for electrical connectors and terminals due to its excellent conductivity and corrosion resistance.

Marine Industry: Brass fittings are used in marine applications because of their resistance to seawater corrosion.

Understanding Nickel Plated Brass Fittings

Nickel Plated Brass Fittings

Definition and Composition

Nickel plating is a process where a thin layer of nickel is electroplated onto the surface of a metal, in this case, brass. The process involves cleaning the brass surface thoroughly, followed by submerging it in an electrolyte solution containing nickel ions. An electric current is then passed through the solution, causing the nickel ions to bond with the brass surface, forming a uniform, thin coating.

Nickel-plated brass fittings are thus composed of a brass core covered by a layer of nickel. The thickness of the nickel layer can vary depending on the application and desired properties but typically ranges from a few micrometers to several millimeters.

Properties

The addition of nickel plating to brass fittings imparts several enhanced properties. One of the most significant benefits is the increased corrosion resistance. Nickel is highly resistant to oxidation and corrosion, providing an extra protective barrier against environmental factors such as moisture, chemicals, and air pollutants. This makes nickel-plated brass fittings ideal for applications where exposure to corrosive elements is a concern.

When comparing durability and strength, nickel-plated brass fittings generally offer similar mechanical properties to regular brass fittings. The core material remains brass, so the inherent strength and ductility of brass are retained. However, the nickel coating can enhance surface hardness, providing additional resistance to wear and tear.

Applications

Nickel-plated brass fittings are preferred in various applications where enhanced corrosion resistance and aesthetic appeal are crucial. Common applications include:

Plumbing Systems: Especially in environments with corrosive water or chemicals.

Hydraulic Systems: Where fittings are exposed to harsh industrial conditions.

Aerospace and Automotive Industries: For high-performance and aesthetically demanding components.

Electrical and Electronics: Where enhanced conductivity and corrosion resistance are needed.

Marine Applications: Due to the superior resistance to saltwater corrosion.

Key Differences Between Brass and Nickel Plated Brass Fittings

Corrosion Resistance

Brass Fittings: Brass naturally possesses good corrosion resistance due to its copper content. It forms a protective oxide layer when exposed to air, which helps prevent further corrosion. However, in highly corrosive environments, such as those with high acidity or salt content, brass can still be susceptible to corrosion over time.

Nickel Plated Brass Fittings: Nickel plating significantly enhances the corrosion resistance of brass fittings. The nickel layer acts as a barrier, protecting the brass core from corrosive elements. This makes nickel-plated brass fittings more suitable for harsh environments, including marine applications, chemical processing plants, and outdoor installations exposed to the elements.

Durability and Strength

Brass Fittings: Brass is known for its excellent durability and mechanical strength. It can withstand substantial pressure and mechanical stress, making it suitable for various industrial applications. Brass fittings are also resistant to wear and deformation, ensuring long-term performance.

Nickel Plated Brass Fittings: While the core strength of nickel-plated brass fittings is similar to that of regular brass fittings, the nickel plating adds a layer of hardness to the surface. This enhances the overall durability of the fitting by providing additional resistance to wear, abrasion, and mechanical damage. Consequently, nickel-plated brass fittings can offer longer service life in demanding applications.

Cost and Availability

Brass Fittings: Brass fittings are widely available and generally more cost-effective compared to their nickel-plated counterparts. The absence of the additional plating process reduces manufacturing costs, making brass fittings a more economical choice for many standard applications.

Nickel Plated Brass Fittings: The additional nickel plating process adds to the cost of these fittings, making them more expensive than regular brass fittings. However, the improved performance and extended lifespan in corrosive environments can justify the higher upfront cost in specific applications.

Application Suitability

Brass Fittings: Ideal for standard plumbing, HVAC, and industrial applications where moderate corrosion resistance and mechanical strength are sufficient. Commonly used in residential plumbing, water supply lines, and general industrial systems.

Nickel Plated Brass Fittings: Better suited for applications requiring superior corrosion resistance and a polished appearance. Commonly used in marine environments, chemical processing, high-end plumbing fixtures, and electrical connectors exposed to harsh conditions.

Choosing the Right Fitting for Your Needs

Industry-Specific Recommendations

Industry / Use Case

Brass Fittings

Nickel-Plated Brass Fittings

Plumbing & HVAC

Suitable for most residential/commercial systems where moderate corrosion resistance is enough. Ideal for water supply lines, heating systems, general connections.

Recommended for high-end fixtures and visible piping; good where aesthetics matter or water is mildly corrosive.

Automotive & Aerospace

Used in fuel lines, cooling systems, hydraulic uses with moderate durability needs.

Preferred in harsh conditions (high humidity, temperature extremes, corrosive substances); ideal where durability + appearance are critical.

Marine & Offshore

Generally not recommended due to saltwater corrosion risk.

Highly recommended; superior saltwater corrosion resistance. Suitable for boat fittings, marine plumbing, offshore oil & gas.

Chemical Processing

Suitable where exposure to highly corrosive chemicals is minimal.

Ideal for aggressive chemicals; added protection against corrosion/chemical attack.

Electrical & Electronics

Used for standard connectors/terminals with adequate conductivity and corrosion resistance.

Preferred for components in harsh environments; improved oxidation resistance (and stable surface for contacts).

automotive application Topa

Environmental Considerations

Marine Environments:

In marine settings, fittings are constantly exposed to saltwater, which accelerates corrosion. Nickel plated brass fittings are the best choice due to their enhanced corrosion resistance, ensuring long-term reliability and performance.

Industrial Environments:

Industrial settings often involve exposure to chemicals, high humidity, and varying temperatures. Nickel plated brass fittings are recommended for these environments as they provide superior protection against chemical corrosion and mechanical wear.

Outdoor Environments:

Outdoor installations are subject to weather conditions, including rain, UV exposure, and temperature fluctuations. Nickel plated brass fittings offer better resistance to these elements, maintaining their integrity and appearance over time.

High-Temperature Environments:

In environments with extreme temperatures, both brass and nickel-plated brass fittings perform well. However, nickel plated brass fittings may provide an extra layer of protection and durability, especially in applications requiring high thermal conductivity and resistance.

Choose Topa to Custom Your Needs

When it comes to selecting the perfect fittings for your unique applications, Topa is your go-to partner. With our extensive experience and dedication to quality, we offer customized solutions tailored to meet your specific requirements. Here’s why you should choose Topa:

Industry Expertise

At Topa, we have a deep understanding of various industries, from automotive to marine, and chemical processing to electrical systems. Our team of experts can guide you in selecting the right fittings for your specific needs.

Customized Solutions

We specialize in creating custom fittings that meet the exact specifications of your project. Whether you need brass, nickel-plated brass, or any other material, we can provide fittings that are designed to perform in your particular environment and application.

High-Quality Products

Quality is our top priority. Our fittings are manufactured using the finest materials and state-of-the-art processes, ensuring they meet the highest standards of durability, performance, and reliability.

Extensive Inventory

We maintain a large inventory of fittings to ensure quick and efficient delivery. This means you can count on us to have the products you need when you need them, minimizing downtime and keeping your projects on schedule.

Competitive Pricing

Despite our high standards and custom capabilities, we offer competitive pricing to ensure you get the best value for your investment. Our goal is to provide you with cost-effective solutions without compromising on quality.

Exceptional Service

Customer satisfaction is at the heart of what we do. Our dedicated team is always ready to assist you with any questions, from selecting the right product to providing after-sales support. We strive to exceed your expectations at every step.

Global Reach

Based in China, we serve clients worldwide, including the United States, Europe, Asia, Australia, Germany, and the United Kingdom. Our global reach ensures we understand and meet the diverse needs of our international clientele.

By choosing Topa, you’re not just getting high-quality fittings; you’re partnering with a company committed to providing exceptional service and customized solutions. Let us help you find the perfect fittings to ensure the success of your project. Contact Topa today to discuss your requirements and discover how we can meet your needs.

Conclusion

In summary, brass fittings offer cost-effectiveness, excellent durability, and natural corrosion resistance, making them suitable for many standard applications. Nickel-plated brass fittings, on the other hand, provide enhanced corrosion resistance, increased surface hardness, and a sleek, polished appearance, making them ideal for more demanding and visually critical environments. Based on the analysis, if your application requires superior corrosion resistance and aesthetics, nickel-plated brass fittings are the better choice. However, for general purposes, brass fittings are a reliable and economical option. Consider your specific needs and contact us at Topa for more information or to request a custom quote.

FAQ

Brass fittings are durable, corrosion-resistant, and cost-effective. They are easy to work with due to their malleability and ductility, making them ideal for a wide range of applications.

Nickel-plated brass fittings offer enhanced corrosion resistance, increased surface hardness, and a shiny, polished appearance, making them suitable for harsh environments and applications where aesthetics are important.

Yes, the additional nickel plating process adds to the cost of these fittings, making them more expensive than regular brass fittings. However, their improved performance and longevity can justify the higher upfront cost in specific applications.

While brass fittings have good corrosion resistance, they may not be the best choice for marine environments due to potential corrosion from saltwater exposure. Nickel-plated brass fittings are more suitable for such conditions.

Consider the specific requirements of your application, such as environmental conditions, required durability, aesthetic preferences, and budget constraints. For harsh environments and high aesthetic needs, choose nickel-plated brass fittings. For general applications, brass fittings are a reliable and economical option.

Contact us with your specific requirements, and our team of experts will guide you through the process of selecting or designing custom fittings that meet your needs. We offer tailored solutions to ensure the success of your project.

What is MIP Brass Fitting

What is MIP Brass Fitting

What is MIP Brass Fitting

Table of Contents

Introduction

Brass fittings are essential components in the plumbing industry, widely recognized for their durability, reliability, and versatility. They are used in various applications, ranging from residential plumbing systems to complex industrial setups. The primary aim of this article is to provide readers with a comprehensive understanding of MIP brass fittings. This will include an in-depth look at their properties, benefits, and the various applications in which they are used.

What is MIP Brass Fitting?

Definition of MIP (Male Iron Pipe) fitting

MIP (Male Iron Pipe) fittings are a specific type of brass fitting characterized by their external threads. These threads are designed to screw into corresponding FIP (Female Iron Pipe) fittings, which have internal threads. The primary function of MIP fittings is to create a secure and tight seal when connected to FIP fittings. This connection method ensures that the fitting remains firmly in place, preventing leaks and maintaining the integrity of the piping system. MIP fittings are commonly used in various plumbing applications, including residential, commercial, and industrial settings, due to their reliability and ease of use.

MIP fitting

Specific features of MIP brass fittings

Threading details:

MIP brass fittings typically feature tapered threads. The tapering of the threads is crucial for creating a secure, leak-proof connection. As the fitting is screwed into the FIP fitting, the tapered threads gradually increase in diameter, which helps to form a tight seal. This design minimizes the risk of leaks, ensuring that the connection remains robust under various pressure conditions. The tapered threading also allows for easy disassembly and reassembly, which is beneficial for maintenance and repairs.

Size specifications:

MIP brass fittings come in a range of sizes to accommodate different pipe diameters. The sizes are typically measured in inches, and common sizes include 1/8″, 1/4″, 3/8″, 1/2″, 3/4″, 1″, and larger. The availability of multiple sizes allows for versatility in plumbing applications, as the appropriate size can be selected based on the specific requirements of the piping system. This ensures a proper fit and optimal performance of the plumbing installation.

Differences between MIP and FIP (Female Iron Pipe) fittings

MIP vs FIP

Thread orientation:

The primary difference between MIP and FIP fittings lies in their thread orientation. MIP fittings have external threads, meaning the threads are on the outside of the fitting. In contrast, FIP fittings have internal threads, with the threads located on the inside of the fitting. This complementary design allows MIP and FIP fittings to be paired together to create a secure connection.

Connection method:

When connecting MIP and FIP fittings, the external threads of the MIP fitting are screwed into the internal threads of the FIP fitting. This method of connection ensures a tight seal, which is essential for preventing leaks and maintaining the integrity of the plumbing system. The design of these fittings makes them easy to install and disassemble, which is advantageous for both initial installations and ongoing maintenance.

Application and compatibility:

MIP and FIP fittings are designed to work together in various plumbing applications. They are compatible with a wide range of piping materials, including brass, copper, PVC, and galvanized steel. This compatibility makes them a versatile choice for different types of plumbing systems. Additionally, their robust design and reliable performance make them suitable for use in high-pressure and high-temperature environments, further enhancing their utility in diverse applications.

Applications of MIP Brass Fittings

Water Supply Lines

MIP brass fittings are widely used in residential plumbing to connect pipes carrying water throughout homes. Their robust construction and resistance to corrosion make them ideal for potable water systems. These fittings ensure that water lines remain leak-free, providing a reliable and long-lasting solution for household plumbing needs. The tapered threads of MIP fittings help create a tight seal, preventing leaks and ensuring efficient water flow.

Gas Lines

MIP brass fittings are also suitable for connecting natural gas lines in residential settings. Their durability and resistance to high pressure make them a reliable choice for gas connections. Brass is particularly favored for gas applications due to its non-sparking properties and ability to withstand the demands of gas flow. These fittings ensure a secure connection, reducing the risk of gas leaks and enhancing the safety of the household gas system.

HVAC Systems

In commercial and industrial HVAC (Heating, Ventilation, and Air Conditioning) systems, MIP brass fittings play a crucial role in creating secure connections. These systems often operate under high pressure and temperature conditions, requiring fittings that can withstand such demands. MIP brass fittings provide the necessary durability and reliability, ensuring efficient operation and reducing the risk of leaks. Their corrosion resistance is particularly beneficial in HVAC systems, where moisture and varying temperatures are common.

Chemical and Oil Processing

MIP brass fittings are highly resistant to many chemicals, making them suitable for use in chemical and oil processing industries. These fittings can withstand the corrosive nature of various chemicals and oils, ensuring long-term reliability and safety. In industrial processing applications, where the integrity of connections is critical, MIP brass fittings provide a secure and leak-proof solution. Their ability to maintain performance under harsh conditions makes them indispensable in these industries.

Fuel Lines

MIP brass fittings are used in automotive applications to connect fuel lines. Their durability and resistance to corrosion ensure that fuel systems operate efficiently and safely. Brass fittings can handle the demands of fuel flow and pressure, reducing the risk of leaks and enhancing the overall reliability of the vehicle’s fuel system. The tapered threads provide a secure connection, preventing fuel from escaping and ensuring optimal performance.

How to Choose the Right MIP Brass Fitting

Determining the Correct Size

Selecting the appropriate size for an MIP brass fitting is crucial for ensuring a secure and efficient connection. Here are the steps to determine the correct size:

  • Measure Pipe Diameter Accurately: Use a caliper or a pipe diameter tape measure to get the precise diameter of the pipe. Accurate measurements are essential to ensure that the fitting will fit correctly and create a leak-proof connection.
  • Refer to Size Charts: Consult size charts provided by manufacturers to match the measured pipe diameter with the correct fitting size. MIP fittings are typically available in standard sizes such as 1/8″, 1/4″, 3/8″, 1/2″, 3/4″, 1″, and larger.
  • Consider the Application: Depending on whether the fitting is for a residential, commercial, or industrial application, the required size might vary. Ensure the fitting size matches the application’s needs for optimal performance.

Considering the Type of Application

Different applications have specific requirements that must be considered when selecting MIP brass fittings:

  • Pressure Conditions: Determine the pressure the fitting will be subjected to. High-pressure applications require fittings that can withstand such conditions without failing.
  • Temperature Conditions: Evaluate the operating temperature of the system. MIP brass fittings are known for their high-temperature tolerance, but it’s essential to ensure they match the specific temperature range of your application.
  • Fluid Type: Consider the type of fluid (water, gas, chemicals) that will flow through the fittings. Ensure the fitting material is suitable for the fluid type to prevent corrosion or degradation.

Compatibility with Other Materials and Fittings

Ensuring compatibility with other materials and fittings in the system is vital for the integrity and efficiency of the plumbing setup:

  • Material Compatibility: Ensure that brass fittings are compatible with the pipe materials (e.g., copper, PVC, galvanized steel) in your system. Incompatible materials can lead to corrosion and reduced lifespan.
  • Thread Compatibility: Verify that the thread type and size of the MIP fitting match the corresponding FIP fitting or other components in the system. This ensures a secure and leak-proof connection.
  • System Requirements: Consider the overall system requirements and how the fittings will interact with other components. For example, ensure that the fittings won’t cause electrolysis or galvanic corrosion when used with dissimilar metals.

Installation Guide for MIP Brass Fittings

Tools and Materials Needed

  • Pipe Cutter: To cut the pipe to the required length.
  • Pipe Wrench: For tightening the fittings securely.
  • Thread Sealant: Teflon tape or pipe dope to ensure a leak-proof connection.
  • MIP Brass Fitting: The fitting is to be installed.

Step-by-Step Installation Process

Preparing the Pipe:

  • Clean the Pipe Ends: Remove any debris, dirt, or old sealant from the pipe ends to ensure a clean surface. This helps create a smooth and secure connection.
  • Cut the Pipe to Required Length: Use a pipe cutter to cut the pipe to the necessary length. Ensure the cut is straight and clean for a better fit.

Applying Thread Sealant:

  • Wrap Teflon Tape: Wrap Teflon tape around the male threads of the MIP fitting. Wrap the tape in the direction of the threads (clockwise) to ensure it adheres properly. Make about 2-3 wraps, covering the threads evenly.
  • Alternatively, Apply Pipe Dope: If using pipe dope, apply a thin, even layer to the male threads of the MIP fitting. Ensure complete coverage without excess.

Threading the Fitting:

  • Screw the MIP Fitting into the FIP Fitting: Start by threading the MIP fitting into the FIP fitting by hand. Turn the fitting clockwise until it is hand-tight. Ensure the threads engage smoothly and correctly.

Tightening and Securing:

  • Use a Pipe Wrench: After hand-tightening, use a pipe wrench to further tighten the connection. Grip the MIP fitting with the wrench and turn it clockwise. Ensure the fitting is snug but avoid over-tightening, as this can damage the threads and cause leaks.
rust MIP fitting

Common Mistakes to Avoid

  • Avoid Over-Tightening: Over-tightening can damage the threads and compromise the seal. Tighten the fitting until it is snug, but do not apply excessive force.
  • Ensure Threads are Clean and Properly Sealed: Clean threads and proper application of thread sealant are crucial for a leak-proof connection. Neglecting this can result in leaks and connection failures.
  • Do Not Mix Incompatible Materials: Ensure that the materials of the pipes and fittings are compatible. Mixing incompatible materials can lead to corrosion and reduced lifespan of the fittings.

Tips for Ensuring a Leak-Free Connection

  • Double-check the Sealant Application: Ensure that Teflon tape or pipe dope is applied evenly and covers all the threads. Proper sealant application is key to preventing leaks.
  • Test the Connection for Leaks Before Use: After installation, test the connection for leaks. Turn on the water or gas supply and check for any signs of leakage around the fitting. If a leak is detected, tighten the fitting slightly and reapply the sealant if necessary.
  • Regular Maintenance: Periodically inspect the fittings for any signs of wear or leaks. Regular maintenance helps ensure the long-term reliability of the connection.

Maintenance and Troubleshooting for MIP Brass Fittings

Regular Inspection and Maintenance Tips

Scheduled Inspections:

Conduct regular inspections of your MIP brass fittings at least twice a year. This helps identify potential issues before they become significant problems.

Inspect all visible fittings for signs of wear, leaks, or corrosion.

Check for Leaks:

Look for any water or gas leaks around the fittings. This can be done visually or by using a leak detection solution (soapy water) which will bubble if a leak is present.

If a leak is detected, take immediate action to address it, such as tightening the fitting or reapplying thread sealant.

Clean the Fittings:

Keep the fittings clean from dirt and debris. Use a damp cloth to wipe down the fittings regularly, ensuring there are no blockages or buildup.

Avoid using harsh chemicals that can corrode or damage the brass.

Monitor Pressure and Temperature:

Ensure that the system’s pressure and temperature remain within the recommended limits for the brass fittings. Overexposure to high pressure or temperature can lead to premature wear and failure.

Common Issues and How to Resolve Them

Leaks:

  • Identification: Leaks can often be detected by the presence of water or gas escaping from the fitting.
  • Resolution: If a leak is detected, first try to tighten the fitting using a pipe wrench. If tightening does not resolve the issue, disassemble the fitting, clean the threads, reapply thread sealant (Teflon tape or pipe dope), and reassemble the fitting. Ensure it is snug but not over-tightened.
  • Prevention: Regularly inspect fittings for signs of wear and promptly address any minor leaks to prevent them from worsening.

Corrosion:

  • Identification: Corrosion on brass fittings can appear as greenish or bluish discoloration and can weaken the fitting, leading to leaks or failures.
  • Resolution: If corrosion is detected, clean the fitting with a brass-safe cleaner. For severe corrosion, replace the fitting entirely to ensure the system’s integrity.
  • Prevention: Ensure fittings are not exposed to harsh chemicals or environments that promote corrosion. Using compatible materials and proper sealants can also reduce the risk of corrosion.

Thread Damage:

  • Identification: Damaged threads can be identified by difficulty in screwing the fittings together or visible wear and tear on the threads.
  • Resolution: If threads are damaged, the fitting may need to be replaced. Attempting to repair damaged threads can compromise the seal and lead to leaks.
  • Prevention: Avoid cross-threading by aligning fittings properly before tightening. Use the appropriate tools and avoid over-tightening to prevent thread damage.

Conclusion

MIP brass fittings are essential for creating secure and durable connections across various applications, from residential plumbing to industrial systems. Choosing the right fitting is crucial for ensuring system efficiency and longevity. Selecting the appropriate size, understanding application requirements, and ensuring compatibility with other materials are key factors in making the right choice. Additionally, seeking professional advice for complex plumbing needs can prevent installation errors and ensure optimal system performance, contributing to a reliable and efficient plumbing system.

FAQ

MIP stands for Male Iron Pipe, which indicates that the fitting has external threads designed to screw into a Female Iron Pipe (FIP) fitting.

MIP brass fittings are commonly used in residential plumbing for water and gas lines, in commercial and industrial HVAC systems, and in automotive and marine fuel and cooling systems.

To ensure a leak-free connection, clean the threads, apply thread sealant (Teflon tape or pipe dope), and tighten the fitting securely without over-tightening.

Yes, MIP brass fittings can be used with various pipe materials, including copper, PVC, and galvanized steel, as long as the materials are compatible.

Measure the diameter of the pipe accurately and refer to size charts provided by manufacturers to select the appropriate fitting size.

If a leak is found, try tightening the fitting. If the leak persists, disassemble the fitting, clean the threads, reapply thread sealant, and reassemble. If necessary, replace the fitting.

Brass vs Bronze Fittings Key Differences Explained

Brass vs Bronze Fittings: Key Differences Explained

Brass vs Bronze Fittings: Key Differences Explained

Introduction

Did you know that brass and bronze fittings are integral components in over 80% of industrial applications worldwide? From plumbing and electrical systems to marine hardware and architectural elements, these versatile materials play a crucial role in ensuring the reliability and efficiency of countless systems. This post aims to provide a comprehensive comparison between brass and bronze fittings. By examining their composition, properties, applications, cost, and environmental considerations, we will equip you with the knowledge needed to choose the most appropriate material for your specific needs.

Understanding Brass and Bronze

Definition and Composition

Brass: Brass is an alloy primarily composed of copper and zinc. The proportions of copper and zinc can be varied to create a range of brasses with varying properties. Generally, brass consists of about 60-70% copper and 30-40% zinc. The addition of zinc enhances the strength and ductility of copper, making brass a highly versatile material suitable for numerous applications.

Bronze: Bronze is an alloy primarily consisting of copper and tin, with the tin content typically ranging from 12% to 20%. In addition to tin, bronze may also contain other elements such as aluminum, manganese, nickel, or phosphorus to enhance its properties. The inclusion of tin provides bronze with greater hardness and strength compared to pure copper, making it ideal for applications requiring high durability and resistance to wear.

Bronze Fittings

Physical Properties

Brass: Brass is known for its bright, gold-like appearance, making it an aesthetically pleasing choice for decorative applications. It has excellent malleability, meaning it can be easily shaped and formed without breaking, which makes it ideal for intricate designs and detailed work. Brass also exhibits good ductility, allowing it to be stretched into wires or thin sheets. Brass has a relatively low melting point, which simplifies casting and fabrication processes.

Bronze: Bronze typically has a dull, brownish color that can develop a greenish patina over time due to oxidation. This patina is often considered attractive and is valued in artistic and architectural applications. Bronze is harder than brass, which gives it superior wear resistance. However, this increased hardness also makes bronze more brittle, meaning it is less likely to bend and more likely to crack under stress. The alloy’s hardness and brittleness make it ideal for applications that require durable, long-lasting components, such as bearings, bushings, and marine hardware.

Mechanical Properties

Brass: Brass possesses a good balance of strength and flexibility, with tensile strength varying depending on the specific alloy composition. It generally ranges from 300 to 600 MPa (megapascals), making it suitable for many mechanical applications. One of the standout features of brass is its excellent corrosion resistance, especially in environments where it is exposed to water or humid conditions. This property makes brass a preferred material for plumbing fittings, valves, and other components that must withstand corrosive environments. Additionally, brass’s antimicrobial properties add to its desirability for applications in healthcare and food processing industries.

Bronze: Bronze is renowned for its durability and exceptional resistance to wear and fatigue. It has a tensile strength that can range from 350 to 700 MPa, depending on the specific alloy and the presence of additional elements. Bronze’s superior resistance to wear makes it an ideal material for high-stress applications, such as gears, bearings, and heavy machinery components. Its ability to withstand constant friction and maintain performance over time ensures longevity and reliability in demanding environments. Furthermore, bronze exhibits excellent resistance to saltwater corrosion, making it a prime choice for marine applications, such as ship fittings, propellers, and underwater fastenings.

Common Applications

Brass Fittings:

Plumbing: Brass fittings are widely used due to their excellent corrosion resistance and durability. They are commonly found in water supply lines, pipe fittings, valves, and faucets. Brass’s antimicrobial properties make it a hygienic choice for potable water systems.

Electrical Connectors: The good conductivity of brass makes it an ideal material for electrical connectors, terminals, and switches. Its corrosion resistance ensures long-term reliability in electrical systems, reducing the risk of connectivity issues.

Bronze Fittings:

Bearings and Bushings: Bronze fittings are preferred for bearings and bushings because of their exceptional wear resistance and low friction properties. They can withstand high loads and repeated stress, making them suitable for heavy machinery, automotive applications, and industrial equipment.

Marine Hardware: Bronze’s resistance to saltwater corrosion makes it ideal for marine applications such as ship fittings, propellers, and underwater fastenings. Its durability and longevity in harsh marine environments make it a reliable choice for nautical engineering.

Advantages in Specific Uses

Why Brass is Preferred in Certain Applications:

Corrosion Resistance: Brass fittings are highly resistant to corrosion, particularly from water and humid environments. This makes them ideal for plumbing and outdoor applications where exposure to moisture is common.

Malleability and Ductility: The malleability and ductility of brass allow for easy manufacturing and shaping into complex forms. This property is particularly advantageous in creating detailed and decorative items, such as musical instruments and ornate fixtures.

Conductivity: Brass’s excellent electrical conductivity makes it suitable for use in electrical components and connectors, ensuring efficient energy transfer and minimal power loss.

Why Bronze is Preferred in Other Applications:

Durability and Wear Resistance: Bronze’s superior hardness and wear resistance make it the material of choice for applications subjected to high friction and heavy loads, such as bearings, bushings, and industrial machinery parts.

Low Friction: The low friction properties of bronze reduce wear and tear on moving parts, enhancing the lifespan and performance of mechanical components. This is particularly beneficial in applications where smooth operation and longevity are critical.

Saltwater Corrosion Resistance: Bronze’s ability to resist corrosion from saltwater environments makes it indispensable for marine applications. Its use in ship fittings, propellers, and underwater fastenings ensures durability and reliability in challenging marine conditions.

Performance and Durability

Brass Fittings:

Temperature: Brass fittings perform well under a wide range of temperatures, typically handling temperatures from -100°F to 450°F (-73°C to 232°C). However, at extremely high temperatures, brass can lose some strength and become more susceptible to deformation.

Pressure: Brass fittings are known for their ability to withstand moderate pressures, making them suitable for household plumbing systems and industrial applications where pressure requirements are not exceedingly high. They are commonly used in systems with pressures up to 1,000 psi.

Corrosion Resistance: Brass’s excellent resistance to corrosion, especially from water and humid environments, ensures reliable performance in plumbing and marine applications. However, in environments with high chlorine content, such as swimming pools, brass can undergo dezincification, which can weaken the material over time.

Bronze Fittings:

Temperature: Bronze fittings can handle a wide range of temperatures, generally performing well from -40°F to 500°F (-40°C to 260°C). Their ability to retain strength and hardness at high temperatures makes them suitable for high-heat applications.

Pressure: Bronze fittings are capable of withstanding higher pressures than brass, making them ideal for industrial and marine applications where pressure can be significant. They are often used in systems that operate at pressures up to 2,000 psi or more.

Corrosion Resistance: Bronze has superior corrosion resistance, particularly from saltwater and acidic environments. This makes it a preferred choice for marine hardware and other applications exposed to harsh or corrosive conditions.

Choosing the Right Fitting

Factors to Consider

Mechanical Requirements: Determine the mechanical requirements of your application. If you need fittings that can withstand high pressure and wear, bronze may be the better choice due to its superior strength and durability. For applications requiring good corrosion resistance and moderate strength, brass is often suitable.

Conductivity Needs: If electrical conductivity is a crucial factor, brass fittings are generally preferred due to their excellent conductivity. This is particularly important in electrical and electronic applications.

Budget Constraints

Material Costs: Brass is typically less expensive than bronze, making it a cost-effective choice for applications where budget is a primary concern. However, it is important to balance cost with the required performance and longevity of the fitting.

Long-Term Costs: Consider the long-term costs associated with maintenance and replacement. While bronze may have a higher initial cost, its superior durability and longer lifespan can result in lower long-term expenses.

Environmental Conditions

Corrosive Environments: For applications exposed to corrosive environments, such as marine settings or areas with high humidity, bronze is often the preferred material due to its exceptional corrosion resistance. Brass can also perform well in many corrosive environments but may require more frequent maintenance or replacement.

Temperature and Pressure: Evaluate the operating temperature and pressure conditions of your application. Bronze fittings are better suited for high-temperature and high-pressure applications, while brass fittings are generally sufficient for moderate conditions.

Brass vs Bronze Fittings

Step-by-Step Guide

Identify Application Requirements

List the Specific Mechanical and Electrical Requirements of Your Application:

Determine if the application requires high tensile strength, flexibility, or wear resistance.

For electrical applications, consider the need for high conductivity and minimal resistance.

Understand the specific mechanical demands, such as whether the fitting needs to support heavy loads or withstand high friction.

Determine the Required Durability, Corrosion Resistance, and Other Performance Characteristics:

Assess the expected lifespan of the fittings and the conditions they will face.

Consider if the fittings need to resist specific types of corrosion, such as from salt water, chemicals, or acidic environments.

Evaluate other performance factors like thermal conductivity, machinability, and appearance.

Evaluate Environmental Conditions

Assess the Environmental Conditions Where the Fittings Will Be Used:

Examine the exposure to moisture, including whether the environment is humid, wet, or submerged in water.

Determine the presence of chemicals or pollutants that could affect the fittings.

Evaluate the operating temperature range and any fluctuations in temperature that could impact the material.

Consider the pressure conditions the fittings will face, including both static and dynamic pressures.

Consider the Potential for Corrosion and the Need for Resistance to Wear and Fatigue:

Identify if the fittings will be used in environments prone to corrosion, such as marine or industrial settings.

Consider the need for wear resistance in applications involving high friction or repetitive motion.

Assess the likelihood of fatigue from cyclic loading or other stresses.

Consider Budget Constraints

Compare the Initial Costs of Brass and Bronze Fittings:

Research the market prices for brass and bronze fittings to understand the cost differences.

Consider the availability of each material and any potential supply chain issues that could affect pricing.

Factor in the Long-Term Costs Related to Maintenance, Replacement, and Potential Downtime Due to Fitting Failures:

Evaluate the maintenance requirements for each material, including the frequency and cost of inspections and cleanings.

Consider the expected lifespan of the fittings and the potential need for replacements over time.

Assess the impact of fitting failures on your operations, including the cost of downtime and repairs.

Match Material Properties to Requirements:

Based on the Identified Requirements and Environmental Conditions, Match the Properties of Brass and Bronze to Your Needs:

Use Brass for Applications Needing Good Conductivity, Moderate Strength, and Corrosion Resistance at a Lower Cost:

Brass is ideal for electrical connectors, plumbing fixtures, and decorative items due to its excellent conductivity and aesthetic appeal.

It is also suitable for applications where moderate strength and corrosion resistance are sufficient, and cost is a critical factor.

Choose Bronze for Applications Requiring High Strength, Durability, and Superior Corrosion Resistance in Harsh Environments:

Bronze is preferred for bearings, bushings, and marine hardware because of its superior wear resistance and ability to withstand harsh conditions.

It is also the material of choice for applications involving high stress, friction, and exposure to corrosive elements, providing longevity and reliability.

By thoroughly assessing your application requirements, environmental conditions, and budget constraints, you can make an informed decision on whether brass or bronze fittings are the best fit for your needs. Matching the material properties to the specific demands of your application ensures optimal performance, cost-effectiveness, and durability.

Conclusion

In summary, brass and bronze fittings each offer unique properties that make them suitable for different applications. When choosing between these materials, consider the specific mechanical and environmental requirements of your application, as well as budget constraints. We recommend evaluating these factors carefully to ensure you select the most appropriate fitting for your needs. If you found this post helpful, please share it with your network, leave a comment with your thoughts, or reach out for further information and assistance.

FAQ

Brass is primarily made of copper and zinc, known for its good conductivity and corrosion resistance. Bronze, made of copper and tin, offers superior strength, durability, and wear resistance.

Brass is generally less expensive than bronze, making it a cost-effective choice for applications where budget is a concern.

Bronze fittings are preferred in harsh environments, such as marine settings, due to their superior resistance to corrosion, wear, and high-pressure conditions.

Brass fittings can handle moderate temperatures but may lose strength at extremely high temperatures. For higher temperature resistance, bronze fittings are a better choice.

Brass fittings require regular inspection and cleaning to prevent buildup and corrosion, especially in environments with high chlorine levels.

With proper maintenance, bronze fittings can last 80 to 100 years or more, making them a durable and long-lasting option for demanding applications.

How to Remove a Brass Push-to-Connect Fitting

How to Remove a Brass Push-to-Connect Fitting

How to Remove a Brass Push-to-Connect Fitting

Introduction

Brass push-to-connect fittings are popular for their ease of installation and reliable performance. However, when it’s time to remove them, having the right knowledge and tools is essential. This guide provides a comprehensive step-by-step process to help you confidently and effectively remove brass push-to-connect fittings.

Understanding Brass Push-to-Connect Fittings

Definition and Description

Brass push-to-connect fittings, often referred to as push-fit or quick-connect fittings, are revolutionary components in the plumbing industry designed for rapid and effortless installation. Unlike traditional fittings that require soldering, clamps, or adhesives, these fittings employ a simple push mechanism that locks pipes securely in place. This design makes them an ideal choice for a wide range of plumbing applications, providing an efficient solution for joining pipes made from various materials such as copper, PEX (cross-linked polyethylene), and CPVC (chlorinated polyvinyl chloride). Their versatility and ease of use have made them a popular choice among both DIY enthusiasts and professional plumbers

Components

A typical brass push-to-connect fitting comprises several critical components, each playing a unique role in ensuring a secure and leak-free connection:

Body: The main structure is made of durable brass, which houses all other components. Its robust design ensures longevity and resistance to corrosion, making it suitable for various plumbing environments.

O-ring: Located inside the fitting, the O-ring is crucial for creating a watertight seal around the pipe. This rubber ring compresses against the pipe surface, preventing leaks and ensuring the reliability of the connection.

Grip Ring: This component is designed to grip the pipe firmly, holding it in place once inserted. The grip ring’s teeth dig into the pipe’s surface, providing a secure hold that withstands the pressure and vibrations commonly encountered in plumbing systems.

Collet: The collet is a ring located at the fitting’s entrance. When compressed using a specialized removal tool, it releases the grip on the pipe, allowing for easy disconnection. This feature simplifies maintenance and modifications, making the system more adaptable.

Tools and Materials Needed

To successfully remove a brass push-to-connect fitting, it is important to have the appropriate tools on hand. Here are the essential tools you will need:

Disconnect Clip or Tongs: These are specially designed tools that compress the collet, allowing the pipe to be released from the fitting. Disconnect clips are small, circular devices that fit around the pipe and collet, while disconnect tongs have handles for easier operation. Both tools are essential for safely and effectively removing push-to-connect fittings without damaging the pipe or fitting.

Pipe Cutter: A reliable pipe cutter is necessary if you need to cut the pipe to remove the fitting or to make adjustments to the plumbing system. Pipe cutters provide a clean and precise cut, which is crucial for ensuring a proper connection when reinstalling or replacing fittings.

Bucket or Towel: Always have a bucket or towel on hand to catch any residual water that may be present in the pipes. This helps prevent water damage to your work area and makes the removal process cleaner and more efficient.

Preparatory Steps

Shutting Off the Water Supply

Before beginning the removal process, it’s crucial to turn off the main water supply to prevent any water flow. This step is essential to avoid water spraying from the pipes when you disconnect the fitting. Locate the main water valve, which is typically found near the water meter, and turn it off completely. This ensures that no water will flow through the pipes during the removal process, allowing you to work safely and efficiently.

Relieving Pressure in the System

After shutting off the water supply, it’s important to relieve any residual pressure in the plumbing system. Open the nearest faucet to the fitting you plan to remove and let the water run until it stops. This step helps release any remaining pressure in the pipes, preventing unexpected water sprays that could occur when you disconnect the fitting. Ensuring the system is depressurized will make the removal process smoother and safer.

Clearing the Work Area

A clean and accessible work area is essential for efficiently removing a brass push-to-connect fitting. Clear the area around the fitting by removing any obstacles that could hinder your access or movement. Ensure you have enough space to comfortably use your tools and position yourself properly. Having a clean and organized workspace not only improves efficiency but also reduces the risk of accidents or mistakes during the removal process.

Step-by-Step Guide to Removing the Fitting

Locating the Fitting

The first step in removing a brass push-to-connect fitting is to identify the specific fitting that needs to be removed. Carefully inspect the plumbing system to locate the fitting, ensuring you correctly identify it among other similar components. Check for any nearby pipes, joints, or obstructions that might complicate the removal process.

hydraulic flange seal

Using the Removal Tool

Once you have identified and accessed the fitting, follow these steps to use the removal tool effectively:

Position the Disconnect Clip: Take the disconnect clip or tongs and place them around the pipe, aligning the tool with the fitting’s collet. The collet is the ring at the end of the fitting that holds the pipe in place. Ensure the disconnect clip fits snugly around the pipe and collet for effective compression.

Apply Pressure: Squeeze the disconnect clip to compress the collet. This action disengages the grip ring inside the fitting, which holds the pipe securely. Applying steady and even pressure is crucial to ensure the collet compresses uniformly, releasing its grip on the pipe.

Pull the Fitting: While maintaining pressure on the collet with the disconnect clip, gently pull the fitting away from the pipe. The fitting should slide off smoothly if the collet is properly compressed. If done correctly, the pipe will be free of the fitting without any significant resistance.

Applying Pressure and Removing the Fitting

During the removal process, you might encounter some resistance. Here are some tips to handle this:

Reposition the Disconnect Clip: If the fitting does not slide off easily, check to ensure the disconnect clip is correctly positioned and fully compressing the collet. Sometimes, readjusting the clip’s position can help achieve better compression.

Apply Steady Pressure: Avoid using excessive force, which could damage the pipe or the fitting. Instead, apply steady and even pressure on the disconnect clip. This technique ensures that the collet compresses properly, releasing the grip ring’s hold on the pipe.

Rotate Slightly: If the fitting still resists, gently rotate it back and forth while maintaining pressure on the disconnect clip. This action can help loosen any residual grip and facilitate smoother removal.

Inspecting the Pipe and Fitting

After successfully removing the fitting, it is essential to inspect both the pipe and the fitting for any signs of damage:

Examine the Pipe: Look for any scratches, dents, or deformities on the pipe that could affect its future use. Minor scratches can often be smoothed out, but significant damage may require cutting and replacing a section of the pipe.

Check the Fitting: Inspect the fitting for any visible damage, such as cracks or deformations. Pay particular attention to the O-ring and grip ring, as these components are critical for creating a watertight seal. If the fitting shows any signs of wear or damage, it should be replaced to ensure the integrity of your plumbing system.

Clean the Components: Before reusing the pipe or fitting, clean them thoroughly to remove any debris or residue. A clean surface is essential for achieving a secure and leak-free connection when reinstalling the fitting or installing a new one.

Troubleshooting Common Issues

Stuck Fittings

Sometimes, despite your best efforts, a brass push-to-connect fitting may become stuck and resist removal. Here are several strategies to address this issue:

Reposition the Disconnect Clip: Ensure that the disconnect clip is properly aligned with the collet. Misalignment can prevent the collet from fully compressing, making it difficult to release the fitting. Reposition the clip, making sure it fits snugly around the collet, and try applying pressure again.

Apply Lubricant: A small amount of water or a lubricant such as silicone spray can help reduce friction and ease the fitting of the pipe. Apply a modest amount around the collet and pipe connection, then use the disconnect clip to compress the collet and attempt to remove the fitting again.

Use a Different Tool: Some fittings may require a specific type of removal tool for best results. If the disconnect clip is not working, try using disconnect tongs or another tool designed for your specific fitting type. Different tools can provide varying levels of leverage and pressure, which might be necessary for particularly stubborn fittings.

Damaged Fittings

During the removal process, fittings can occasionally become damaged. If this occurs, it is important to address the damage to ensure the integrity of your plumbing system:

Inspect for Cracks or Deformities: After removing the fitting, thoroughly inspect it for any visible cracks, deformities, or other signs of damage. Even small cracks can lead to leaks or system failures.

Replace Damaged Fittings: If you find any damage, it is best to replace the fitting rather than attempting to reuse it. Using a damaged fitting can compromise the entire plumbing system, leading to more extensive repairs in the future.

Leaks

leak brass push to connect fitting

Leaks are a common issue that can arise after removing and reinstalling fittings. Here’s how to troubleshoot and resolve leaks:

Check for Residual Leaks: After removing the fitting, closely inspect the pipe and fitting for any signs of residual leaks. This can be done by visually inspecting the connection points and feeling for moisture.

Ensure Proper Installation: When installing a new fitting, make sure it is properly aligned and securely connected to the pipe. Push the pipe firmly into the fitting until it seats fully, ensuring the O-ring creates a watertight seal.

Clean and Smooth Pipe Ends: Before reconnecting or installing a new fitting, clean the pipe ends thoroughly. Remove any debris, dirt, or old sealant that could interfere with the connection. Use sandpaper or a pipe-cleaning tool to smooth out any rough edges, ensuring a clean, even surface for the fitting to seal against.

Test the System: After reinstallation, turn the water supply back on and check the connection for leaks. Allow the water to run for a few minutes and inspect the fitting closely. If any leaks are detected, shut off the water, adjust the fitting, and retest.

Cleaning and Maintenance

Cleaning the Pipe Ends

After removing a brass push-to-connect fitting, it is essential to properly clean the pipe ends to ensure a secure and leak-free connection when reinstalling or installing a new fitting. Follow these steps:

Wipe Down the Pipe Ends: Use a clean, dry cloth to thoroughly wipe down the exposed pipe ends. This step removes any dust, dirt, or debris that may have accumulated.

Inspect for Rough Edges: Check the pipe ends for any rough edges, burrs, or imperfections that could hinder a new fitting from sealing properly. Use a fine-grit sandpaper or a pipe deburring tool to smooth out any rough spots.

Ensure Clean Surfaces: Make sure the pipe ends are completely clean and free of any contaminants. A smooth, clean surface is crucial for achieving a watertight seal with the new fitting.

Maintaining Fittings for Reuse

If you plan to reuse the brass push-to-connect fittings, it is important to clean and inspect them carefully to ensure they remain in good working condition:

Thorough Cleaning: Clean the fittings thoroughly with a cloth and, if necessary, a mild soap solution. Ensure all internal and external surfaces are free from debris, dirt, and any residual pipe material.

Inspect for Damage: Carefully inspect the fittings for any signs of wear and tear, such as cracks, deformities, or damaged O-rings. If any part of the fitting is damaged, it should be replaced rather than reused.

Drying: Allow the fittings to dry completely before storing them. Moisture can lead to corrosion, which can compromise the integrity of the fittings over time.

Storage Tips

Proper storage of fittings and tools is essential to maintain their condition and ensure they are readily available when needed:

Designated Storage Area: Assign a specific area for storing fittings and tools. This could be a dedicated shelf, drawer, or storage box in your workshop or garage.

Protection from Dirt and Moisture: Store fittings in a clean, dry place to protect them from dirt, moisture, and physical damage. Using airtight containers or sealed bags can help prevent corrosion and contamination.

Conclusion

Removing brass push to connect fittings requires understanding its components, using the right tools, and following a systematic process. With the right tools and knowledge, removing brass push-in connection fittings can be a simple task. Share your tips, ask questions, or provide feedback at Contact Topa.

FAQ

Yes, brass push-to-connect fittings can be reused if they are in good condition. Ensure they are thoroughly cleaned and inspected for any damage before reusing.

You will need a disconnect clip or tongs to compress the collet and release the fitting. Additionally, having a pipe cutter and a bucket or towel to catch any residual water is recommended.

The fitting should slide off smoothly once the collet is compressed and the grip ring is released. If there is resistance, double-check the alignment of the disconnect clip and apply steady pressure.

Reposition the disconnect clip to ensure it is properly aligned, apply a small amount of lubricant, or use a different removal tool designed for your specific fitting type.

Ensure that the pipe ends are clean and smooth before installing a new fitting. Properly align the fitting and push it firmly onto the pipe until it seats fully to create a watertight seal.

Wear gloves to protect your hands from sharp edges and debris, and use safety glasses to prevent any debris from getting into your eyes. Always turn off the water supply and relieve pressure in the system before starting.

How to Loosen Brass Fittings

How to Loosen Brass Fittings

How to Loosen Brass Fittings

Table of Contents

Introduction

Brass fittings are widely used in various industries due to their durability, resistance to corrosion, and excellent conductivity. However, over time, these fittings can become stuck due to factors like corrosion, debris buildup, or overtightening. Knowing how to effectively loosen brass fittings is crucial for maintenance and repair tasks. This guide will walk you through the process with detailed steps and professional tips.

Tools and Materials Needed

Before starting the task of loosening brass fittings, it is essential to gather all the necessary tools and materials. Proper preparation ensures a smoother process and reduces the risk of damage or injury.

Essential Tools and Materials

Adjustable Wrench

An adjustable wrench is a versatile tool that can fit various sizes of nuts and bolts. It’s crucial for gripping and turning the brass fittings without slipping.

Pliers

Pliers provide additional grip and control, especially useful for smaller fittings or when you need to hold one part steady while working on another.

Pipe Wrench

A pipe wrench is designed for gripping round objects like pipes and fittings. Its adjustable jaws can lock onto fittings firmly, making it easier to apply torque.

Heat Gun or Torch

Applying heat can expand the metal and help break the bond that holds the fitting in place. A heat gun provides controlled heat, while a torch offers more intense heat for tougher jobs.

Penetrating Oil (e.g., WD-40)

Penetrating oil is used to loosen rusted or corroded parts. It seeps into the threads and helps to break down the rust, making it easier to turn the fitting.

Safety Gloves

Safety gloves protect your hands from sharp edges, heat, and chemicals. Choose gloves that provide both protection and dexterity.

Safety Goggles

Safety goggles are essential to protect your eyes from flying debris, sparks, or splashes of penetrating oil.

Rags

Rags are useful for cleaning the area around the fitting, wiping off excess oil, and protecting surfaces from heat or oil spills.

Preparation Steps

Proper preparation is critical to ensure safety and efficiency when loosening brass fittings. Follow these steps to set up your workspace and prepare the fittings for loosening:

Safety First

Wear Safety Gear

Before you start, put on your safety gloves and goggles. This protective gear shields you from potential hazards such as flying debris, sharp edges, and hot surfaces.

Inspect the Area

Clean the Workspace

Ensure that the area around the fitting is clean and free from any obstructions. Remove any dirt, grease, or debris that could interfere with your work.

Check for Corrosion and Damage

Examine the fitting and the surrounding components for signs of corrosion, rust, or physical damage. Corrosion can make fittings more difficult to loosen, and damage might indicate the need for replacement rather than repair.

Identify the Fitting

Determine the Type

Identify the type of brass fitting you are working with. Common types include compression fittings, flare fittings, and threaded fittings. Knowing the type will help you choose the right tools and techniques.

Measure the Size

Measure the size of the fitting to ensure you select the appropriately sized wrench or tool. Using the right size tool is crucial to avoid rounding off or damaging the fitting.

Methods to Loosen Brass Fittings

Using Basic Hand Tools

Choose the Right Wrench

Selecting the correct wrench is crucial for effectively loosening brass fittings. An adjustable wrench is versatile and can be adjusted to fit various sizes of fittings. A pipe wrench, with its serrated jaws, provides a firm grip on round objects like pipes and fittings.

Adjustable Wrench: This tool can be adjusted to the exact size of the fitting, ensuring a snug fit. It’s useful for both small and large fittings.

Pipe Wrench: Ideal for gripping and turning cylindrical objects, the pipe wrench’s jaws tighten as more pressure is applied, making it highly effective for loosening stuck fittings.

loose brass fitting

Secure the Fitting

To prevent damaging the fitting or the connected pipe, it’s important to secure the fitting properly. Use one wrench to hold the fitting stationery and another to turn the nut or fitting.

Position the Wrench: Place the wrench around the fitting and ensure it’s tightly secured. The jaws should grip the fitting firmly without slipping.

Hold Firmly: Use one wrench to hold the fitting steady. This prevents any movement that could cause damage to the pipe or fitting during the loosening process.

Turn Counterclockwise: Use the second wrench to turn the nut or fitting counterclockwise. This is the standard direction for loosening most fittings.

Apply Steady Pressure

Applying steady and even pressure is key to preventing damage to the brass fitting.

Avoid Sudden Movements: Jerky or sudden movements can damage the fitting or strip the threads. Instead, apply gradual, steady pressure.

Consistent Force: Maintain consistent pressure on the wrench until the fitting begins to loosen. If the fitting does not budge, consider using additional methods like applying heat or penetrating oil.

Applying Heat

Understand Thermal Expansion

Heat causes metals to expand. By heating the brass fitting, you can take advantage of this expansion to break the bond between the fitting and the pipe.

Thermal Expansion: Heating the fitting causes it to expand slightly, which can help to break any corrosion or debris that’s holding it in place.

Use a Heat Gun or Torch

Applying heat directly to the fitting can be very effective.

Heat Gun: A heat gun provides controlled heat, which is safer for surrounding materials. Direct the heat gun at the fitting and apply heat evenly.

Torch: A torch provides more intense heat, which can be useful for particularly stubborn fittings. Use caution to avoid overheating.

Attempt to Loosen

After heating, the fitting should be easier to turn.

Timing: Heat the fitting for a few minutes, ensuring the heat is distributed evenly.

Loosen While Warm: While the fitting is still warm, use a wrench to attempt to loosen it. The expansion from the heat should make it easier to turn.

Using Penetrating Oil

Select Penetrating Oil

High-quality penetrating oil is essential for loosening stuck fittings.

Quality Matters: Choose a reputable brand like WD-40, which is designed to penetrate rust and corrosion.

Apply Generously

Applying penetrating oil correctly increases its effectiveness.

Spray Thoroughly: Spray the oil around the fitting, ensuring it reaches the threads and any corroded areas.

Wait: Allow the oil to penetrate for at least 15-20 minutes. For severe corrosion, you may need to wait longer or reapply.

Using Penetrating Oil

Try Loosening

Once the oil has had time to work, attempt to loosen the fitting.

Use a Wrench: Use your wrench to turn the fitting. The penetrating oil should have loosened the rust and debris, making it easier to turn.

Reapply if Needed: If the fitting remains stuck, apply more oil and wait longer before trying again.

Leveraging Impact Tools

Impact Wrench

For particularly stubborn fittings, an impact wrench can provide the necessary torque.

High Torque: An impact wrench delivers high torque, which can break free even the most stubborn fittings.

Safety Precautions

Using an impact wrench requires proper safety measures.

Familiarity: Ensure you understand how to operate the impact wrench safely.

Protective Gear: Wear safety goggles and gloves to protect yourself from any flying debris or accidental slips.

Use the Tool

Follow the correct procedures for using the impact wrench.

Manufacturer’s Instructions: Always follow the manufacturer’s instructions for safe and effective use.

Controlled Use: Apply the wrench to the fitting and use controlled bursts to gradually loosen the fitting.

Combination Methods

Heat and Penetrating Oil

Combining heat and penetrating oil can be particularly effective.

Apply Penetrating Oil First: Spray the fitting with penetrating oil and let it sit for the recommended time.

Apply Heat: After the oil has penetrated, apply heat to the fitting. The combination of oil and heat can break down rust and corrosion more effectively.

Heat and Hand Tools

Using heat in conjunction with hand tools can also be effective.

Heat the Fitting: Apply heat to the fitting as described earlier.

Use Hand Tools: While the fitting is still warm, use your wrench to attempt loosening it. The heat will have expanded the metal, making it easier to turn.

Troubleshooting Common Issues

Stubborn or Corroded Fittings

Identify Corrosion

Corrosion is a common issue with brass fittings, particularly in environments with high moisture or chemical exposure. Identifying corrosion early can help in choosing the right approach to loosen the fitting.

Visual Inspection: Look for green or white deposits around the fitting. These deposits are typical signs of brass corrosion, indicating areas where the fitting might be stuck.

Physical Signs: Corroded fittings may also feel rough or exhibit visible pitting and flaking.

Use a Brass Fitting Extractor

When fittings are severely corroded, traditional tools might not be sufficient. A brass fitting extractor is specifically designed to handle these situations.

Specialized Grip: The extractor has specially designed jaws that can grip corroded and rounded-off fittings more effectively than standard wrenches.

Step-by-Step Use:

  • Position the extractor on the fitting.
  • Tighten the jaws securely around the fitting.
  • Use a wrench or handle to turn the extractor, loosening the fitting.

Prevent Future Corrosion

To avoid dealing with corroded fittings in the future, take preventive measures during installation and maintenance.

Anti-Seize Compound: Apply an anti-seize compound to the threads of the fitting during reinstallation. This compound helps to prevent corrosion by creating a barrier between the metal and environmental elements.

Regular Maintenance: Periodically inspect fittings for early signs of corrosion and apply protective coatings as needed.

broken brass fitting

Damaged Fittings

Assess Damage

Before attempting to loosen or reuse a brass fitting, assess its condition to determine the best course of action.

Visual and Physical Inspection: Check for stripped threads, cracks, or any signs of structural compromise. Use a magnifying glass if necessary for a detailed inspection.

Functional Test: Gently try to turn the fitting. If it moves too easily or wobbles, the threads might be stripped or the fitting might be cracked.

Repair or Replace

Depending on the extent of the damage, you may need to repair or replace the fitting.

Minor Damage:

Thread Repair Kits: For slightly stripped threads, use a thread repair kit to restore the threads.

Sealants and Epoxies: Small cracks can sometimes be sealed with appropriate industrial epoxies.

Extensive Damage:

Replacement: If the fitting is heavily damaged or poses a risk of failure, replace it with a new one. Ensure the replacement is of the same type and size for compatibility.

Proper Installation

To avoid damage during future installations, follow best practices for installing brass fittings.

Avoid Overtightening: Use a torque wrench to apply the manufacturer-recommended amount of torque. Overtightening can strip threads and crack fittings.

Lubricate Threads: Applying a suitable lubricant or anti-seize compound to the threads can help prevent damage during tightening and make future loosening easier.

Tips for Preventing Stuck Brass Fittings

Proper Installation

Use Appropriate Torque: Always refer to the manufacturer’s specifications for the correct torque levels when installing brass fittings. Using a torque wrench can ensure you apply just the right amount of force.

Align Components Correctly: Misalignment during installation can cause undue stress on the fitting, leading to it becoming stuck over time. Ensure that all parts are properly aligned before tightening.

Regular Maintenance

Inspect Periodically: Schedule regular inspections of your brass fittings to catch any signs of wear, corrosion, or damage early. This proactive approach helps in maintaining the integrity of the fittings.

Clean Regularly: Keeping fittings clean from dirt, debris, and corrosive elements can significantly extend their lifespan. Use appropriate cleaning solutions for brass to avoid damage.

Lubricants

Apply Anti-Seize Compounds: Using anti-seize compounds on the threads during installation creates a protective barrier that prevents metal-to-metal contact and subsequent seizing.

Reapply as Needed: During maintenance checks, reapply lubricants or anti-seize compounds to ensure continued protection against corrosion and sticking.

By following these troubleshooting tips and preventive measures, you can effectively manage and maintain brass fittings, ensuring they remain functional and easy to work with over time. Proper care and maintenance are key to preventing common issues and extending the lifespan of your brass fittings.

Conclusion

Loosening brass fittings can be a straightforward task with the right tools and techniques. By following the methods outlined in this guide, you can handle even the most stubborn fittings with confidence. Regular maintenance and proper installation practices will help prevent future issues.

FAQ

If the fitting remains stuck after applying heat and penetrating oil, try the following:

Reapply penetrating oil and let it sit for a longer period, up to 24 hours.

Use an impact wrench to apply more torque.

Consider using a brass fitting extractor if the fitting is severely corroded.

Penetrating oil is specifically designed to penetrate and break down rust and corrosion. Regular lubricants may not be as effective for loosening stuck fittings. It’s recommended to use a high-quality penetrating oil like WD-40 for best results.

To prevent brass fittings from becoming stuck:

Apply an anti-seize compound to the threads during installation.

Avoid overtightening the fittings.

Perform regular maintenance and inspections to detect and address corrosion early.

Using a torch to heat brass fittings is effective, but it should be done with caution:

Keep the flame controlled and directed only at the fitting.

Avoid overheating to prevent damage to the fitting and surrounding components.

Always wear safety goggles and gloves.

Signs that a brass fitting may need replacement include:

Visible cracks or breaks in the fitting.

Stripped or severely damaged threads.

Excessive corrosion that compromises the fitting’s integrity.

Persistent leaks even after tightening or applying sealant.

Yes, many of these methods can be used on other types of metal fittings, such as copper, steel, and aluminum. However, always consider the specific properties and heat tolerance of the metal you are working with to avoid damage.


How to Use Teflon Tape on Brass Fittings

How to Use Teflon Tape on Brass Fittings

How to Use Teflon Tape on Brass Fittings

Table of Contents

Introduction

Brass fittings, known for their durability and resistance to corrosion, are commonly used in plumbing systems for their ability to withstand high pressures and temperatures. One of the most effective methods for sealing threaded connections is using Teflon tape, also known as PTFE (polytetrafluoroethylene) tape or plumber’s tape. This thin, flexible tape is applied to the threads of pipe fittings to create a tight seal that prevents leaks and enhances the longevity of the connection. With the right techniques and a bit of practice, you can achieve leak-free connections.

Understanding Teflon Tape

Teflon Tape on Brass Fittings Topa

What is Teflon Tape?

Teflon tape, formally known as PTFE (polytetrafluoroethylene) tape, is a fundamental tool in the plumbing industry. This versatile, non-adhesive film is commonly referred to as plumber’s tape due to its widespread use in sealing pipe threads. The primary function of Teflon tape is to prevent leaks by filling the minute gaps between threaded connections, ensuring a watertight or airtight seal.

The material composition of Teflon tape allows it to be highly resistant to water, chemicals, and temperature variations, making it an ideal sealing solution for a variety of plumbing applications. Its thin, flexible nature enables it to conform easily to the threads of pipes and fittings, creating a durable seal that can withstand the pressures and conditions typically encountered in plumbing systems.

Types of Teflon Tape

Teflon tape is available in several types, each distinguished by color and intended for specific applications. Understanding the different types of Teflon tape is crucial for selecting the right tape for your plumbing project:

White Teflon Tape: This is the most common type of Teflon tape and is typically used for standard water pipe applications. It is suitable for sealing the threads of most household plumbing connections, including those for faucets, showerheads, and other water fixtures.

Yellow Teflon Tape: Specifically designed for gas lines, yellow Teflon tape is thicker and denser than its white counterpart. It is used to seal the threads of gas pipe connections, ensuring a safe and secure seal that can prevent gas leaks. It is essential for applications involving natural gas, propane, and other gas systems.

Pink Teflon Tape: This heavy-duty tape is used for water lines and is thicker than white Teflon tape, providing a more robust seal. It is often used in commercial and industrial plumbing applications where a stronger, more durable seal is required.

Why Use Teflon Tape with Brass Fittings?

Ensuring a Tight Seal

Brass fittings, like all threaded fittings, have small gaps and imperfections in their threads that can allow water or gas to leak through if not properly sealed. Teflon tape addresses this issue by filling these gaps and creating a tight seal. When wrapped around the threads, the tape conforms to the contours of the threads, effectively plugging any potential leakage paths. This tight seal is crucial in both high-pressure and low-pressure systems to maintain the integrity of the plumbing system.

Preventing Leaks

Leak prevention is one of the primary reasons for using Teflon tape with brass fittings. Leaks can lead to water damage, mold growth, and increased utility bills in water systems. In gas systems, leaks can be hazardous, posing risks of fire or explosion. By using Teflon tape, you create a reliable barrier that prevents fluids or gases from escaping through the threaded connections.

Step-by-Step Guide to Using Teflon Tape on Brass Fittings

Achieving a secure and leak-free connection with brass fittings requires the correct application of Teflon tape. This step-by-step guide will walk you through the process, ensuring that your fittings are properly sealed and ready for use.

Gathering Your Materials

Before you begin, make sure you have all the necessary materials and tools on hand. Having everything ready will make the process smoother and more efficient.

Teflon tape: Choose the appropriate type for your application (e.g., white for water lines, yellow for gas lines).

Brass fittings: Ensure they are the correct size and type for your plumbing project.

Wrench: A suitable wrench for tightening the fittings.

Clean cloth: For cleaning the threads of the fittings.

Preparation

Proper preparation of the brass fittings is crucial for ensuring a secure seal. Follow these steps to get the fittings ready:

Clean the Threads: Use a clean cloth to thoroughly remove any dirt, oil, or debris from the threads of the brass fittings. Clean threads provide a better surface for the Teflon tape to adhere to and create a more effective seal.

Ensure Dryness: Make sure the threads are completely dry before applying the tape. Moisture can interfere with the tape’s ability to adhere properly and may compromise the seal.

use teflon tape Topa

Applying the Teflon Tape

Applying Teflon tape correctly is key to achieving a leak-free connection. Here’s how to do it:

Starting Point: Begin wrapping the tape 1-2 threads back from the end of the fitting. This prevents the tape from getting into the system, where it could potentially cause blockages or other issues.

Direction: Wrap the tape clockwise around the threads. This is the same direction that the fitting will be screwed on. Wrapping in the correct direction ensures that the tape does not unravel when the fitting is tightened.

Number of Wraps: Typically, 3-5 wraps of tape are sufficient to create a good seal. The exact number of wraps may vary depending on the specific fitting and application, but this range generally provides effective coverage.

Smooth Application: As you wrap the tape, ensure it is applied smoothly and evenly without wrinkles or overlaps. A smooth application ensures consistent coverage and a more reliable seal.

Connecting the Fittings

Once the Teflon tape is applied, the fittings can be connected. Follow these steps for proper assembly:

Hand-Tighten First: Start by screwing the fittings together by hand. This initial step ensures that the threads are properly aligned and engaged. Hand-tightening also helps to avoid cross-threading, which can damage the fittings and compromise the seal.

Final Tightening: After hand-tightening, use a wrench to securely tighten the connection. Be cautious not to over-tighten, as excessive force can damage the threads and the Teflon tape, leading to leaks. Tighten the fitting until it feels snug, then give it an additional quarter turn with the wrench.

By following these steps, you can ensure that your brass fittings are properly sealed with Teflon tape, providing a reliable and leak-free connection. This meticulous approach not only prevents leaks but also extends the life of your plumbing system, saving you time and money on future repairs.

Common Mistakes and How to Avoid Them

When using Teflon tape on brass fittings, avoiding common mistakes is essential to ensure a secure, leak-free connection. Understanding these mistakes and knowing how to avoid them can save you time, effort, and potential frustration. Here are the most common pitfalls and how to prevent them.

Using the Wrong Type of Tape

One of the most frequent mistakes is using the incorrect type of Teflon tape for your specific application. Teflon tape comes in different colors, each designed for particular uses.

Solution: Ensure you use the appropriate type of Teflon tape for brass fittings. Typically, white Teflon tape is used for water lines, while yellow tape is for gas lines, and pink tape is for heavy-duty water lines. Always check the tape’s specifications to match them with your project’s requirements.

Topa Teflon Tape on Brass Fittings

Incorrect Application

Proper application of Teflon tape is critical for creating a reliable seal. Incorrect application can lead to leaks and compromised connections.

Wrong Direction:

Mistake: Wrapping the tape counterclockwise can cause it to unravel when the fitting is tightened.

Solution: Always wrap the tape clockwise around the threads. This ensures the tape stays in place as the fitting is tightened.

Inadequate Layers:

Mistake: Using too few layers of tape can result in an insufficient seal, while too many layers can cause difficulty in screwing the fittings together.

Solution: Apply 3-5 wraps of tape for a secure seal. This range provides adequate coverage without excess bulk.

Uneven Application:

Mistake: Wrinkles, overlaps, or gaps in the tape can compromise the seal and lead to leaks.

Solution: Apply the tape evenly and smoothly. Make sure each layer is flat and tight against the threads without overlaps or gaps.

Over-Tightening

Applying excessive force when tightening fittings can damage both the threads and the Teflon tape, leading to potential leaks and reduced connection integrity.

Risks: Over-tightening can strip the threads, deform the fittings, or tear the Teflon tape, compromising the seal.

Solution: Tighten the fitting until it feels snug, then, give it a quarter turn with a wrench. This method ensures a secure connection without over-stressing the threads or the tape.

By avoiding these common mistakes, you can ensure a more reliable and durable seal with your brass fittings. Proper selection and application of Teflon tape, along with careful tightening, will help you achieve leak-free connections and maintain the integrity of your plumbing system.

Troubleshooting and Maintenance Tips

Ensuring your brass fittings sealed with Teflon tape remain leak-free and durable involves regular troubleshooting and maintenance. Here are some essential tips to help you maintain your plumbing connections effectively.

Checking for Leaks

After assembling your brass fittings, it is crucial to check for any signs of leaks to ensure that the connection is secure.

Method:

Run Water Through the Connection: Obs closely observe the connection point once the fittings are assembled and the water supply is turned on.

Inspect for Leaks: Look for any signs of water seeping out from the threads. Even small drips can indicate an improper seal.

Action:

If a Leak is Detected:

Disassemble the Connection: Carefully unscrew the fittings.

Reapply Teflon Tape: Remove the old tape completely from the threads, ensuring no residue is left behind. Clean the threads with a cloth.

Rewrap with New Tape: Apply fresh Teflon tape, ensuring it is wrapped evenly and in the correct direction.

Tighten Again: Reassemble the fittings, hand-tightening first, then using a wrench for the final snug fit.

seal on Brass Fittings

Reapplying Teflon Tape

If you need to disconnect and reconnect fittings for any reason, it’s essential to reapply fresh Teflon tape to maintain a proper seal.

When Needed:

During Maintenance: Anytime fittings are unscrewed and reconnected.

After Leak Detection: If a leak is found and the connection needs to be resealed.

Steps:

Remove Old Tape: Completely strip off the old Teflon tape from the threads. Use a cloth to clean the threads thoroughly, removing any remnants.

Clean the Threads: Ensure the threads are clean and dry.

Rewrap with New Tape: Apply new Teflon tape, starting 1-2 threads back from the end, wrapping clockwise, and ensuring 3-5 layers for a secure seal.

Routine Maintenance

Regular maintenance helps to ensure the longevity and reliability of your plumbing connections.

Regular Checks:

Inspect Connections: Periodically check all Teflon-taped connections for any signs of wear, corrosion, or leaks. This can be done during routine plumbing inspections or whenever you perform maintenance on your plumbing system.

Preventive Measures:

Ensure Fittings Remain Tight: Over time, vibrations and temperature changes can cause fittings to loosen. Check that all fittings are still snug and give them a slight turn with a wrench if necessary.

Check Tape Integrity: Look for signs that the Teflon tape might be deteriorating, such as visible wear or discoloration. If the tape appears compromised, it’s best to reapply the new tape.

By following these troubleshooting and maintenance tips, you can ensure that your brass fittings remain secure and leak-free. Regular checks and proper reapplication of Teflon tape will help maintain the integrity and performance of your plumbing system, preventing potential issues and prolonging the lifespan of your connections.

Conclusion

With the knowledge gained from this guide, you can confidently tackle your next plumbing project. Proper use of Teflon tape is a straightforward yet highly effective method for ensuring long-lasting and secure fittings. For more plumbing tips and professional advice, be sure to follow our blog. We regularly share valuable insights and practical tips to help you with your plumbing projects. If you have any questions or need further assistance, don’t hesitate to reach out to us.

FAQ

Yes, Teflon tape is suitable for most brass fittings used in plumbing. It helps create a tight seal and prevent leaks. However, ensure you use the correct type of tape for your specific application (e.g., white for water lines, yellow for gas lines).

Typically, 3-5 wraps of Teflon tape are sufficient to create a secure seal. This range provides adequate coverage without adding too much bulk, which can make it difficult to screw the fittings together.

Always wrap Teflon tape clockwise around the threads. This ensures that the tape stays in place and doesn’t unravel when the fitting is tightened.

No, Teflon tape should not be reused. Once a fitting has been unscrewed, the tape will be compressed and may not provide an effective seal if reused. Always apply fresh tape when reconnecting fittings.

While brass to brass fittings can sometimes create a tight seal without tape, using Teflon tape is recommended to ensure a leak-free connection. The tape fills any small gaps and provides additional sealing and lubrication.

Yes, Teflon tape can be used with various types of fittings, including PVC, copper, and steel. It is versatile and effective for sealing threaded connections in many plumbing applications. Always ensure you use the appropriate type of tape for the specific material and application.

How to Connect Brass Fittings

How to Connect Brass Fittings

How to Connect Brass Fittings

Table of Contents

Introduction

Connecting brass fittings is a fundamental skill essential for various applications such as plumbing, gas lines, refrigeration, and hydraulic systems. Whether you are working on a residential plumbing project, setting up a gas line, or installing a complex hydraulic system, knowing how to properly connect brass fittings ensures a reliable and leak-free connection.

Step-by-Step Guide to Connecting Brass Fittings

Cutting the Pipe

Measure the Length of the Pipe Needed:

Begin by determining the exact length of pipe required for your project. Use a tape measure to measure the distance between the connection points accurately. Mark the pipe with a pencil or marker at the point where it needs to be cut.

Use a Pipe Cutter to Make a Clean, Straight Cut:

Select a pipe cutter suitable for the type of pipe you are using (e.g., copper). Place the pipe cutter around the marked area and tighten the cutter until it is snug around the pipe. Rotate the cutter around the pipe, tightening it slightly after each full rotation. Continue this process until the pipe is cut through. This method ensures a clean, straight cut, which is crucial for a proper fitting connection.

Deburring the Pipe Ends

Use a Deburring Tool to Remove Any Burrs from the Cut Pipe End:

After cutting the pipe, burrs or rough edges are often left behind. These need to be removed to ensure a smooth connection. Use a deburring tool, which can be a handheld tool specifically designed for this purpose or an attachment for a drill. Run the tool around the inside and outside edges of the pipe end to remove any burrs or rough spots.

Ensure the Pipe End is Smooth to Prevent Leaks:

After deburring, feel the pipe end with your fingers to make sure it is smooth and even. Any remaining roughness can cause improper seating of the fitting, leading to potential leaks. A smooth pipe end is essential for a secure and leak-free connection.

Cleaning the Pipe and Fitting

Wipe the Pipe and Fitting with a Clean Cloth to Remove Dirt and Oil:

Before assembly, clean both the pipe and the fitting thoroughly. Use a clean cloth to wipe away any dirt, dust, or oil. This step ensures that no contaminants interfere with the sealant or the connection.

Use an Appropriate Cleaning Solution if Necessary:

In cases where the pipe and fitting are particularly dirty or greasy, use a suitable cleaning solution. For metal pipes, a solvent-based cleaner can be effective. For other materials, a mild detergent and water may suffice. Ensure the components are completely dry before proceeding to the next step.

seal on Brass Fittings

Applying Sealant

Choose the Right Sealant: PTFE Tape or Pipe Dope:

Select an appropriate sealant based on the application and type of fitting. PTFE tape (also known as plumber’s tape) is commonly used for threaded fittings, while pipe dope (a paste sealant) can be used for both threaded and non-threaded connections.

Wrap PTFE Tape Around the Threads of the Pipe in a Clockwise Direction or Apply Pipe Dope Evenly on the Threads:

If using PTFE tape, start at the end of the threads and wrap the tape in a clockwise direction, overlapping each layer slightly. Apply enough tape to cover the threads without excess bulk.

If using pipe dope, apply a thin, even layer over the threads using a brush or your finger. Ensure complete coverage to create a proper seal.

Inserting the Pipe into the Fitting

Align the Pipe with the Fitting and Insert It Firmly:

With the sealant applied, align the pipe with the fitting carefully. Insert the pipe into the fitting, pushing it in firmly to ensure it is fully seated. For threaded connections, screw the pipe into the fitting by hand until it is snug.

Ensure the Pipe is Fully Seated in the Fitting:

Double-check that the pipe is fully inserted or screwed into the fitting. A proper fit is crucial for a secure connection and to prevent leaks.

Tightening the Connection

Use Wrenches to Tighten the Fitting:

For threaded fittings, use two wrenches: one to hold the fitting in place and the other to turn the pipe. Tighten the connection until it is secure. For compression fittings, use a wrench to tighten the compression nut.

Avoid Over-Tightening to Prevent Damage:

Be cautious not to over-tighten the connection. Over-tightening can damage the threads or the fitting itself, leading to leaks or future failures. Tighten just enough to ensure a secure and leak-free connection.

By following these detailed steps, you can ensure that your brass fittings are connected properly, providing a reliable and durable solution for your plumbing, gas, refrigeration, or hydraulic systems. Proper preparation, clean components, and careful assembly are key to achieving optimal results.

Connecting Different Types of Brass Fittings

Brass fittings come in various types, each designed for specific applications and connection methods. Understanding the differences and how to properly connect each type ensures a secure and leak-free installation. This section will guide you through the steps for connecting threaded, compression, flare, and push-to-connect brass fittings.

Compression Fittings

Slide the Compression Nut and Ring onto the Pipe:

Begin by sliding the compression nut onto the pipe, followed by the compression ring (also known as a ferrule). Ensure the ring is positioned correctly, with its tapered end facing the fitting.

Insert the Pipe into the Fitting:

Push the pipe into the compression fitting until it reaches the internal stop within the fitting. This ensures the pipe is fully seated and aligned correctly for a secure connection.

Tighten the Compression Nut with a Wrench:

Slide the compression nut towards the fitting and hand-tighten it onto the threads of the fitting. Use a wrench to further tighten the nut. As you tighten, the compression ring is compressed between the nut and the fitting, creating a tight seal around the pipe. Tighten until the connection is secure, but avoid over-tightening to prevent damage to the pipe or fitting.

Flare Fittings

Cut and Flare the Pipe End Using a Flaring Tool:

First, cut the pipe to the desired length using a pipe cutter. Ensure the cut is clean and straight. Next, use a flaring tool to create a flare at the end of the pipe. Insert the pipe into the flaring tool, tighten the tool’s clamp, and use the flaring cone to expand the pipe end into a flare. This flare provides a surface for the fitting to seal against.

Fit the Flare Nut and Flare Fitting onto the Pipe:

Slide the flare nut onto the pipe, followed by placing the flared pipe end into the flare fitting. Ensure the flare nut is correctly positioned behind the flare on the pipe.

Tighten the Flare Nut to the Fitting:

Thread the flare nut onto the flare fitting by hand, ensuring it is correctly aligned. Use a wrench to tighten the flare nut, securing the flared pipe end against the fitting. Tighten until the connection is secure, but be careful not to over-tighten, as this can damage the flare or fitting.

Push-to-Connect Fittings

Simply Push the Pipe into the Fitting Until It Clicks into Place:

Push-to-connect fittings are designed for quick and easy connections. Simply push the pipe into the fitting until you feel it click into place. The internal mechanism of the fitting grips the pipe securely, creating a tight seal without the need for additional tools or sealants.

Ensure a Secure Connection by Pulling Lightly on the Pipe:

After inserting the pipe, lightly pull on it to ensure it is fully engaged and secure within the fitting. The fitting should hold the pipe firmly in place, indicating a proper connection.

By following these detailed steps for each type of brass fitting, you can ensure a secure and reliable connection, whether you are working with threaded, compression, flare, or push-to-connect fittings. Understanding the specific requirements and techniques for each type of fitting is essential for achieving optimal results in your plumbing, gas, refrigeration, or hydraulic systems.

Troubleshooting Common Issues

Even with careful installation, issues can arise with brass fittings. Identifying and resolving these issues promptly is crucial for maintaining the integrity and functionality of your system. Here, we will discuss common problems such as leaks, loose connections, and corrosion, and provide detailed steps to troubleshoot and fix these issues.

Leaks

Leaks are a common issue in plumbing and hydraulic systems. They can lead to significant damage if not addressed promptly.

Identify the Source of the Leak:

Begin by visually inspecting the system to locate the exact source of the leak. Check around all fittings and joints for any signs of moisture or dripping. Sometimes, leaks can be subtle and may require closer inspection, such as using a flashlight to detect small droplets or damp spots.

Tighten the Fitting:

If the leak is coming from a fitting, use a wrench to tighten it slightly. Be cautious not to over-tighten, as this can damage the threads or the fitting itself. Tightening should be done incrementally, checking the leak after each adjustment.

Reapply Sealant if Necessary:

If tightening the fitting does not stop the leak, you may need to disassemble the connection and reapply the sealant. For threaded connections, remove the fitting, clean the threads thoroughly to remove old sealant, and then reapply PTFE tape or pipe dope. For other types of fittings, inspect the sealing surfaces for any debris or damage before reassembling.

leak brass push to connect fitting

Loose Connections

Loose connections can lead to inefficiencies and potential leaks. Ensuring all fittings are securely tightened is crucial for the system’s performance.

Check All Connections:

Regularly inspect all fittings and connections in your system. Gently tug on pipes and fittings to check for any movement. A properly connected fitting should not show any signs of looseness.

Tighten Any Loose Fittings:

Use appropriate tools, such as wrenches, to tighten any loose fittings. For threaded connections, ensure that the threads are not stripped and that the fitting can be tightened properly. For compression fittings, ensure the compression nut is snug and the ferrule is properly seated.

Replace Worn-Out Fittings if Needed:

If a fitting cannot be tightened sufficiently due to wear or damage, it should be replaced. Inspect the fitting and the corresponding pipe end for any signs of wear, damage, or deformation. Replace with a new fitting to ensure a secure connection.

Corrosion and Wear

Corrosion and wear can weaken brass fittings over time, leading to leaks and system failures. Regular inspection and maintenance are key to preventing these issues.

Inspect Fittings Regularly for Signs of Corrosion:

Conduct routine inspections of your brass fittings, looking for any signs of corrosion, such as discoloration, pitting, or rust. Pay special attention to areas exposed to harsh conditions, such as moisture or chemicals.

Replace Corroded Fittings Promptly:

If you identify any fittings that show signs of significant corrosion, replace them immediately. Corroded fittings can compromise the integrity of the entire system. When replacing, ensure the new fittings are suitable for the environmental conditions to prevent future corrosion.

Preventative Measures:

To minimize corrosion, consider using protective coatings or treatments on brass fittings, especially in harsh environments. Ensure the system is properly maintained, and any leaks are addressed promptly to prevent moisture accumulation around the fittings.

By following these detailed steps, you can effectively troubleshoot and resolve common issues with brass fittings, ensuring your system remains reliable and efficient. Regular maintenance and prompt attention to any problems are essential for the longevity and performance of your plumbing, gas, refrigeration, or hydraulic systems.

Conclusion

Connecting brass fittings is a straightforward process when armed with the right knowledge and tools. Whether you are working on plumbing, gas, refrigeration, or hydraulic systems, understanding the specific requirements and techniques for each type of fitting ensures secure and leak-free connections.

Should you have any questions or need further assistance, do not hesitate to leave a comment or reach out for professional advice. Properly connected brass fittings are key to the safety and functionality of your systems, and we are here to support you in achieving that goal.

FAQ

For brass fittings, PTFE tape and pipe dope are commonly used. PTFE tape is ideal for threaded connections, while pipe dope can be used for both threaded and non-threaded fittings.

A fitting is tight enough when it is secure and does not leak. Use a wrench to tighten the fitting until it is snug, but avoid over-tightening to prevent damage. Check for leaks after tightening.

First, identify the source of the leak. Tighten the fitting with a wrench if it is loose. If the leak persists, disassemble the fitting, clean the threads, reapply sealant, and reassemble.

Yes, brass fittings can be used with various types of pipes, including copper, PVC, and PEX. Ensure that the fitting type matches the pipe material and size for a secure connection.

It is recommended to inspect brass fittings at least once a year, or more frequently in harsh environments. Look for signs of discoloration, pitting, or rust, and replace any corroded fittings promptly.

Common tools needed for connecting brass fittings include wrenches, a pipe cutter, a deburring tool, and sealant (PTFE tape or pipe dope). Depending on the type of fitting, you might also need a flaring tool or compression tool.

Contact Topa

Save 30% on maintenance costs with our easy-install hydraulic fittings. Contact Now!