Pressure Washer Hose Fitting Types A Comprehensive Guide

Pressure Washer Hose Fitting Types: A Comprehensive Guide

Pressure Washer Hose Fitting Types: A Comprehensive Guide

Introduction

Choosing the right hose fittings is crucial for ensuring optimal performance of your pressure washer. They not only influence the efficiency and effectiveness of your pressure washing tasks but also impact the safety and longevity of your equipment. Missteps in selecting the appropriate fittings can lead to leaks, bursts, and even equipment damage, potentially causing costly repairs and downtime. This comprehensive guide aims to cover everything you need to know about pressure washer hose fitting types.

What are Pressure Washer Hose Fittings?

Pressure washer hose fittings are essential components that connect the various parts of a pressure washer system, including hoses, guns, nozzles, and other accessories. These fittings ensure a secure and leak-proof connection, allowing water to flow at high pressure without interruption. They come in various shapes, sizes, and types to accommodate different hose diameters and pressure requirements. Their primary function is to maintain the integrity of the pressure washer system by providing a robust and reliable link between components.

Common Materials Used

Pressure washer hose fittings are typically made from materials that offer durability and resistance to corrosion and wear. The most common materials used are:

Stainless Steel

Stainless steel fittings are known for their exceptional resistance to corrosion and rust, making them ideal for environments where exposure to moisture and chemicals is common. These fittings are extremely durable and can withstand high pressures and temperatures, ensuring they maintain their integrity under demanding conditions. This makes stainless steel a preferred choice for industrial and commercial applications where reliability is crucial. However, stainless steel fittings are generally more expensive than those made from other materials.

Brass

Brass fittings strike a balance between durability and cost, making them a popular choice for many pressure washer systems. They are corrosion-resistant and offer good strength, which makes them suitable for medium to high-pressure applications. Brass fittings are relatively inexpensive compared to stainless steel, providing a cost-effective solution without sacrificing much in terms of performance.

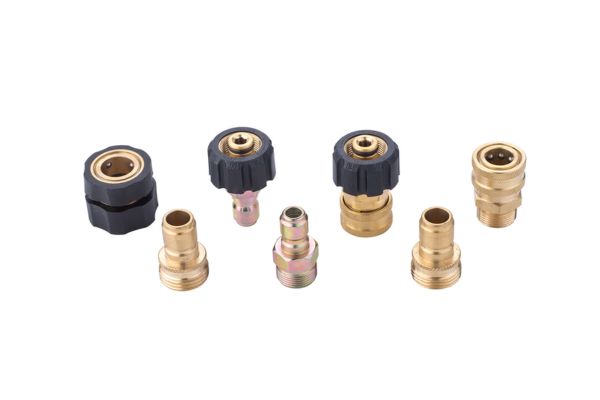
Types of Pressure Washer Hose Fittings

Pressure washer hose fittings come in various types, each designed to meet specific needs and applications. Understanding the differences between these fittings is essential for selecting the right one for your pressure washer system. Here, we will explore the most common types of pressure washer hose fittings available on the market.

Quick Connect Fittings

Quick connect fittings are popular for their ease of use and convenience. These fittings allow users to quickly attach and detach hoses and accessories without the need for tools. Quick connect fittings typically consist of a plug and a socket. The plug inserts into the socket, and a simple push-and-click mechanism secures the connection. This type of fitting is ideal for those who frequently change attachments, such as different spray nozzles or extension wands. Quick connect fittings are available in various sizes and materials, including stainless steel, brass, and plastic, making them versatile and suitable for a range of pressure washer models and applications.

Pressure Washer Hose Fitting Types

Threaded Fittings

Threaded fittings, also known as screw fittings, are another common type of pressure washer hose fitting. These fittings use a threaded mechanism to create a secure connection. The two main types of threaded fittings are National Pipe Thread (NPT) and British Standard Pipe (BSP). NPT fittings are standard in the United States, while BSP fittings are commonly used in Europe and other parts of the world. Threaded fittings are known for their reliability and ability to withstand high pressures, making them suitable for both residential and commercial applications. However, they require more effort to connect and disconnect compared to quick connect fittings, often needing tools like wrenches to ensure a tight seal.

Twist Connect Fittings

Twist connect fittings combine elements of both quick connect and threaded fittings. They feature a twist-and-lock mechanism that allows for secure connections without the need for tools. Users simply twist the fitting to lock it in place, providing a quick and easy way to connect hoses and accessories. Twist connect fittings are designed to prevent accidental disconnections, ensuring a reliable connection during use. These fittings are commonly used in medium to high-pressure applications and are available in various materials to suit different needs.

Snap Coupler Fittings

Snap coupler fittings are designed for ease of use and secure connections. These fittings use a snap-on mechanism, similar to quick connect fittings, but with added security features to prevent accidental disconnections. Snap couplers are often used in high-pressure applications where a reliable connection is critical. They are available in different sizes and materials, including stainless steel and brass, making them suitable for various pressure washer systems. Snap coupler fittings are favored for their durability and ease of use, particularly in professional and industrial settings.

Bayonet Fittings

Bayonet fittings are less common but still an important type of pressure washer hose fitting. These fittings use a bayonet-style locking mechanism, similar to those found on camera lenses. The fitting is inserted and then twisted to lock it in place. Bayonet fittings provide a secure connection that is easy to engage and disengage, making them suitable for various pressure washer applications. They are often used in residential and light commercial settings where quick and secure connections are needed.

pressure washer Types Topa

M22 Fittings

M22 fittings are a specific type of threaded fitting commonly used in pressure washers. They have a 22mm diameter and are often found on consumer-grade pressure washers and accessories. M22 fittings are known for their reliability and ease of use, providing a secure connection for hoses and attachments. They are typically made from brass or plastic and are suitable for a range of pressure washer applications.

Specific Applications and Compatibility

Choosing the right pressure washer hose fittings depends significantly on the specific application and compatibility with your equipment. Different settings, such as residential and commercial use, as well as varying pressure requirements, necessitate the use of different fitting types to ensure optimal performance and safety.

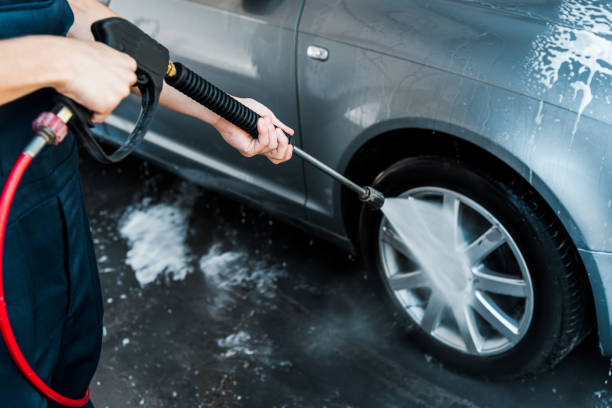
Residential vs Commercial Use

The requirements for pressure washer hose fittings differ considerably between residential and commercial applications. Residential pressure washers are typically designed for lighter-duty tasks, such as cleaning patios, vehicles, and home exteriors. These washers usually operate at lower pressures and flow rates compared to commercial units. Consequently, the fittings used in residential systems are often made from materials like plastic or brass, which are sufficient for lower pressure and less frequent use.  

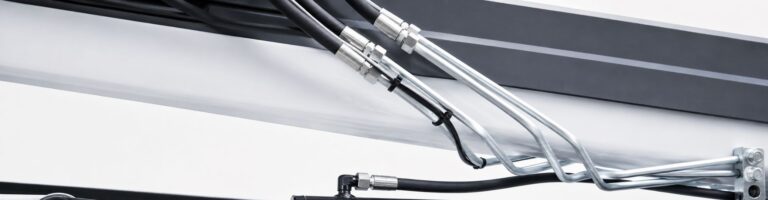
High-Pressure Applications

High-pressure applications require fittings that can safely handle elevated PSI (pounds per square inch) ratings without compromising performance or safety. Fittings suitable for high-pressure applications are typically made from strong, durable materials such as stainless steel or high-grade brass. These materials can withstand intense pressure and reduce the risk of leaks or bursts. Quick-connect fittings made from stainless steel are often used in high-pressure settings because they provide a secure, leak-proof connection that can be easily and quickly changed as needed.

Low-Pressure Applications

Low-pressure applications, such as light cleaning tasks, garden irrigation, or washing delicate surfaces, require fittings that are easy to handle and install, without the need for the heavy-duty durability required by high-pressure systems. Plastic and brass fittings are commonly used in low-pressure applications due to their sufficient strength for lower PSI ratings and their cost-effectiveness.

How to Choose the Right Pressure Washer Fitting

Selecting the right pressure washer hose fittings is essential for ensuring the efficiency, safety, and longevity of your pressure washer system. Here, we will guide you through the process of choosing the best fittings for your needs by assessing various factors, ensuring compatibility with your equipment, and considering future-proofing your setup.

Assessing Your Needs

When choosing pressure washer fittings, it’s crucial to consider several factors to ensure they meet your specific requirements:

Pressure Rating: The PSI rating of your pressure washer is one of the most critical factors. Ensure that the fittings you choose are rated to handle the maximum pressure your washer can produce. Using fittings with a lower PSI rating than required can lead to failures and safety hazards.

Material: The material of the fittings should match the demands of your application. For high-pressure and commercial use, stainless steel fittings are ideal due to their durability and resistance to corrosion. Brass fittings are suitable for medium to high-pressure applications and offer a good balance of durability and cost. For low-pressure and residential use, plastic fittings are often sufficient and more cost-effective.

Size: Fittings come in various sizes, and it’s essential to select the correct size to ensure a secure and leak-proof connection. Common sizes include 1/4″, 3/8″, and 1/2″ fittings. Check your pressure washer and accessories to determine the appropriate size.

Type of Fitting: Consider the type of fitting that best suits your needs. Quick-connect fittings are convenient for frequent changes, while threaded fittings offer a secure connection for high-pressure applications. Push-lock fittings are easy to install for low-pressure tasks, and swivel fittings provide maneuverability to prevent hose kinks.

Matching Fittings to Equipment

Ensuring compatibility between your fittings and pressure washer equipment is crucial for seamless operation:

Hoses: Verify the diameter and threading of your hoses to match them with the appropriate fittings. For example, if your hose has a 3/8″ diameter with NPT threading, choose fittings that correspond to these specifications.

Guns and Wands: Check the connections on your pressure washer gun and wand to ensure they are compatible with the fittings you plan to use. Quick connect fittings are often used for ease of attachment and detachment.

Nozzles and Accessories: Ensure that the fittings are compatible with various nozzles and other accessories you may use. This includes checking for the correct threading and connection types to avoid leaks and ensure a secure fit.

Adapters: In some cases, you may need adapters to bridge different types or sizes of fittings. Ensure that any adapters used are rated for the pressure and application requirements.

Pressure washer fitting car cleaning

Future-Proofing Your Setup

Choosing versatile fittings can help future-proof your pressure washer setup, allowing for adaptability and longevity:

Universal Fittings: Opt for fittings that are compatible with a wide range of equipment and accessories. Universal fittings provide flexibility and make it easier to switch out components as needed without compatibility issues.

Durable Materials: Invest in high-quality fittings made from durable materials such as stainless steel or high-grade brass. These materials are more resistant to wear and corrosion, ensuring a longer lifespan and reducing the need for frequent replacements.

Standard Sizes and Types: Stick to standard sizes and types of fittings, such as NPT or quick connect, which are widely used and readily available. This makes it easier to find replacement parts and accessories in the future.

Expandable Systems: Consider the potential for expanding your pressure washer system. Choose fittings that can accommodate additional hoses, guns, and accessories as your needs grow. Swivel fittings, for example, can enhance maneuverability, making it easier to use longer hoses without tangling.

Installation and Maintenance Tips

Proper installation and maintenance of pressure washer hose fittings are crucial for ensuring optimal performance, safety, and longevity. This section provides step-by-step instructions for installing various fitting types, best practices for maintenance, and tips for troubleshooting common fitting-related issues.

Installation Guidelines

Installing pressure washer hose fittings correctly is essential to prevent leaks and ensure a secure connection. Here are step-by-step instructions for installing the most common fitting types:

Quick Connect Fittings:

Step 1: Ensure both the plug and socket are clean and free of debris.

Step 2: Pull back the collar on the socket.

Step 3: Insert the plug into the socket.

Step 4: Release the collar to lock the plug in place. Tug gently to ensure it is securely connected.

Threaded Fittings (NPT/BSP):

Step 1: Apply Teflon tape or pipe thread sealant to the male threads. Wrap the tape in the direction of the threads to prevent it from unraveling.

Step 2: Insert the male fitting into the female fitting.

Step 3: Hand-tighten the connection.

Step 4: Use a wrench to tighten the fitting further, taking care not to over-tighten and strip the threads.

Twist Connect Fittings:

Step 1: Align the fitting with the connection point.

Step 2: Insert the fitting and twist it to lock it in place.

Step 3: Ensure it is securely connected by giving it a gentle tug.

Troubleshooting Common Issues

Identifying and resolving fitting-related problems quickly can save time and prevent damage to your pressure washer system. Here are some common issues and how to address them:

Leaks at the Connection:

Cause: Loose fitting, worn threads, or damaged O-rings.

Solution: Tighten the fitting securely. If the threads are worn, apply Teflon tape or replace the fitting. Replace damaged O-rings.

Difficulty Connecting or Disconnecting Fittings:

Cause: Debris in the fitting, worn components, or lack of lubrication.

Solution: Clean the fitting thoroughly. Lubricate metal fittings. Replace worn components.

Reduced Water Pressure:

Cause: Blocked fitting, kinked hose, or incorrect fitting size.

Solution: Clean the fitting to remove blockages. Ensure the hose is not kinked. Verify the fitting size is appropriate for your pressure washer system.

Fittings Coming Loose During Use:

Cause: Improper installation, incompatible fittings, or damaged threads.

Solution: Reinstall the fitting correctly, ensuring a secure connection. Check compatibility and replace incompatible fittings. Replace fittings with damaged threads.

Conclusion

In this comprehensive guide, we’ve explored the various types of pressure washer hose fittings, their specific applications, and the importance of choosing the right materials and sizes. We also provided detailed instructions for installation and maintenance, ensuring your fittings remain in top condition for optimal performance and safety. Remember, selecting the appropriate fittings for your pressure washer not only enhances efficiency but also ensures safe and reliable operation.

FAQ

The most common types include quick connect fittings, threaded fittings (NPT/BSP), twist connect fittings, snap coupler fittings, push-lock fittings, and bayonet fittings.

Check the diameter and threading specifications of your pressure washer hoses and accessories. Common sizes are 1/4″, 3/8″, and 1/2″.

No, plastic fittings are generally suitable for low-pressure applications. For high-pressure applications, stainless steel or brass fittings are recommended due to their durability and ability to withstand high pressures.

Ensure fittings are properly installed and tightened. Use Teflon tape or pipe thread sealant on threaded fittings, and regularly inspect and replace worn or damaged O-rings and fittings.

Regularly inspect fittings for wear and damage, clean them to remove debris, apply a light lubricant to metal fittings, store them in a dry place, and replace worn or damaged fittings promptly.

Matching fittings to your equipment ensures a secure, leak-proof connection, maintains optimal water pressure, and prevents damage to both the fittings and the pressure washer system.

How to Remove Stripped Brake Line Fittings

How to Remove Stripped Brake Line Fittings

How to Remove Stripped Brake Line Fittings

Table of Contents

Introduction

Proper brake maintenance is crucial for ensuring the safety and performance of your vehicle. The brake system is one of the most vital components in any vehicle, directly impacting your ability to stop effectively and avoid accidents. Neglecting brake maintenance can lead to decreased performance, increased wear and tear on brake components, and, ultimately, dangerous driving conditions. By addressing issues like stripped brake line fittings promptly and correctly, you maintain the integrity of your brake system, ensuring it functions optimally and keeps you safe on the road.

Understanding Brake Line Fittings

Types of Brake Line Fittings

Brake line fittings come in various types, each designed for specific applications and ensuring a secure, leak-free connection within the brake system. The three most common types are flare fittings, compression fittings, and inverted flare fittings:

Flare Fittings: These fittings feature a conical seat that forms a tight seal when the flare nut is tightened. They are commonly used in high-pressure hydraulic systems, including brake lines, due to their ability to withstand significant pressure without leaking.

Compression Fittings: These consist of a compression nut and a compression ring (ferrule) that compresses against the brake line when tightened, creating a seal. They are typically used for lower-pressure applications but can be found in some brake systems.

Inverted Flare Fittings: Similar to flare fittings, inverted flare fittings have a concave seat and are often used in automotive brake systems for their reliability and ease of installation.

brake line fitting adapter supplier

Common Causes of Stripping

Understanding why brake line fittings become stripped can help prevent this issue in the future. The most common causes include:

Over-Tightening: Applying too much torque when tightening a brake line fitting can damage the threads, leading to stripping. It’s essential to follow the manufacturer’s torque specifications to avoid this problem.

Corrosion: Exposure to moisture and road salt can cause brake line fittings to corrode, weakening the threads and making them more susceptible to stripping when force is applied. Regular inspections and maintenance can help mitigate corrosion-related issues.

Improper Tools: Using the wrong tools, such as adjustable wrenches or pliers, instead of proper line wrenches or flare nut wrenches, can damage the fitting’s threads. Always use the correct tools designed for brake line work to ensure a secure and undamaged fitting.

Signs of a Stripped Fitting

Identifying a stripped brake line fitting early can prevent further damage and potential brake failure. Key signs to look for include:

Visual Inspection: Check the threads on the brake line fitting for any signs of damage, such as flattened or missing threads. A fitting that appears rounded or damaged likely indicates stripping.

Performance Symptoms: If you notice a decrease in braking performance, such as a spongy brake pedal or a loss of brake fluid, it could be due to a stripped fitting causing a leak. Any noticeable reduction in braking efficiency warrants an immediate inspection of the brake system, including the fittings.

Step-by-Step Guide to Removing Stripped Brake Line Fittings

Assessing the Situation

Visual Inspection and Determining the Extent of the Damage

Before attempting to remove a stripped brake line fitting, perform a thorough visual inspection to assess the extent of the damage. Look for signs such as flattened or missing threads, rounded edges, and any visible corrosion. Evaluate whether the fitting can be saved or if it requires replacement. If the damage is minor, simpler techniques may suffice. For severe stripping, more advanced methods or complete replacement may be necessary.

Choosing the Right Method Based on the Level of Stripping

The level of damage will dictate the removal method. Minor stripping might be resolved with penetrating oil and grip enhancement, while severe cases may require cutting and re-flaring the line. Deciding on the appropriate technique ensures efficiency and minimizes further damage to the brake line.

Stripped Brake Line Fittings

Using Penetrating Oil

Application Techniques for Maximum Effectiveness

Penetrating oil can be a lifesaver for loosening corroded or stuck brake line fittings. To use it effectively, generously apply the oil to the fitting and allow it to seep into the threads. Use a small brush to help the oil penetrate deeper. Repeat the application several times over at least 15-30 minutes to ensure thorough penetration.

Allowing Time for the Oil to Work

Patience is key when using penetrating oil. After applying the oil, allow sufficient time for it to work its way into the threads. For heavily corroded fittings, you might need to wait an hour or more. During this time, avoid applying any force to the fitting, as premature attempts can cause further stripping.

Grip Enhancement Techniques

Using Vice Grips and Brake Line Pliers to Gain Better Grip

When dealing with stripped fittings, getting a firm grip is crucial. Use vice grips or specialized brake line pliers designed to provide a secure hold without further damaging the fitting. Adjust the vice grips to the correct size, ensuring they grip tightly around the fitting.

Applying Steady, Controlled Force to Avoid Further Stripping

Once you have a good grip, apply steady and controlled force to turn the fitting. Avoid sudden or jerky movements, as these can exacerbate the stripping. If the fitting doesn’t budge initially, reapply the penetrating oil and try again after a short period.

Cutting and Re-Flaring the Line

When and How to Cut the Brake Line

In cases where the fitting is severely stripped and cannot be removed using conventional methods, cutting the brake line may be necessary. Use a pipe cutter to make a clean, straight cut on the brake line, removing the damaged section.

Tools for Flaring the Brake Line Correctly

After cutting the brake line, you’ll need to re-flare the end to attach a new fitting. Use a high-quality flaring tool to create a precise flare. Follow the tool’s instructions carefully to ensure a proper and secure flare, which is crucial for preventing leaks.

Reattaching the New Fitting

Once the brake line is flared, attach the new fitting by sliding it onto the flared end and tightening it to the appropriate torque specification. Ensure a snug fit without over-tightening, which can lead to future stripping.

Using Heat and Cold

Applying Heat to Expand the Metal

Heat can help loosen stubborn fittings by expanding the metal. Use a propane torch to apply heat evenly around the fitting for a few minutes. Be cautious not to overheat, as excessive heat can damage nearby components. After heating, attempt to remove the fitting with pliers or vice grips.

Using Cold Treatments to Contract the Metal

Alternatively, applying cold can contract the metal and make removal easier. Use an aerosol freeze spray or dry ice to cool the fitting rapidly. Once it contracts, try loosening the fitting with the appropriate tools.

Safety Precautions When Using Heat and Cold

When using heat or cold, always follow safety protocols. Wear protective gloves and safety glasses to prevent burns or frostbite. Ensure proper ventilation when using a torch, and keep flammable materials away from the work area.

install Brake Line Fittings

Alternative Removal Methods

Specialty Tools Like Extraction Sockets

For particularly stubborn or severely stripped fittings, specialty tools like extraction sockets can be effective. These sockets are designed to grip stripped or damaged fasteners tightly. Select the correct size and fit it onto the fitting, then use a ratchet to remove it.

Using a Dremel or Rotary Tool for Precise Cuts

A Dremel or rotary tool can be used to carefully cut away damaged portions of the fitting. This method requires precision and patience. Make small, controlled cuts to avoid damaging the brake line itself. Once enough material is removed, you may be able to grip and remove the fitting.

Last-Resort Methods and Professional Help

If all else fails, seeking professional help may be necessary. A skilled mechanic has access to advanced tools and techniques for removing stripped fittings. Don’t hesitate to reach out to a professional to avoid causing further damage or compromising your vehicle’s brake system.

Replacing the Brake Line Fittings

Choosing the Correct Replacement Fitting

When replacing brake line fittings, selecting the correct replacement is crucial for maintaining the integrity and safety of your brake system. Here are key factors to consider:

Size: Ensure the replacement fitting matches the diameter of the brake line and the thread size of the original fitting. Using a fitting that is too large or too small can result in leaks and brake failure.

Type: Choose the appropriate type of fitting based on your brake system’s design. Common types include flare fittings, compression fittings, and inverted flare fittings. Refer to your vehicle’s manual or consult with an automotive expert if unsure.

Material: Select a fitting made from durable materials such as stainless steel or brass, which are resistant to corrosion and high pressure. Avoid using inferior materials that may not withstand the demands of the brake system.

Installing the New Fitting

Proper installation of the new fitting is essential to ensure a secure and leak-free connection. Follow these steps for optimal results:

Preparation: Clean the brake line and fit thoroughly to remove any debris or old thread sealant. Use a wire brush or brake cleaner if necessary.

Thread Sealant: Apply a small amount of thread sealant or anti-seize compound to the threads of the new fitting. This helps create a better seal and makes future removal easier.

Attachment: Slide the new fitting onto the brake line and thread it onto the corresponding port. Use a line wrench to tighten the fitting. Be cautious not to over-tighten, as this can strip the threads and cause damage. Tighten until snug and then give it a final quarter turn.

Testing the Installation

After installing the new fitting, it’s crucial to test the brake system to ensure there are no leaks and that it functions correctly:

Visual Inspection: Check the fitting and surrounding areas for any signs of brake fluid leaks. A dry fitting indicates a successful installation.

Brake Pedal Test: Press the brake pedal several times to build pressure in the brake lines. The pedal should feel firm and responsive. If it feels spongy or sinks to the floor, there may be air in the lines or a leak.

Brake Fluid Level: Check the brake fluid reservoir and top it off if necessary. Low brake fluid can affect braking performance and indicate a leak.

Road Test: Take the vehicle for a short test drive in a safe area to ensure the brakes are functioning properly. Pay attention to the brake response and listen for any unusual noises.

Post-Removal Maintenance

Inspecting the Brake System

After replacing the brake line fitting, it’s a good practice to inspect the entire brake system for any additional wear and tear:

Brake Lines: Check for any signs of wear, cracks, or corrosion on the brake lines. Replace any damaged sections to prevent future issues.

Brake Pads and Rotors: Inspect the brake pads and rotors for wear. Worn pads should be replaced, and rotors should be resurfaced or replaced if they show signs of excessive wear or damage.

Calipers and Wheel Cylinders: Ensure that the calipers and wheel cylinders are in good condition and functioning correctly. Look for leaks or sticking components.

Routine Maintenance Tips

Regular maintenance can help prevent future issues with brake fittings and extend the life of your brake system:

Regular Inspections: Periodically inspect the brake lines and fittings for any signs of wear or damage. Early detection can prevent more severe problems.

Proper Tools: Always use the correct tools, such as line wrenches and flare nut wrenches, to avoid damaging fittings during maintenance.

Torque Specifications: Follow the manufacturer’s torque specifications when tightening fittings to avoid over-tightening and stripping threads.

Regular Brake Fluid Checks and Changes

Brake fluid plays a vital role in the performance of your brake system. Regular checks and changes are essential:

Fluid Level: Check the brake fluid level regularly and top it off as needed. Low fluid levels can indicate a leak or worn brake pads.

Fluid Quality: Over time, brake fluid can become contaminated with moisture and debris, reducing its effectiveness. Replace the brake fluid according to the manufacturer’s recommended schedule, typically every 2-3 years.

Bleeding the Brakes: Bleed the brake lines to remove any air bubbles that can cause a spongy brake pedal and reduce braking efficiency. This is especially important after replacing fittings or brake lines.

Conclusion

Dealing with stripped brake line fittings can be challenging, but with patience and the right approach, it’s a task that can be successfully managed. Remember, taking your time and carefully following each step is crucial. Always prioritize safety by wearing protective gear and working in a stable, well-ventilated environment. If at any point you feel unsure or overwhelmed, don’t hesitate to seek professional assistance.

FAQ

If penetrating oil doesn’t loosen the fitting, reapply and wait longer, ensuring thorough coverage. For heavily corroded fittings, you might need to use heat, cold, or specialized tools like extraction sockets. Patience is key, and sometimes multiple applications are necessary.

Using regular pliers is not recommended, as they can further strip the fitting and damage the brake line. Vice grips or brake line pliers provide a more secure grip, reducing the risk of additional damage.

Inspect the brake line for any signs of wear, cracks, or severe corrosion. If the brake line itself is in good condition, you may only need to replace the fitting. However, if the line shows significant damage, replacing the entire brake line is advisable for safety.

A spongy or soft brake pedal, extended stopping distances, or a pedal that sinks to the floor are common signs of air in the brake lines. Bleeding the brakes to remove air bubbles will typically resolve this issue.


Driving with a stripped brake line fitting is unsafe, as it can lead to brake fluid leaks and brake failure. Address the issue immediately by either repairing the fitting or consulting a professional mechanic to ensure your brake system is functioning correctly.

Check your brake fluid level regularly, at least once a month, and top it off as needed. Brake fluid should be replaced according to the manufacturer’s recommended schedule, typically every 2-3 years, to maintain optimal braking performance and safety.

How to Remove Rusted Brake Line Fitting

How to Remove Rusted Brake Line Fitting

How to Remove Rusted Brake Line Fitting

Table of Contents

Introduction

Dealing with rusted brake line fittings is a common challenge faced by many vehicle owners and mechanics. These fittings, often exposed to harsh conditions, can become severely rusted over time, making them difficult to remove. Ignoring this issue can lead to compromised brake performance and potential safety hazards. The purpose of this post is to provide a comprehensive guide on safely and effectively removing rusted brake line fittings.

Understanding Brake Line Fittings

What are Brake Line Fittings?

Brake line fittings are crucial components in a vehicle’s braking system, serving as the connectors between various brake lines and other hydraulic components. These fittings ensure that brake fluid flows efficiently from the master cylinder to the brake calipers or wheel cylinders, allowing the braking system to function correctly. Typically made from durable metals such as steel or brass, brake line fittings are designed to withstand high pressure and harsh conditions. They come in various types and sizes, including flare fittings, compression fittings, and banjo fittings, each serving a specific purpose in different parts of the braking system. The integrity of these fittings is vital for maintaining the braking system’s effectiveness and ensuring the safety of the vehicle.

Rusted Brake Line Fitting Topa

Common Causes of Rust

Rust on brake line fittings is a frequent issue that can compromise the safety and performance of the braking system. Several factors contribute to the rusting of these fittings:

Environmental Factors: Vehicles exposed to harsh weather conditions, such as heavy rain, snow, or humidity, are more susceptible to rust. The moisture in these environments can lead to oxidation, causing the metal fittings to corrode over time.

Exposure to Road Salt: In regions where road salt is used during winter to melt ice and snow, brake line fittings are at a higher risk of rusting. The salt accelerates the corrosion process by creating a more conducive environment for the metal to oxidize.

Lack of Maintenance: Infrequent inspection and maintenance of the braking system can lead to the accumulation of dirt, grime, and moisture on brake line fittings. Over time, this buildup can promote rust formation.

Age and Wear: As vehicles age, their components naturally wear down. Older brake line fittings, having been exposed to the elements for extended periods, are more likely to develop rust compared to newer ones.

Mechanical Damage: Physical damage to brake line fittings, such as dents or scratches, can expose the bare metal underneath the protective coating, making it more susceptible to rust.

Preparation Steps

Preparing the Work Area

Before beginning any work on removing rusted brake line fittings, it’s essential to prepare your work area properly. Ensure the area is clean and free of clutter to provide ample space for maneuvering and to prevent accidents. A well-ventilated workspace is crucial, especially when using penetrating oils and other chemicals, to avoid inhaling harmful fumes. Proper lighting is also important, as it allows you to see the components clearly and reduces the risk of mistakes. Gathering all the necessary tools and materials beforehand will save time and make the process smoother.

Lifting and Securing the Vehicle

To safely access the brake line fittings, you need to lift and secure your vehicle properly. Follow these detailed steps:

Choose a Flat Surface: Park your vehicle on a flat, level surface to ensure stability.

Engage the Parking Brake: Apply the parking brake to prevent the vehicle from rolling.

Use Wheel Chocks: Place wheel chocks on the opposite side of the vehicle to further prevent any movement.

Locate the Jack Points: Refer to your vehicle’s manual to find the recommended jack points, which are designed to safely lift the vehicle without causing damage.

Lift the Vehicle: Position the jack under the designated jack point and slowly lift the vehicle until the wheel you’re working on is off the ground.

Secure with Jack Stands: Place jack stands under the vehicle at the recommended points and lower the vehicle onto the stands for added stability. Never rely solely on the jack to hold the vehicle up.

Double-Check Stability: Gently shake the vehicle to ensure it is securely supported by the jack stands before beginning any work.

Identifying the Rusted Fitting

Locating the rusted brake line fitting is a crucial step in the removal process. Here’s how to do it:

Visual Inspection: Begin by visually inspecting the brake lines under the vehicle. Follow the lines from the master cylinder to the brake calipers or wheel cylinders, looking for any signs of rust or corrosion.

Feel for Rough Spots: Use your hands to feel along the brake lines for any rough or flaky areas, which can indicate rust.

Check Connection Points: Pay special attention to the connection points where the brake lines meet other components, as these areas are more prone to rust due to exposure to moisture and road debris.

Use a Flashlight: If visibility is an issue, use a flashlight to thoroughly inspect the brake lines and fittings.

Mark the Area: Once you’ve identified the rusted fitting, mark the area with a piece of chalk or tape to easily locate it during the removal process.

Step-by-Step Guide to Removing Rusted Brake Line Fitting

Applying Penetrating Oil

Penetrating oil is essential for loosening rusted brake line fittings. It helps to dissolve rust and lubricate the fitting, making it easier to remove. Follow these instructions:

Select the Right Penetrating Oil: Choose a high-quality penetrating oil specifically designed for rusted bolts and fittings. Popular brands like WD-40, PB Blaster, or Liquid Wrench are effective options. These products are formulated to penetrate rust and corrosion deeply.

Apply Generously: Spray the penetrating oil generously on the rusted fitting. Ensure the oil covers the entire fitting and surrounding area. The goal is to get the oil to seep into the threads and break the rust bond.

Allow to Soak: Let the oil soak into the rust for at least 15-30 minutes. For heavily rusted fittings, you may need to reapply the oil and allow it to soak overnight. This gives the oil time to penetrate deep into the rust and make the fitting easier to loosen.

Repeat if Necessary: If the fitting is still stuck after the initial application, apply more penetrating oil and give it additional time to work. Patience is key; multiple applications might be necessary for heavily corroded fittings.

Using the Right Tools

Choosing the appropriate wrench and using it correctly is crucial to avoid further damage to the brake line fitting.

Select the Correct Wrench: Use a flare nut wrench or a brake line wrench specifically designed for brake fittings. These wrenches have a unique design that provides better grip and reduces the risk of rounding off the fitting. Unlike regular wrenches, flare nut wrenches grip more sides of the nut, making them ideal for soft metal fittings.

Properly Position the Wrench: Place the wrench snugly on the fitting. Ensure it’s positioned correctly to maximize leverage and grip. The wrench should fit tightly around the fitting without slipping.

Apply Controlled Force: Turn the wrench slowly and steadily. Avoid using excessive force, which can strip or damage the fitting. If the fitting doesn’t budge, try a gentle back-and-forth motion to help break the rust seal.

Applying Heat

Heat can help break the rust seal by expanding the metal fitting, making it easier to loosen.

Use a Heat Gun: A heat gun is preferable to an open flame, as it provides controlled heat without the risk of igniting nearby flammable materials. Using a heat gun allows you to apply heat directly to the fitting without damaging surrounding components.

Heat the Fitting: Apply heat evenly around the fitting for a few minutes. Focus on the area directly around the fitting to avoid damaging nearby components. The heat will cause the metal to expand, which can help break the rust bond.

Caution: Be careful not to overheat the fitting or surrounding areas, as excessive heat can weaken the metal and cause other damage. Always monitor the temperature closely and avoid applying heat for too long.

Using a Rotary Tool

A rotary tool can help remove excess rust and make it easier to access the fitting.

Attach the Right Bit: Use a wire brush or cutting bit suitable for metal. The wire brush attachment can effectively remove surface rust, while a cutting bit can help in more severe cases.

Carefully Remove Rust: Gently grind away rust from the fitting and surrounding areas. Be cautious not to cut into the brake line or fitting itself. Focus on removing just enough rust to improve access and grip.

Clean the Area: After using the rotary tool, wipe the area clean with a rag to remove debris and ensure better visibility. This will also help the penetrating oil and wrench work more effectively.

install Brake Line Fittings

Gently Tapping the Fitting

Tapping can help break the rust seal and make it easier to loosen the fitting.

Use a Small Hammer: Select a small ball-peen hammer or a similar tool. The hammer should be light enough to tap gently without causing damage.

Tap Gently: Lightly tap around the fitting to help break the rust bond. Focus on the fitting itself rather than the surrounding brake line to avoid damage. The vibrations from tapping can help loosen the rust.

Avoid Excessive Force: Use gentle taps to avoid damaging the fitting or brake line. The goal is to create small vibrations, not to forcefully break the rust.

Slow and Steady Force

Applying consistent, steady force is crucial to avoid breaking the fitting.

Gradual Pressure: Apply gradual, steady pressure when turning the wrench. Quick, jerky movements can cause the fitting to snap or strip. Patience is key to preventing damage.

Reverse Technique: If the fitting begins to move, try turning it back and forth (tightening and then loosening) to help break the rust seal further. This technique can gradually work the rust loose without applying excessive force.

Using a Brake Line Wrench

Using a brake line wrench provides better grip and control, reducing the risk of damage.

Position the Wrench: Ensure the brake line wrench is properly positioned on the fitting, covering as much surface area as possible for a secure grip. The wrench should fit snugly and not slip off.

Apply Steady Pressure: Turn the wrench with steady, controlled pressure. Avoid using extensions or cheater bars, as they can increase the risk of damaging the fitting. The goal is to apply even force to avoid stripping the fitting.

Leverage Techniques: If the fitting is particularly stubborn, use leverage techniques such as bracing the wrench against a solid surface to increase your control and reduce the risk of slipping. This can help apply more force without damaging the fitting or brake line.

Post-Removal Steps

Inspecting the Brake Line

Once the rusted brake line fitting has been successfully removed, it’s crucial to thoroughly inspect the brake line itself for any additional damage or rust. Follow these steps:

Visual Inspection: Look along the entire length of the brake line for any visible signs of rust, corrosion, or damage. Pay special attention to areas near connection points and bends.

Feel for Weak Spots: Gently run your fingers along the brake line to feel for any weak spots, rough patches, or thinning areas that may indicate corrosion or damage.

Use a Flashlight: Utilize a flashlight to illuminate hard-to-see areas and ensure you don’t miss any small cracks or rust spots.

Assess the Integrity: If you find any significant rust or damage, consider replacing the entire brake line rather than just the fitting to ensure the safety and reliability of your braking system.

Cleaning the Area

Cleaning the fitting area is essential to ensure a secure and proper connection when installing the new fitting. Here’s how to do it:

Remove Debris: Use a clean rag or brush to wipe away any dirt, debris, or rust particles from the fitting area.

Use a Cleaner: Apply a brake cleaner or a degreaser to the fitting area to remove any remaining oil, grease, or contaminants. Follow the product instructions for proper use.

Scrub if Necessary: If there is stubborn rust or dirt, use a small wire brush to gently scrub the area until it is clean and smooth.

Dry the Area: Ensure the fitting area is completely dry before proceeding to install the new fitting. Use a clean cloth to wipe away any moisture.

Bleeding the Brake Lines

After replacing the brake line fitting, it’s essential to bleed the brake lines to remove any air bubbles that may have entered the system. Here are the detailed steps:

Gather Materials: You’ll need a brake bleeder kit, fresh brake fluid, a container for old fluid, and a wrench that fits the bleeder valve.

Locate the Bleeder Valve: Identify the bleeder valve on the brake caliper or wheel cylinder closest to the brake line you worked on.

Prepare the System: Attach the brake bleeder kit to the bleeder valve. Ensure the container is positioned to catch old brake fluid.

Open the Bleeder Valve: Use the wrench to open the bleeder valve slightly. Be prepared for brake fluid to flow out.

Pump the Brake Pedal: Have an assistant pump the brake pedal slowly and steadily. As the pedal is pressed, old fluid and air bubbles will be pushed out through the bleeder valve.

Close the Valve: Once the pedal is fully depressed, close the bleeder valve before your assistant releases the pedal to prevent air from re-entering the system.

Repeat the Process: Continue this process until you see clear, bubble-free brake fluid coming out of the bleeder valve. Make sure to check and top off the brake fluid reservoir to maintain proper fluid levels.

Move to Other Wheels: If you worked on multiple brake lines, repeat the bleeding process for each wheel, starting from the furthest wheel from the master cylinder and moving closer.

Final Check: Once all brake lines are bled, ensure the brake pedal feels firm and responsive. Check for any leaks around the new fitting and bleeder valves.

Conclusion

In conclusion, dealing with rusty brake lines can be done safely and effectively with the right tools, techniques, and patience. We covered some of the basic steps, including applying penetrating oil, using the proper tools, applying heat, using a rotary tool, gently tapping the fitting, and applying slow and steady pressure. Additionally, we detail the post-disassembly steps, including inspecting the brake lines, cleaning the area, replacing fittings and bleeding the brake lines to ensure a successful repair. If you have any experience or additional tips, feel free to contact us.

FAQ

It’s best to use a high-quality penetrating oil designed specifically for rusted bolts and fittings. Popular brands include WD-40, PB Blaster, and Liquid Wrench, which are effective at breaking down rust and lubricating the fitting.

While a regular wrench can be used, it’s recommended to use a flare nut wrench or a brake line wrench. These wrenches provide a better grip and reduce the risk of rounding off the fitting, ensuring a more secure and damage-free removal.

It’s safer to use a heat gun rather than an open flame like a torch. A heat gun provides controlled heat without the risk of igniting flammable materials nearby. Applying even heat around the fitting helps to expand the metal and break the rust seal.

After removing the rusted fitting, inspect the entire brake line for any signs of rust, corrosion, or damage. If you find significant rust or weak spots, it’s advisable to replace the entire brake line to ensure the safety and reliability of your braking system.

If the fitting remains stuck, try reapplying penetrating oil and allowing it to soak for a longer period, possibly overnight. You can also gently tap the fitting with a small hammer to help break the rust seal. If it still doesn’t budge, using a rotary tool to carefully remove excess rust may help.

Bleeding the brake lines is essential to remove any air bubbles that may have entered the system during the replacement process. Air in the brake lines can lead to a spongy brake pedal and reduced braking efficiency, compromising the safety of your vehicle.

Contact Topa

Have a question or suggestion? Fill out the form below to get in touch with one of our experts.

How to Remove Brake Line Fittings

How to Remove Brake Line Fittings

How to Remove Brake Line Fittings

Table of Contents

Introduction

Proper removal of brake line fittings is crucial not only for maintaining the efficiency and safety of your vehicle’s braking system but also for preventing potential damage that can arise from improper handling. This guide will walk you through the process, emphasizing safety considerations and addressing common challenges you might face. We’ll cover everything from the tools you need to step-by-step instructions and troubleshooting tips. 

Tools and Materials Needed

Essential Tools

Wrenches (flare nut wrenches, line wrenches)

Flare nut wrenches and line wrenches are specifically designed to grip the hexagonal nuts of brake line fittings without stripping them, ensuring a secure and efficient removal process.

Penetrating Oil

Penetrating oil is used to loosen rusted or seized brake line fittings, making it easier to remove them without causing damage.

Brake Line Cutter

A brake line cutter is essential for cutting brake lines cleanly and accurately when replacing sections of the line.

Brake Line Flaring Tool

This tool is used to create precise flares on the ends of brake lines, ensuring a tight and leak-free connection with the fittings.

Additional Materials

Replacement Brake Lines or Fittings

Having replacement brake lines or fittings on hand is crucial in case the original components are damaged or too corroded to reuse.

Brake Fluid

Fresh brake fluid is necessary for refilling the brake system after replacing the brake lines or fittings.

Preparatory Steps

Safety First

Importance of Wearing Safety Gear

Wearing safety gear, including gloves and safety glasses, is crucial to protect yourself from brake fluid, which is corrosive, and other potential hazards such as debris and sharp edges.

Ensuring the Vehicle is on a Stable and Flat Surface

Ensuring the vehicle is parked on a stable and flat surface prevents accidental movement and provides a secure working environment. Engaging the parking brake and using wheel chocks can add extra security.

Using Jack Stands for Added Safety

Using jack stands to support the vehicle after lifting it with a jack adds an extra layer of safety. Jack stands are more stable and reliable than jacks alone, preventing the vehicle from falling during the repair.

Initial Inspection

Checking the Condition of Brake Lines and Fittings

Before beginning the removal process, inspect the brake lines and fittings for any signs of wear, such as cracks, leaks, or bends. This helps you determine the extent of the repairs needed.

Identifying Any Visible Rust, Corrosion, or Damage

Look for any rust, corrosion, or damage on the fittings and lines. These issues can make removal more challenging and may require additional steps, such as using penetrating oil to loosen rusted parts.

Preparing the Vehicle

Removing the Wheel for Better Access to the Brake Lines

Removing the wheel provides better access to the brake lines and fittings, making it easier to work on them. Ensure the vehicle is securely lifted and supported before removing the wheel.

Using Penetrating Oil on the Fittings to Ease Removal

Apply penetrating oil to the brake line fittings and allow it to soak for a few minutes. This helps to loosen any rust or corrosion, making the fittings easier to remove without causing damage.

Step-by-Step Guide to Removing Brake Line Fittings

Loosening the Fittings

Proper Technique for Using Flare Nut Wrenches

Flare nut wrenches are specifically designed to grip the nuts on brake line fittings securely, reducing the risk of rounding off the corners. Position the wrench snugly around the fitting and apply steady pressure. Avoid using adjustable wrenches as they can slip and damage the fittings.

Step-by-Step Instructions for Loosening Different Types of Fittings

Inverted Flare Fittings: Place the flare nut wrench on the fitting, ensuring it is seated properly. Turn the wrench counterclockwise to loosen the fitting. If the fitting is resistant, apply penetrating oil and allow it to soak before attempting again.

Bubble Flare Fittings: Use the appropriate size flare nut wrench, grip the fitting securely, and turn counterclockwise. Be patient and apply penetrating oil if necessary.

Banjo Fittings: Use a line wrench or a socket wrench for better leverage. Loosen the bolt holding the banjo fitting, taking care not to strip the threads.

Tips for Dealing with Stubborn or Seized Fittings

Penetrating Oil: Apply penetrating oil to the fitting and let it soak for at least 15 minutes. This can help break down rust and corrosion.

Heat Application: Carefully use a propane torch to heat the fitting. Heat can expand the metal slightly, making it easier to loosen the fitting. Be cautious not to overheat and damage nearby components.

Tapping Method: Gently tap the fitting with a hammer to help break up rust and corrosion. This can sometimes loosen stubborn fittings.

Patience and Persistence: Don’t rush the process. Allow the penetrating oil and other methods time to work effectively.

cut An Fitting hose

Cutting the Brake Line (if necessary)

When and Why Cutting the Brake Line Might Be Necessary

Cutting the brake line may be necessary if the fittings are too corroded or damaged to be removed intact. It’s also an option when replacing a section of the brake line that is compromised.

How to Safely Cut the Brake Line Without Damaging Other Components

Select the Right Tool: Use a brake line cutter specifically designed for this task. These tools provide a clean and precise cut.

Positioning: Ensure the area around the brake line is clear of other components. Position the cutter around the brake line and tighten the tool gradually.

Cutting: Rotate the cutter around the brake line, tightening slightly with each rotation until the line is cut through. Avoid applying excessive force, which can deform the line and create an uneven cut.

Removing the Old Fittings

Detailed Steps for Removing Different Types of Brake Line Fittings

Inverted Flare Fittings: Once the fitting is loosened, continue turning the flare nut wrench until the fitting is completely unscrewed. Carefully pull the brake line away from the fitting.

Bubble Flare Fittings: After loosening the fitting with the flare nut wrench, remove it by continuing to unscrew it manually if necessary. Pull the brake line out of the fitting gently.

Banjo Fittings: After removing the bolt, carefully pull the banjo fitting away from the brake line. Be cautious of any residual brake fluid that may leak out.

Handling Rust and Corrosion Effectively

Rust Penetration: Apply a generous amount of penetrating oil to heavily rusted fittings and allow time for it to work. Repeat as necessary.

Wire Brush: Use a wire brush to remove surface rust and corrosion from the fittings and surrounding areas. This can help improve the grip of the wrench and make removal easier.

Replacement of Severely Corroded Parts: If a fitting or section of the brake line is severely corroded, it’s best to replace it entirely. This ensures the integrity and safety of the brake system.

Troubleshooting Common Issues

Stubborn Fittings

Techniques for Dealing with Fittings That Won’t Budge

Patience and Persistence: Apply penetrating oil to the fitting and allow it to soak for at least 15-30 minutes. In some cases, multiple applications may be necessary to break through the rust and corrosion.

Proper Tools: Ensure you are using the correct size and type of wrench. Flare nut wrenches provide a better grip than standard wrenches and are less likely to round off the fitting.

Leverage: Use a longer wrench or a breaker bar to gain more leverage. Be careful not to apply too much force to avoid damaging the fitting or the surrounding components.

Use of Heat and Other Methods to Loosen Stubborn Fittings

Heat Application: Carefully use a propane torch to heat the fitting. Heat can expand the metal, making it easier to loosen. Heat the fitting evenly and avoid overheating, which can damage other parts. Always take precautions to prevent fire hazards, especially around flammable brake fluid.

Impact Tools: An impact wrench can provide short bursts of torque that might free a stubborn fitting. Use it cautiously to avoid damaging the fitting or the line.

Vibration: Tapping the fitting lightly with a hammer can help break the bond of rust and corrosion. Combine this with penetrating oil for better results.

Topa Rusted Brake Line Fitting

Stripped or Damaged Fittings

Identifying and Dealing with Stripped or Damaged Fittings

Visual Inspection: Check for rounded edges or signs of wear on the fitting. Stripped fittings will not grip the wrench properly and can make removal difficult.

Alternative Tools: Use a bolt extractor or a specialized socket designed to grip stripped fittings. These tools can provide the necessary grip to remove damaged fittings.

Cutting: If the fitting is too damaged to remove with tools, you may need to cut the brake line and replace the fitting entirely.

Options for Replacing Damaged Fittings

Replacement Kits: Purchase a brake line repair kit that includes new fittings and the necessary tools to install them. These kits are designed to be user-friendly and ensure a proper fit.

Professional Help: If the fitting is severely damaged or if you are unsure about replacing it yourself, consider seeking professional assistance. A mechanic can ensure the fitting is replaced correctly and safely.

Upgrading Fittings: Consider upgrading to higher-quality or corrosion-resistant fittings to prevent future issues. Stainless steel fittings, for example, are more resistant to rust and corrosion.

Brake Fluid Leaks

How to Manage and Clean Up Brake Fluid Leaks During the Process

Containment: Use a drip pan or absorbent materials like rags or paper towels to catch any leaking brake fluid. Place them under the area you are working on to minimize mess.

Immediate Cleanup: Clean up any brake fluid spills immediately. Brake fluid is highly corrosive and can damage paint and other vehicle components. Use a brake cleaner to remove fluid from surfaces.

Disposal: Dispose of used rags and paper towels following local regulations. Brake fluid should not be poured down drains or disposed of in regular trash.

Preventing Brake Fluid Contamination

Sealing the System: Cap or plug any open brake lines or fittings to prevent dirt and debris from entering the brake system. Use clean, dry caps or plugs specifically designed for this purpose.

Clean Work Area: Ensure that the work area is clean and free of contaminants. Avoid using tools or parts that have been in contact with dirt or other substances.

Fresh Brake Fluid: Use only fresh, uncontaminated brake fluid when refilling the system. Old or contaminated fluid can cause damage to the brake system and reduce braking efficiency.

Proper Storage: Store brake fluid in a sealed container to prevent moisture and dirt from contaminating it. Brake fluid is hygroscopic, meaning it absorbs moisture from the air, which can lead to corrosion and reduced performance.

Post-Removal Steps

Inspecting and Cleaning the Area

Checking for Any Damage to Surrounding Components

Visual Inspection: Carefully examine the area around the brake line fittings for any signs of damage or wear. Look for cracks, dents, or other deformities on the brake lines, calipers, and nearby components.

Functional Check: Ensure that the brake lines are not bent or kinked, as this can affect the flow of brake fluid and the overall performance of the braking system.

Integrity of Connections: Verify that all connections, such as clamps and brackets, are intact and securely holding the brake lines in place.

Cleaning the Area Thoroughly Before Installing New Fittings

Removing Debris: Use a clean rag or paper towel to wipe away any dirt, debris, or old brake fluid from the area around the brake line fittings.

Brake Cleaner: Apply brake cleaner to the fittings and surrounding components to remove any residual brake fluid and contaminants. This ensures a clean surface for the new fittings.

Drying: Allow the cleaned areas to dry completely before proceeding with the installation of new fittings. This helps to prevent any contamination of the new fittings and brake fluid.

Brake Line Fitting Guide

Installing New Brake Line Fittings

Choosing the Right Replacement Fittings

Matching Specifications: Ensure that the replacement fittings match the specifications of the original fittings. This includes the type (e.g., inverted flare, bubble flare), size, and material.

Quality Materials: Opt for high-quality fittings made from durable materials, such as stainless steel or brass, to ensure longevity and resistance to corrosion.

Compatibility: Verify that the new fittings are compatible with the existing brake lines and the overall braking system.

Proper Installation Techniques to Ensure a Secure Fit

Positioning the Fitting: Align the new fitting with the brake line and ensure it is seated properly before tightening.

Using the Right Tools: Use a flare nut wrench or line wrench to tighten the fitting securely. Avoid using adjustable wrenches, as they can slip and damage the fitting.

Torque Specifications: Tighten the fitting to the manufacturer’s recommended torque specification to ensure a secure and leak-free connection. Over-tightening can damage the fitting and brake line.

Double-Checking: Once installed, double-check the fitting for proper alignment and tightness. Make sure there are no visible gaps or misalignments.

Bleeding the Brakes

Importance of Bleeding the Brakes After Replacing Fittings

Air Removal: Bleeding the brakes is essential to remove any air that may have entered the brake lines during the fitting replacement process. Air in the brake lines can lead to a spongy brake pedal and reduced braking efficiency.

Restoring Brake Pressure: Proper bleeding ensures that the brake system is fully pressurized and functioning correctly, providing optimal braking performance and safety.

Step-by-Step Guide to Bleeding the Brake System

Preparation: Gather the necessary tools, including a brake bleeder kit, a container for old brake fluid, and fresh brake fluid. Ensure the vehicle is securely lifted and supported.

Locate Bleed Valves: Identify the bleed valves on each brake caliper or wheel cylinder. Start with the wheel furthest from the master cylinder (usually the rear passenger side).

Attach Bleeder Hose: Attach a clear hose to the bleed valve and place the other end in a container to catch the old brake fluid.

Open Bleed Valve: Have an assistant press the brake pedal several times and hold it down. Open the bleed valve to allow brake fluid and air to escape. Close the valve before the assistant releases the brake pedal.

Repeat Process: Repeat this process until no air bubbles are visible in the brake fluid coming out of the hose. Ensure that the brake fluid reservoir is topped up with fresh fluid throughout the process to prevent air from entering the system.

Proceed to Next Wheel: Move to the next wheel (rear driver side, front passenger side, front driver side) and repeat the bleeding process for each wheel.

Final Check: After bleeding all wheels, check the brake pedal for firmness. If it feels spongy, repeat the bleeding process. Ensure the brake fluid reservoir is at the proper level and all bleed valves are securely closed.

Conclusion

In this guide, we covered the essential steps to remove brake line fittings. Performing regular maintenance on your vehicle’s brake system not only ensures your safety but also extends the lifespan of your vehicle. By knowing how to remove and replace brake line fittings, you can save on repair costs and gain a deeper understanding of your vehicle’s mechanics, empowering you to handle future repairs with confidence.

FAQ

You will need flare nut wrenches, penetrating oil, a brake line cutter, a brake line flaring tool, and safety gear such as gloves and safety glasses.

Apply penetrating oil and allow it to soak in, use a flare nut wrench for better grip, apply heat cautiously to expand the metal, and use a longer wrench or breaker bar for added leverage.

Use a bolt extractor or a specialized socket for stripped fittings. If the fitting is too damaged, consider cutting the brake line and replacing the fitting entirely.

Seal any open brake lines or fittings with clean, dry caps, ensure the work area is clean, use fresh brake fluid, and store brake fluid in a sealed container to prevent moisture and dirt contamination.

If you encounter severely damaged fittings, if the brake system feels spongy after bleeding, or if you are unsure about any step in the process, it is best to seek assistance from a professional mechanic to ensure safety and proper function.

Bleeding the brakes removes any air that may have entered the system, ensuring the brake system is fully pressurized and functioning correctly, which is crucial for safe braking performance.

Brake Line Fitting Sealant Choosing the Right One

Brake Line Fitting Sealant : Choosing the Right One

Brake Line Fitting Sealant: Choosing the Right One

Table of Contents

Introduction

When it comes to vehicle maintenance, one often overlooked yet crucial component is the brake line fitting sealant. This sealant plays a vital role in ensuring the integrity and reliability of a vehicle’s braking system by preventing leaks at the brake line fittings. A reliable brake line fitting sealant not only helps maintain optimal brake performance but also significantly enhances vehicle safety, reducing the risk of brake failure due to fluid leaks. The purpose of this post is to guide readers in selecting the most suitable brake line fitting sealant for their specific needs, ensuring their vehicles remain safe and efficient on the road.

Understanding Brake Line Fitting Sealant

Brake line fitting sealant is a specialized adhesive substance used to create a secure and leak-proof connection between brake line fittings. Its primary function is to prevent brake fluid leaks that can compromise the braking system’s efficiency and safety. By sealing the tiny gaps and threads between fittings, the sealant ensures that the hydraulic pressure within the brake lines is maintained, allowing for consistent and reliable brake performance.

Different Types of Brake Line Fitting Sealants

Thread Sealant

Description: Thread sealant is a liquid or paste applied to the threads of brake line fittings to create a strong bond and seal.

Common Use: It is typically used for threaded connections where a tight seal is crucial to prevent fluid leaks.

Features: Thread sealants are often anaerobic, meaning they cure in the absence of air, ensuring a hard and durable seal.

Anaerobic Sealant

Description: Anaerobic sealant is a type of adhesive that hardens when in contact with metal and deprived of air.

Common Use: Ideal for applications where metal-to-metal contact is involved, such as brake line fittings.

Features: It provides excellent resistance to vibration and thermal expansion, making it suitable for high-pressure brake systems.

PTFE Tape

Description: Polytetrafluoroethylene (PTFE) tape, also known as Teflon tape, is a non-adhesive tape used to wrap around threads before assembly.

Common Use: It is used to seal threaded joints in brake lines and other fluid systems.

Features: PTFE tape is known for its excellent chemical resistance and ability to withstand high temperatures, making it a versatile choice for various sealing applications.

brake line fitting adapter supplier

Benefits of Using Brake Line Fitting Sealant

Prevents Leaks: The primary benefit of using brake line fitting sealant is its ability to prevent fluid leaks, ensuring the braking system maintains proper hydraulic pressure.

Enhances Safety: By preventing leaks, the sealant contributes to the overall safety of the vehicle, reducing the risk of brake failure.

Improves Performance: A well-sealed brake line ensures consistent brake performance, providing drivers with reliable stopping power.

Extends Lifespan: Using the appropriate sealant can extend the lifespan of brake line fittings by protecting them from corrosion and wear caused by brake fluid exposure.

Ease of Maintenance: Sealants make it easier to maintain and service brake systems, as they can be applied and removed without causing damage to the fittings.

Key Considerations When Choosing Sealant

Materials

One of the foremost considerations when selecting a brake line fitting sealant is its compatibility with both the brake fluid used in the vehicle and the materials of the brake lines themselves. Brake fluids can vary (DOT 3, DOT 4, DOT 5, etc.), each having different chemical properties. The sealant must be chemically stable and resistant to these fluids to prevent degradation over time. Additionally, brake lines are typically made from materials like steel, copper, or aluminum, and the sealant must adhere effectively to these materials without causing corrosion or damage.

Temperature and Pressure Ratings

Brake systems operate under extreme conditions, with high temperatures and pressures. The chosen sealant must be able to withstand these conditions without losing its sealing properties. Look for sealants that specify their temperature and pressure ratings, ensuring they can handle the maximum operating conditions of your brake system. This ensures the sealant will not break down under intense heat or pressure, maintaining a secure and leak-proof seal.

Ease of Application and Removal

The ease with which a sealant can be applied and later removed is another critical factor. A good sealant should be straightforward to apply, whether it comes in a paste, liquid, or tape form. It should spread evenly and fill gaps without requiring excessive force or precision. Equally important is the ability to remove the sealant cleanly if necessary, for maintenance or repairs. Sealants that are too difficult to remove can lead to additional labor and potential damage to the brake lines during disassembly.

Curing Time and Conditions

Curing time refers to the period required for the sealant to fully harden and become effective. Depending on the type of sealant, curing times can vary significantly. For example, anaerobic sealants require metal-to-metal contact and the absence of air to cure properly. Understanding the curing conditions and timeframes is essential for planning repairs and ensuring that the vehicle is not put back into service before the sealant has been fully set. Fast-curing sealants may be preferred for quicker turnarounds, while longer-curing options might offer stronger bonds.

Chemical Resistance and Durability

Brake line fitting sealants are exposed to a variety of chemicals, including brake fluids, oils, and road contaminants. Therefore, the chosen sealant must exhibit strong chemical resistance to prevent breakdown and maintain its sealing capabilities over time. Additionally, the durability of the sealant is crucial for long-term performance. A durable sealant will resist vibrations, thermal cycling, and physical wear, ensuring that the brake lines remain sealed throughout the vehicle’s operation.

Application Techniques for Brake Line Fitting Sealant

Preparing the Brake Line Fittings

Cleaning: Before applying any sealant, it is crucial to thoroughly clean the brake line fittings. Use a wire brush or abrasive pad to remove any rust, dirt, or old sealant residues. Follow up with a brake cleaner or solvent to ensure all contaminants are removed. This helps the sealant adhere properly and prevents leaks.

Inspection: Inspect the fittings for any signs of damage or excessive wear. Look for cracks, deep scratches, or deformations that could compromise the seal. Replace any damaged fittings before proceeding with the sealant application.

Applying Thread Sealant

Step-by-Step Application:

Select the Sealant: Choose a high-quality thread sealant compatible with your brake fluid and fitting material.

Apply the Sealant: Squeeze a small amount of sealant onto the threads of the fitting. Spread it evenly around the threads using a brush or your fingers.

Assemble the Fitting: Screw the fitting into place, ensuring it is properly aligned. Tighten it to the manufacturer’s recommended torque specification.

Curing: Allow the sealant to cure according to the manufacturer’s instructions before testing the brake system.

Brake Line Fitting Sealant

Applying Anaerobic Sealant

Step-by-Step Application:

Select the Sealant: Use an anaerobic sealant designed for brake line fittings.

Apply the Sealant: Apply a thin, even layer of the sealant to the male threads of the fitting.

Assemble the Fitting: Insert the fitting into the mating component and tighten it to the specified torque. Anaerobic sealants cure in the absence of air and the presence of metal ions.

Curing: Ensure that the parts remain undisturbed while the sealant cures. Follow the manufacturer’s recommended curing time before using the brake system.

Applying PTFE Tape

Step-by-Step Application:

Select the Tape: Use PTFE tape (commonly known as Teflon tape) suitable for high-pressure brake applications.

Wrap the Tape: Starting at the first thread, wrap the PTFE tape around the male threads in the direction of the thread rotation. Apply 2-3 layers of tape, ensuring it is tight and even.

Assemble the Fitting: Screw the fitting into place, being careful not to over-tighten, which could damage the tape and cause leaks.

Check for Leaks: After assembly, check the connection for leaks. If a leak is detected, disassemble and reapply the tape as necessary.

Common Mistakes to Avoid During Application

Insufficient Cleaning: Failing to clean the fittings thoroughly can prevent the sealant from adhering properly, leading to leaks.

Over-Application: Using too much sealant can cause it to squeeze out of the threads and contaminate the brake fluid, potentially causing brake system failure.

Under-Application: Applying too little sealant may not provide an adequate seal, leading to leaks under pressure.

Improper Curing: Not allowing sufficient curing time before testing the brake system can result in a weak bond and potential leaks.

Wrong Sealant Type: Using a sealant not compatible with brake fluid or fitting material can cause degradation of the sealant and leaks over time.

Over-Tightening: Excessive tightening can damage the threads and the sealant, compromising the seal and leading to leaks.

Troubleshooting Common Issues

Identifying and Fixing Leaks

Identifying Leaks:

Visual Inspection: Regularly inspect the brake line fittings for any signs of fluid leakage. Look for wet spots, drips, or puddles around the fittings.

Pressure Test: Use a pressure tester to check for leaks in the brake system. Apply pressure to the system and observe any pressure drop, indicating a potential leak.

Brake Fluid Levels: Monitor the brake fluid reservoir for any unexplained drops in fluid levels, which could suggest a leak in the brake lines.

Fixing Leaks:

Tightening Fittings: If a leak is detected, first try tightening the fitting to the recommended torque specification. Be cautious not to over-tighten, which can damage the fitting or the sealant.

Reapplying Sealant: If tightening does not resolve the leak, disassemble the fitting, clean off the old sealant, and reapply a fresh coat of the appropriate sealant. Ensure the surfaces are clean and dry before reassembly.

Replacing Components: If the fitting or the brake line is damaged, replace the faulty component. Using a damaged fitting can result in persistent leaks despite proper sealing techniques.

Brake Line Fitting leak

Dealing with Difficult or Stubborn Fittings

Stuck Fittings:

Penetrating Oil: Apply a penetrating oil to the threads and allow it to sit for several minutes to loosen any rust or corrosion.

Heat Application: Gently apply heat to the fitting using a heat gun or torch. Be cautious to avoid damaging surrounding components or causing a fire hazard. The heat can expand the metal and help break the bond.

Proper Tools: Use the appropriate tools such as a flare nut wrench or line wrench, which provide better grip and prevent rounding off the fittings.

Cross-Threaded Fittings:

Inspection: Carefully inspect the threads for damage. If the threads are cross-threaded, use a thread chaser or tap and die set to repair the threads.

Replacement: In severe cases where the threads cannot be repaired, replace the fitting to ensure a proper seal and avoid future issues.

Removing Old or Hardened Sealant

Mechanical Removal:

Wire Brush: Use a wire brush or abrasive pad to scrub away old or hardened sealant from the threads. Be thorough in removing all remnants, as leftover sealant can prevent the new sealant from adhering properly.

Thread Chaser: A thread chaser tool can help clean and restore the threads by removing any residual sealant or corrosion.

Chemical Removal:

Solvents: Apply a suitable solvent, such as brake cleaner or acetone, to dissolve the old sealant. Allow the solvent to sit for a few minutes to soften the sealant before scrubbing it away.

Sealant Removers: Specialized sealant removers are available for breaking down and removing old sealant. Follow the manufacturer’s instructions for safe and effective use.

Avoiding Damage:

Gentle Scrubbing: When removing old sealant, be careful not to damage the threads or the fitting surface. Use gentle scrubbing motions and avoid using excessive force.

Protective Measures: If using chemical removers, ensure they are compatible with the brake line material to avoid corrosion or weakening of the fittings.

Conclusion

In conclusion, selecting the right brake line fitting sealant is essential for ensuring the safety and efficiency of your vehicle’s braking system. By carefully preparing the fittings, applying the sealant correctly, and avoiding common mistakes, you can achieve a secure and leak-free brake line connection. Remember, prioritizing safety and quality when selecting and applying brake line fitting sealants is paramount. Always opt for high-quality products and follow best practices to ensure your vehicle’s braking system remains reliable and effective.

FAQ

Brake line fitting sealant is a specialized adhesive used to create a secure, leak-proof connection between brake line fittings. It is crucial for maintaining hydraulic pressure and preventing brake fluid leaks, which ensures reliable brake performance and vehicle safety.

The main types of brake line fitting sealants include thread sealants, anaerobic sealants, and PTFE tape. Each type has specific applications and benefits, such as varying curing times, chemical resistance, and ease of application.

When choosing a brake line fitting sealant, consider factors like compatibility with brake fluid and fitting materials, temperature and pressure ratings, ease of application and removal, curing time, and chemical resistance. Selecting a sealant that meets these criteria ensures a secure and durable connection.

To prepare brake line fittings, clean them thoroughly with a wire brush and brake cleaner to remove dirt, rust, and old sealant. Inspect the fittings for damage and replace any that are worn or cracked. Proper preparation ensures the new sealant adheres correctly.

Common mistakes include insufficient cleaning of the fittings, over-application or under-application of the sealant, not allowing enough curing time, using the wrong type of sealant, and over-tightening the fittings. Avoiding these mistakes helps ensure a secure and leak-free connection.

To remove old or hardened sealant, use a wire brush or thread chaser to mechanically remove the residue. Apply a solvent like brake cleaner or a specialized sealant remover to dissolve and soften the old sealant. Be gentle to avoid damaging the threads or fittings during removal.

Contact Topa

Save 30% on maintenance costs with our easy-install hydraulic fittings. Contact Now!