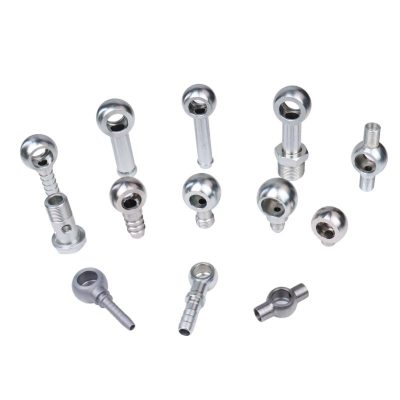
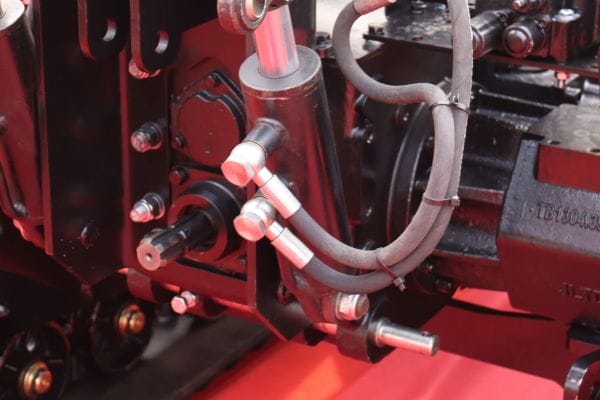
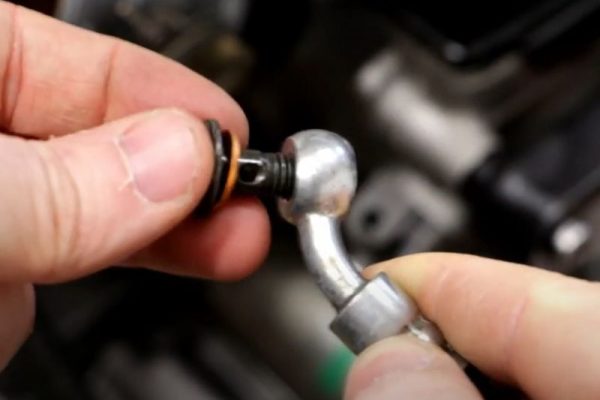
Banjo Fitting Installation A Comprehensive How-To Manual

Banjo Fitting Installation: A Comprehensive How-To Manual

Banjo Fitting Installation: A Comprehensive How-To Manual

Table of Contents

Introduction

Banjo fittings are a type of hydraulic connector commonly used in various industries, including automotive, aerospace, and manufacturing. These fittings are characterized by their unique design, which allows for a 360-degree rotation of the hose or tubing, providing flexibility and ease of use in tight spaces. Banjo fittings consist of a hollow bolt and spherical union, making them ideal for applications requiring precise alignment and secure connections. Incorrect installation can lead to leaks, pressure drops, and system failures, potentially causing significant downtime and costly repairs.  The purpose of this comprehensive guide is to provide detailed, step-by-step instructions on how to install banjo fittings correctly.

Understanding Banjo Fittings

Definition and Components

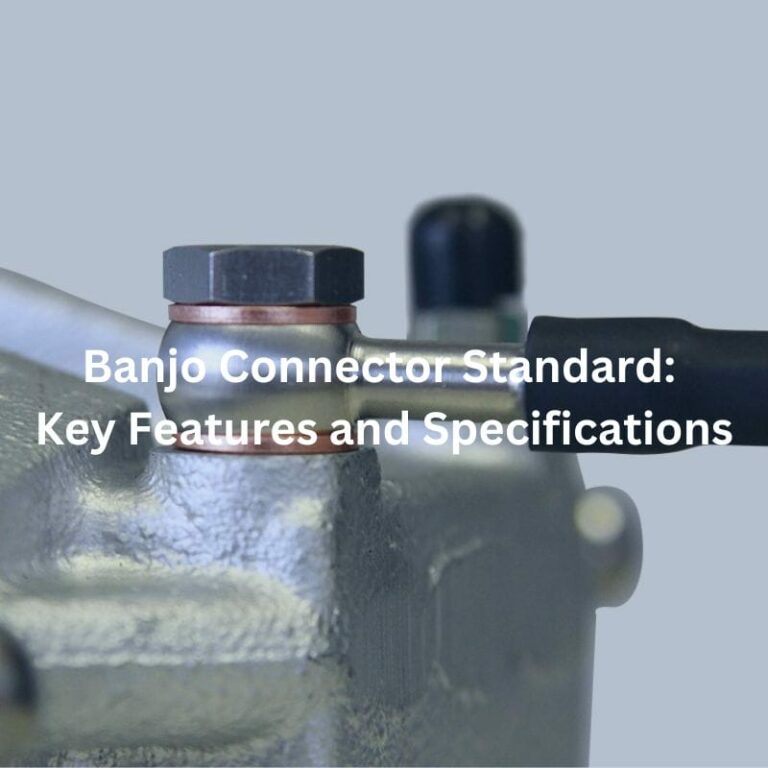
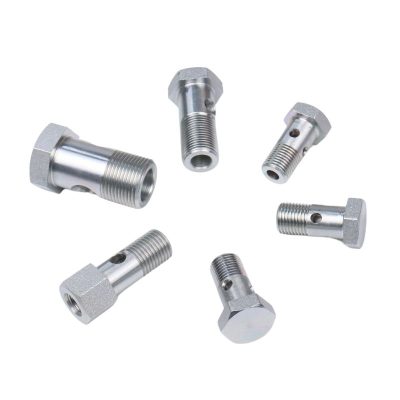
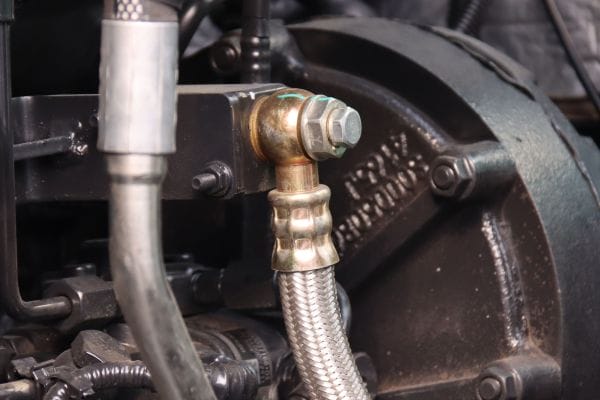
Banjo fittings are specialized connectors used primarily in hydraulic and fuel systems. They consist of a hollow bolt and a spherical union, which allows the fitting to rotate 360 degrees. This unique design provides flexibility and makes them ideal for applications where space is limited. The primary components of a banjo fitting include the banjo bolt, which has a hole drilled through its shaft to allow fluid passage, and the banjo, a donut-shaped connector that fits over the bolt. Additionally, washers or sealing rings are used on either side of the banjo to ensure a tight, leak-free connection.

Common Applications and Industries
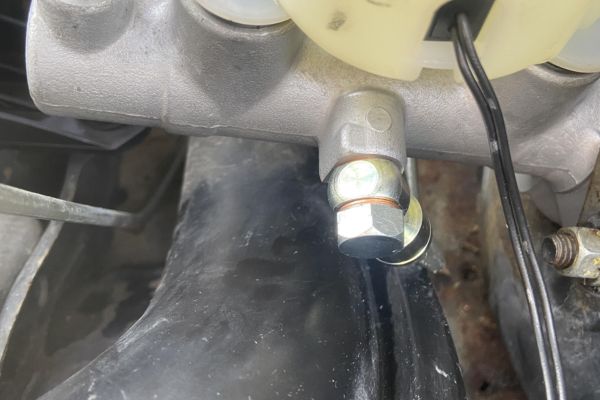
banjo fitting Brake system

Banjo fittings are widely used across various industries due to their versatility and reliability. In the automotive industry, they are commonly found in brake systems, fuel lines, and turbochargers, where their compact design and ability to handle high pressures are highly valued. In the aerospace sector, banjo fittings are used in hydraulic and fuel systems, where their durability and precision are critical. Manufacturing and industrial applications also benefit from banjo fittings, particularly in hydraulic machinery and equipment where efficient fluid transfer is essential. The agriculture industry uses these fittings in irrigation systems and machinery, while the marine industry employs them in various onboard systems for both commercial and recreational vessels.

Benefits of Using Banjo Fittings

The use of banjo fittings offers several advantages, making them a preferred choice in many applications. Their compact and flexible design allows for easy installation in confined spaces, reducing the need for additional fittings and connectors. The 360-degree rotation capability ensures optimal alignment and reduces stress on hoses and tubing, thereby minimizing the risk of leaks and failures. Banjo fittings are also known for their high-pressure handling capabilities, making them suitable for demanding environments. Furthermore, their robust construction and use of quality materials enhance their durability and longevity, leading to lower maintenance costs and improved system reliability. The ease of maintenance and replacement further adds to their appeal, making banjo fittings a cost-effective and efficient solution for fluid transfer needs.

Step-by-Step Installation Process

Tools and Materials Needed

List of essential tools

Wrenches

Torque wrench

Lubricants

Cleaning supplies

List of materials

Banjo fittings

Bolts and washers

Sealing rings or gaskets

Positioning the Banjo Fitting

Aligning with Connection Points:

Start by identifying the connection points where the banjo fitting will be installed. Ensure that the fitting aligns perfectly with the ports to avoid any misalignment that could lead to leaks or system inefficiencies. Gently place the banjo fitting in position, making sure that the bolt hole aligns with the corresponding holes in the components you are connecting.

Ensuring Proper Orientation:

Proper orientation is crucial for the functionality and durability of the installation. The banjo fitting should be oriented in a way that allows for the natural flow of fluids without putting stress on the hoses or tubing. Check the fitting’s alignment from different angles to confirm that it is positioned correctly. The 360-degree rotation feature of banjo fittings can be used to achieve the optimal orientation.
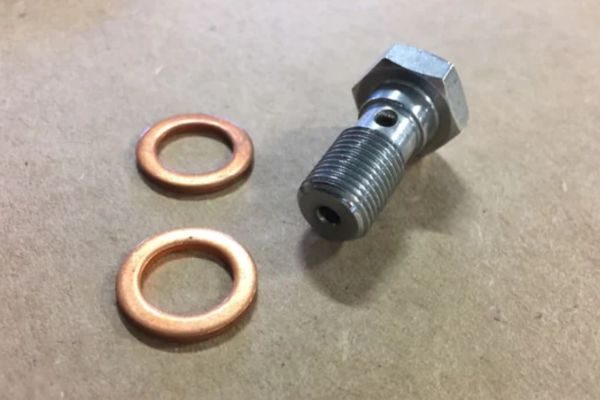
Banjo bolt component

Inserting the Bolt and Washers

Choosing the Correct Bolt Length:

Selecting the appropriate bolt length is essential for a secure and leak-free connection. The bolt must be long enough to pass through the banjo fitting and the components being connected but not so long that it protrudes excessively. Measure the thickness of the components and the fitting to determine the required bolt length. If in doubt, consult the manufacturer’s specifications or a professional for guidance.

Placing Washers Appropriately:

Washers play a critical role in ensuring a tight seal and even distribution of pressure. Place a washer on either side of the banjo fitting before inserting the bolt. The washers should be of the correct size and material as specified for the application. This helps in preventing leaks and protects the components from damage due to uneven pressure distribution.

Applying Sealing Rings or Gaskets

Selecting the Right Type:

Sealing rings or gaskets are essential for creating a leak-proof connection. Depending on the application, choose the appropriate type of sealing ring or gasket. Common materials include rubber, copper, or composite materials, each suited for different operating conditions and fluid types. Ensure that the sealing rings or gaskets are compatible with the fluids being used and the operating temperatures and pressures.

Positioning for Optimal Sealing:

Proper positioning of sealing rings or gaskets is crucial for achieving an effective seal. Place the sealing rings or gaskets between the washers and the banjo fitting, ensuring they are centered and not twisted or deformed. This positioning helps in maintaining a consistent and reliable seal under various operating conditions.

Tightening the Bolt

Initial Hand-Tightening:

Begin by hand-tightening the bolt to secure the fitting in place. This allows you to make any necessary adjustments before final tightening. Ensure that the bolt threads smoothly and that there is no cross-threading, which can damage the threads and compromise the seal.

Using a Torque Wrench for Precise Tightening:

After hand-tightening, use a torque wrench to tighten the bolt to the manufacturer’s specified torque value. This ensures that the bolt is tightened to the correct level, providing a secure connection without over-tightening, which can damage the components and lead to leaks. Follow a cross-pattern tightening method if multiple bolts are involved to ensure even pressure distribution.

Double-Checking the Installation

Inspecting for Gaps or Misalignment:

Once the bolt is tightened, inspect the installation for any gaps or misalignment. Check that the banjo fitting sits flush against the components and that the washers and sealing rings are in place. Any visible gaps or misalignment should be corrected before proceeding.

Verifying Torque Specifications:

Finally, verify that the bolt has been tightened to the correct torque specification using the torque wrench. This final check ensures that the connection is secure and that the risk of leaks or component damage is minimized. Document the torque values used and any observations during the installation process for future reference and maintenance purposes.
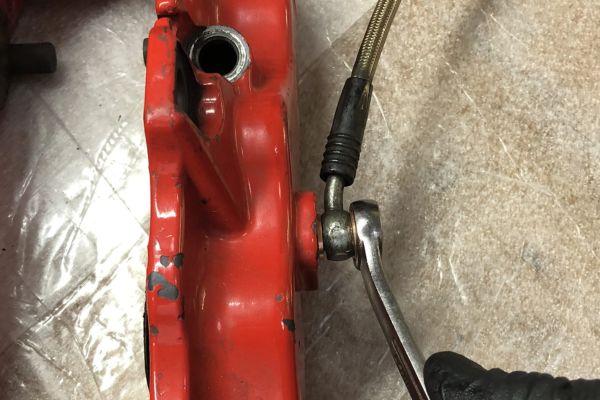
install banjo bolt fitting

Testing the Installation

Pressure Testing

Setting Up a Pressure Test:

Before conducting a pressure test, ensure that all components are securely connected and that the system is properly sealed. Attach a pressure gauge to the system at a point close to the banjo fitting to monitor pressure levels accurately. Gradually introduce fluid into the system using a pump, increasing the pressure to the specified test level. It is essential to follow the manufacturer’s recommendations for pressure testing to avoid over-pressurizing and damaging the system. Make sure to use compatible fluids and clean the system of any debris or contaminants before starting the test.

Observing for Leaks:

Once the system reaches the test pressure, observe the banjo fitting and surrounding connections for any signs of leaks. Look for droplets, fluid seepage, or any pressure drops on the gauge. It is beneficial to use a leak detection solution, which bubbles upon contact with escaping fluid, to identify even the smallest leaks. Inspect all sides of the fitting thoroughly, paying close attention to the areas around the washers and sealing rings. If any leaks are detected, depressurize the system before making necessary adjustments or repairs. Ensure all leaks are resolved before proceeding to the next testing phase.

Functional Testing

Running System Tests:

After completing the pressure test, it’s time to run functional tests on the entire system. Start by operating the system under normal working conditions, gradually increasing the load to its typical operating level. Observe the system as it runs, ensuring that all components, including the banjo fitting, are performing as expected. Check for any unusual noises, vibrations, or irregularities in system behavior that might indicate issues with the installation or other components.

Monitoring Performance:

Continuously monitor the performance of the system during the functional test. Keep an eye on pressure readings, fluid flow rates, and temperature levels to ensure they remain within acceptable ranges. Pay close attention to the banjo fitting area, checking for any signs of leaks or structural stress. Additionally, compare the system’s performance data with baseline readings or manufacturer specifications to identify any discrepancies. Document all findings and any adjustments made during the test. If the system operates smoothly without any issues, the installation can be considered successful. However, if any problems are detected, make the necessary adjustments or repairs and retest the system until it performs optimally.

Troubleshooting Common Issues

Identifying Leaks

Common Causes:

Leaks in banjo fittings can occur due to several reasons, including improper installation, worn or damaged sealing rings, incorrect torque application, and misaligned components. Over-tightening or under-tightening the bolt can also lead to leaks, as can using incompatible materials for washers or gaskets. Additionally, debris or contamination within the fitting can prevent a proper seal, leading to fluid escape.

Solutions and Fixes:

To address leaks, first, depressurize the system and inspect the banjo fitting thoroughly. If the sealing rings or gaskets are damaged or worn, replace them with new, compatible parts. Ensure that the washers are correctly positioned and that the bolt is tightened to the manufacturer’s specified torque. Clean the fitting and surrounding areas to remove any debris or contaminants. If the leak persists, recheck the alignment of the fitting and the integrity of the components involved. If necessary, disassemble the fitting, inspect each part for defects, and reassemble it carefully, ensuring proper alignment and torque.

Addressing Misalignment

Diagnosing the Problem:

Misalignment of banjo fittings can cause leaks and reduce the efficiency of the system. Symptoms of misalignment include uneven wear on components, difficulty in tightening the bolt, and visible gaps between the fitting and the connected parts. To diagnose misalignment, visually inspect the fitting and use measuring tools to check the alignment of the fitting with the connection points.

Corrective Actions:

To correct misalignment, first, loosen the bolt and realign the fitting with the connection points. Ensure that the banjo fitting sits flush against the components and that the bolt hole is perfectly aligned. Tighten the bolt by hand initially to maintain alignment, then use a torque wrench to apply the specified torque evenly. If the components are significantly misaligned, consider using alignment tools or seeking professional assistance to correct the issue. Regularly inspect the system to ensure the fitting remains properly aligned during operation.

Handling Damaged Components

Recognizing Damage:

Damaged components can compromise the integrity of the banjo fitting installation and lead to system failures. Common signs of damage include visible cracks, deformation, corrosion, and excessive wear on the fitting, bolt, washers, or sealing rings. Inspect the components regularly for any signs of damage, especially after high-pressure operations or if leaks are detected.

Replacing Parts:

If any components are found to be damaged, they should be replaced immediately to maintain the system’s integrity. When replacing parts, ensure that the new components are compatible with the existing system and meet the manufacturer’s specifications. Follow the installation steps carefully to avoid introducing new issues. Use high-quality, recommended materials to prevent premature wear and damage. After replacing the parts, reassemble the fitting and perform pressure and functional tests to ensure the system operates correctly and efficiently.

By understanding and addressing common issues such as leaks, misalignment, and damaged components, you can ensure the long-term reliability and performance of your banjo fitting installations. Regular maintenance and inspections are key to preventing these problems and ensuring a leak-free, efficient hydraulic or fuel system.

Conclusion

In summary, the proper installation of banjo fittings involves meticulous attention to detail, from positioning and securing the fitting to pressure testing and troubleshooting common issues like leaks and misalignment. Following the guidelines provided in this comprehensive manual ensures a secure, leak-free connection that enhances the performance and reliability of your hydraulic or fuel system. Adhering to these best practices not only prevents costly repairs and downtime but also extends the lifespan of your components. Regular practice and proficiency in these techniques will lead to more efficient and successful installations, ensuring your systems operate at their best.

FAQ

What are banjo fittings used for?

Banjo fittings are commonly used in hydraulic and fuel systems for their ability to provide a secure and flexible connection in tight spaces, allowing for 360-degree rotation.

How do I know if my banjo fitting is properly aligned?

Ensure the fitting aligns perfectly with the connection points, sits flush against the components, and the bolt hole is centered. Proper alignment prevents leaks and ensures efficient fluid flow.

What should I do if I detect a leak after installation?

First, depressurize the system. Check for worn or damaged sealing rings, improper torque, or misalignment. Replace any damaged parts, clean the area, and retighten the bolt to the specified torque.

How tight should the banjo bolt be?

Use a torque wrench to tighten the banjo bolt to the manufacturer’s specified torque value. Over-tightening or under-tightening can cause leaks or damage to the components.

Can I use any type of sealing ring or gasket with my banjo fitting?

No, it’s essential to use sealing rings or gaskets that are compatible with the fluids, operating temperatures, and pressures specific to your application. Always refer to the manufacturer’s recommendations.

How often should I inspect my banjo fittings?

Regularly inspect your banjo fittings as part of routine maintenance, especially after high-pressure operations or if you suspect a leak. Checking for signs of wear, damage, or misalignment helps prevent future issues.

What is a Banjo Bolt Used For

What is a Banjo Bolt Used For?

What is a Banjo Bolt Used For?

Table of Contents

Introduction

Did you know that banjo bolts, despite their unassuming appearance, play a crucial role in ensuring the safety and efficiency of high-performance vehicles? A banjo bolt is a specialized type of fastener that features a hollow, cylindrical design with a cross-drilled hole, allowing fluid to pass through it. This bolt is paired with a banjo fitting, which is a hollow, ring-shaped component with a single or double barb. The banjo bolt and fitting work together to create a secure and leak-proof connection in fluid systems. The unique design allows the banjo fitting to rotate around the bolt, providing flexibility and ease of alignment in various applications.

Understanding Banjo Bolts

Basic Structure

The design of a banjo bolt is ingeniously simple yet highly effective. At its core, a banjo bolt consists of a hollow, cylindrical bolt that is cross-drilled, allowing fluid to flow through its center and out through the side holes. This unique structure enables the bolt to serve as a conduit for fluids, making it a vital component in systems where secure and efficient fluid transfer is essential.

The banjo bolt pairs with a banjo fitting, which is a ring-shaped, hollow component that resembles the shape of a banjo—hence the name. The banjo fitting typically has one or two barbs that connect to hoses or pipes, creating a seamless pathway for fluid to travel. When the banjo fitting is placed around the bolt and secured with a nut, the assembly forms a tight, leak-proof connection that can withstand high pressures.

To better visualize, imagine a bolt with a hole drilled through its shaft. This hole intersects with another hole drilled perpendicular to it, forming a passageway for fluid. The banjo fitting, which resembles a flattened ring with a hose attached to its side, fits over the bolt. When fluid enters the banjo fitting, it flows through the bolt’s hollow shaft and exits through the side holes, continuing its journey through the connected hose or pipe.

Banjo bolt fitting Topa

Materials Used

Stainless Steel: Known for its exceptional strength, corrosion resistance, and durability, stainless steel is a popular choice for banjo bolts used in harsh environments or where the risk of corrosion is high. This makes stainless steel banjo bolts ideal for automotive brake systems, marine applications, and industrial machinery where exposure to moisture and chemicals is common.

Brass: Brass is prized for its excellent machinability, corrosion resistance, and aesthetic appeal. Banjo bolts made from brass are often used in fuel systems and low-pressure hydraulic applications. The material’s natural resistance to corrosion by fuel and its ability to form a tight seal make it a reliable choice for these systems.

Aluminum: Lightweight yet strong, aluminum banjo bolts are used in applications where weight savings are crucial, such as in aerospace and high-performance automotive systems. Despite being lighter, aluminum can still provide the necessary strength and durability for many fluid transfer applications.

The choice of material for a banjo bolt depends largely on the specific requirements of the application, including factors like operating pressure, environmental conditions, and compatibility with the fluids being transferred. For instance, in an automotive braking system, the ability to withstand high pressures and resist corrosion from brake fluids is paramount, making stainless steel the material of choice. In contrast, a fuel system might prioritize corrosion resistance and ease of manufacturing, leading to the selection of brass.

By understanding the basic structure and materials used in banjo bolts, one can appreciate the versatility and critical role these components play in a wide range of industries. Whether ensuring the safety of a vehicle’s braking system or facilitating the smooth operation of hydraulic machinery, banjo bolts are indispensable in their applications.

Primary Uses of Banjo Bolts

Automotive Industry

Banjo bolt fitting automotive

In the automotive industry, banjo bolts play a pivotal role in brake systems, ensuring safe and efficient operation. Brake systems rely on hydraulic pressure to activate the brake calipers, which in turn press the brake pads against the rotors to slow down or stop the vehicle. Banjo bolts are essential in creating a secure and leak-proof connection between the brake lines and the calipers.

The banjo bolt is used to attach the brake line to the caliper through a banjo fitting. When the brake pedal is pressed, brake fluid travels through the brake lines and enters the banjo fitting via the hollow banjo bolt. The fluid then flows through the bolt’s drilled holes and into the caliper, creating the hydraulic pressure needed to push the brake pads against the rotors. This mechanism ensures that the braking force is evenly distributed and effective, providing reliable stopping power.

Use in Fuel Systems, Including Fuel Lines and Filters

Banjo bolts are also widely used in automotive fuel systems. They are instrumental in connecting fuel lines to various components such as fuel pumps, filters, and injectors. In fuel systems, the banjo bolt ensures a secure and tight connection, preventing fuel leaks and maintaining system integrity.

For instance, in a fuel injection system, banjo bolts connect the fuel lines to the injectors. Fuel from the tank is pumped through the lines and passes through the banjo fitting attached by the banjo bolt. This connection allows the fuel to flow smoothly into the injectors, where it is atomized and delivered into the engine cylinders. The precision and reliability of banjo bolts in these connections are crucial for optimal engine performance and fuel efficiency.

Hydraulic Systems

Application in Hydraulic Lines for Fluid Transfer

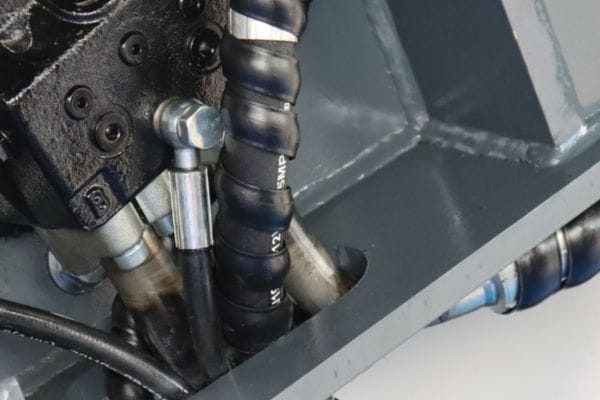
In hydraulic systems, banjo bolts are essential for facilitating fluid transfer in high-pressure environments. Hydraulic systems rely on pressurized fluid to transmit power and perform various functions, such as lifting, pressing, and moving heavy loads. Banjo bolts are used to connect hydraulic hoses and components, ensuring a secure and leak-proof fluid transfer.

For example, in construction equipment like excavators and bulldozers, hydraulic systems power the movement of the arms, buckets, and other attachments. Banjo bolts connect the hydraulic hoses to the cylinders and control valves, allowing pressurized hydraulic fluid to flow through the system and activate the desired movements. The robustness and reliability of banjo bolts ensure that these machines can operate efficiently under demanding conditions.

Examples of Machinery and Equipment Utilizing Banjo Bolts

Beyond construction equipment, banjo bolts are used in a wide range of machinery and equipment that rely on hydraulic systems. This includes agricultural machinery like tractors and harvesters, industrial machines such as presses and lifts, and even in aircraft landing gear systems. In each of these applications, banjo bolts facilitate the secure and efficient transfer of hydraulic fluid, enabling the machinery to perform its intended functions.

Other Industrial Applications

Use in Oil and Gas Industries

In the oil and gas industry, banjo bolts are used in various applications involving fluid transfer and pressure management. They are employed in systems that transport oil, gas, and other fluids through pipelines and processing equipment. The ability of banjo bolts to provide leak-proof connections under high pressure and harsh environmental conditions makes them indispensable in this sector.

For instance, banjo bolts are used in the connection of pipelines to pumps and valves in oil refineries and drilling rigs. These connections need to withstand extreme pressures and temperatures, and banjo bolts provide the necessary durability and reliability to ensure safe and efficient operation.

Application in Marine and Aerospace Industries

In the marine industry, banjo bolts are used in hydraulic systems that control various functions on ships and boats, such as steering, propulsion, and deck machinery. The corrosive marine environment requires components that can resist rust and deterioration, and banjo bolts made from materials like stainless steel are ideal for these conditions.

In the aerospace industry, banjo bolts are used in hydraulic systems that operate the aircraft’s control surfaces, landing gear, and other critical systems. The high-performance requirements of aerospace applications demand components that are lightweight, durable, and capable of withstanding extreme pressures and temperatures. Banjo bolts meet these criteria, ensuring reliable operation in the demanding conditions of flight.

Banjo bolt fitting Agriculture

Choosing the Right Banjo Bolt

Material Selection Based on the Application

Stainless Steel: Known for its excellent corrosion resistance and high strength, stainless steel is often chosen for applications exposed to harsh environments or corrosive substances. For instance, in marine applications where components are frequently in contact with salt water, stainless steel banjo bolts provide long-lasting performance without rusting. Additionally, in automotive brake systems, stainless steel bolts ensure durability and safety under high-pressure conditions.

Brass: Brass is valued for its good corrosion resistance, ease of machining, and suitability for lower-pressure applications. It is commonly used in fuel systems and lower-pressure hydraulic applications where its ability to resist fuel corrosion and form tight seals is beneficial. Brass banjo bolts are also aesthetically pleasing and often used where appearance matters.

Aluminum: Lightweight yet strong, aluminum is ideal for applications where reducing weight is a priority, such as in aerospace and high-performance automotive systems. Although aluminum does not have the same strength as stainless steel, its lightweight and resistance to oxidation make it suitable for components that need to minimize overall weight without compromising on performance.

Size and Thread Considerations

The size and thread specifications of a banjo bolt are vital for ensuring a proper fit and secure connection. Selecting the correct size involves matching the bolt to the diameter of the hose or pipe it will connect to, as well as ensuring it fits the banjo fitting properly.

Diameter: The diameter of the banjo bolt must match the inner diameter of the hose or pipe to ensure a secure fit and effective fluid transfer. Using the correct diameter prevents leaks and maintains system pressure.

Thread Type and Pitch: The thread type (e.g., metric, SAE) and pitch (the distance between threads) must match the receiving component’s specifications. Using mismatched threads can lead to cross-threading, leaks, and potential system failure. It’s essential to verify the thread specifications and ensure compatibility with the components being used.

Length: The length of the banjo bolt should be sufficient to pass through the banjo fitting and secure with a nut while allowing enough thread engagement for a tight seal. Insufficient length can result in a weak connection, while excessive length can cause interference with other components.

Quality Standards

Industry Standards and Certifications to Look For

To ensure the reliability and safety of banjo bolts, it’s important to adhere to industry standards and certifications. These standards guarantee that the components meet specific criteria for quality, performance, and safety.

ISO Standards: The International Organization for Standardization (ISO) provides globally recognized standards for various components, including banjo bolts. ISO standards ensure that the bolts meet rigorous quality and performance criteria, making them suitable for international use.

SAE Standards: The Society of Automotive Engineers (SAE) sets standards for automotive components, including banjo bolts. SAE standards ensure that the bolts are compatible with automotive systems and meet safety and performance requirements.

Certifications: Look for certifications such as ISO 9001, which indicates that the manufacturer adheres to a quality management system and consistently produces high-quality products. Other relevant certifications might include those for specific industries, such as aerospace or marine.

By considering these factors and prioritizing quality standards and reputable sources, you can select the right banjo bolt for your specific application, ensuring optimal performance, safety, and longevity.

Conclusion

Banjo bolts are indispensable components in various industries, providing secure and efficient fluid transfer in automotive, hydraulic, oil and gas, marine, and aerospace applications. Their unique design, material versatility, and ability to withstand high pressures make them critical for safety and performance. Reflecting on their widespread use, it’s clear that banjo bolts play a vital role in ensuring the reliability of complex systems. We invite you to share your experiences with banjo bolts or reach out for more information on selecting the right one for your needs.

FAQ

A banjo bolt is a hollow bolt used to connect fluid lines in hydraulic and fuel systems, allowing fluid to pass through its center and into a connected fitting.

Banjo bolts are commonly used in automotive brake and fuel systems, hydraulic machinery, and various industrial applications including oil and gas, marine, and aerospace industries.

Banjo bolts are typically made from stainless steel, brass, or aluminum, each chosen for its specific properties such as corrosion resistance, strength, and weight.

Consider factors such as material compatibility, size, thread type, and the specific requirements of your application, including pressure and environmental conditions.

Banjo bolts offer secure and leak-proof connections, ease of installation, flexibility in alignment, and reliable performance under high-pressure conditions.

Sourcing from reputable manufacturers ensures high-quality materials, adherence to industry standards, rigorous quality control, and reliable performance of the banjo bolts in critical applications.

How to Measure a Banjo Fitting

How to Measure a Banjo Fitting

How to Measure a Banjo Fitting

Table of Contents

Introduction

Precise measurements are crucial for the proper functioning of banjo fittings in various applications, from automotive systems to hydraulic machinery. This post aims to provide a comprehensive guide on how to measure banjo fittings accurately, ensuring optimal performance and compatibility. We’ll cover the basics of banjo fittings, the tools required, a step-by-step measurement guide, common challenges, and advanced techniques to help you achieve precise results.

Understanding Banjo Fittings

Banjo fittings are specialized connectors used in hydraulic systems to join pipes or hoses to a component while allowing fluid to flow through a hollow bolt. They derive their name from their circular “banjo” shape, resembling the musical instrument. These fittings are crucial in applications where space constraints and the need for fluid transfer efficiency are significant concerns. Banjo fittings provide a compact and secure connection, ensuring reliable performance in various demanding environments.

banjo bolt hydraulic fittings Topa

Components

The main components of a banjo fitting include:

Bolt: The central component through which fluid flows. This hollow bolt is designed to allow the passage of hydraulic fluid, ensuring a smooth and uninterrupted flow within the system. The bolt’s diameter and length are critical measurements that determine its compatibility with other components.

Washer: The washer provides a seal between the bolt and the component to which the fitting is attached. It is typically made of a durable material capable of withstanding high pressures and temperatures, ensuring no leaks occur at the connection points.

Eye: The eye is the circular part of the banjo fitting that connects to the hose or pipe. It features an opening through which the bolt passes, and its dimensions are vital for ensuring a secure and leak-free connection. The eye’s inner and outer diameters, as well as its thickness, are essential measurements for fitting compatibility.

Applications

Banjo fittings are commonly used in various industries and scenarios where efficient fluid transfer in tight spaces is required. Some of the primary applications include:

Automotive Industry: In vehicles, banjo fittings are often used in braking systems, fuel lines, and hydraulic clutch systems. Their compact design allows for efficient fluid transfer even in confined spaces, ensuring optimal performance and safety.

Aerospace Industry: Aircraft systems rely on banjo fittings for hydraulic fluid transfer in flight control systems, landing gear, and other critical components. The fittings’ reliability and space-saving design are essential for maintaining the aircraft’s functionality and safety.

Industrial Machinery: Banjo fittings are used in various industrial machines for hydraulic fluid transfer, including construction equipment, manufacturing machinery, and agricultural vehicles. Their ability to provide secure and efficient connections in tight spaces makes them invaluable in these applications.

Marine Industry: In boats and ships, banjo fittings are utilized in hydraulic systems for steering, lifting, and other essential functions. The fittings’ durability and efficiency are crucial for ensuring reliable operation in marine environments.

Medical Equipment: Banjo fittings are also found in medical devices and equipment where precise fluid transfer is necessary. Their compact design allows for integration into intricate systems, ensuring accurate and reliable performance.

Step-by-Step Guide to Measuring Banjo Fittings

Measuring the Bolt Diameter

How to Measure:

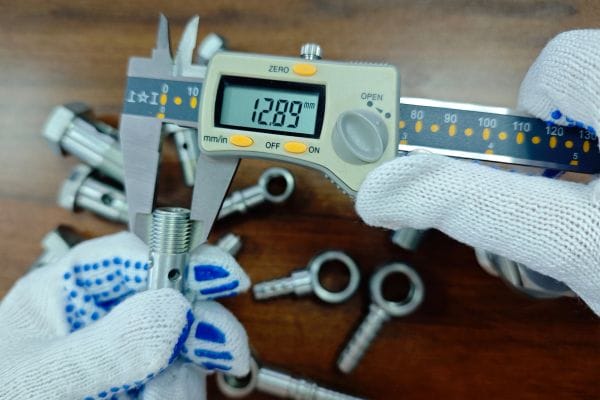
Select the Right Tool: Use a pair of calipers for accurate measurement. Digital calipers are recommended for their ease of use and precision.

Prepare the Bolt: Ensure the bolt is clean and free of any debris. This will prevent any obstruction during measurement.

Measure the Diameter:

Open the calipers and place the jaws around the bolt’s diameter.

Close the jaws until they touch the bolt’s surface without compressing it.

Read the measurement displayed on the calipers.

Importance:

Measuring the bolt diameter is crucial for fitting compatibility. An accurate measurement ensures that the bolt will fit correctly with other components, preventing leaks and ensuring the hydraulic system’s efficiency.

Measure Banjo bolt Thread

Measuring the Inner and Outer Diameter of the Eye

How to Measure:

Inner Diameter:

Use the inside jaws of the calipers.

Insert the calipers into the eye of the banjo fitting.

Open the jaws until they touch the inner sides of the eye.

Read the measurements on the calipers.

Outer Diameter:

Use the outside jaws of the calipers.

Place the jaws around the outer edge of the eye.

Close the jaws until they touch the outer surface of the eye.

Read the measurements on the calipers.

Tips for Ensuring Precision:

Stabilize the Fitting: Place the fitting on a stable surface to prevent movement during measurement.

Consistent Pressure: Apply consistent pressure when closing the caliper jaws to avoid compressing the material and obtaining inaccurate measurements.

Measuring the Thickness of the Eye

How to Measure:

Select the Right Tool: Use a micrometer for measuring the thickness of the eye. Micrometers provide highly accurate measurements, especially for smaller dimensions.

Prepare the Eye: Ensure the eye is clean and free of any debris.

Measure the Thickness:

Open the micrometer and place the anvil and spindle around the eye.

Close the micrometer until the anvil and spindle lightly touch the eye’s surfaces.

Read the measurement displayed on the micrometer.

Significance:

Measuring the thickness of the eye is essential for fitting performance. The thickness affects the strength and durability of the fitting, ensuring it can withstand the pressures and forces in the hydraulic system.

Measuring the Overall Length

Measure Banjo bolt Fitting Length

How to Measure:

Select the Right Tool: Use a ruler or a measuring tape for this measurement.

Prepare the Fitting: Place the banjo fitting on a flat, stable surface.

Measure the Length:

Align the zero point of the ruler with one end of the fitting.

Extend the ruler along the length of the fitting to the opposite end.

Read the measurement from the ruler.

Importance:

Measuring the overall length of the banjo fitting is critical for installation. This measurement ensures that the fitting will fit within the allocated space and align correctly with other components in the system. Accurate length measurement is crucial for proper assembly and optimal performance of the hydraulic system.

Common Challenges and Solutions

Inaccurate Measurements

Common Causes of Inaccurate Measurements:

Incorrect Tool Usage: Using the wrong tool or using a tool incorrectly can lead to inaccurate measurements. For example, using calipers instead of a micrometer for measuring thickness may not provide the needed precision.

Dirty Fittings: Dirt, debris, or oil on the fittings can interfere with the measurement process, leading to erroneous readings.

Environmental Factors: Temperature fluctuations, humidity, and lighting can affect the accuracy of measurements. For instance, metals expand and contract with temperature changes, which can alter the dimensions slightly.

How to Avoid Them:

Correct Tool Usage:

Ensure you are using the appropriate tool for each specific measurement.

Familiarize yourself with the correct operation of each tool. Refer to the user manuals or seek training if necessary.

Regularly calibrate your tools to ensure they provide accurate readings.

Clean Fittings:

Before taking measurements, thoroughly clean the fittings to remove any dirt, debris, or oil.

Use a clean, lint-free cloth and, if necessary, a suitable cleaning solvent to ensure all contaminants are removed.

Control Environmental Factors:

Conduct measurements in a controlled environment where temperature and humidity are stable.

Ensure good lighting conditions to improve visibility and accuracy.

Allow metal fittings to acclimate to room temperature before measuring to avoid expansion or contraction errors.

Tool Limitations

Potential Limitations of Measurement Tools:

Accuracy Range: Some tools may not be precise enough for very small or very large measurements. For example, a standard ruler might not provide the precision needed for small diameter measurements.

Wear and Tear: Over time, tools can wear out or become damaged, leading to inaccuracies.

Manual Reading Errors: Human error in reading measurements, especially on analog tools, can lead to inaccuracies.

How to Overcome Them:

Use Appropriate Tools:

Select tools that are designed for the specific measurements you need. For small, precise measurements, use micrometers or digital calipers instead of standard rulers.

Invest in high-quality tools known for their accuracy and durability.

Regular Maintenance and Calibration:

Regularly inspect tools for wear and tear. Replace any tools that show signs of damage.

Calibrate tools periodically to ensure they provide accurate readings. Calibration should be done according to the manufacturer’s guidelines or standards.

Minimize Manual Errors:

Use digital tools where possible to minimize human reading errors.

Take multiple measurements and average them to reduce the impact of any single inaccurate reading.

Environmental Factors

Effects of Environmental Factors on Measurements

Temperature: Temperature changes can cause materials to expand or contract, affecting measurements. For example, a metal fitting may be slightly larger in a warmer environment due to thermal expansion.

Dirt and Debris: Particles on the fittings or measurement tools can interfere with accurate measurements. Even small amounts of dirt can skew readings.

Humidity and Moisture: High humidity or moisture can affect both the materials being measured and the tools, potentially leading to rust or other damage that affects accuracy.

Solutions to Environmental Challenges

Controlled Environment:

Perform measurements in a temperature-controlled environment to minimize the effects of thermal expansion or contraction.

Maintain a consistent humidity level to prevent rust or other moisture-related issues.
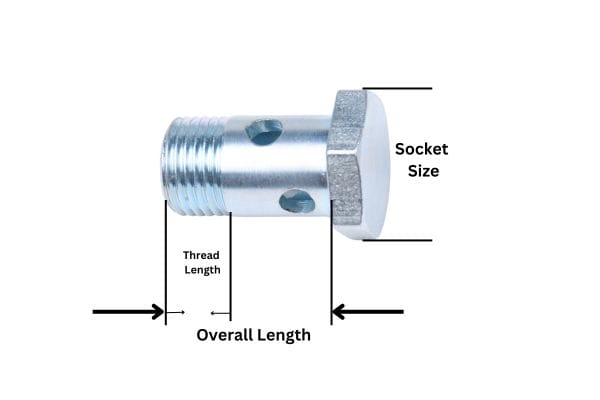
Cleanliness:

Ensure all fittings and tools are thoroughly cleaned before measurements.

Use clean, dry hands or gloves to handle both fittings and tools to avoid transferring oils or dirt.

Stabilize the Environment:

Allow fittings and tools to acclimate to the measurement environment for a period before taking measurements.

Use clean, dry storage solutions to keep tools and fittings free from environmental contaminants when not in use.

How to Customize Your Banjo Fitting

Customizing a banjo fitting to meet specific needs and applications involves several key steps. Here’s a detailed guide on how to customize your banjo fitting effectively:

Determine Your Requirements

Identify the Application:

Understand the specific application for which the banjo fitting will be used. This includes the type of hydraulic system, the pressure levels, and the environmental conditions.

Define the Specifications:

List the exact specifications required for the fitting, such as the diameter of the bolt, the size of the eye, the material, and any special coatings or treatments needed for corrosion resistance or other environmental factors.

Choose the Right Materials

Material Selection:

Select the appropriate material based on the application. Common materials include stainless steel, brass, and aluminum. Each material has its own benefits; for example, stainless steel offers excellent corrosion resistance, while brass is known for its machinability and durability.

Consider Coatings and Treatments:

Depending on the application, you might need additional coatings or treatments. For example, anodizing aluminum can enhance its resistance to wear and corrosion.

Length:

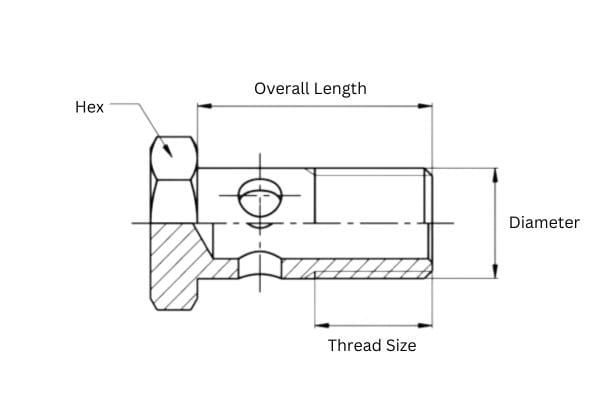
Start by identifying the specific length needed for your application. This involves measuring the distance between the components that the banjo fitting will connect.

Consider any space constraints and ensure the length will allow for proper installation and operation within the system.

Custom Length Specifications:

Provide the manufacturer with detailed specifications of the required length. This includes the overall length of the banjo fitting as well as the length of individual components such as the bolt and the eye.

Ensure that the length specifications include tolerances to account for any slight variations during manufacturing.

Customizing the Banjo Bolt's Thread

Thread Type and Size:

Determine the appropriate thread type (e.g., metric, UNF, BSP) and size based on your system requirements. The thread type and size must match the mating components to ensure a secure connection.

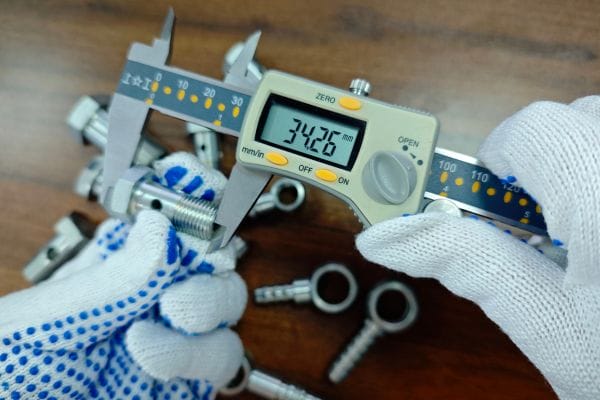
Specify the thread pitch and diameter accurately to the manufacturer. For example, you might need an M10x1.0 thread, where M10 represents the diameter in millimeters, and 1.0 represents the pitch in millimeters.

Thread Length:

Specify the length of the threaded portion of the banjo bolt. This is crucial to ensure that the bolt can be properly tightened without bottoming out or being too short to secure the connection.

Include any special requirements, such as left-hand threading or fine/coarse threading, depending on the application.

Customizing the Hole Diameter of the Banjo Eye

banjo Thread Size

Inner Diameter (ID) and Outer Diameter (OD):

Measure and specify the inner diameter of the banjo eye, which must match the hose or pipe it connects to. Ensure this measurement is precise to avoid leaks or connection issues.
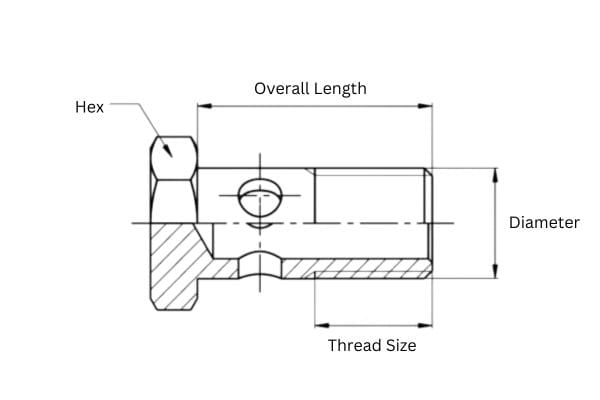
Specify the outer diameter of the banjo eye to ensure it fits within the system’s spatial constraints and provides the necessary strength.

Custom Hole Sizes:

If the application requires a non-standard hole size, provide detailed specifications to the manufacturer. This might include specific tolerances to ensure a precise fit.

Consider the material thickness around the hole to maintain the integrity and strength of the banjo fitting.

Connecting Methods:

Threaded Connection:

For threaded connections, specify the type and size of the threads on the mating components.

Ensure that the threads are compatible with the banjo bolt’s threads to avoid cross-threading or connection issues.

Push Lock Connection:

If using a push-lock connection, provide specifications for the push-lock fittings, including the size and type of connection.

Ensure that the push-lock connection is compatible with the hose and can withstand the system’s pressure requirements.

Other Connection Methods:

If other types of connections are required, such as quick disconnects or flange fittings, provide detailed specifications to the manufacturer.

Ensure that the selected connection method is suitable for the application and provides a secure and reliable connection.

By carefully specifying each of these elements, you can customize banjo fittings to meet the precise requirements of your hydraulic system. Clear and detailed communication with your manufacturer is essential to ensure that all specifications are accurately met, resulting in a fitting that performs reliably and efficiently in your application.

Conclusion

In this article, we cover all the measurement details as well as customization requirements for banjo fittings. You can apply these techniques to your projects and share this article to help others in the industry. For more information on banana fitting and measurement techniques, contact Topa and we’ll get back to you as soon as possible.

FAQ

For most plumbing applications involving water, Teflon tape is commonly used due to its ease of application and effectiveness. For gas lines, it’s recommended to use pipe dope rated specifically for gas applications. For oil and other specific fluids, ensure you use a sealant compatible with the fluid.

Tighten the fittings until they are snug and secure. Use a wrench to finish tightening after hand-tightening, but be cautious not to over-tighten, as this can damage the threads and cause leaks. The connection should feel firm without excessive force.

After assembling the fittings, test the connections by running water, gas, or air through the system and inspecting for leaks. If any leaks are detected, disassemble the connection, clean the threads, reapply the sealant, and reassemble the fittings. Regular maintenance and inspections also help ensure leak-free connections.

Yes, brass fittings can be used for both indoor and outdoor installations. However, for outdoor applications, it’s advisable to use brass fittings with corrosion-resistant coatings to protect the connections from extreme weather conditions.

If you over-tighten a fitting and damage the threads, you may need to replace the damaged fitting or pipe section. Disassemble the connection, inspect the threads for damage, and replace any parts as necessary. Reassemble the connection with the appropriate sealant and tighten it carefully to avoid over-tightening again.

It’s recommended to inspect your brass pipe fittings regularly, at least every few months, to check for signs of leaks, corrosion, or wear. Regular maintenance helps identify and address any issues early, ensuring the longevity and reliability of your piping system.

Metric Bite Type Fittings A Comprehensive Guide

Metric Bite Type Fittings: A Comprehensive Guide

Metric Bite Type Fittings: A Comprehensive Guide

Introduction

Metric bite type fittings are essential components in fluid and gas systems, renowned for their reliability and versatility. These fittings provide a secure and leak-proof connection, making them indispensable in industries such as hydraulics, pneumatics, automotive, and more. This guide delves into the different types of metric bite type fittings, their specific applications, and the best practices for their selection, installation, and maintenance. By understanding these aspects, professionals can make informed decisions that enhance the efficiency and safety of their systems.

Understanding Metric Bite Type Fittings

Definition and Basic Concept

Metric bite type fittings are mechanical connectors designed to join sections of tubing in a secure and leak-proof manner. The term “bite type” refers to the way the fitting interacts with the tube. When the nut of the fitting is tightened, the ferrule (a ring-like component within the fitting) bites into the outer surface of the tube. This action creates a strong mechanical grip and a gas-tight or liquid-tight seal. These fittings are often used in high-pressure applications due to their ability to maintain integrity under stress.

The basic concept behind metric bite type fittings revolves around their ability to provide a reliable and efficient connection without the need for welding or soldering. This makes them particularly advantageous in applications where disassembly and reassembly are required, or where heat-sensitive materials are involved. The metric specification indicates that the dimensions and tolerances of these fittings adhere to the metric system, which is widely used in international applications and industries.

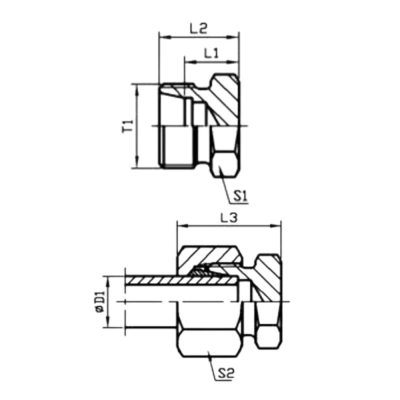
4C Bite Type Tube Plug Topa

History and Development

The history of metric bite type fittings dates back to the mid-20th century when the need for reliable and easy-to-install connections in hydraulic and pneumatic systems became increasingly apparent. Early versions of these fittings were developed to address the limitations of traditional threaded and welded connections, which often required specialized skills and tools.

The development of bite type fittings was driven by the demands of industries such as aerospace, automotive, and manufacturing, where high-pressure systems are common. Engineers sought a solution that could offer both reliability and ease of use. The introduction of the ferrule-based design marked a significant advancement, providing a secure grip on the tubing without compromising the flow of fluids or gases.

Over the years, advancements in materials science and manufacturing techniques have further refined the design and performance of metric bite type fittings. Modern fittings are made from a variety of materials, including stainless steel, brass, and carbon steel, each selected for their specific properties and suitability for different applications. Innovations such as improved ferrule designs and enhanced sealing technologies have continued to enhance the performance and reliability of these fittings.

Key Features and Benefits

Metric bite type fittings offer several key features and benefits that make them a preferred choice in many applications:

Leak-Proof Seal: The biting action of the ferrule creates a tight seal that prevents leaks, even under high pressure. This ensures the integrity of the fluid or gas system, reducing the risk of contamination and loss of efficiency.

High Pressure and Temperature Tolerance: These fittings are designed to withstand extreme conditions, making them suitable for use in demanding environments such as hydraulic systems, automotive applications, and industrial machinery.

Ease of Installation: Unlike welded or soldered connections, metric bite type fittings can be installed quickly and easily with standard tools. This reduces installation time and costs, making them an attractive option for both initial installations and maintenance.

Versatility: Available in a wide range of sizes and configurations, metric bite type fittings can be used in various applications. They are compatible with different types of tubing materials, including metal and plastic.

Standardization: Adhering to metric standards ensures compatibility and interchangeability with other components, simplifying the design and maintenance of fluid and gas systems.

Types of Metric Bite Type Fittings

Metric bite type fittings come in various configurations to meet the diverse needs of fluid and gas systems. These fittings are engineered to provide reliable and leak-proof connections in a range of applications, from industrial machinery to automotive systems. The primary types of metric bite type fittings include male fittings, female fittings, elbow fittings, tee fittings, and cross fittings. Additionally, these fittings are available in different materials, such as stainless steel and brass, to suit specific requirements and environments.

Male Fittings

Male fittings, also known as male connectors, feature external threads that allow them to be screwed into female fittings or ports. These fittings are commonly used to connect tubing to other components in a system, such as valves, pumps, and cylinders. The external threading ensures a secure and tight connection, preventing leaks and maintaining system integrity.

Female Fittings

Female fittings, or female connectors, have internal threads that receive the external threads of male fittings. These fittings are designed to connect tubing to male-threaded components, creating a seamless and reliable connection. Female fittings are widely used in systems where quick disassembly and reassembly are required, as they provide a straightforward and secure method for joining components.

Elbow Fittings

Elbow fittings are designed to change the direction of tubing in a fluid or gas system. These fittings are available in different angles, most commonly 45 degrees and 90 degrees, allowing for precise routing of tubing around obstacles and within confined spaces. Elbow fittings are essential in applications where space constraints or specific flow directions must be accommodated. They are available in both male and female configurations, as well as in various sizes and materials.

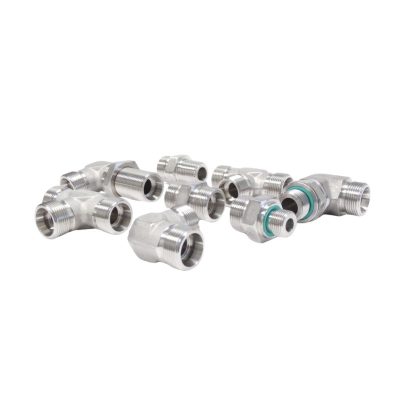
Metric Bite Type Fittings type

Tee Fittings

Tee fittings, or tee connectors, facilitate three-way connections in a fluid or gas system. These fittings have one inlet and two outlets (or vice versa), forming a T-shaped intersection. Tee fittings are commonly used to split or combine fluid or gas flow in a system, making them ideal for applications requiring distribution to multiple points. They are available in equal and reduced configurations, allowing for different flow rates and tube sizes to be connected.

Cross Fittings

Cross fittings, also known as four-way fittings, enable four-way connections in a fluid or gas system. These fittings have one inlet and three outlets (or vice versa), forming a cross-shaped intersection. Cross fittings are used in applications where fluid or gas needs to be distributed to multiple branches from a single source. They are less common than tee fittings but are essential in complex systems that require multiple flow paths.

Material Variations

Metric bite type fittings are manufactured from a variety of materials to meet the demands of different applications and environments. The most common materials include:

Stainless Steel: Known for its corrosion resistance, strength, and durability, stainless steel fittings are ideal for harsh environments, such as marine and chemical processing applications.

Brass: Brass fittings offer excellent machinability, corrosion resistance, and conductivity, making them suitable for applications in plumbing, refrigeration, and low-pressure hydraulic systems.

Carbon Steel: Carbon steel fittings provide high strength and durability, making them suitable for high-pressure and heavy-duty applications, such as industrial machinery and automotive systems.

Applications of Metric Bite Type Fittings

Hydraulic Systems

In hydraulic systems, metric bite type fittings are crucial for maintaining the integrity and efficiency of fluid power systems. These fittings connect hydraulic hoses, tubes, and components, ensuring that high-pressure fluids are transferred safely and reliably. Common applications include:

Construction Equipment: Hydraulic excavators, bulldozers, and loaders rely on these fittings for the operation of hydraulic cylinders and motors.

Manufacturing Machinery: Presses, injection molding machines, and CNC machines use hydraulic systems with metric bite type fittings for precise control and movement.

Automotive Industry

The automotive industry extensively uses metric bite type fittings in various systems where durability and leak-proof connections are critical. These fittings are found in:

Fuel Lines: Ensuring secure and leak-free connections in fuel delivery systems.

Brake Systems: Providing reliable connections in hydraulic brake lines, crucial for vehicle safety.

Transmission Cooling Systems: Used in cooling lines to maintain optimal transmission temperatures.

Plumbing Systems

In plumbing systems, these fittings are used to connect pipes and tubes, ensuring a leak-proof seal that is vital for water distribution and waste management. Applications include:

Residential Plumbing: Connecting water supply lines to faucets, toilets, and showers.

Commercial Buildings: Ensuring reliable connections in water distribution systems for offices, hotels, and restaurants.

Irrigation Systems: Providing secure connections in garden and agricultural irrigation systems.

How Metric Bite Type Fittings Work

Metric bite type fittings function through a unique biting mechanism that creates a strong and leak-proof connection between tubing and the fitting itself. The core components of a metric bite type fitting include the body, nut, and ferrule (or cutting ring). Here’s a step-by-step breakdown of how they work:

Insertion: The tube is inserted into the fitting body until it reaches a defined stop. This ensures the tube is properly aligned within the fitting.

Tightening the Nut: When the nut is tightened, it forces the ferrule to move axially along the tube. As the ferrule advances, it starts to bite into the outer surface of the tube.

Biting Action: The ferrule’s sharp edge cuts into the tube, creating a secure grip. This biting action deforms the tube slightly, forming a tight, mechanical seal between the tube and the fitting body.

Sealing: The compression of the ferrule against the tube and fitting body forms a robust seal. This seal is capable of withstanding high pressures and prevents any leakage of fluids or gases.

The effectiveness of this mechanism relies on the precise engineering of the fitting components, ensuring that the ferrule bites uniformly into the tube and the seal remains intact even under fluctuating pressures and temperatures.

Assembly and Installation Process

Proper assembly and installation of metric bite type fittings are crucial for achieving a secure and leak-proof connection. Here is a step-by-step guide:

Preparation

Ensure that the tube end is cut squarely and is free from burrs. Use a tube cutter for a clean cut.

Clean the tube end to remove any debris, oil, or contaminants that might affect the sealing process.

Insertion

Insert the tube into the fitting body until it bottoms out against the internal shoulder of the fitting. This ensures that the tube is properly positioned for the biting action.

Initial Tightening:

Hand-tighten the nut onto the fitting body. This initial tightening aligns the tube and ferrule properly within the fitting.

Wrench Tightening:

Using a wrench, tighten the nut further according to the manufacturer’s specifications. Typically, this involves turning the nut a specific number of turns beyond hand-tight.

The common practice is to mark the position of the nut and then tighten it by an additional 1.5 to 2 turns for initial assembly, ensuring the ferrule bites securely into the tube.

Inspection

After tightening, inspect the connection to ensure there is no visible gap between the fitting body and the nut.

Check for any misalignment or improper seating of the tube within the fitting.

Maintenance Tips

Conduct Regular Inspections

Frequency: Schedule inspections at regular intervals based on the system’s operating conditions and manufacturer recommendations.

What to Look For: Check for signs of wear, corrosion, or damage on the fittings, tubing, and connected components.

Actions: If any wear or damage is detected, replace the affected components promptly to avoid system failure.

Clean the Fittings Periodically

Cleaning Frequency: Establish a routine cleaning schedule to maintain the fittings’ cleanliness and prevent contamination.

Cleaning Method: Use appropriate cleaning solutions and methods recommended by the manufacturer. Avoid abrasive materials that could damage the fittings.

Benefits: Regular cleaning prevents the buildup of dirt, debris, and contaminants that can compromise the seal and functionality of the fittings.

Apply Lubrication if Recommended by the Manufacturer

Lubrication Points: Identify the specific points on the fitting that require lubrication, such as the threads or ferrule.

Lubrication Type: Use the type of lubricant specified by the manufacturer to ensure compatibility and effectiveness.

Procedure: Apply the lubricant as directed during installation or maintenance to reduce friction and wear, and to ensure smooth assembly and disassembly.

Troubleshooting Common Issues

Leaks

Symptoms: The presence of fluid or gas escaping from the fitting connection.

Causes:

Improper installation (e.g., insufficient tightening or misalignment of the tube).

Worn or damaged components (e.g., ferrule, tube, or fitting body).

Solutions:

Check for proper installation by verifying the fitting is tightened according to manufacturer specifications.

Inspect the fitting and tubing for damage; replace any worn or damaged parts.

Reassemble the fitting, ensuring the tube is fully inserted and the nut is properly tightened.

Vibration

Symptoms: Excessive movement or noise from the fitting connection, potentially leading to leaks or component fatigue.

Causes:

Inadequately secured fittings.

High levels of vibration in the operating environment.

Solutions:

Ensure all fittings are securely tightened.

Consider using vibration-resistant fittings or supports to dampen the effects of vibration.

Implement additional supports or clamps to stabilize the tubing and fittings, reducing movement and the risk of fatigue.

Conclusion

In summary, metric bite type fittings are crucial for ensuring secure, leak-proof connections in fluid and gas systems across various industries. Their robust design, ease of installation, and versatility make them indispensable in applications ranging from hydraulics and pneumatics to automotive and HVAC systems. Regular maintenance and proper troubleshooting are essential to maximize their lifespan and efficiency. For tailored solutions and optimal performance, always seek professional advice to address specific needs and challenges in your systems.

FAQ

Metric bite type fittings are used to create secure, leak-proof connections in fluid and gas systems, commonly found in hydraulic, pneumatic, automotive, and HVAC applications.

The fittings themselves can often be reused if they are in good condition, but the ferrules typically should not be reused as they may not seal properly a second time.

Ensure the tube is cut squarely, deburred, and clean before insertion. Follow the manufacturer’s torque specifications when tightening the nut to create a proper seal.

Metric bite type fittings are commonly made from stainless steel, brass, and carbon steel, chosen based on the specific application’s pressure, temperature, and corrosion resistance requirements.

Regular inspections should be conducted at intervals recommended by the manufacturer or based on the system’s operating conditions, typically ranging from monthly to annually.

Check for proper installation and ensure the fitting is tightened according to specifications. If the leak persists, inspect for damage and replace any worn components as needed.

How Do Banjo Fittings Work

How Do Banjo Fittings Work

How Do Banjo Fittings Work?

Introduction

Banjo fittings, characterized by their distinctive round shape with a hollow bolt, are essential components in hydraulic and pneumatic systems. Their unique design allows for a fluid connection that can rotate 360 degrees, making them ideal for applications where space is limited, and flexible connections are necessary. This post aims to provide an in-depth understanding of how banjo fittings work. By exploring their design, working principles, applications, and maintenance, readers will gain comprehensive knowledge about these vital components.

Understanding Banjo Fittings

Banjo fittings are specialized connectors used in hydraulic and pneumatic systems to facilitate fluid flow between components. Their name derives from their distinctive shape, which resembles a banjo, with a circular fitting body and a bolt passing through its center. These fittings are crucial in applications where space constraints and flexibility are significant considerations, enabling a secure yet adaptable connection.

Design and Structure

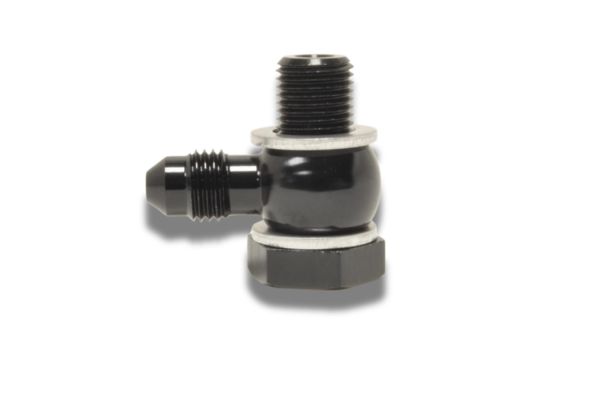
banjo fitting component

The design of banjo fittings is ingeniously simple yet highly effective, consisting of several key components that work together to ensure optimal performance:

  • Body: The body of a banjo fitting is typically circular with a hollow, cylindrical shape. It features an inlet and outlet for fluid flow, often connected to hoses or pipes. The body is designed to house the bolt and allow fluid to pass through while maintaining a secure connection.
  • Bolt: The bolt is a critical component that passes through the center of the fitting body. It is usually hollow, allowing fluid to flow through its center. The bolt has a threaded end that secures it in place and tightens the fitting. Holes along the bolt’s shaft enable fluid to pass into and out of the fitting body, ensuring continuous flow.
  • Eyelet: The eyelet, or the ring section of the fitting body, encircles the bolt. It allows the bolt to be secured within the fitting while providing an opening for fluid to flow through. The eyelet’s design ensures that the fitting can be tightened without restricting fluid flow.
  • Seals (O-rings): To prevent leaks and ensure a secure connection, banjo fittings are equipped with seals, typically made of rubber or synthetic materials. These O-rings fit snugly around the bolt and within the fitting body, creating a tight seal that prevents fluid from escaping and contaminants from entering the system.

Materials Used

Banjo fittings are constructed from various materials, chosen based on the application’s requirements and the fluids being transported. Common materials include:

  • Steel: Known for its strength and durability, steel banjo fittings are used in high-pressure applications and environments where robustness is essential.
  • Brass: Brass fittings offer excellent corrosion resistance and are often used in applications involving water or mildly corrosive fluids.
  • Aluminum: Lightweight and corrosion-resistant, aluminum banjo fittings are suitable for applications where weight reduction is crucial without sacrificing performance.

Sizes and Standards

Banjo fittings come in various sizes to accommodate different system requirements. Industry standards ensure compatibility and reliability across applications. Key standards include:

  • ISO: ISO standards provide globally recognized specifications for banjo fittings, ensuring quality and interoperability.
  • SAE: SAE standards are widely used in the automotive and aerospace industries, specifying dimensions, materials, and performance criteria for hydraulic fittings, including banjo fittings.

Working Principle of Banjo Fittings

Fluid Flow

The fluid flow within a banjo fitting is a key aspect of its functionality. The design allows fluid to enter and exit the fitting efficiently, maintaining a steady flow rate even under varying pressure conditions.

Pathway through the Bolt

The fluid enters the banjo fitting through the hollow bolt. This bolt is designed with a central passage that allows fluid to flow through its length. Along the bolt, there are strategically placed holes or ports that direct the fluid from the central passage into the fitting body. This design ensures that the fluid can move through the bolt without obstruction, facilitating a smooth and continuous flow.

Circular Flow within the Eyelet

Once the fluid exits the bolt through the ports, it enters the eyelet section of the fitting body. The eyelet provides a circular pathway around the bolt, allowing the fluid to flow freely in all directions. This circular flow ensures that the fluid can easily reach the outlet, even if the fitting is positioned in a tight or confined space. The design of the eyelet also helps to distribute the fluid evenly, reducing turbulence and maintaining a consistent flow rate.

Sealing Mechanism

The sealing mechanism in banjo fittings is critical to preventing leaks and ensuring the integrity of the hydraulic system.

  • O-rings: O-rings made from rubber or synthetic materials are used to create a tight seal around the bolt and within the fitting body. These O-rings are positioned at the points where the bolt passes through the fitting body, effectively sealing the connection. The elasticity of the O-rings allows them to compress and expand slightly, accommodating variations in pressure and temperature while maintaining a secure seal.
  • Compression Seals: In addition to O-rings, some banjo fittings use compression seals that are tightened as the bolt is secured. These seals create a tight fit between the bolt and the fitting body, preventing fluid from leaking out of the connection. The combination of O-rings and compression seals ensures a robust and reliable sealing mechanism, even under high-pressure conditions.

Pressure Handling

Banjo fittings are designed to handle varying levels of pressure, making them suitable for a wide range of applications.

  • High-Pressure Tolerance: Banjo fittings made from materials like steel and brass are capable of withstanding high pressures, often encountered in hydraulic systems. The design of the bolt and the eyelet ensures that the fitting can maintain its integrity under significant pressure without deforming or failing.
  • Low-Pressure Applications: For low-pressure applications, such as in certain fuel lines or medical equipment, aluminum banjo fittings are often used. These fittings are lightweight yet strong enough to handle the required pressure levels, ensuring reliable performance.
  • Pressure Ratings: Each banjo fitting comes with a specific pressure rating, indicating the maximum pressure it can handle safely. These ratings are determined based on industry standards and testing, ensuring that the fittings can perform as expected under specified conditions. It is essential to choose a banjo fitting with the appropriate pressure rating for your application to ensure safety and efficiency.

Applications of Banjo Fittings

  • Automotive Industry: Banjo fittings are extensively used in the automotive industry, particularly in brake systems and fuel lines.
  • Brake Systems: In automotive brake systems, banjo fittings are crucial for connecting the brake lines to the brake calipers. The compact and flexible design of banjo fittings allows for easy installation in the confined spaces around the wheels and suspension components. The secure and leak-proof connections provided by banjo fittings ensure reliable brake performance and safety.
  • Fuel Lines: Banjo fittings are also employed in fuel lines, particularly in high-performance and racing vehicles. Their ability to handle high pressure and provide a reliable seal makes them ideal for fuel delivery systems. The fittings ensure that fuel flows smoothly from the tank to the engine, contributing to the overall efficiency and performance of the vehicle.

Hydraulic Systems

Banjo bolt fitting hydraulic Cylinder

Banjo fittings play a vital role in various hydraulic circuits, where precise fluid control and robust connections are essential.

  • Hydraulic Pumps and Motors: In hydraulic systems, banjo fittings are used to connect hydraulic pumps and motors to the rest of the circuit. Their design allows for easy integration into tight spaces and ensures that fluid can flow efficiently between different components. The reliable sealing provided by banjo fittings prevents leaks and maintains the integrity of the hydraulic system.
  • Actuators and Cylinders: Banjo fittings are also used to connect hydraulic actuators and cylinders, ensuring smooth and controlled movement. The fittings’ ability to handle high pressure and provide flexible connections makes them ideal for these applications, where precise fluid control is crucial.

Step-by-Step Guide

Preparing the Components

  • Inspect the Components: Before starting the installation, inspect the banjo fitting, bolt, and O-rings for any signs of damage or defects. Ensure that all components are clean and free from debris.
  • Clean the Connection Points: Use a cleaning cloth to thoroughly clean the surfaces where the banjo fitting will be connected. This includes the fitting body, bolt, and the surfaces on the hose or pipe. Removing any dirt or contaminants will help ensure a secure and leak-free connection.
  • Apply Thread Sealant (if required): If the application requires it, apply a suitable thread sealant or PTFE tape to the threads of the bolt. This will help create a tighter seal and prevent leaks.

Assembling the Fitting

  • Position the O-rings: Place the O-rings onto the bolt, ensuring they are seated correctly in their grooves. The O-rings are crucial for creating a seal between the bolt and the fitting body.
  • Insert the Bolt into the Fitting Body: Slide the bolt through the eyelet of the banjo fitting body. Ensure that the bolt is aligned correctly and that the O-rings remain in place.
  • Align the Fitting with the Hose or Pipe: Position the banjo fitting assembly against the connection point on the hose or pipe. Align the holes in the fitting body with the inlet or outlet on the hose or pipe.
install banjo fitting Topa

Tightening and Securing the Bolt

  • Insert the Bolt into the Connection Point: Begin threading the bolt into the connection point by hand, ensuring that it engages smoothly and does not cross-thread.
  • Tighten the Bolt: Use a wrench to tighten the bolt further, ensuring it is snug but not overtightened. Over-tightening can damage the threads or the O-rings.
  • Use a Torque Wrench (if required): For applications requiring precise torque settings, use a torque wrench to tighten the bolt to the manufacturer’s specified torque value. This ensures that the connection is secure without risking damage to the components.

Checking for Leaks

  • Pressurize the System: Once the banjo fitting is securely tightened, pressurize the system by turning on the hydraulic or fluid system. This will allow you to check for any leaks.
  • Inspect for Leaks: Carefully inspect the connection points around the banjo fitting for any signs of leaks. Use an inspection mirror if necessary to check hard-to-reach areas.
  • Tighten if Necessary: If you detect any leaks, slightly tighten the bolt further, ensuring not to over-tighten. Recheck for leaks after making adjustments.
  • Final Inspection: Once no leaks are detected, perform a final inspection to ensure that all components are securely in place and that the system operates correctly.

Common Issues

Identifying and addressing common problems with banjo fittings can prevent downtime and costly repairs. Here are some typical issues and their solutions:

Leaks:

  • Cause: Leaks can be caused by damaged O-rings, loose bolts, or cracks in the fitting body.
  • Solution: Replace damaged O-rings and ensure bolts are tightened to the correct torque. If the fitting body is cracked, replace the fitting.

Corrosion:

  • Cause: Corrosion can occur due to exposure to harsh chemicals or moisture.
  • Solution: Use fittings made from corrosion-resistant materials such as stainless steel or brass. Apply anti-corrosion coatings if necessary and ensure the system is properly sealed to prevent moisture ingress.

Cracks and Deformation:

  • Cause: Cracks and deformation can result from over-tightening, high pressure, or mechanical stress.
  • Solution: Replace any cracked or deformed fittings. Ensure that fittings are installed correctly and that the system’s pressure does not exceed the fitting’s rated capacity.

Blocked Fluid Flow:

  • Cause: Blockages can be caused by debris or contaminants in the fluid.
  • Solution: Regularly clean the system and use filters to prevent debris from entering the fittings. Inspect and clean the fitting’s internal passages if necessary.

Replacement Guide:

Knowing when and how to replace banjo fittings is essential for maintaining the integrity of the hydraulic system. Follow these guidelines for effective replacement:

When to Replace:

  • Visible Damage: Replace fittings that show visible signs of cracks, corrosion, or deformation.
  • Persistent Leaks: If leaks persist despite replacing seals and tightening connections, it may be time to replace the fitting.
  • Worn Seals: If seals are frequently worn or damaged, it may indicate that the fitting itself is compromised.
  • System Upgrades: During system upgrades or overhauls, consider replacing older fittings to ensure compatibility and reliability.

Conclusion

In this article, we explore the intricate details of banjo fitting, including its design, operating principles, applications, installation process, and maintenance. We compare them to live-connect swivel joints to highlight their unique benefits and discuss common problems and troubleshooting methods to ensure their optimal performance. We hope this comprehensive guide has been informative and helpful. Feel free to share this article with your colleagues and network, comment below with your experiences or questions, and email Topa.

FAQ

Banjo fittings are commonly used in hydraulic and pneumatic systems for applications such as automotive brake lines, fuel systems, industrial machinery, and medical devices.

Banjo fittings prevent leaks using O-rings and compression seals that create a tight seal around the bolt and fitting body, ensuring fluid does not escape from the connection.

Yes, banjo fittings, especially those made from materials like steel and brass, are designed to handle high-pressure environments commonly found in hydraulic systems.

The tools typically required for installing banjo fittings include adjustable wrenches, a torque wrench, hex keys, thread sealant, and cleaning cloths.

Banjo fittings should be inspected regularly, ideally during routine maintenance checks, to look for signs of wear, leaks, or corrosion.

Replace a banjo fitting if you notice visible damage, persistent leaks despite seal replacement, frequent seal wear, or during system upgrades to ensure compatibility and reliability.

Metric Bolt Measurements A Comprehensive Size Guide

Metric Bolt Measurements: A Comprehensive Size Guide

Metric Bolt Measurements: A Comprehensive Size Guide

Table of Contents

Introduction

Accurate bolt measurements are crucial in various industries, from automotive and aerospace to construction and manufacturing. These measurements ensure the integrity and safety of mechanical assemblies, preventing failures that can lead to costly downtime or even catastrophic accidents. This guide aims to provide a comprehensive understanding of metric bolt measurements, offering detailed insights into the components, dimensions, grades, and measurement techniques essential for selecting and using bolts correctly.

Basics of Metric Bolt Measurements

What are Metric Bolts?

Metric bolts are a type of fastener that conform to the metric measurement system, which is the predominant standard used globally. Unlike imperial bolts, which are measured in inches, metric bolts are specified in millimeters, facilitating uniformity and compatibility in international projects. These bolts are available in a variety of sizes and grades, each tailored to meet specific application needs. The use of metric bolts ensures precision and standardization across diverse industries, making them essential components in engineering, manufacturing, and construction.

Why Accurate Measurements Matter

Accurate bolt measurements are essential for ensuring the integrity and safety of mechanical assemblies. Incorrect bolt dimensions can lead to improper fits, which may result in mechanical failures, structural weaknesses, or even catastrophic accidents. Precise measurements ensure that the bolts fit correctly, providing the necessary strength and stability. This is particularly crucial in industries where safety and reliability are paramount, such as aerospace, automotive, and construction.

Components of a Metric Bolt

Overall Length

Head

The head of a metric bolt is the top part that is usually shaped to accommodate a specific type of tool, such as a wrench or a screwdriver. Common head shapes include hexagonal, round, and flat. The head size and shape are important for the application as they determine the tool required for installation and the amount of torque that can be applied.

Shank

The shank is the unthreaded portion of the bolt that lies between the head and the thread. The length of the shank varies depending on the bolt’s intended use. It provides additional strength and helps in positioning the bolt correctly in the assembly.

Thread

The thread is the helical ridge that runs along the bolt’s length, starting from the shank to the end of the bolt. Threads are crucial for the bolt’s ability to screw into a nut or a threaded hole, providing the necessary clamping force to hold components together. The pitch of the thread, which is the distance between adjacent threads, is a critical measurement in ensuring compatibility with nuts and threaded holes.

Nut

The nut is a separate component that works with the bolt to fasten components together. It has an internal thread that matches the bolt’s external thread. The correct pairing of bolt and nut threads is vital for achieving the desired clamping force and ensuring the assembly’s stability.

Industries Using Metric Bolts

Industries Using Metric Bolts

Metric bolts are widely used across various industries due to their standardization and reliability. Some of the key industries include:

Automotive: In the automotive industry, metric bolts are used extensively in the assembly of vehicles. They are essential for fastening parts such as engines, chassis, and body panels, ensuring the vehicle’s structural integrity and performance.

Construction: Construction projects often rely on metric bolts for assembling structural components, machinery, and equipment. These bolts are crucial for maintaining the safety and stability of buildings, bridges, and other infrastructures.

Machinery: In the manufacturing and machinery industries, metric bolts are used to assemble equipment, tools, and machines. They provide the necessary strength and precision required for the proper functioning of mechanical systems.

Understanding Bolt Dimensions

Diameter

Nominal Diameter

The nominal diameter of a bolt refers to the diameter of the bolt’s shank, which is the part without the threads. This measurement is crucial as it determines the bolt’s size category and ensures that it fits correctly in pre-drilled holes or nuts. The nominal diameter is typically specified in millimeters for metric bolts.

How to Measure Diameter

To measure the diameter of a bolt accurately, you can use a caliper. Place the caliper’s jaws around the unthreaded part of the bolt and read the measurement. Ensure that the caliper is perpendicular to the bolt to avoid skewed readings. For threaded sections, measuring across the threads at their widest point will give you the major diameter.

Length

Overall Length vs. Grip Length

Overall Length: The overall length of a bolt is the total length from the flat part of the head to the tip of the bolt. This measurement is essential for determining how far the bolt will extend into the material or components it is fastening.

Grip Length: The grip length is the unthreaded portion of the bolt, which lies between the head and the start of the threads. This section bears the load and provides the clamping force required in the assembly. It is important to choose a bolt with an appropriate grip length to ensure a secure hold.

Tools for Measuring Bolt Length

To measure the length of a bolt, you can use a ruler or a caliper. For longer bolts, a ruler is sufficient. Place the bolt alongside the ruler, starting from the head to the tip, and note the measurement. For more precision, especially with shorter bolts, a caliper is preferred. Ensure that the bolt is straight when taking the measurement to avoid inaccuracies.

Measure Banjo bolt Thread

Thread Pitch

Thread pitch is the distance between adjacent threads on a bolt, measured parallel to the bolt’s axis. It is usually specified in millimeters for metric bolts. For example, a bolt with a thread pitch of 1.5 mm has 1.5 millimeters between each thread. The thread pitch is critical for ensuring compatibility between the bolt and the nut or threaded hole, as it affects the fit and the fastening strength.

Methods for Measuring Thread Pitch

To measure thread pitch, you can use a thread gauge or a caliper. A thread gauge consists of multiple blades, each marked with a different pitch. Simply match the bolt’s threads to the gauge’s blades until you find the one that fits perfectly. Alternatively, using a caliper, measure the distance between the peaks of two adjacent threads and note the measurement.

Head Size

Different Types of Bolt Heads

Bolts come with various head types, each designed for specific applications and tools. Common types include:

Hexagonal Head: Widely used for its ease of installation with a wrench or socket.

Round Head: Often used where a low-profile head is needed.

Flat Head: Designed to sit flush with the material surface, providing a smooth finish.

Socket Head: Used in applications requiring a recessed head, installed with an Allen wrench.

Measuring Head Dimensions

To measure the head dimensions, you need to consider both the diameter and the height of the head. Use a caliper to measure the diameter across the flats for hexagonal heads or the overall diameter for round heads. Measure the height from the base to the top of the head. These measurements are important for ensuring that the bolt head fits within the intended space and can be properly engaged by the appropriate tool.

Understanding these dimensions is crucial for selecting the right bolt for your application, ensuring proper fit, and achieving the desired mechanical performance. Accurate measurement techniques and tools are essential for maintaining the integrity and safety of your assemblies.

Metric Bolt Grades and Strength

Bolt Grades

Metric bolts come in various grades, each indicating the bolt’s strength and suitability for different applications. The grade of a bolt is determined by its material composition and the heat treatment it has undergone. Higher grade bolts are made from stronger materials and are subjected to more rigorous heat treatments, making them suitable for applications that require higher strength and durability. Common metric bolt grades include:

Grade 4.6: Typically used for light-duty applications. It has a tensile strength of 400 MPa and a yield strength of 240 MPa.

Grade 8.8: One of the most common grades, suitable for medium-duty applications. It has a tensile strength of 800 MPa and a yield strength of 640 MPa.

Grade 10.9: Used for high-strength applications, this grade offers a tensile strength of 1000 MPa and a yield strength of 900 MPa.

Grade 12.9: The highest common grade, used in the most demanding applications. It has a tensile strength of 1200 MPa and a yield strength of 1080 MPa.

Markings and Identification

Some metric bolts are marked with their grade on the head, which makes it easy to identify their strength and material composition. These markings usually consist of two numbers separated by a dot. The first number represents one-tenth of the nominal tensile strength in MPa, while the second number is the ratio of yield strength to tensile strength. For example, a Grade 8.8 bolt has a tensile strength of 800 MPa and a yield strength of 80% of that, or 640 MPa. Additionally, bolts may have other markings to indicate the manufacturer’s identification or other specific attributes.

Strength Specifications

Tensile Strength

Tensile strength is the maximum amount of tensile (pulling) stress that a bolt can withstand before failing. It is a critical parameter for determining the suitability of a bolt for a particular application. High tensile strength is required in applications where the bolt will be subjected to significant stretching forces.

Yield Strength

Yield strength is the amount of stress at which a bolt begins to deform plastically. Below this stress, the bolt will return to its original shape when the load is removed. Above this stress, the bolt will be permanently deformed. Yield strength is an important consideration in applications where the bolt will be subjected to constant or fluctuating loads, as it indicates the load level beyond which the bolt will not maintain its shape.

Proof Load

Proof load is the maximum stress that a bolt can withstand without any permanent deformation. It is a safety margin below the yield strength, ensuring that the bolt remains functional under the specified load. Proof load testing is typically performed to verify the bolt’s quality and performance in real-world conditions.

Choosing the Right Grade

Selecting the right bolt grade is crucial for ensuring the safety, reliability, and performance of the assembly. Here are some factors to consider:

Load Requirements: Determine the tensile and shear loads the bolt will be subjected to. Higher loads require bolts with higher tensile and yield strength.

Environmental Conditions: Consider the operating environment, such as exposure to moisture, chemicals, or extreme temperatures. Stainless steel or coated bolts may be necessary for corrosive environments.

Material Compatibility: Ensure the bolt material is compatible with the materials being fastened. This helps prevent galvanic corrosion and other material-related issues.
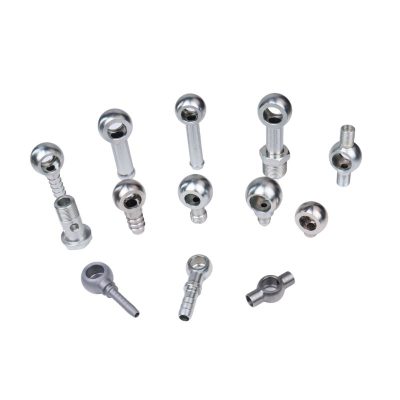
Safety Margins: Always choose a bolt grade that provides a sufficient safety margin beyond the maximum expected load to account for unexpected stresses and ensure long-term reliability.

Cost and Availability: While higher-grade bolts offer superior strength, they are also more expensive. Balance the cost with the application’s requirements to make an economical choice without compromising safety.

How to Custom Metric Bolt Fitting

Create the Blueprint

The first step in customizing a metric bolt fitting is to create a detailed blueprint. This involves drafting a technical drawing that outlines all the specifications of the bolt, including its dimensions, thread type, head shape, and any special features. Ensure that the blueprint adheres to industry standards and includes precise measurements and tolerances. Collaboration with engineers or designers might be necessary to ensure the blueprint meets the required functionality and compatibility with other components.

banjo Thread Size

Select the Dimensions

Once the blueprint is ready, the next step is to select the appropriate dimensions for your custom bolt. This includes:

Diameter: Choose the nominal diameter based on the load requirements and the size of the holes it will pass through.

Length: Determine the overall length, ensuring it provides the necessary clamping force and fits the intended application.

Thread Pitch: Select the correct thread pitch to ensure compatibility with the corresponding nuts or threaded holes.

Accurate dimension selection is critical for ensuring the bolt performs as expected in its application.

Choose the Material

The material of the bolt is crucial for its strength, durability, and suitability for the intended environment. Consider the following factors when choosing the material:

Load Requirements: High-strength applications may require alloy steel or other high-strength materials.

Corrosion Resistance: For environments exposed to moisture or chemicals, consider materials like stainless steel or bolts with corrosion-resistant coatings.

Temperature Resistance: If the bolt will be used in high-temperature environments, select materials that can withstand the thermal stresses.

Common materials for metric bolts include carbon steel, alloy steel, stainless steel, and titanium. Each material has its own set of properties, so it’s important to choose one that matches the specific needs of your application.

Conclusion

In this comprehensive guide on metric bolt measurements, we covered essential aspects of understanding and selecting the right metric bolts for various applications. We defined metric bolts and emphasized the importance of accurate measurements. We explored bolt dimensions—diameter, length, thread pitch, and head size—along with measurement techniques. Additionally, we discussed bolt grades, strength specifications, and factors to consider when choosing the right grade. Finally, we outlined steps for customizing metric bolt fittings. To ensure accuracy, use proper tools, regularly calibrate instruments, double-check measurements, understand specifications, and consult experts. Apply this knowledge to enhance project reliability, and share the guide to promote best practices across industries.

FAQ

What are metric bolts?

Metric bolts are fasteners measured in millimeters, adhering to the metric system, which is the standard used worldwide.

How do I measure the diameter of a metric bolt?

Use a caliper to measure the diameter of the bolt’s shank (unthreaded part) or the major diameter (widest part) of the threaded section.

What is thread pitch?

Thread pitch is the distance between adjacent threads, measured parallel to the bolt’s axis. It ensures compatibility with nuts or threaded holes.

Why are bolt grades important?

Bolt grades indicate the strength and material composition of the bolt, helping to determine its suitability for different applications.

How can I ensure accurate bolt measurements?

Use high-quality measuring tools, regularly calibrate them, double-check measurements, and familiarize yourself with industry standards.

What factors should I consider when choosing a bolt grade?

Consider load requirements, environmental conditions, material compatibility, safety margins, and cost to select the appropriate bolt grade for your application.

Types of Banjo Fittings Everything You Need to Know

Types of Banjo Fittings: Everything You Need to Know

Types of Banjo Fittings: Everything You Need to Know

Table of Contents

Introduction

Banjo fittings, also known as banjo bolts or banjo connectors, are essential components in various hydraulic systems. These unique fittings feature a hollow bolt with a spherical, perforated end, allowing fluid to pass through while connecting to a hose or pipe. The purpose of this guide is to offer a comprehensive overview of the different types of banjo fittings available, their specific applications, and the benefits they provide. By the end of this guide, readers will have a thorough understanding of how banjo fittings work, the various types available, and how to select the right fitting for their needs.

Overview of Banjo Fittings

Banjo fittings, often referred to as banjo bolts or banjo connectors, are a type of hydraulic fitting that is widely used for creating secure connections in fluid systems. The unique design of a banjo fitting includes a hollow bolt with a perforated, spherical end through which fluid flows. This design allows the fitting to rotate around the bolt, providing flexibility and making it easier to install in tight or awkward spaces. The primary function of banjo fittings is to allow fluid to pass through the bolt and into the attached hose or pipe, creating a secure, leak-free connection that can withstand high pressures and various operating conditions.

Historical Background and Evolution

The concept of the banjo fitting can be traced back to the early 20th century, coinciding with the rise of automotive and industrial machinery that required more efficient hydraulic systems. Originally, these fittings were designed to address the need for reliable connections in complex hydraulic circuits, where space was often limited. Over the decades, the design and materials used in banjo fittings have evolved significantly. Early versions were typically made from brass or steel, but modern banjo fittings are often made from more advanced materials like stainless steel and aluminum, which offer superior durability and corrosion resistance. Innovations in manufacturing processes have also improved the precision and reliability of these fittings, making them indispensable in many industries today.

Common Applications and Industries Using Banjo Fittings

Banjo fittings are versatile components used across a wide range of industries and applications. Some of the most common applications include:

Automotive Industry: In the automotive sector, banjo fittings are frequently used in braking systems and fuel lines. Their ability to create secure, leak-free connections in confined spaces makes them ideal for use in cars, trucks, and motorcycles. They ensure that hydraulic fluid or fuel is delivered efficiently and safely, contributing to the overall performance and safety of the vehicle.

Industrial Machinery: In various industrial settings, banjo fittings are used in hydraulic and pneumatic systems. These fittings help to manage fluid flow in machinery, ensuring that equipment operates smoothly and efficiently. Industries such as manufacturing, construction, and mining rely heavily on hydraulic systems where banjo fittings play a critical role.

Agricultural Equipment: Agricultural machinery, such as tractors and harvesters, often uses hydraulic systems to power different components. Banjo fittings are essential for maintaining the hydraulic circuits in these machines, ensuring they operate reliably under tough working conditions.

Medical and Laboratory Equipment: Precision and reliability are paramount in medical and laboratory settings. Banjo fittings are used in various devices and equipment to manage the flow of fluids and gases. Their ability to provide secure connections in compact spaces is particularly valuable in these applications.

Structure and Components of Banjo Fittings

banjo fitting component

Banjo fittings are intricate components designed to facilitate fluid transfer in hydraulic systems efficiently. Their structure is composed of several key elements that work together to ensure secure and reliable connections. The primary parts of a banjo fitting include the banjo bolt, the banjo fitting (or connector), and washers (sealing rings). Each of these components plays a crucial role in the overall functionality of the fitting.

Banjo Bolt

The banjo bolt is a hollow, threaded bolt that serves as the core of the banjo fitting. It has a unique design featuring a hollow shaft with one or more radial holes drilled through it, allowing fluid to pass through. The head of the banjo bolt is typically hexagonal or circular, designed to be easily tightened or loosened with a wrench. The bolt’s threads are precisely machined to fit securely into the corresponding hydraulic component, such as a hose or pipe fitting. The hollow nature of the bolt is essential for the fluid transfer process, as it enables the fluid to flow through the bolt and into the connected components.

Banjo Fitting (Connector)

The banjo fitting, or connector, is a round, perforated component that attaches to the banjo bolt. It is named “banjo” due to its resemblance to the musical instrument. The fitting has an internal passage that aligns with the radial holes in the banjo bolt, creating a pathway for the fluid to flow through. The banjo fitting’s design allows it to swivel around the bolt, providing flexibility during installation and maintenance. This rotational capability is particularly useful in tight or confined spaces where traditional fittings might be challenging to install. The banjo fitting is available in various sizes and configurations to accommodate different hydraulic system requirements.

Washers (Sealing Rings)

Washers, also known as sealing rings, are critical components that ensure a leak-free connection between the banjo bolt and the banjo fitting. Typically made from materials such as copper, aluminum, or rubber, these washers are placed on either side of the banjo fitting. When the banjo bolt is tightened, the washers are compressed, creating a tight seal that prevents fluid leakage. The choice of washer material depends on the specific application and the type of fluid being used. Copper and aluminum washers are common in high-pressure applications due to their durability, while rubber washers are often used in lower-pressure systems.

Materials Used in Manufacturing Banjo Fittings

Banjo fittings are manufactured from a variety of materials, each chosen for its specific properties and suitability for different applications. Common materials include:

Stainless Steel: Known for its corrosion resistance and strength, stainless steel is often used in high-pressure and harsh environment applications.

Brass: Brass fittings are valued for their excellent machinability and good corrosion resistance, making them suitable for a wide range of applications.

Aluminum: Lightweight and corrosion-resistant, aluminum banjo fittings are commonly used in automotive and aerospace industries where weight is a critical factor.

Carbon Steel: Carbon steel fittings offer high strength and durability, making them ideal for heavy-duty industrial applications.

How Banjo Fittings Work: Flow Mechanism

The flow mechanism of banjo fittings is designed to facilitate efficient fluid transfer while maintaining a secure connection. Here’s a step-by-step breakdown of how they work:

Fluid Entry: Fluid enters the banjo bolt through its hollow shaft.

Radial Holes: The fluid flows through the radial holes drilled in the banjo bolt.

Internal Passage: The fluid then enters the internal passage of the banjo fitting, which is aligned with the radial holes.

Swivel Action: The banjo fitting can swivel around the bolt, allowing for flexibility in positioning and reducing stress on the hose or pipe connected to it.

Sealing: The washers on either side of the banjo fitting are compressed as the bolt is tightened, creating a secure, leak-proof seal that ensures the fluid remains within the system.

Types of Banjo Fittings

Banjo fittings come in various types, each designed to meet specific needs and applications. These fittings can be classified based on their design, application, and the materials used in their construction. Understanding these classifications can help in selecting the appropriate fitting for a particular hydraulic system.

banjo hydraulic fitting types Topa China

Single Banjo Fittings

Single banjo fittings are the most common type of banjo fittings. They consist of a single connector and a banjo bolt that allows fluid to pass through. These fittings are typically used in applications where a single line needs to be connected to a hydraulic system. Their simple design makes them easy to install and maintain, making them ideal for a wide range of applications, including automotive braking systems, fuel lines, and industrial machinery.

Key Features:

Simple and compact design

Easy to install and maintain

Suitable for a wide range of applications

Provides a secure and leak-free connection

Double Banjo Fittings

Double banjo fittings, also known as twin banjo fittings, feature two connectors that allow two fluid lines to be connected simultaneously. This design is particularly useful in applications where multiple hydraulic lines need to be managed in a confined space. Double banjo fittings are commonly used in complex hydraulic systems, such as those found in industrial machinery and heavy equipment, where space efficiency and reliable connections are crucial.

Key Features:

Allows connection of two fluid lines

Ideal for complex hydraulic systems

Saves space and reduces installation time

Ensures reliable and leak-free connections

High-Pressure Banjo Fittings

High-pressure banjo fittings are specifically designed to withstand extremely high pressures, making them suitable for demanding hydraulic applications. These fittings are constructed from robust materials like stainless steel and feature reinforced designs to ensure they can handle high-pressure fluid transfer without leaking or failing. High-pressure banjo fittings are commonly used in heavy machinery, industrial equipment, and high-performance automotive systems.

Key Features:

Designed to withstand high pressures

Constructed from robust materials

Suitable for demanding hydraulic applications

Ensures reliable and leak-free performance

Customizable Banjo Fittings

Customizable banjo fittings are tailored to meet specific requirements and applications. These fittings can be made from various materials and designed to fit unique configurations and pressure ratings. Customizable fittings are ideal for specialized applications where standard fittings may not provide the necessary performance or compatibility. Industries such as medical equipment, custom machinery, and unique industrial processes often require customized banjo fittings to meet their precise needs.

Key Features:

Tailored to meet specific requirements

Available in various materials and configurations

Suitable for specialized applications

Ensures precise performance and compatibility

Choosing the Right Banjo Fitting

Selecting the appropriate banjo fitting for your hydraulic system is crucial to ensure optimal performance and reliability. Several factors should be considered to make the right choice, including application requirements, material compatibility, pressure ratings, and size and dimension considerations.

Application Requirements

The first step in choosing the right banjo fitting is to understand the specific requirements of your application. Consider the type of fluid being transferred, the operating environment, and the specific function of the fitting within the hydraulic system. For example, automotive braking systems may require fittings that can handle high pressures and resist corrosion, while industrial machinery might need fittings that can endure heavy use and extreme conditions. Identifying the primary use and operational demands will help narrow down the selection of fittings that are designed to meet those specific needs.

Material Compatibility

Material compatibility is another critical factor when selecting banjo fittings. The material of the fitting must be compatible with the fluid it will come into contact with to prevent corrosion and ensure longevity. Common materials for banjo fittings include stainless steel, brass, and aluminum. Stainless steel is ideal for high-pressure and corrosive environments, brass offers a good balance of strength and corrosion resistance, and aluminum is suitable for applications where weight reduction is essential. Understanding the properties of each material and matching them with your system’s requirements will ensure reliable performance and durability.

Pressure Ratings

Pressure ratings are essential to consider when choosing banjo fittings. Each fitting is designed to withstand a specific range of pressures, and using a fitting with an inadequate pressure rating can lead to leaks or failures. Check the pressure requirements of your hydraulic system and select fittings that can comfortably handle the maximum operating pressure. For high-pressure applications, stainless steel banjo fittings are often preferred due to their strength and resistance to deformation under pressure.

Overall Length

Size and Dimension Considerations

The size and dimensions of the banjo fitting must match the specifications of the hydraulic system components it will connect to. This includes the diameter of the banjo bolt, the size of the connector, and the overall length of the fitting. Ensuring that the fitting fits correctly within the system is crucial for maintaining a secure and leak-free connection. Measure the existing components and verify the dimensions of the banjo fittings before making a purchase to avoid compatibility issues.

Conclusion

In this comprehensive guide, we explore the various types of banjo fittings, their construction and components, and the factors to consider when selecting the right fitting for your hydraulic system. If you have specific needs or are unsure which coupling is best suited to your application, consultation with Topa is highly recommended; we can help you make an informed decision and find a solution that meets your requirements.

FAQ

A banjo fitting is a type of hydraulic fitting that features a hollow bolt with a spherical end, allowing fluid to pass through and connect to a hose or pipe. Its unique design provides flexibility and is commonly used in confined spaces.

Banjo fittings are typically made from materials such as stainless steel, brass, and aluminum. Each material offers different properties, with stainless steel being highly durable and corrosion-resistant, brass offering good machinability and corrosion resistance, and aluminum being lightweight.

Choosing the right banjo fitting involves considering factors such as application requirements, material compatibility, pressure ratings, and size and dimension considerations. Matching the fitting to the specific needs of your hydraulic system ensures optimal performance.

Yes, certain banjo fittings, particularly those made from stainless steel, are designed to handle high-pressure applications. It is important to check the pressure rating of the fitting to ensure it meets the requirements of your system.

Banjo fittings are used in various applications, including automotive braking systems, fuel lines, industrial machinery, agricultural equipment, and medical and laboratory equipment. Their versatility and reliability make them suitable for a wide range of hydraulic systems.

To ensure a leak-free connection, make sure to use the appropriate washers or sealing rings and tighten the banjo bolt to the manufacturer’s specifications. Regular inspection and maintenance of the fittings can also help prevent leaks and ensure reliable performance.

Contact Topa

Have a question or suggestion? Fill out the form below to get in touch with one of our experts.

Contact Topa

Save 30% on maintenance costs with our easy-install hydraulic fittings. Contact Now!